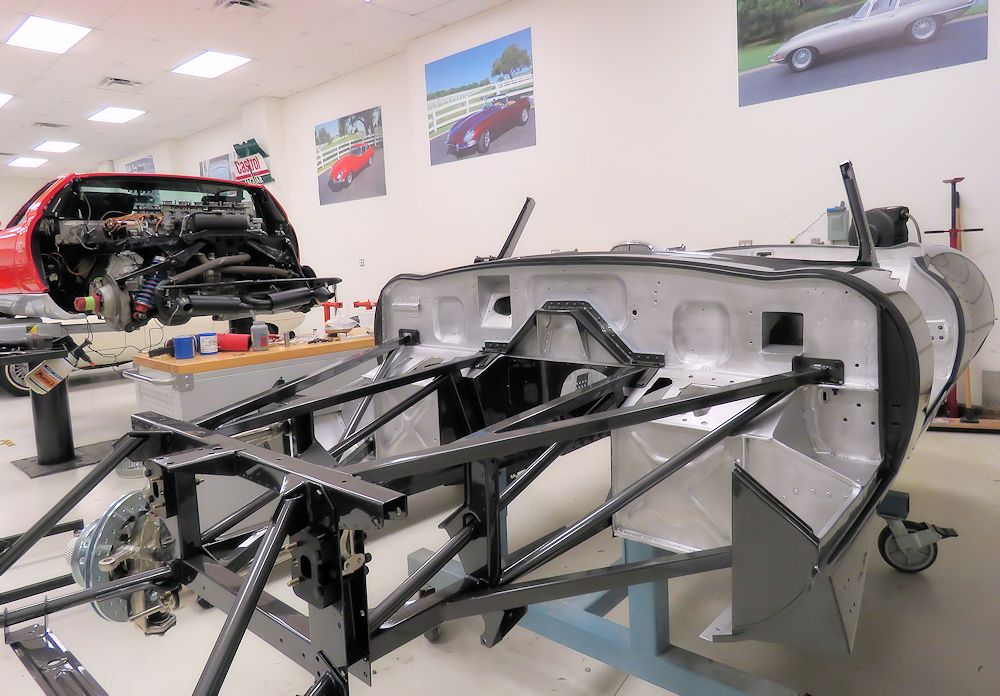
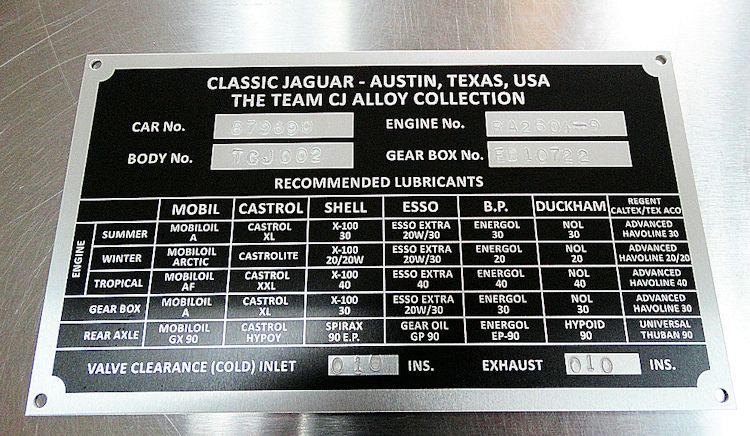
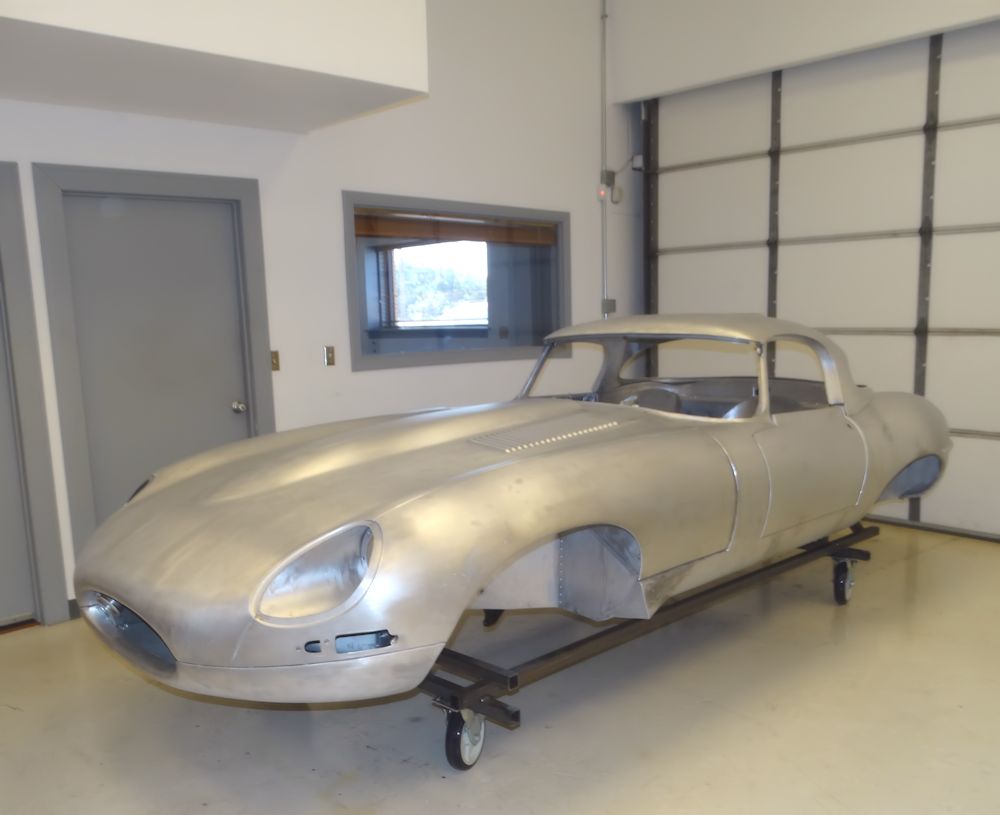
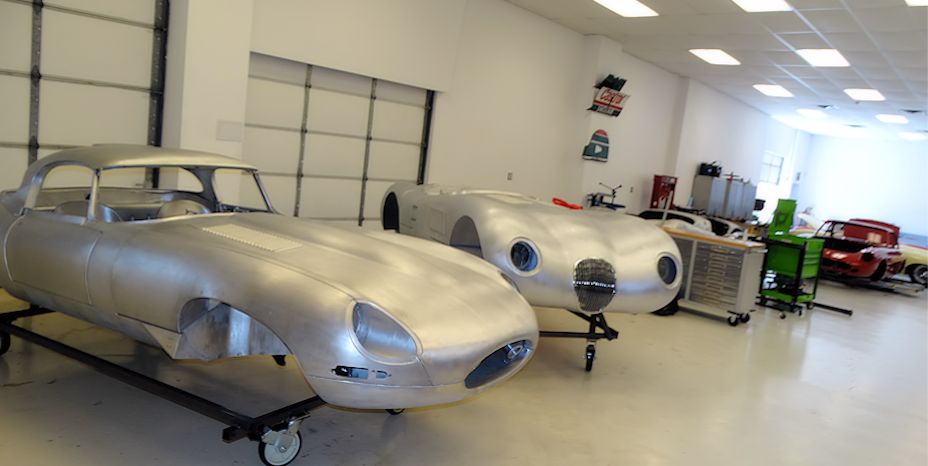
The car features an aluminum monocoque, complete with alloy bonnet, doors, boot lid and hardtop. Suspension anchor points are reinforced with steel. The original matching number engine will be rebuilt to Team CJ Stage Two specifications, featuring a wide angled head and stroked to 4.2L. It will be conservatively rated at 350 HP and 360 ft/lbs of torque on unleaded pump gas.
Many thanks to Jay Leno and his crew for the fantastic show they put together featuring our Team CJ Lightweight E Type. We think the car looked and sounded awesome on screen, but we’ll let you be the judge!VIDEO
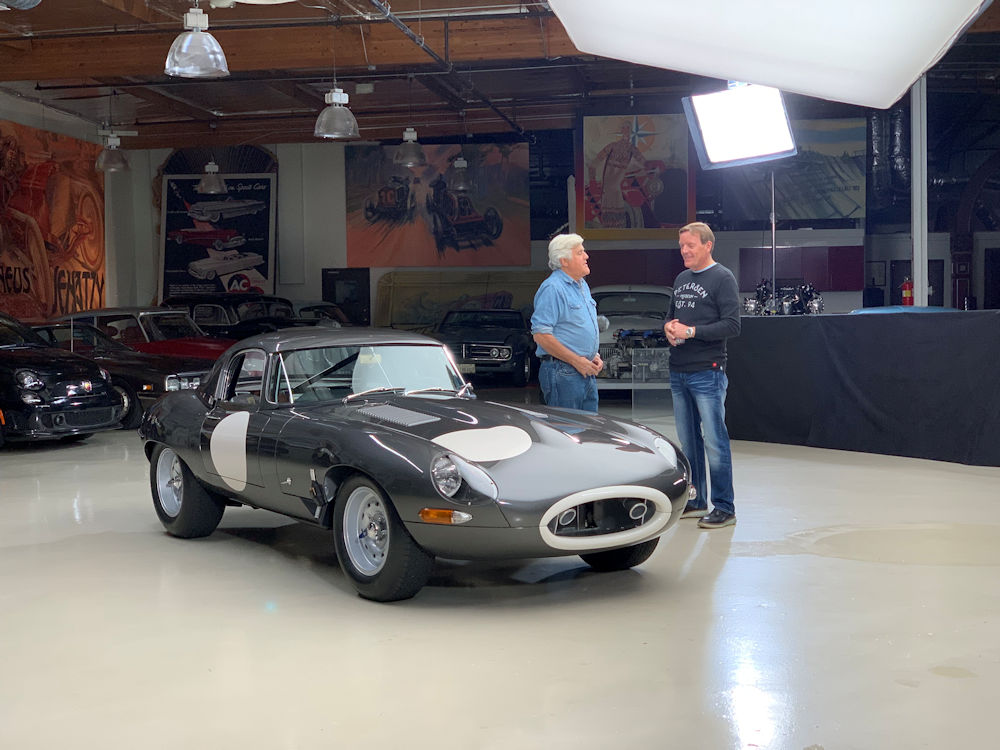
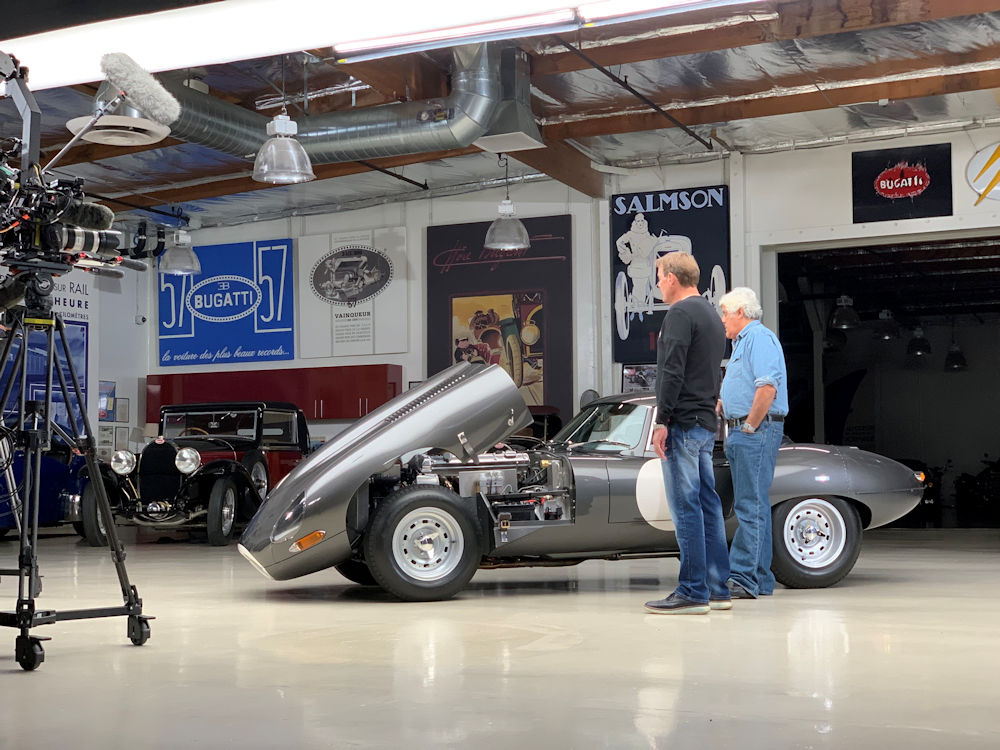
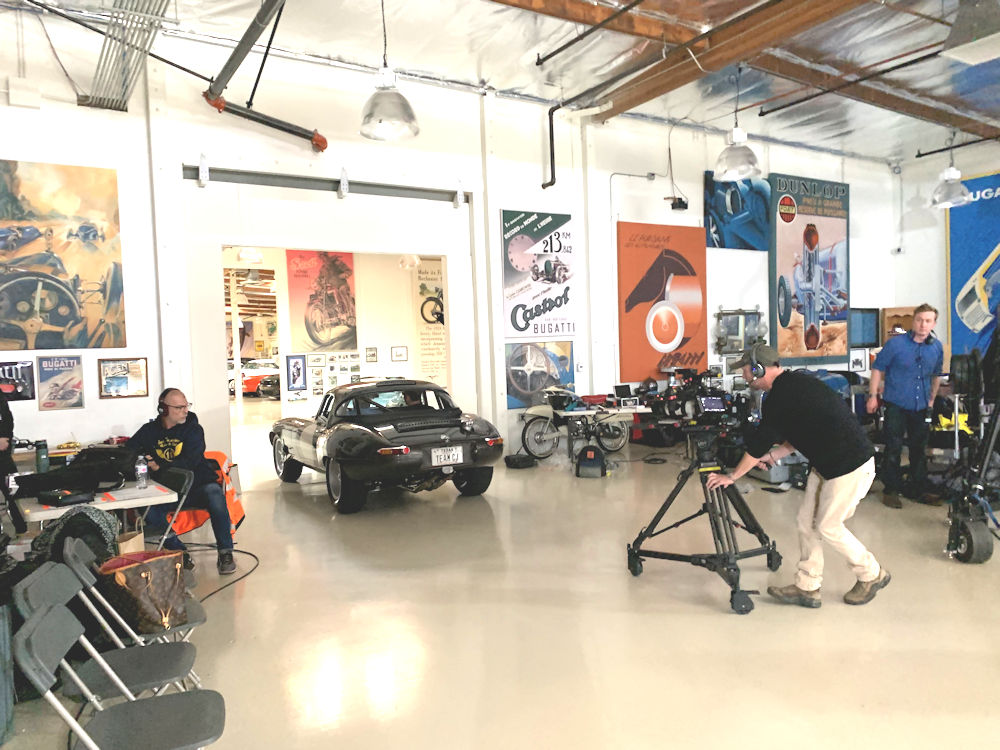
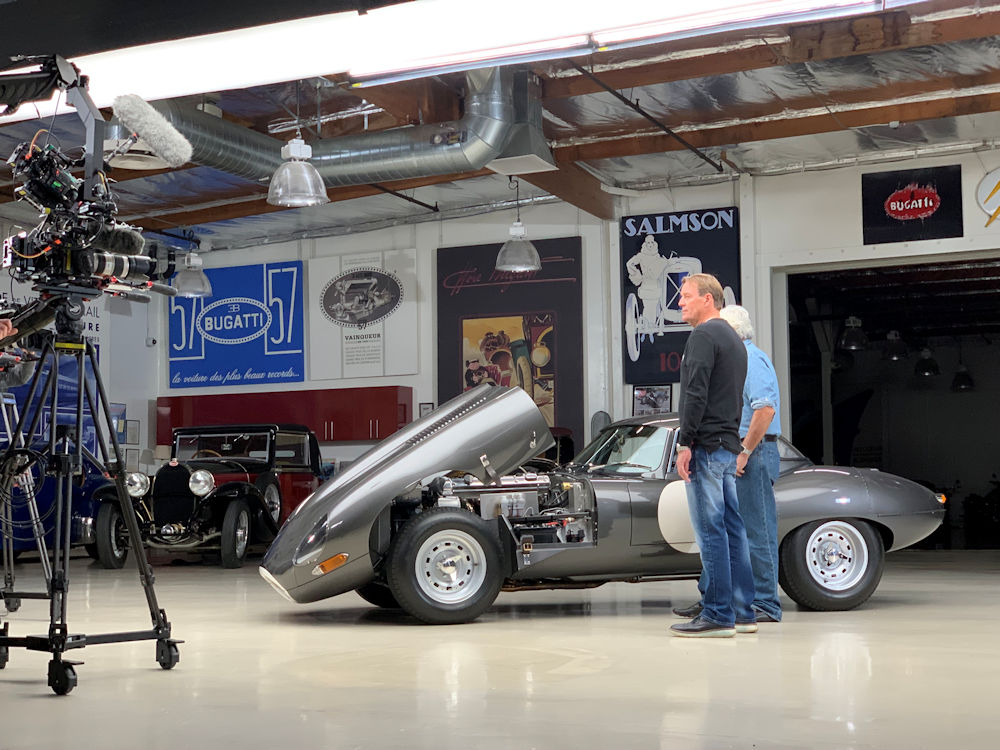
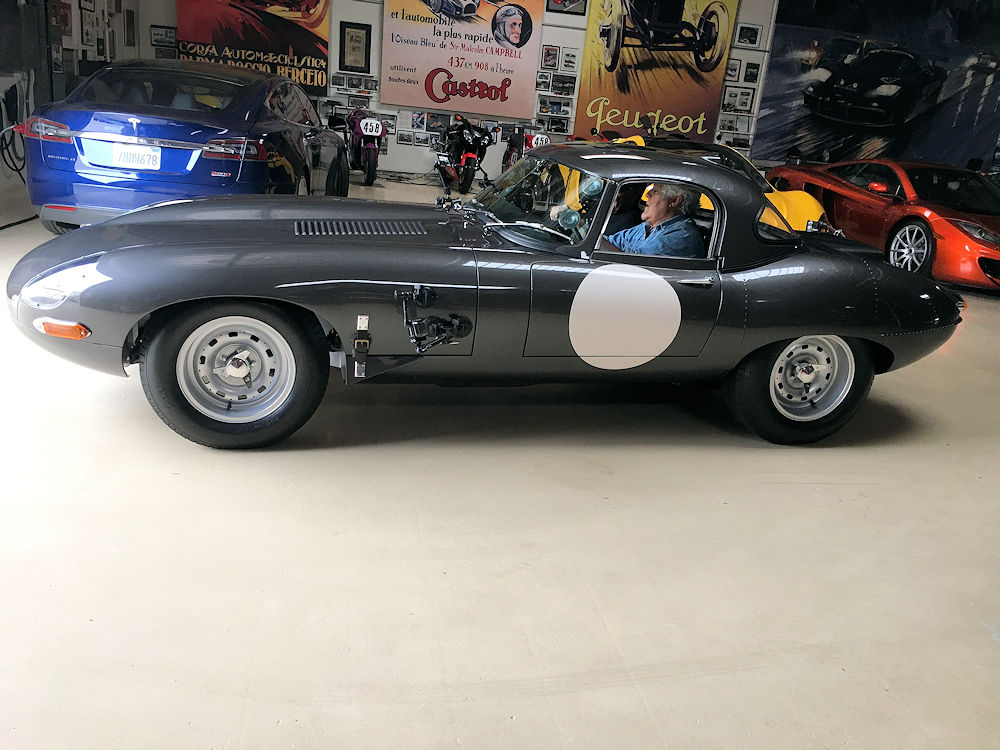
Yesterday I spent the day as Jay Leno’s guest in his incredible garage. Jay checked out the Team CJ Lightweight and also took it for a serious drive through the beautiful hills around Burbank, California. I was a little nervous about doing the show but I really needn’t have worried as Jay was an incredibly kind and gracious host. I was truly honored to meet possibly the number one ‘car guy’ in the world – and the fact that he loved our Team CJ Lightweight made it a very special day! He said it was easily the fastest and most powerful 6 cylinder Jaguar he had ever driven.
For fans of the “Jay Leno’s Garage” show, I can tell you that he really does drive (or ride) everything in his collection. I loved the fact that virtually every car was hooked up to a trickle charger and the breadth of Jay’s automotive knowledge is incredible. The Team CJ Lightweight show will air in February 2019.
This lady had a tough job to do!
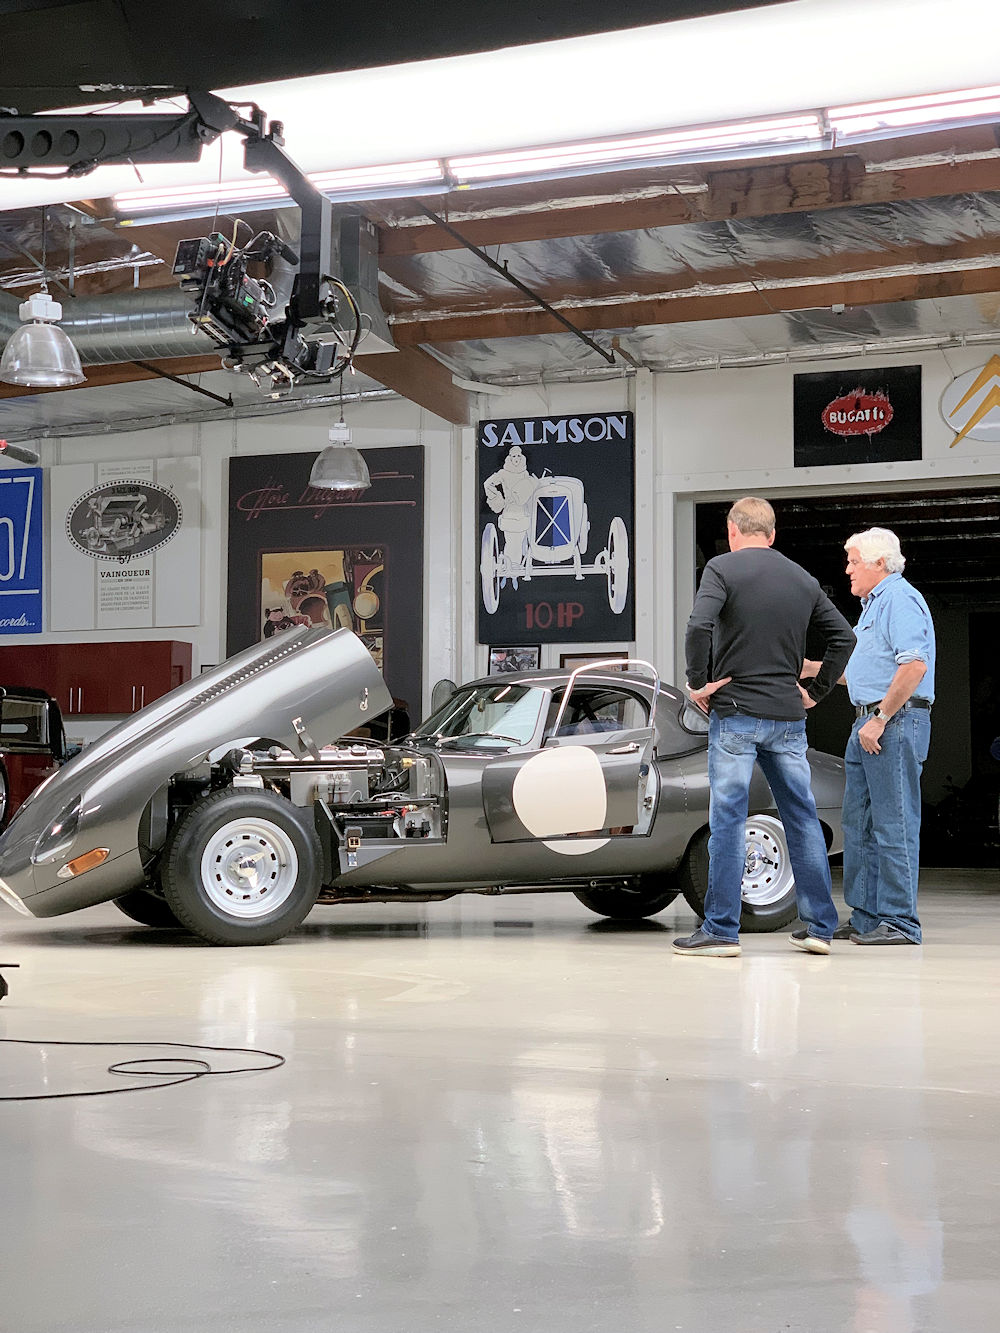
Jay and I talking about the Team CJ Lightweight
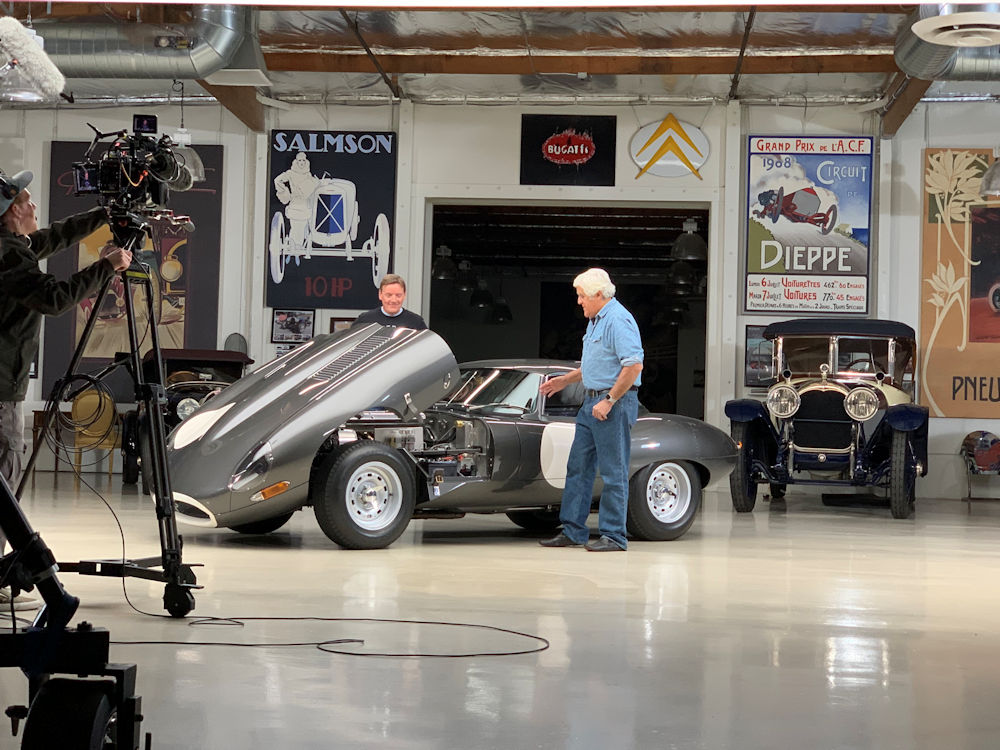
Let's take this thing for a drive!
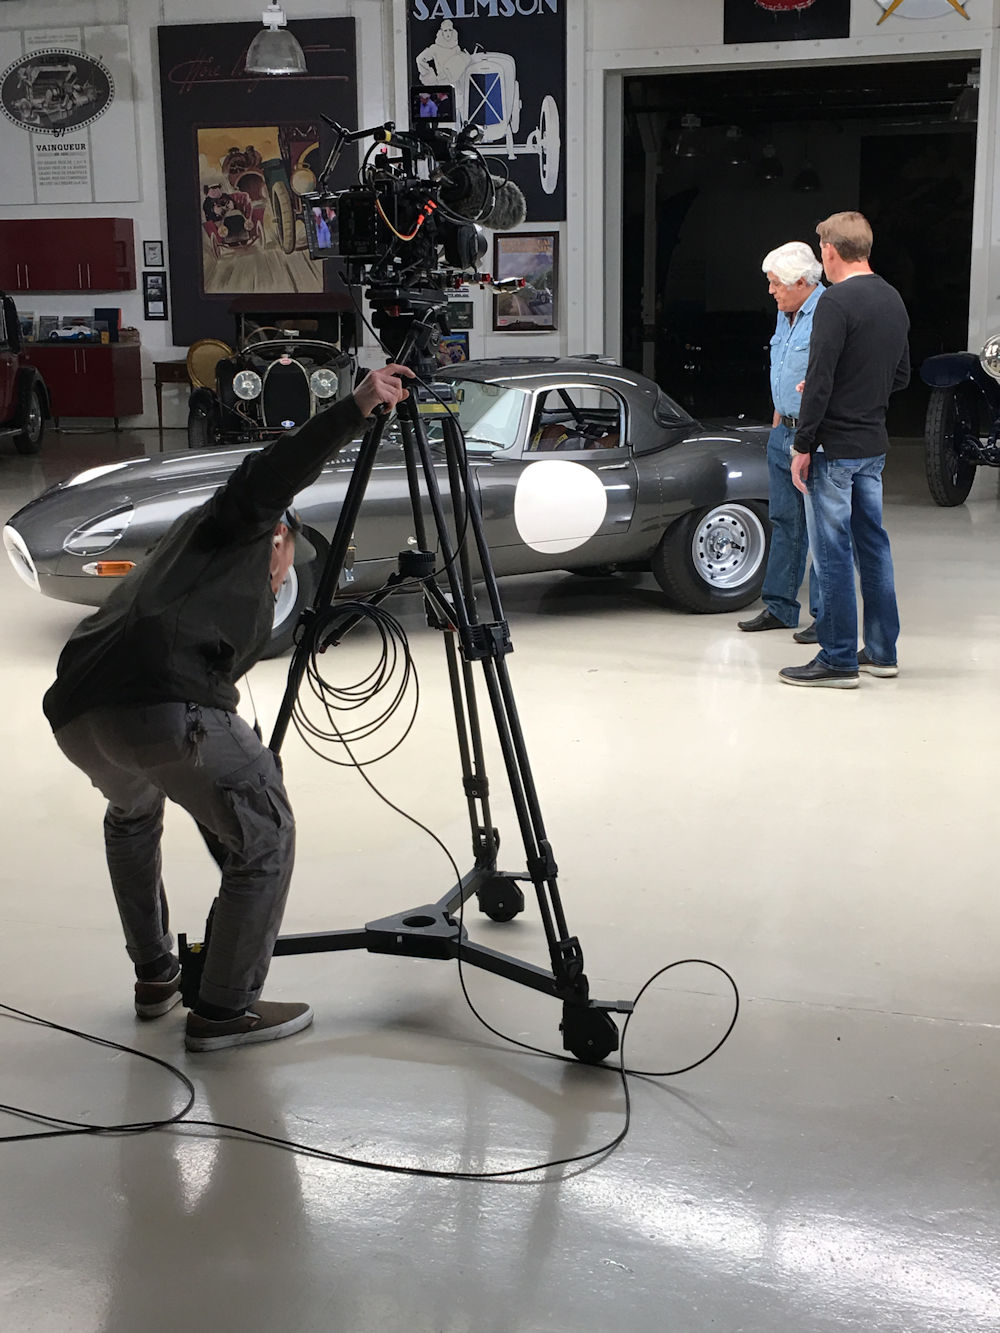
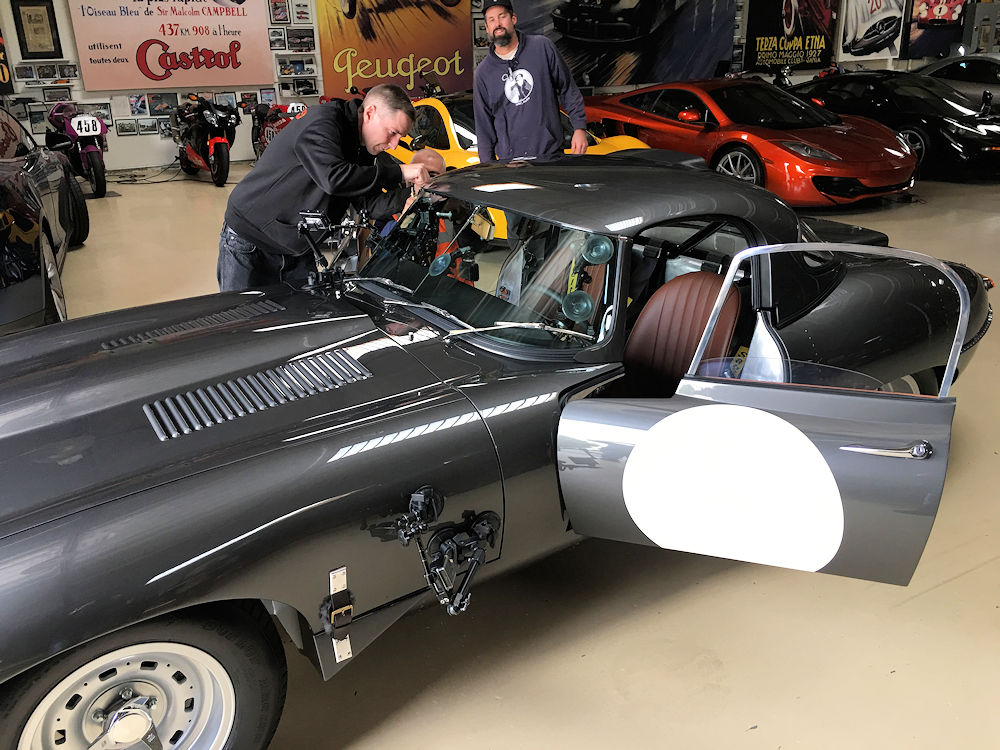
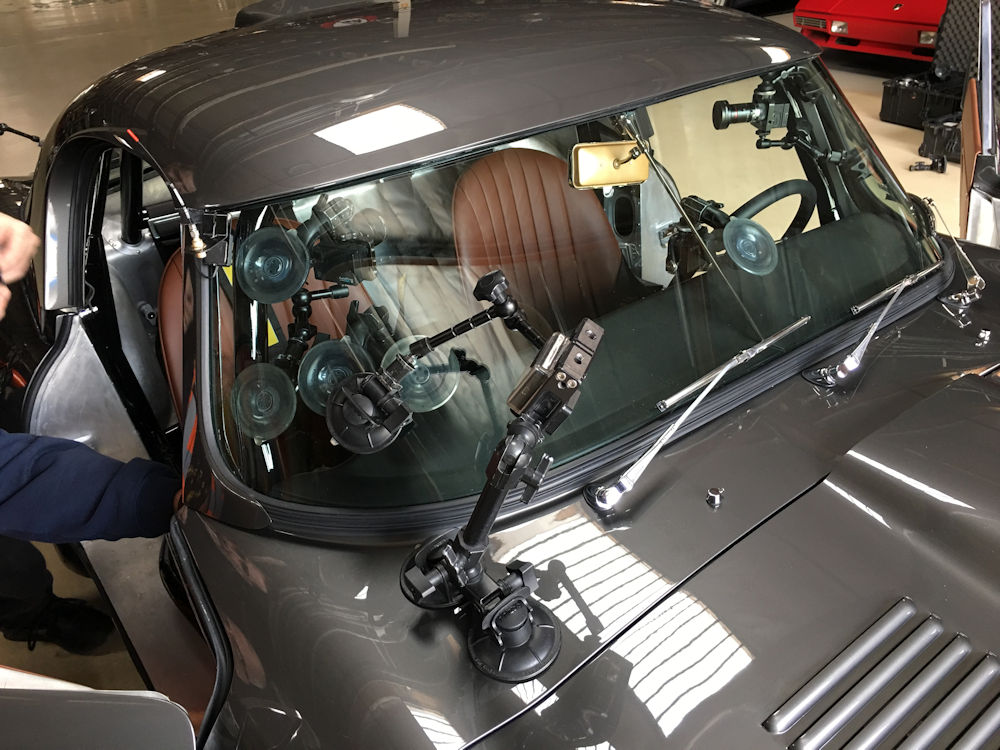
I couldn't count all the cameras that the crew
attached to the Lightweight!
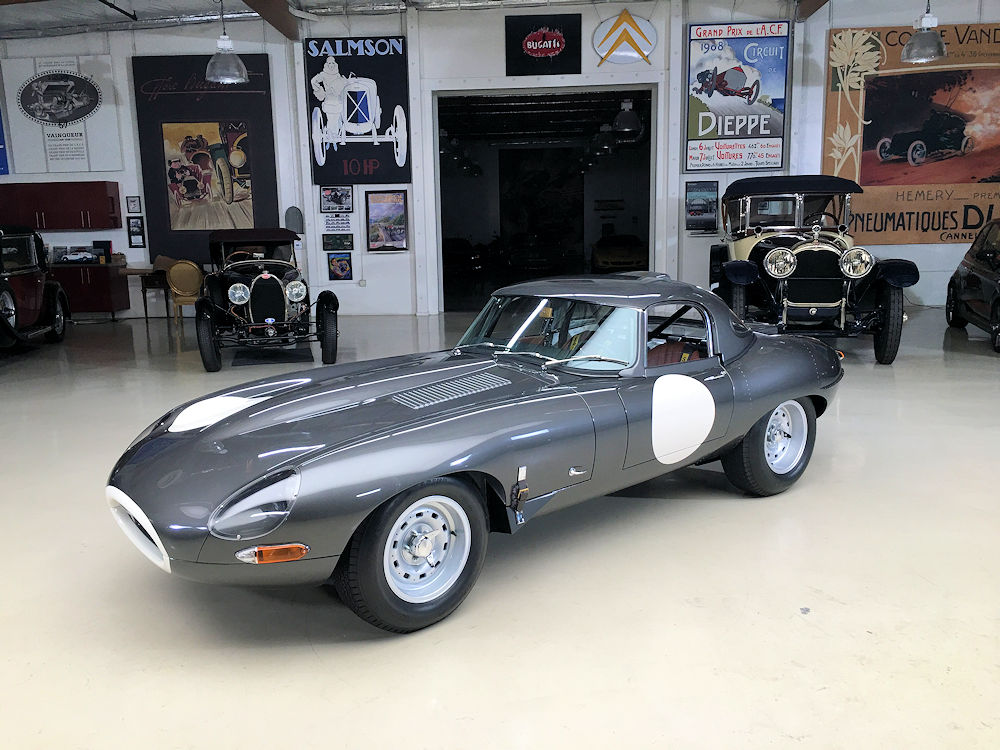
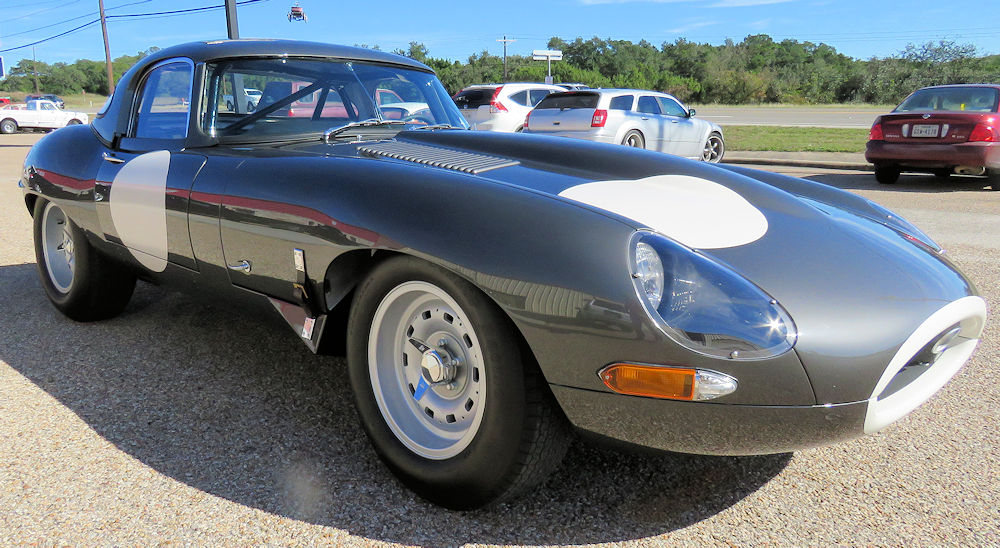
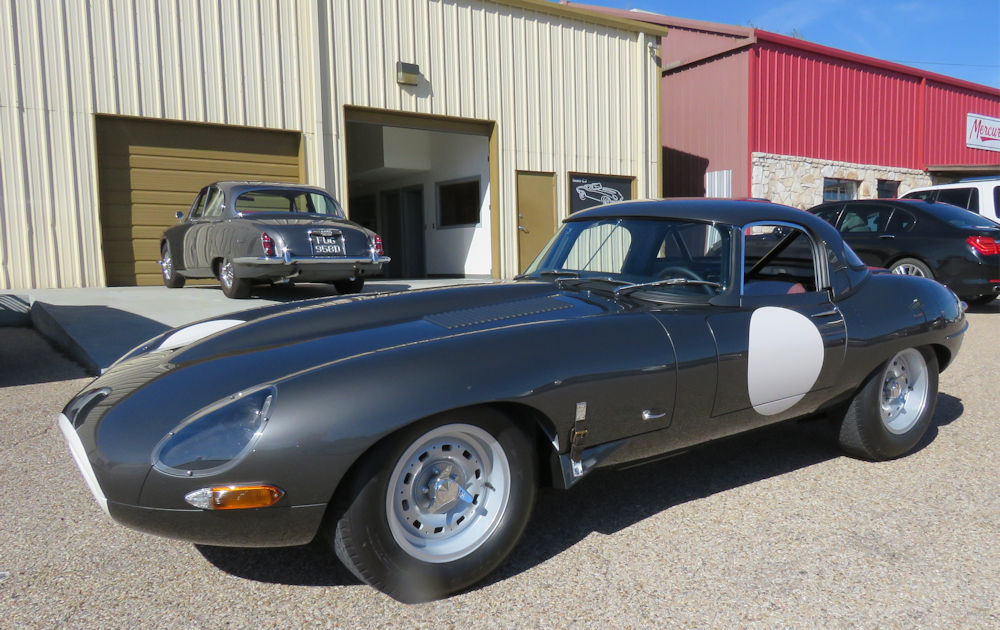
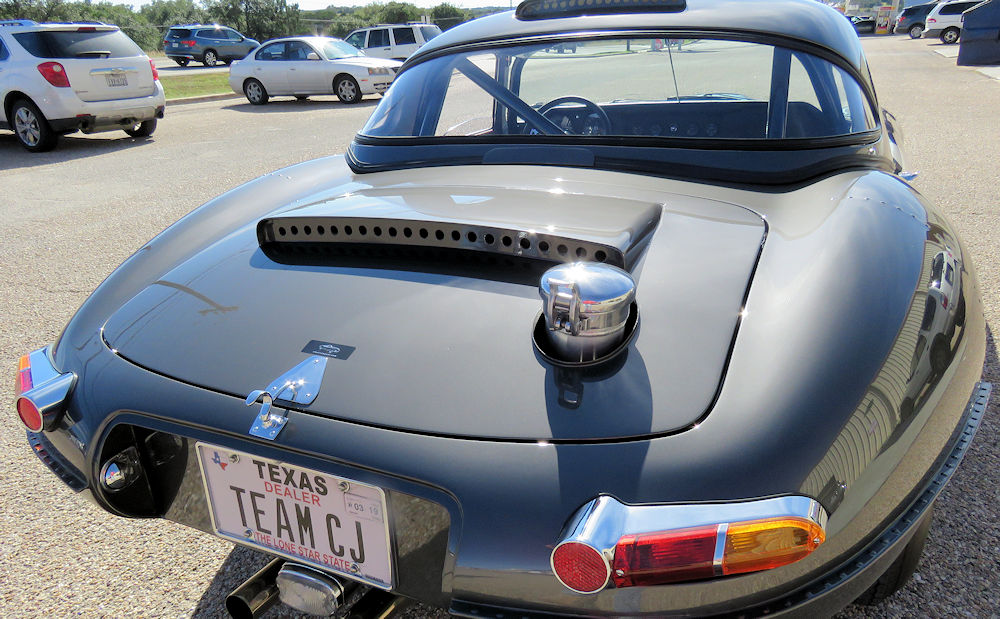
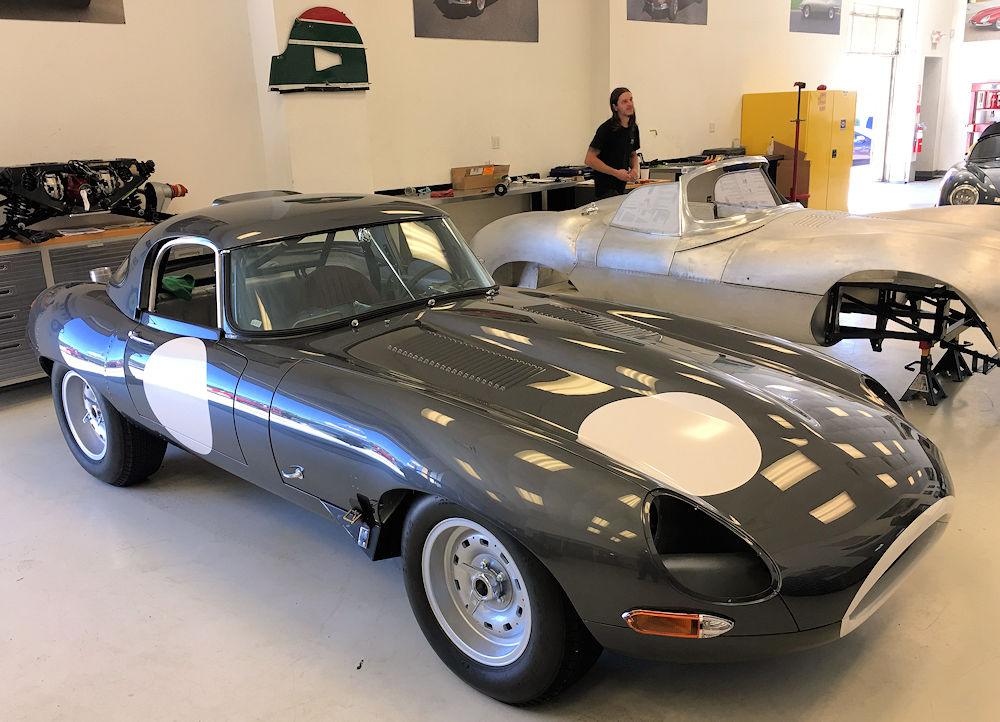
Not quite finished but close enough for some fantastic road testing and shakedown over the last few days! We will be displaying the car at the Hagerty's car show at COTA tomorrow. Anyone local who is planning to attend the SVR racing and/or the car show, stop by and say hello!
Headed for the hills!
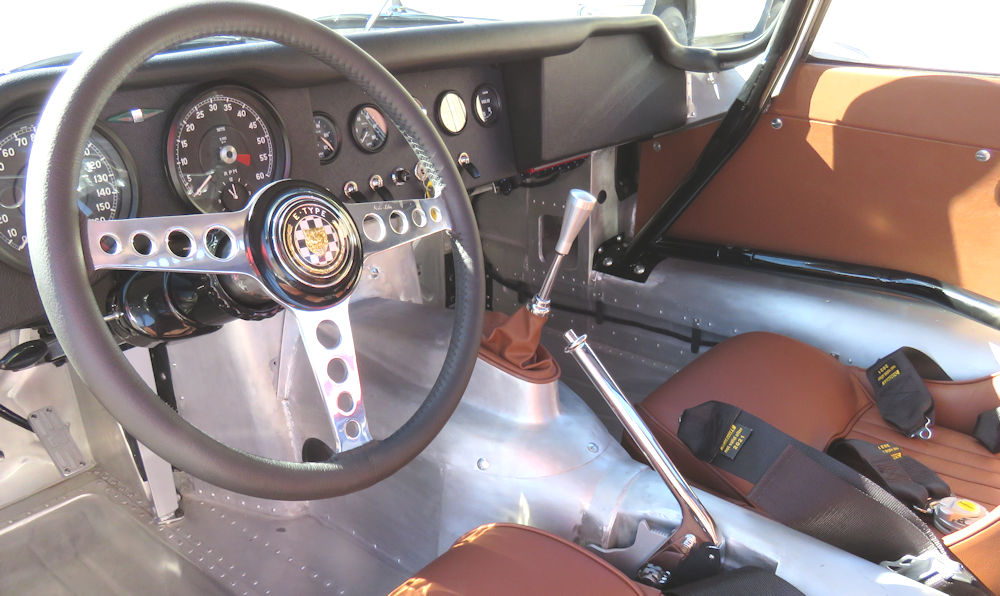
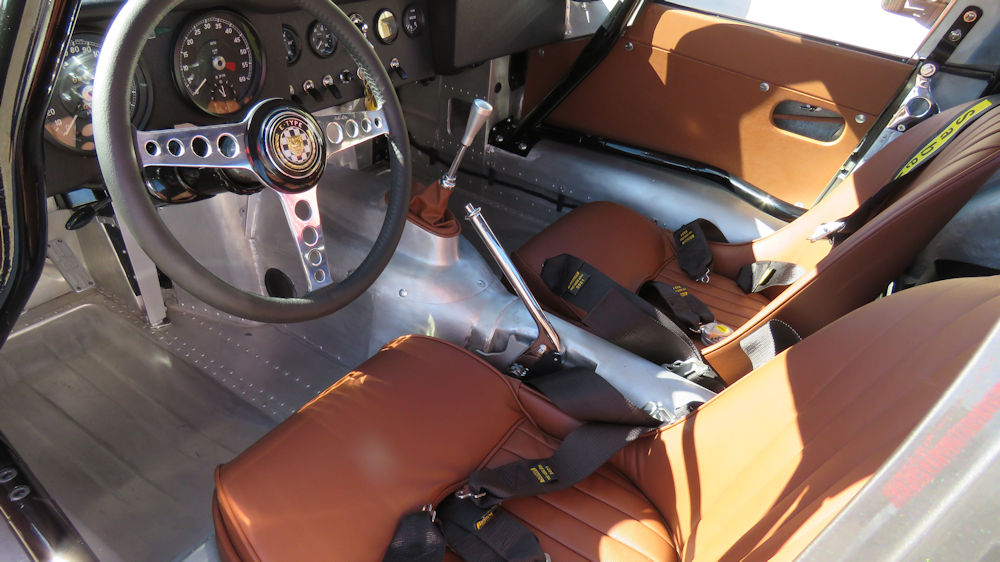
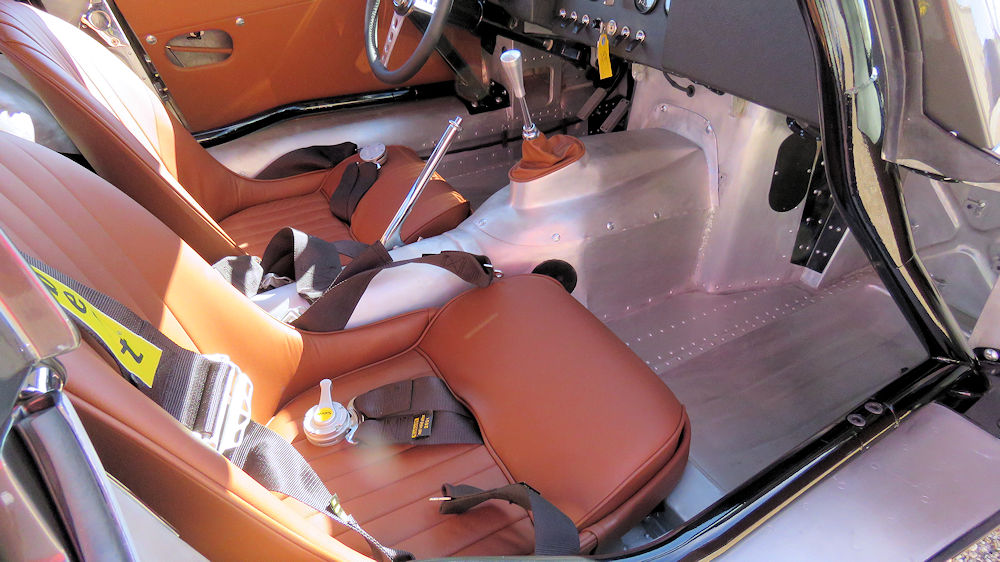
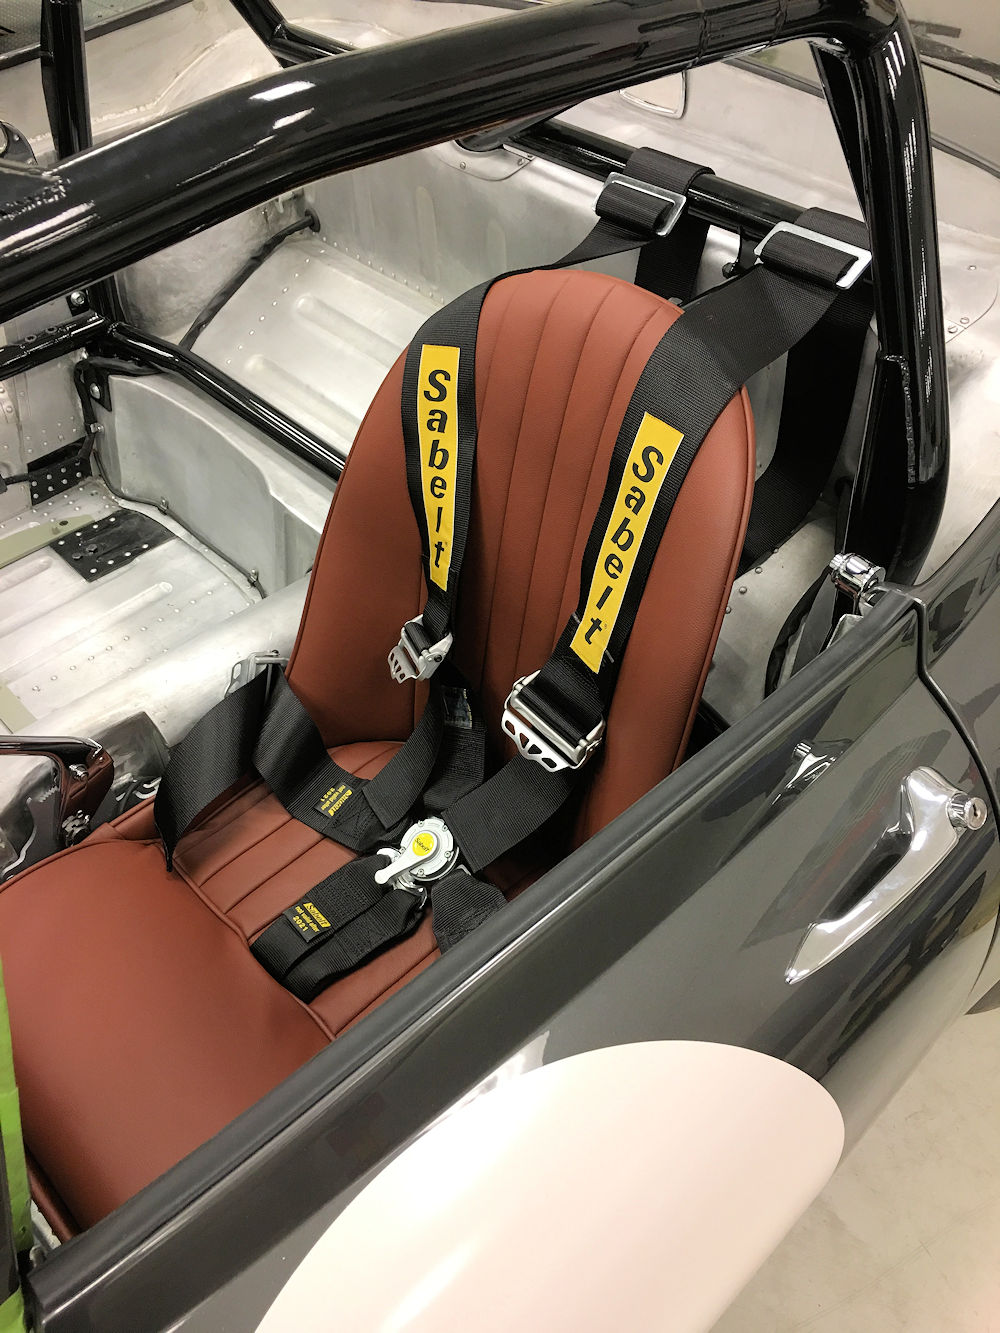
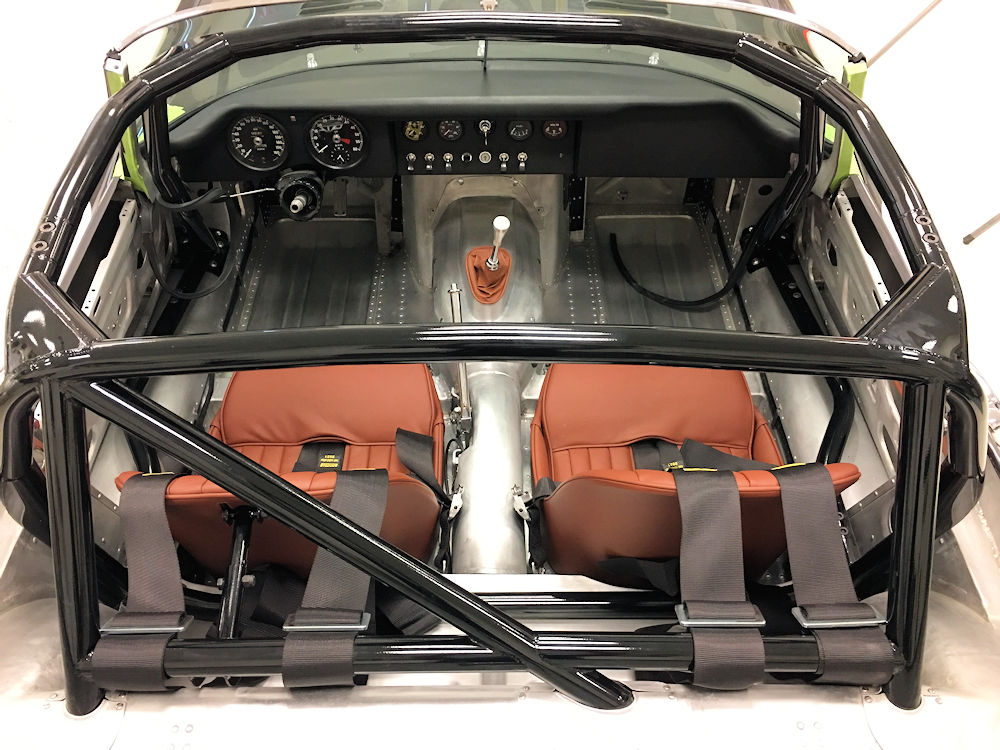
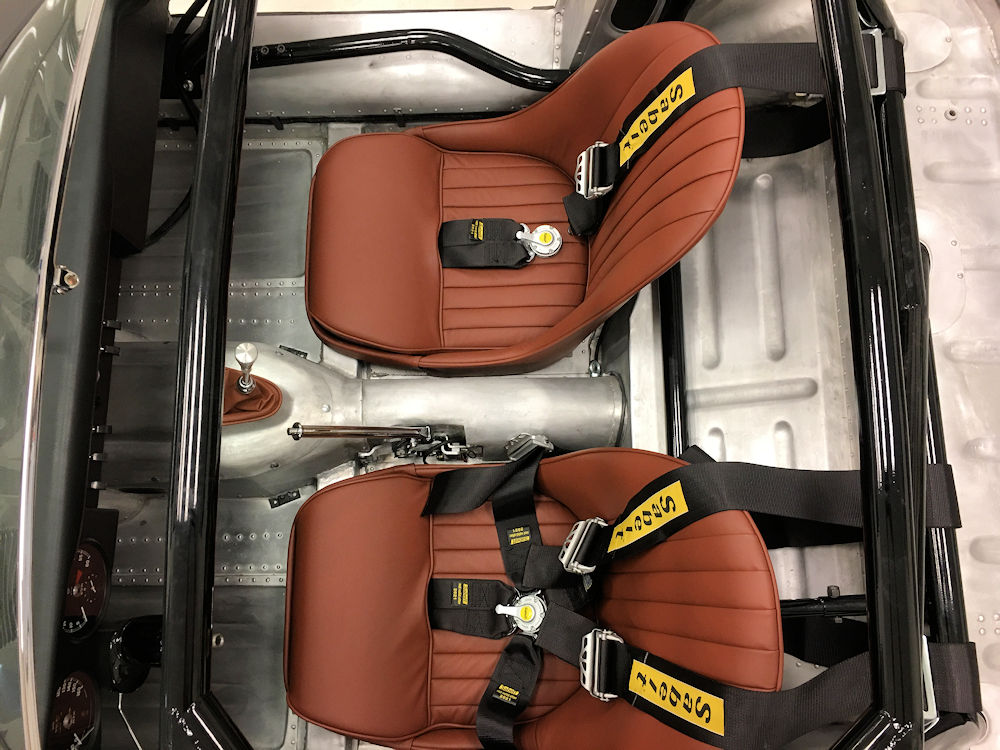
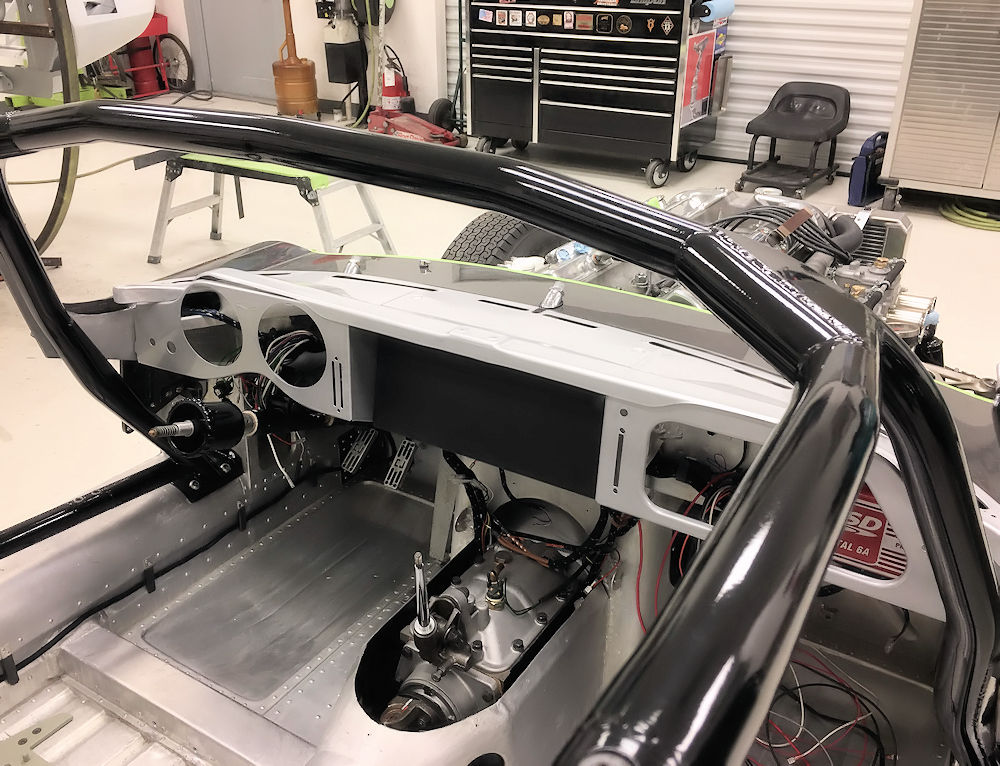
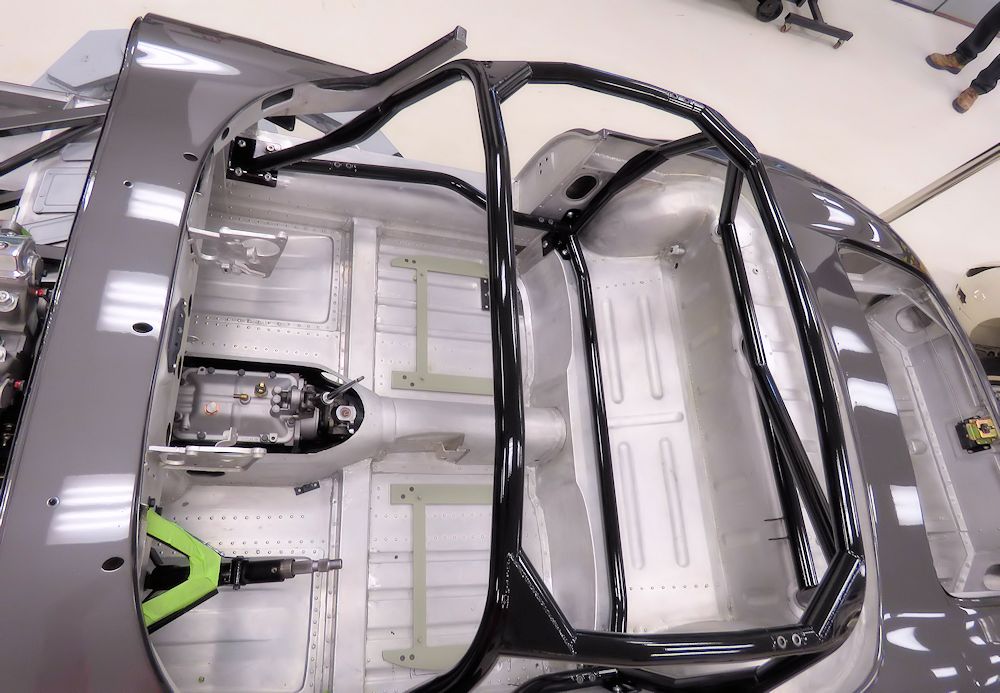
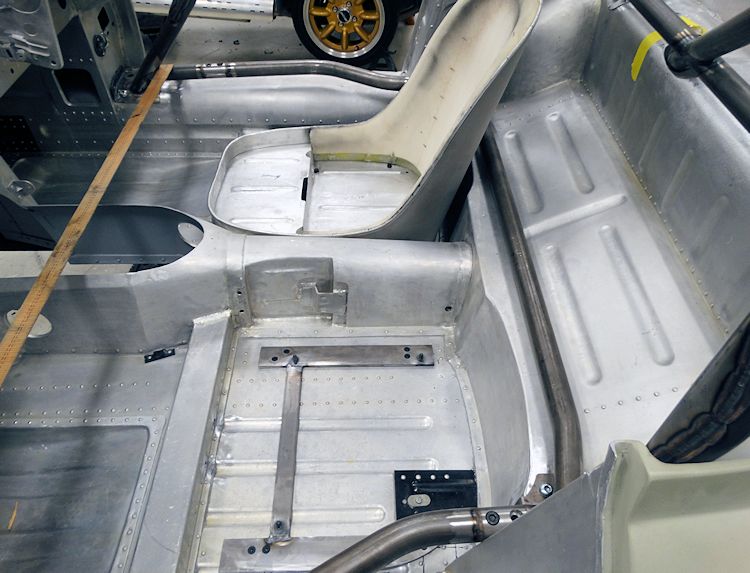
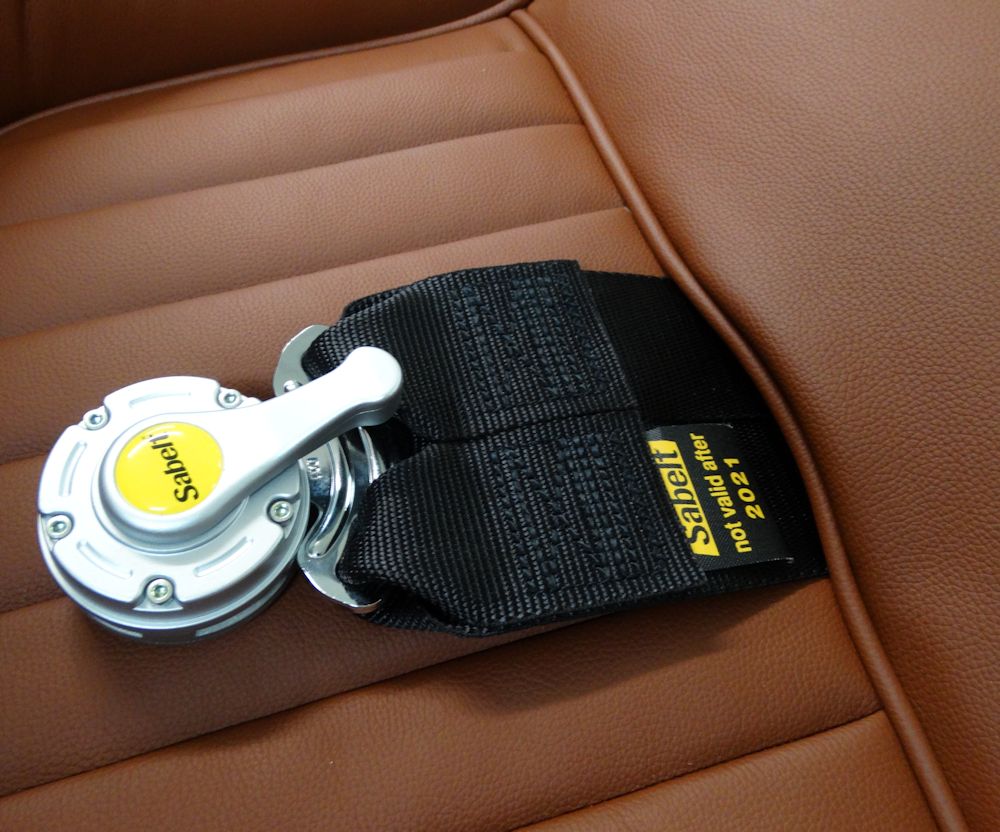
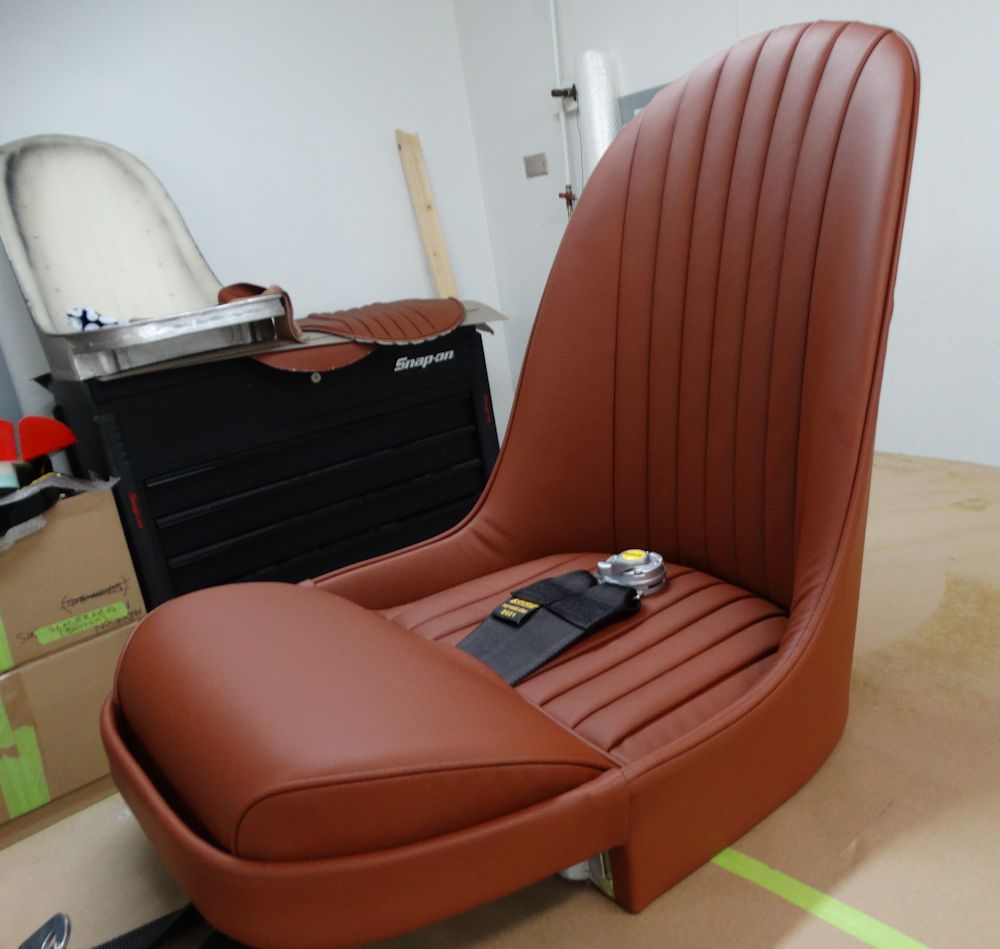
Installing the seats, belts and dash top.
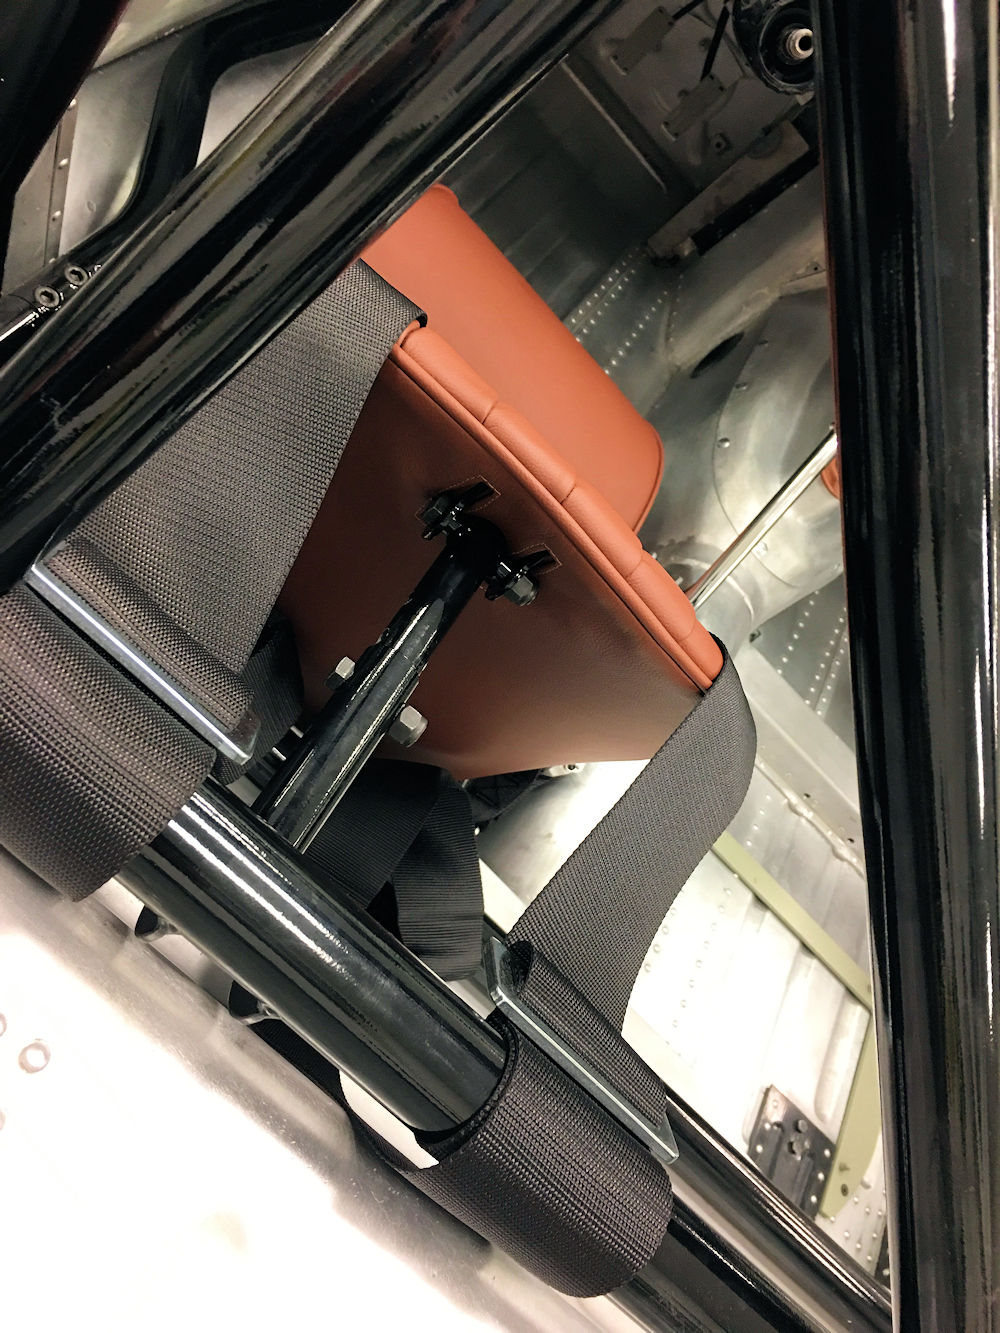
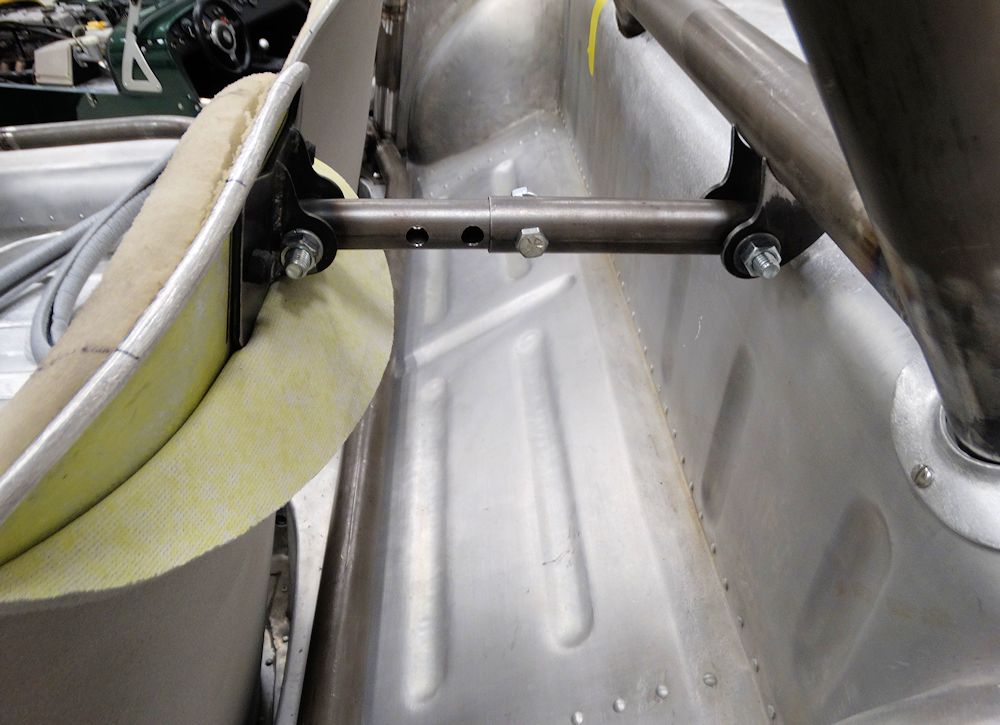
Driver's seat is anchored to the cage
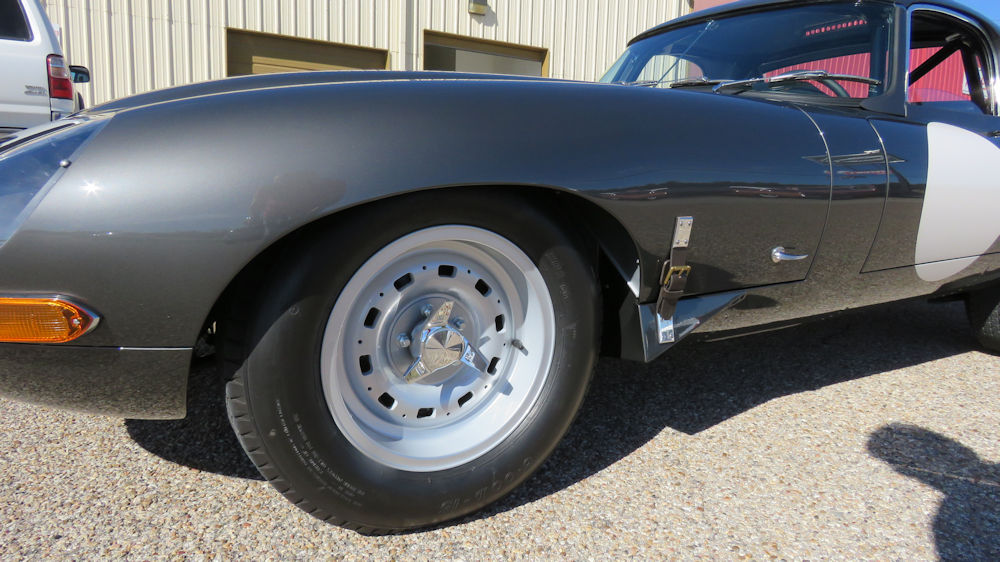
Tan hide a nice contrast with the Gunmetal paint
Dash top now installed
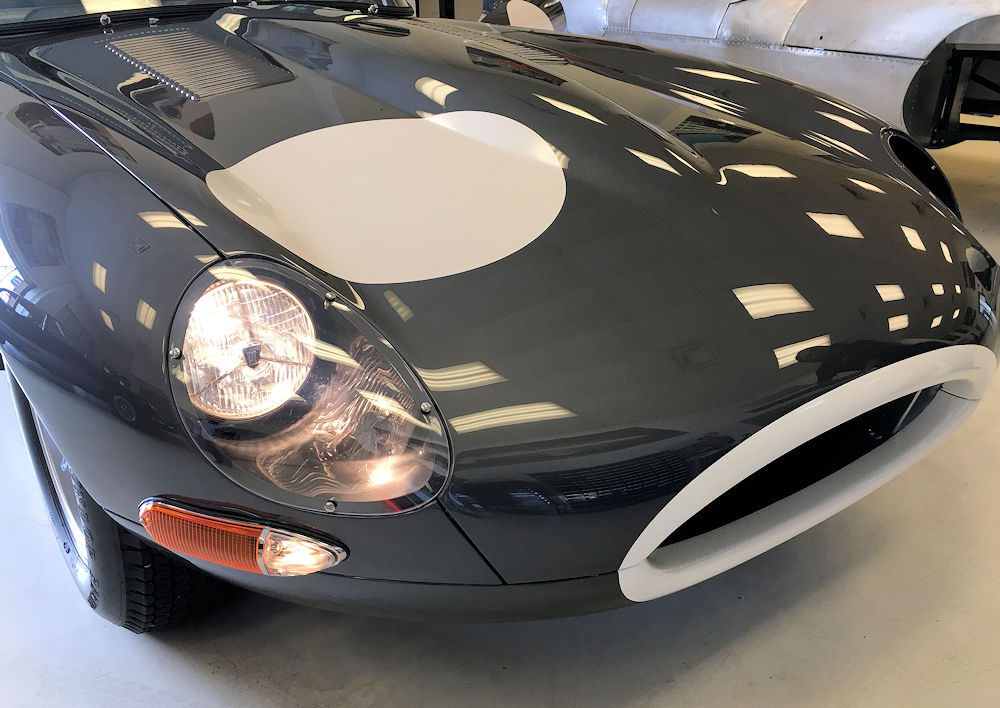
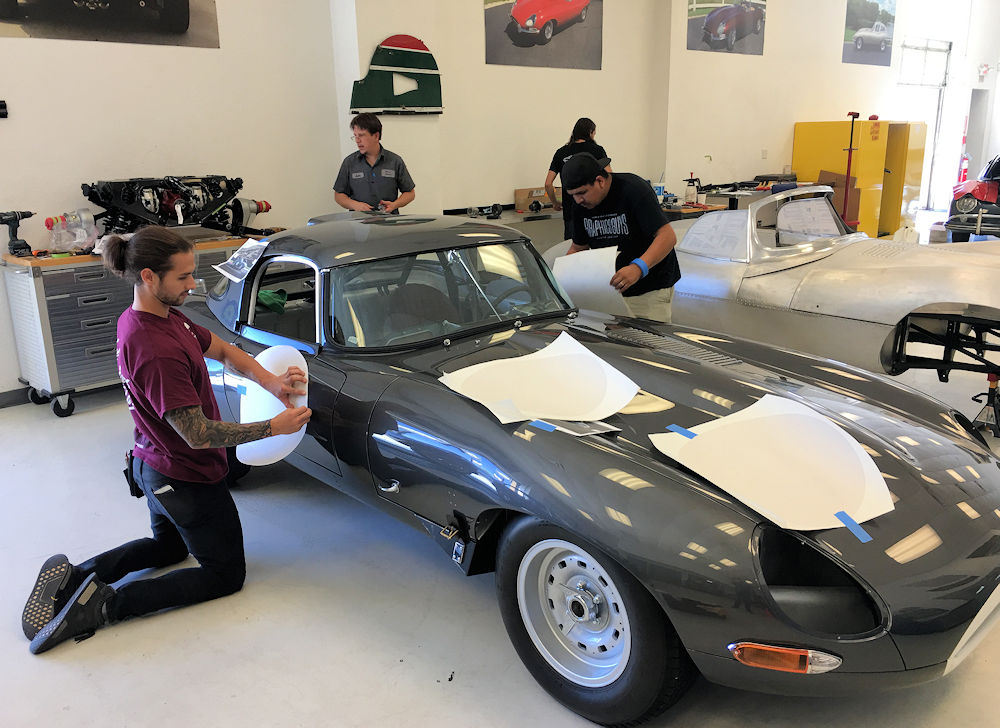
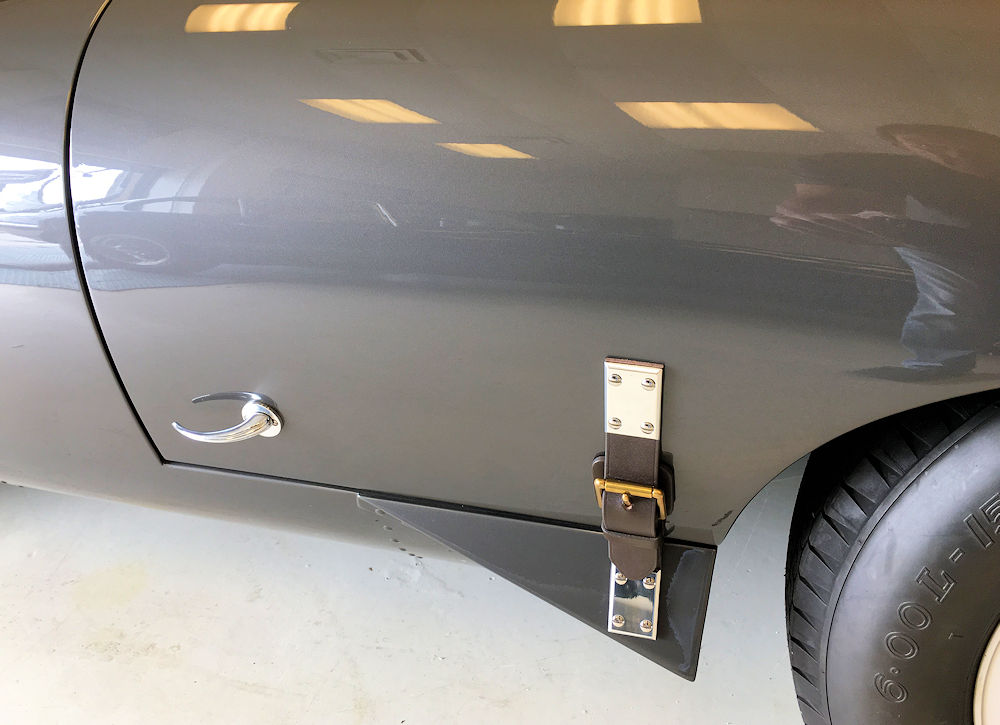
Installing leather bonnet straps, decals, headlamps, etc.
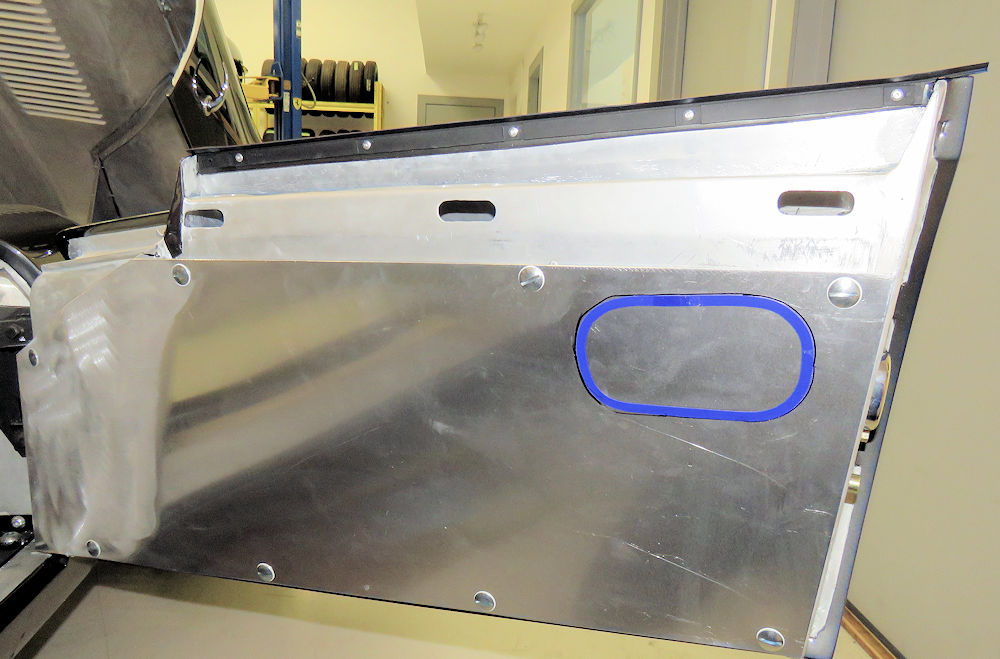
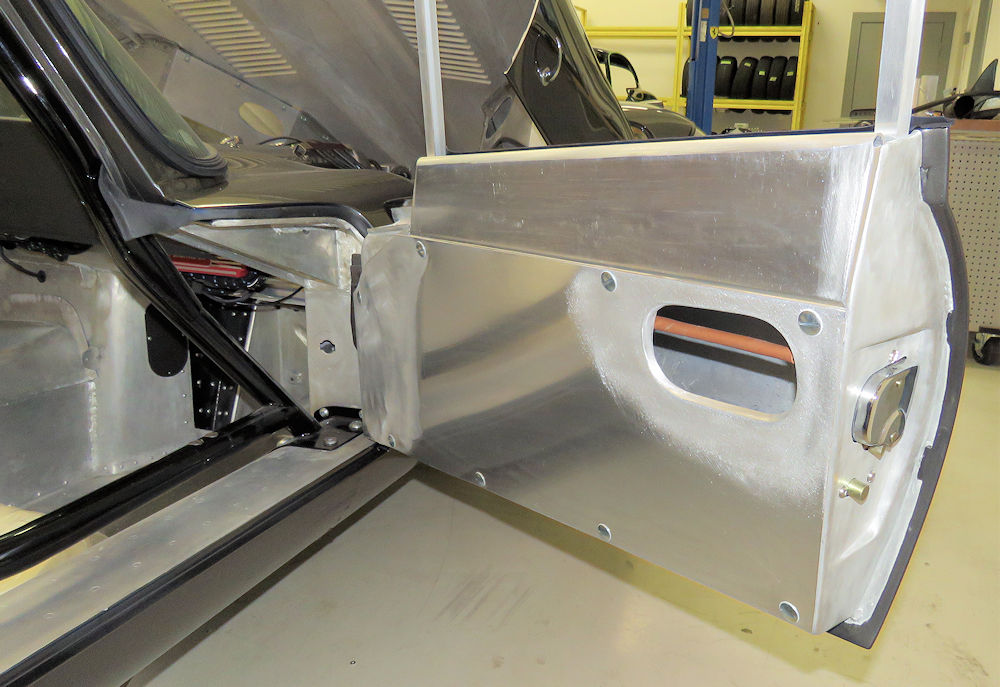
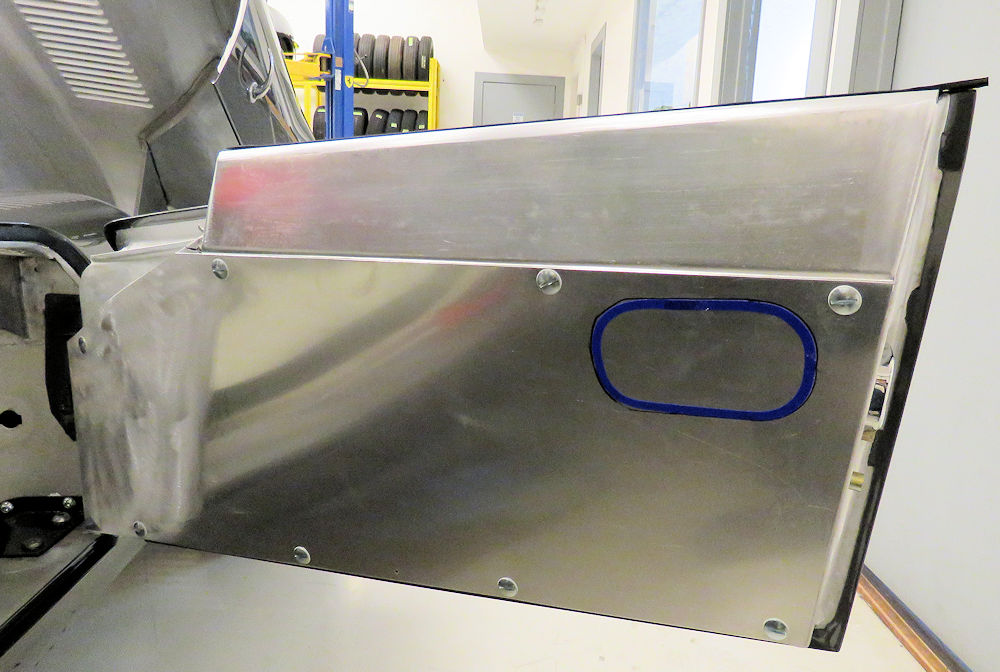
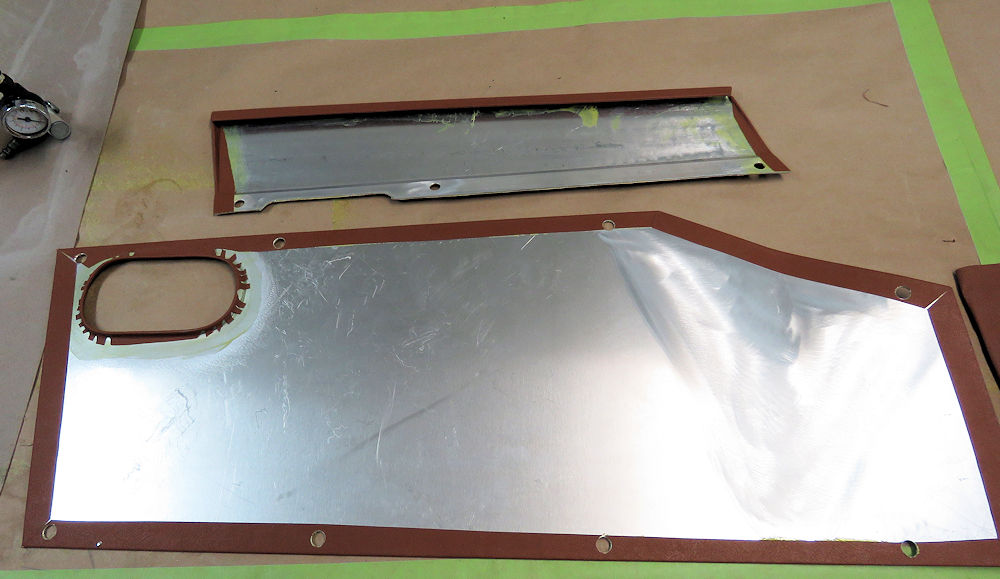
Jake fabricated new alloy inner door panels
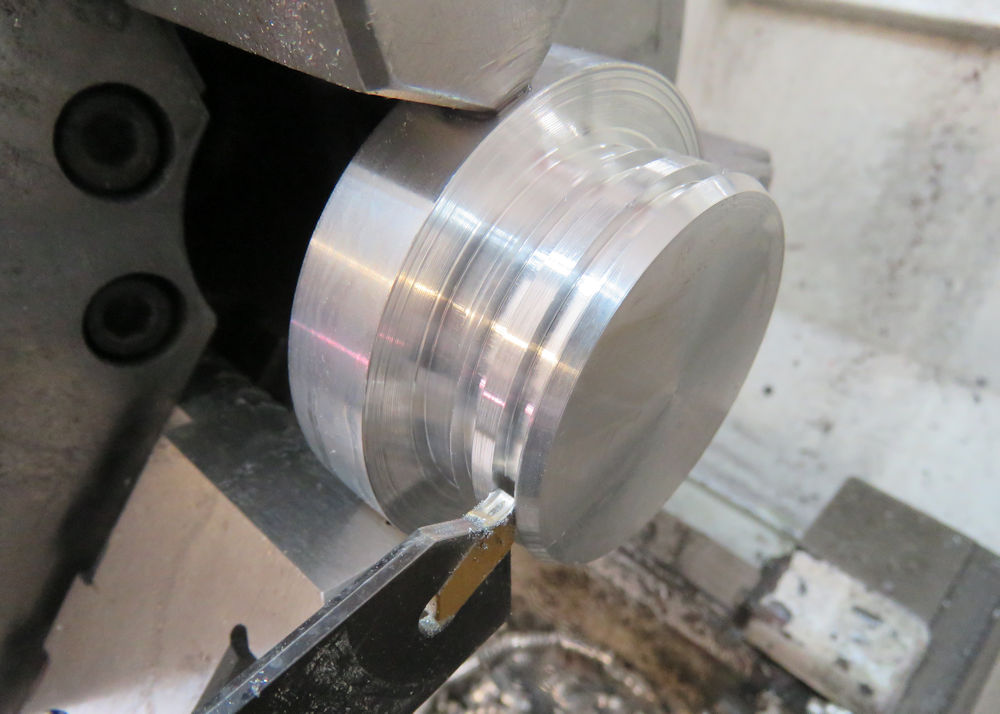
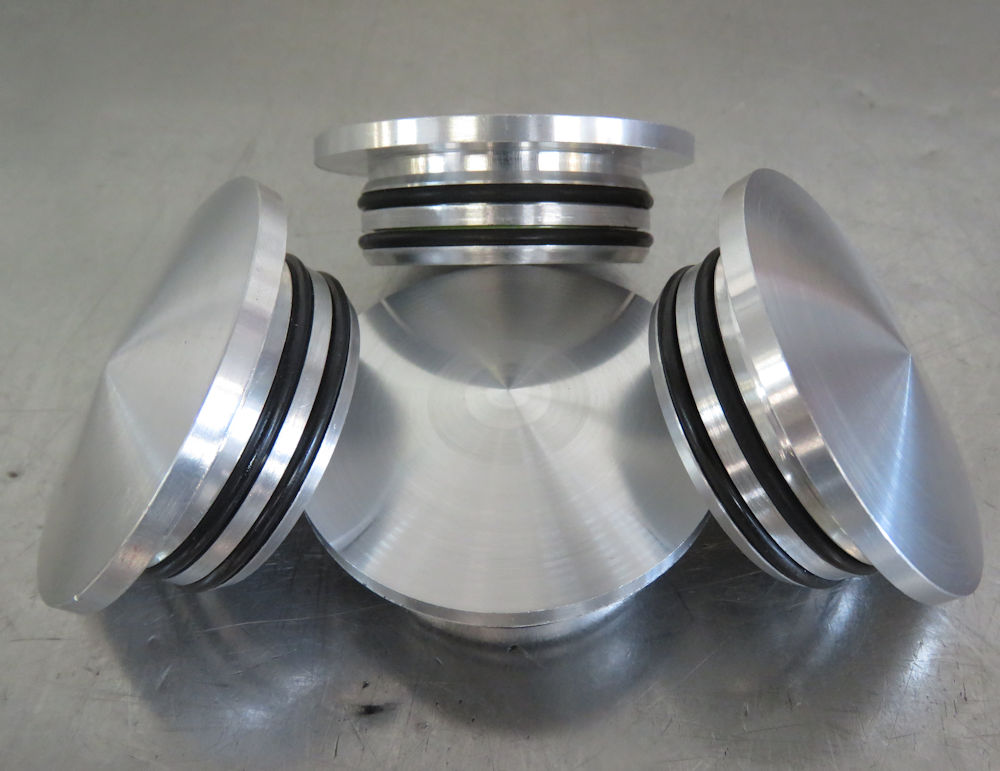
Fabricating aluminum inner door panels and machining custom center caps for the Dunlop racing wheels.
I am delighted to report that this car will feature on an upcoming episode of Jay Leno's Garage (to be filmed in December).
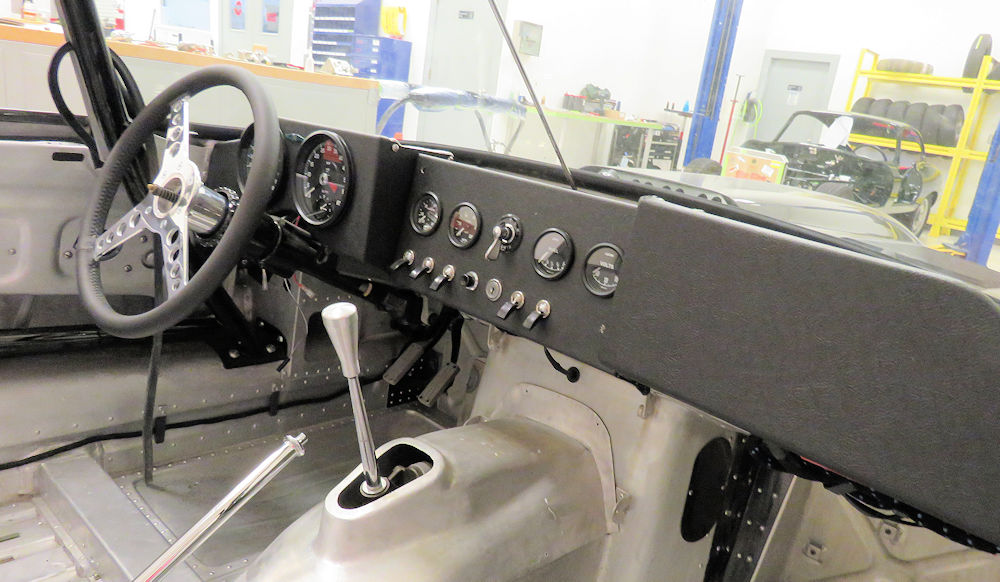
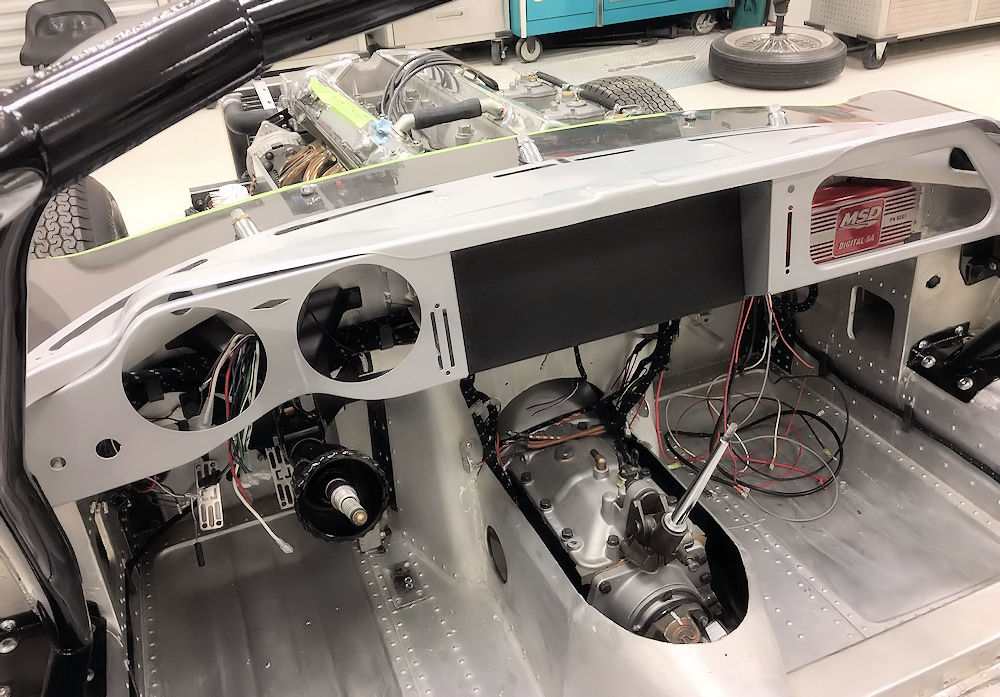
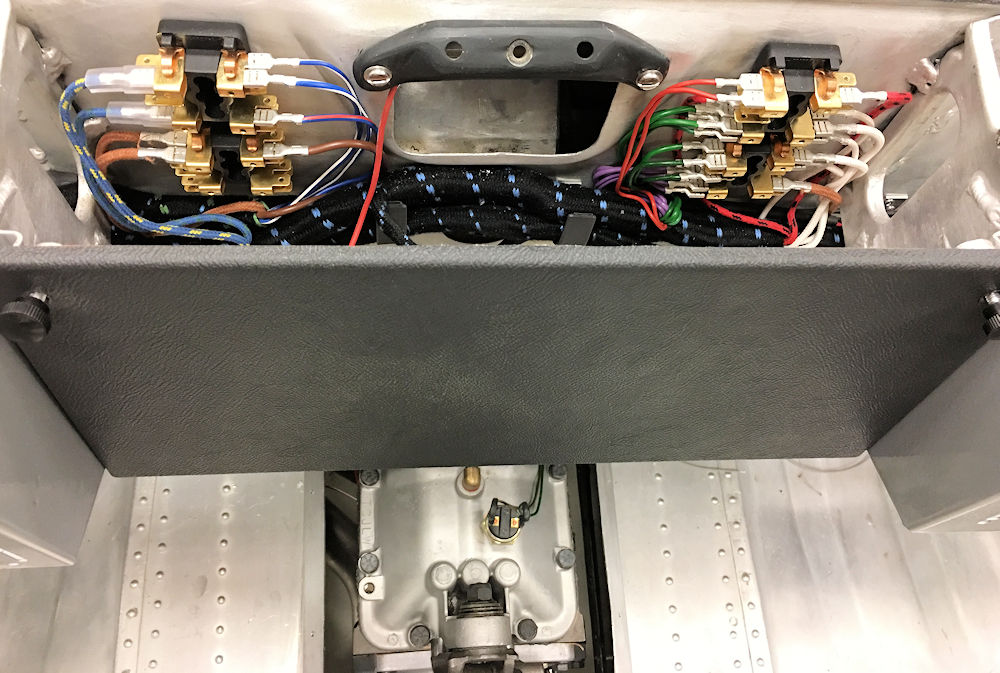
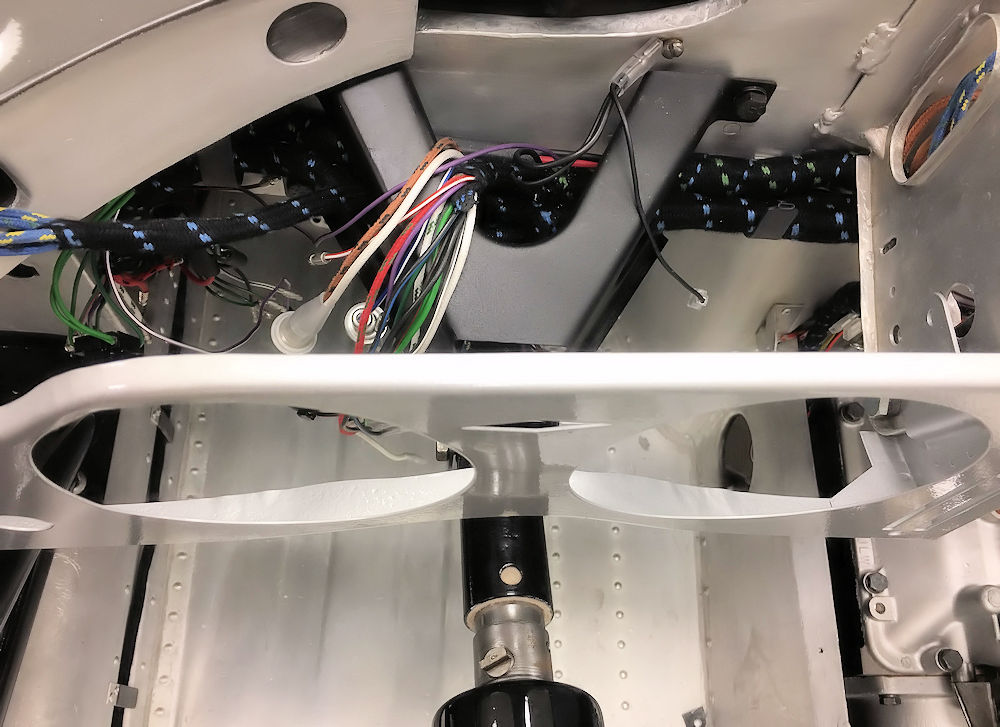
Alex has been busy installing the wiring harness and plotting out the layout of the dash.
Plotting out the dash format
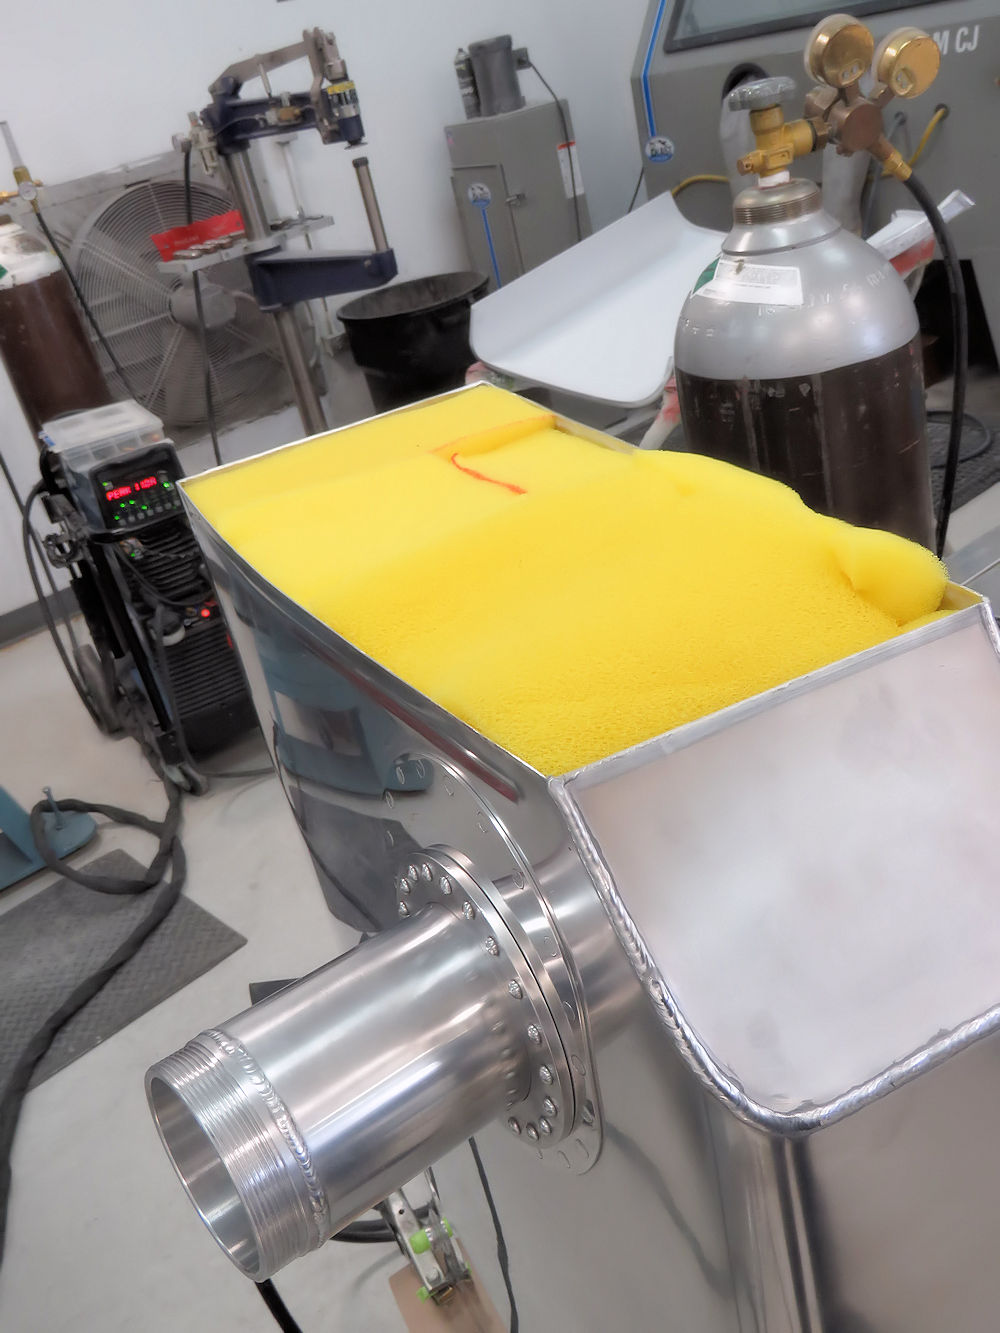
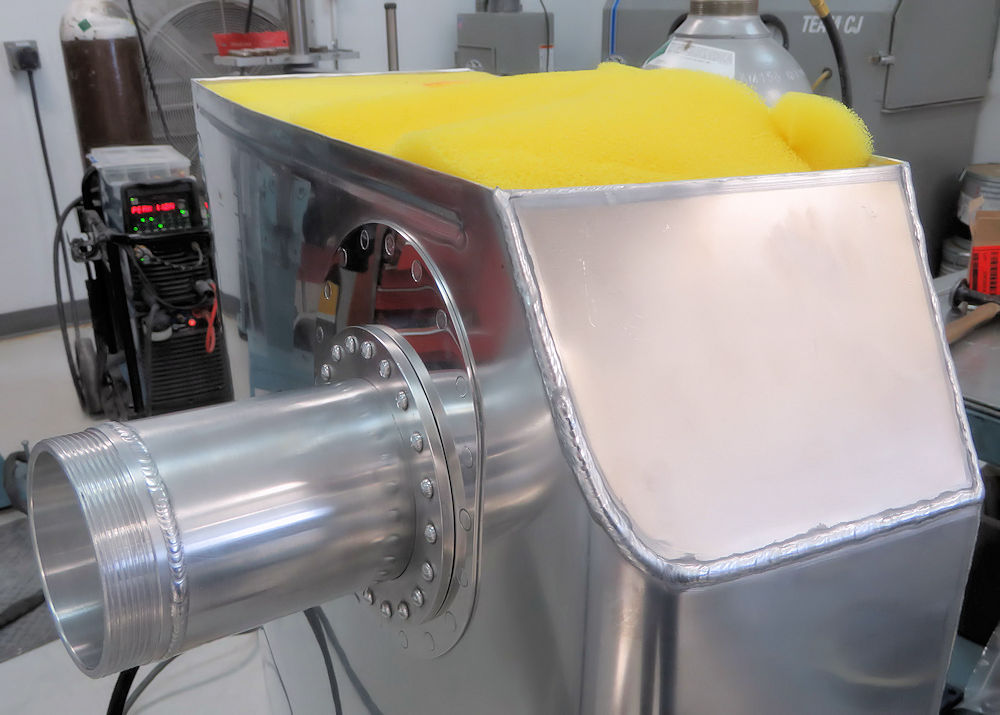
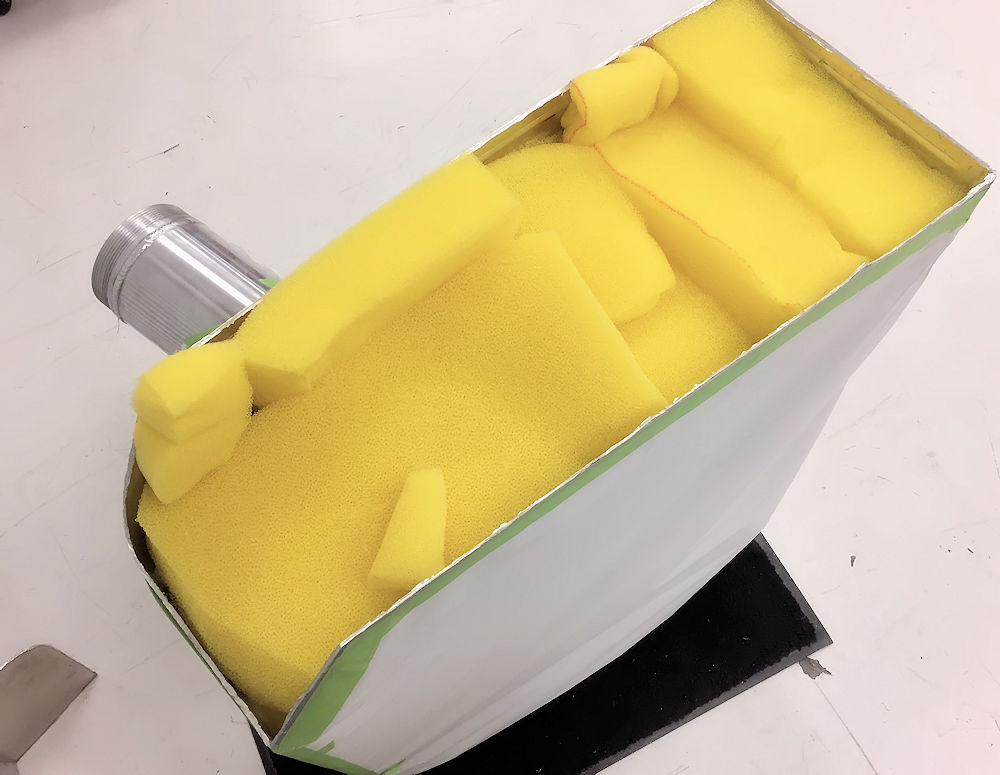
Foam reinstalled
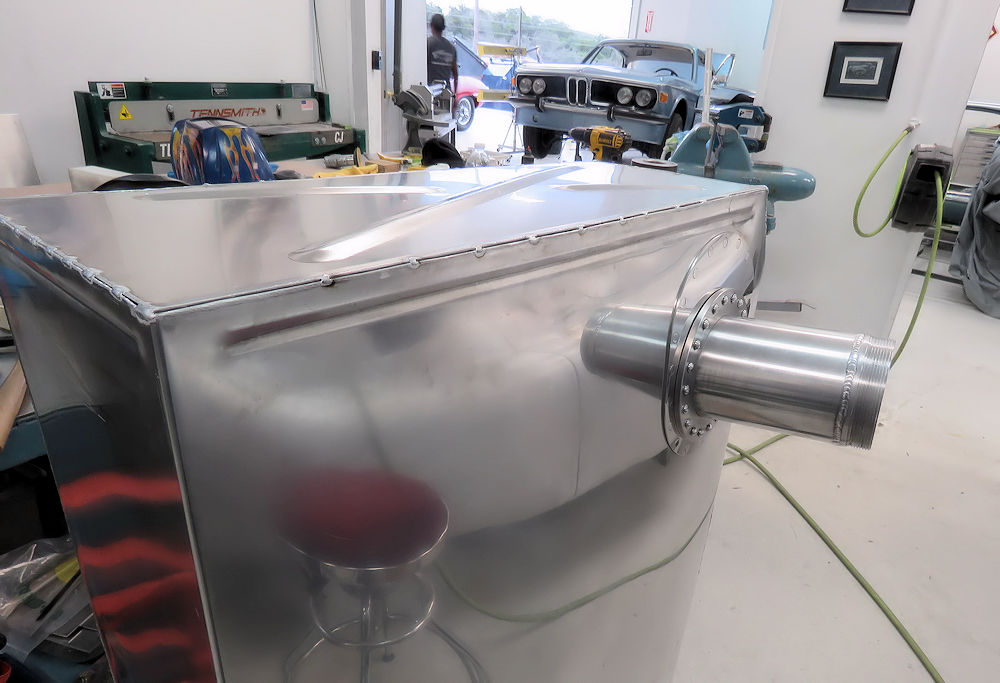
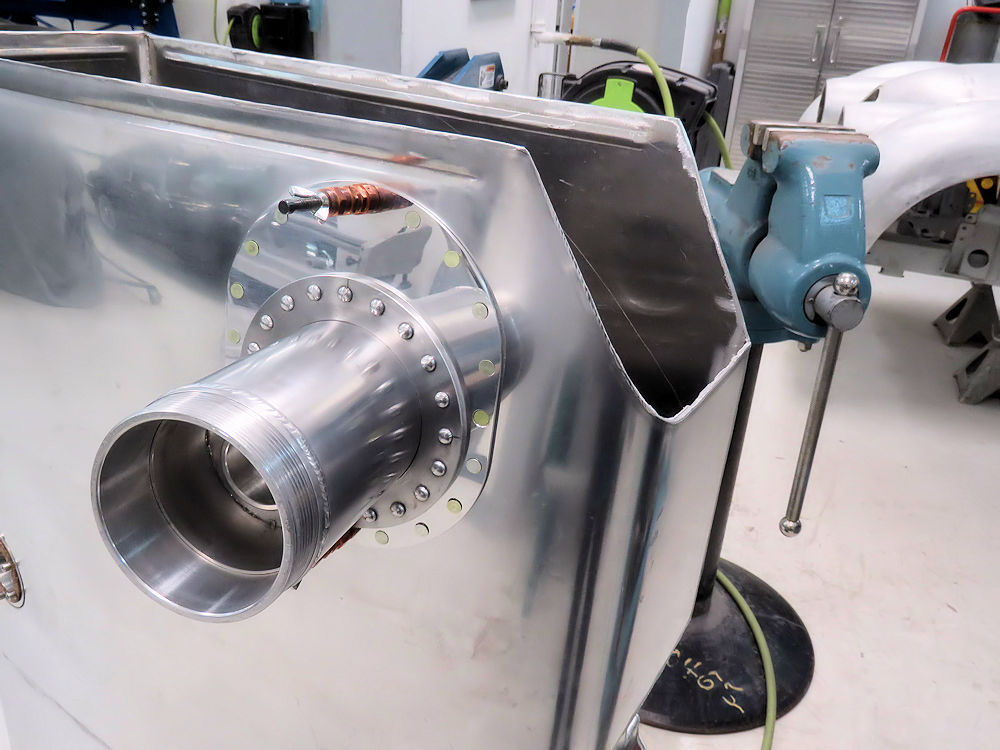
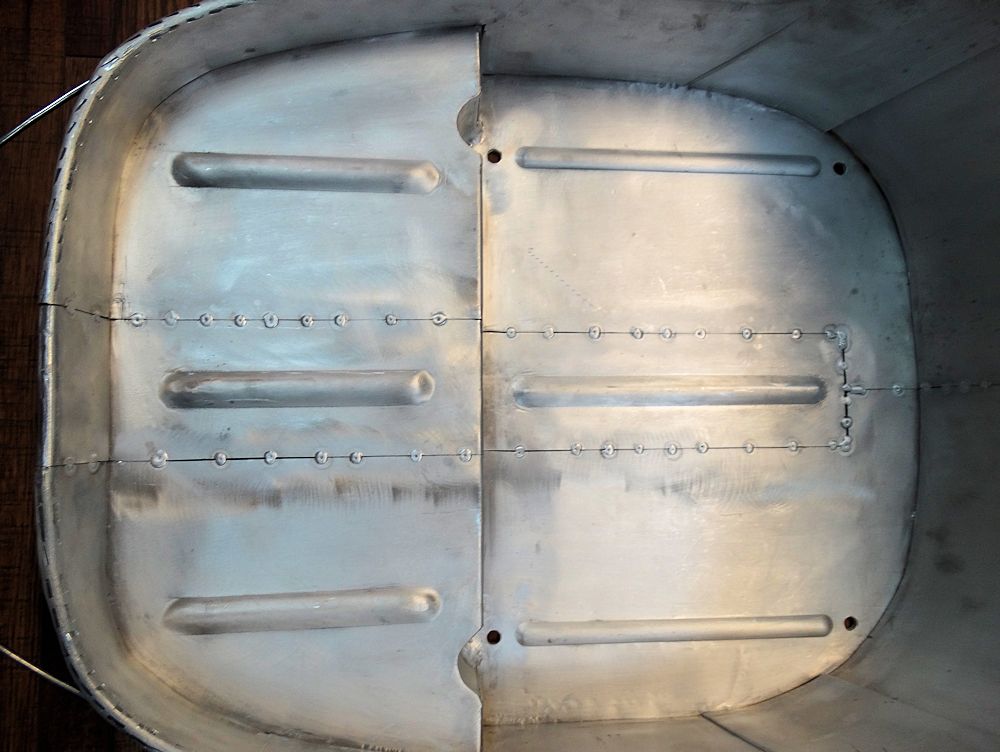
Preparing to weld the tank back together
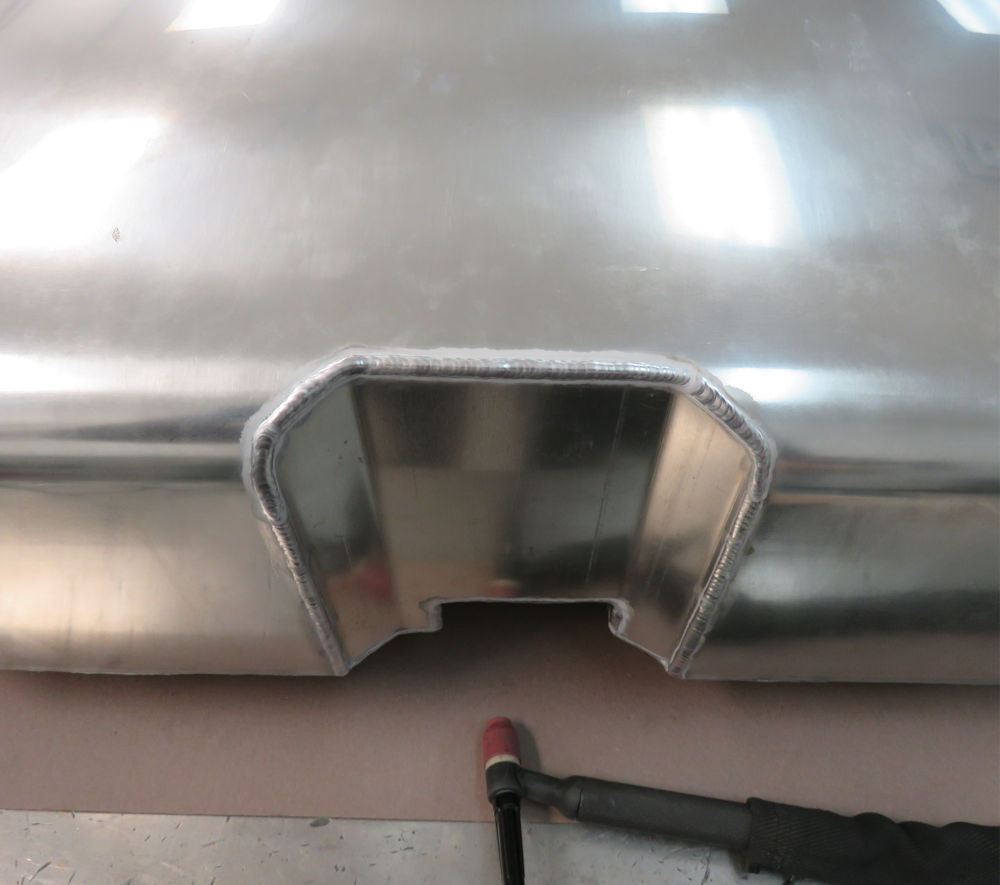
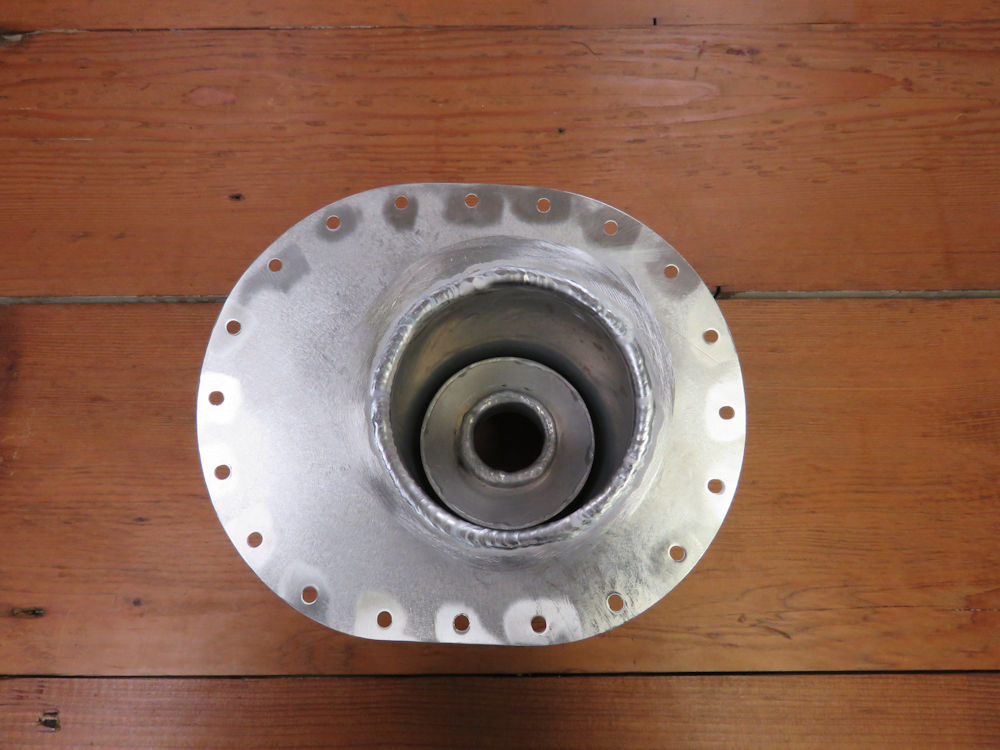
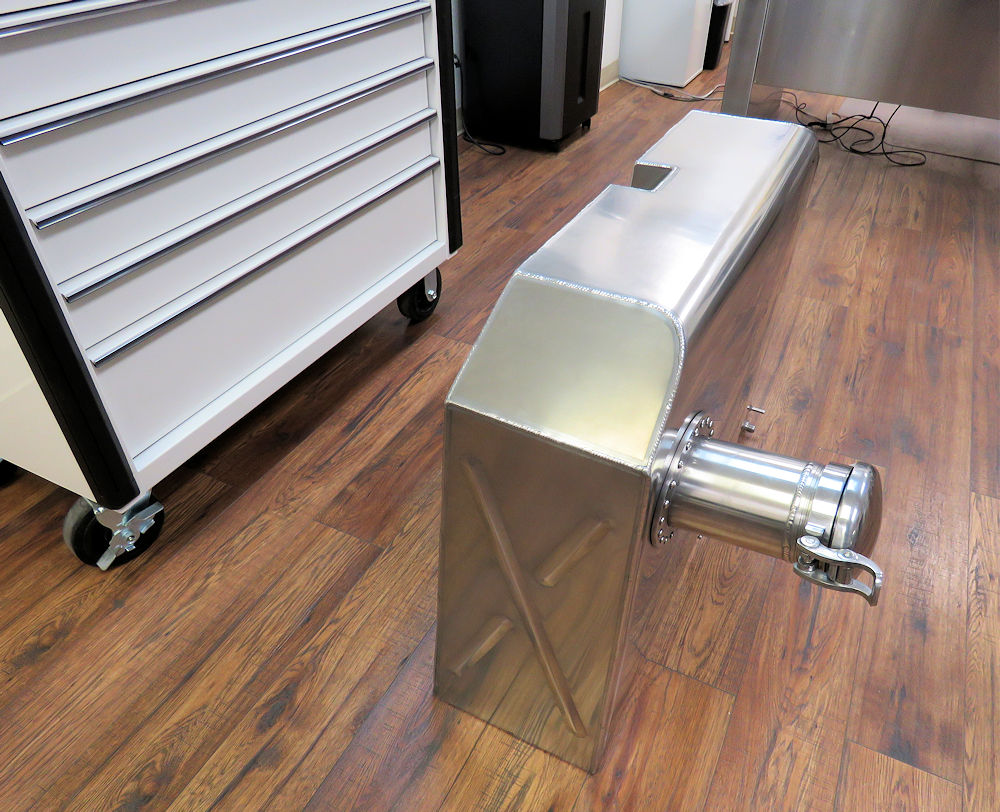
Tank now fully welded
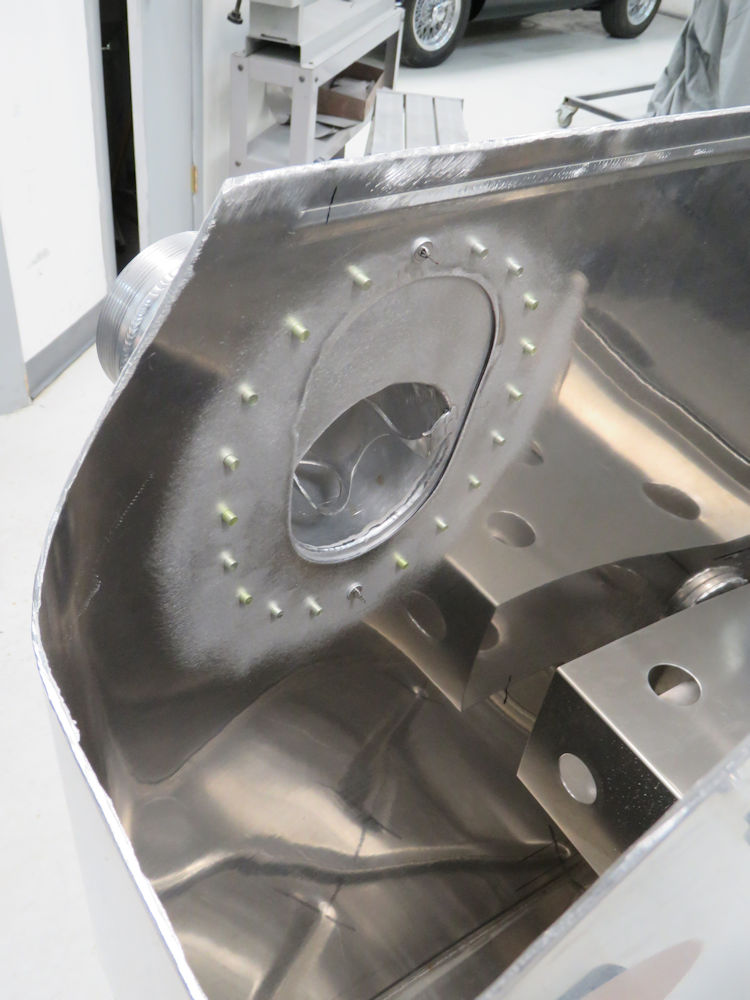
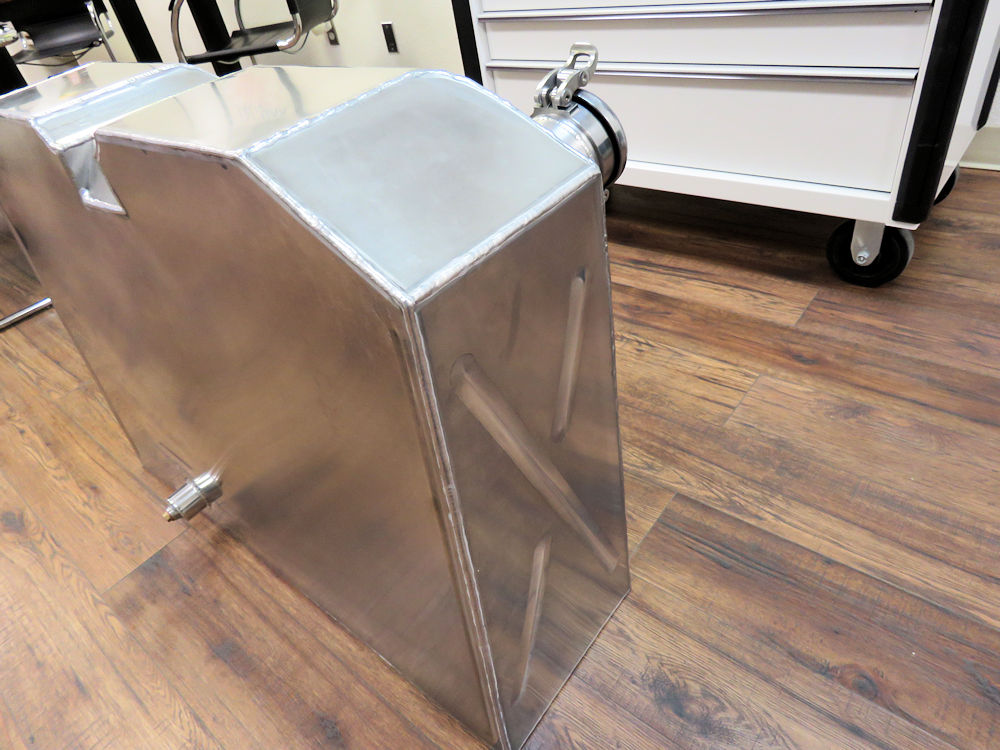
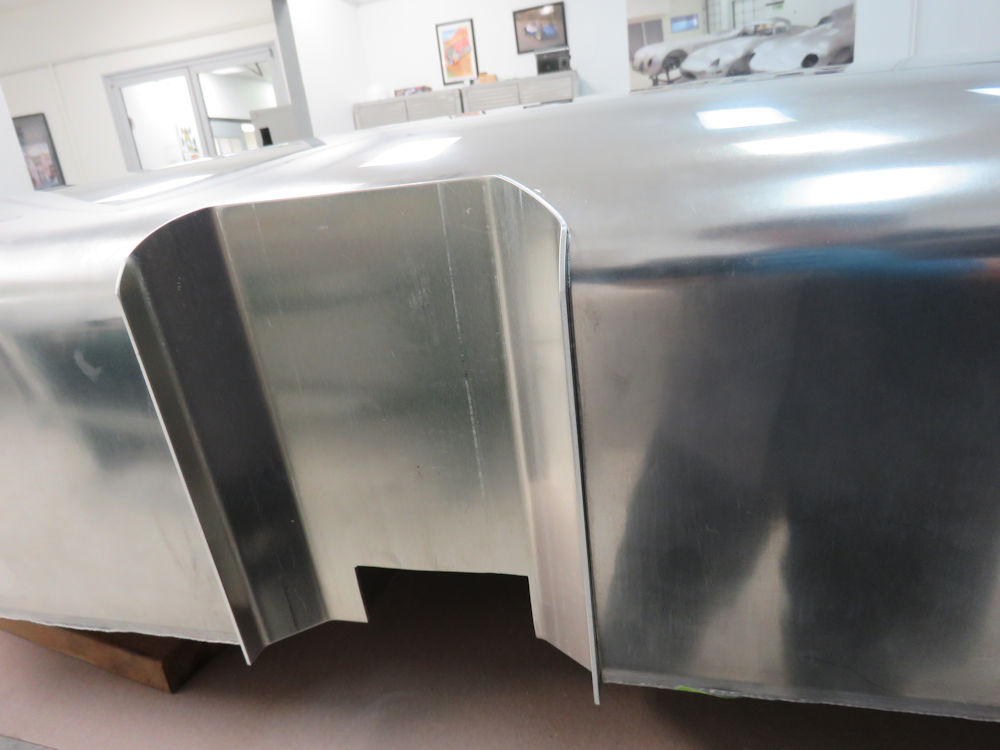
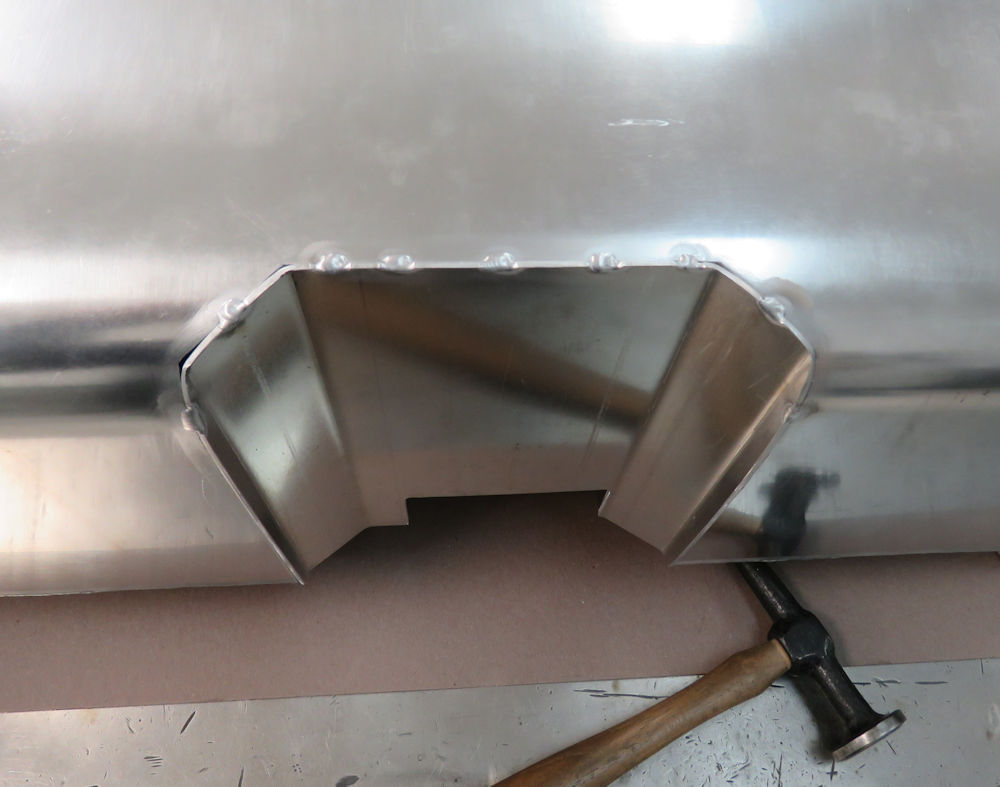
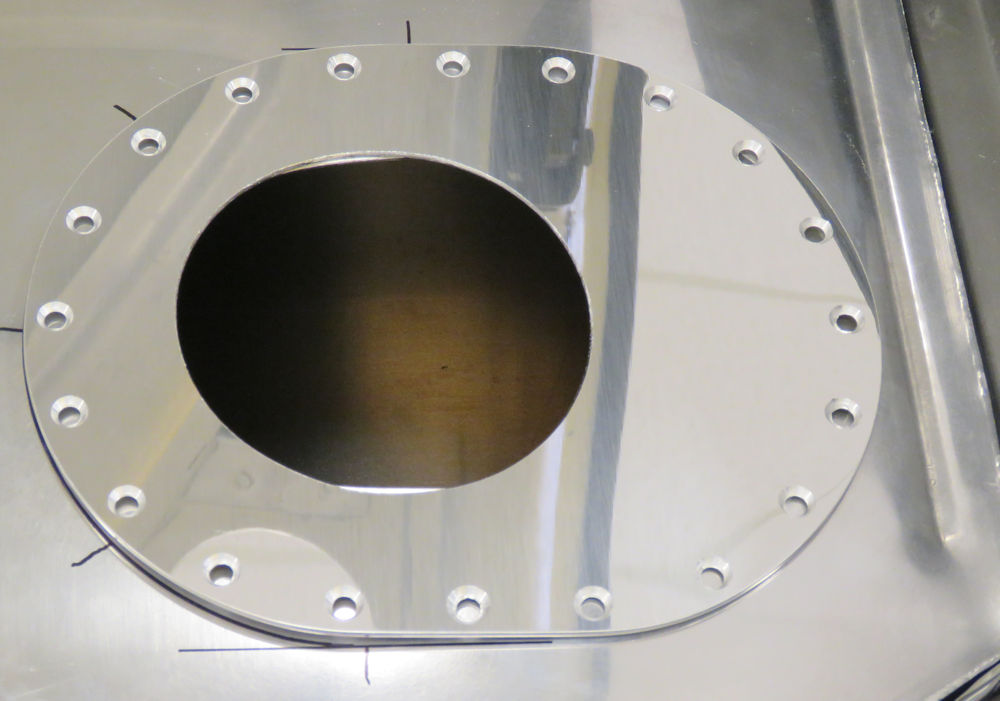
End panel tack welded in place
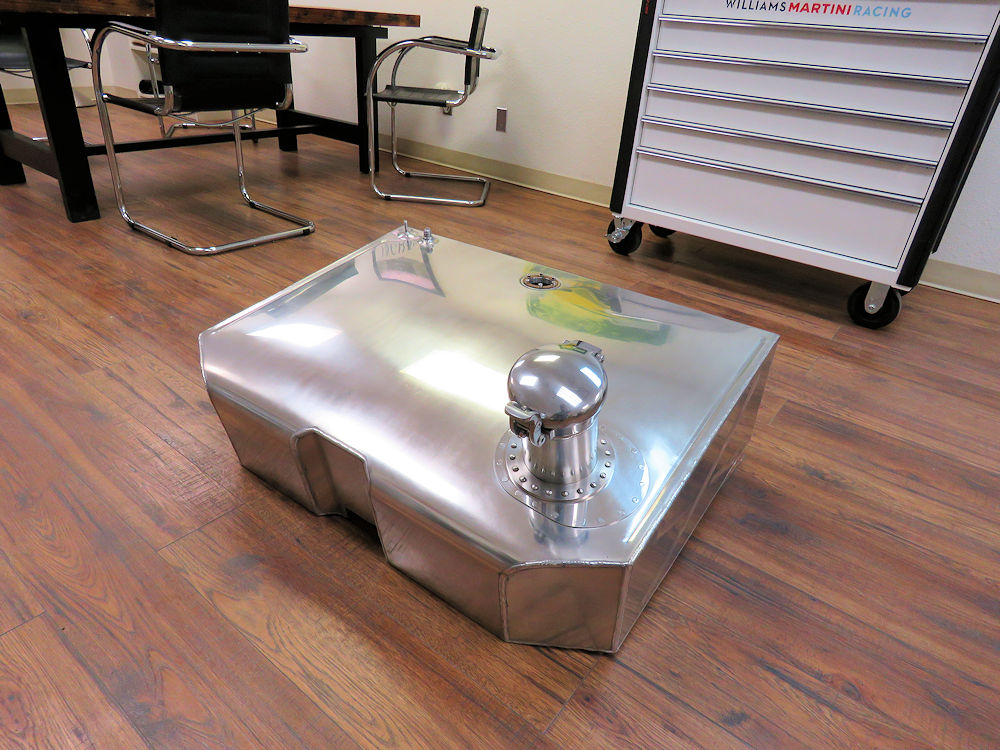
Fuel cell modifications, continued...
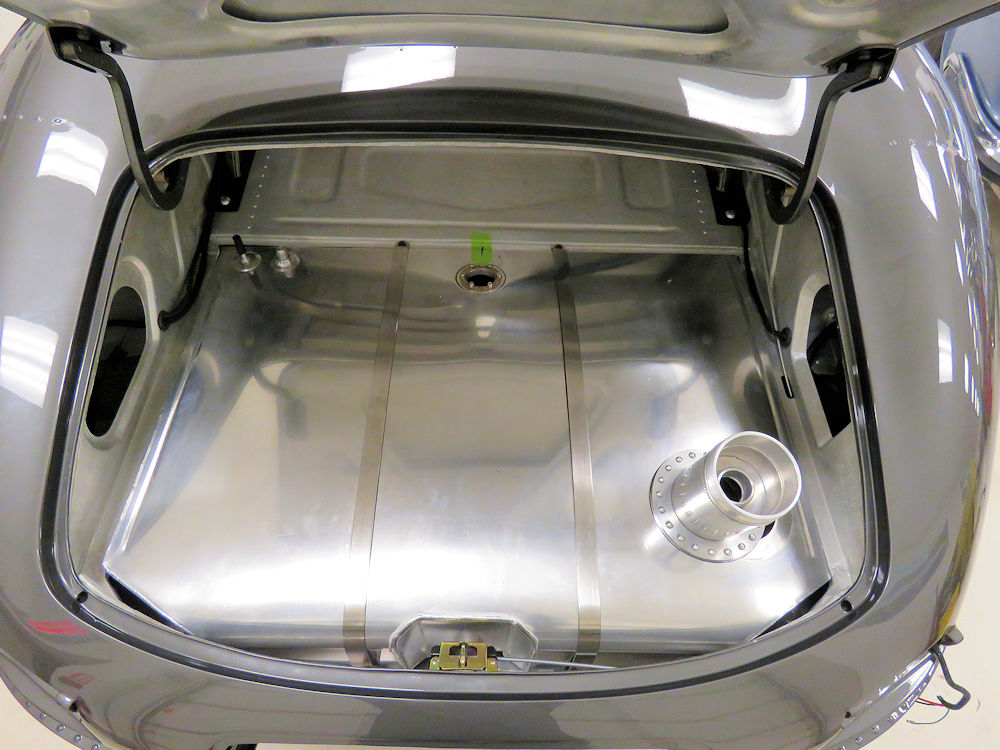
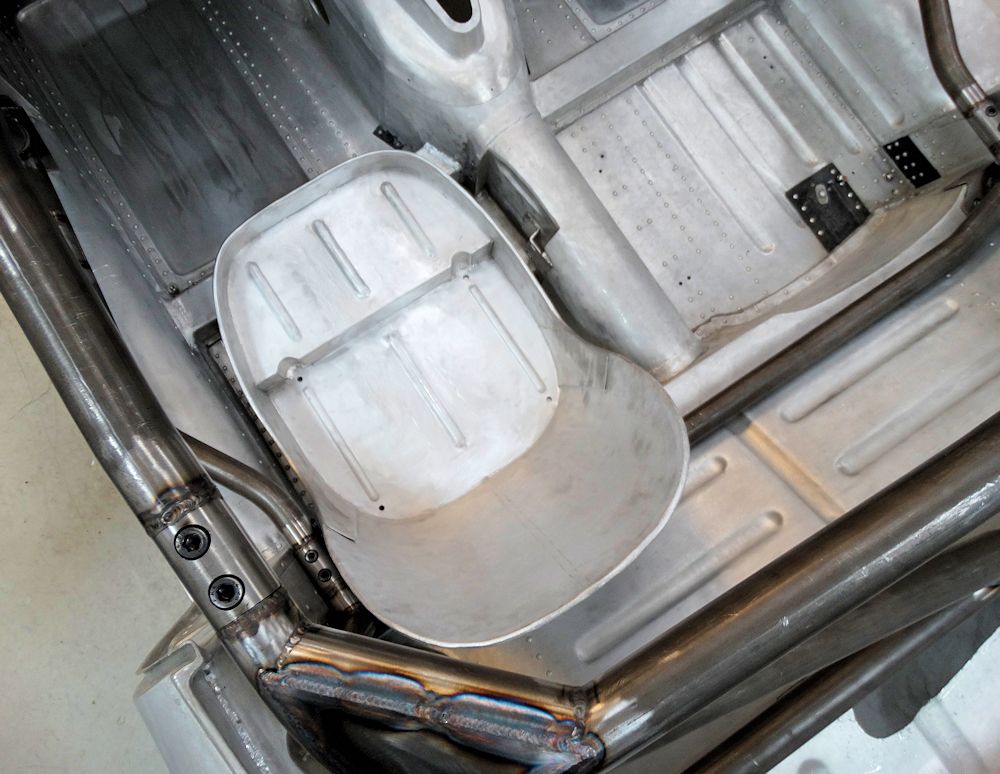
Ready to install
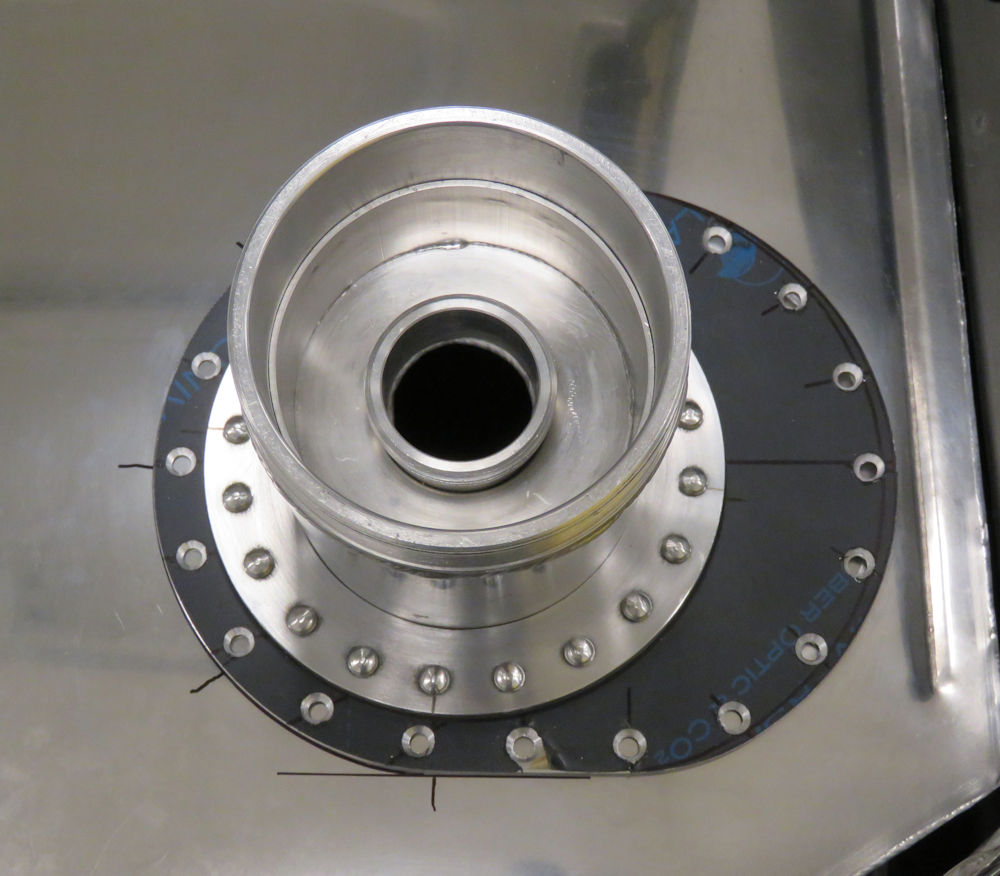
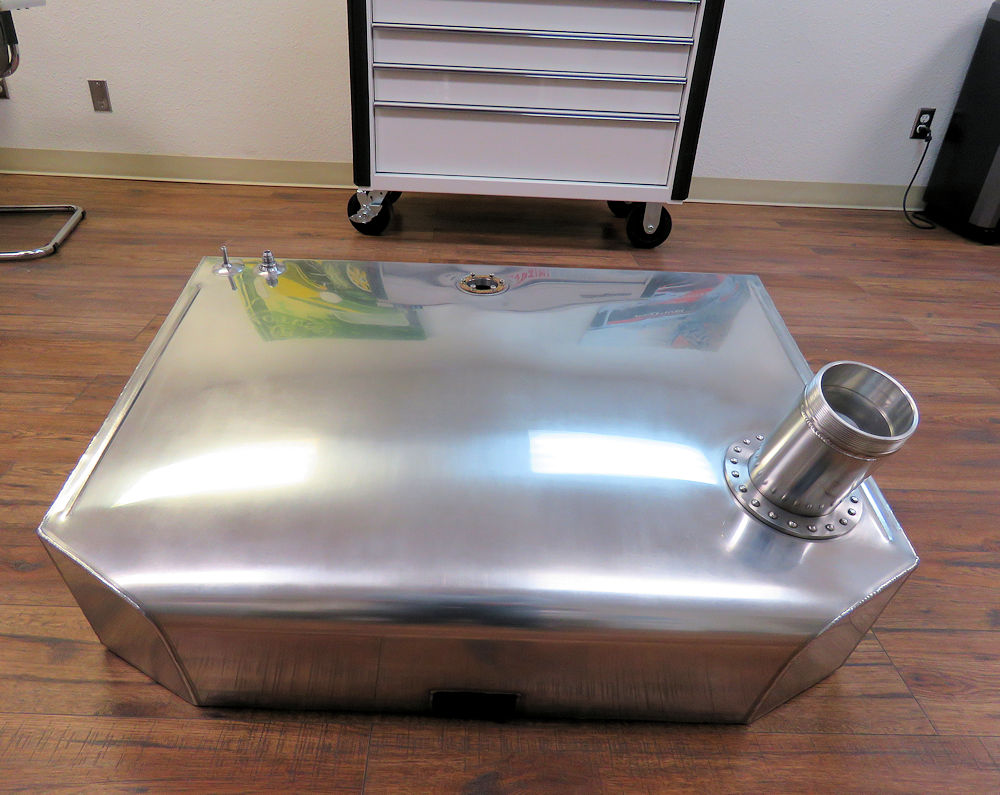
This is a stunning quality item exhibiting workmanship of the highest order, although unfortunately we are going to have to modify the tank fairly extensively in order for it to fit.
We just received the FIA approved 35 gallon fuel tank from Axminster Specialist Panels in England.
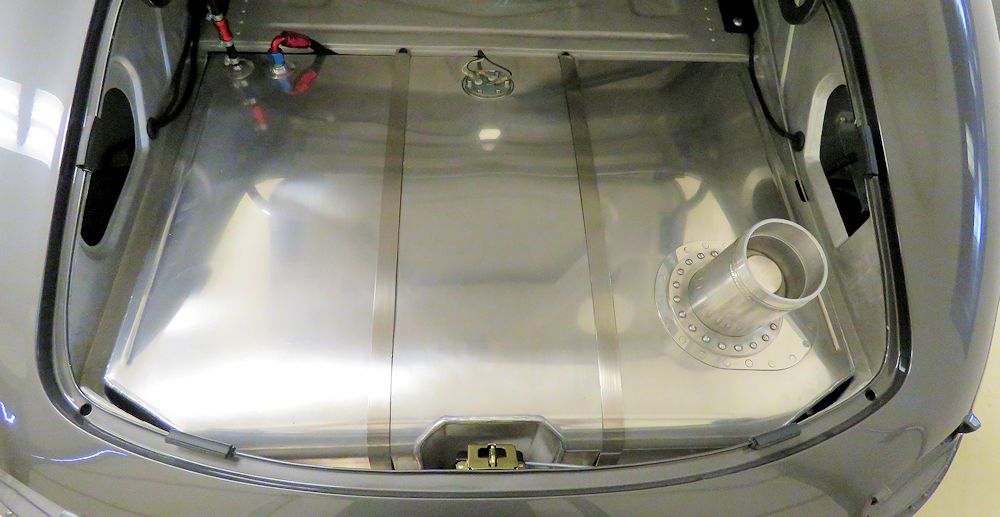
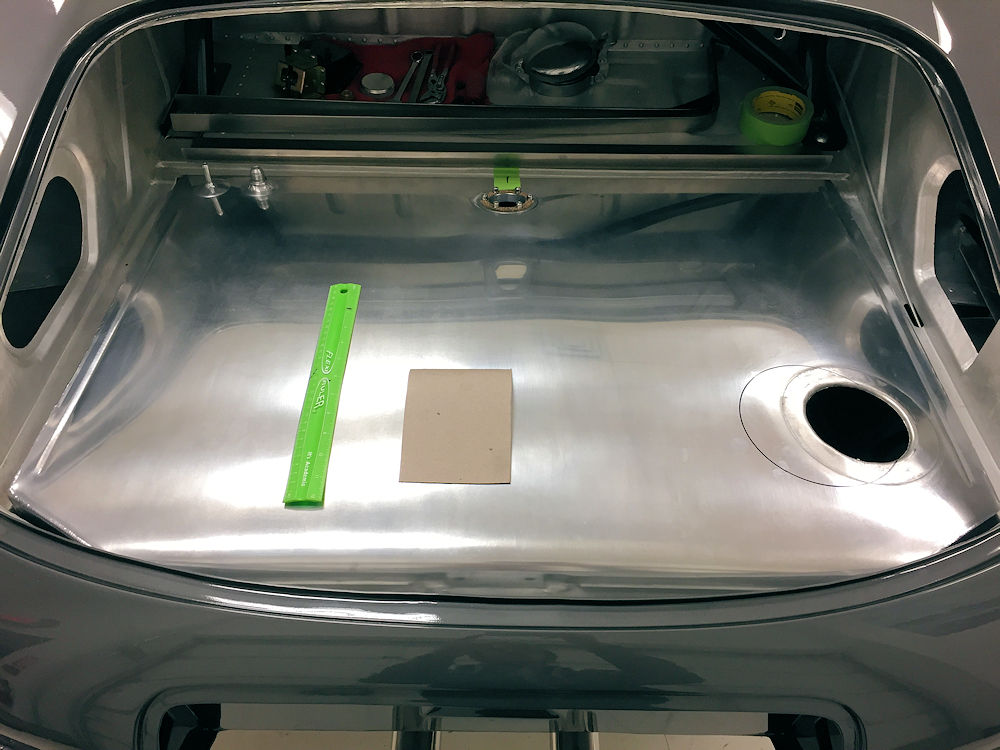
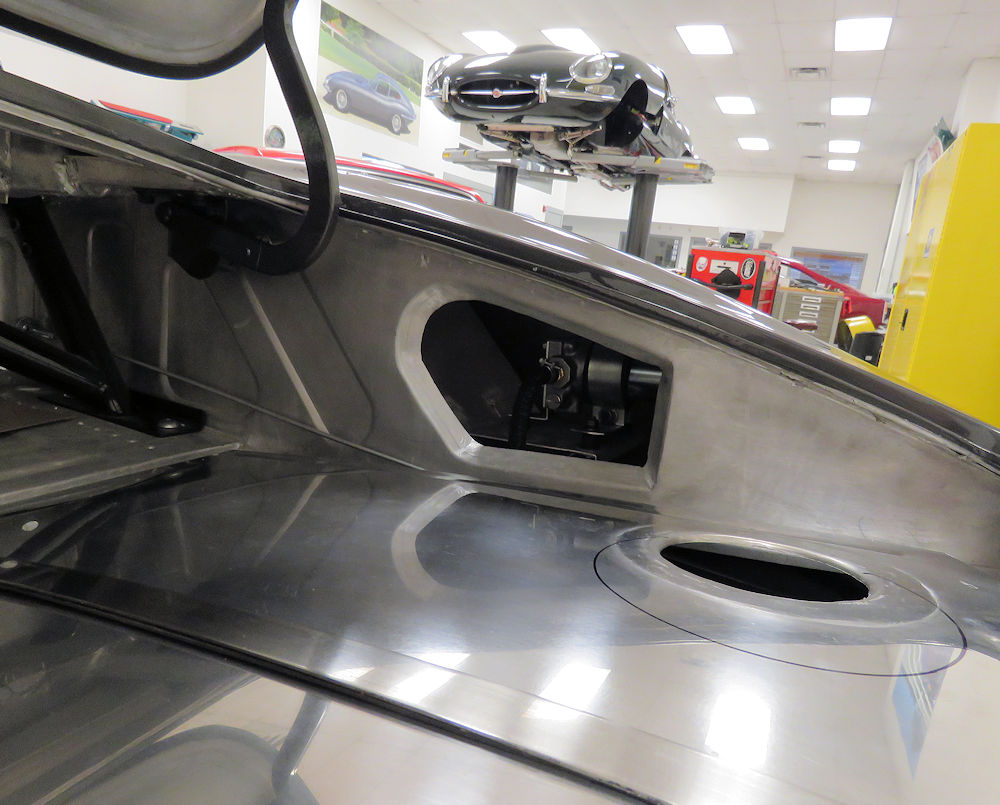
The biggest issues are the rear wall, where the tank does not allow enough room for the boot latch and bracket, and the filler neck does line up with the corresponding hole in the boot lid.
Foam will be removed and replaced
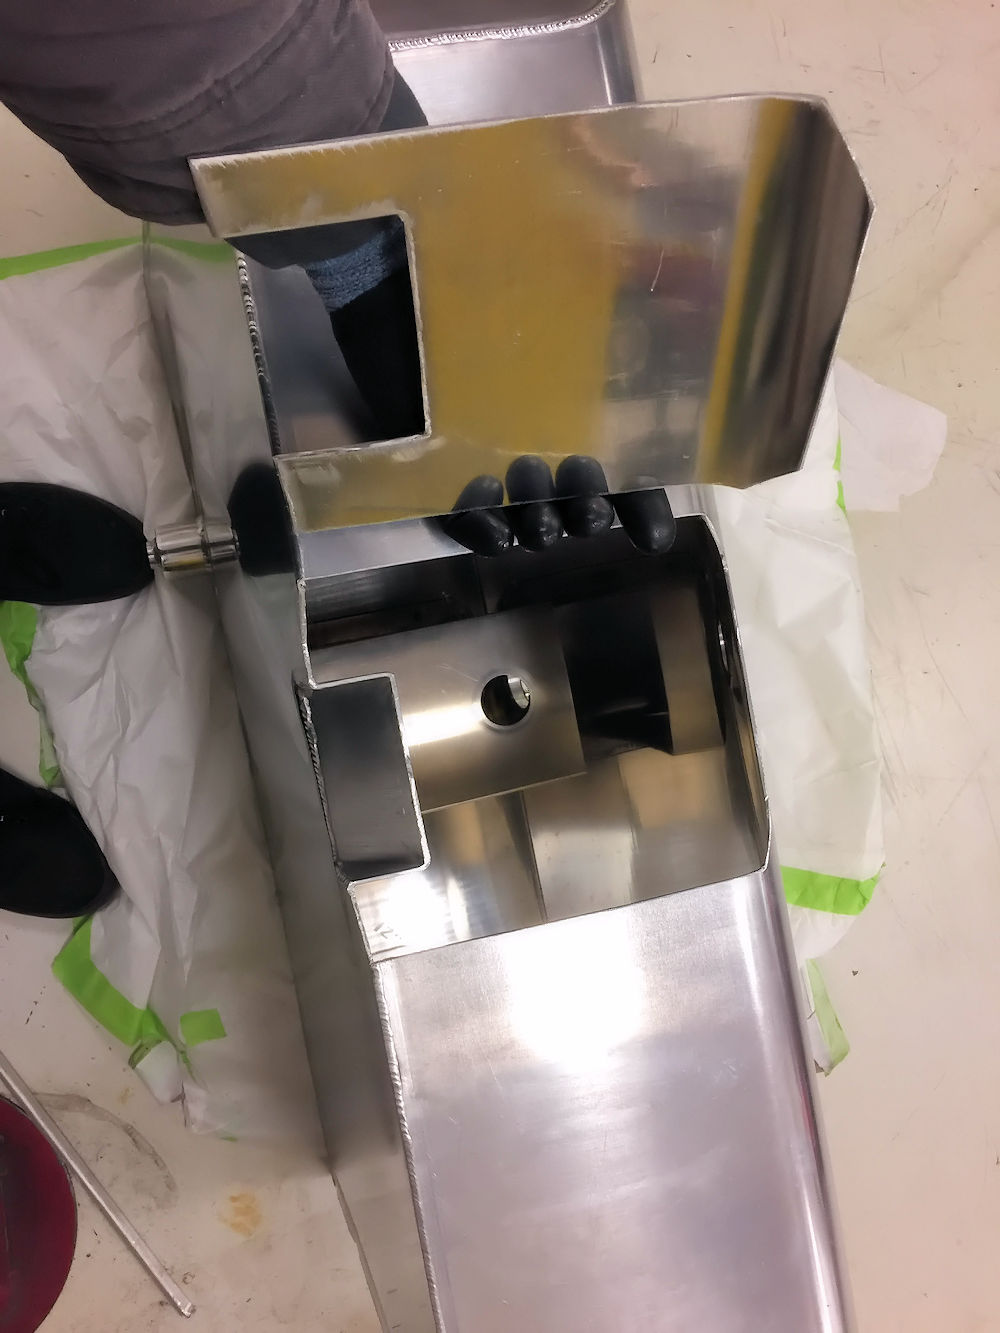
RH side panel will be carefully cut away
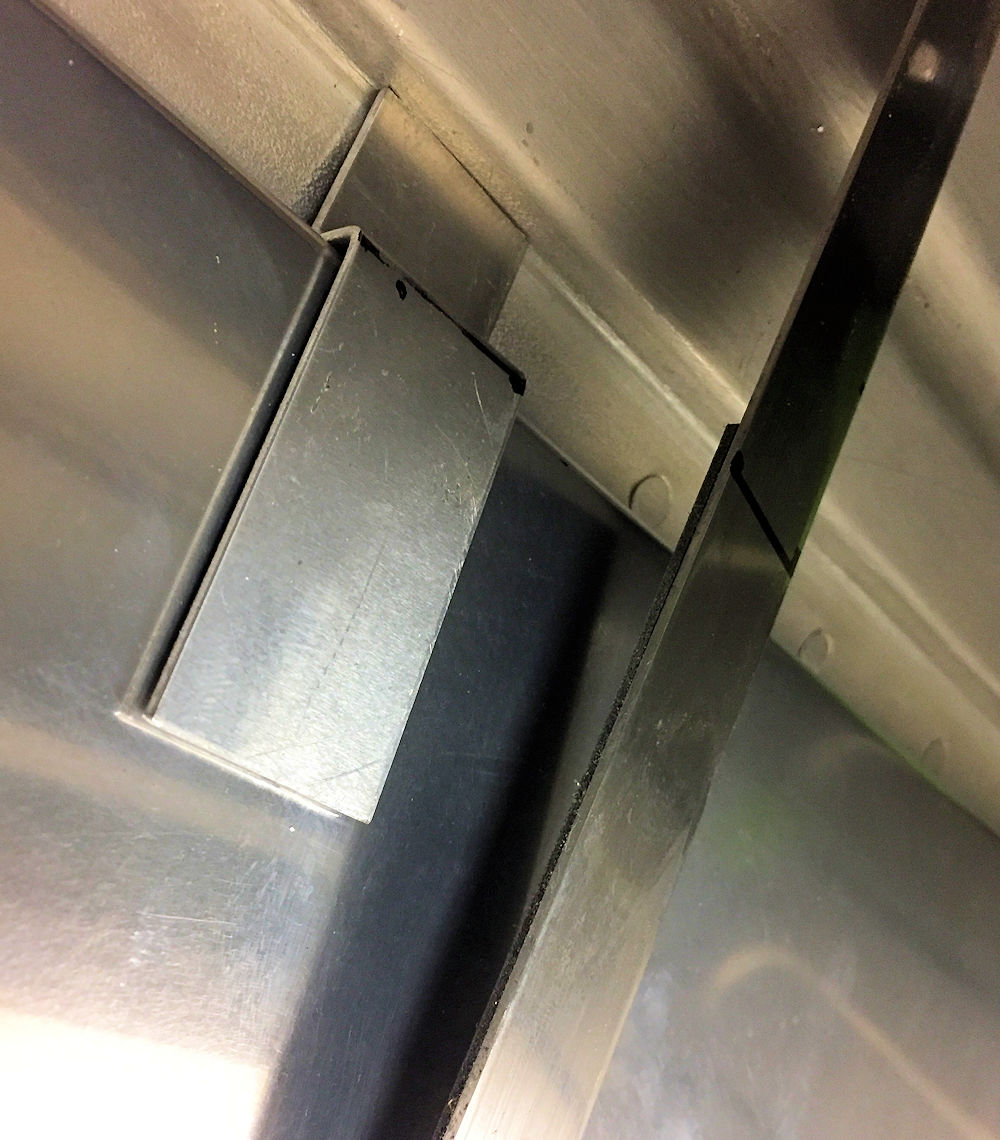
Unfortunately no room for the boot lid latch
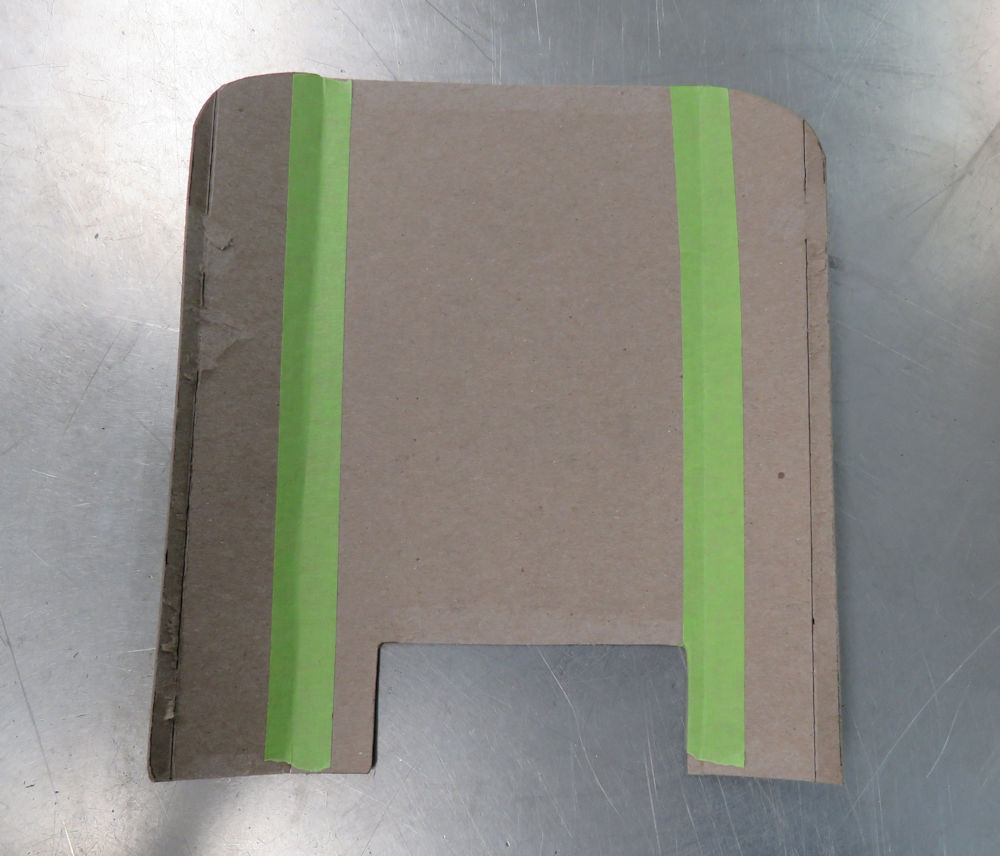
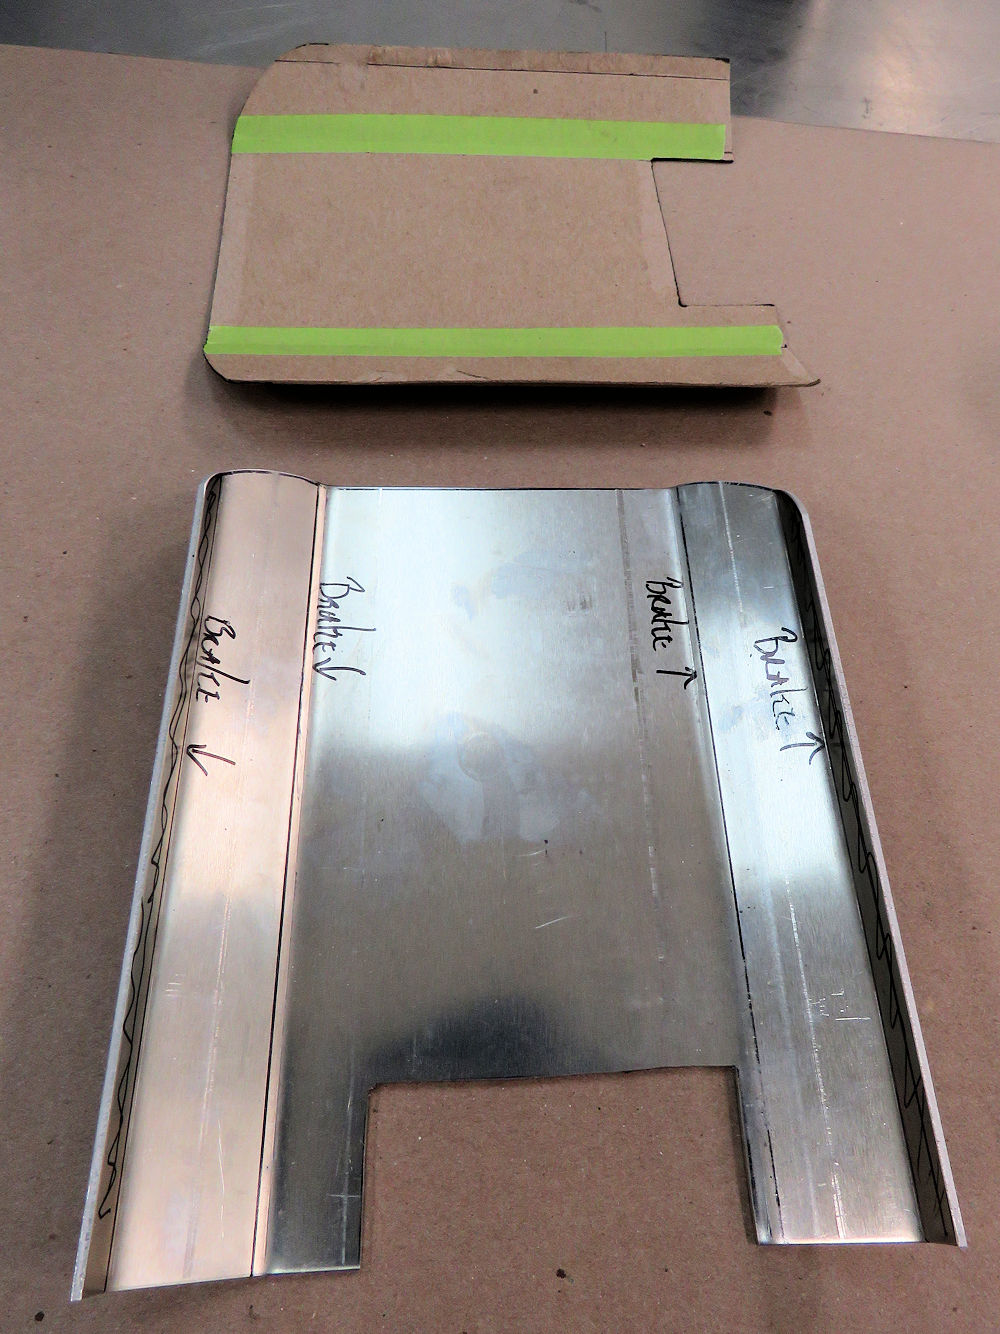
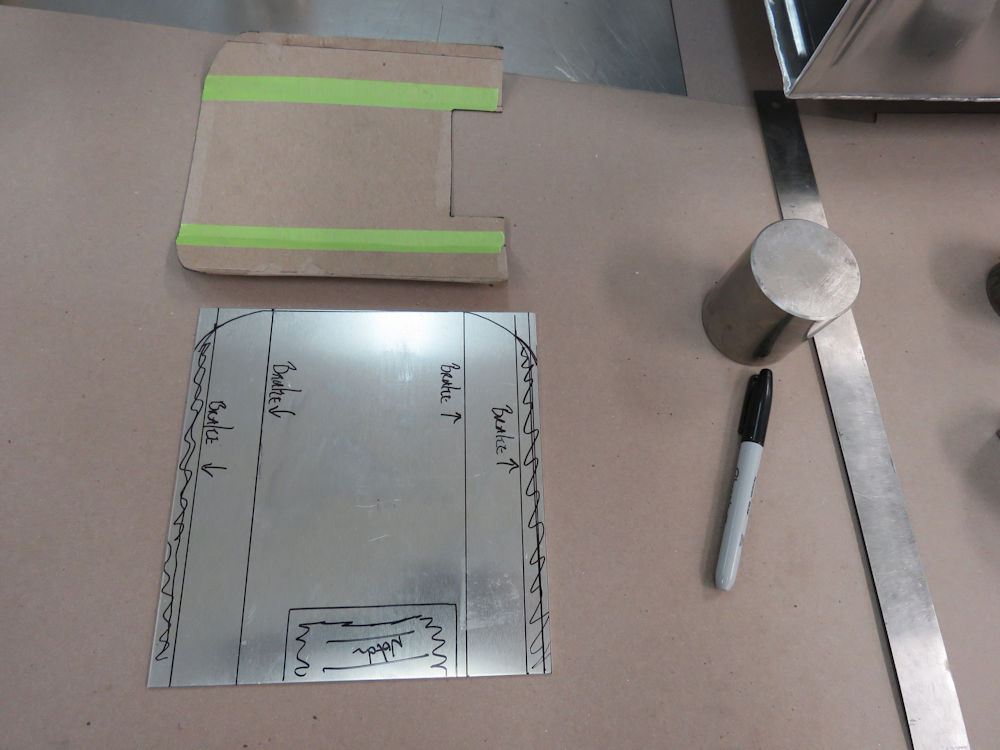
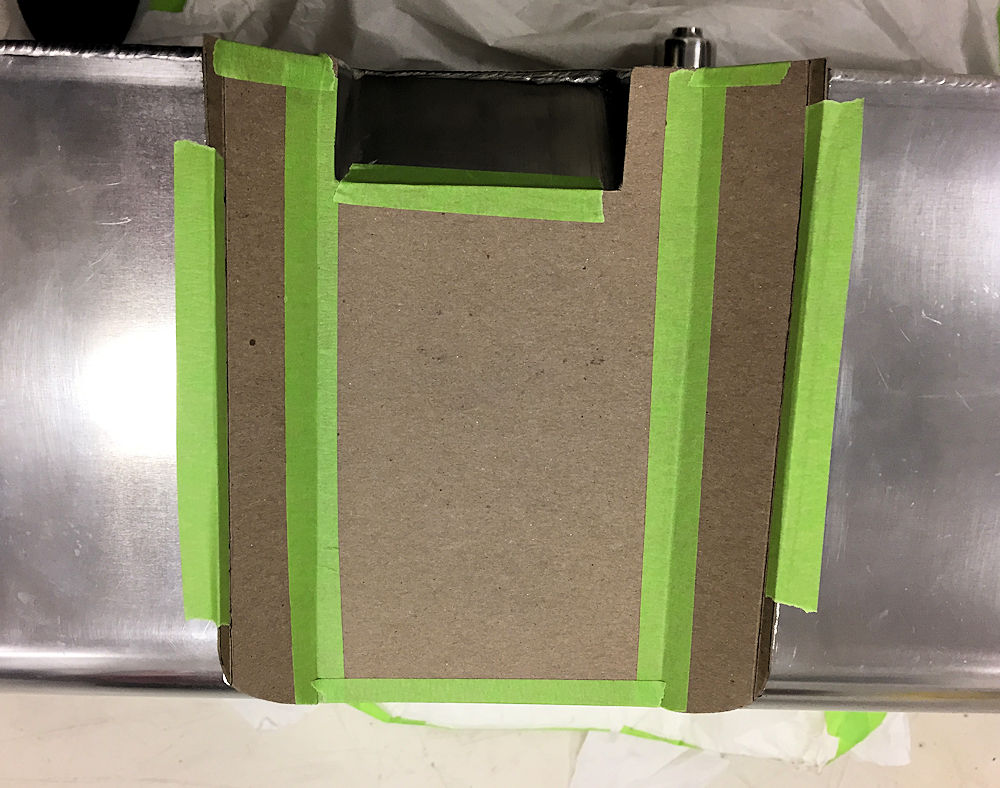
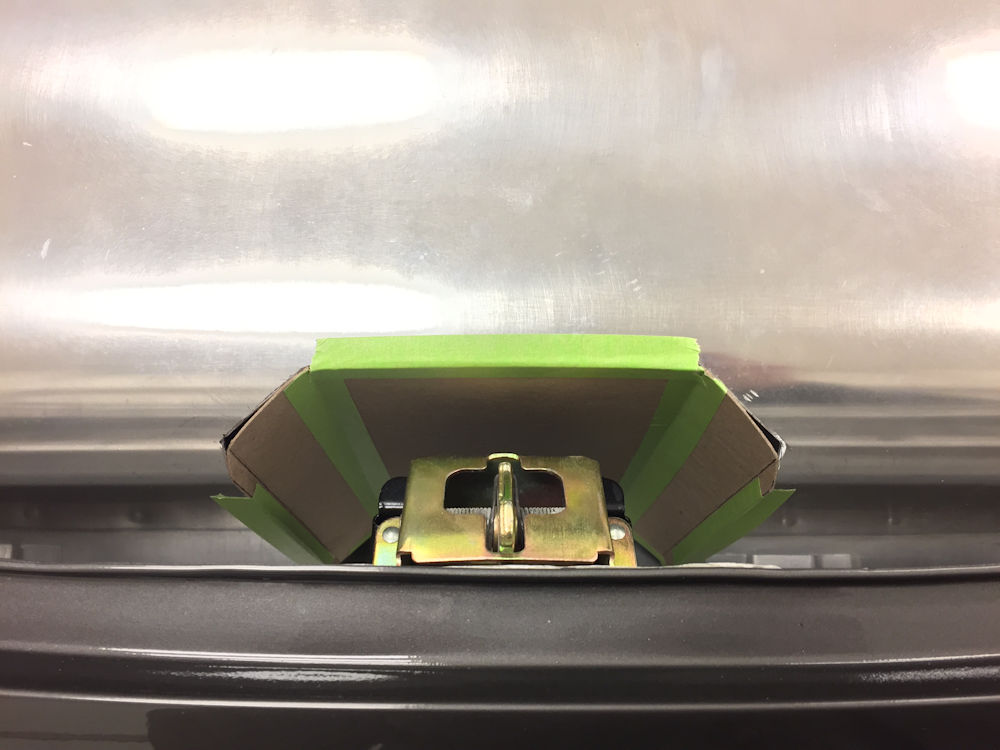
Making a template for the boot latch recess
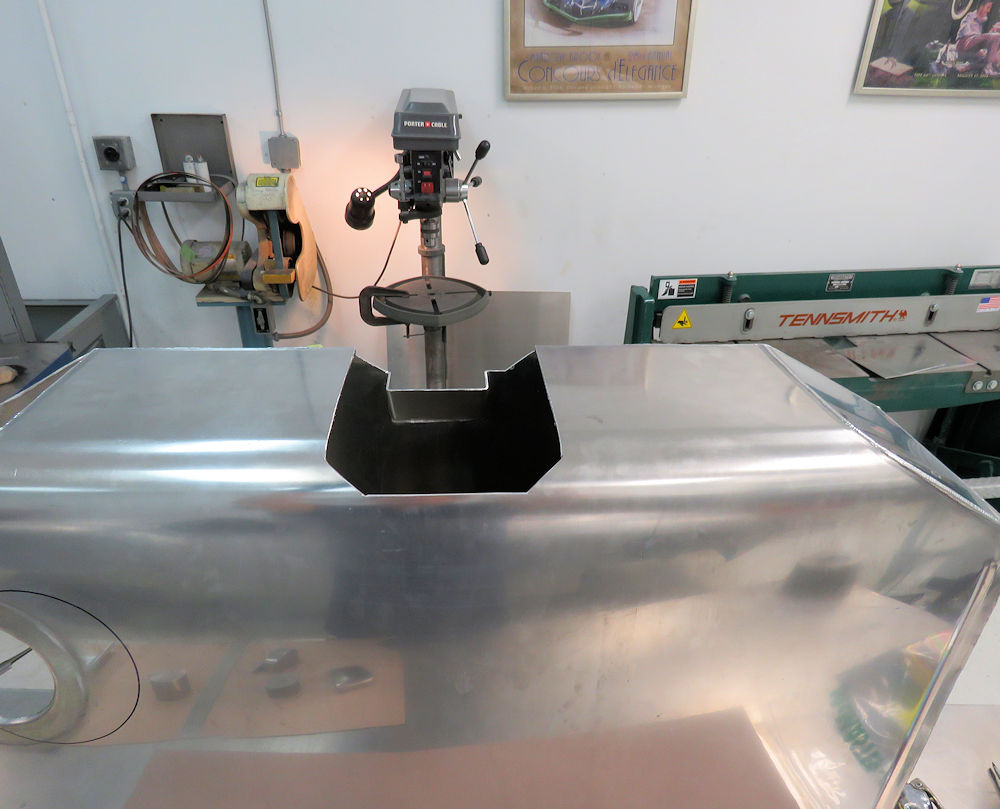
Cutting away the center section of the rear wall
to provide clearance for the boot lid latch
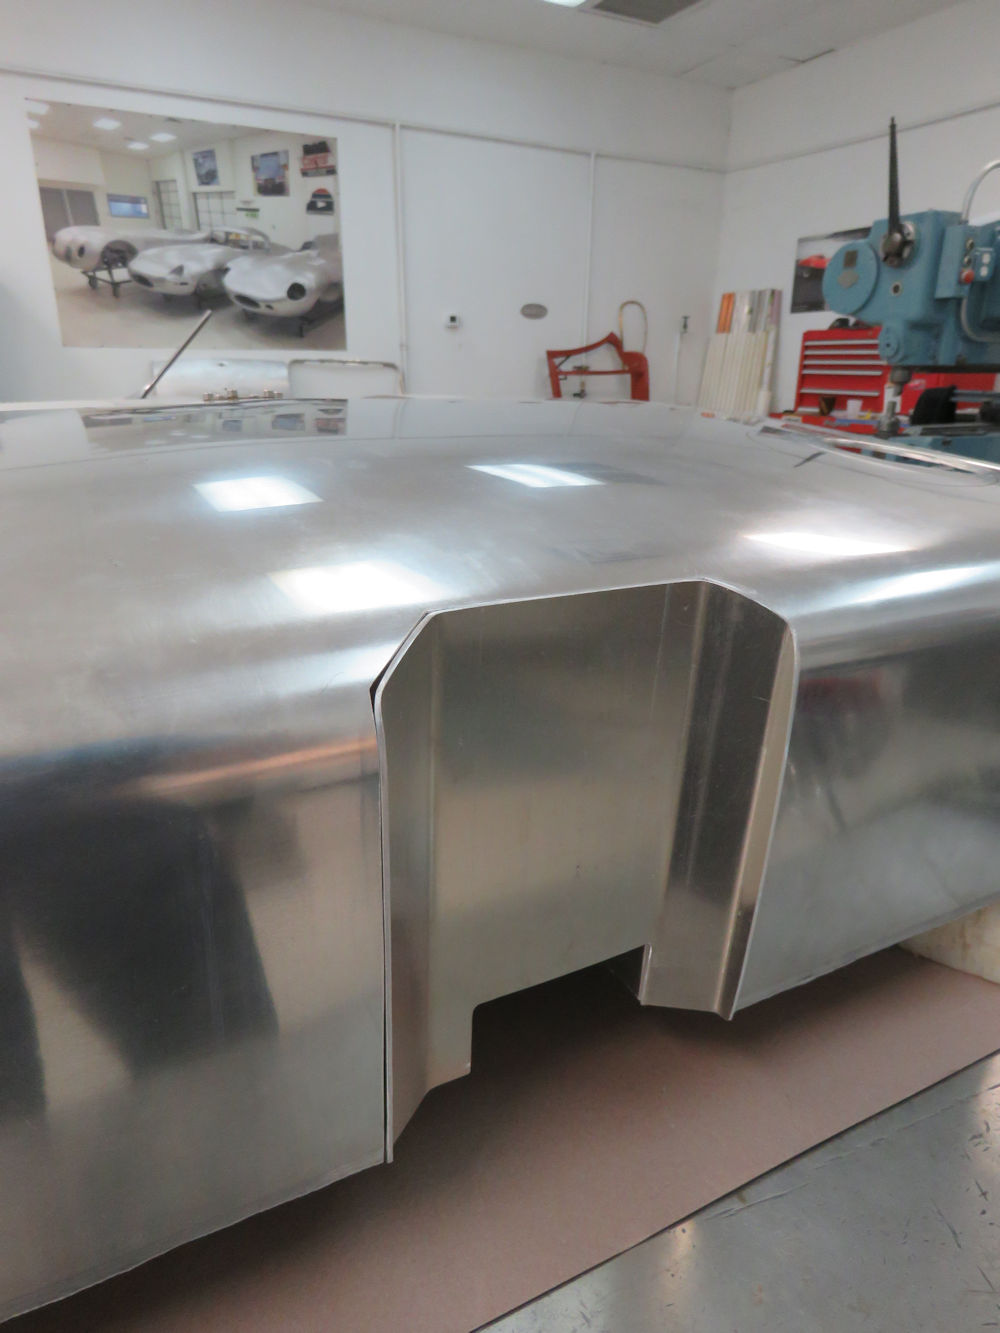
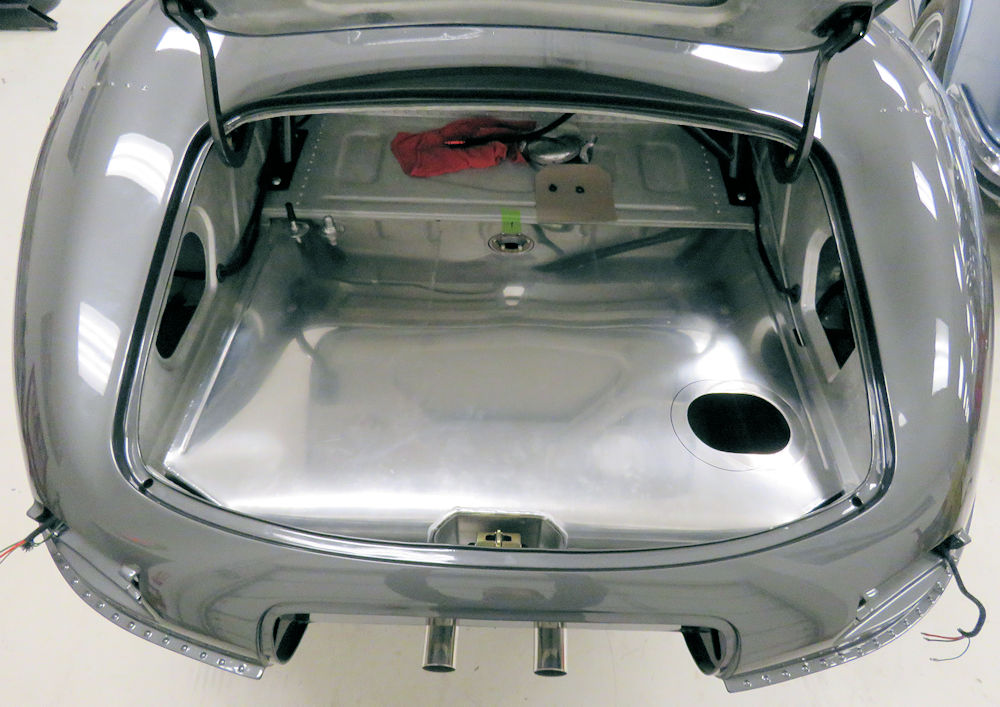
Now room for the latch which can be installed or
removed without removing the tank
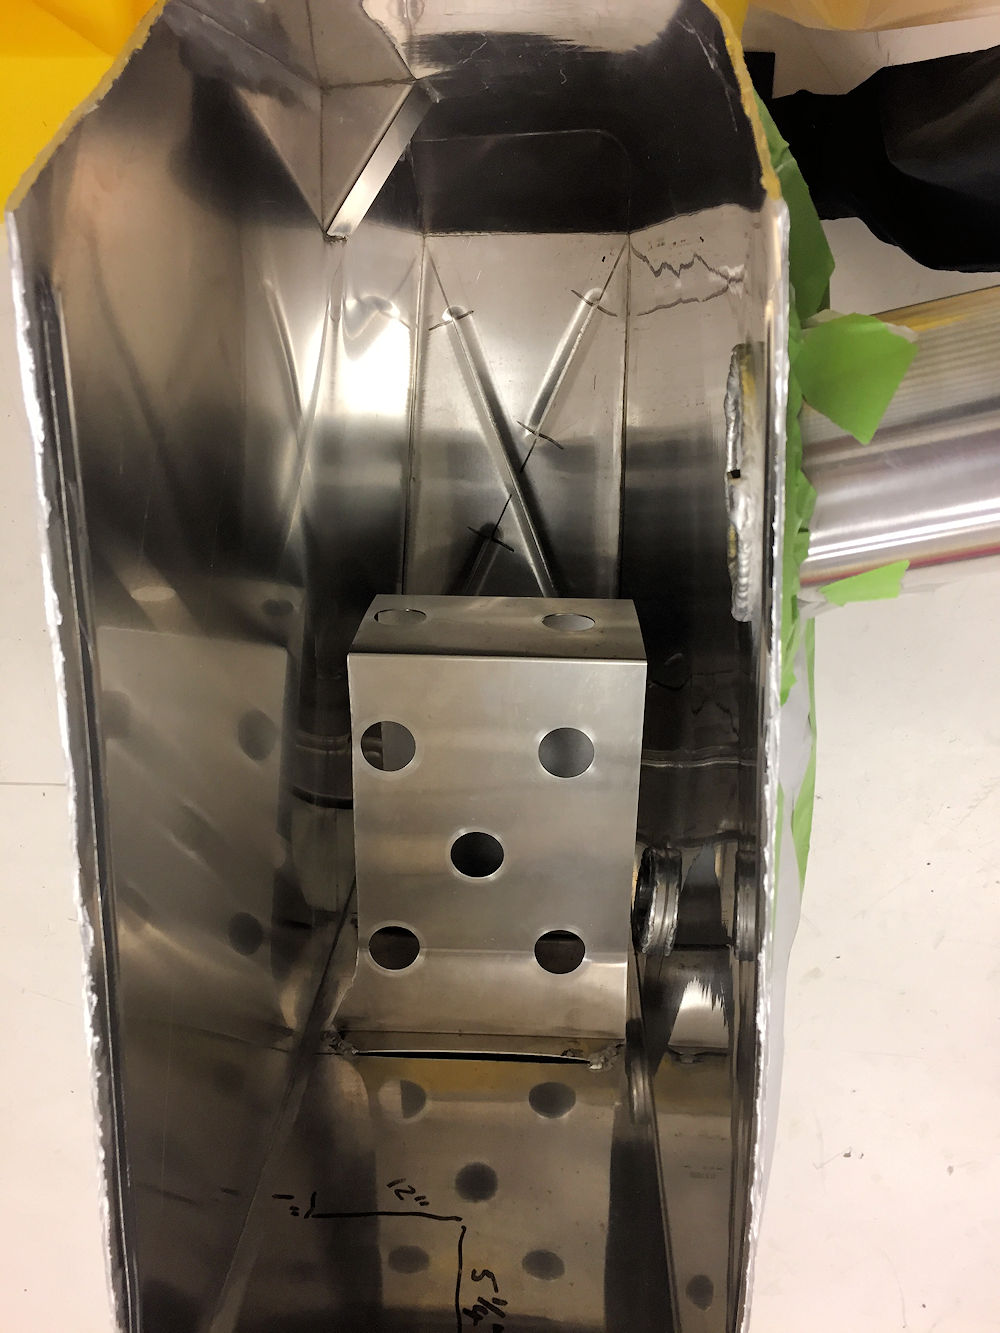
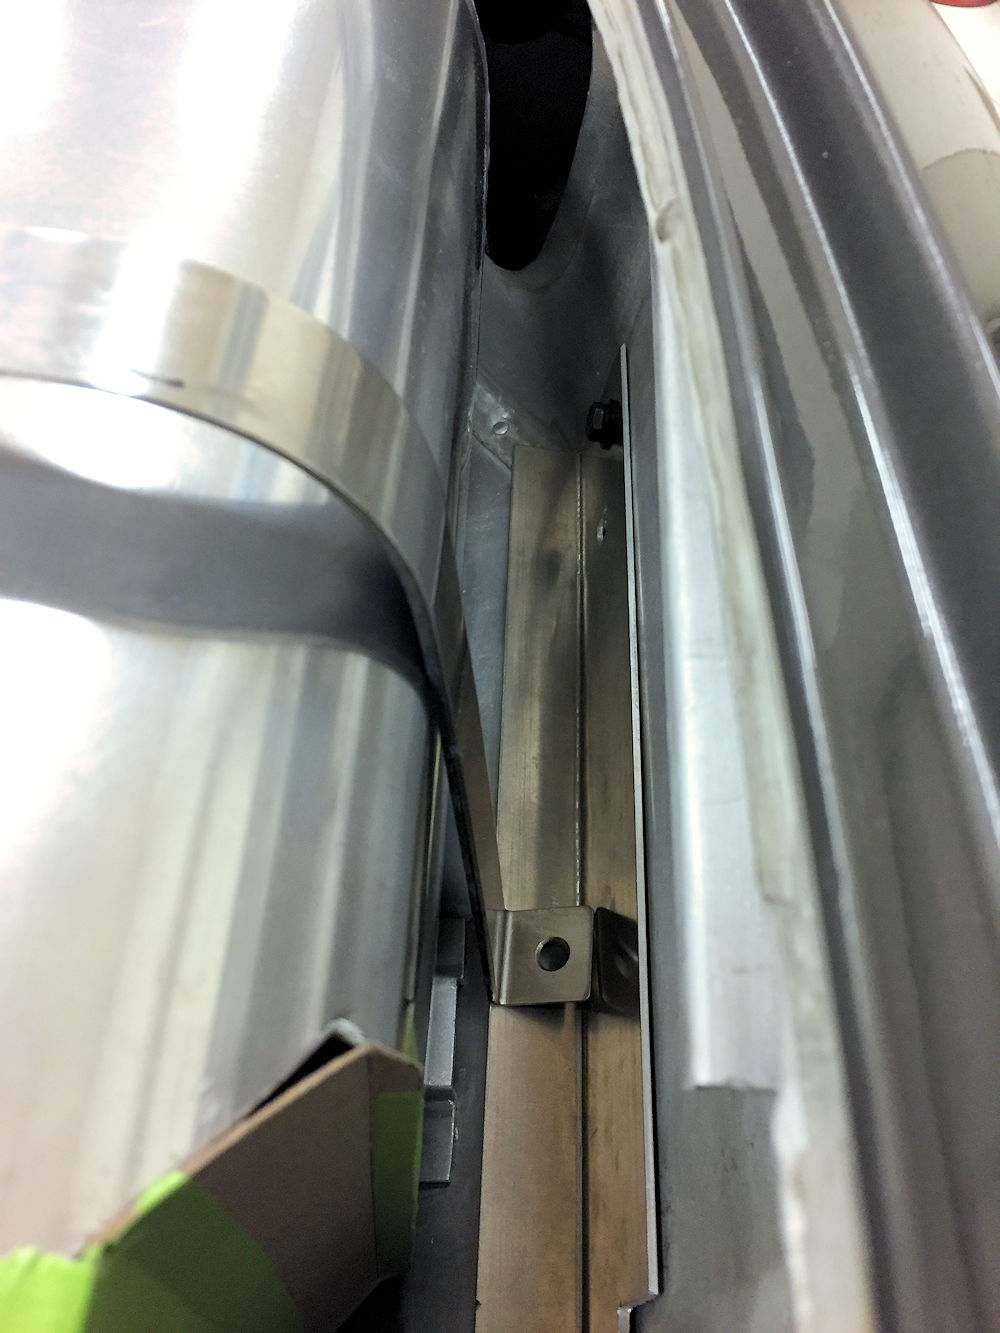
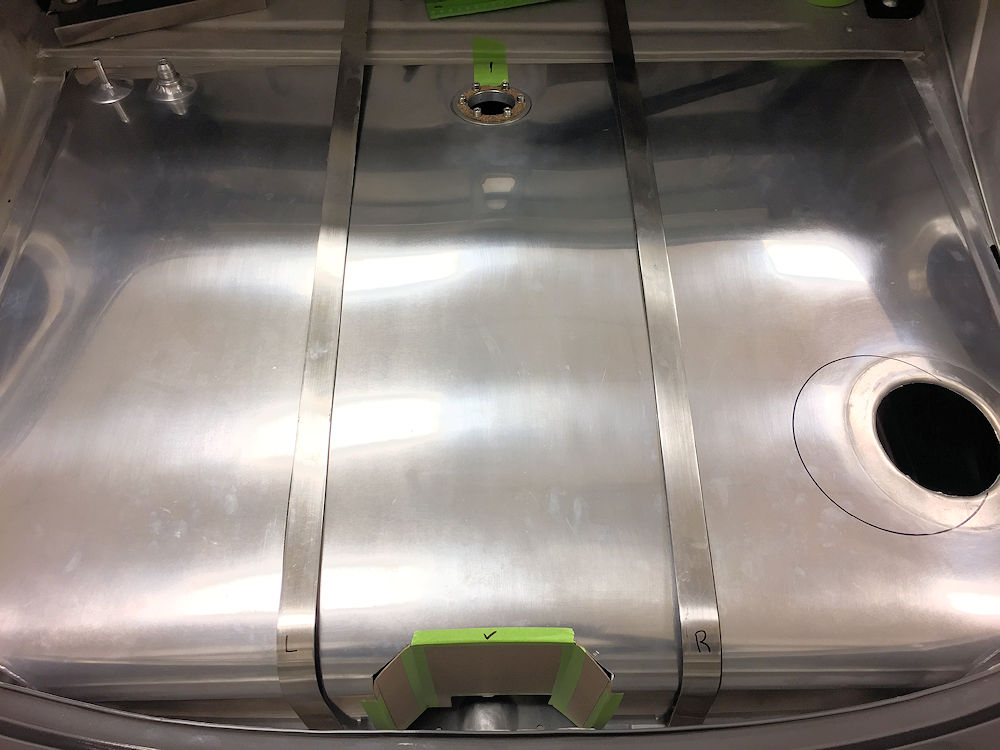
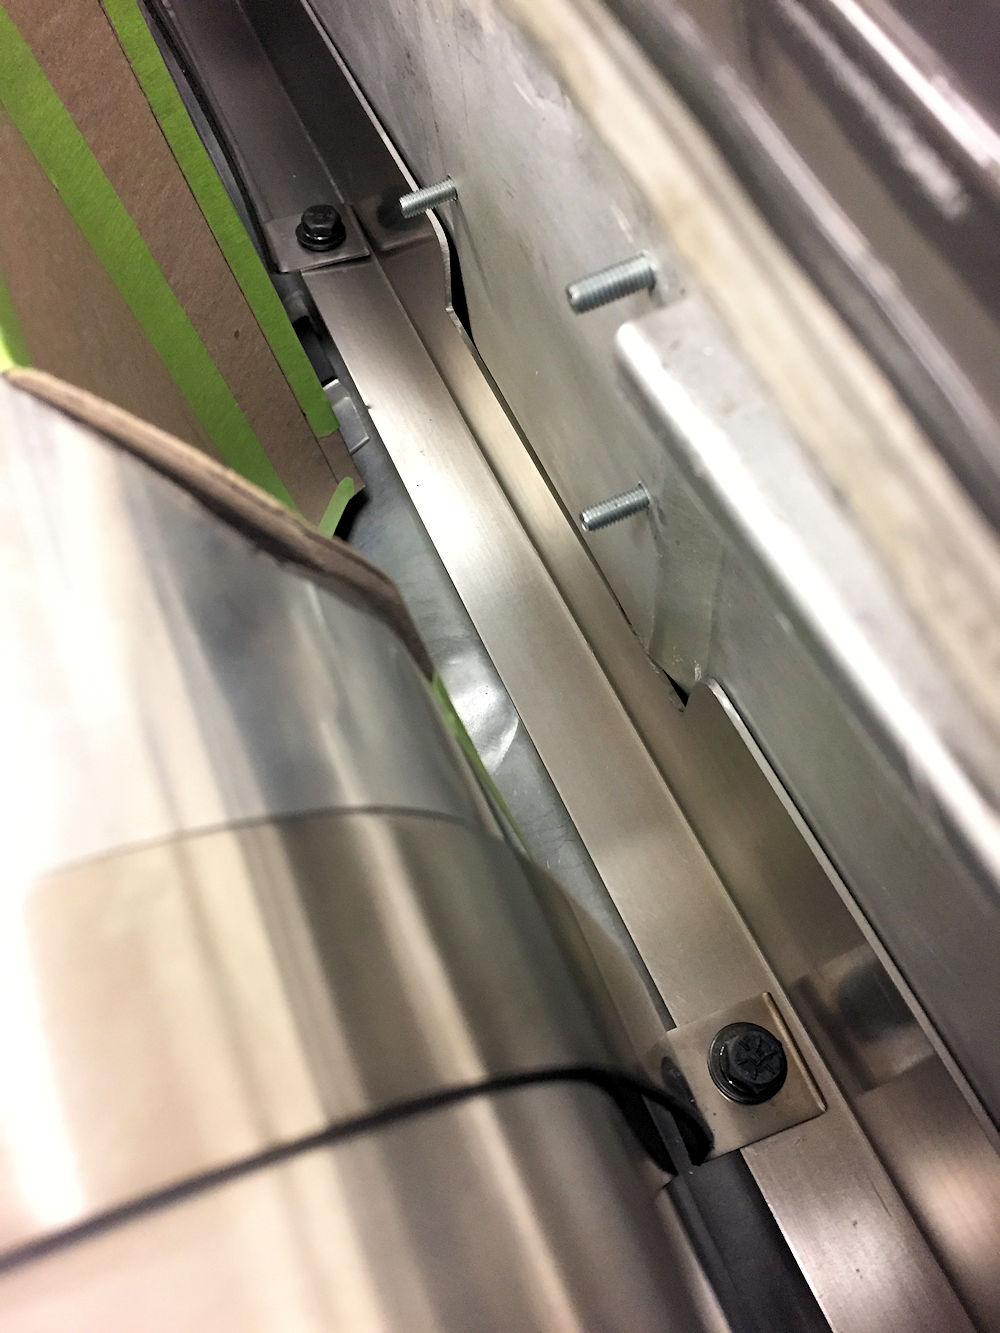
Tank retaining straps will bolt to the rear mounting
bracket
Plotting the location of the rear mounting bracket
Plotting the anchor points for the forward wall
of the tank
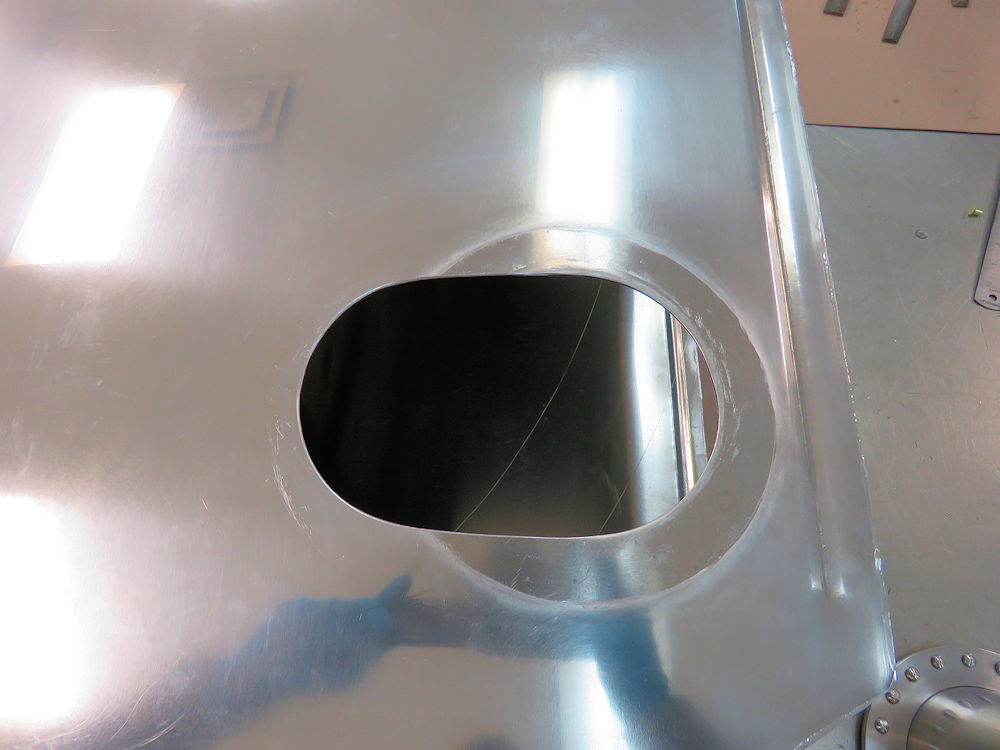
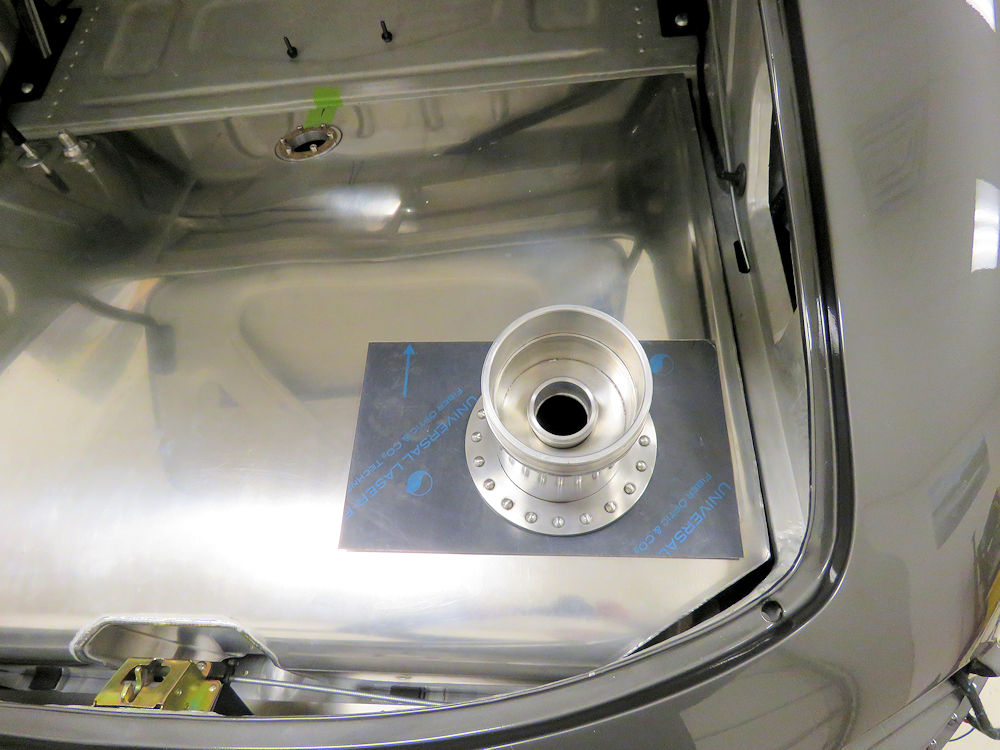
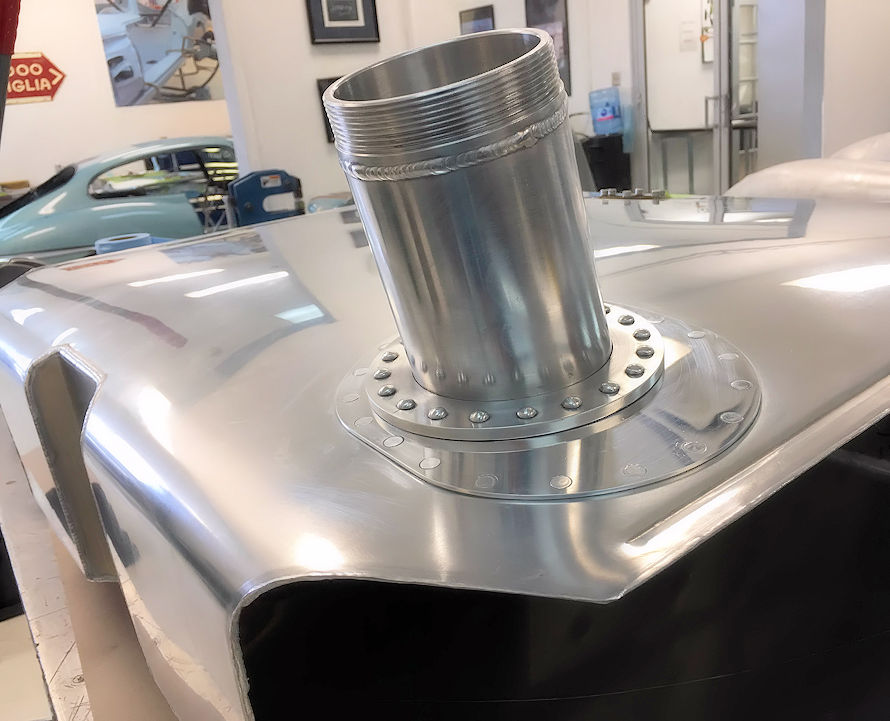
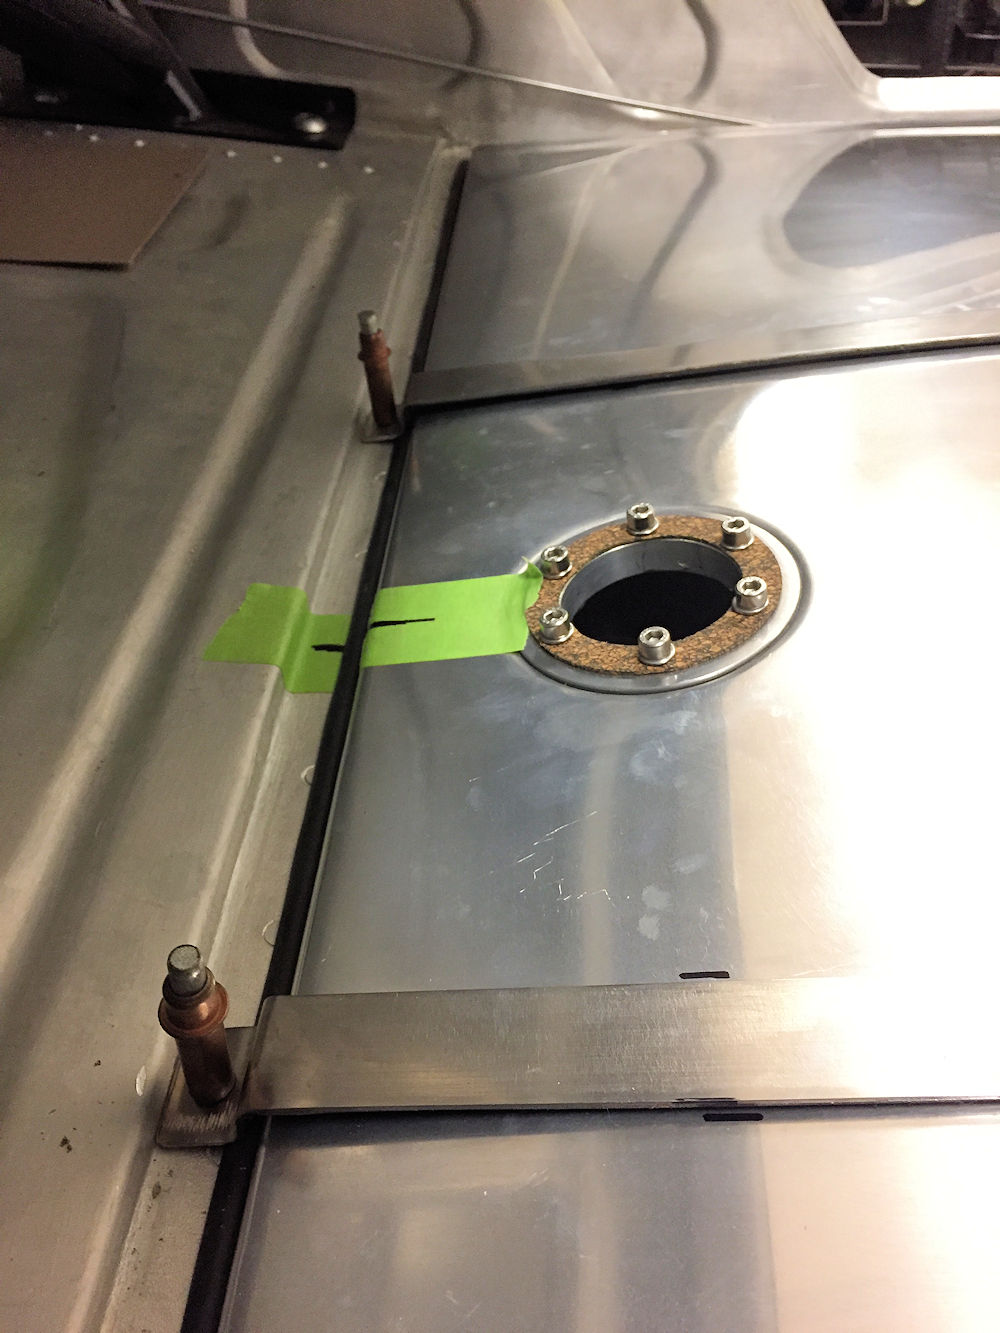
Hole for filler neck will be moved inboard almost
3 inches to work with filler neck hole in boot lid
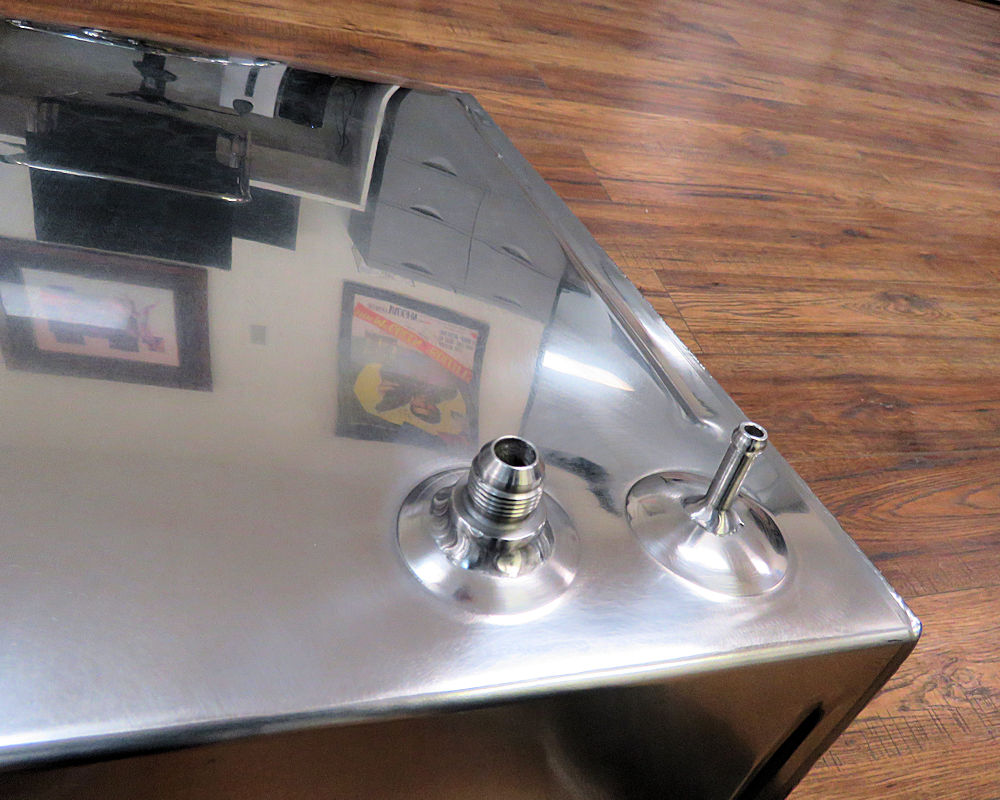
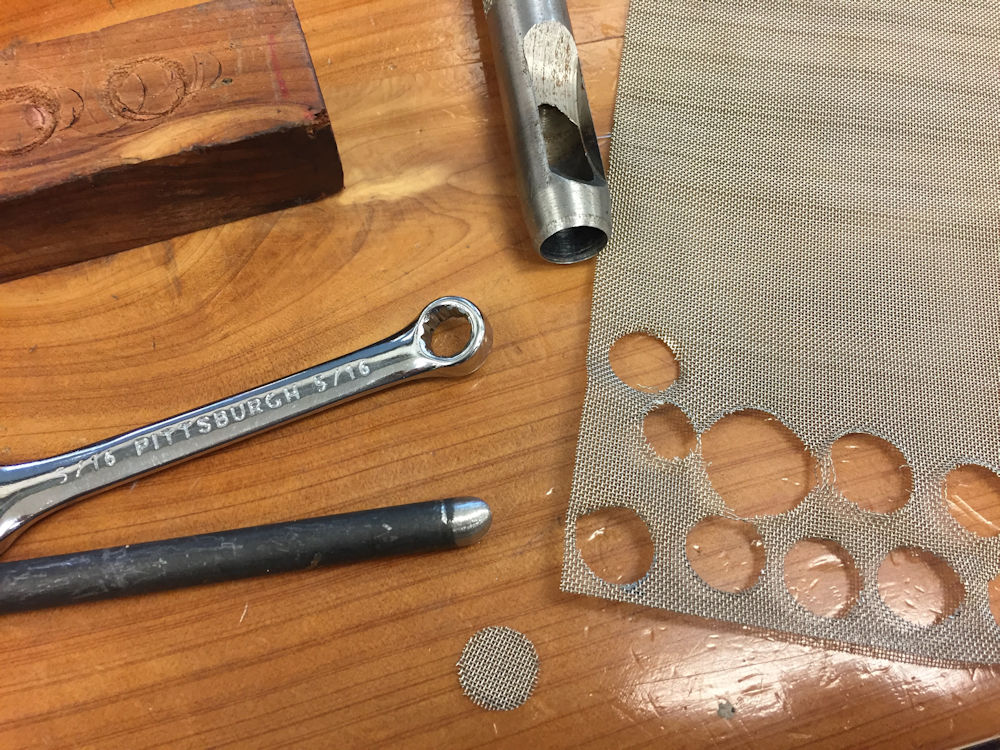
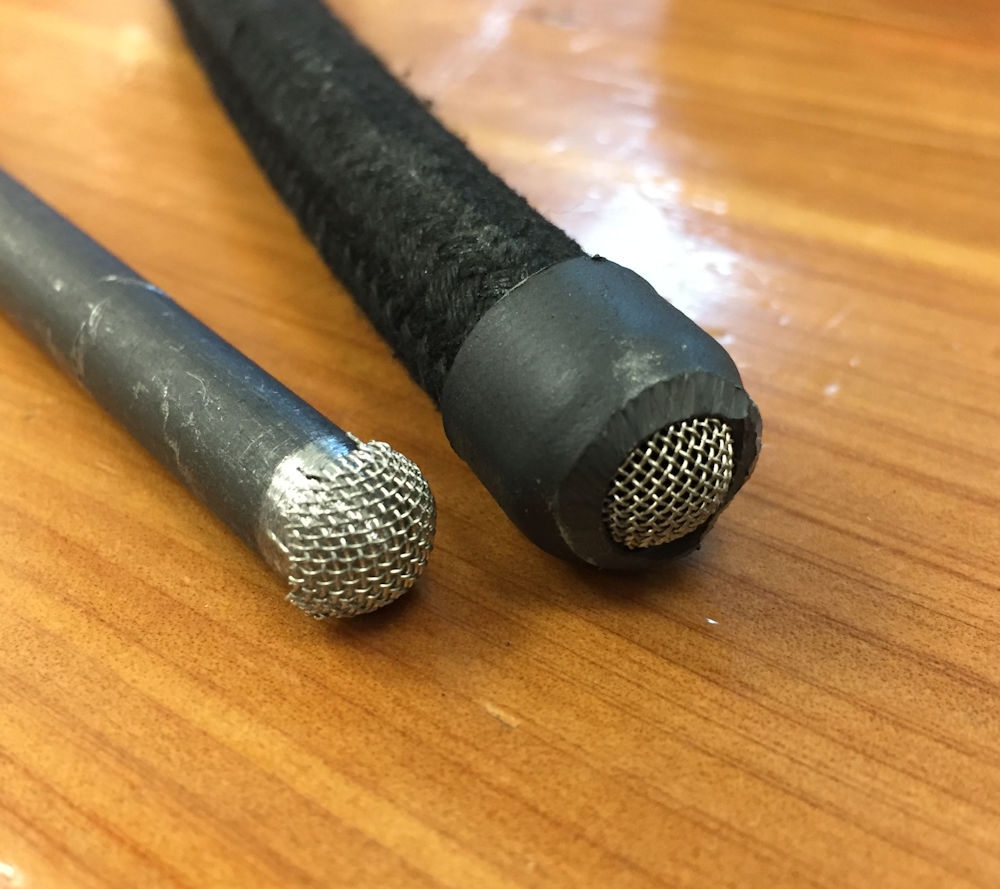
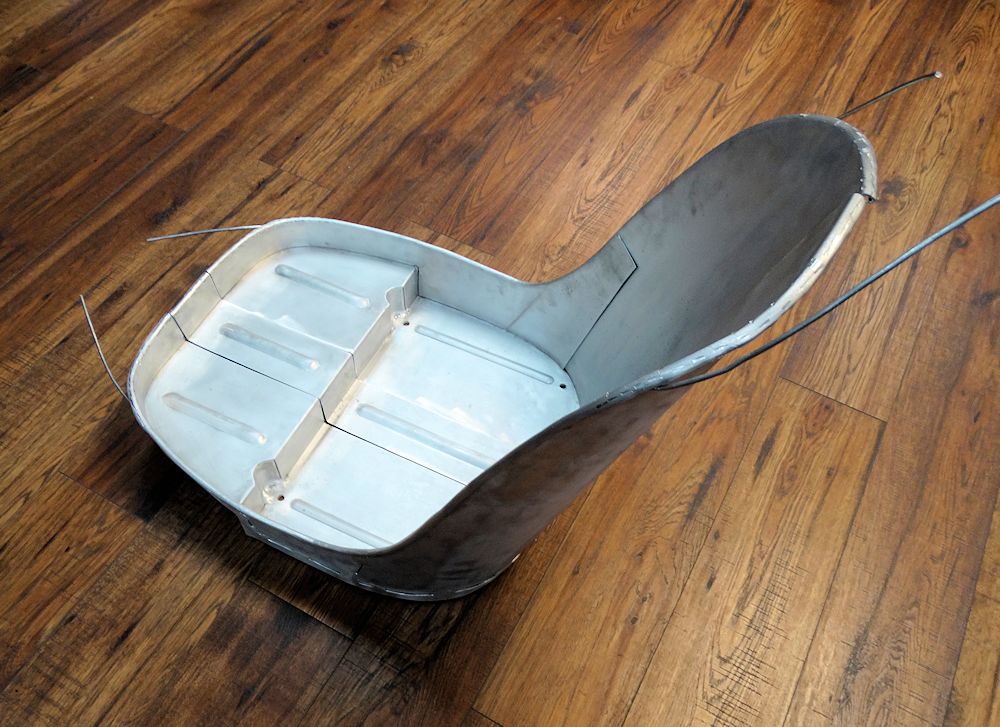
Making stainless fuel screens
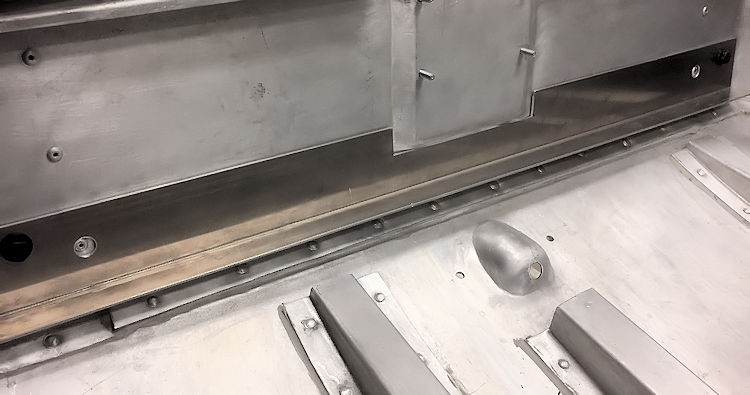
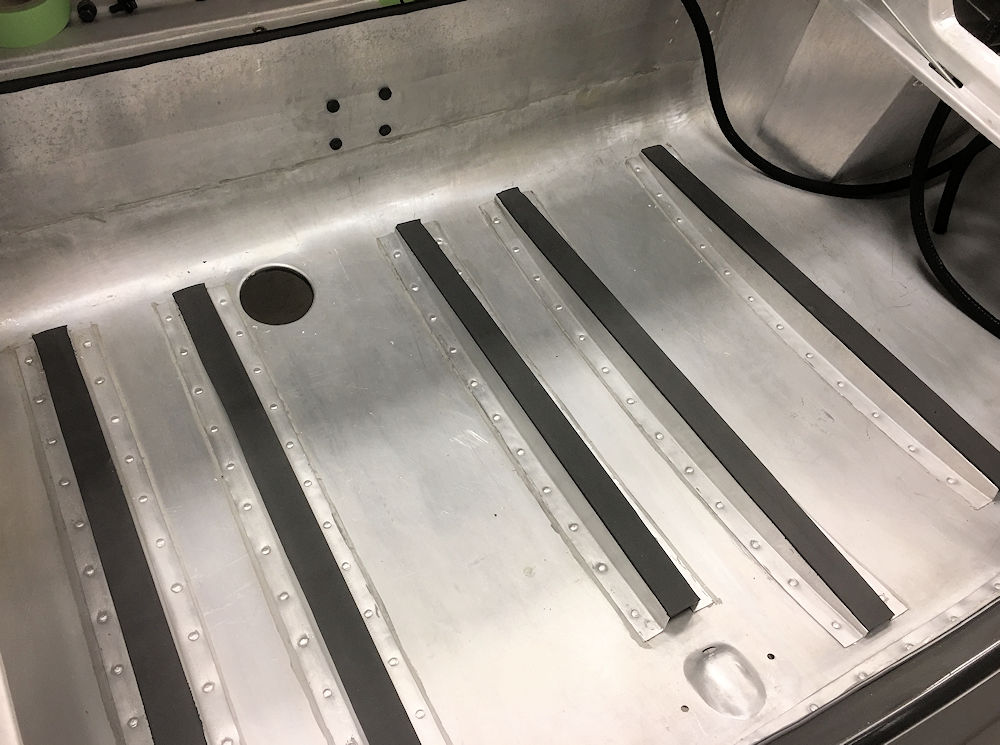
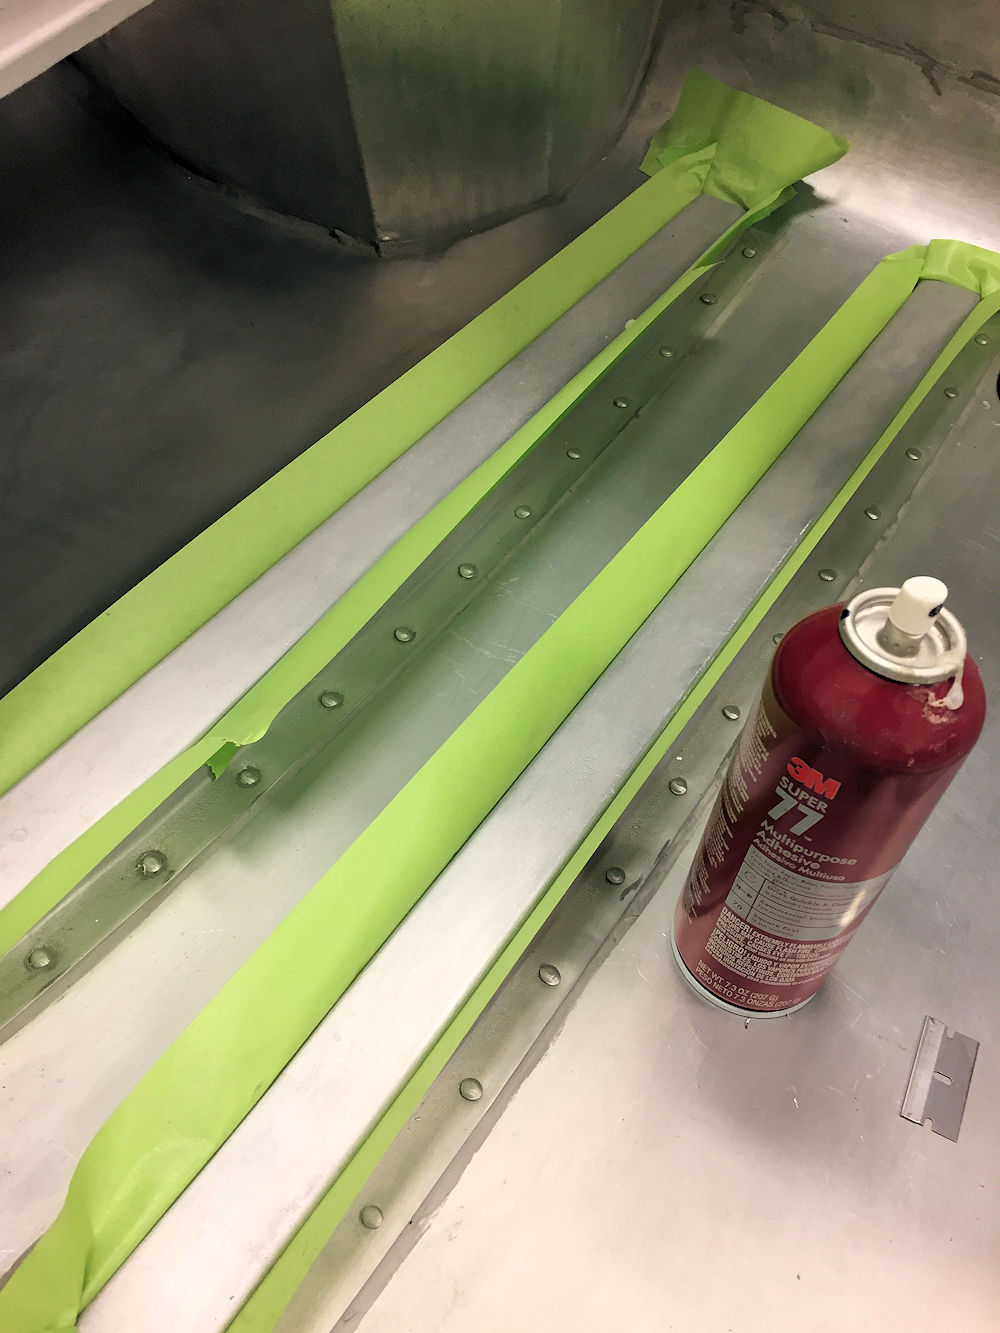
Rubber mounting strips glued to floor support rails
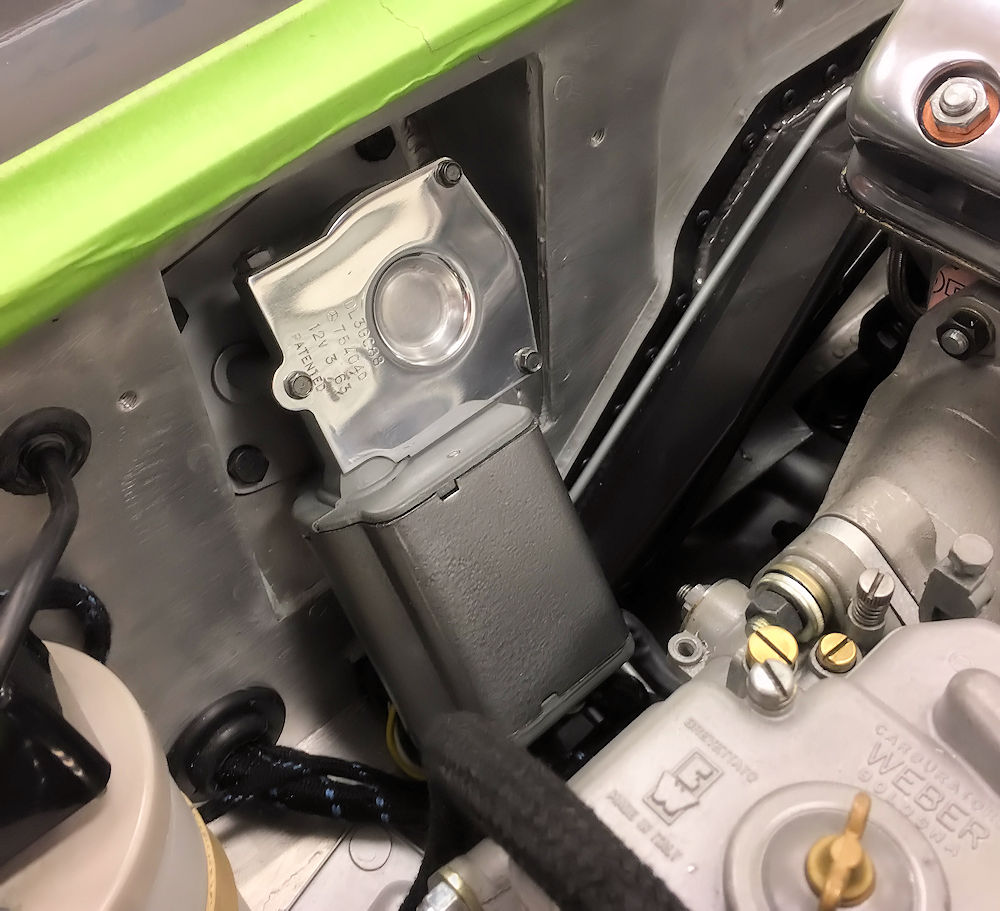
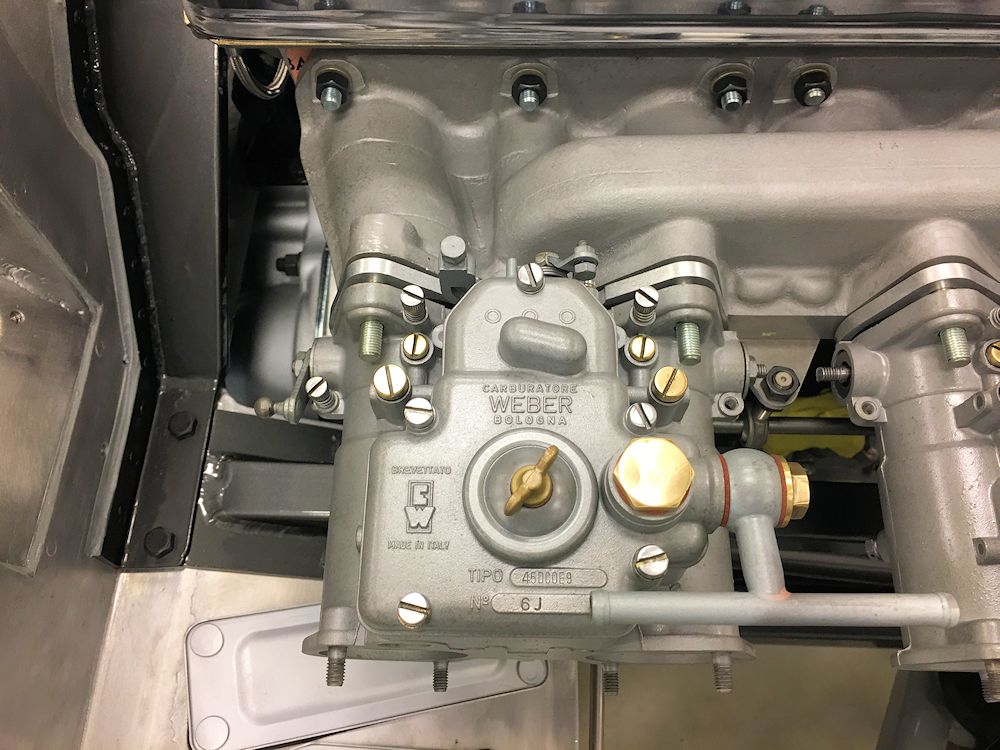
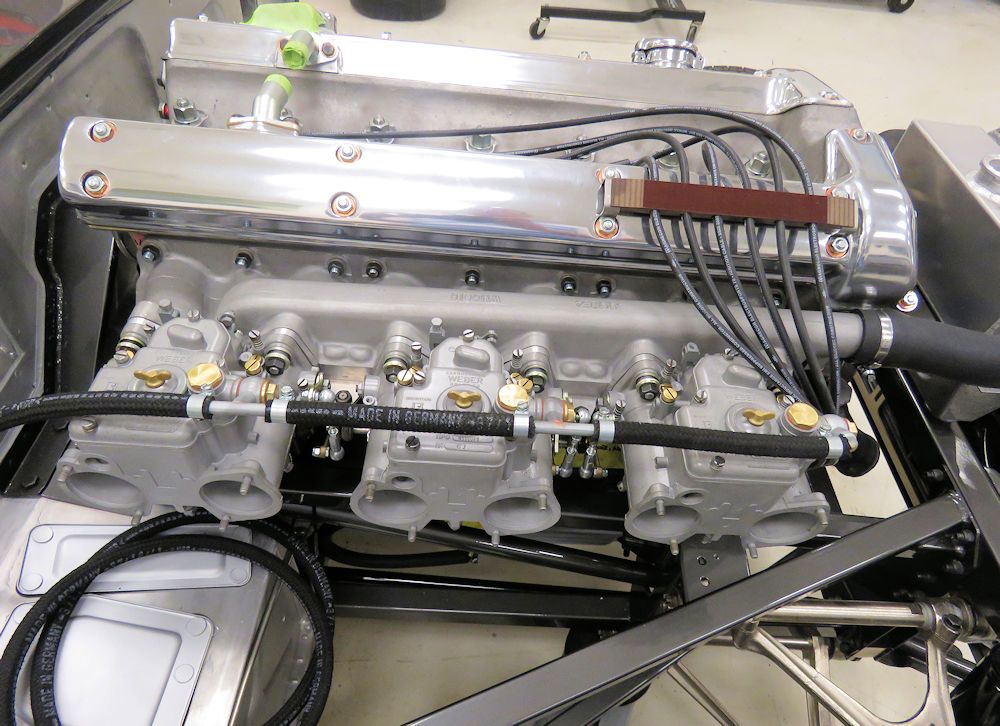
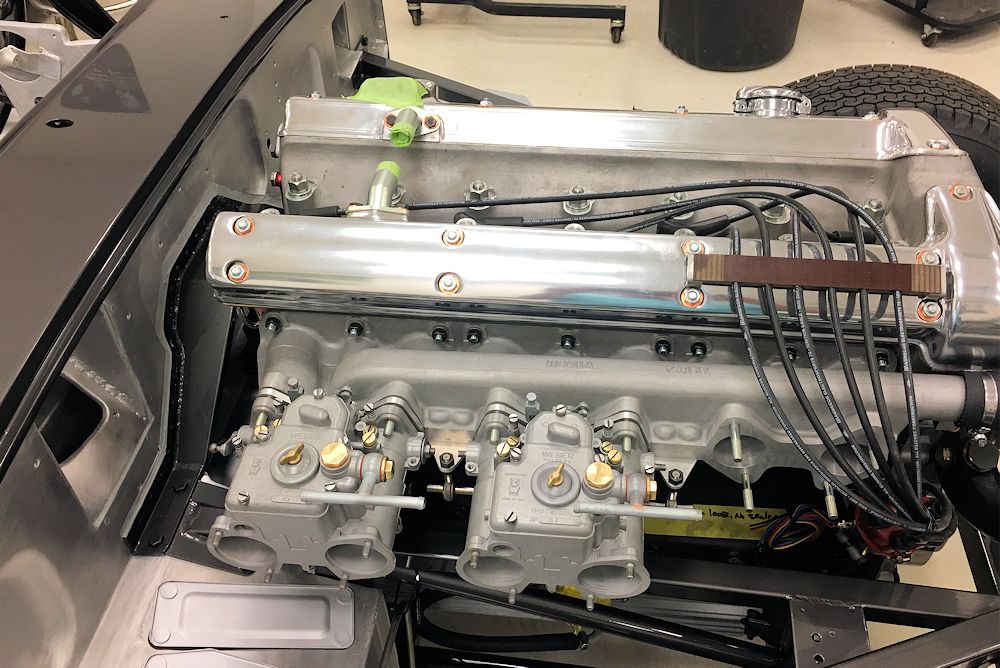
We chose some period Italian made DCOE9 45mm Webers for our Lightweight project.
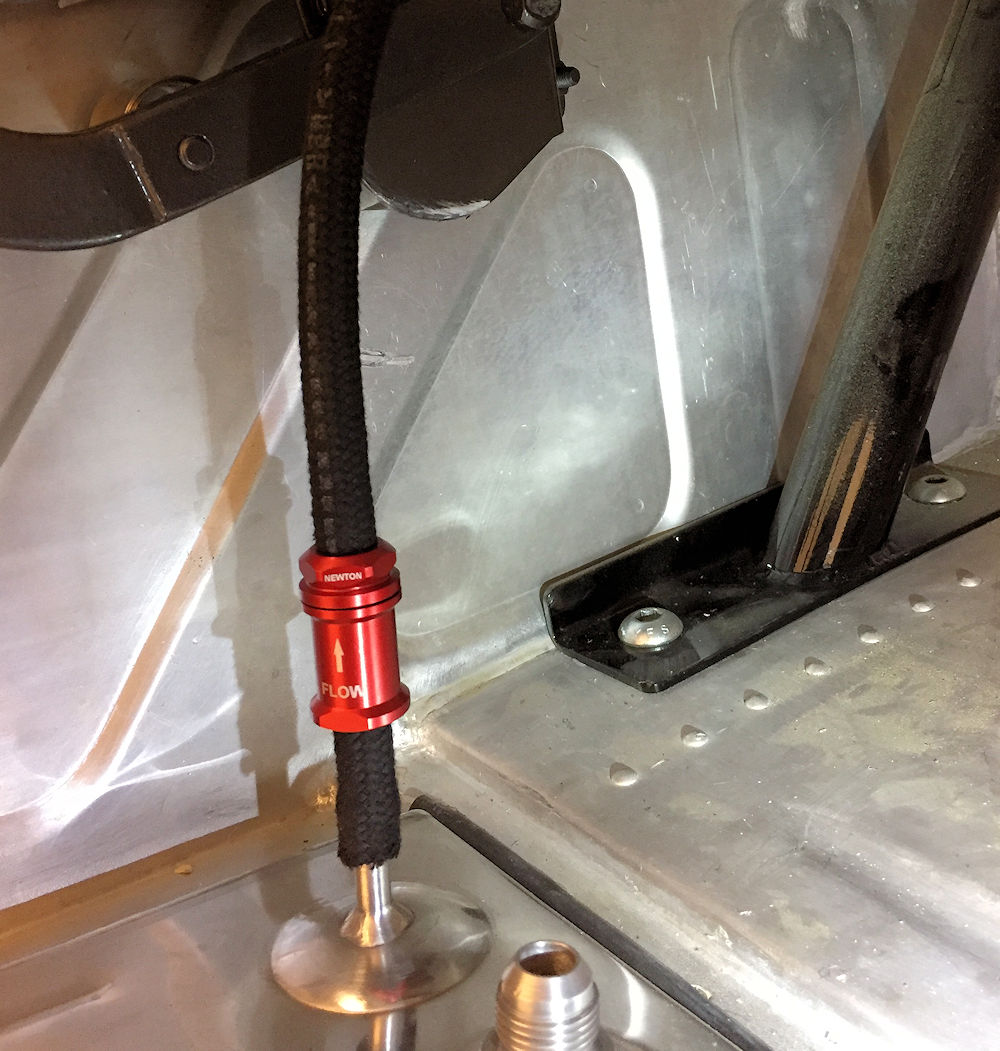
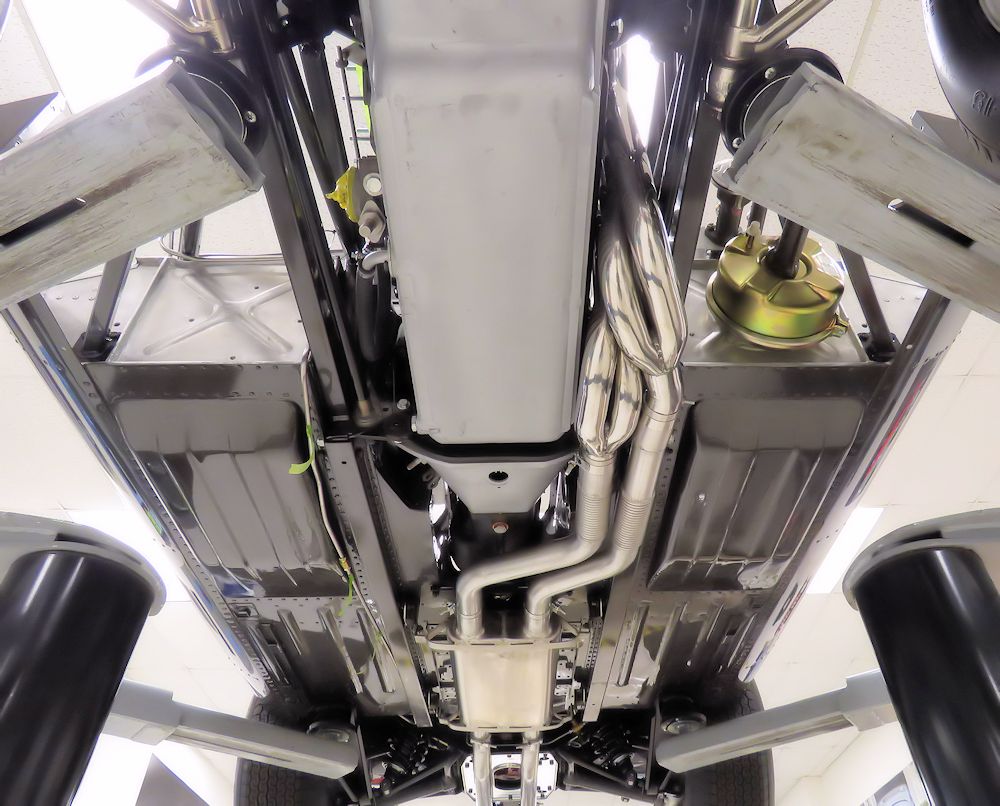
Fuel lines will be concealed in front of the
tank and inside right rear wing
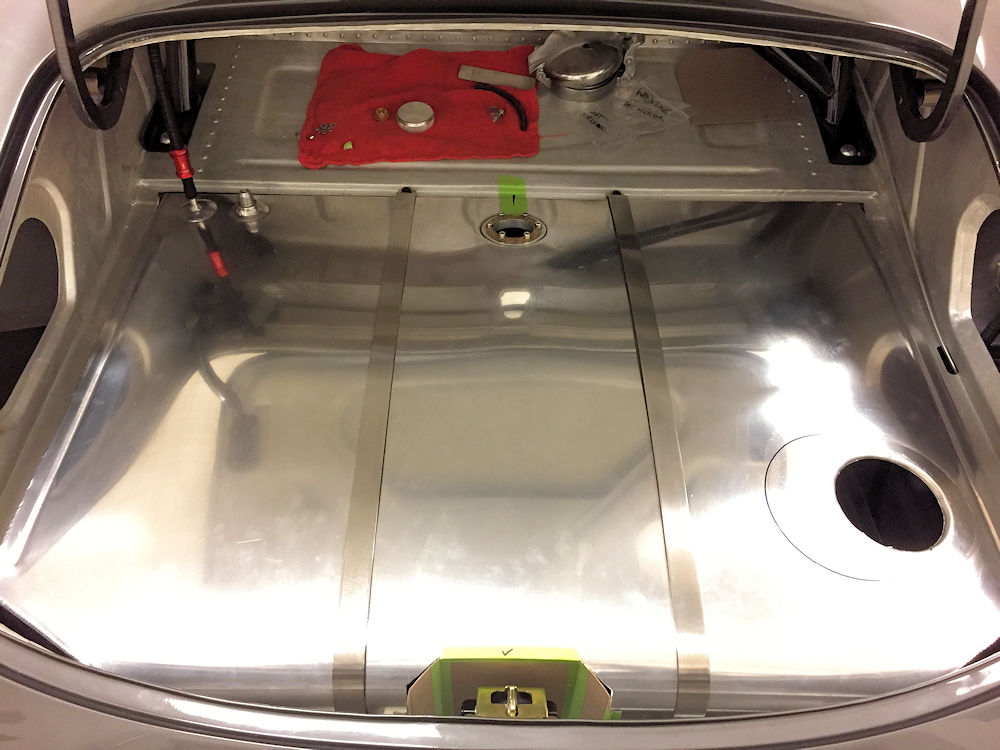
Rear mount bracket now secured, straps trial bolted
to bracket
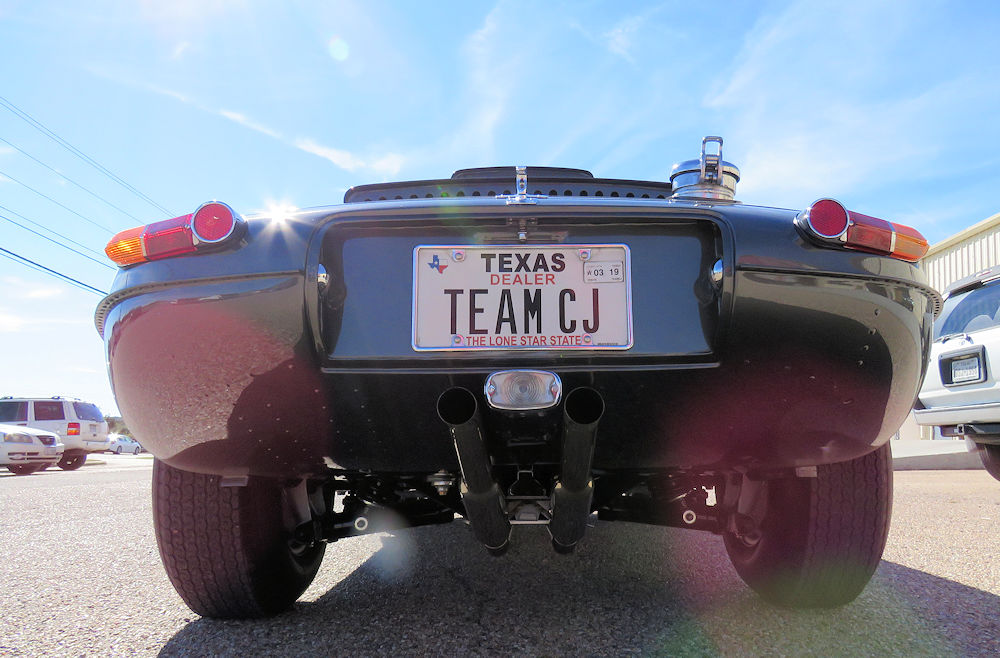
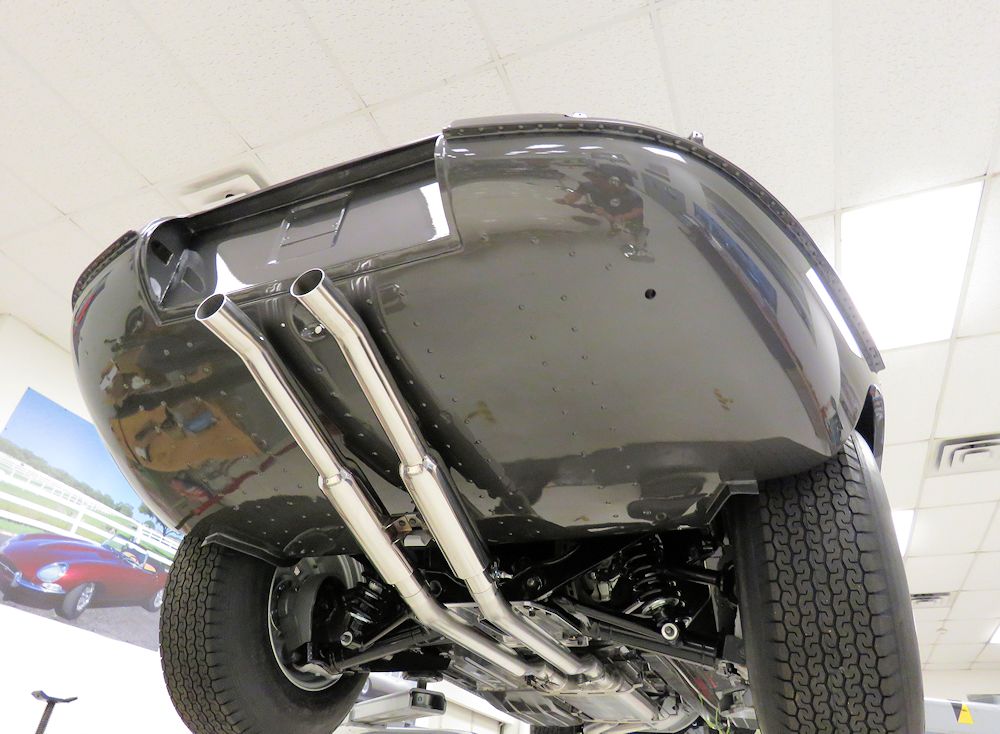
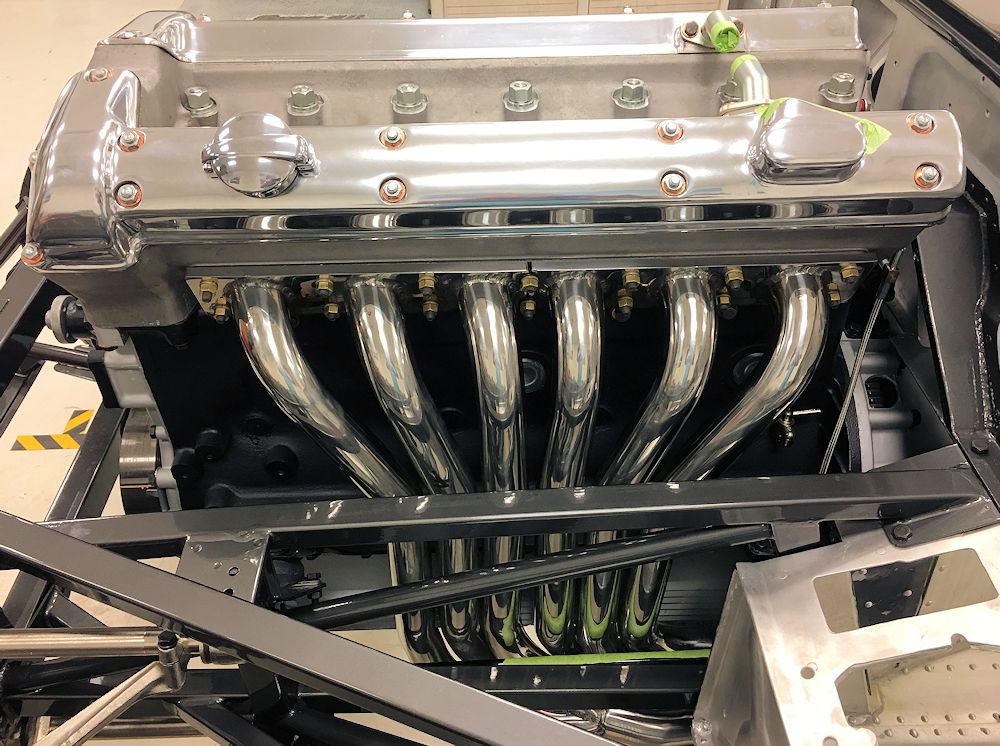
Those carbs have now been completely rebuilt and installed on the special wide angled Crosthwaite and Gardiner intake manifold, along with a custom made free flowing Stage Two exhaust system from our friends at Hayward & Scott in England.
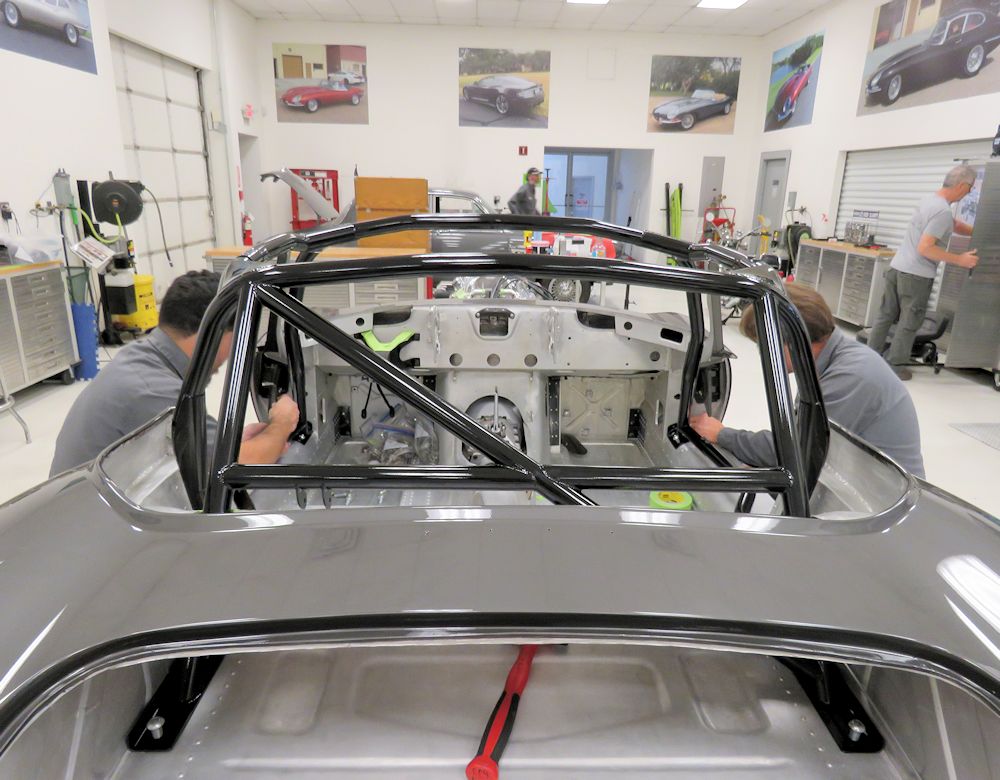
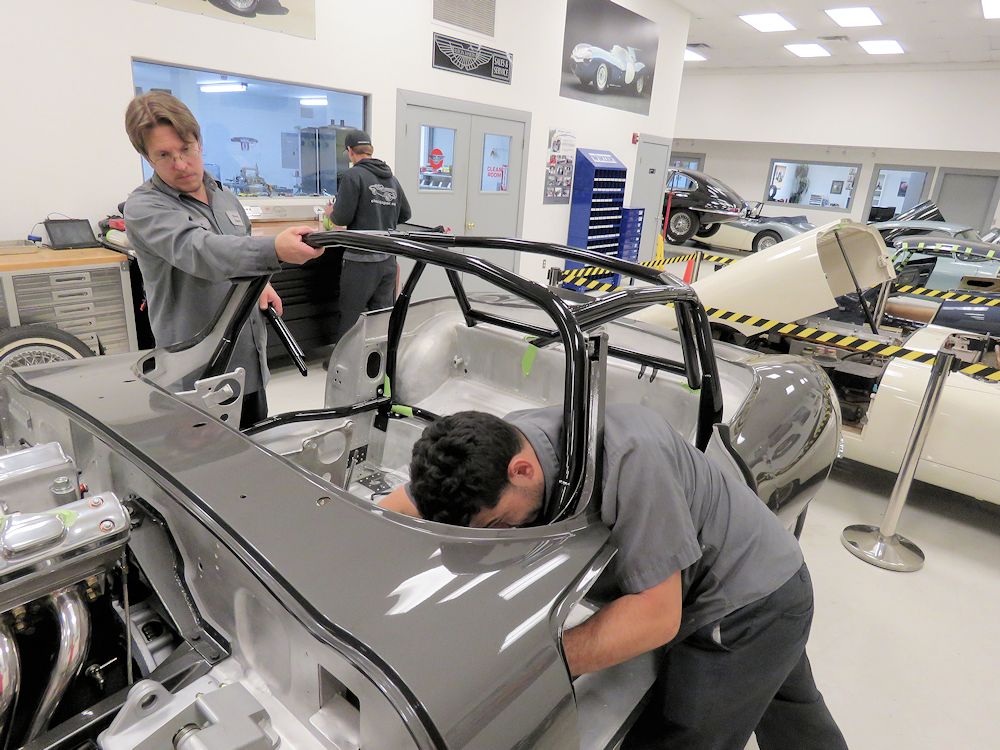
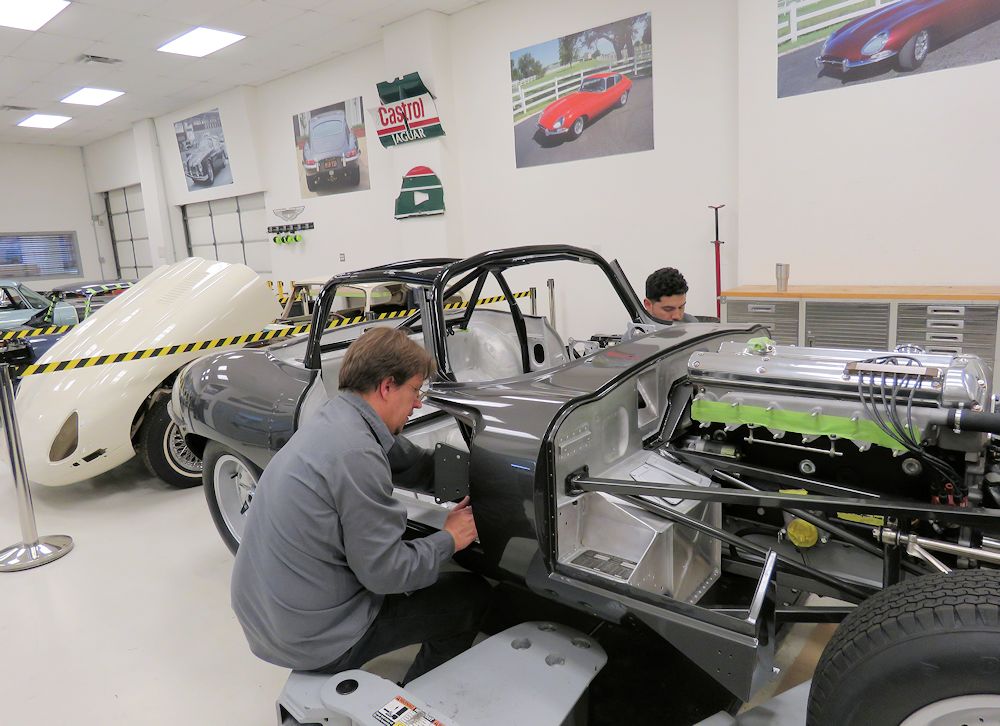
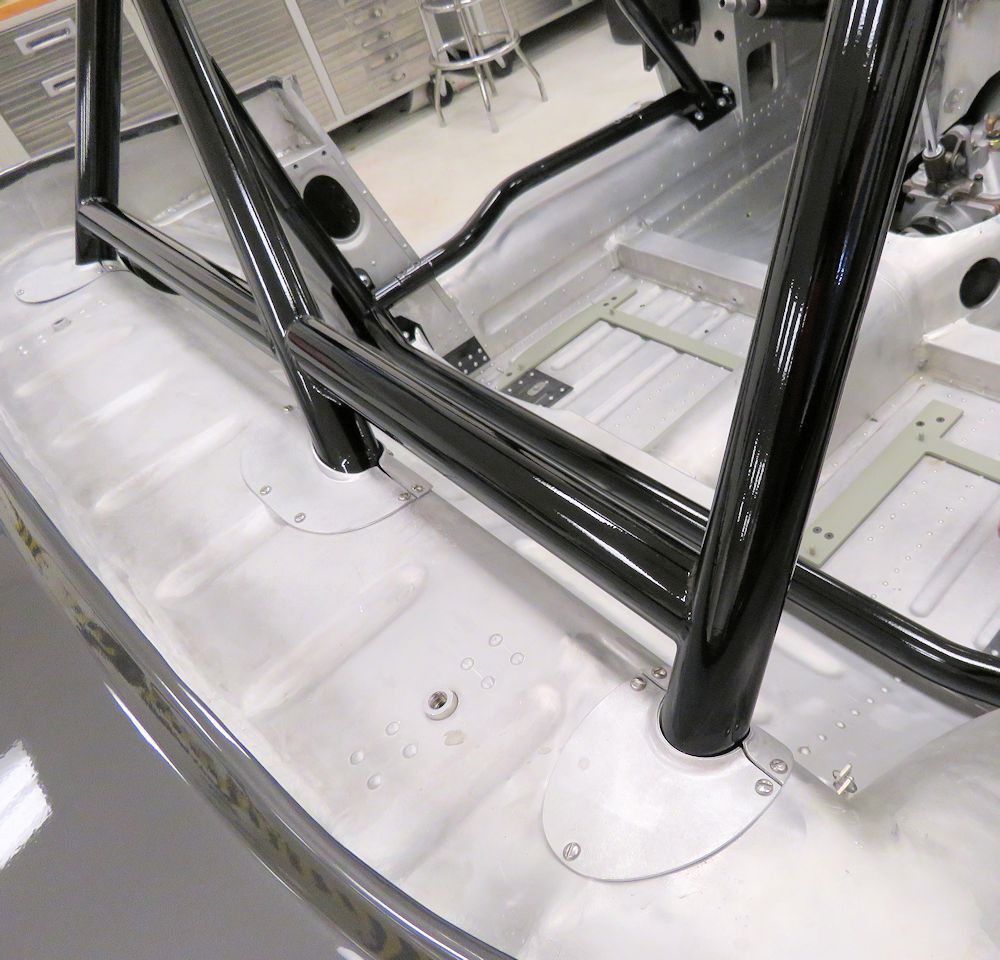
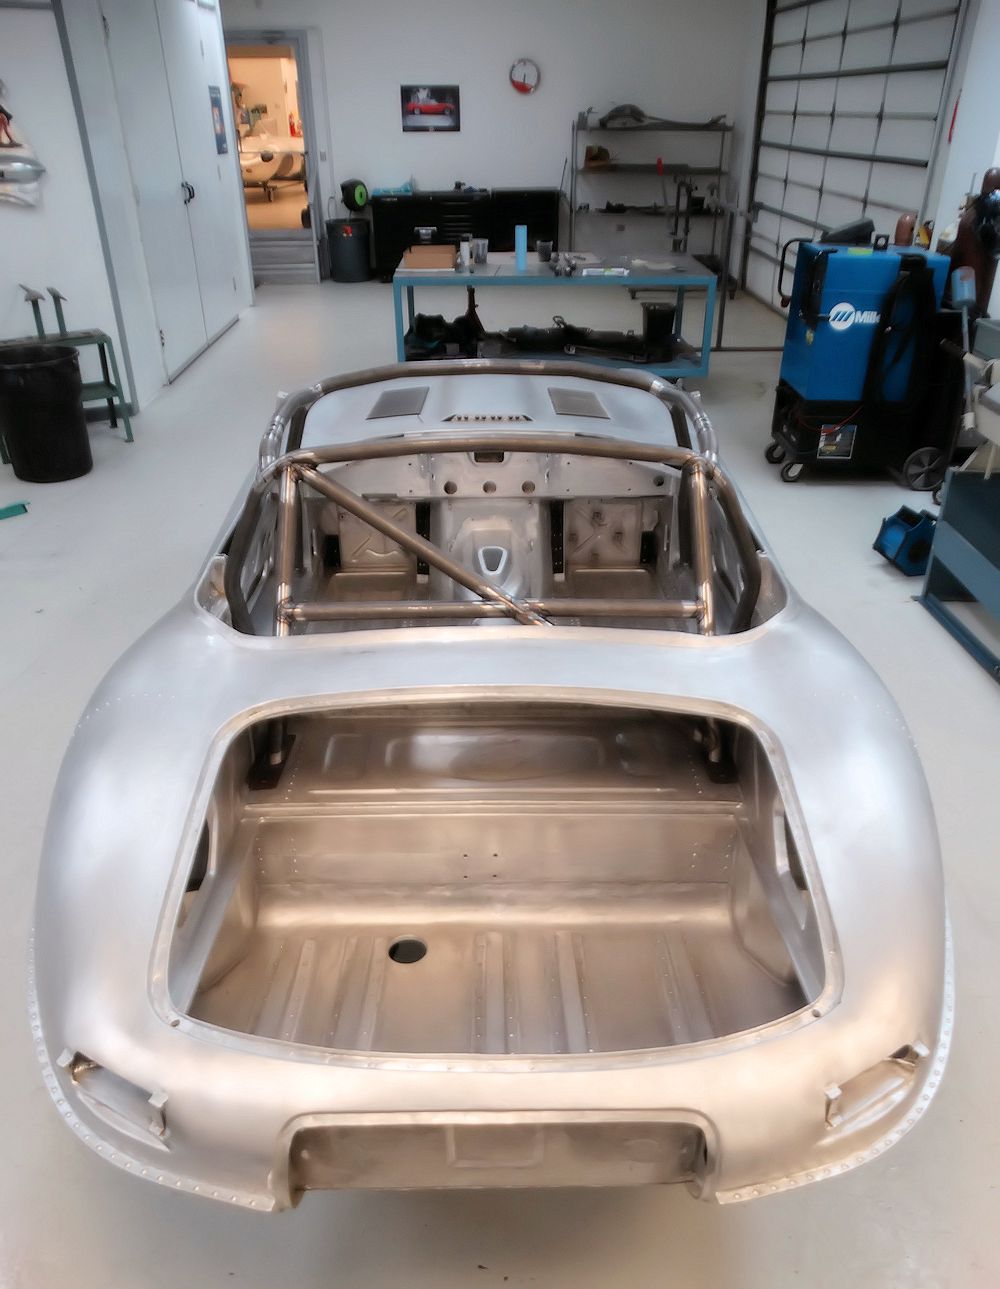
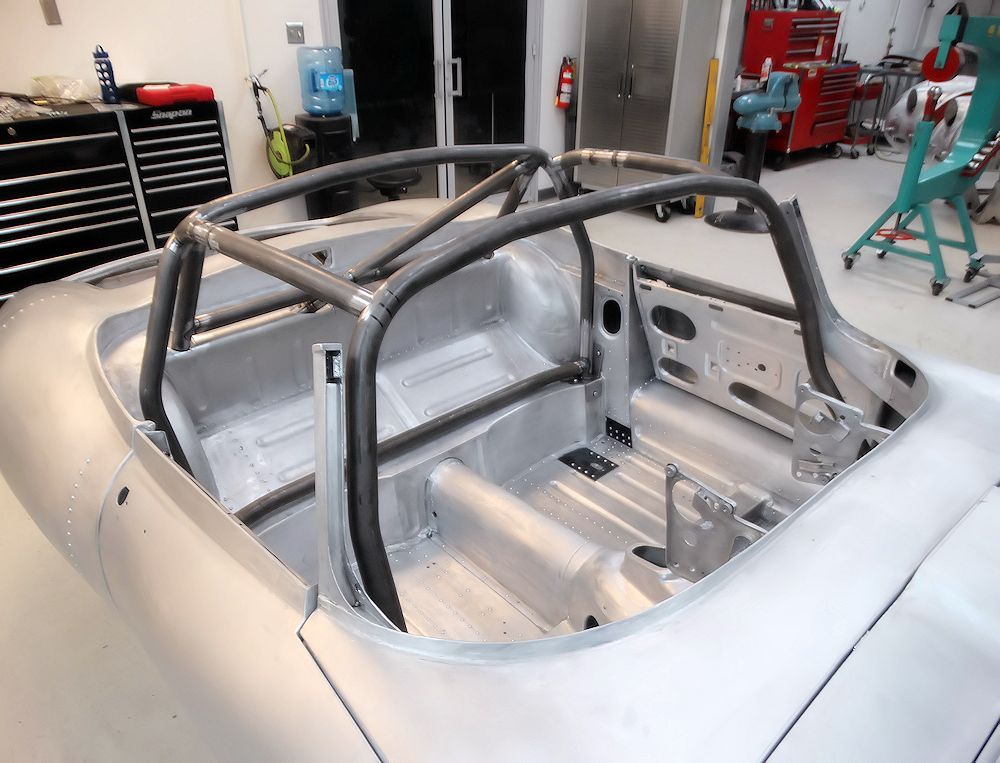
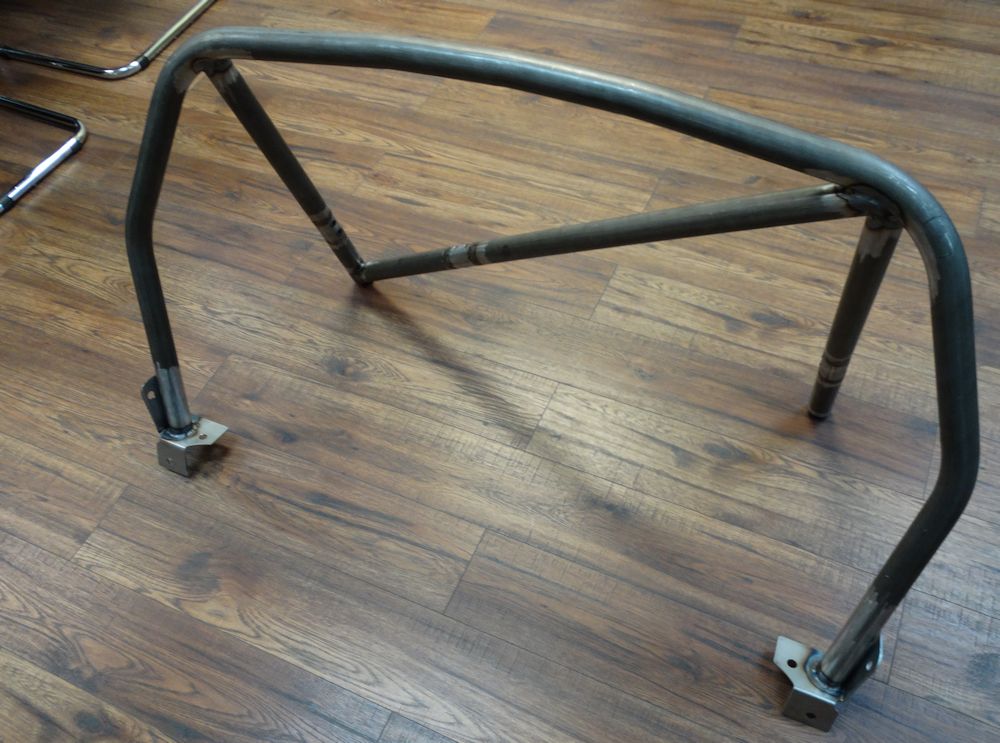
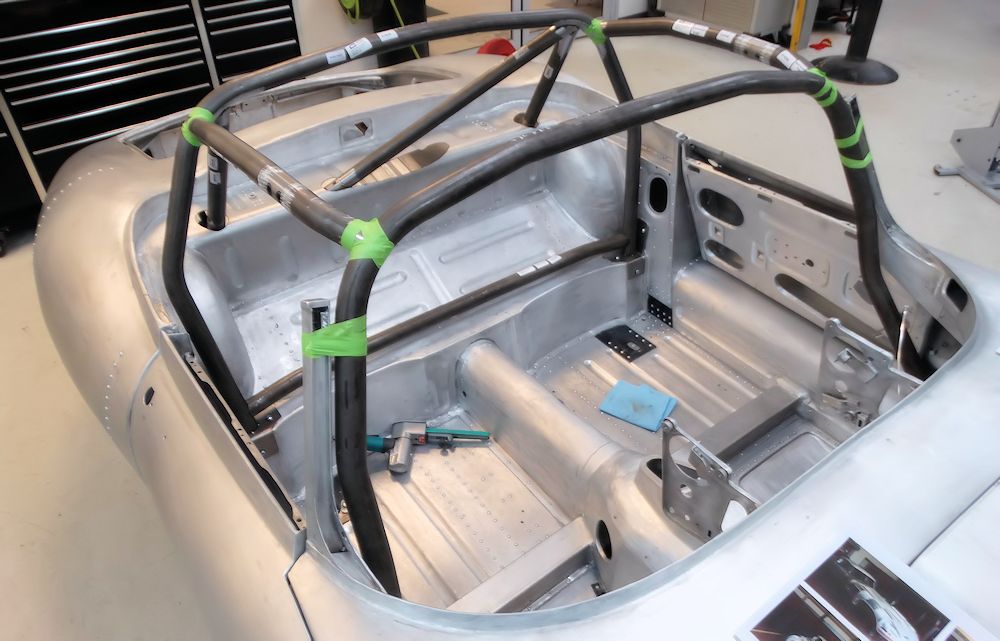
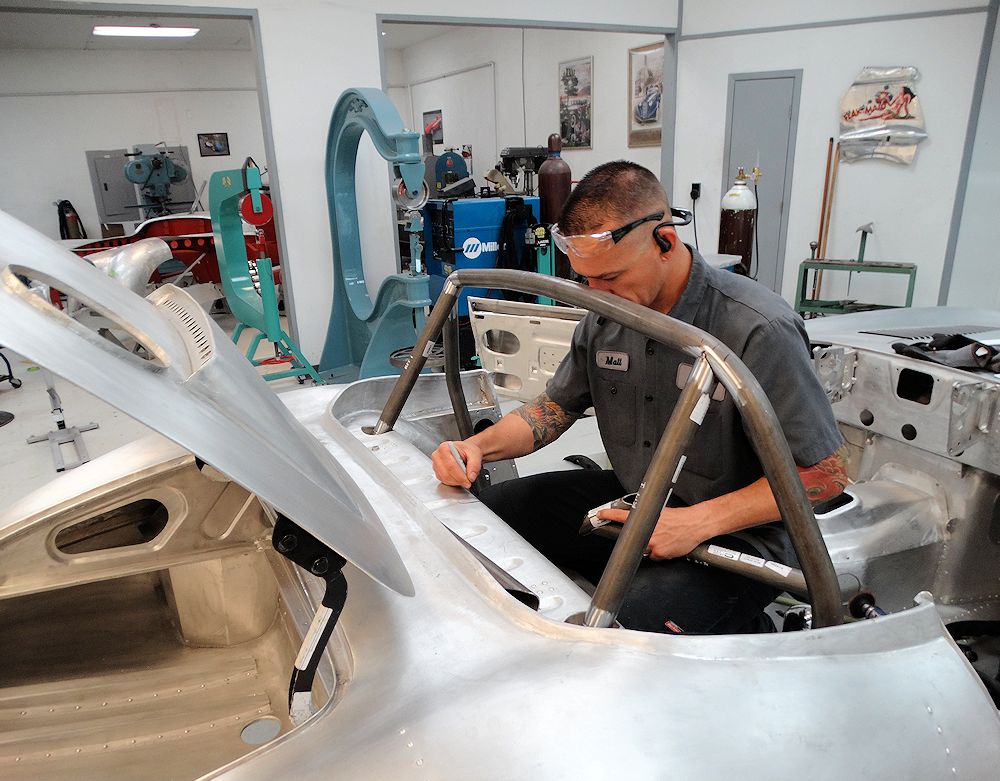
Installing the FIA approved roll cage in the Lightweight.
Jake and Gerardo installing the FIA roll cage
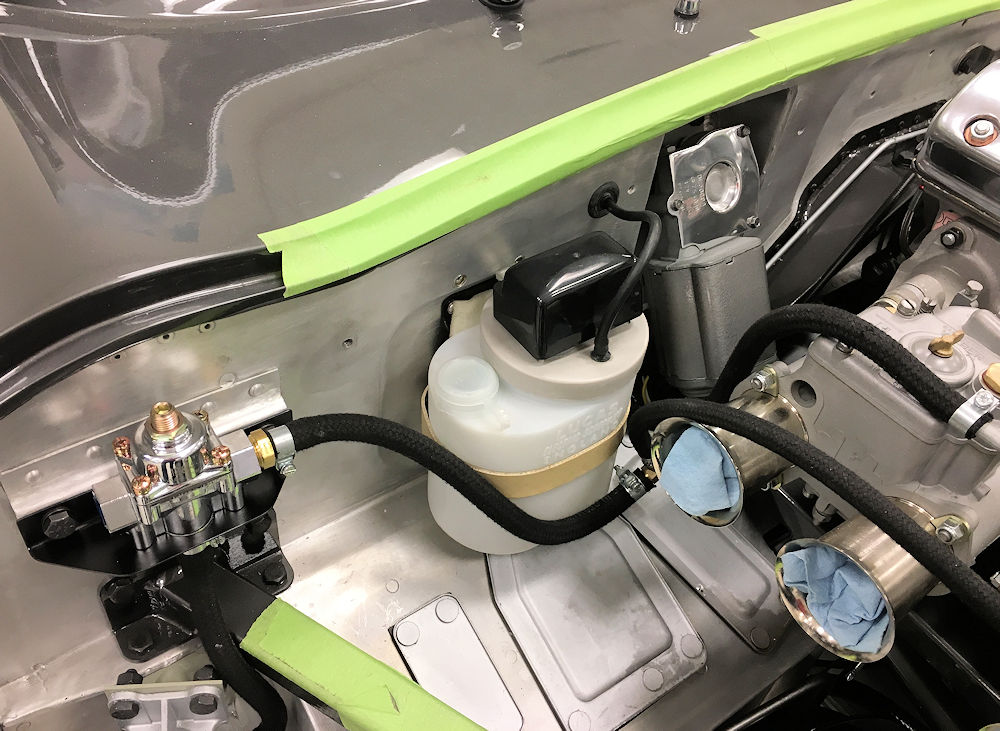
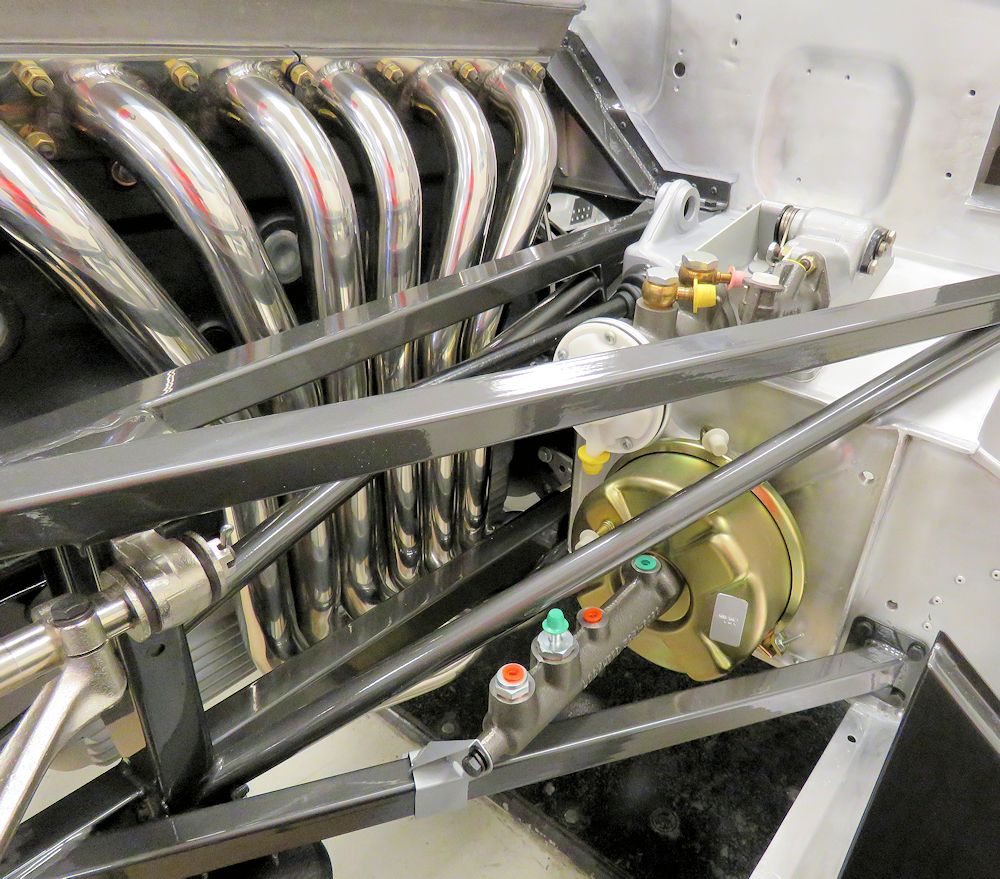
3.8 pedal box has been modified for use with
later master cylinder and booster
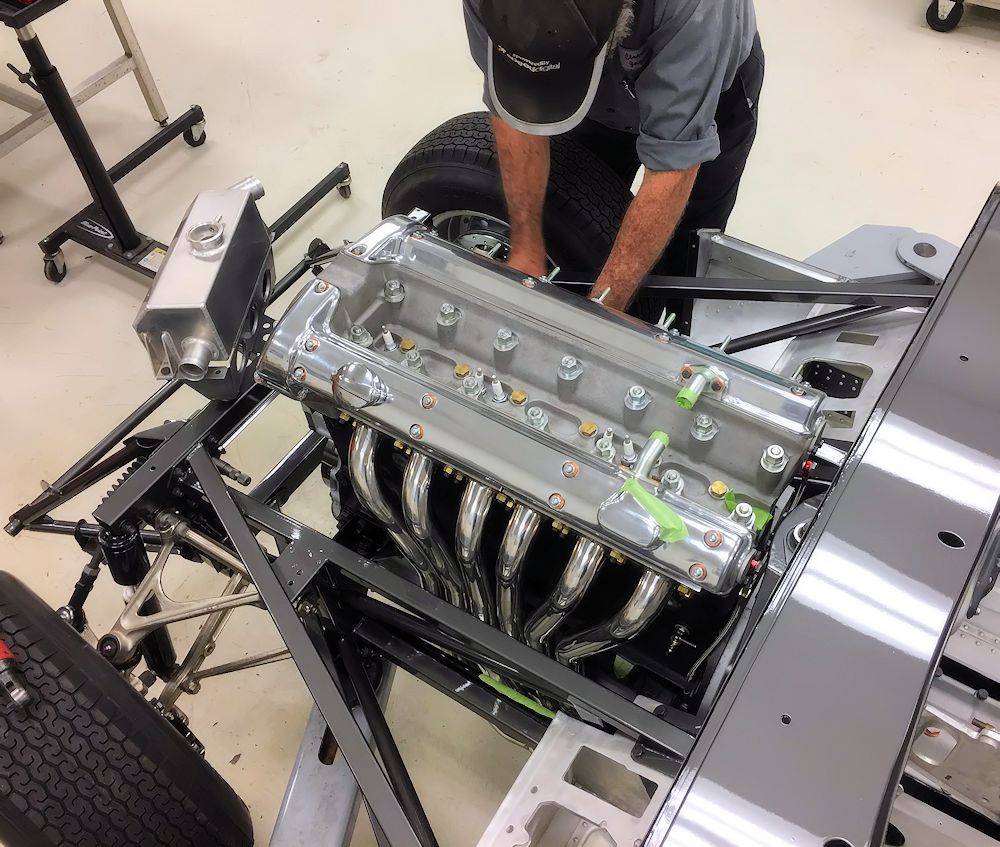
Ray busy installing the custom Hayward & Scott headers and intake manifold to the wide angled head.
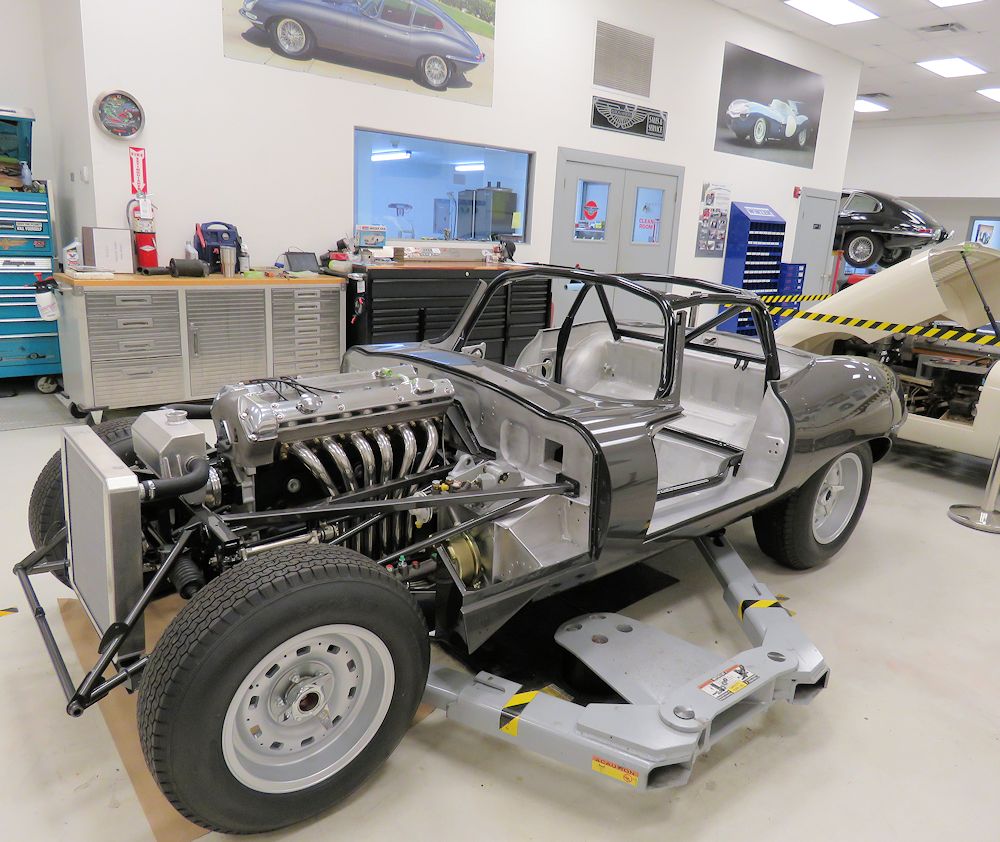
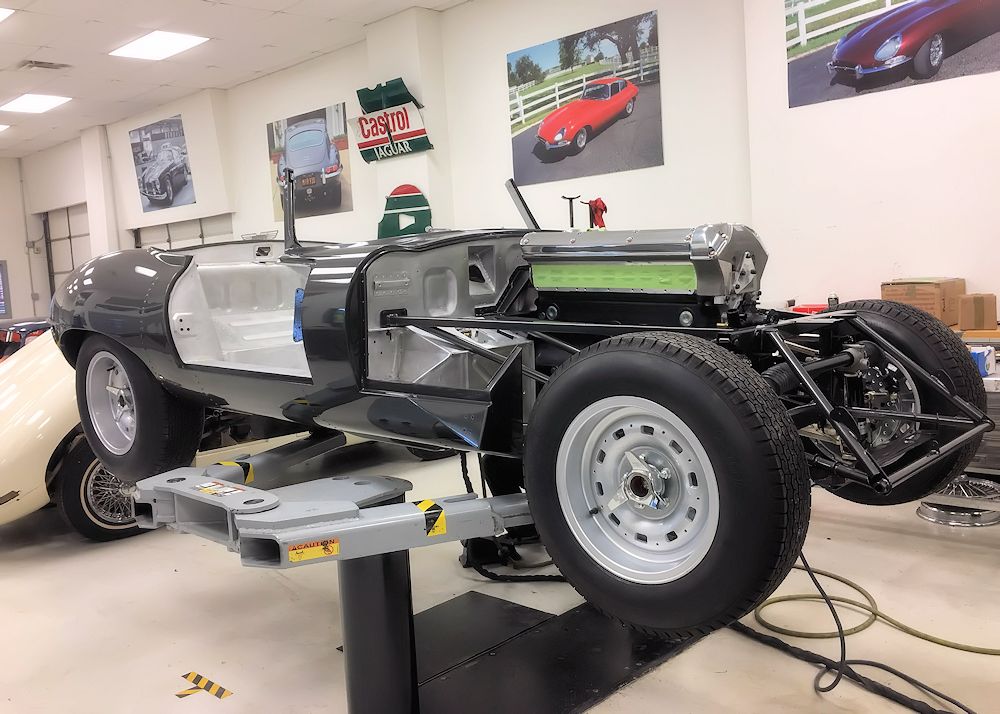
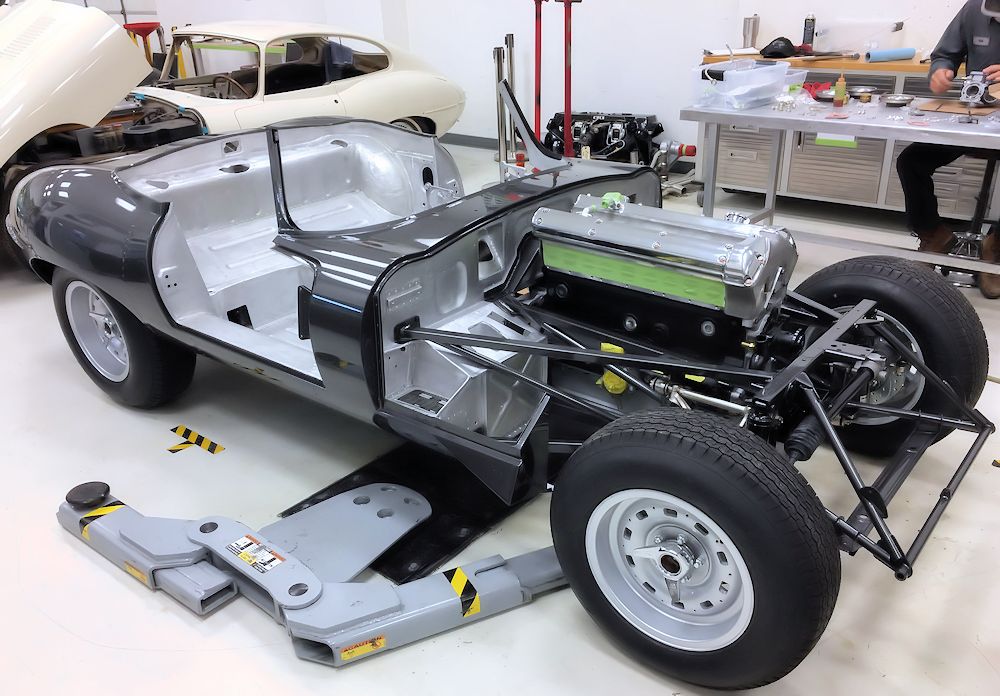
Great to see the drive train installed
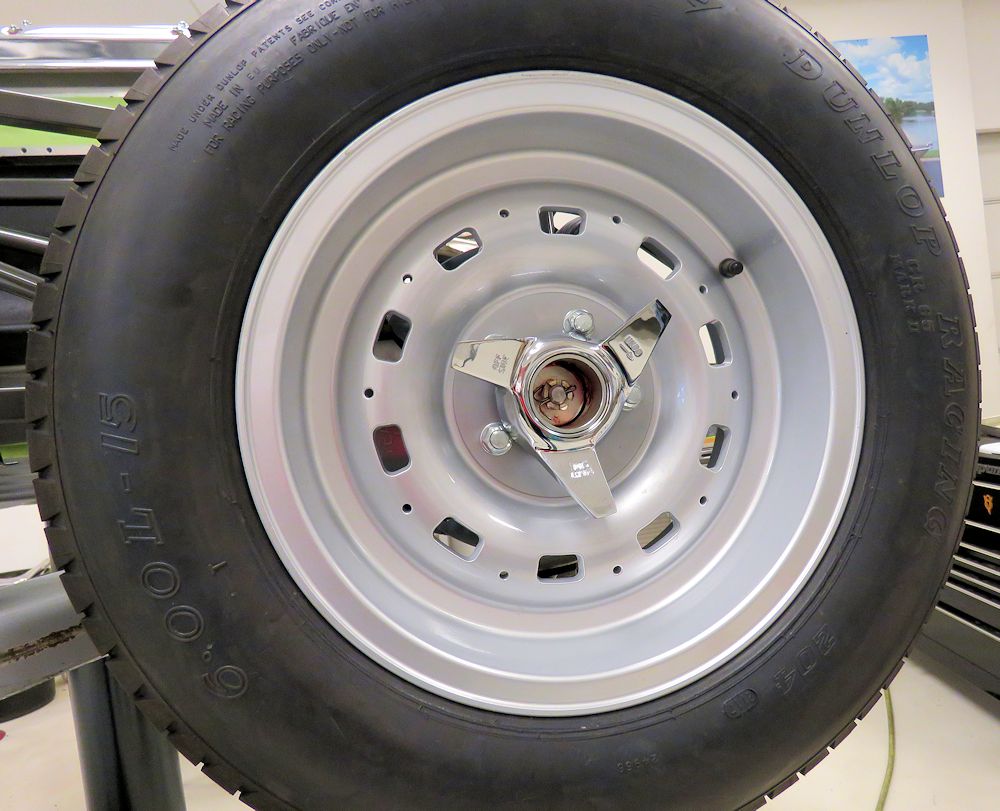
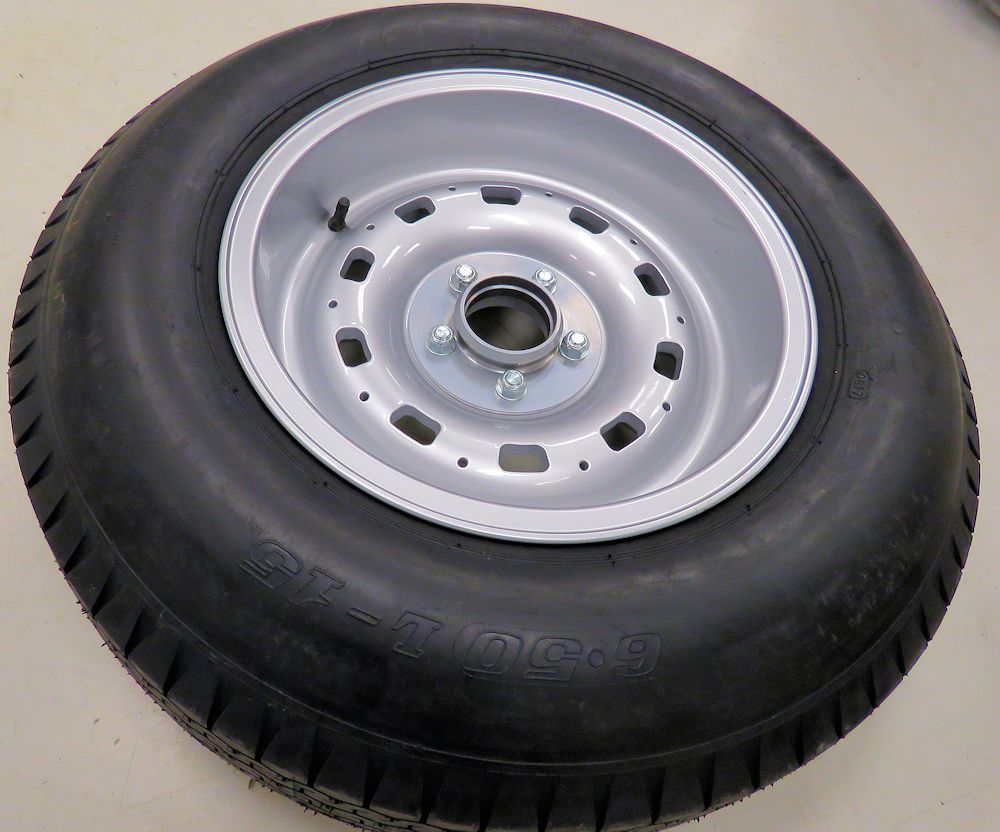
Installing the engine, transmission and Dunlop racing wheels and tires.
The Lightweight on its wheels for the first time!
Time to start going together with this Team CJ Lightweight!
Dunlop 6.00 L-15 racing tires for the front
Dunlop 6.50 L-15 Racing Tires for the rear
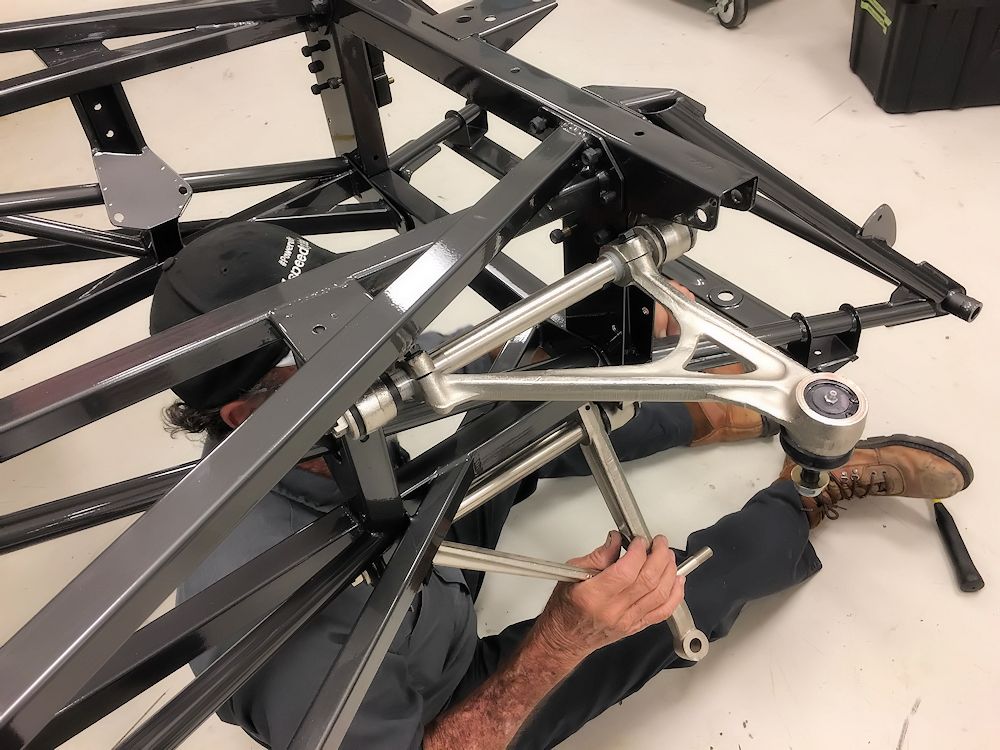
Ray installing the control arms
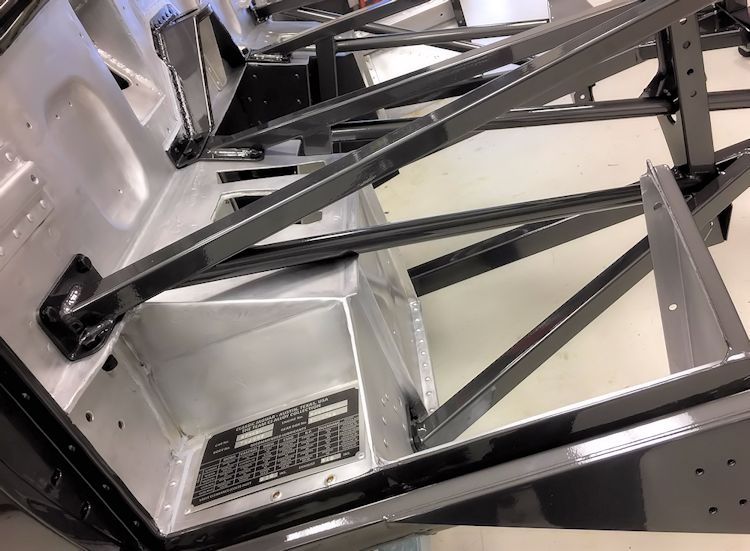
Installing the new engine frames
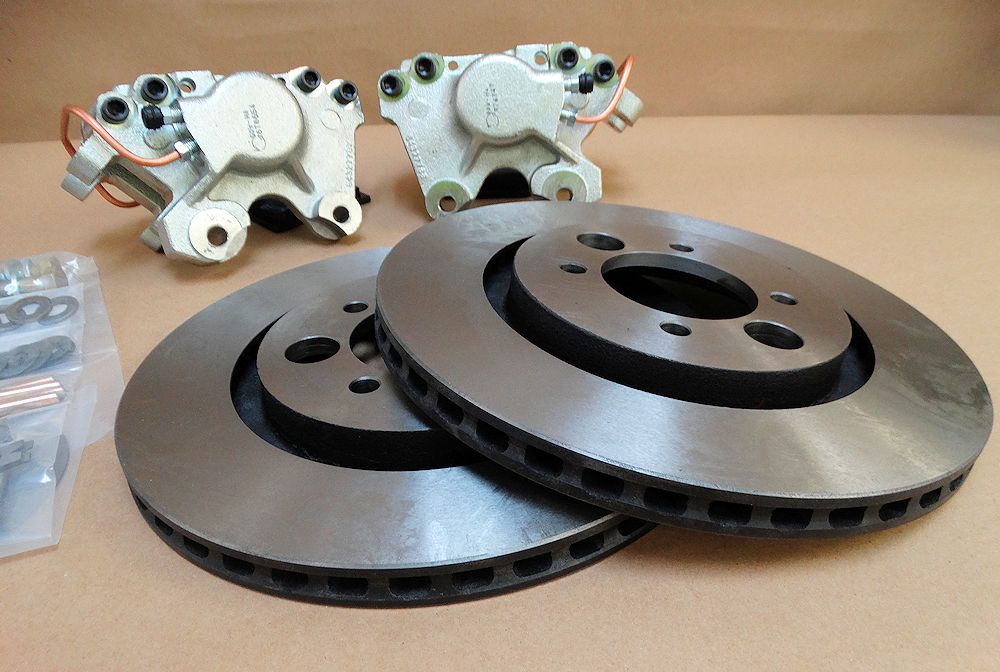
Special CJ/Wilwood vented brakes all round
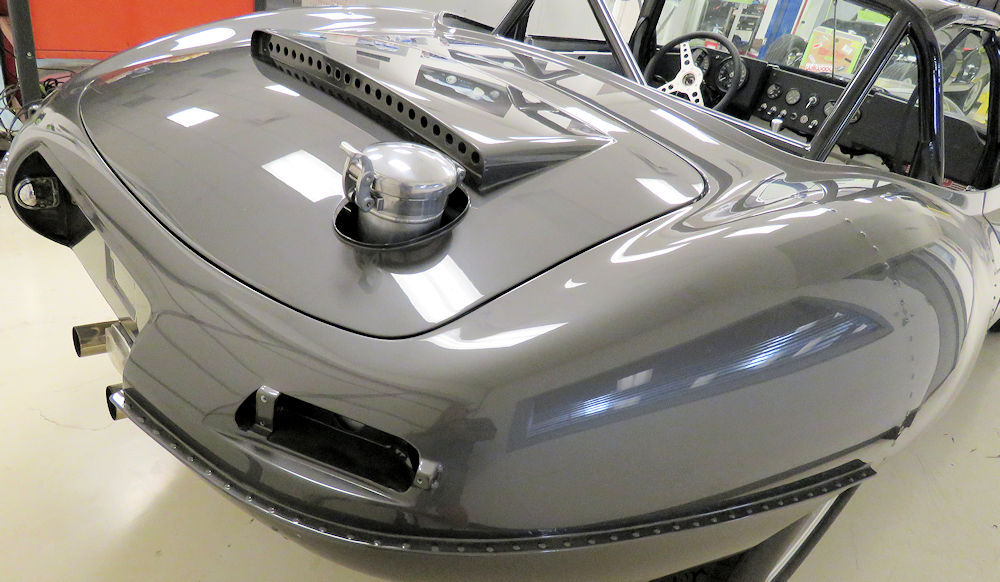
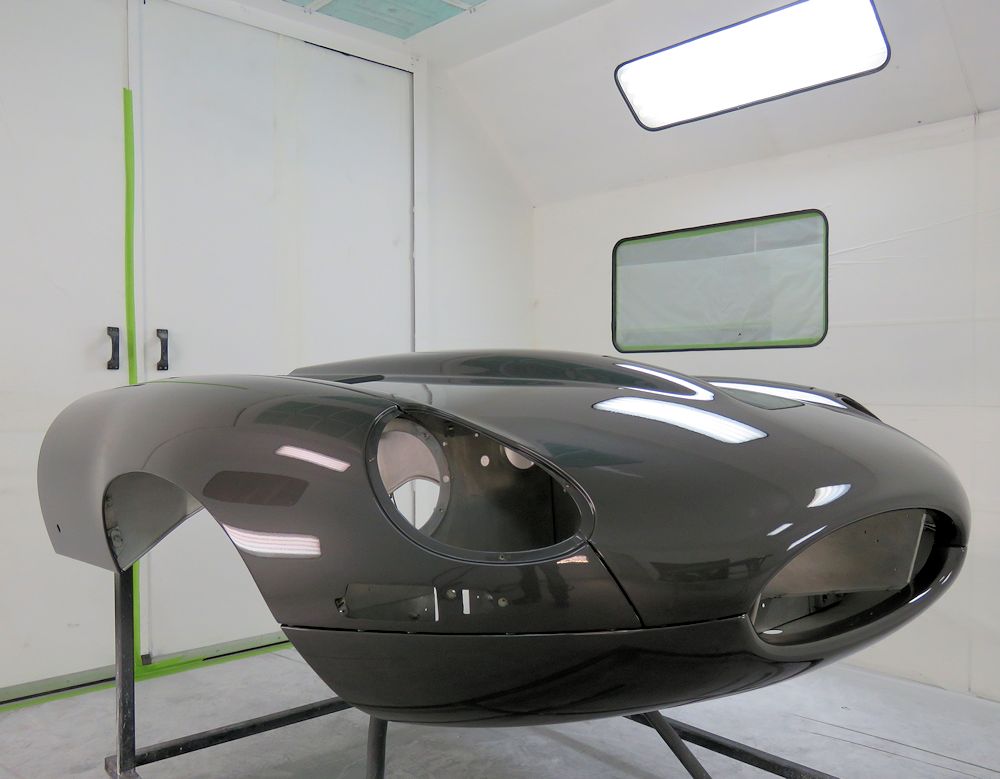
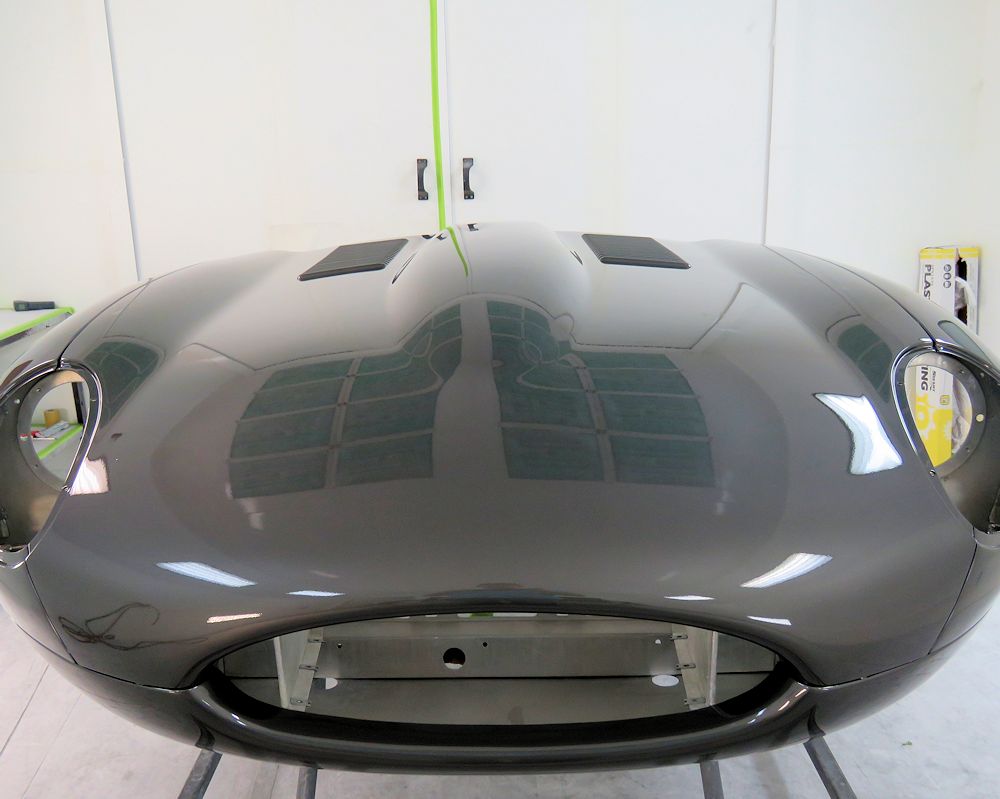
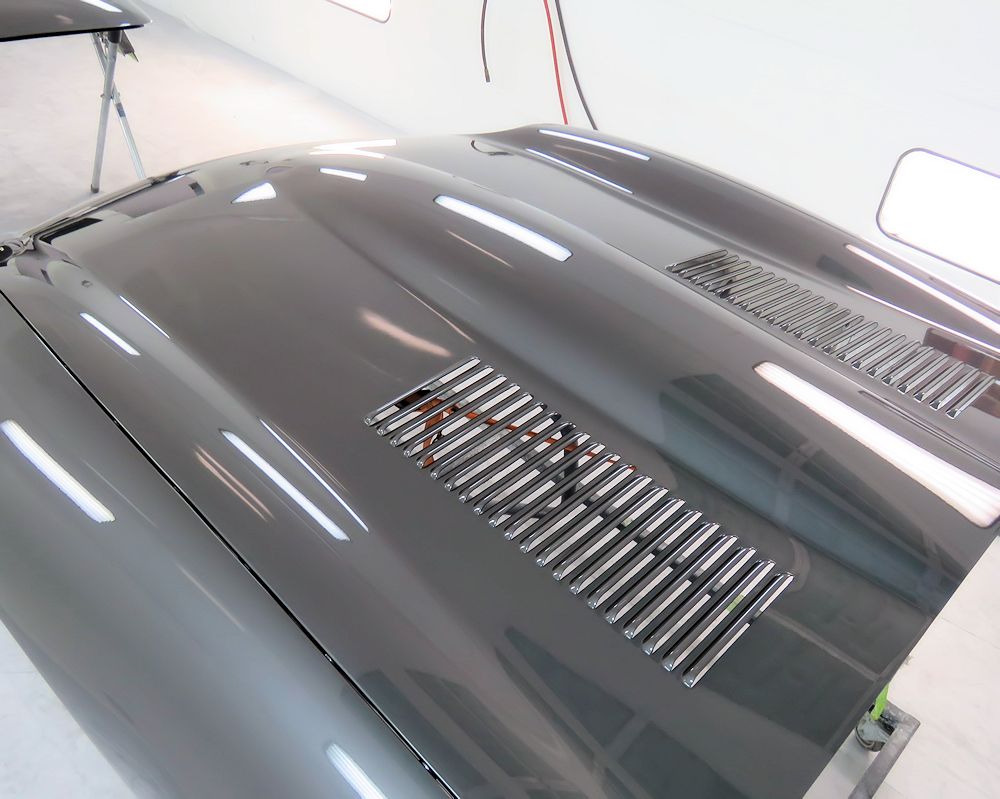
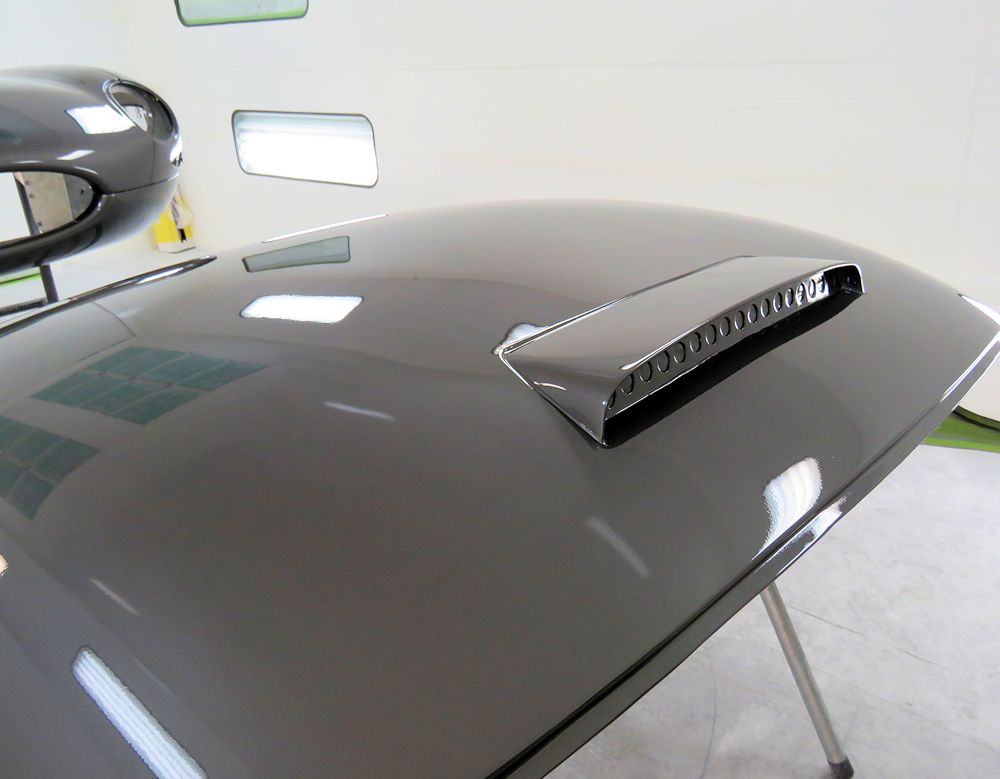
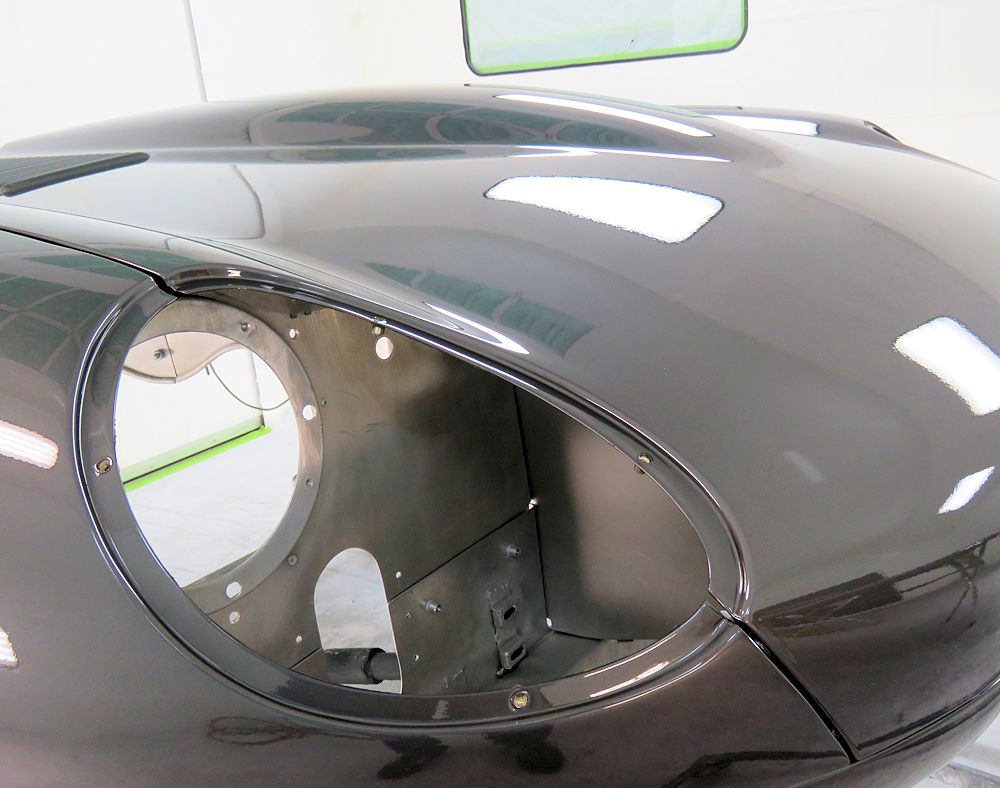
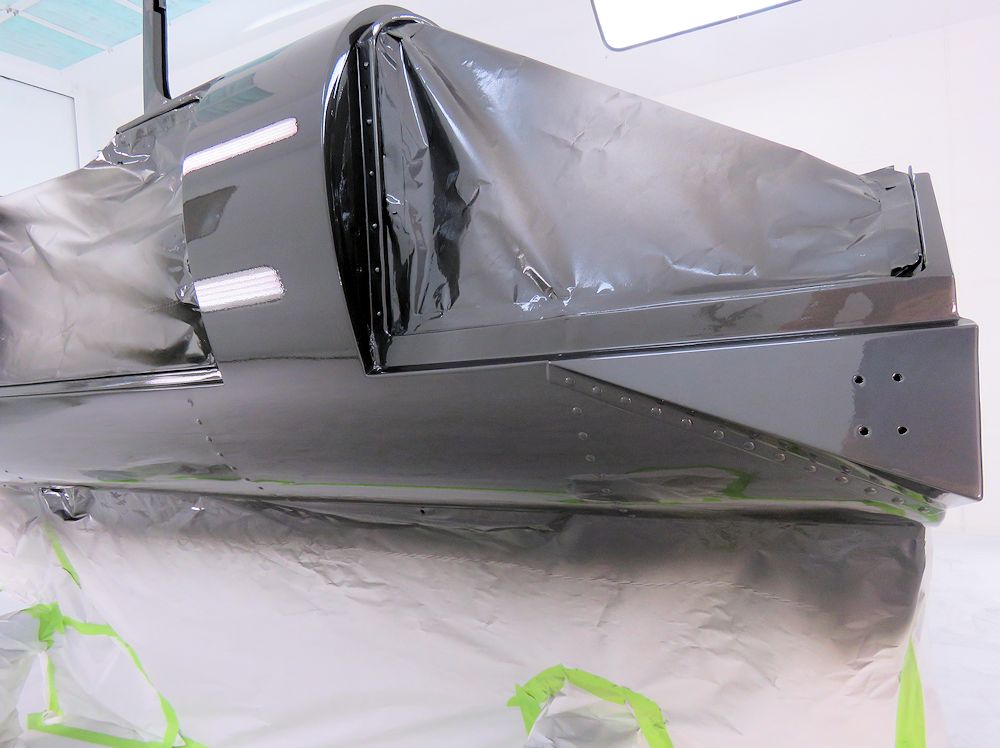
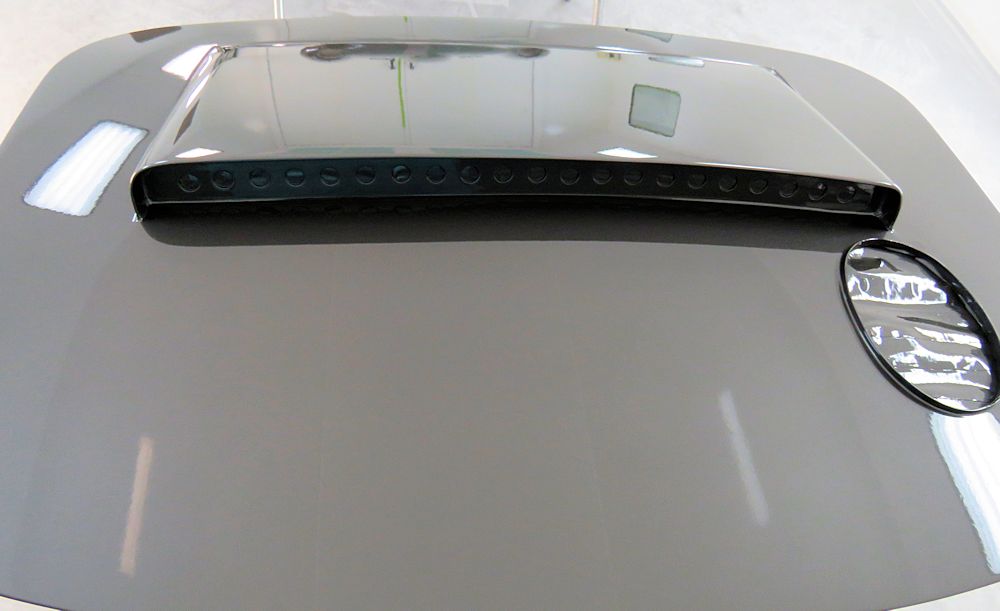
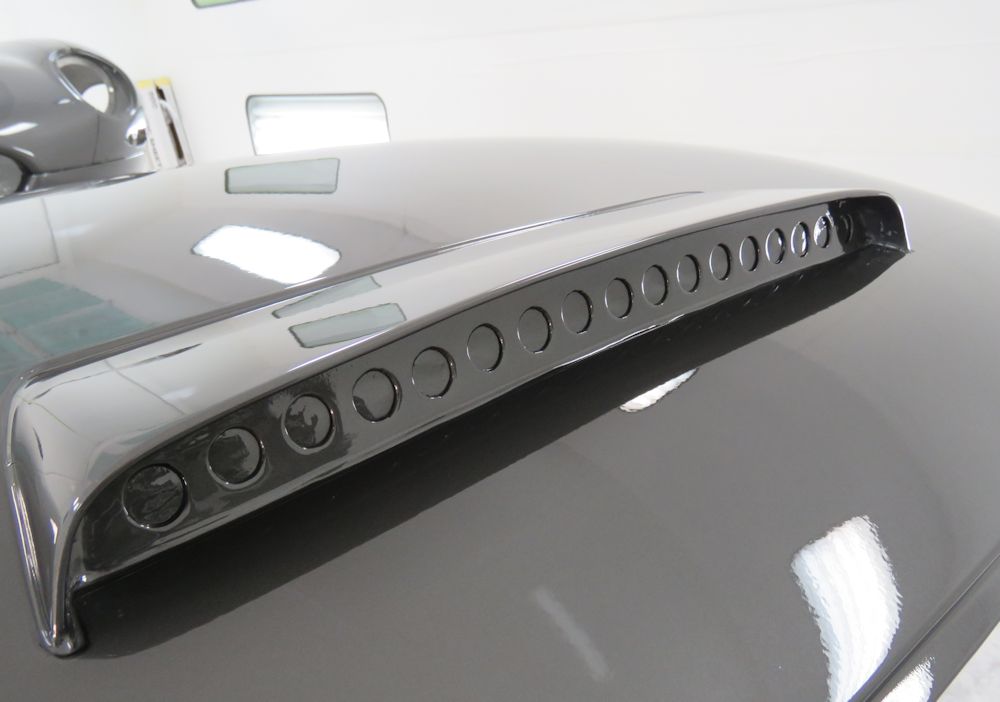
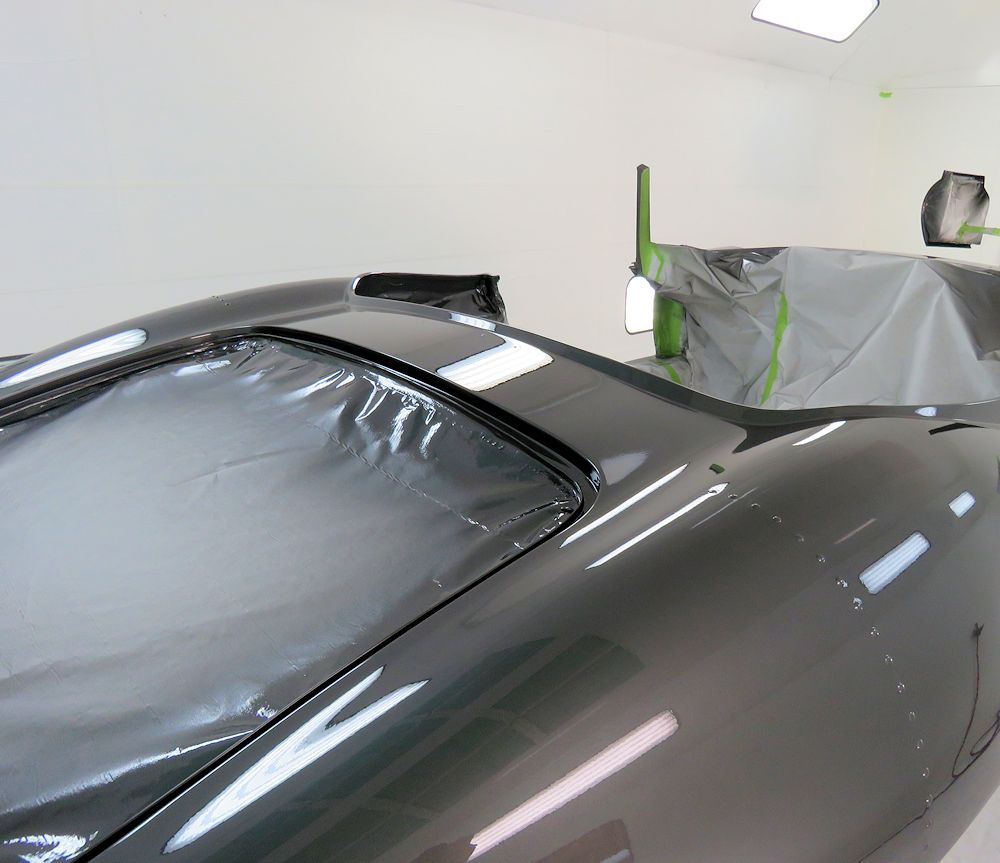
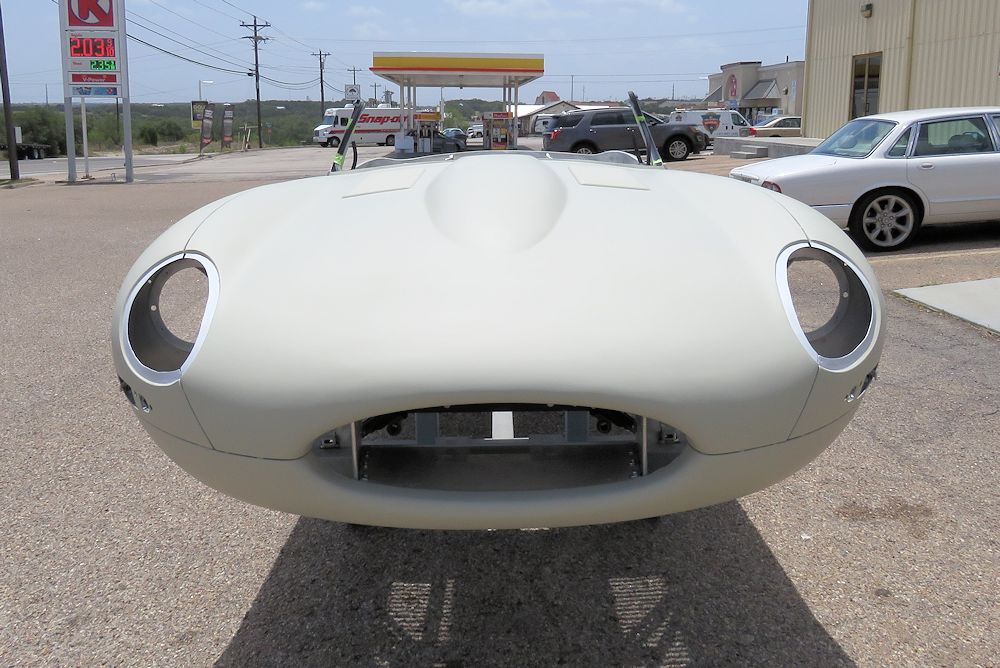
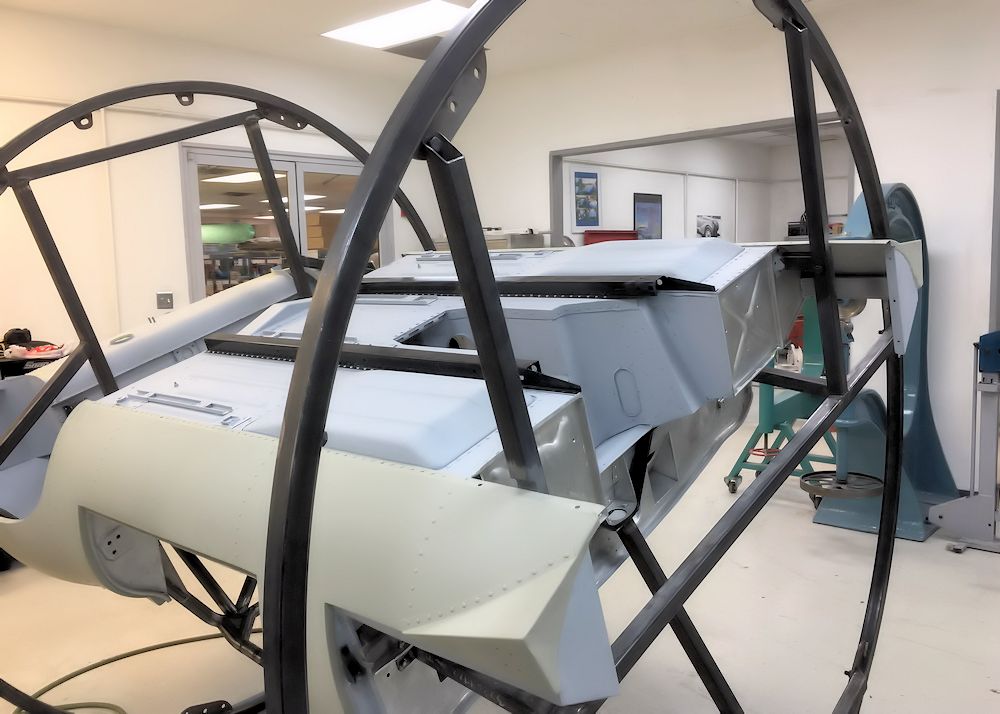
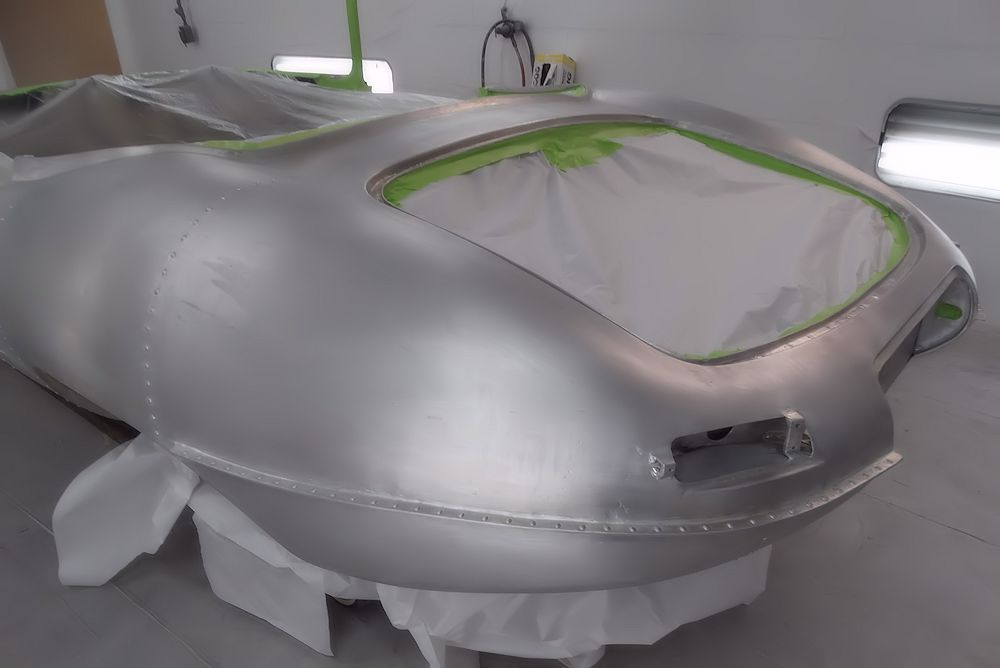
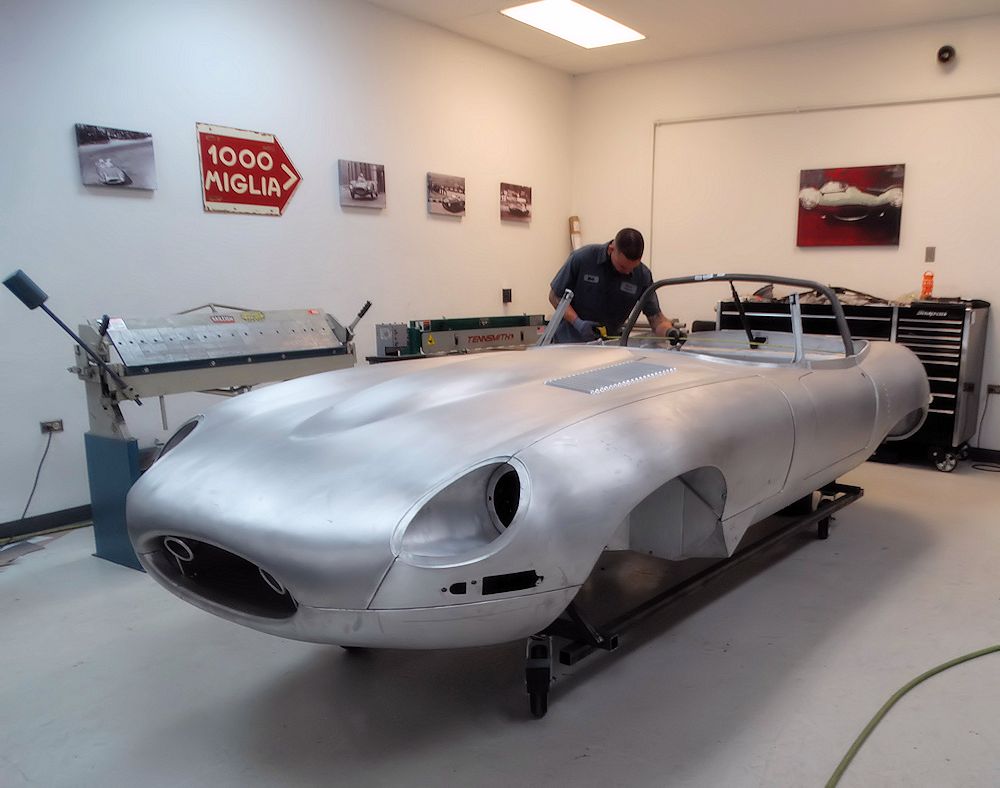
We painted the bonnet, hardtop and boot lid yesterday afternoon.
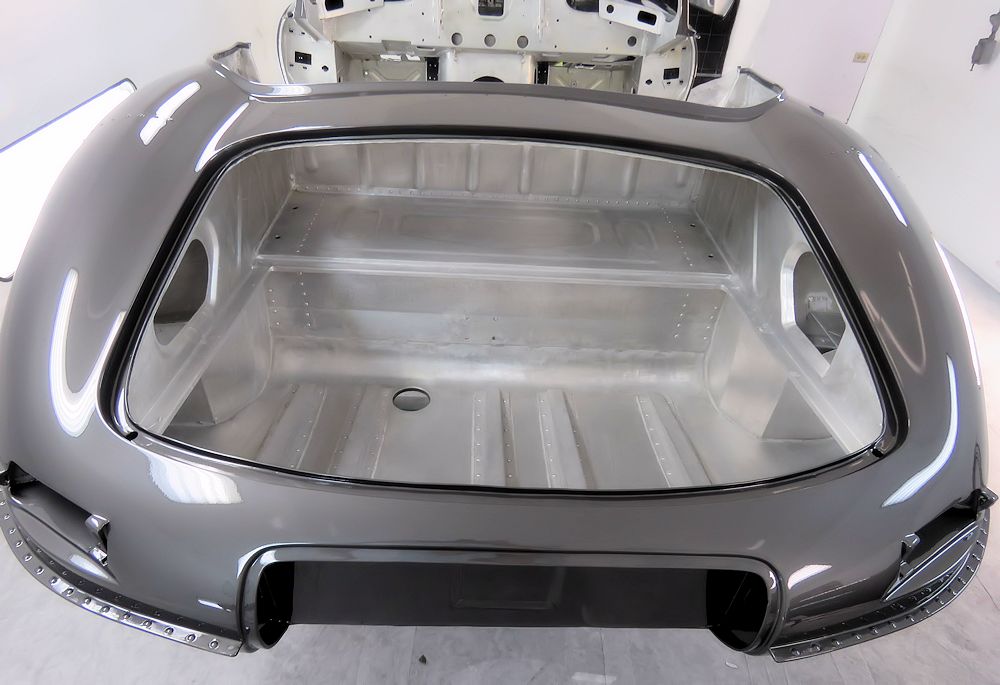
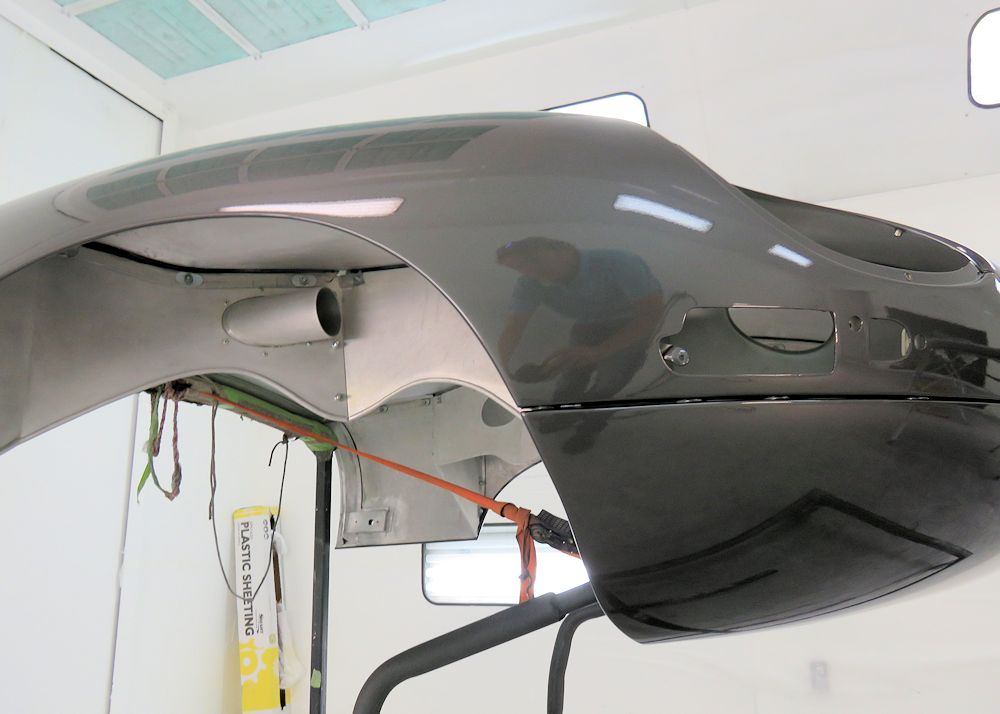
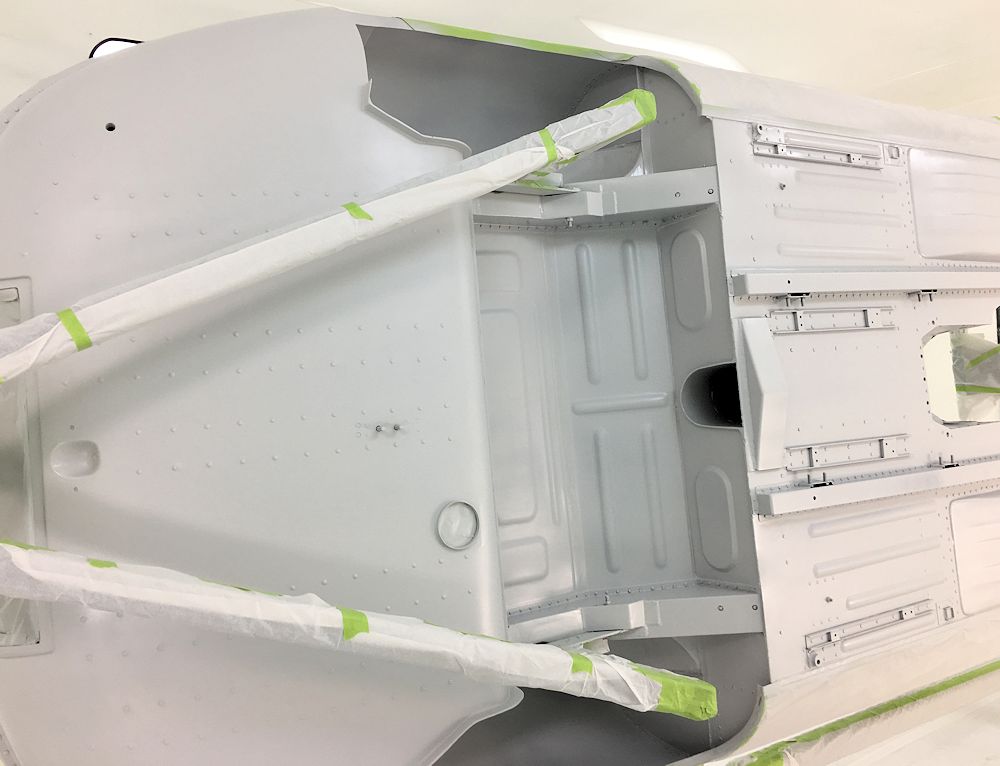
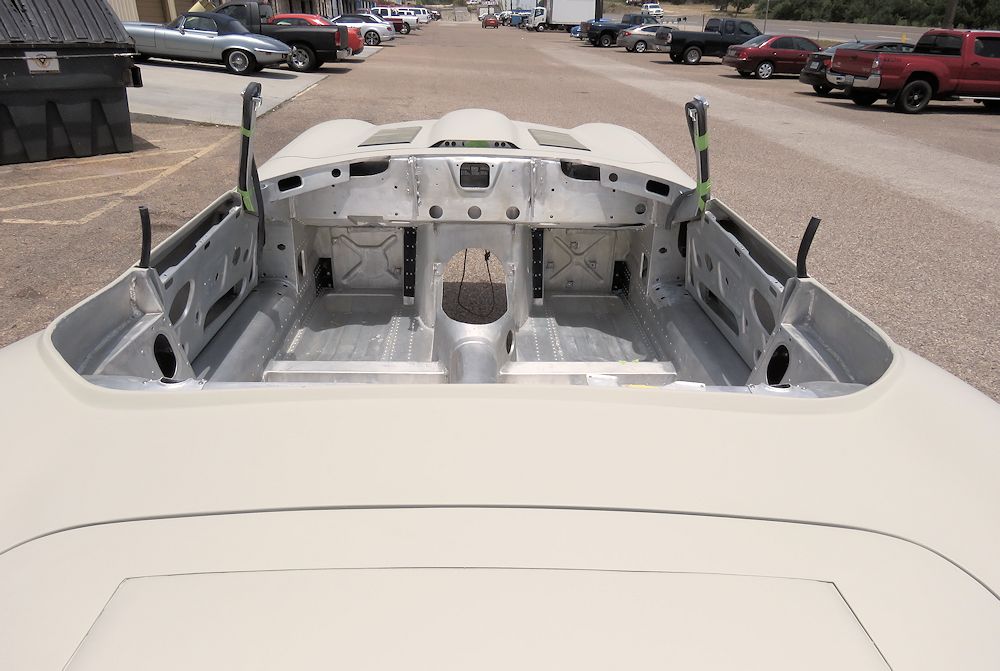
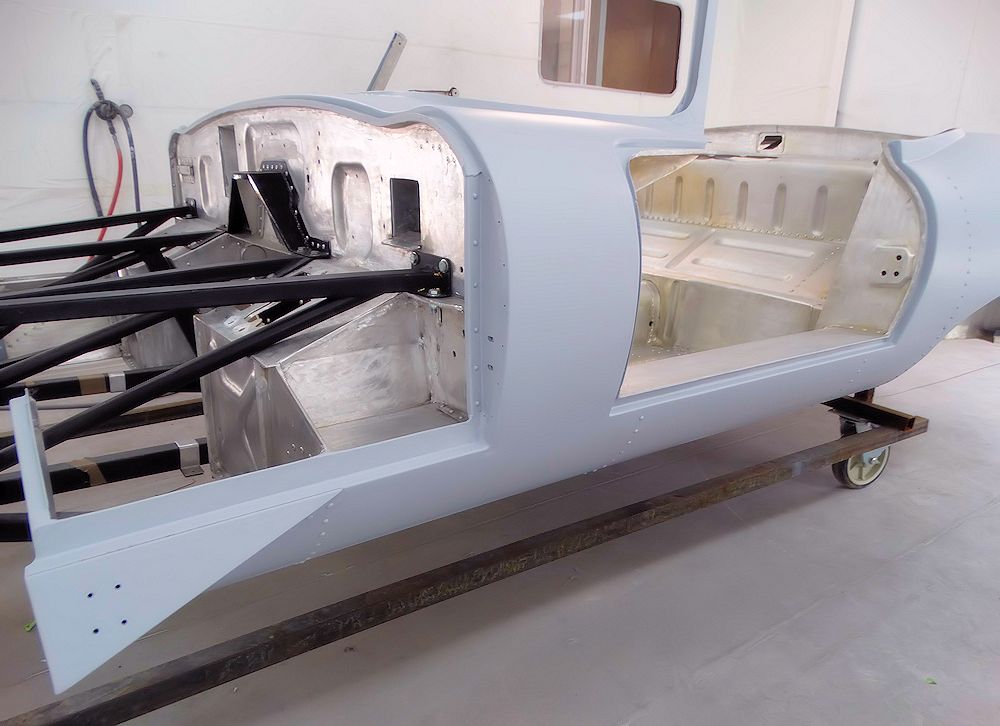
Unmasking the body to reveal the bare aluminum inner surfaces.
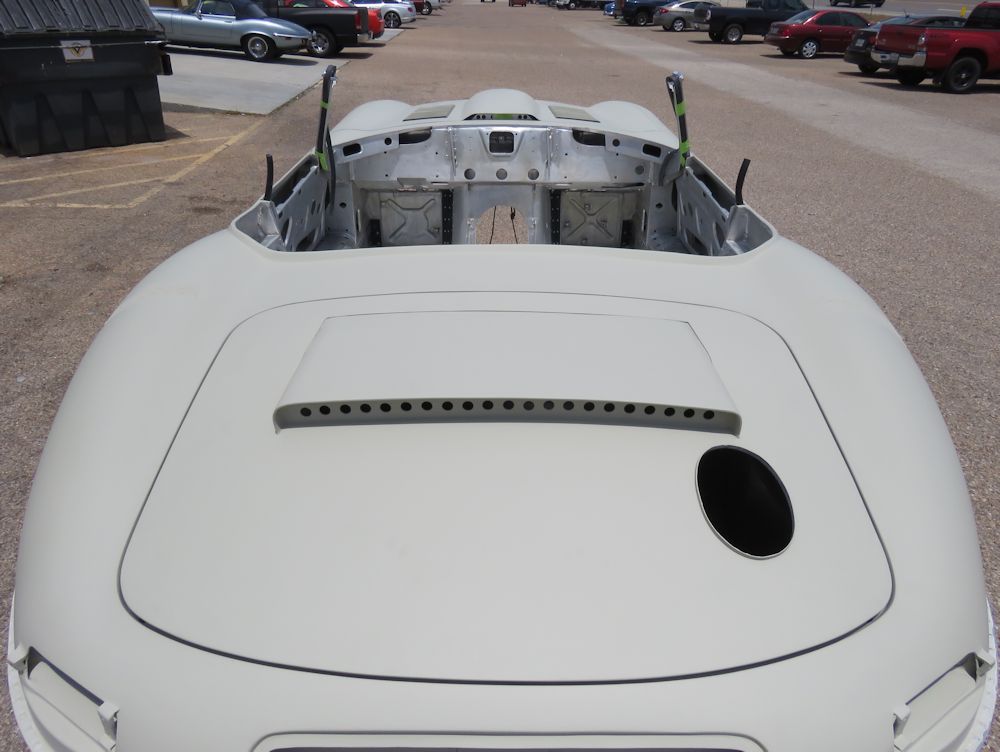
Note underside of bonnet has been left
in bare aluminum
Alloy hardtop was painted at the same time
as the bonnet and boot lid
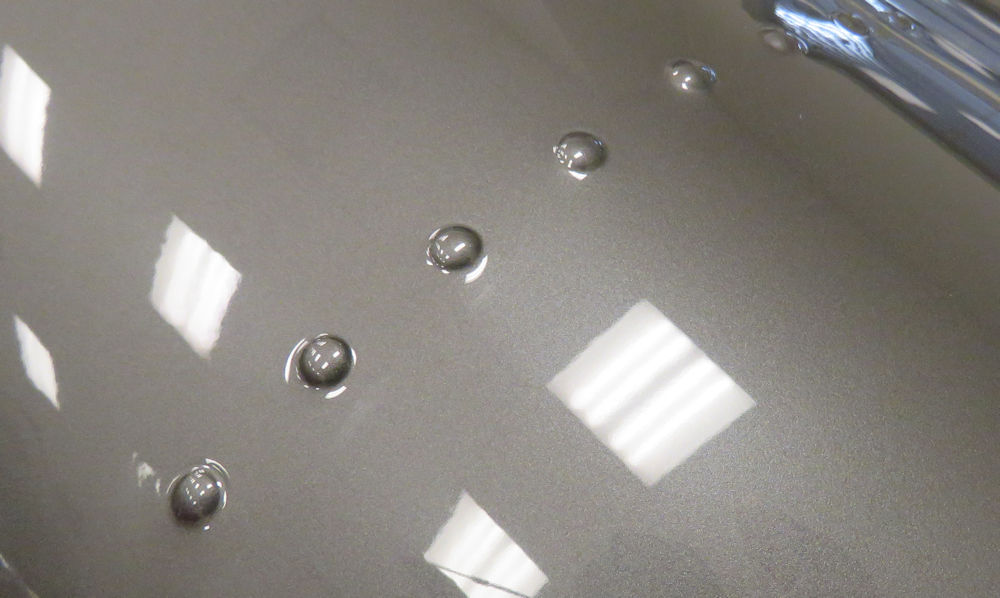
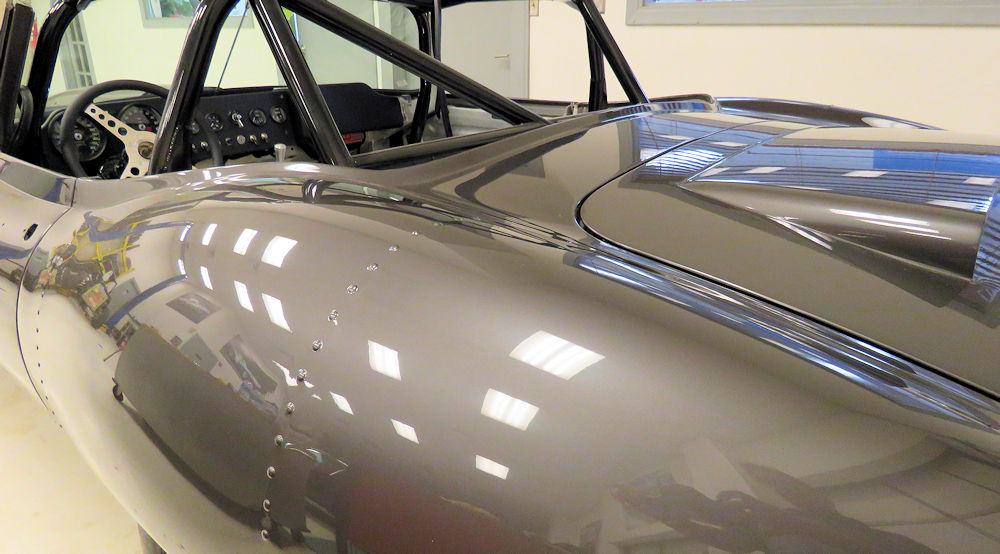
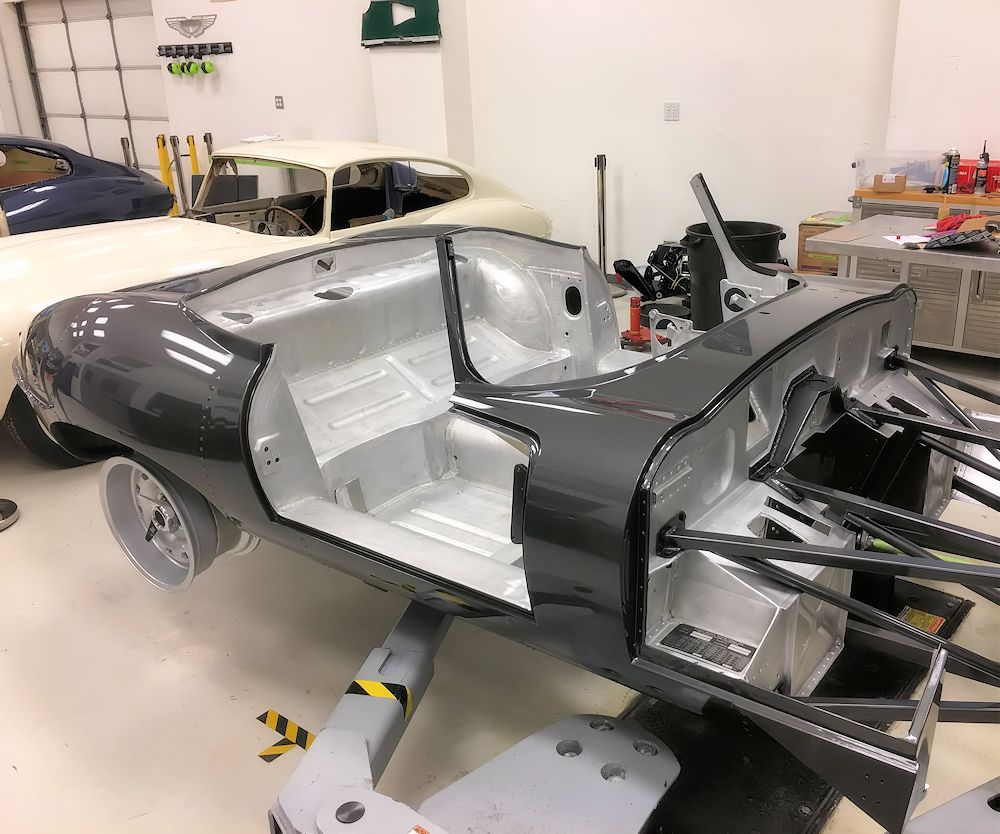
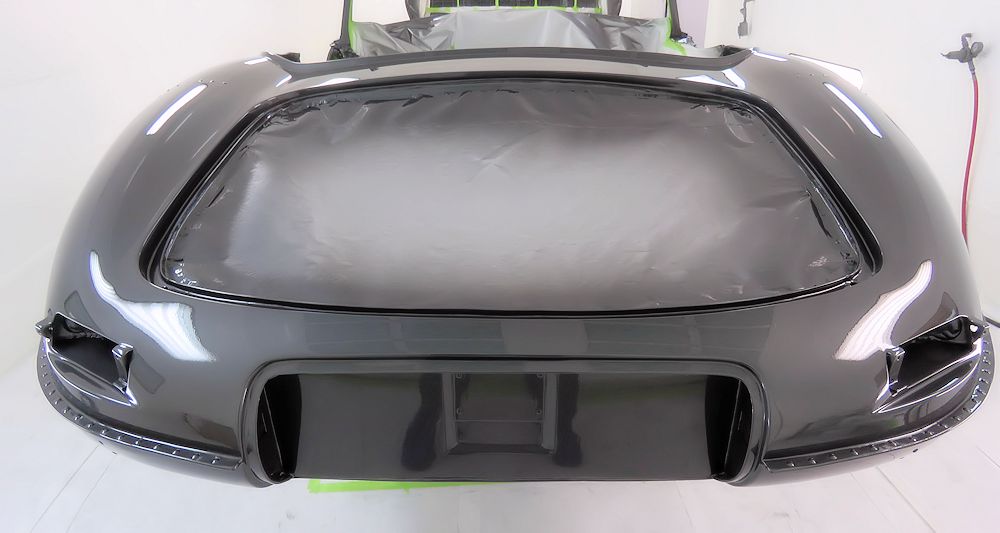
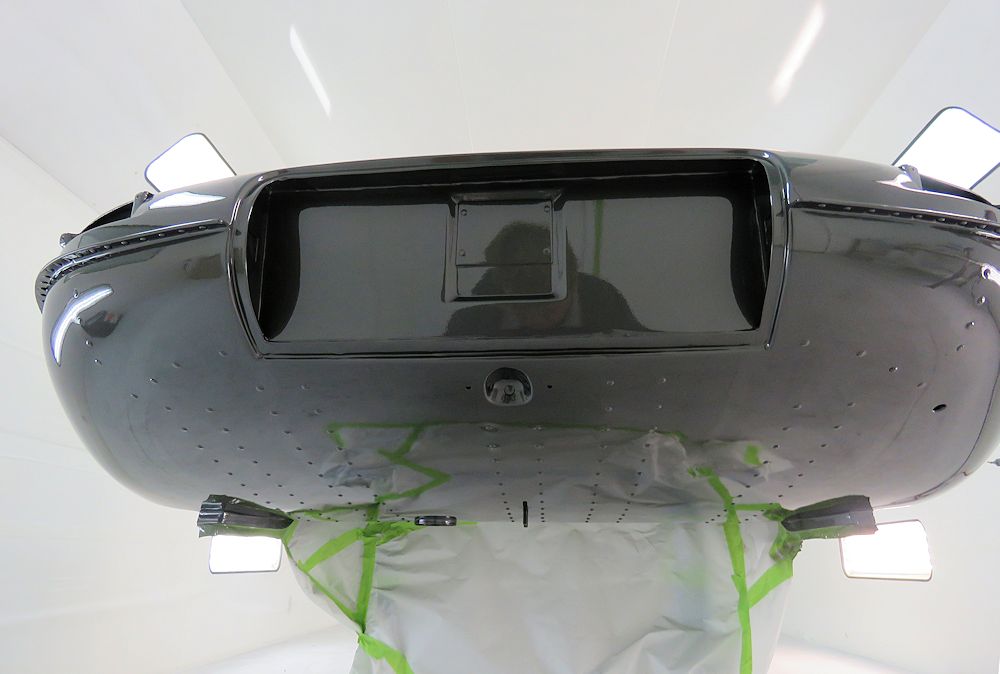
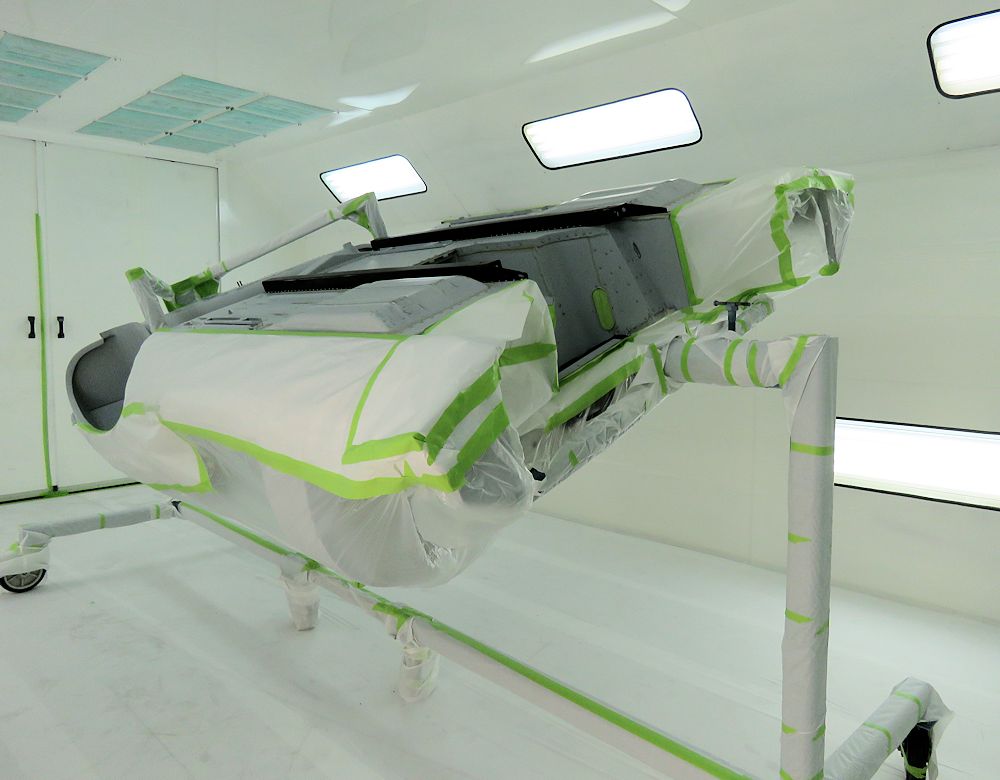
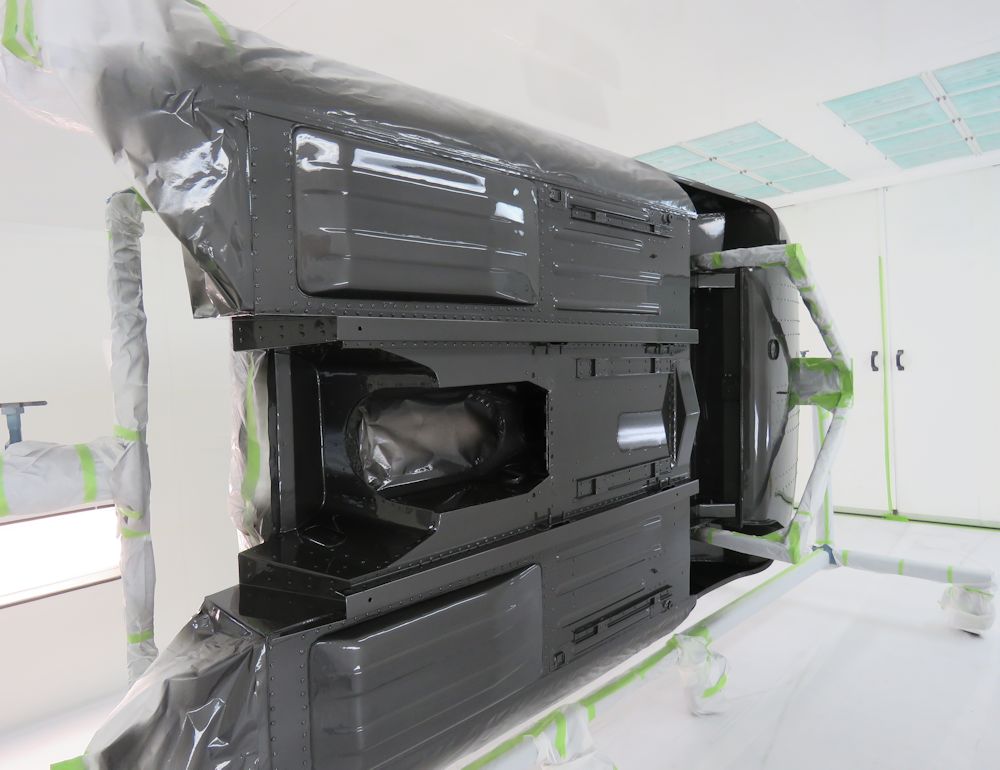
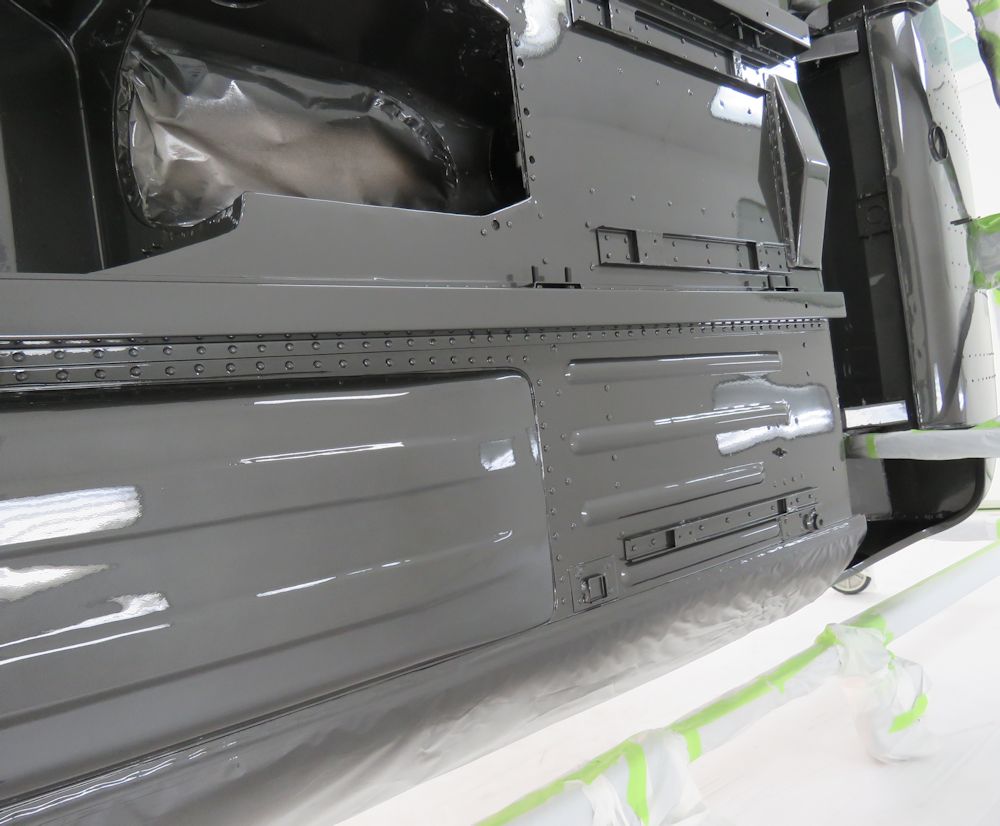
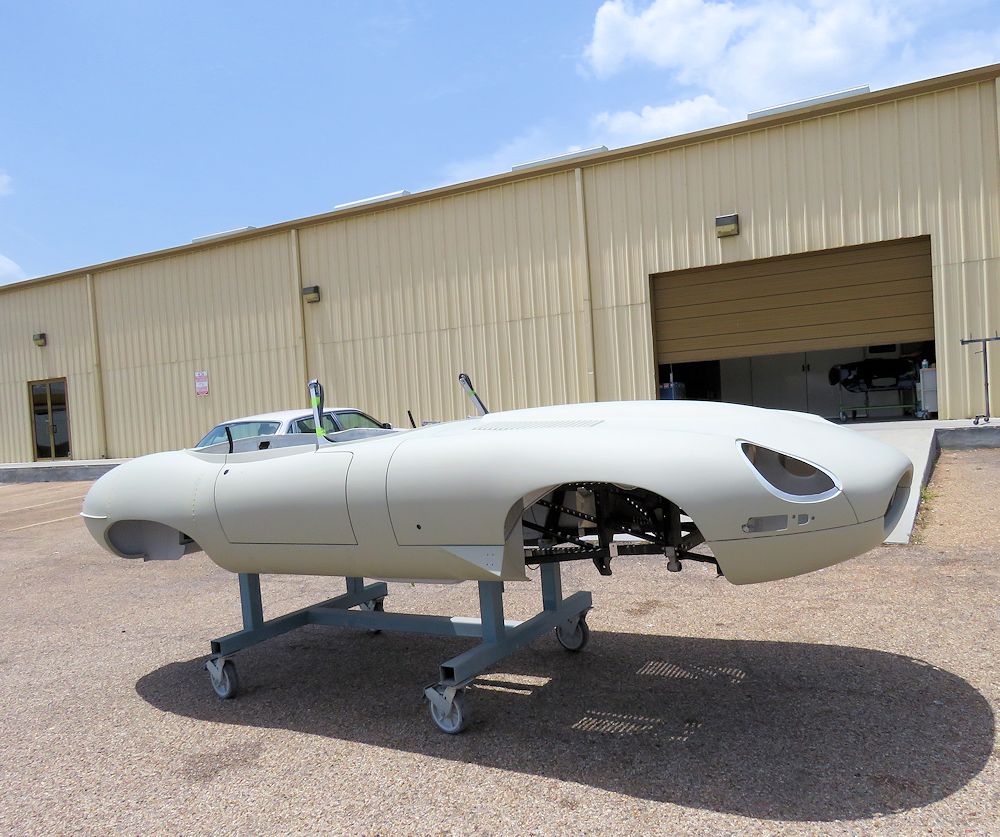
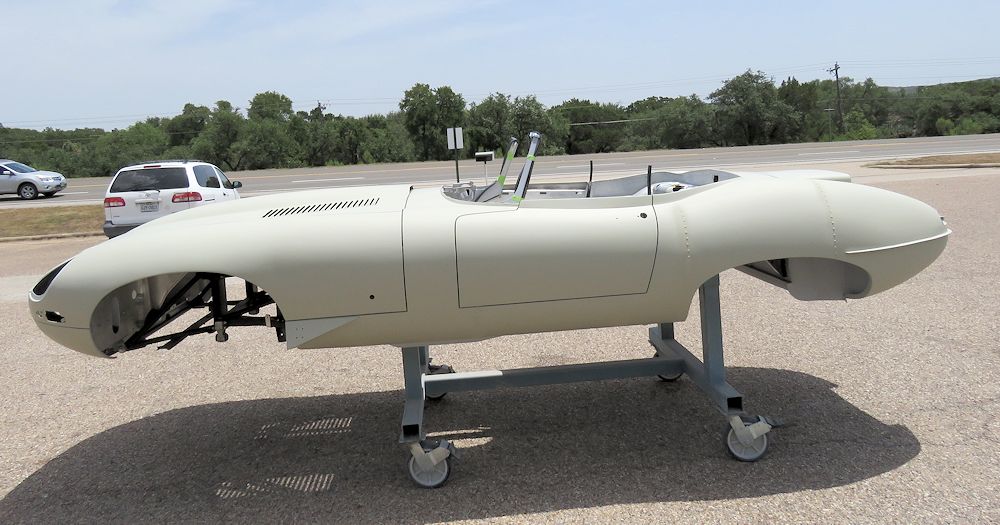
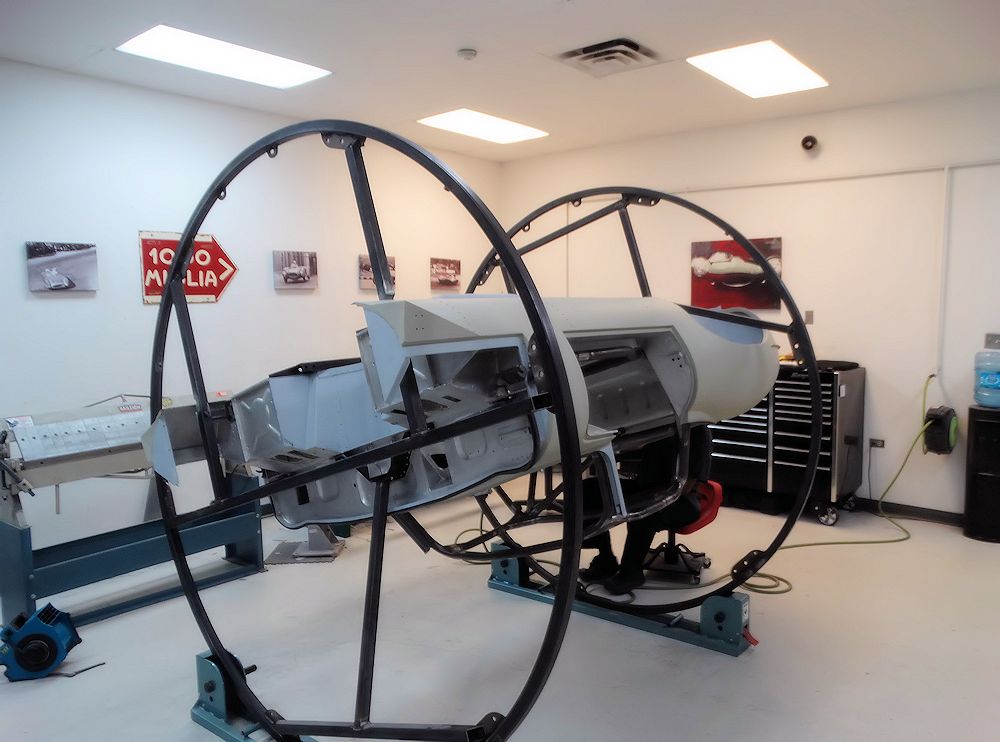
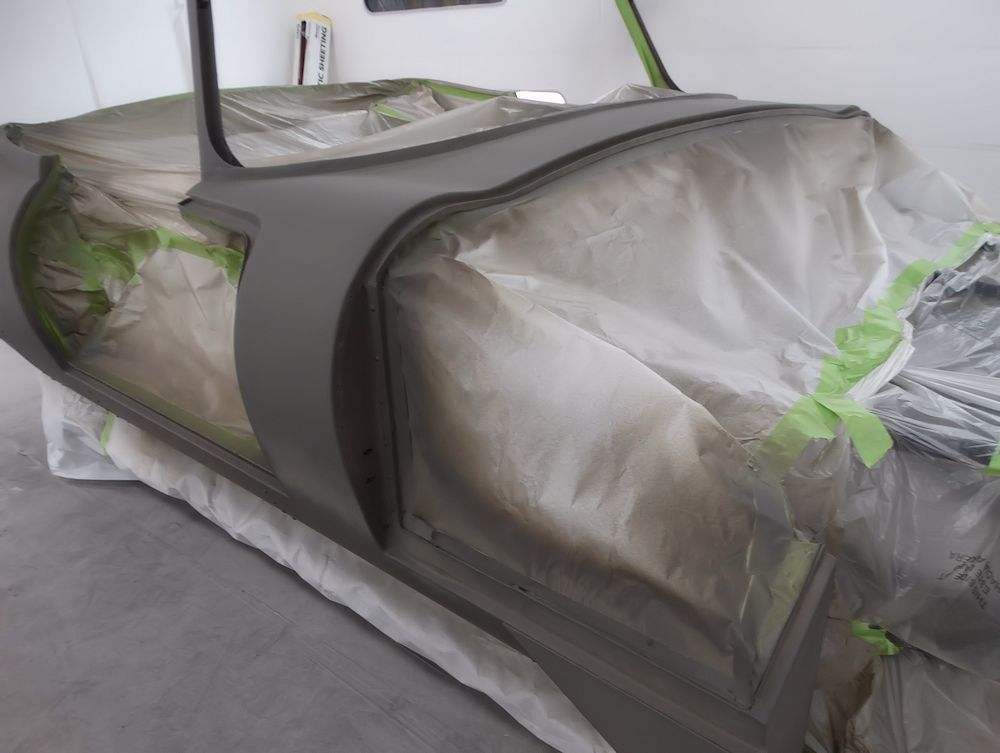
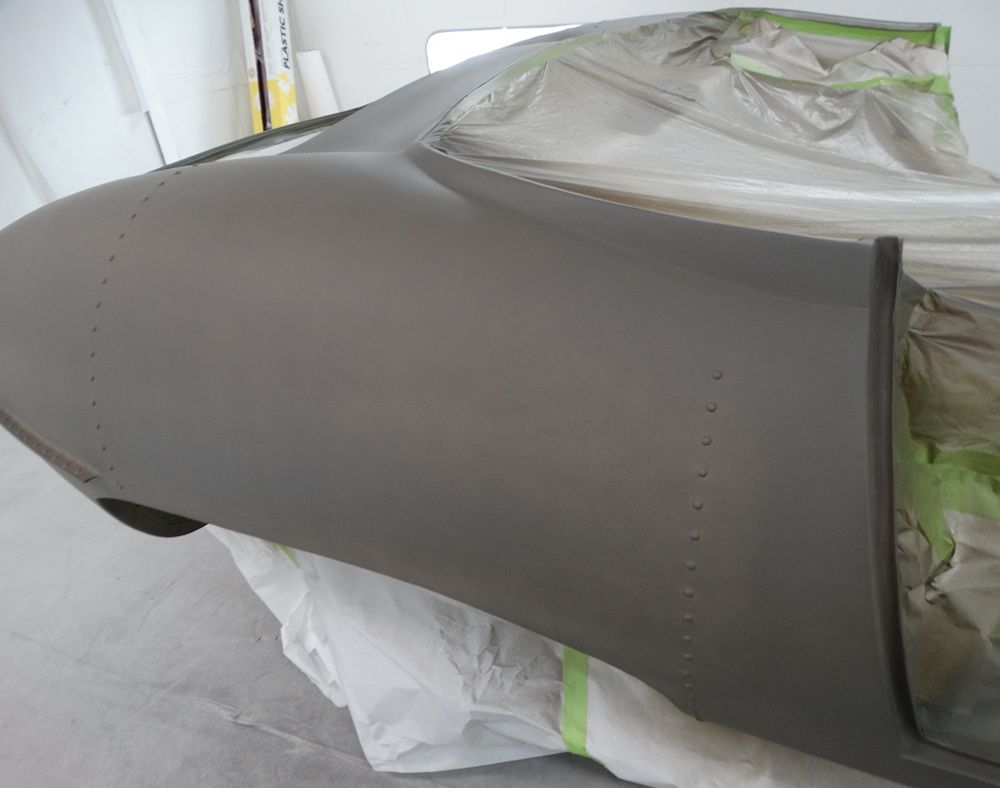
Earlier today we painted the main bodyshell Opalescent Gunmetal.
Time to put this car together!
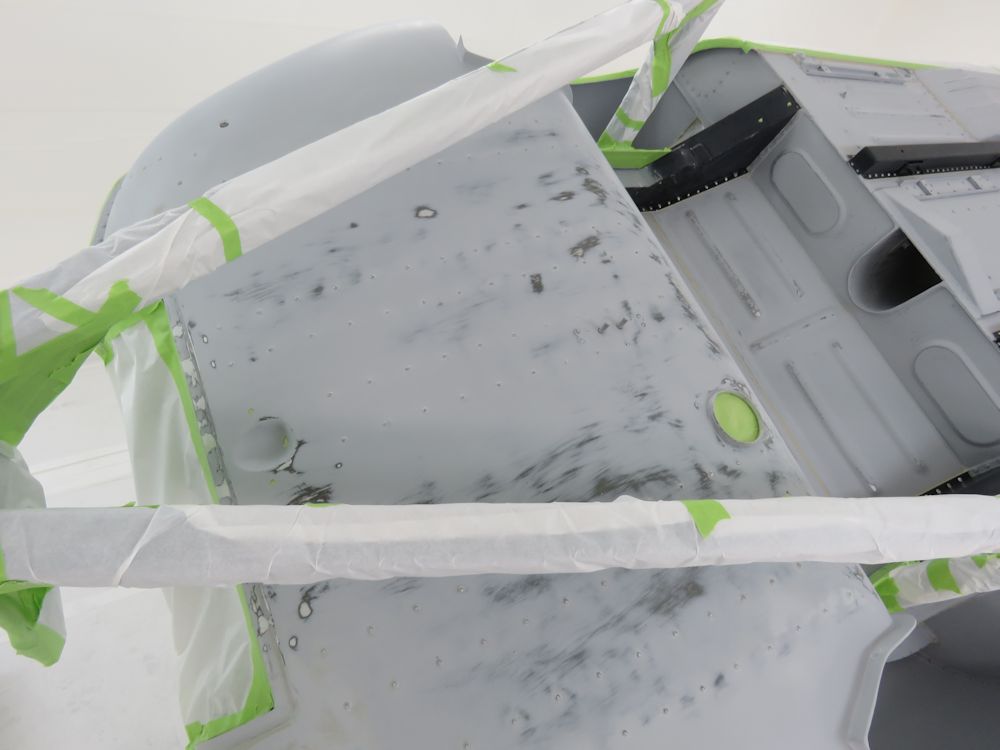
The underside of the floors will be first to be painted
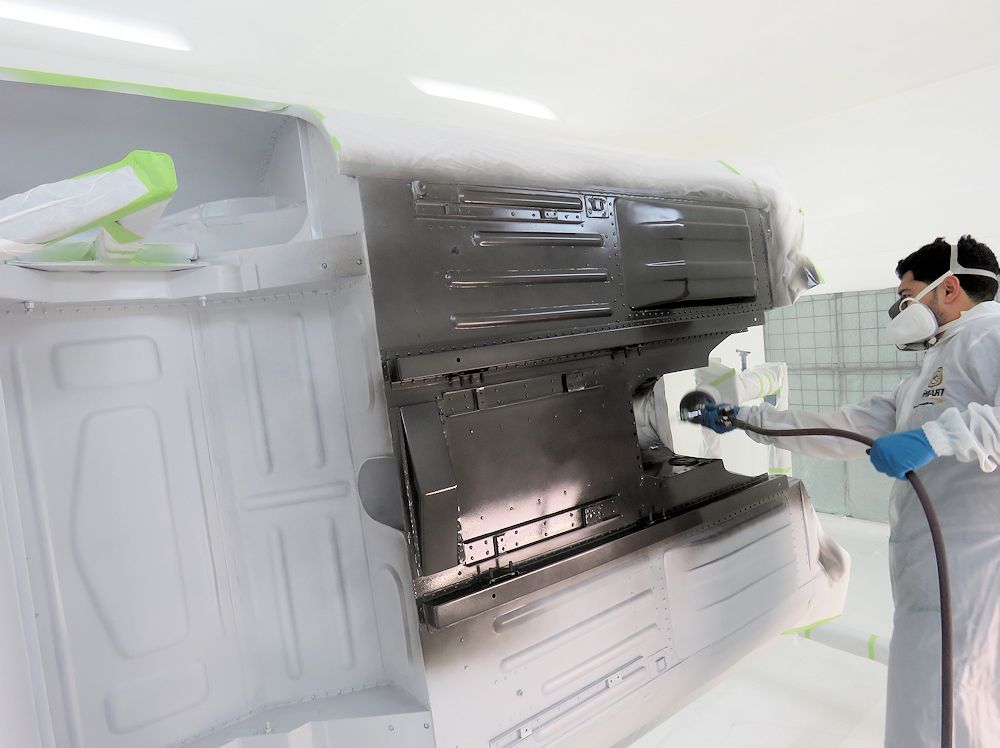
I am pleased to report that we have now begun the process of painting the Lightweight.
Gerardo applying the first of the Opalescent
Gunmetal paint
Sealed with epoxy primer
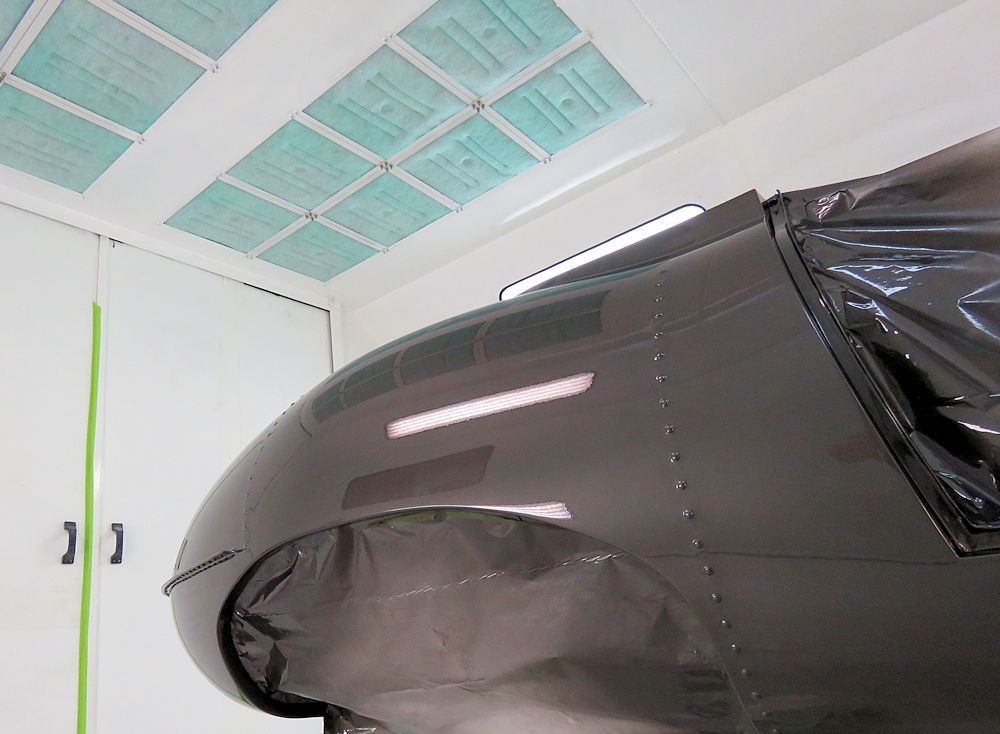
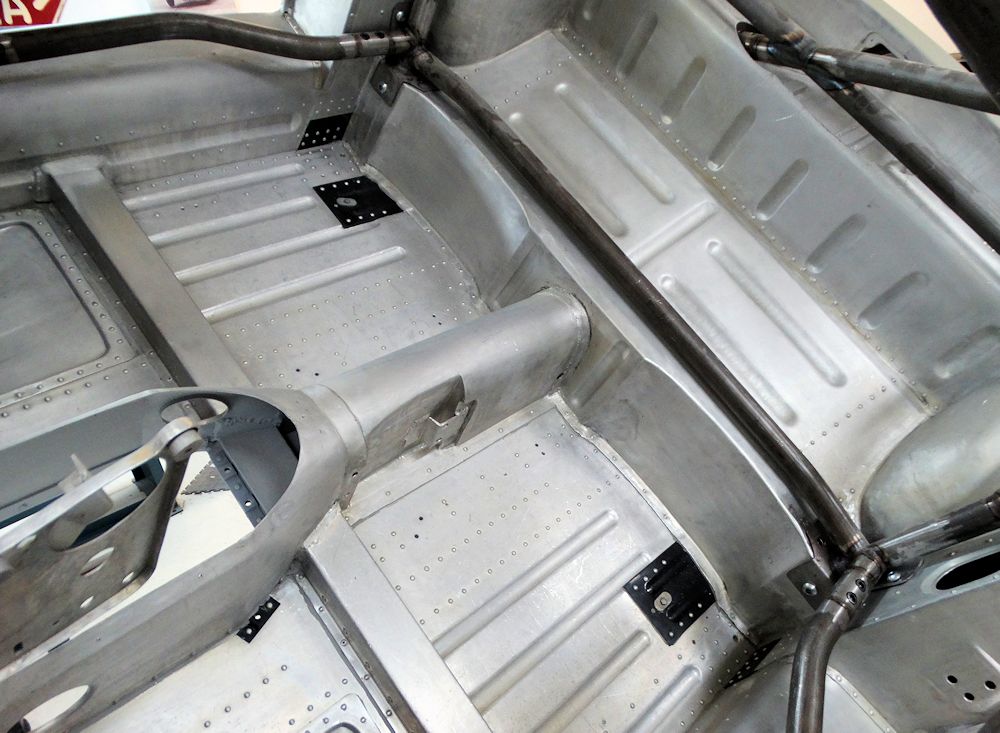
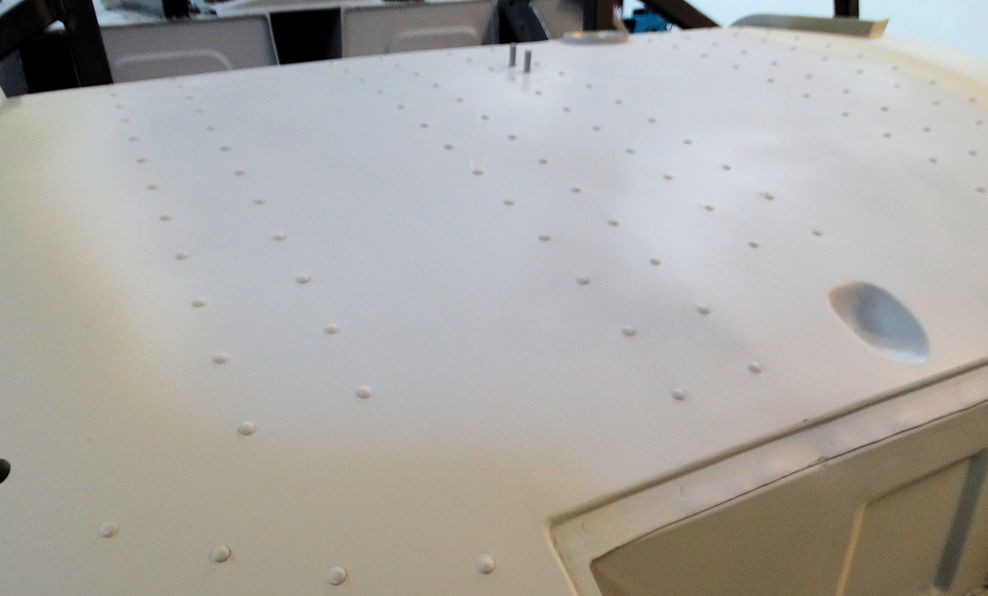
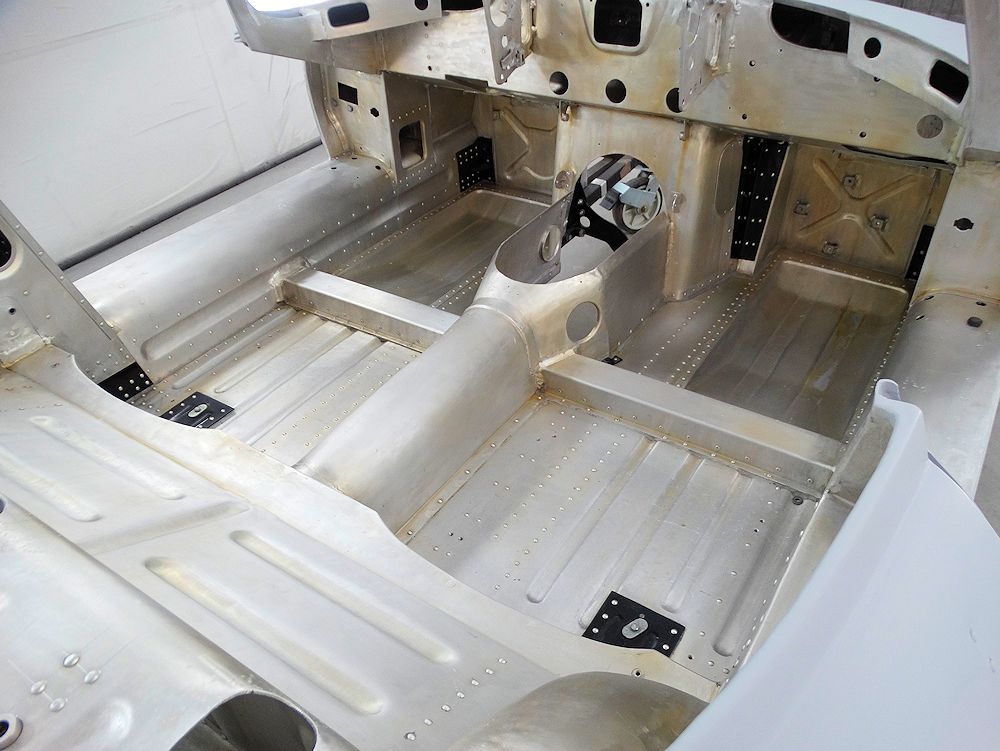
Note all the rivets which are a feature of
the Lightweight's construction
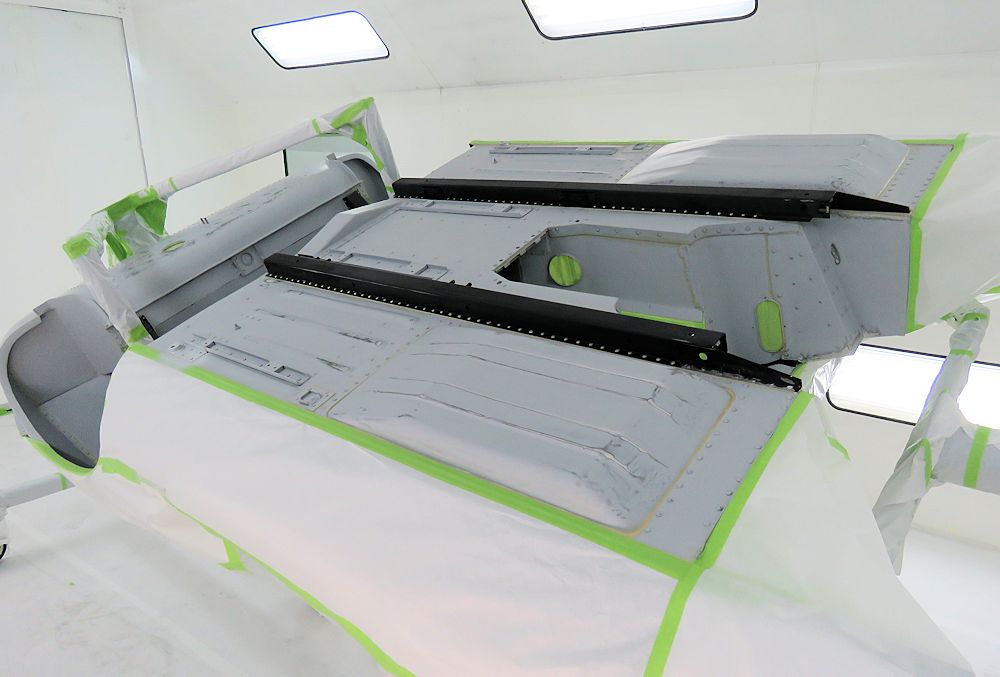
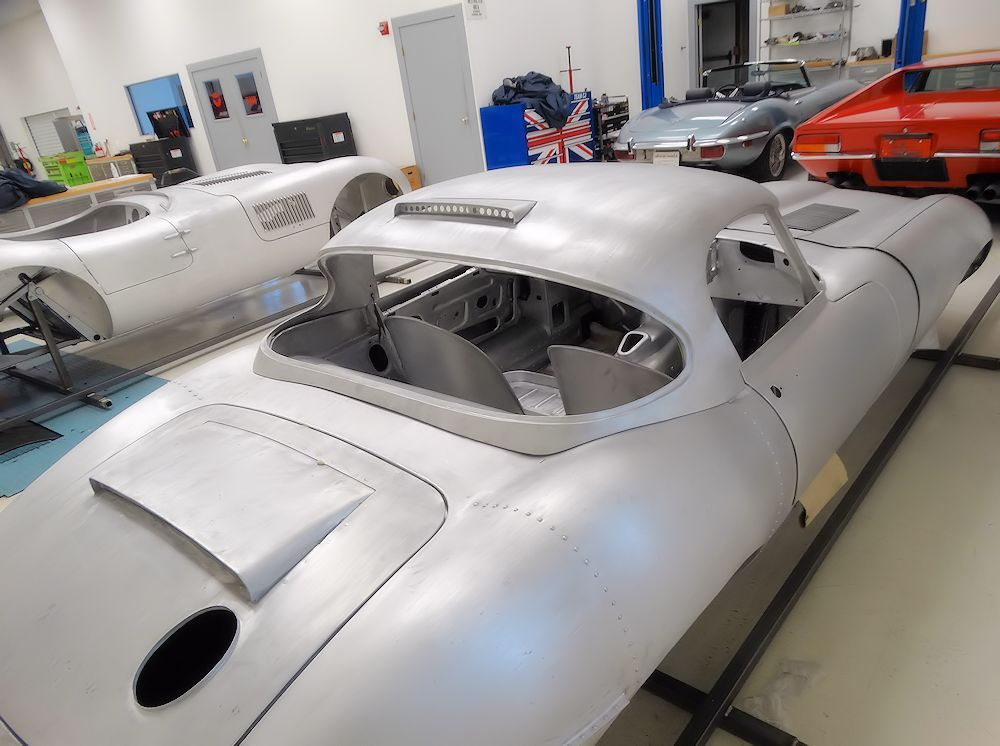
Panel fit has now been finalized
With all of the body and panel work completed, the lightweight is now only a few weeks from its Opalescent Gunmetal paint.
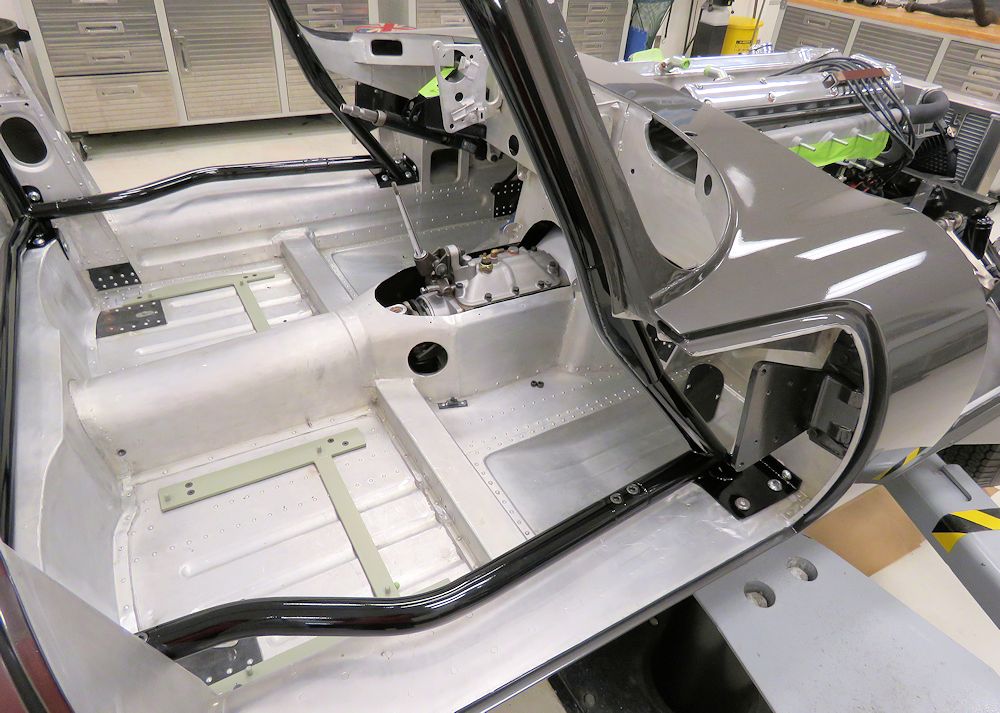
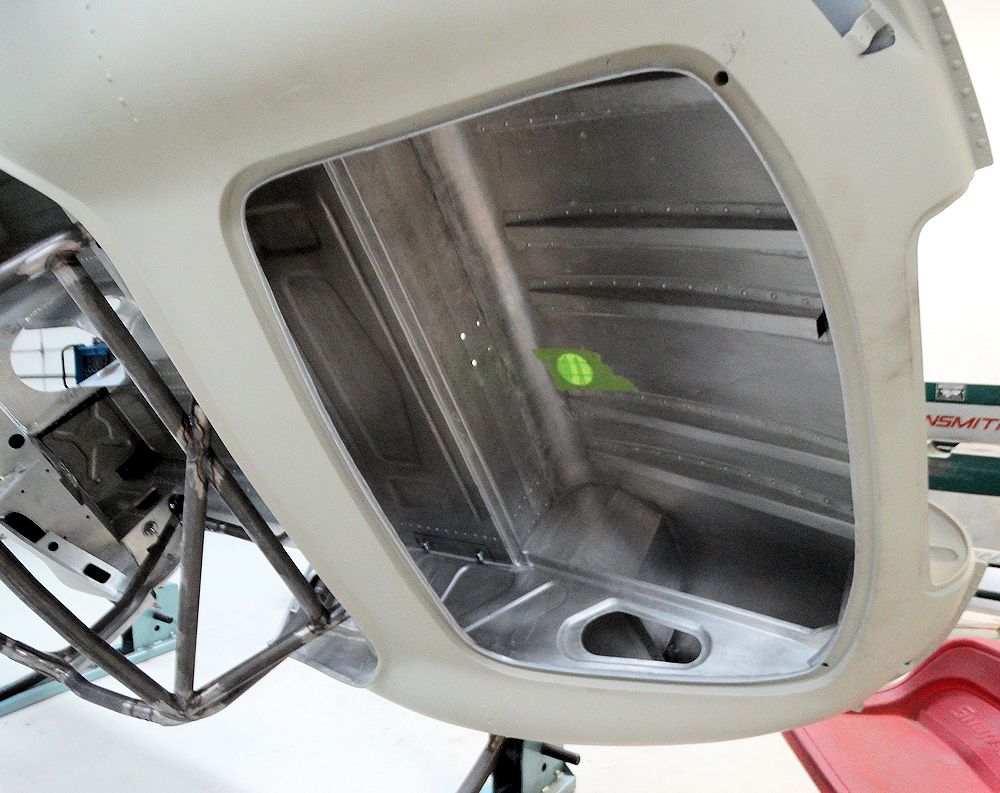
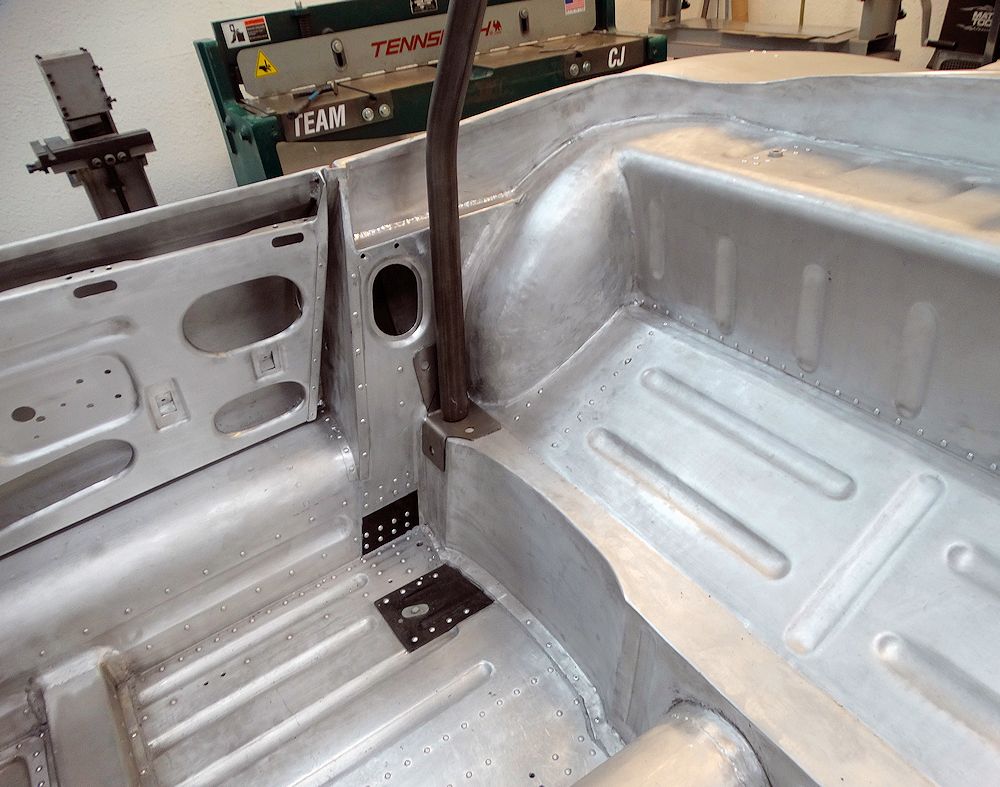
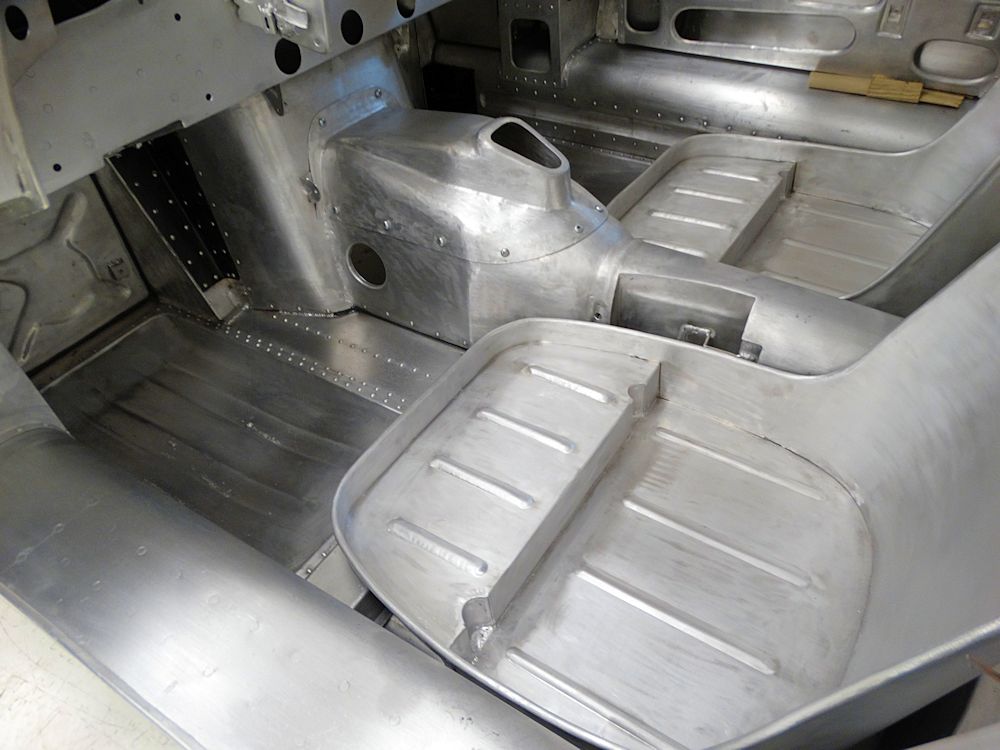
Interior of the car will be left bare aluminum
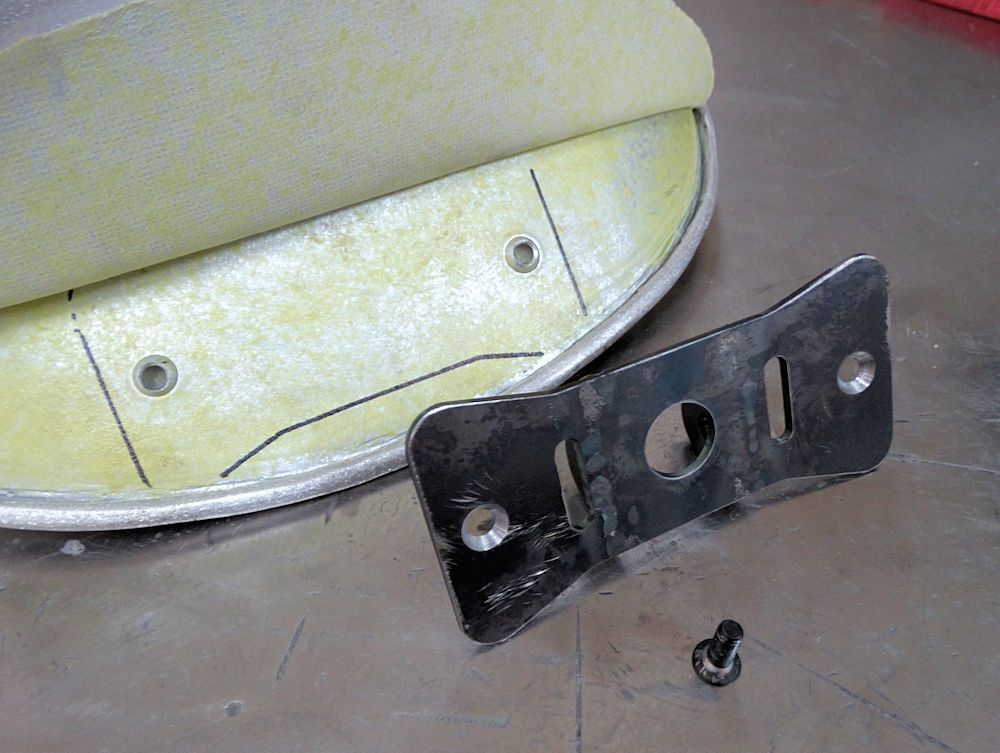
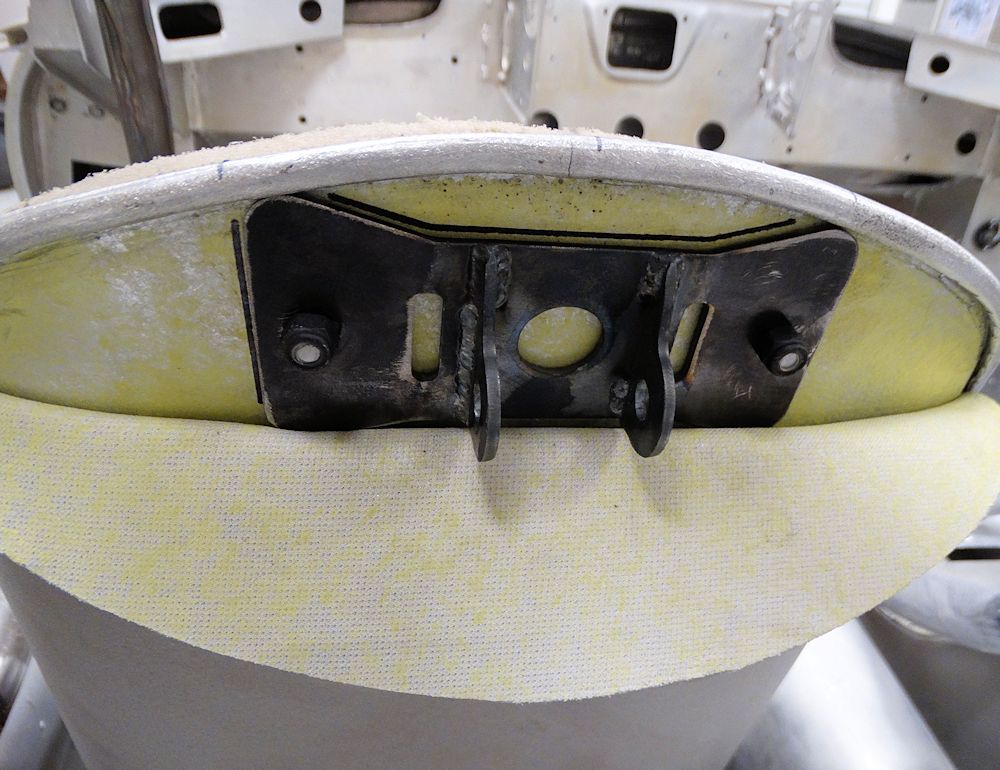
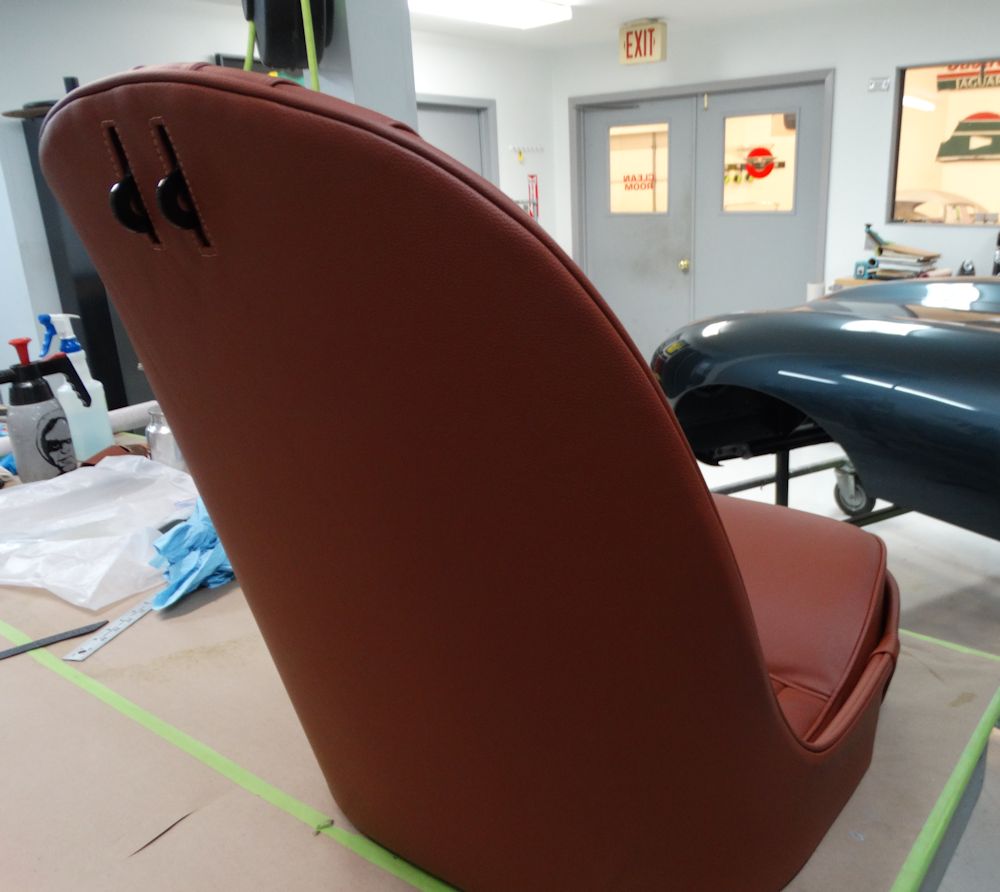
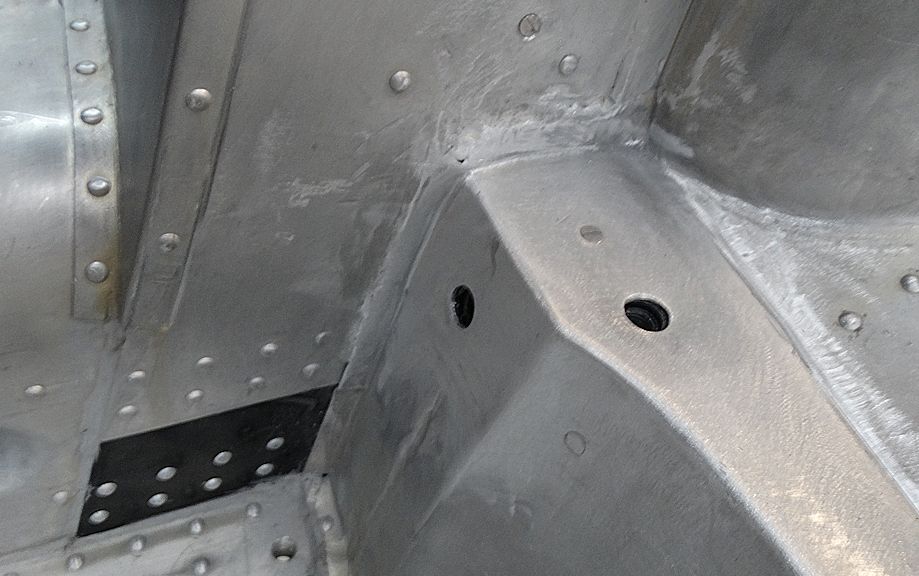
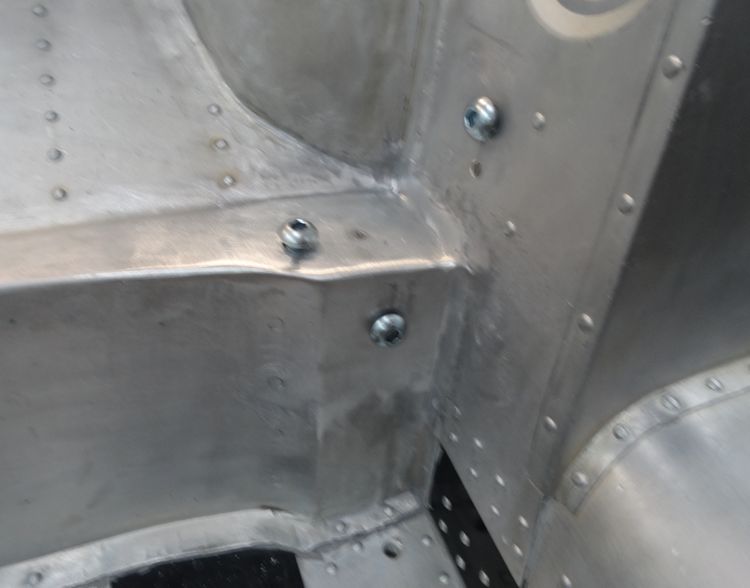
Seat back support brace for driver's seat
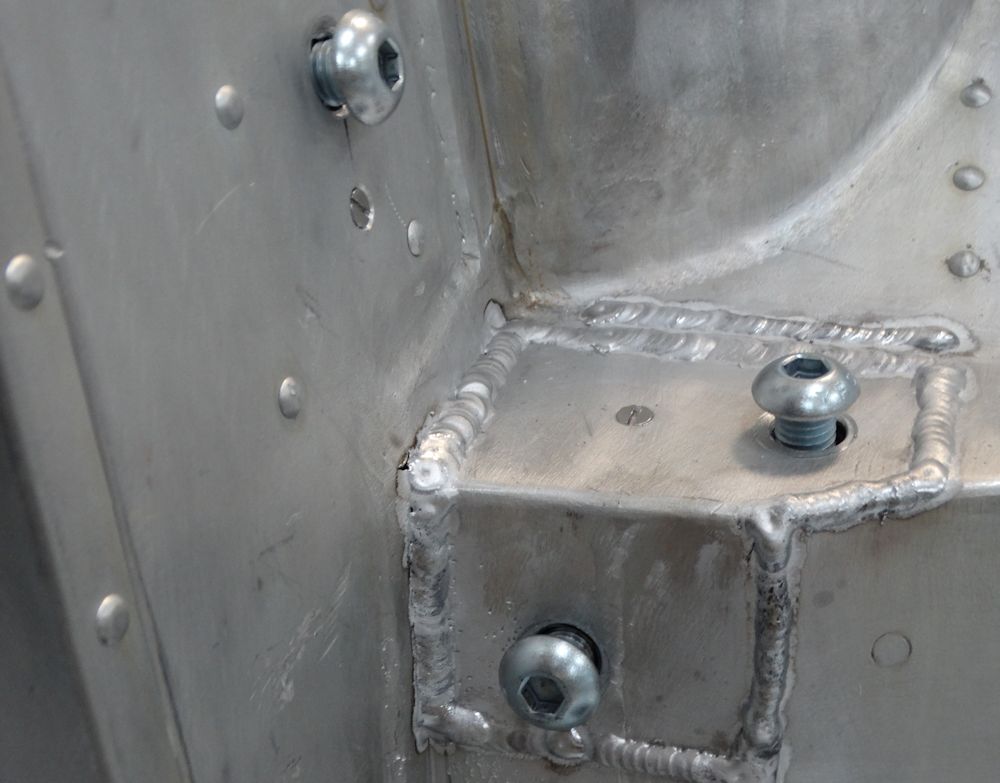
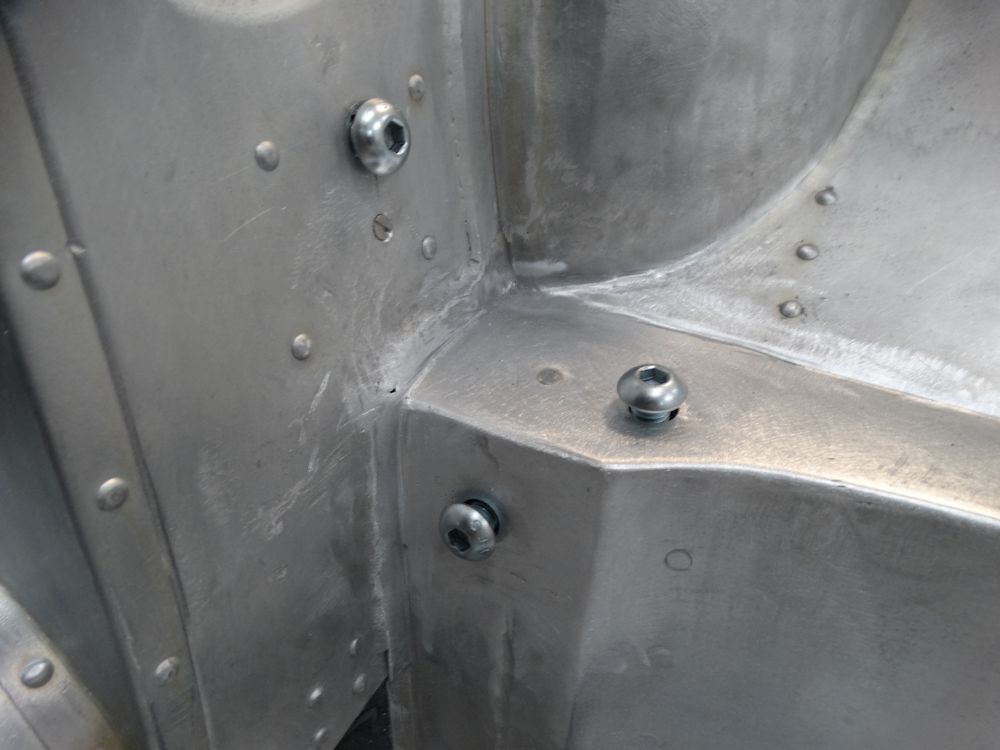
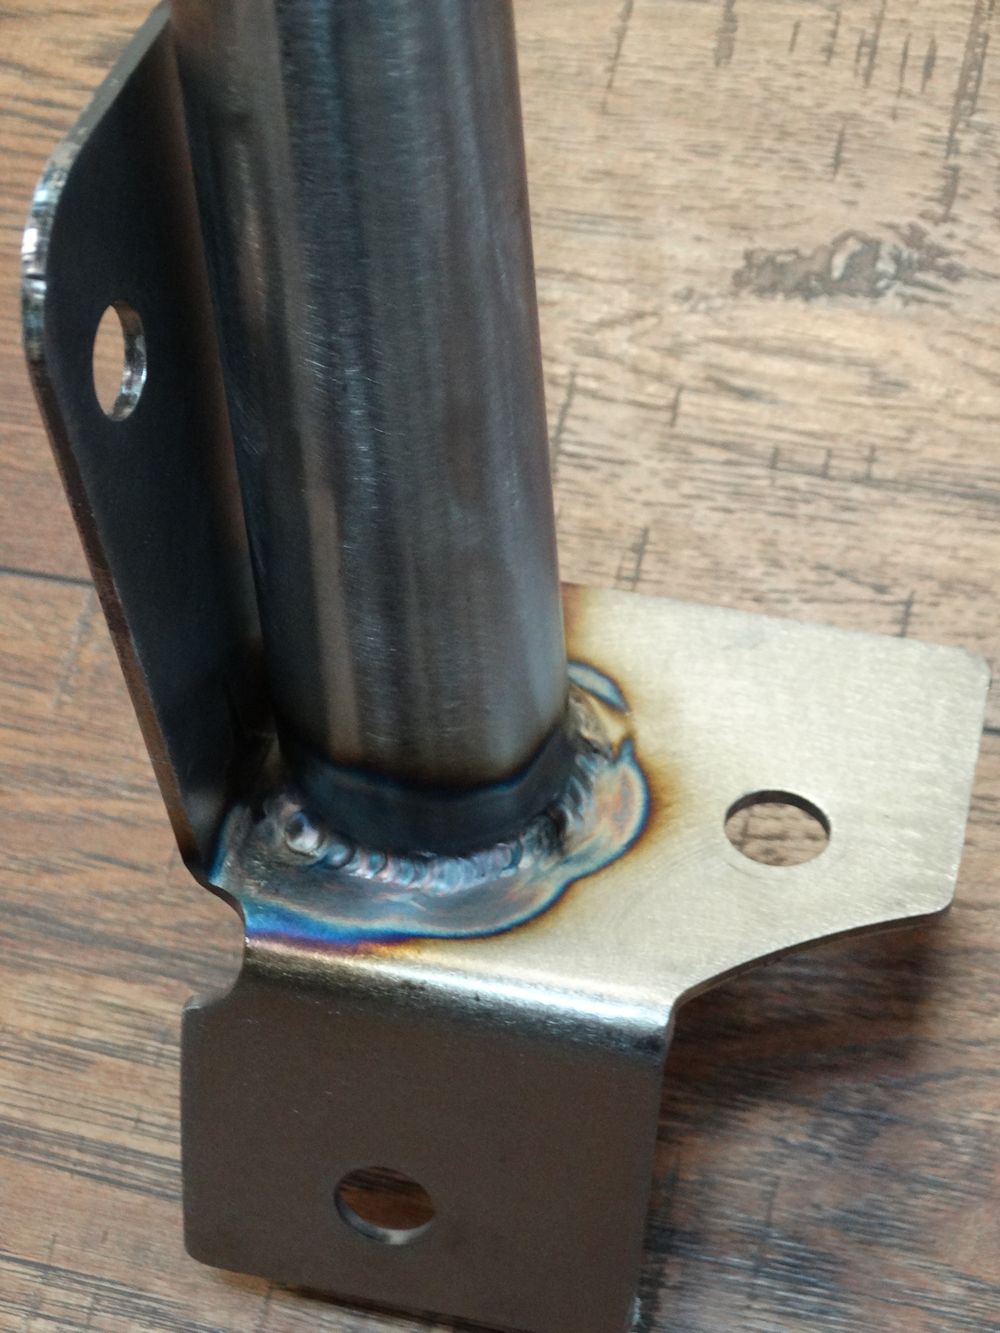
Reinforced steel frame fabricated for mounting
seats to floor
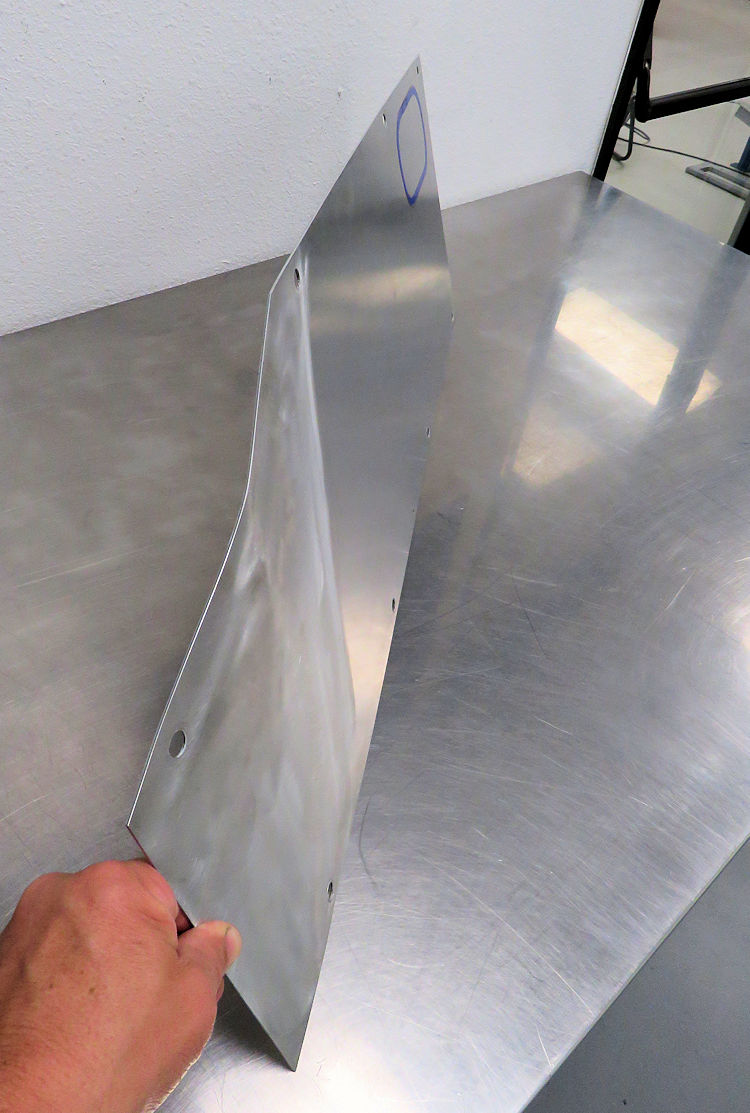
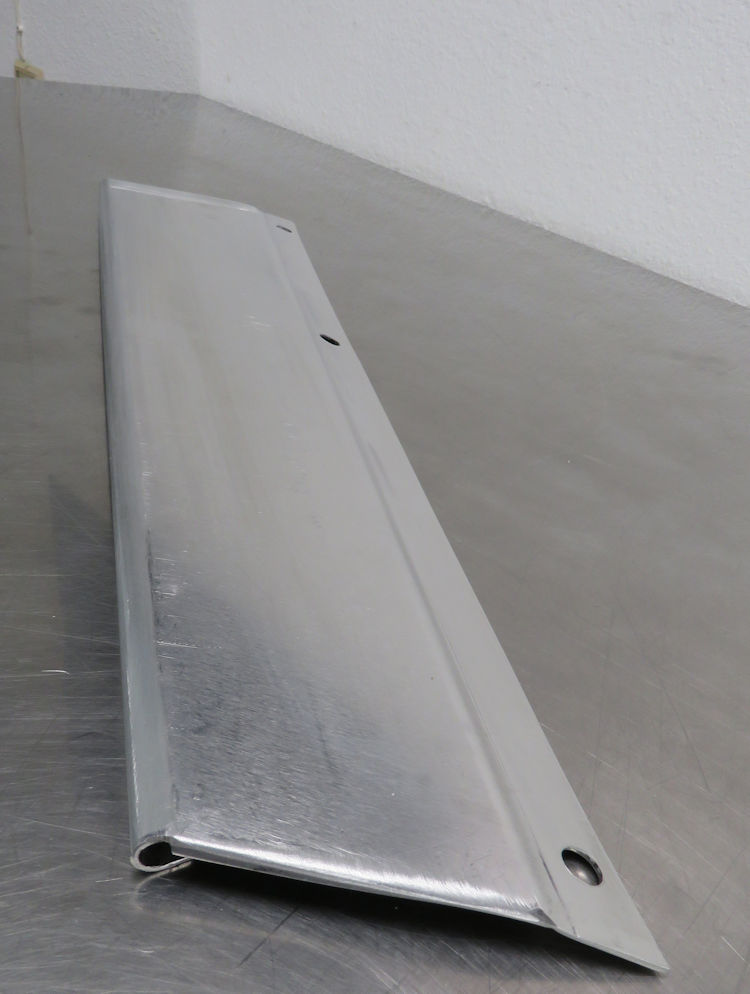
Exposed rivets a feature of the quarter and
rocker panels
Bracket is tied to the main cage
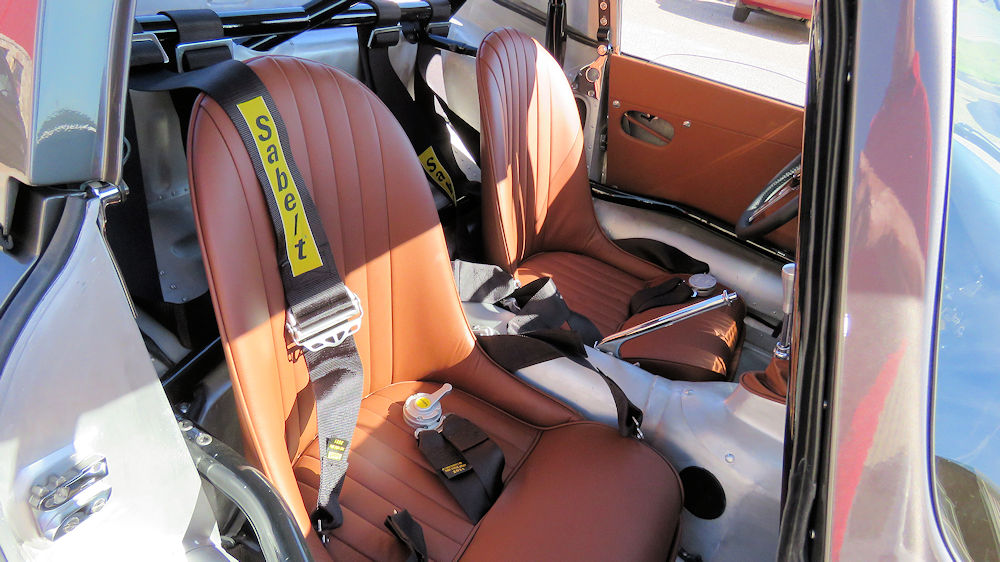
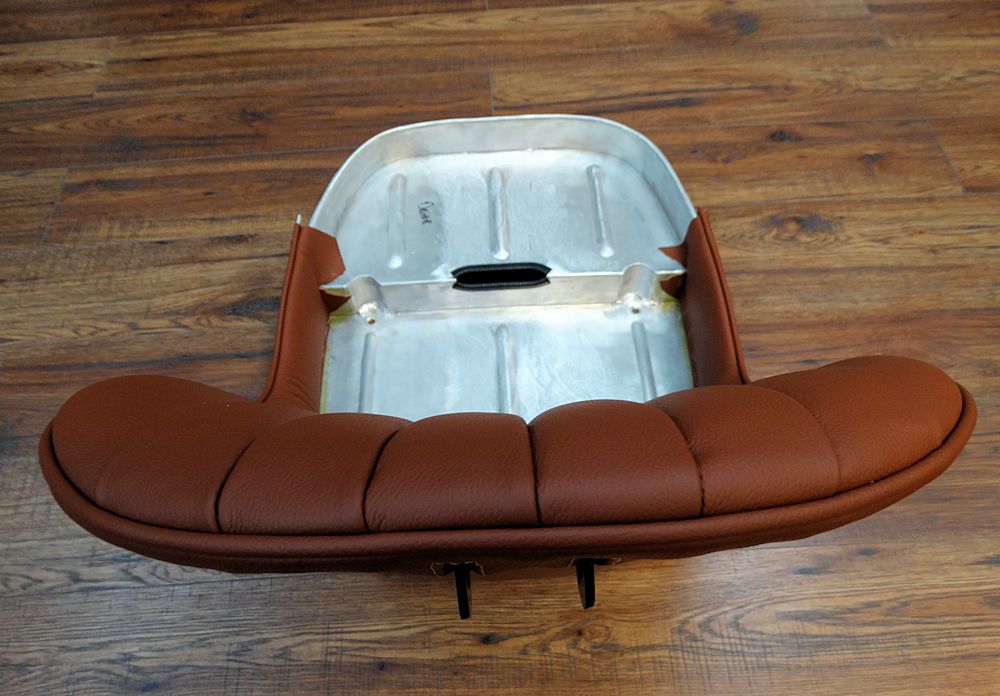
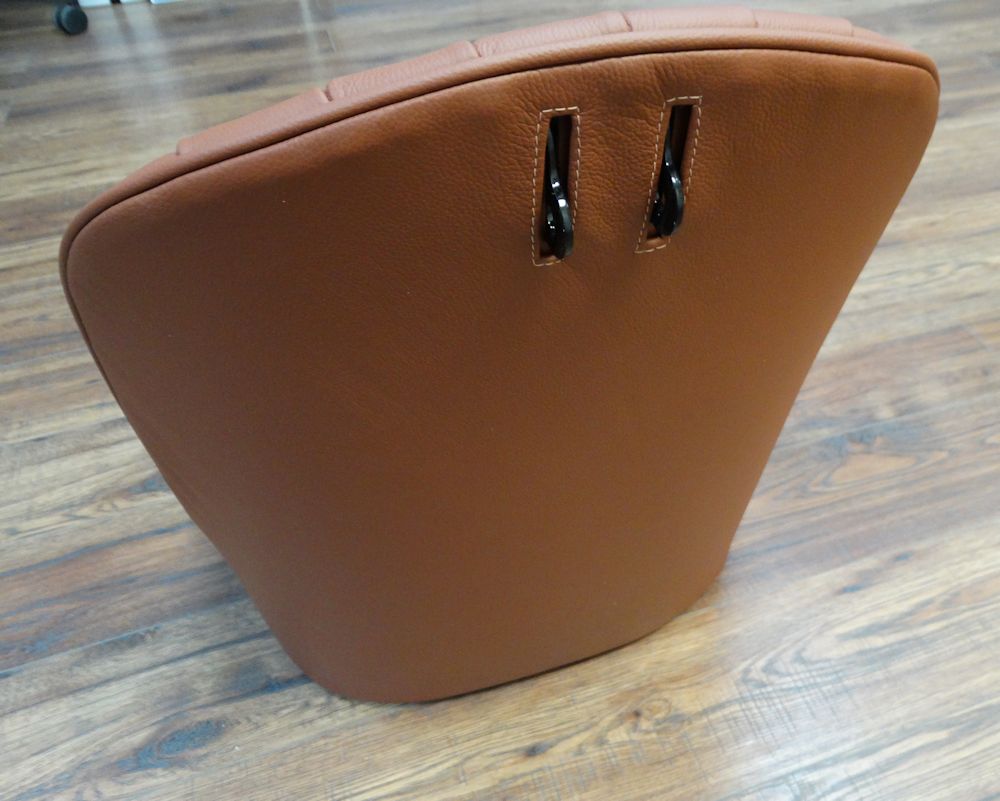
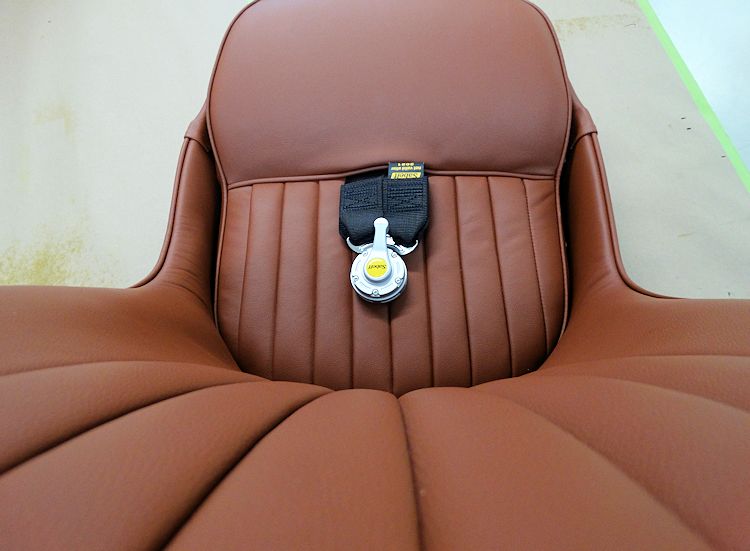
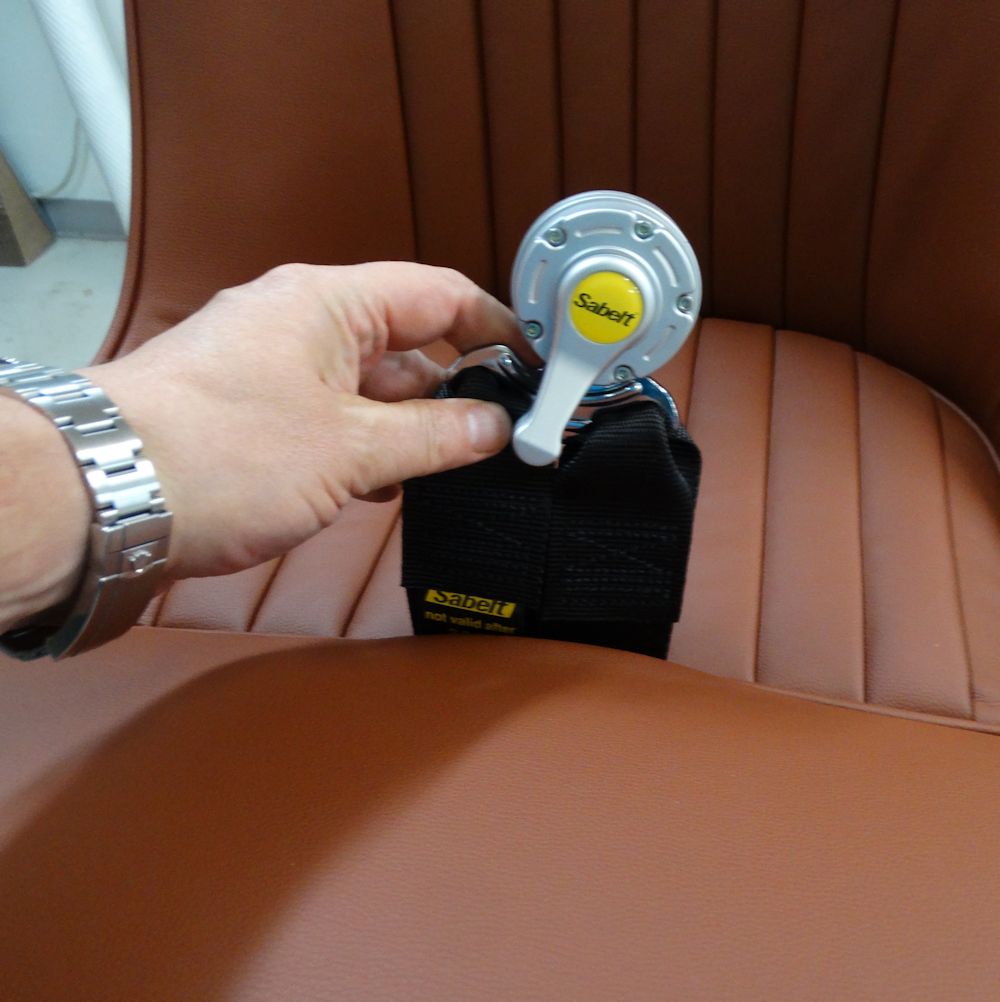
Submarine belt installed through seat base
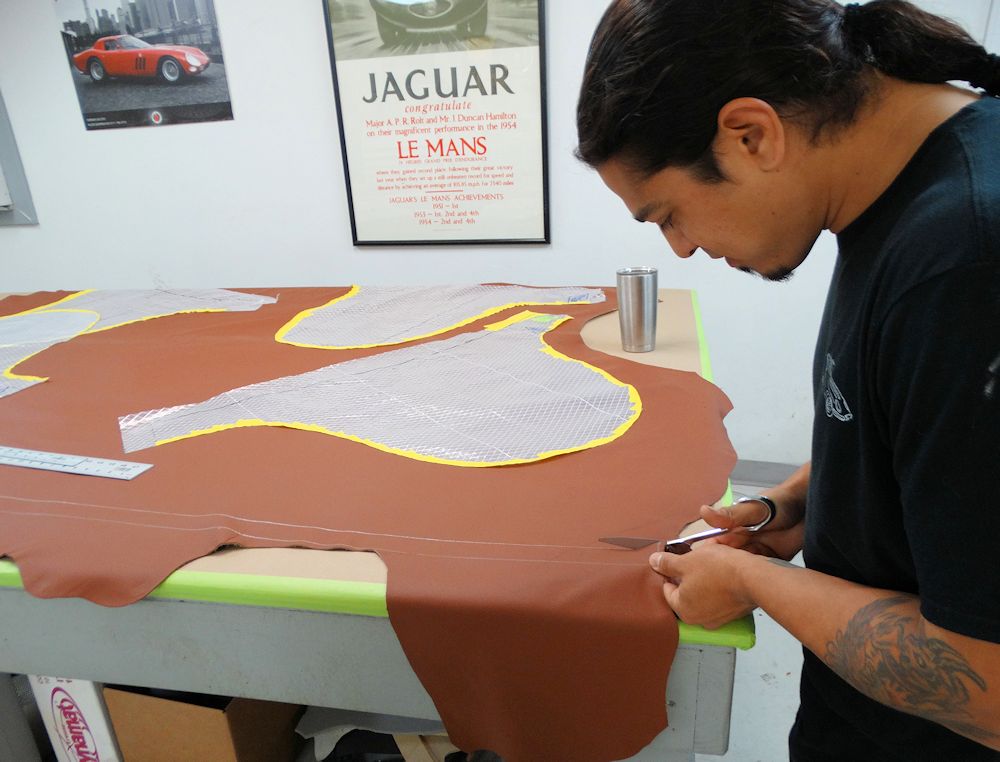
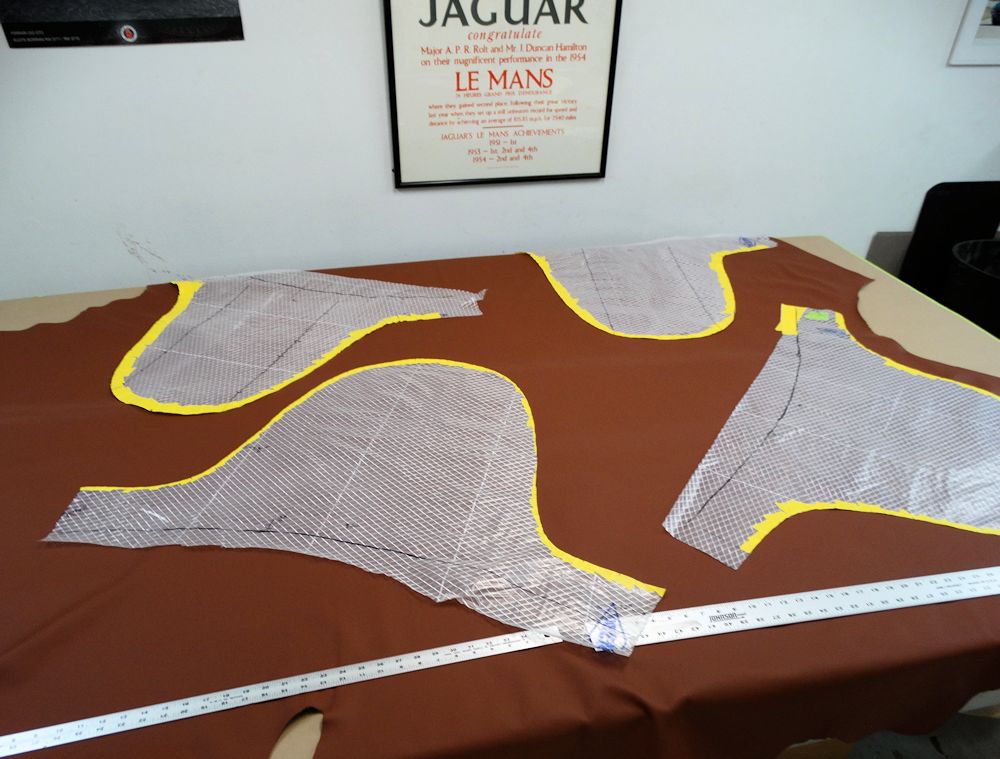
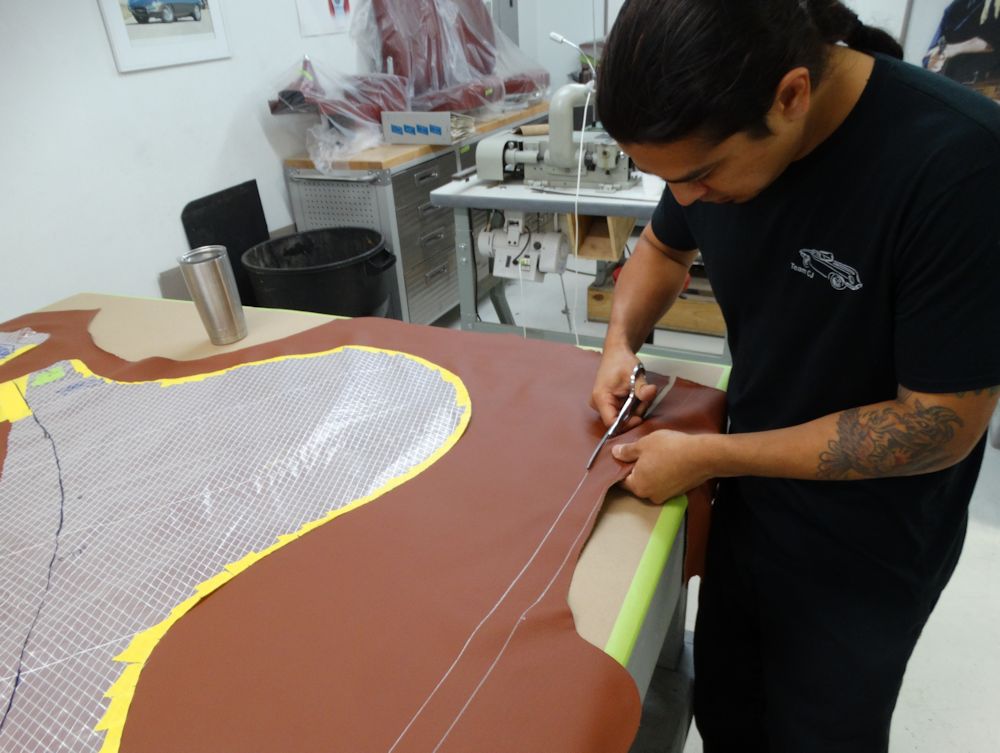
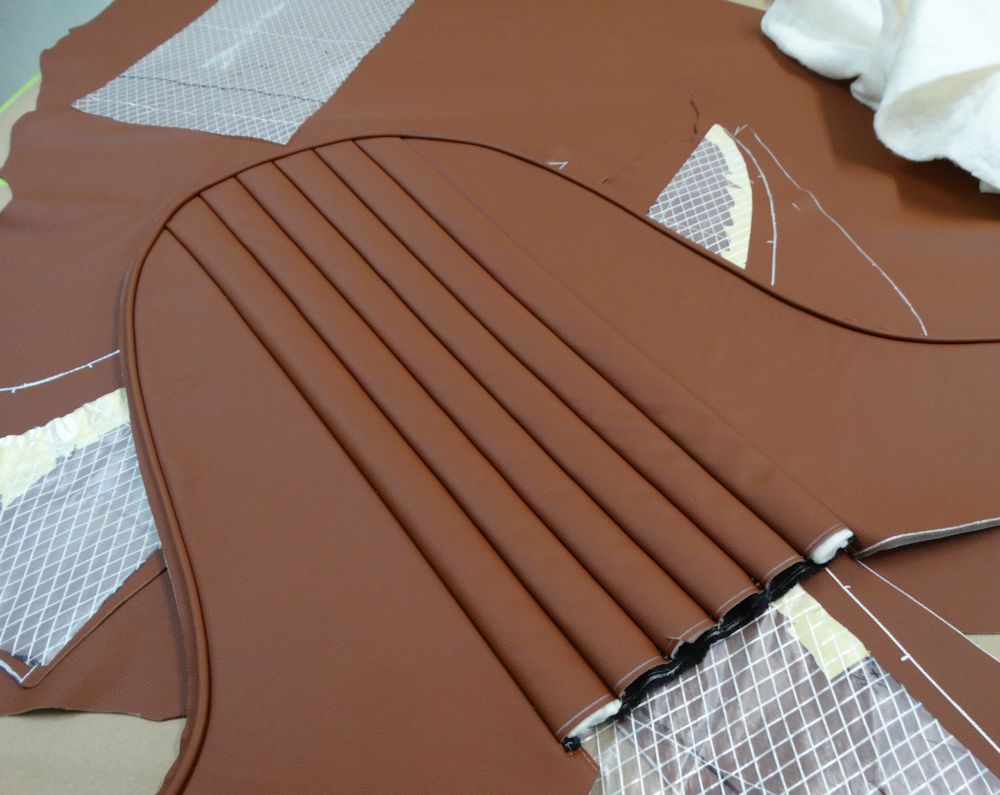
Carlos did a beautiful job fabricating and installing
the tan hide seat covers
Carlos busy making your hide seat covers..
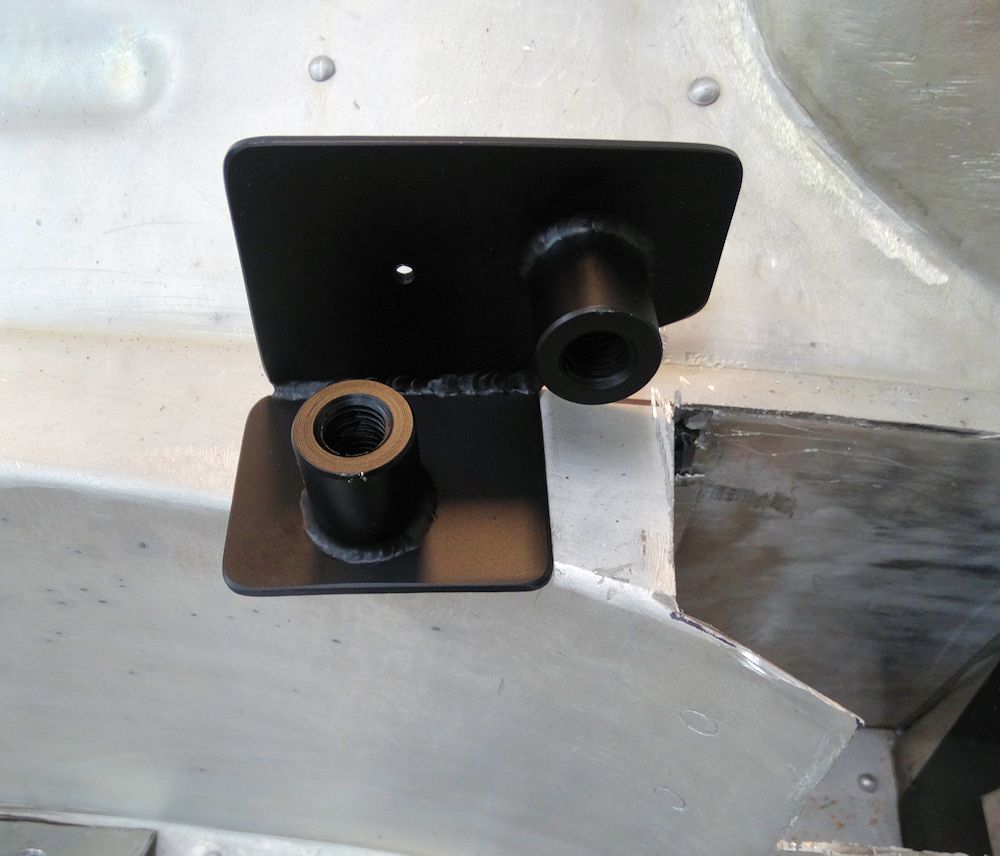
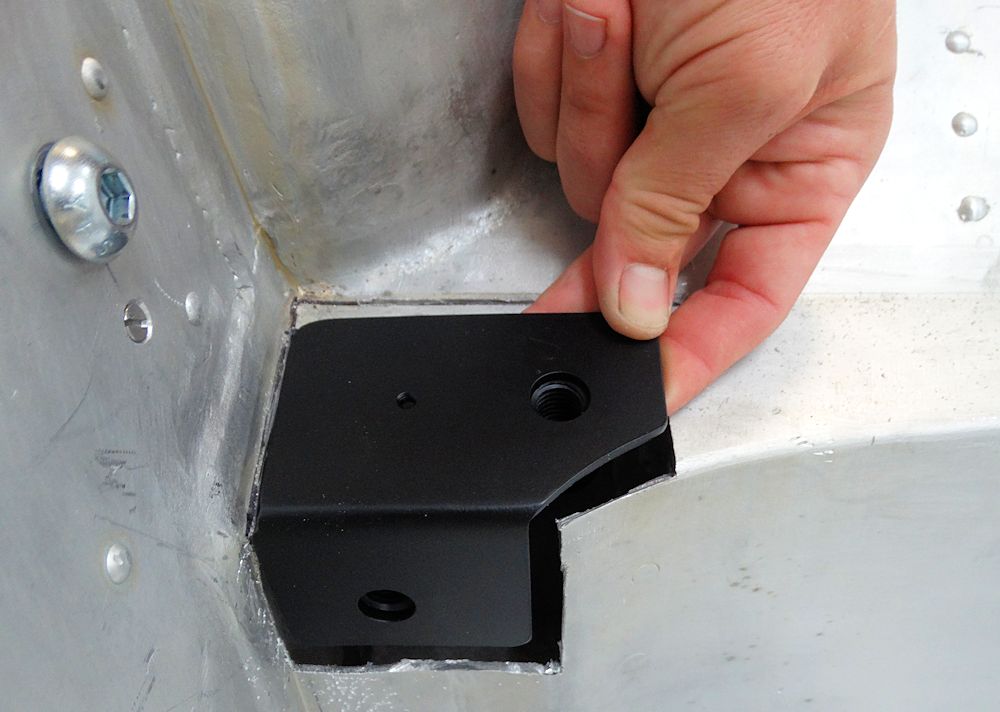
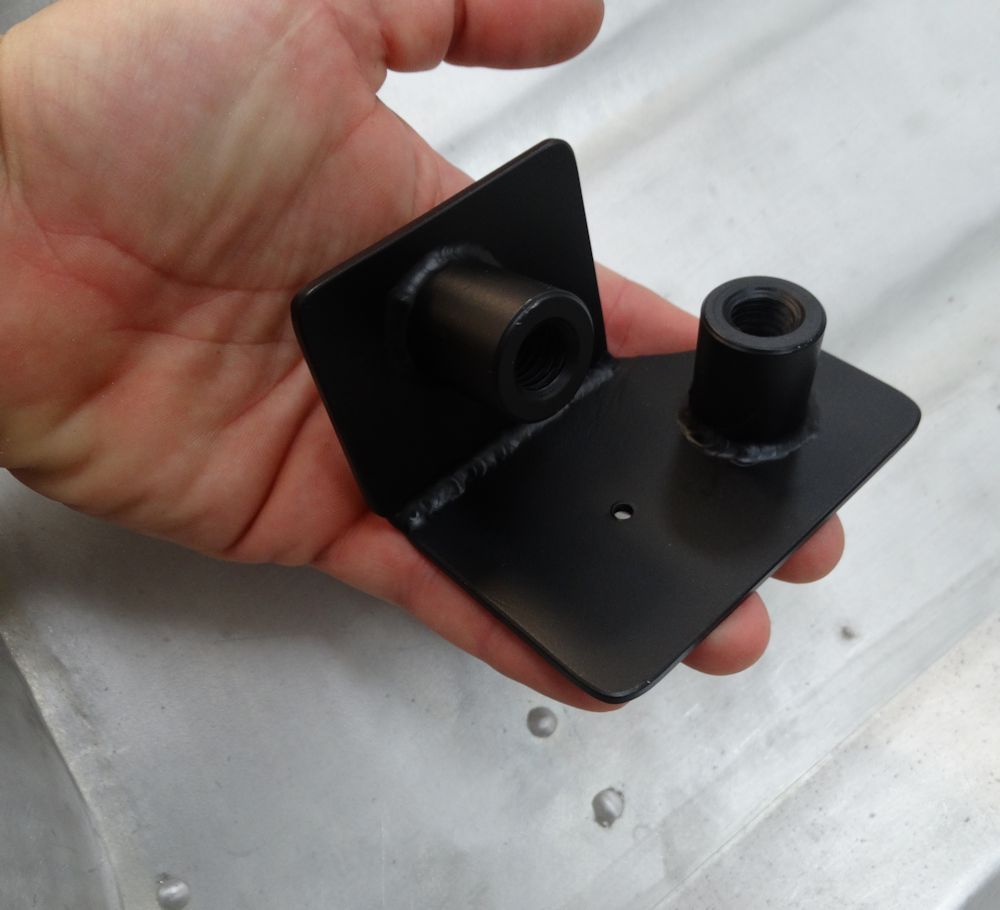
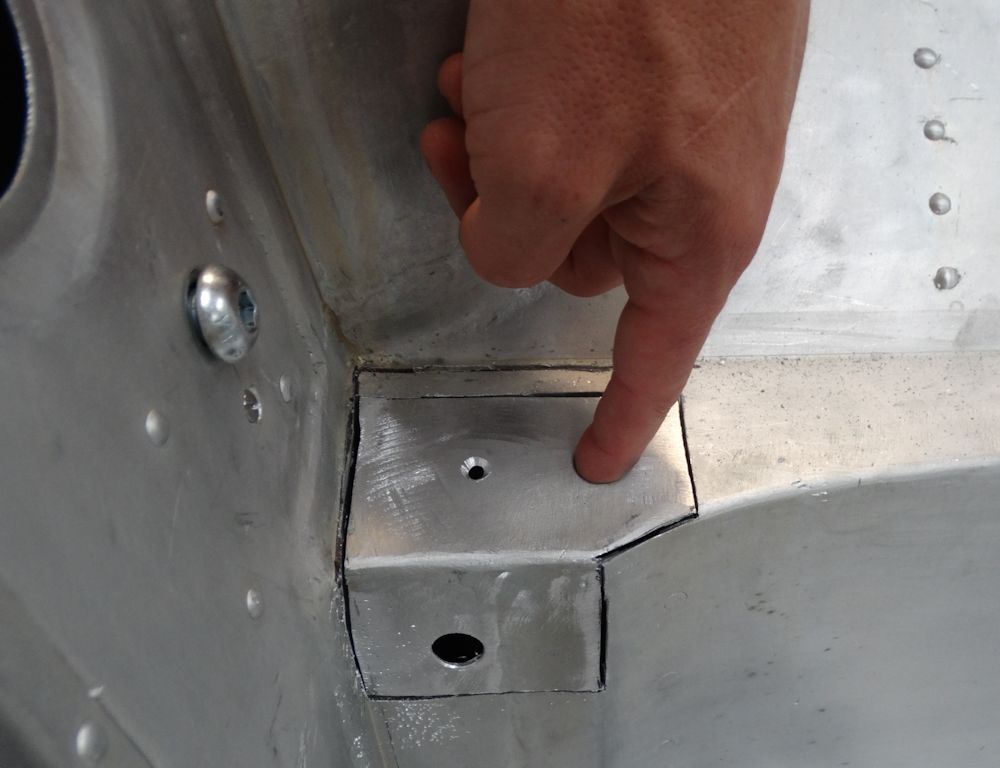
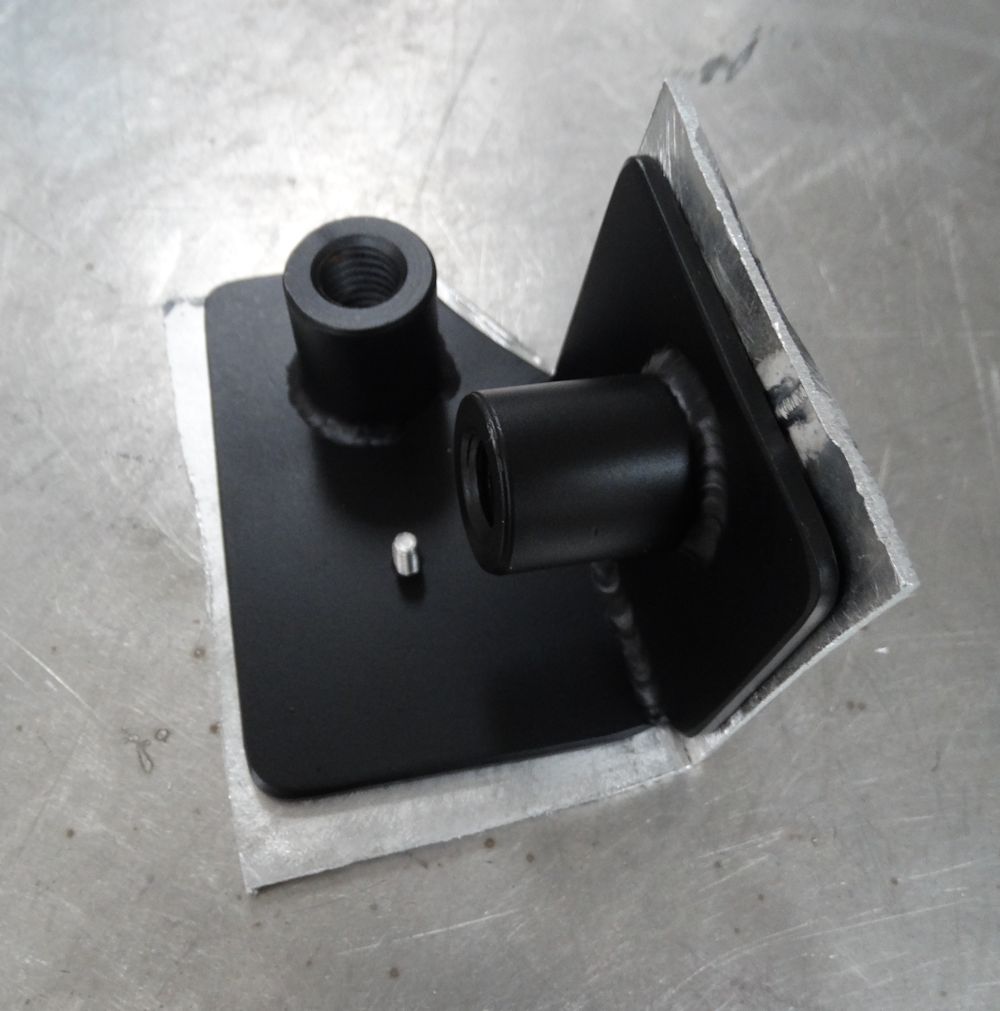
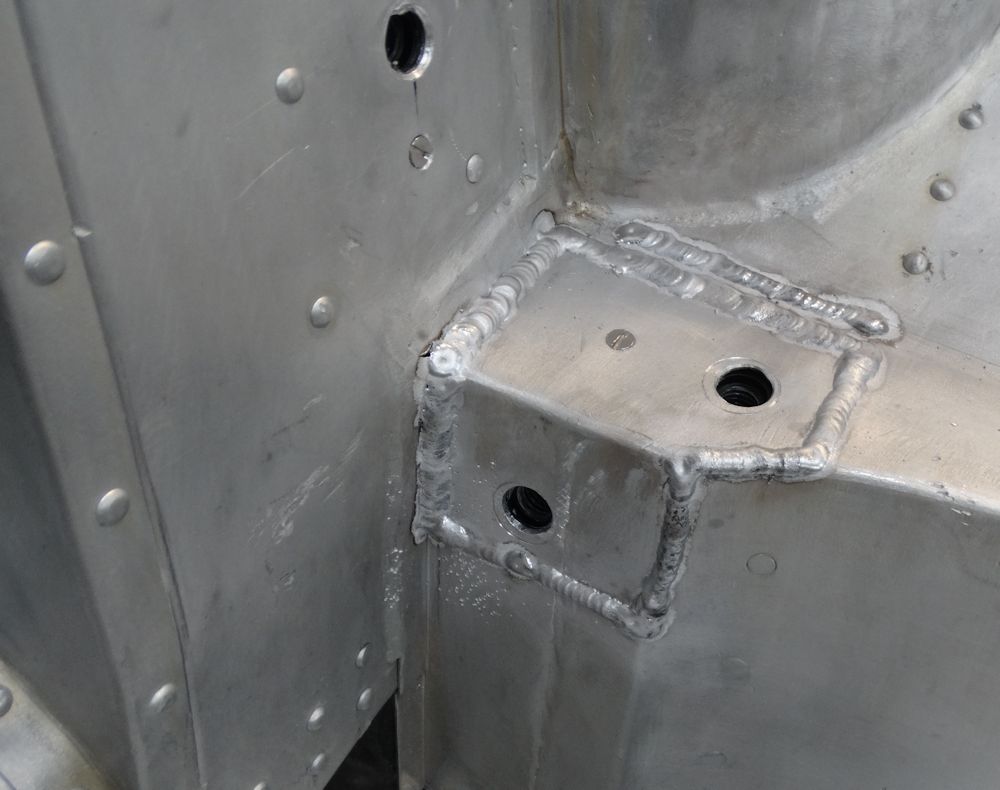
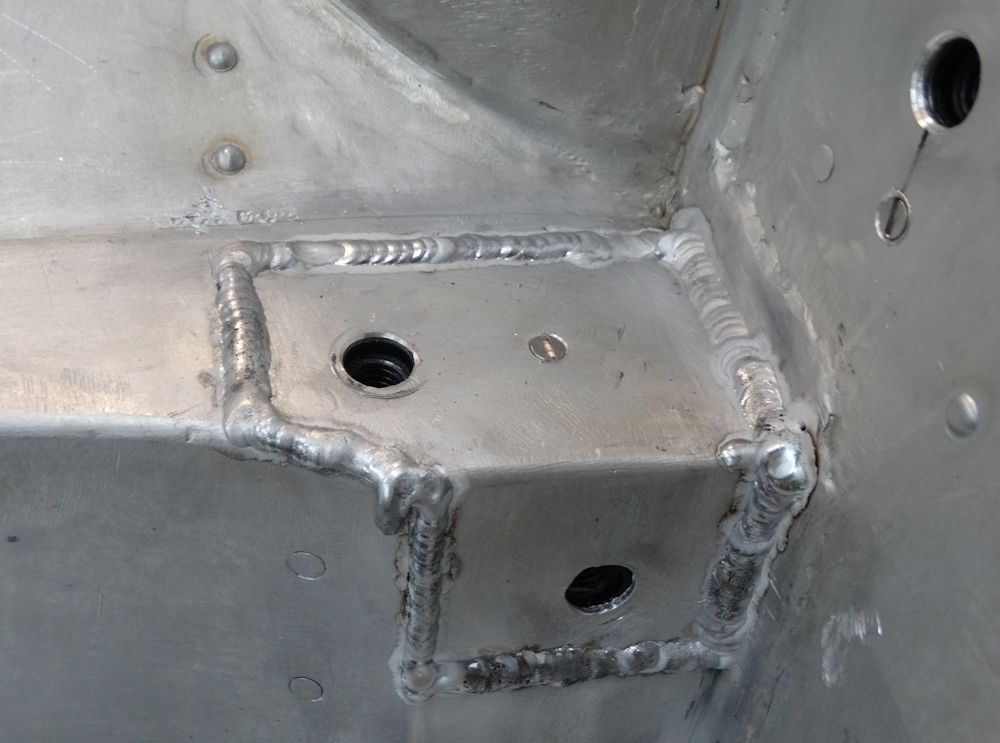
Threaded steel mounting plates will be positioned
beneath the aluminum skin
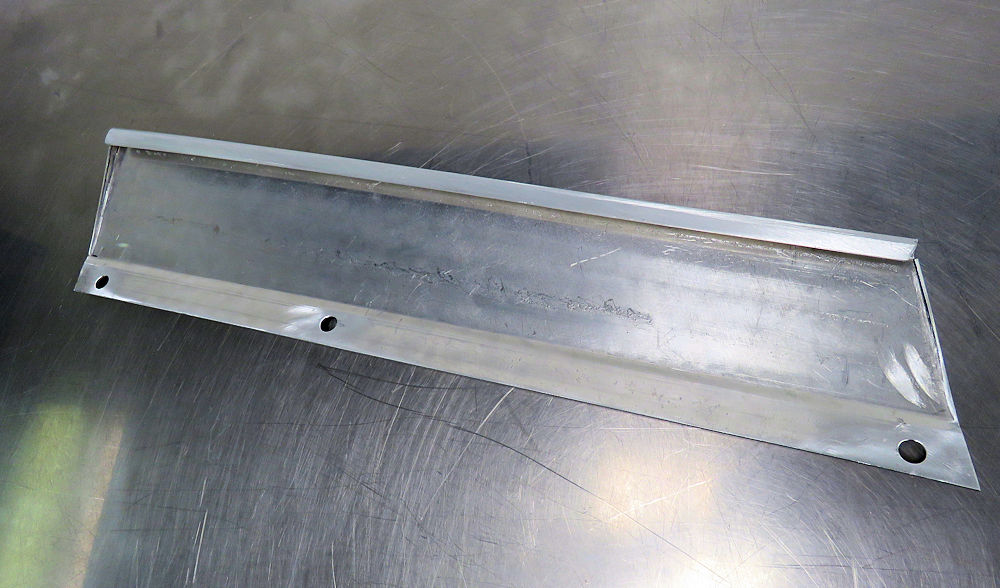
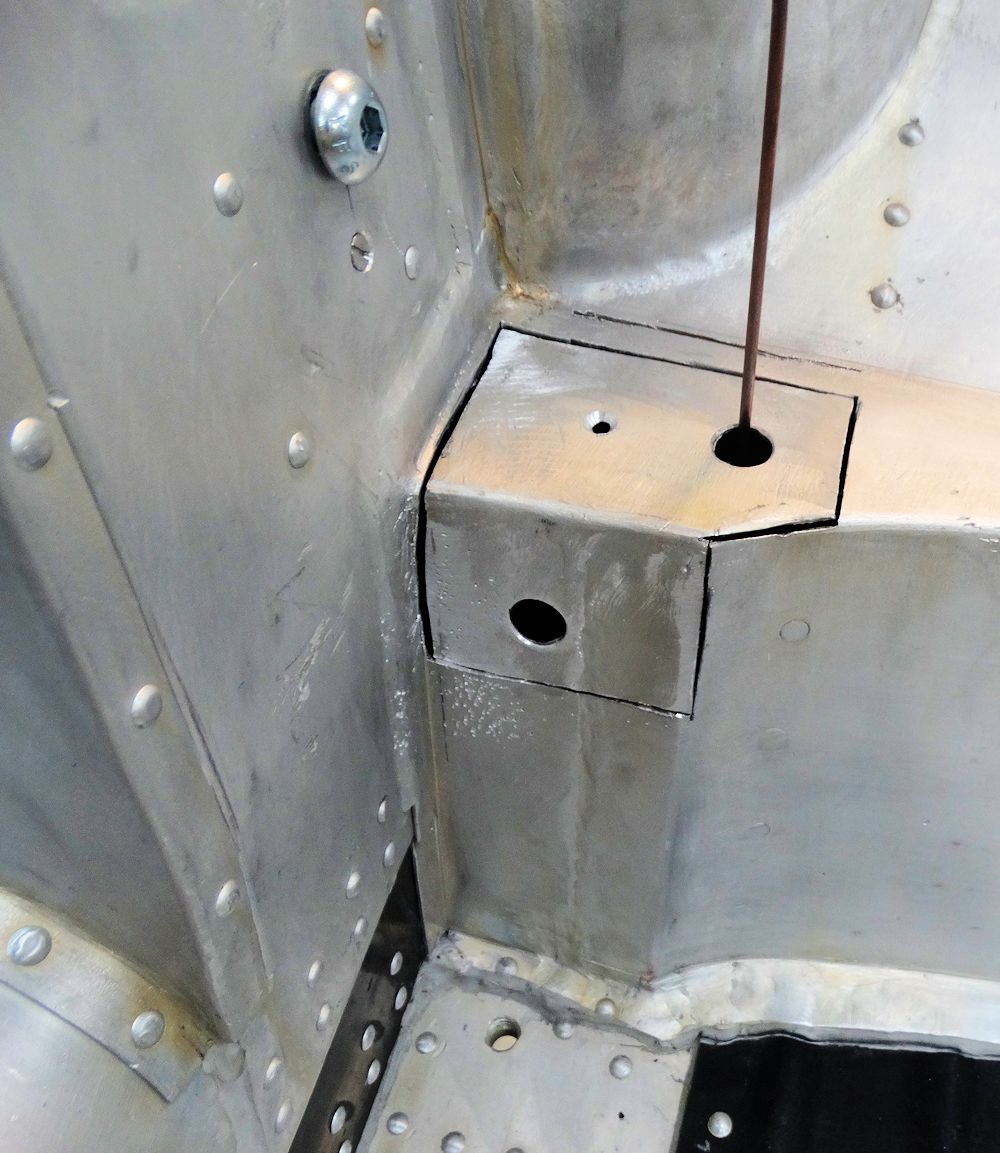
Welding the alloy skin back in place
Repeating the process on the other side of the car
Cage is now bolted to the steel brackets
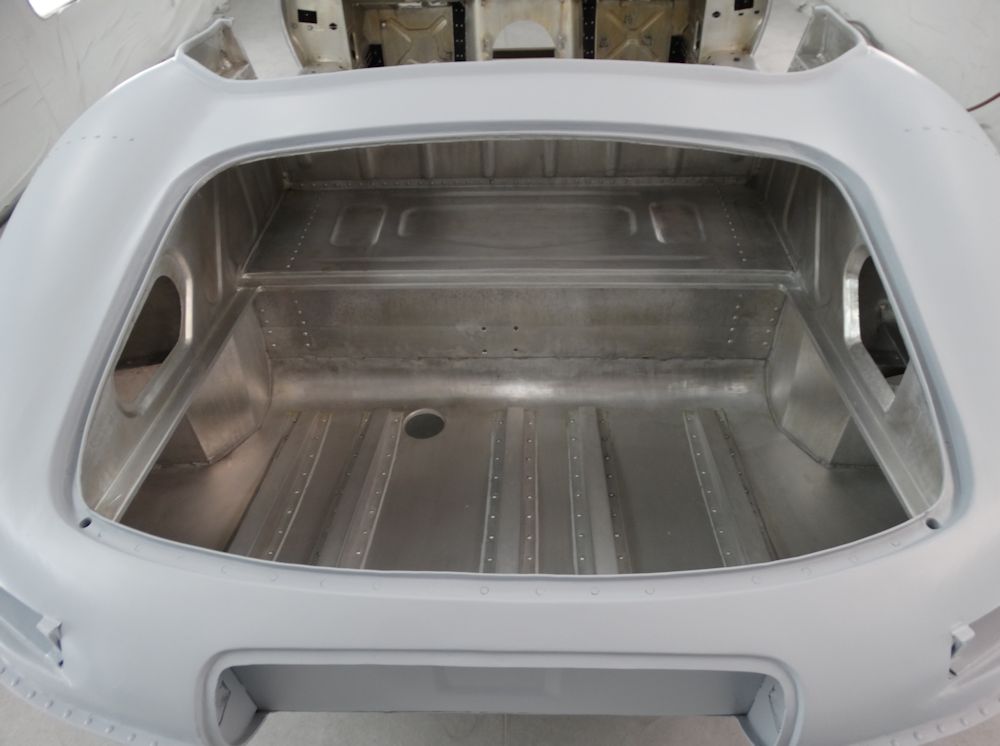
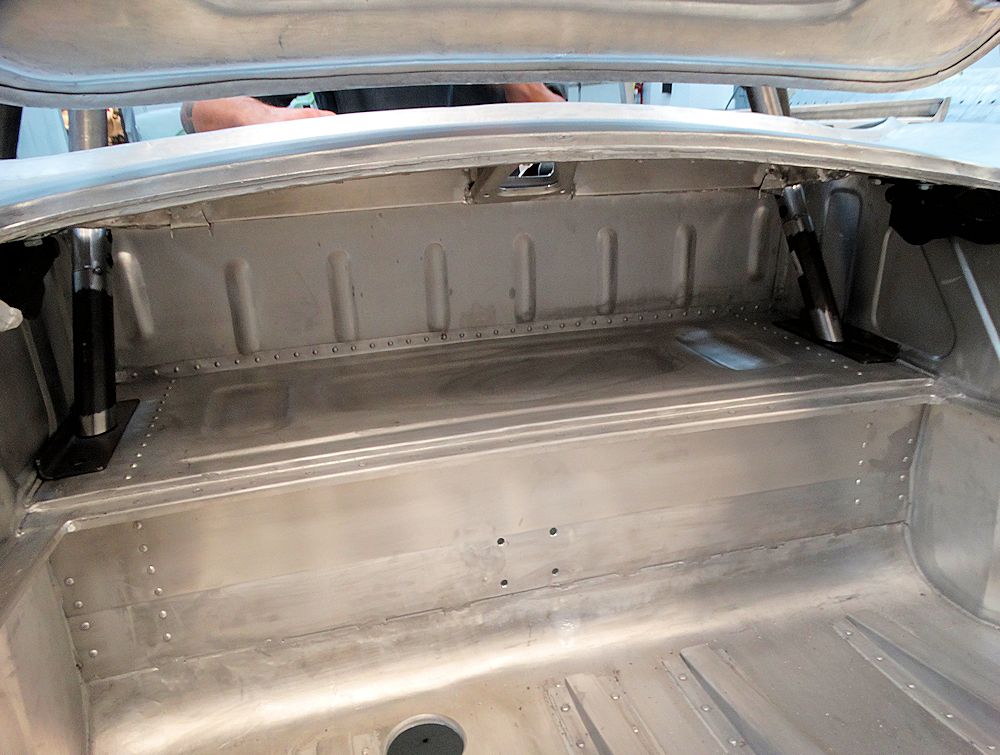
Note how all the boot floor rails are secured
with dozens of rivets
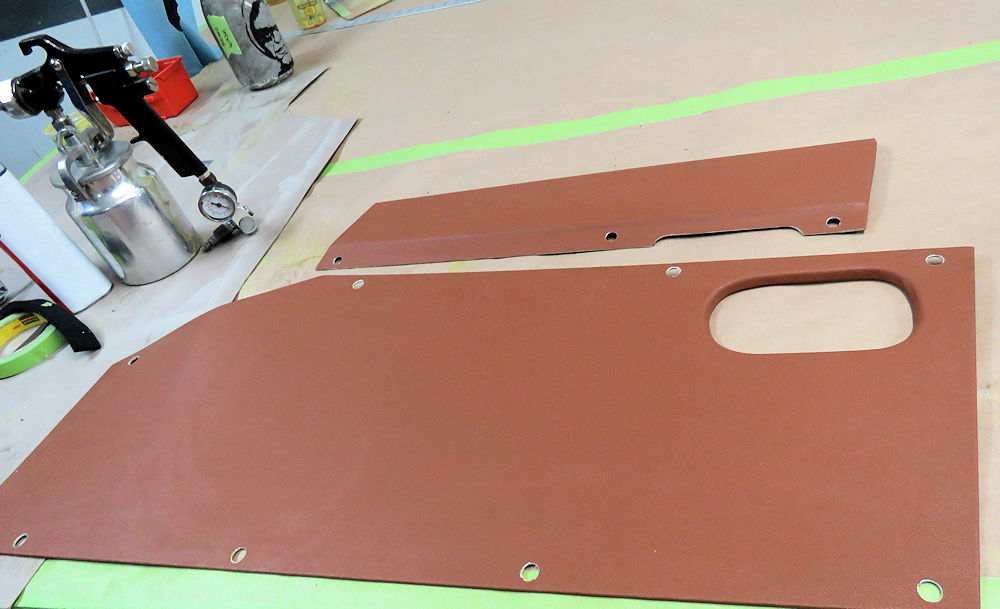
Special 'wash' primer is applied
Bare aluminum is first treated with a conditioner
which fortifies alloy substrates
Boot compartment and cabin will be left unpainted
bare aluminum
Cabin will be left in bare aluminum
Followed by our regular 2K sealer
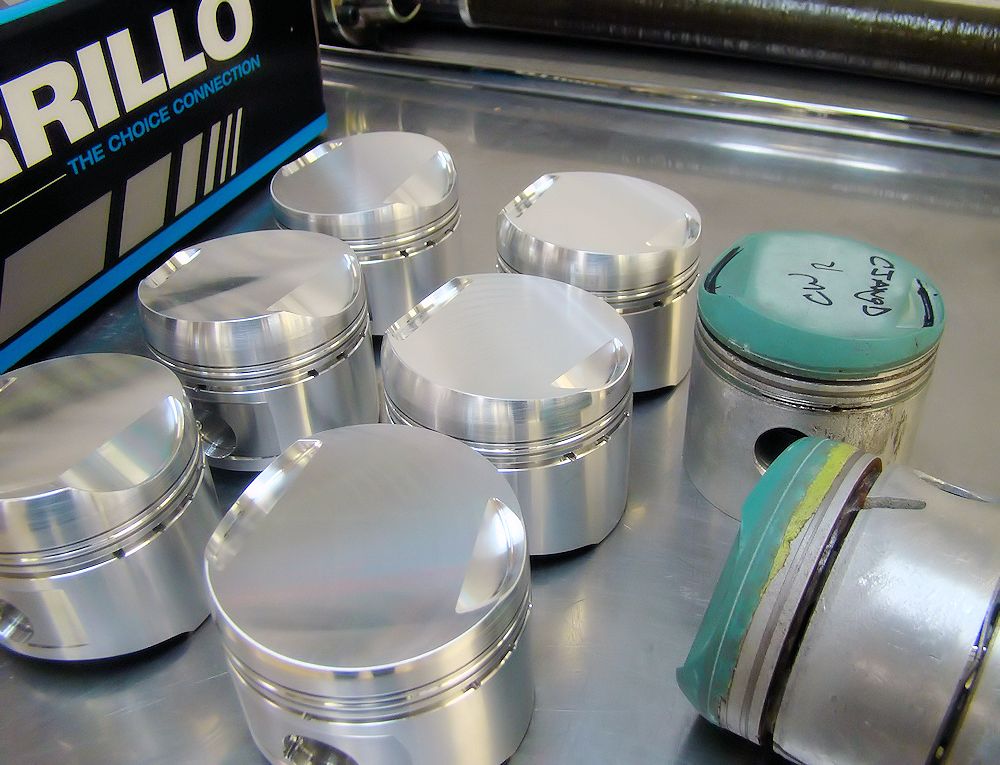
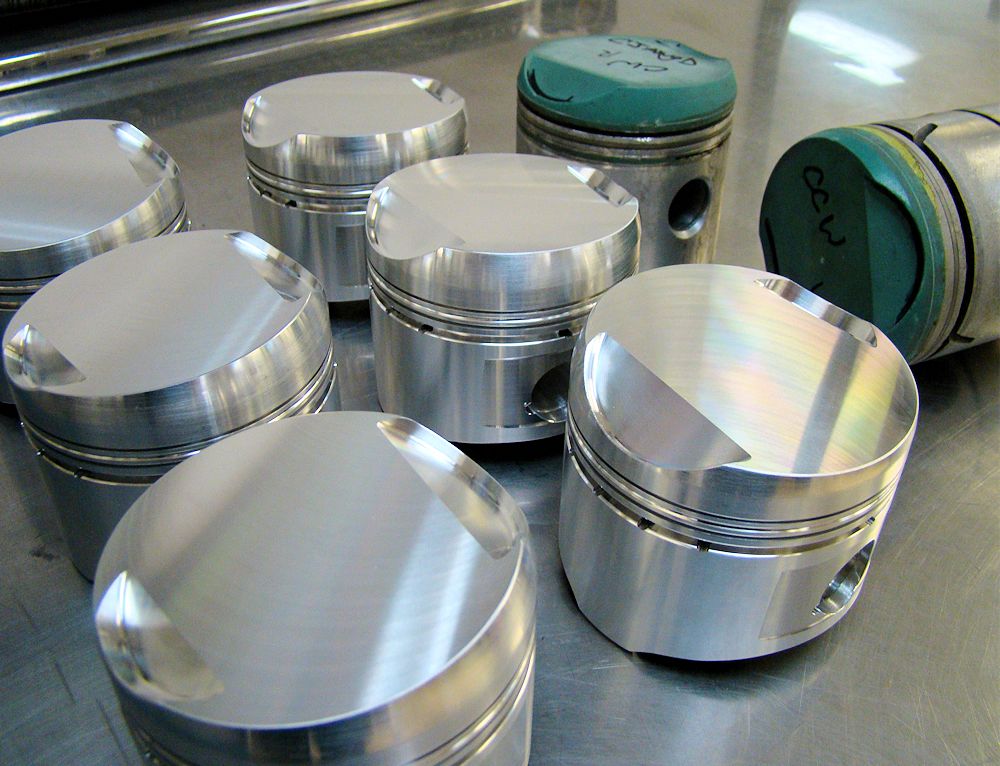
Custom forged CJ pistons designed to work with ultra large valves of the wide angled head.
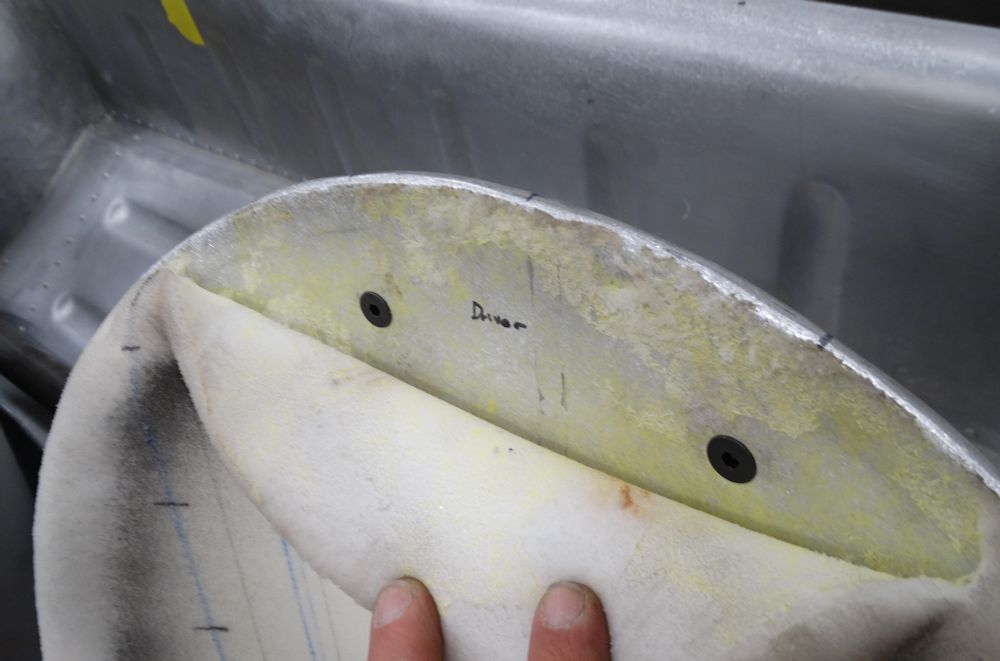
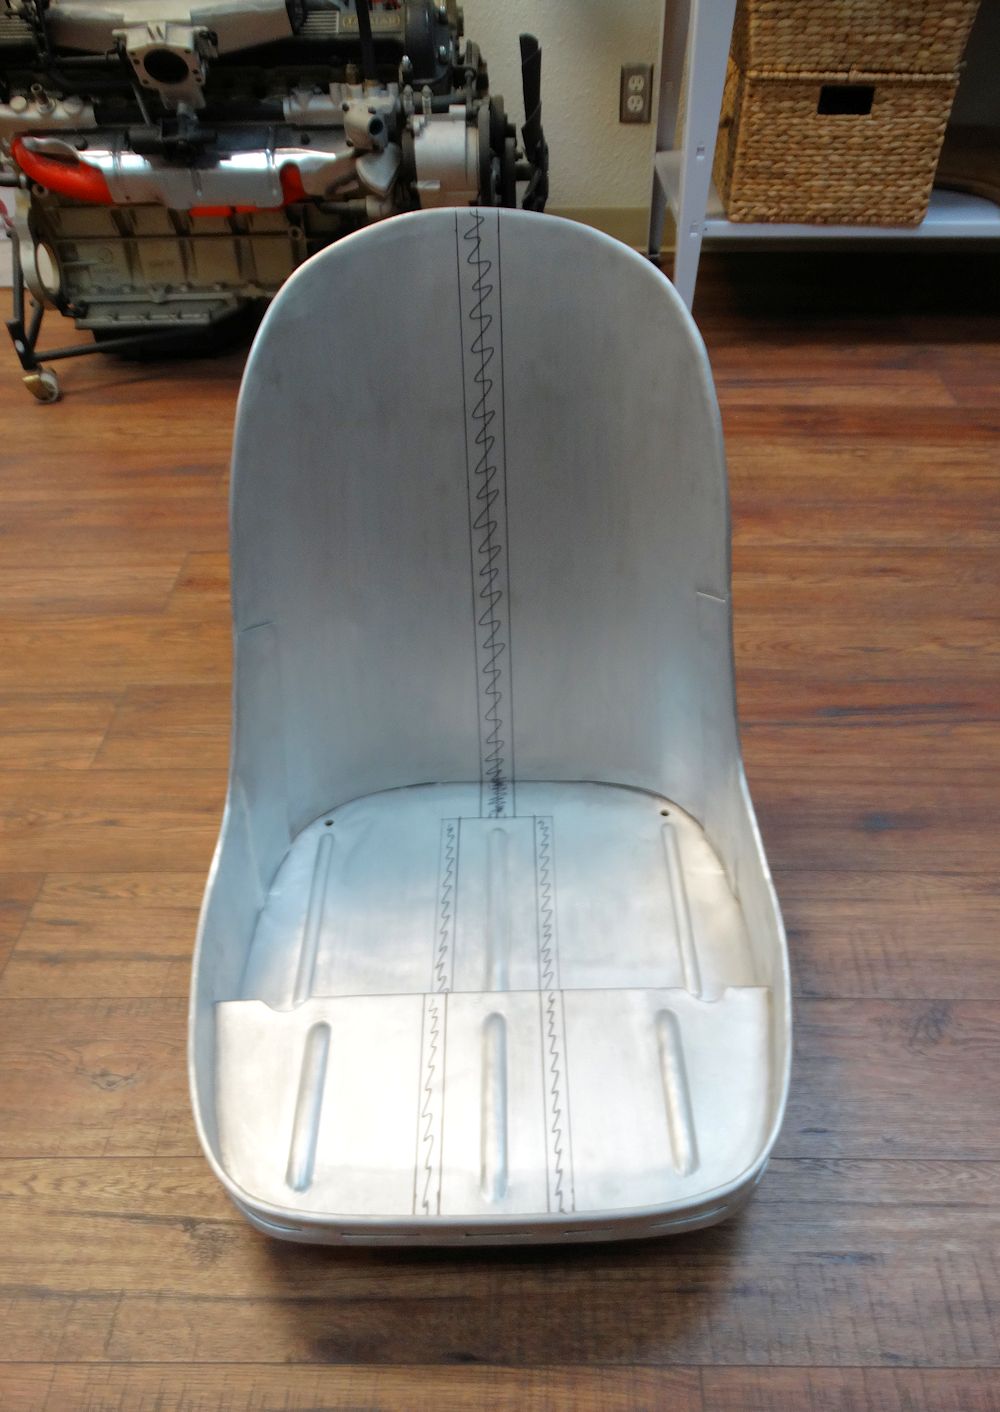
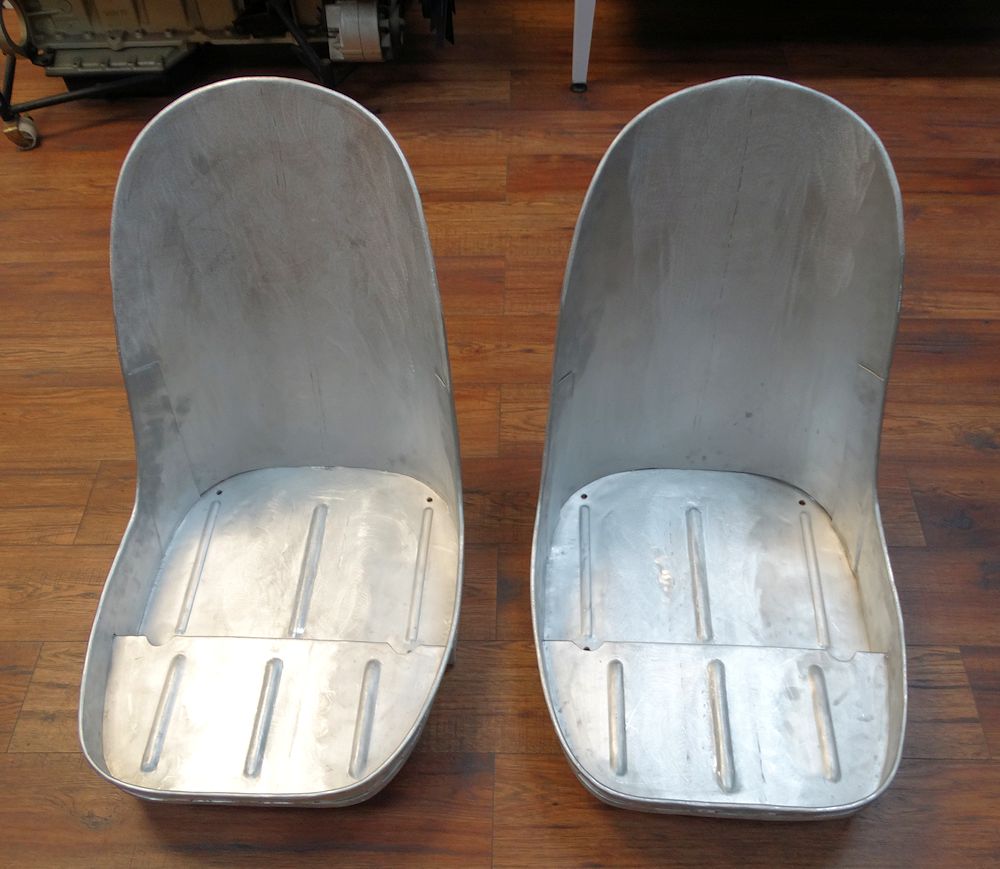
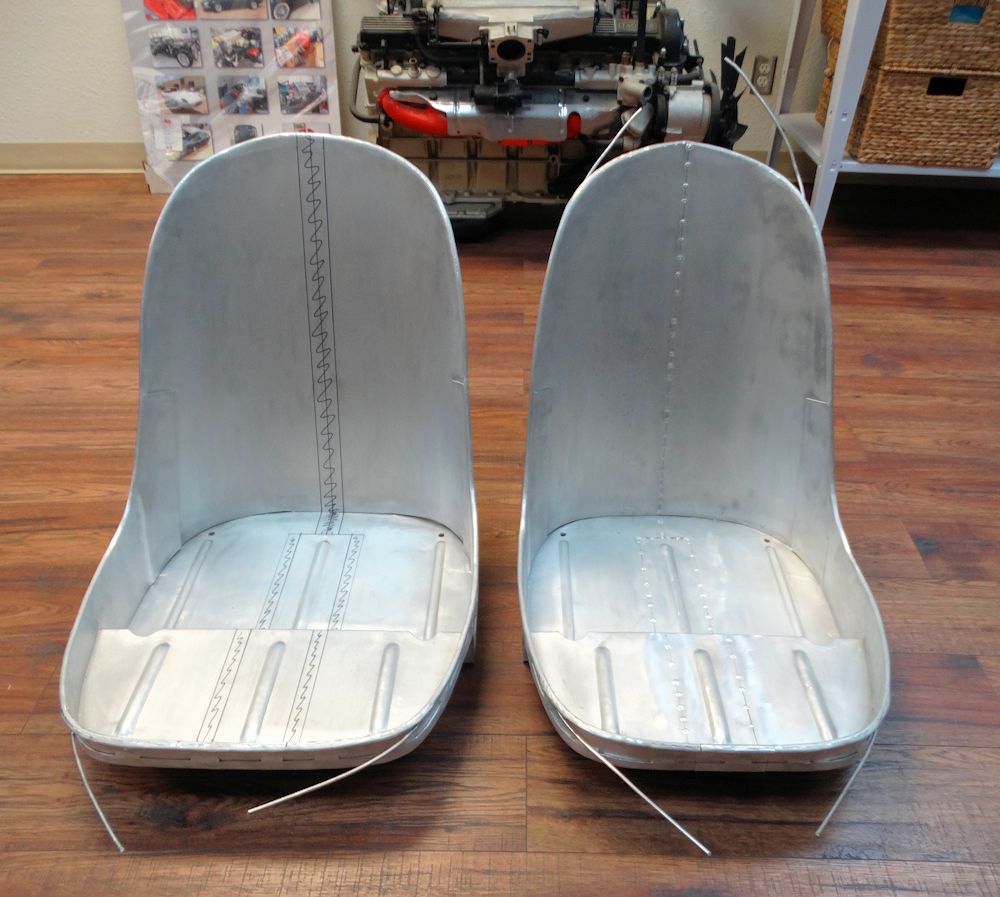
reduce seat width by approximately 1 inch
Marking out area to be sectioned in order to
Note difference between the two seats after the
driver's seat had been modified
Seat cut down the centerline
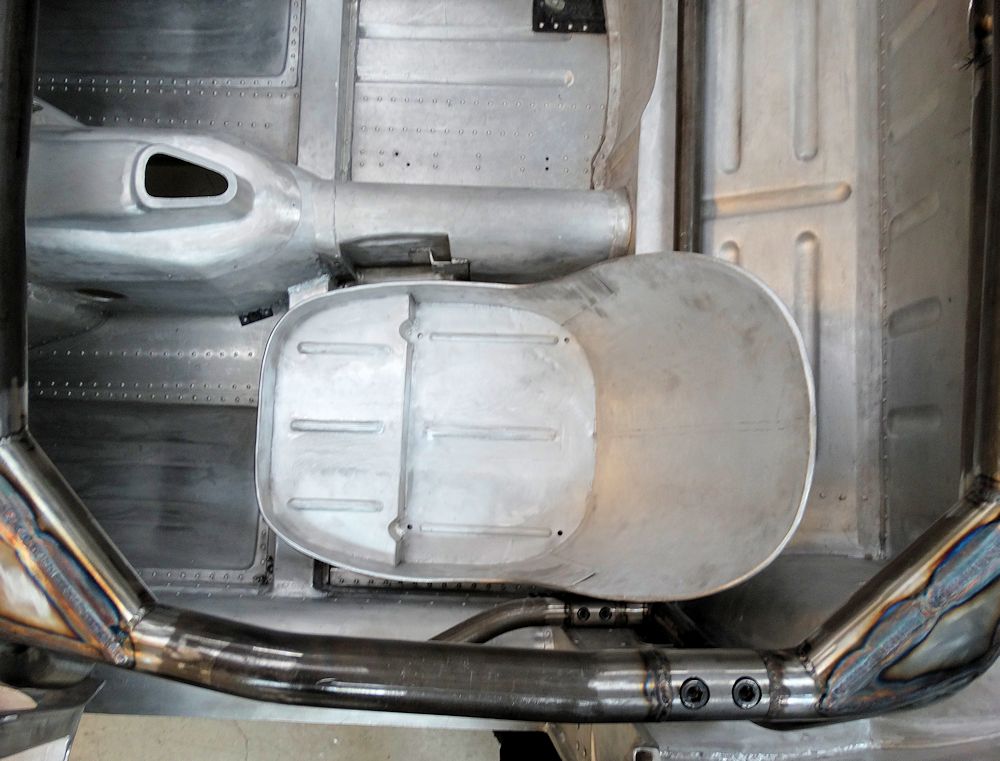
Finalizing position of driver's seat
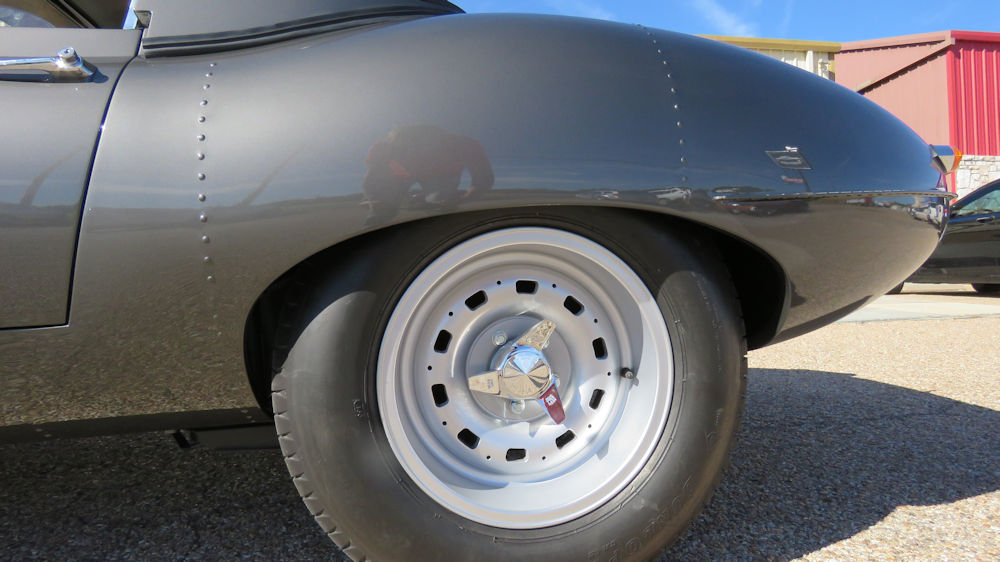
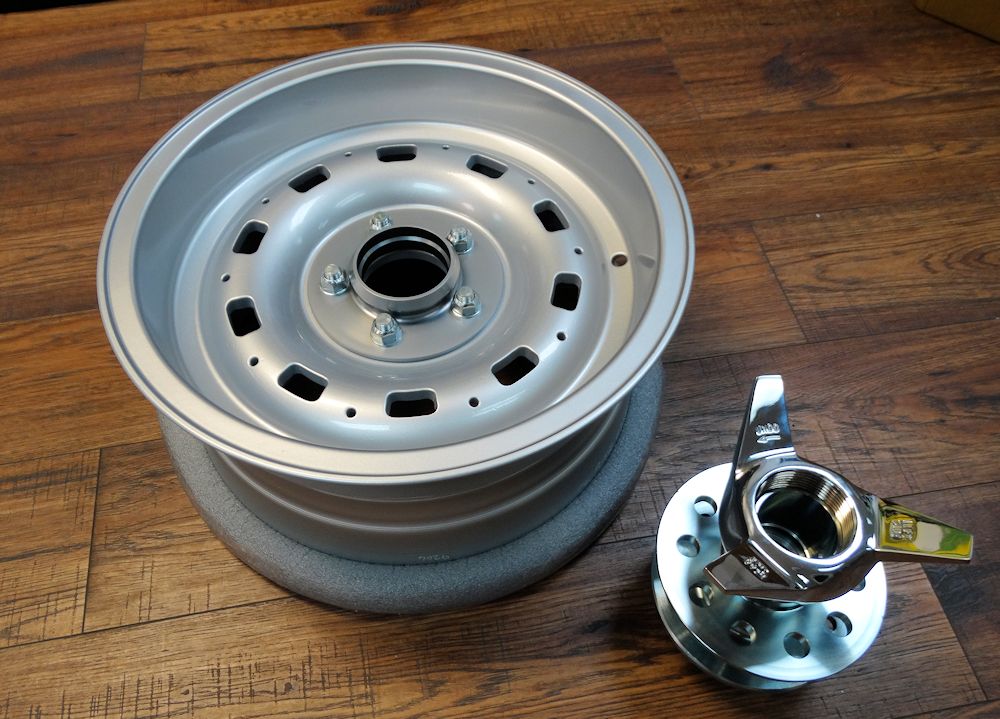
New Dunlop alloy replicas are superb quality
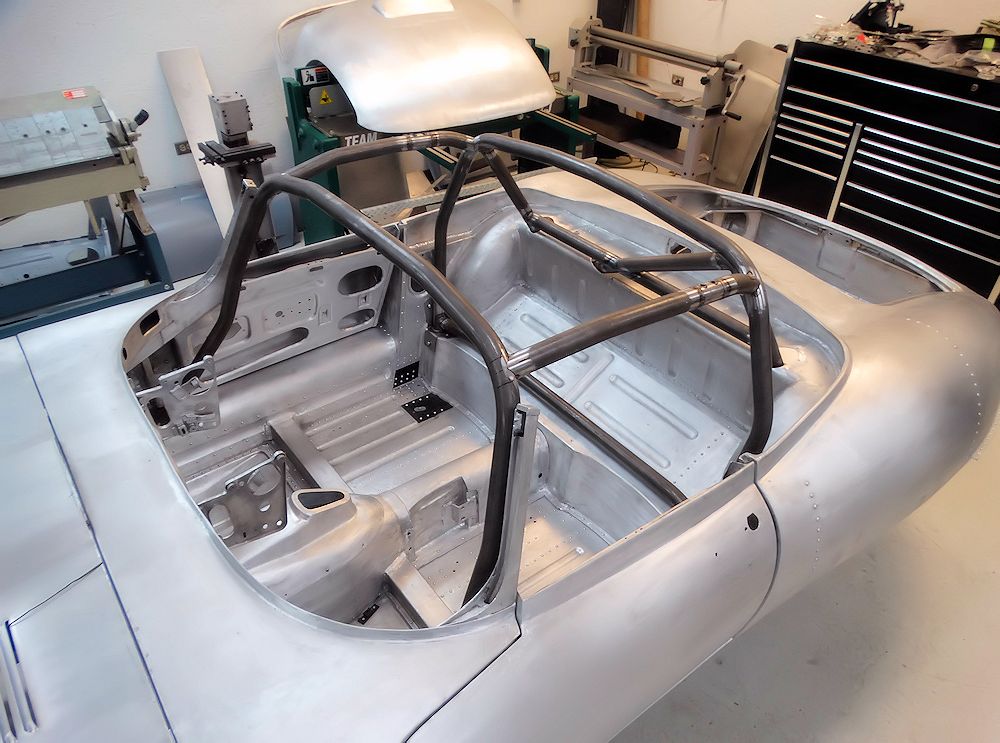
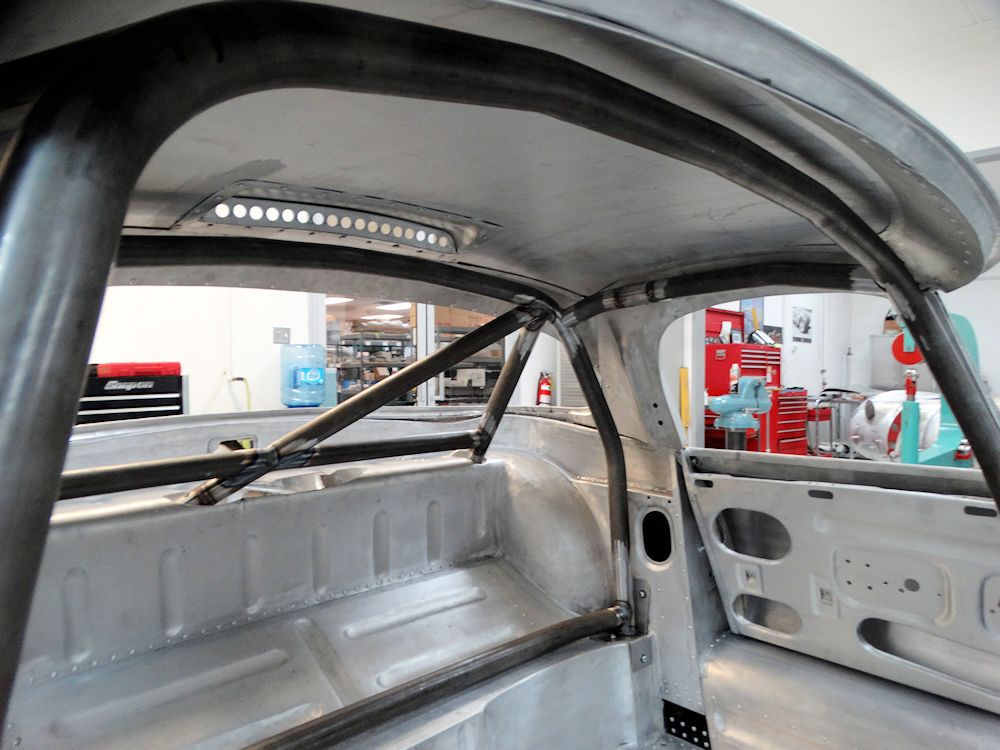
Roll cage installation, continued..
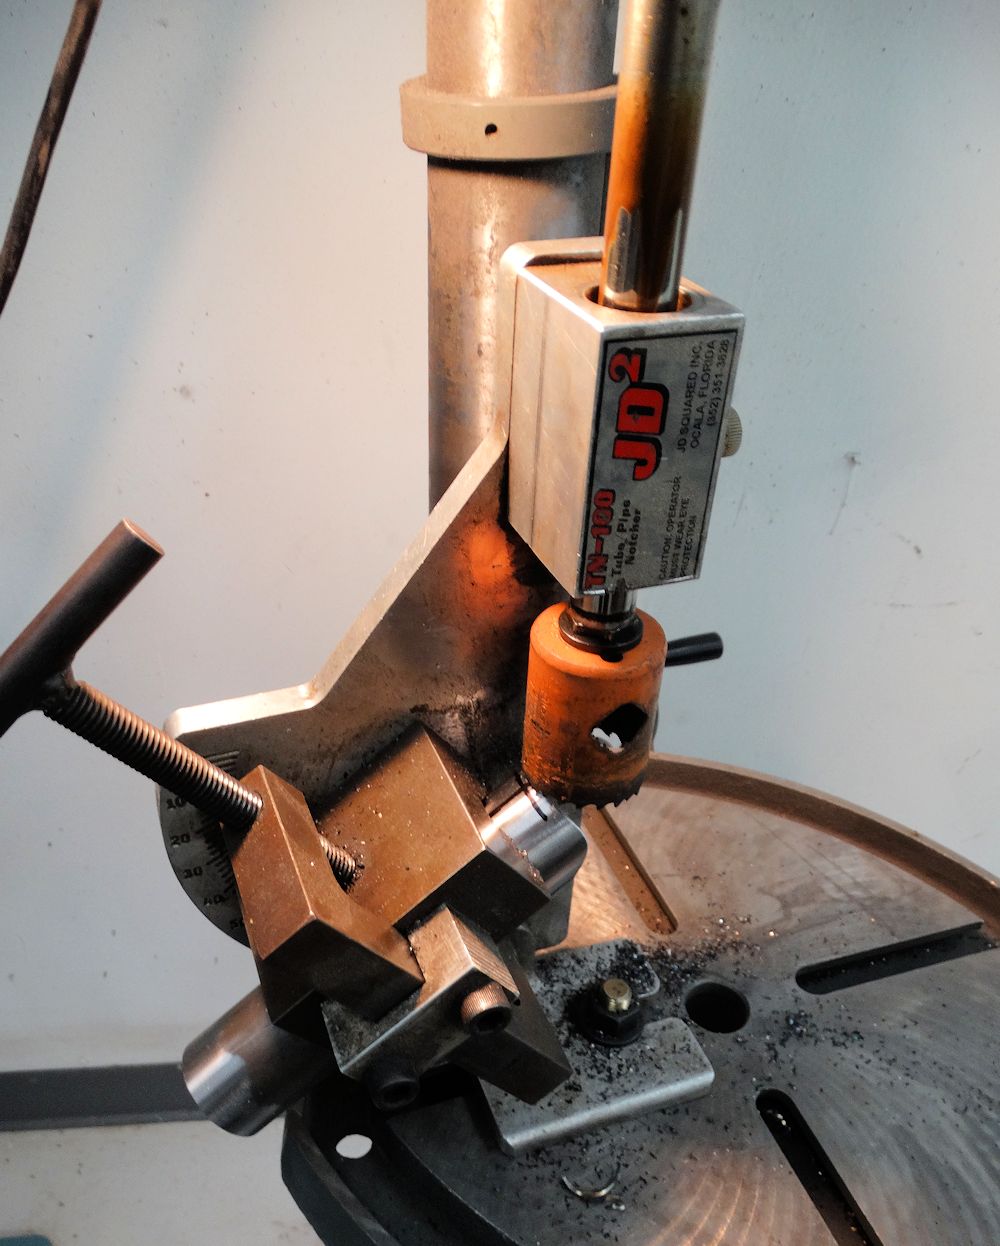
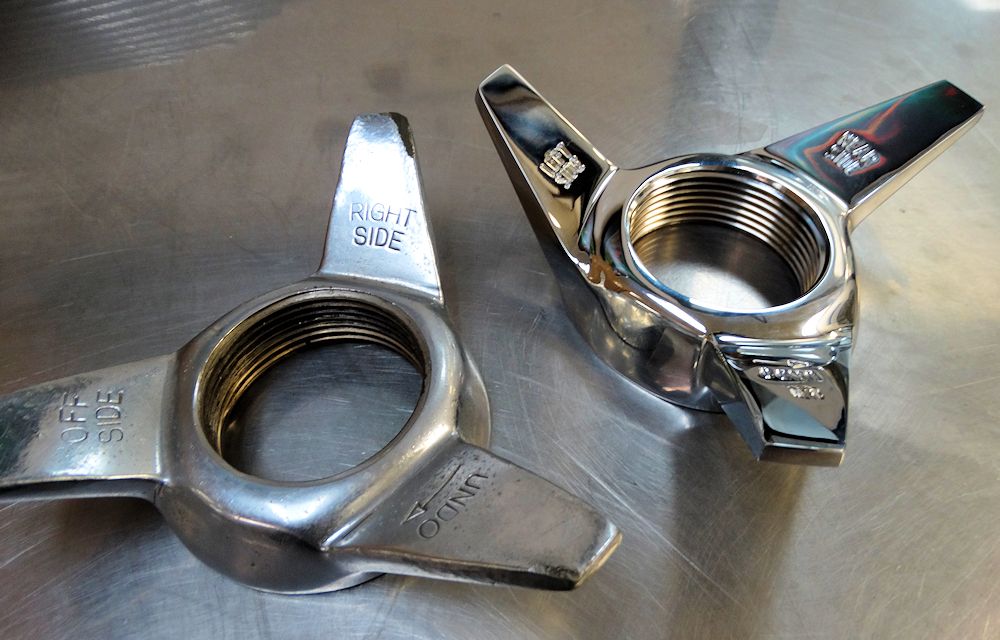
Spinner from Steve McQueen's XKSS side by
side with one of your new spinners
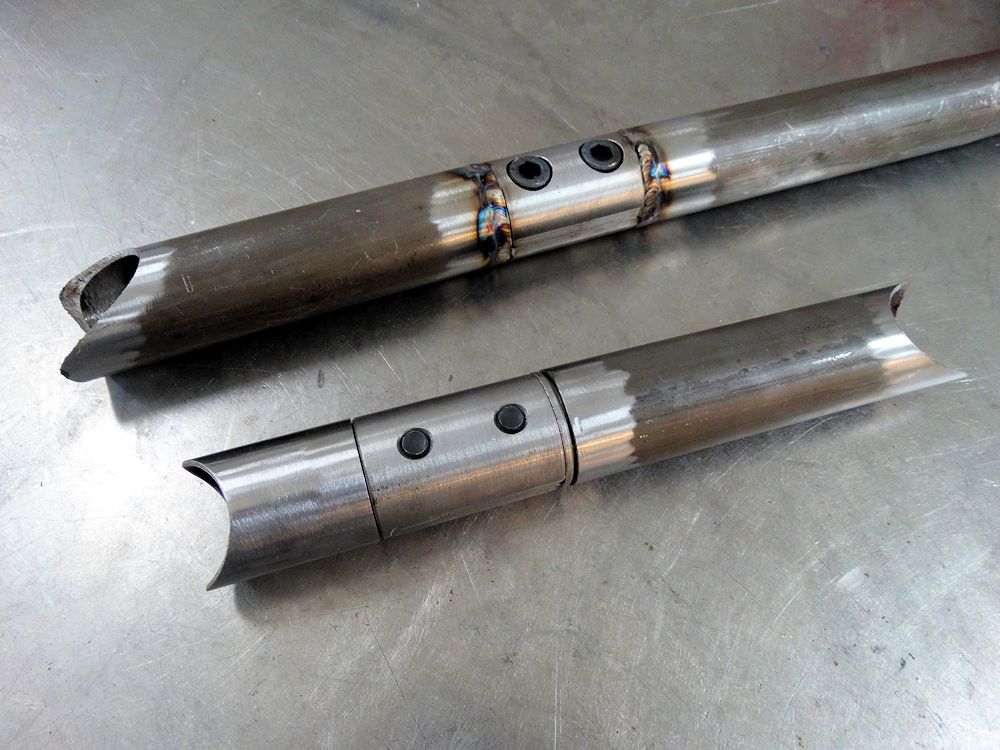
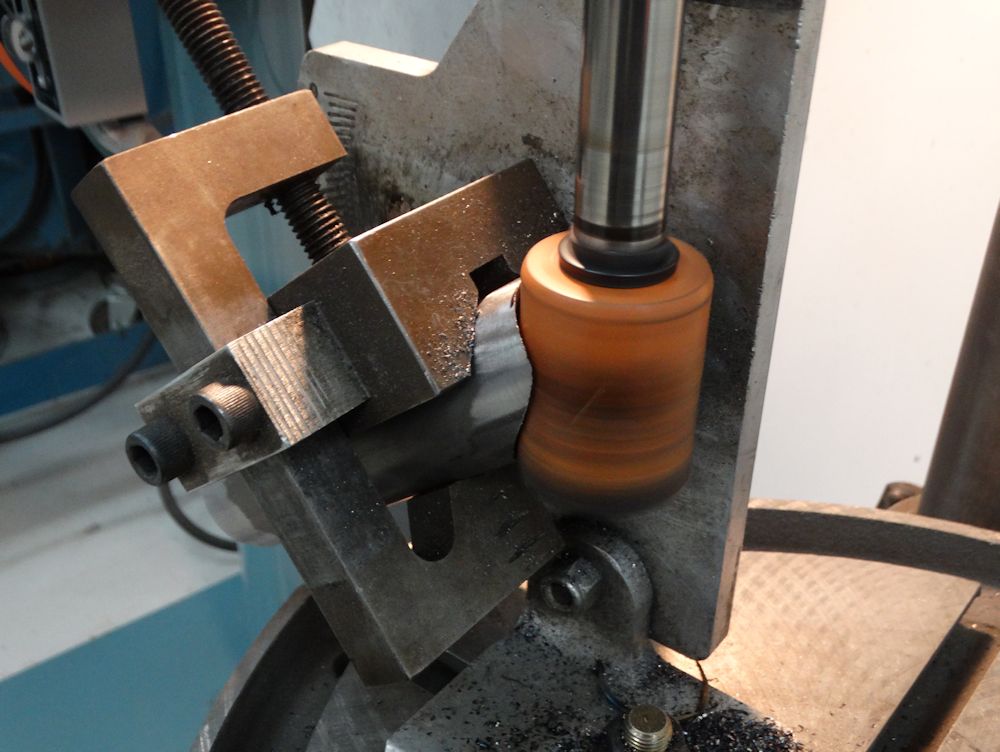
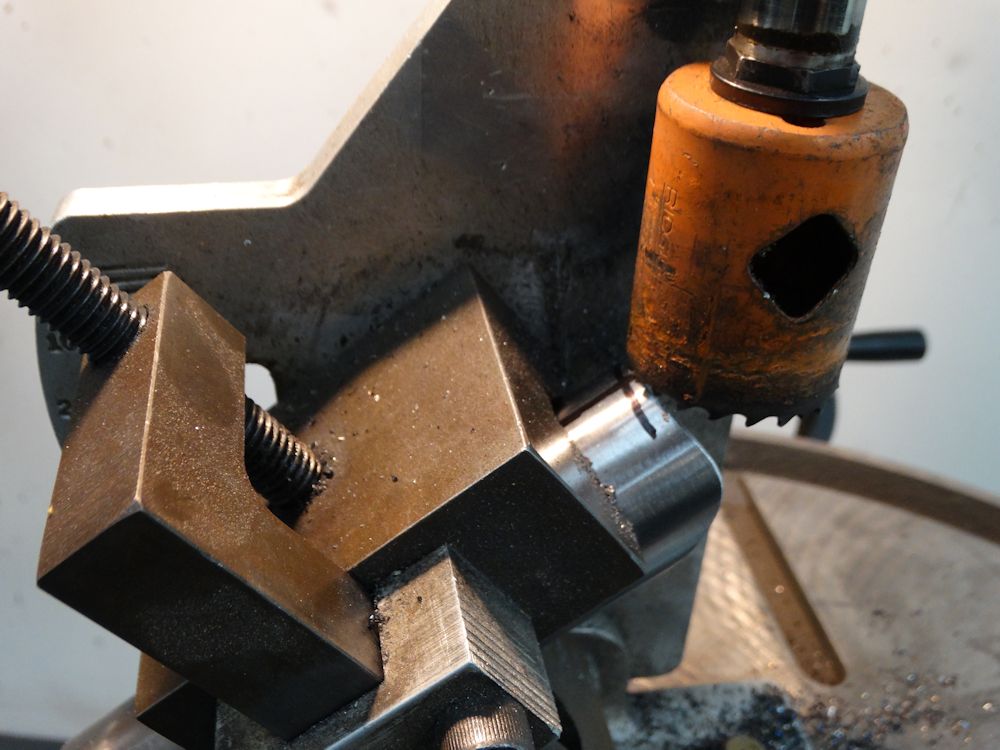
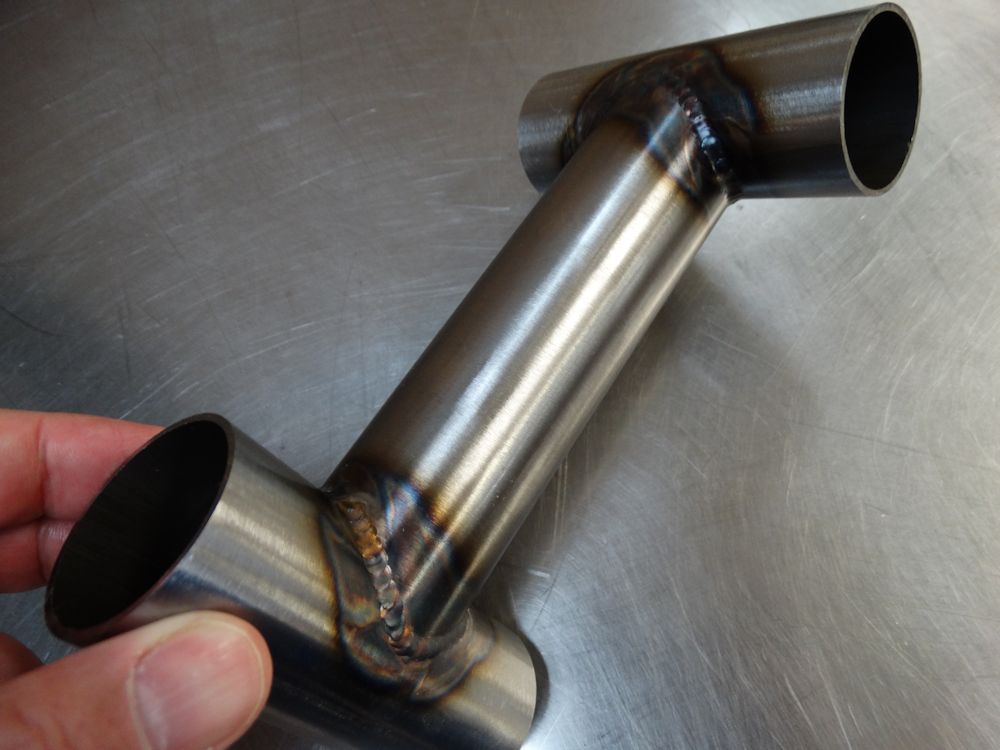
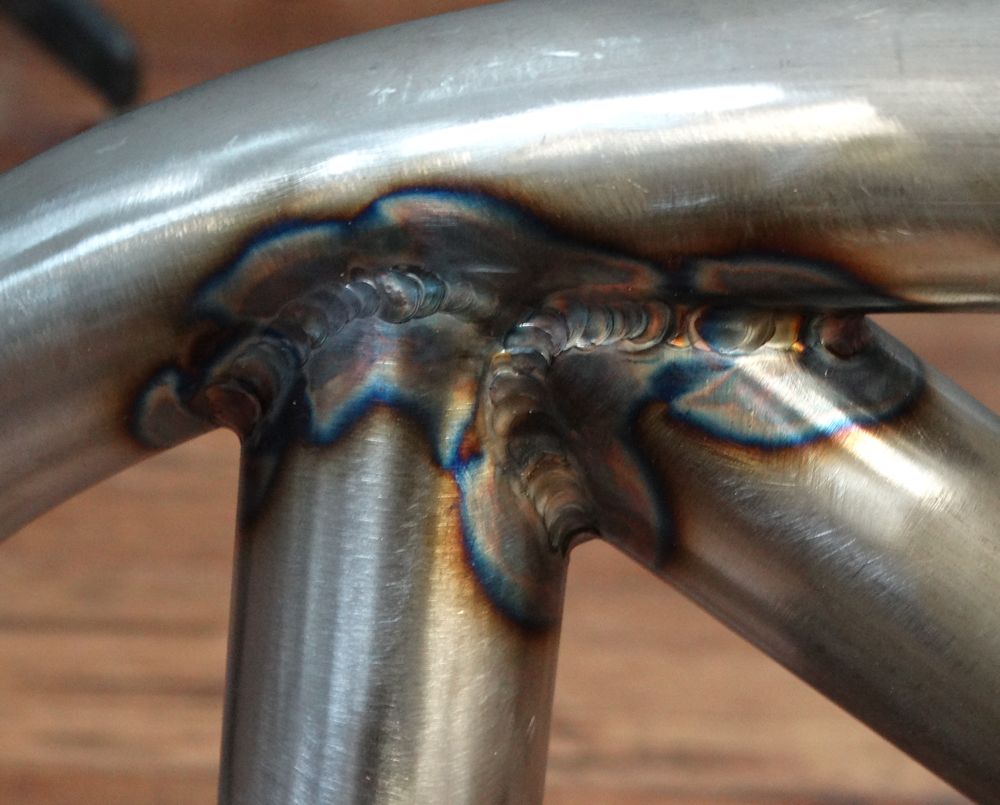
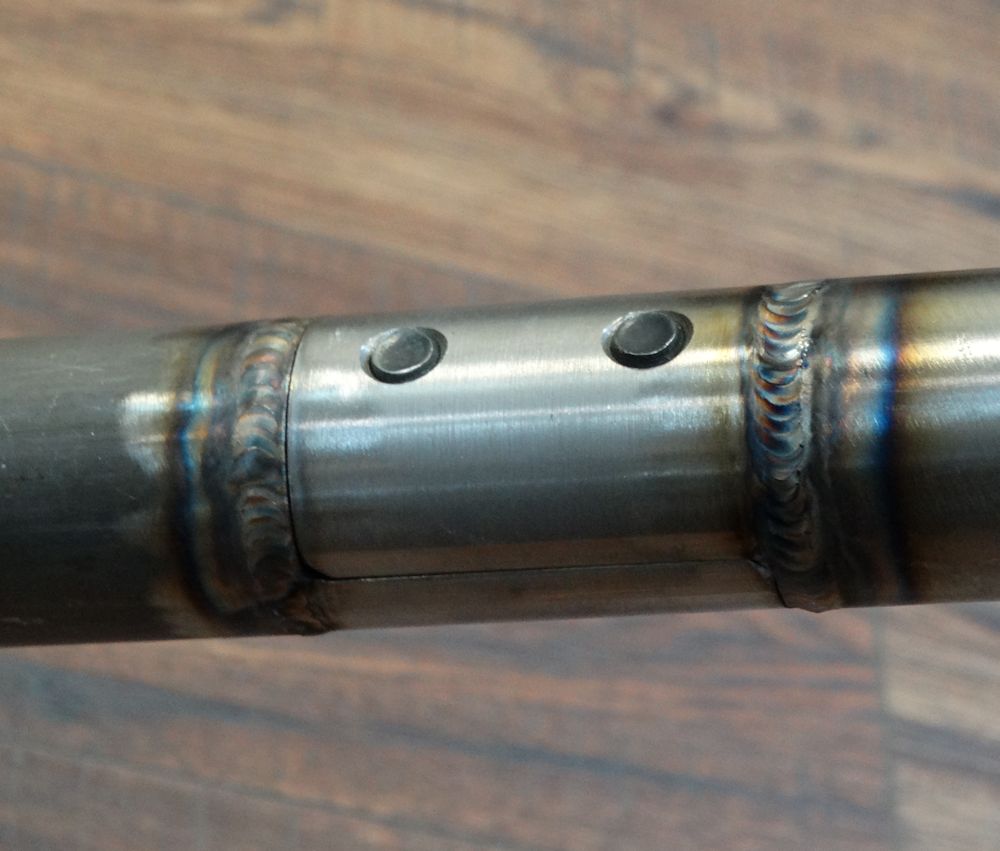
Notching sections of the cage tubing for
perfect fit
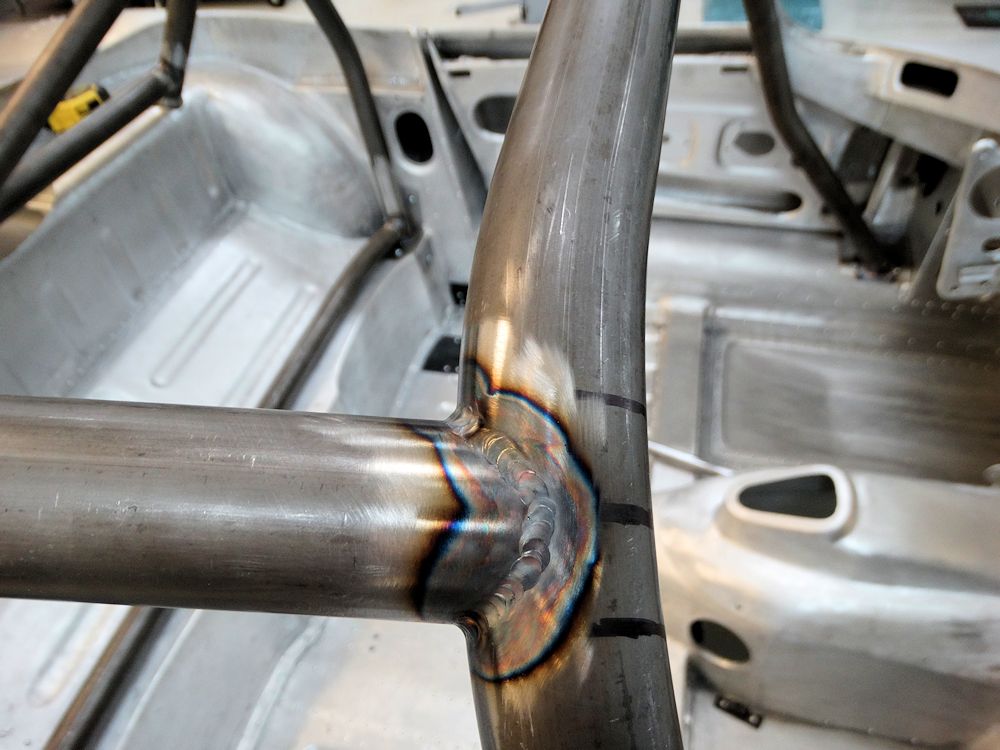
TIG welding upper screen protective bar in place
Trial fitting and welding the roll cage. Sample 'test' weld to be submitted for FIA
approval
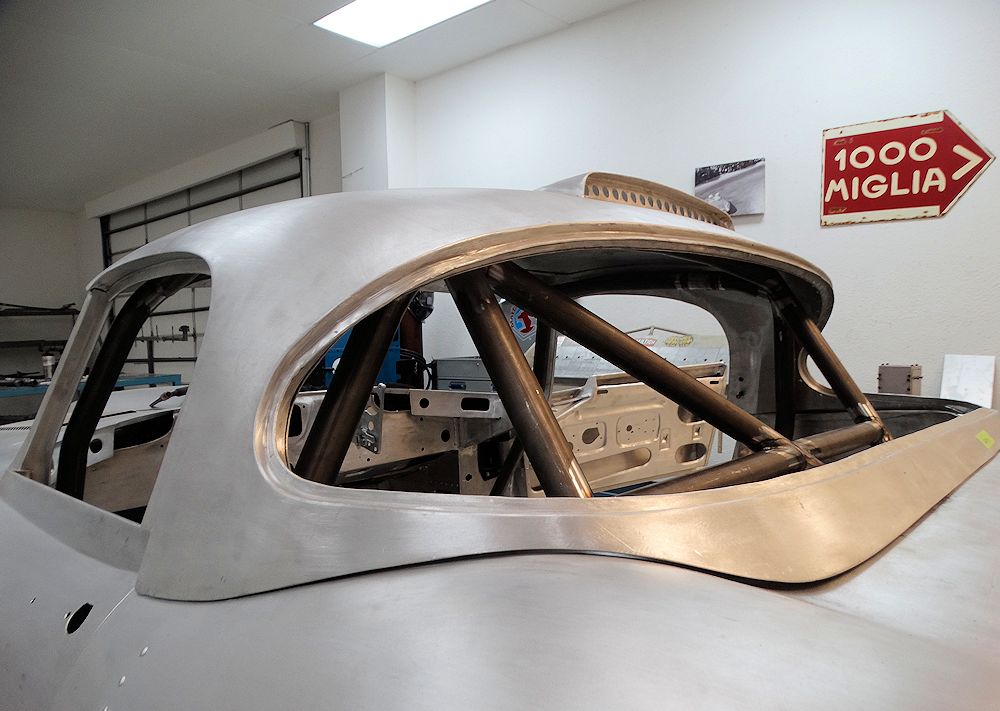
Trial fitting hardtop over cage
Rear section now virtually complete
Trial fitting screen surround
Lower/rear anchor point
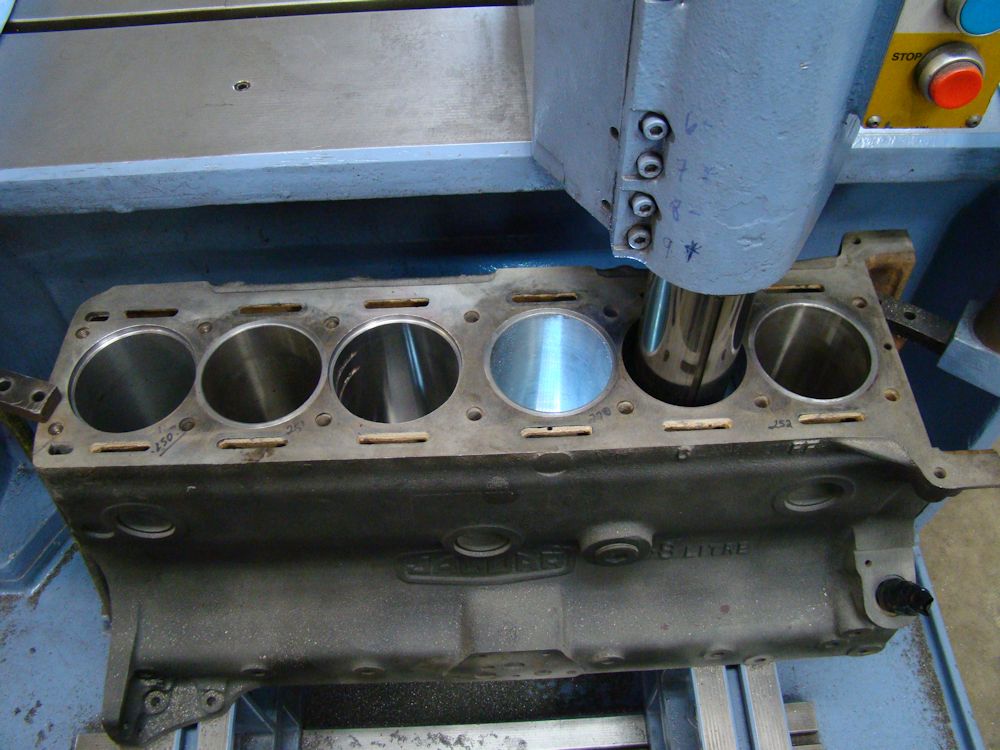
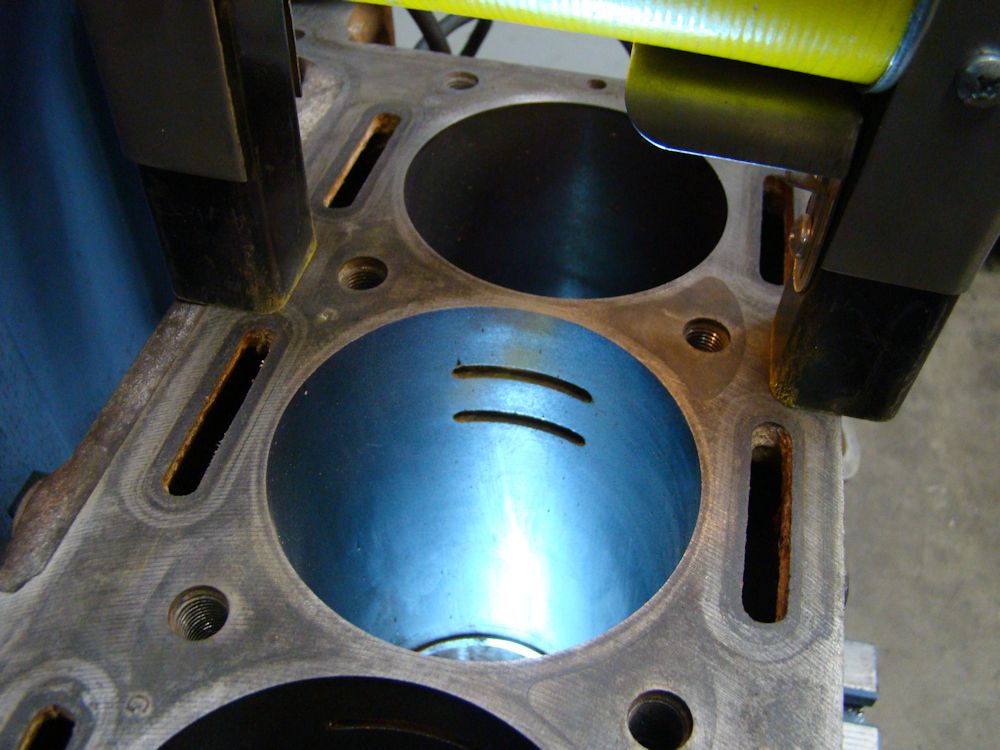
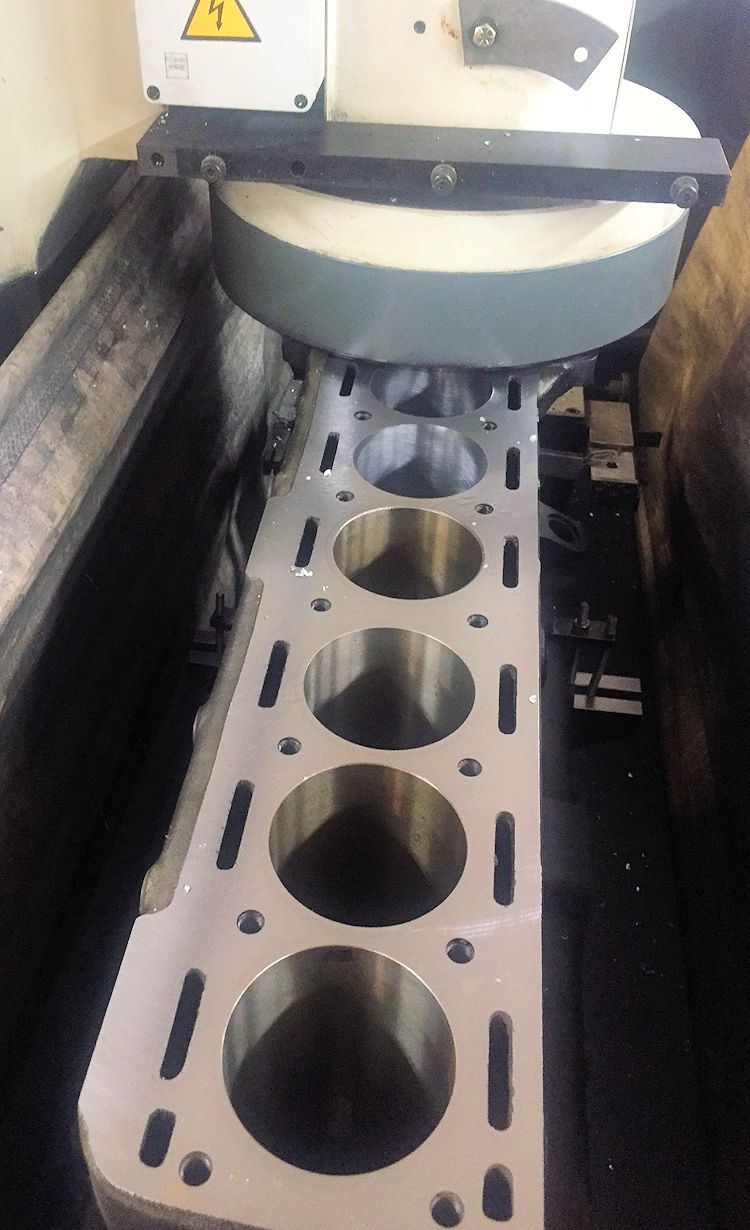
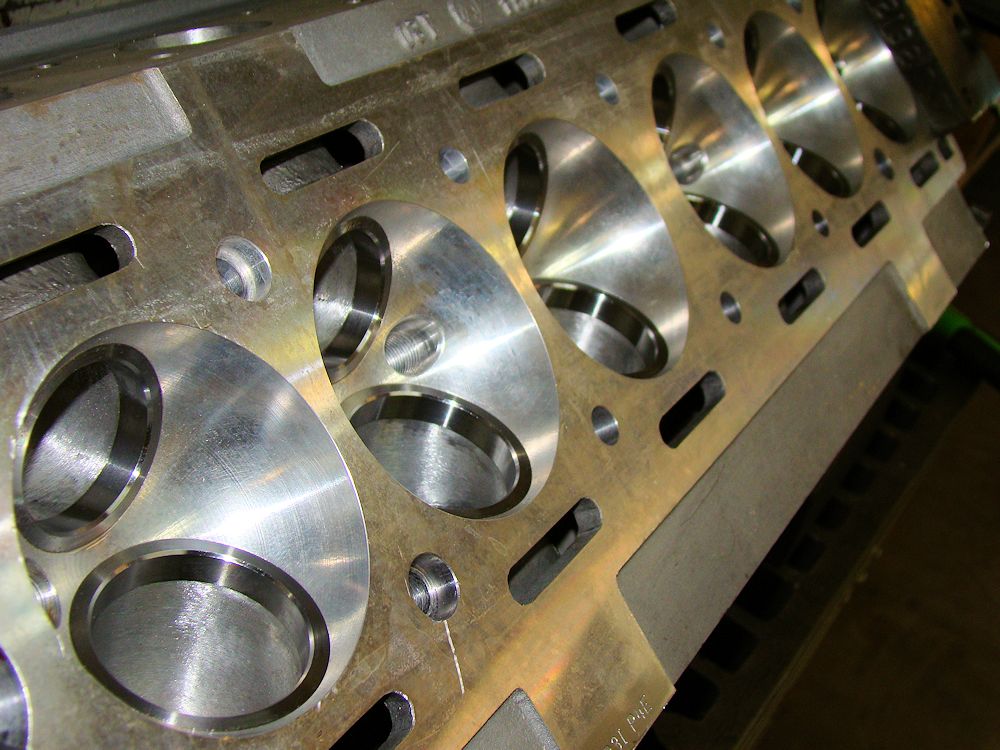
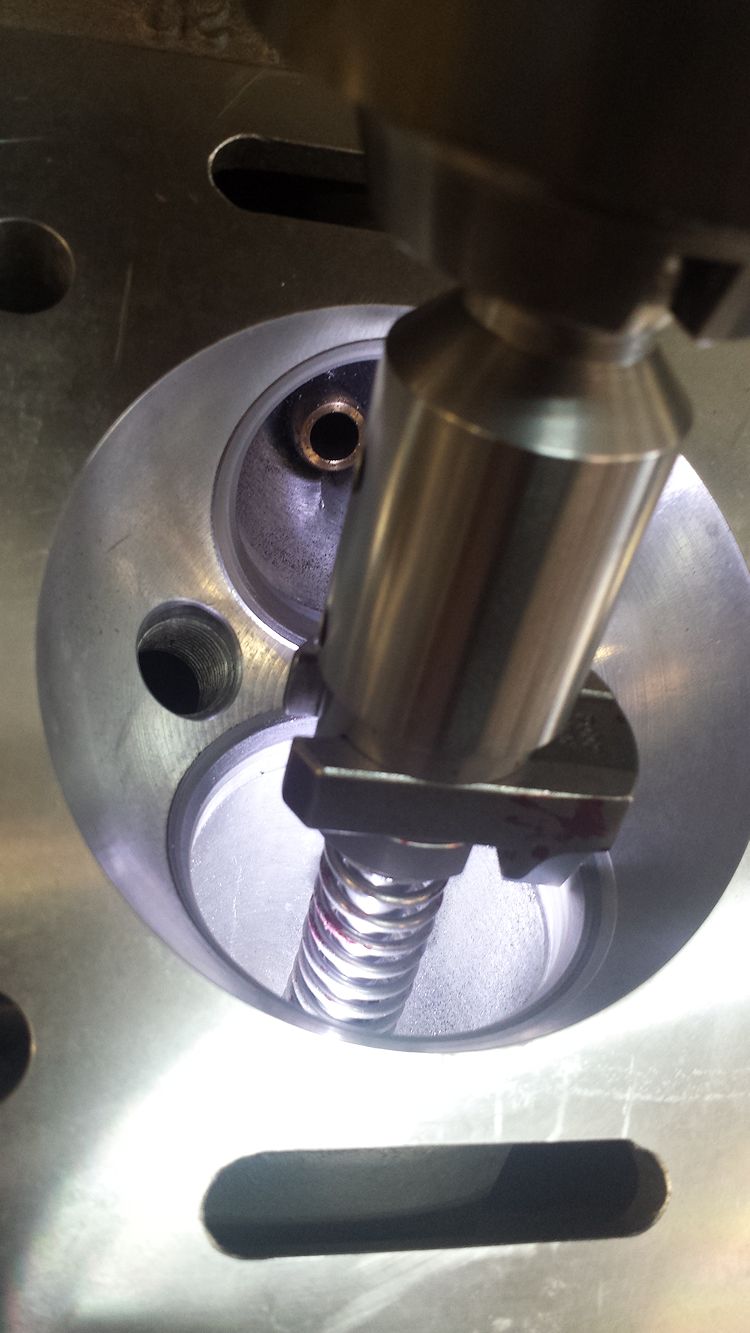
Machining for custom CJ top hat liners
Block machine work in progress. Magnaflux checking block after de-sleeving
revealed no cracks
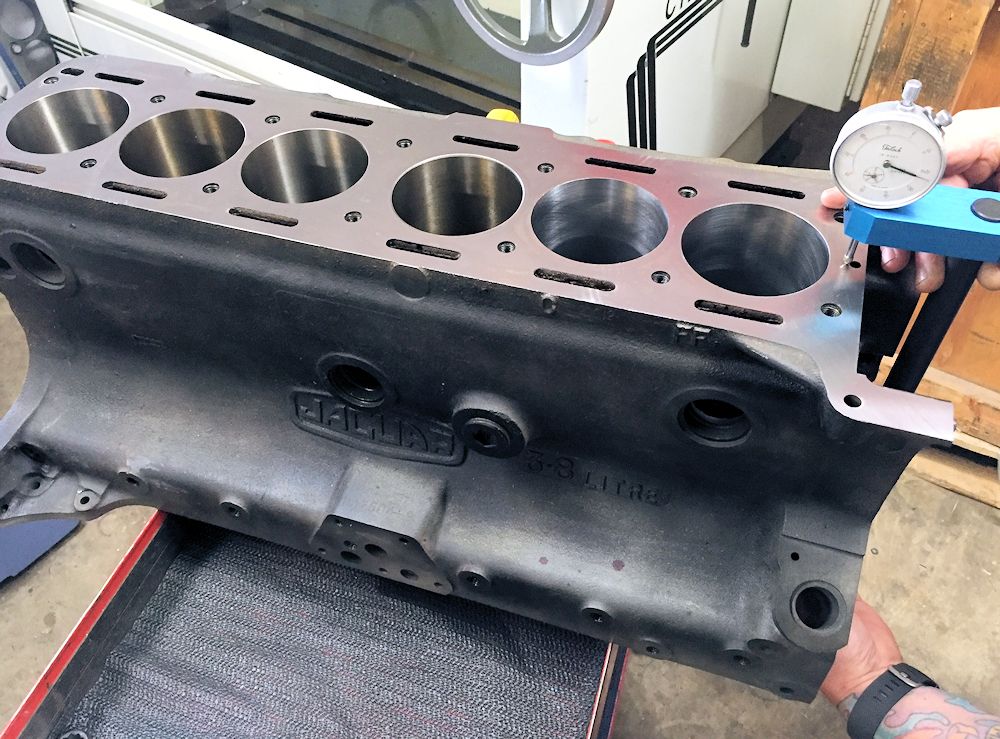
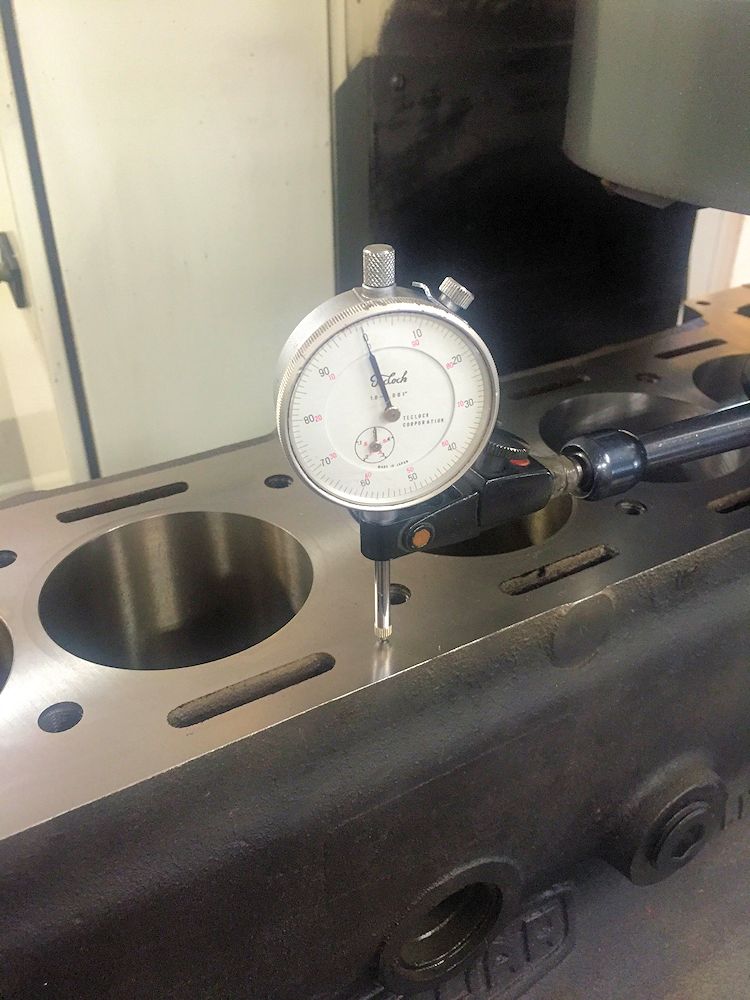
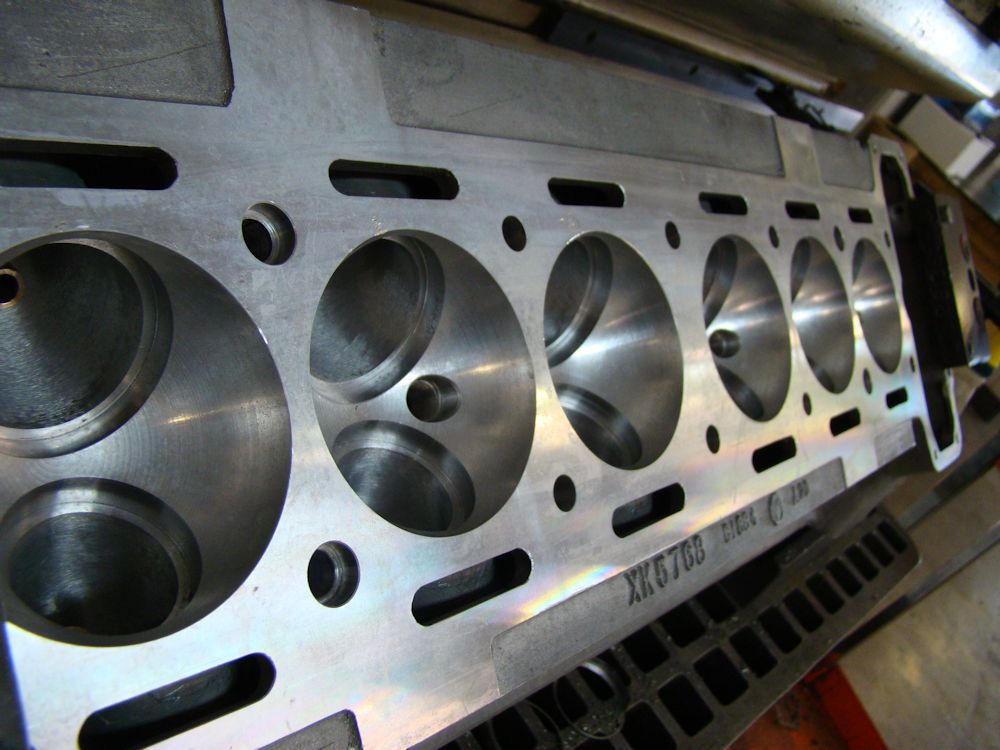
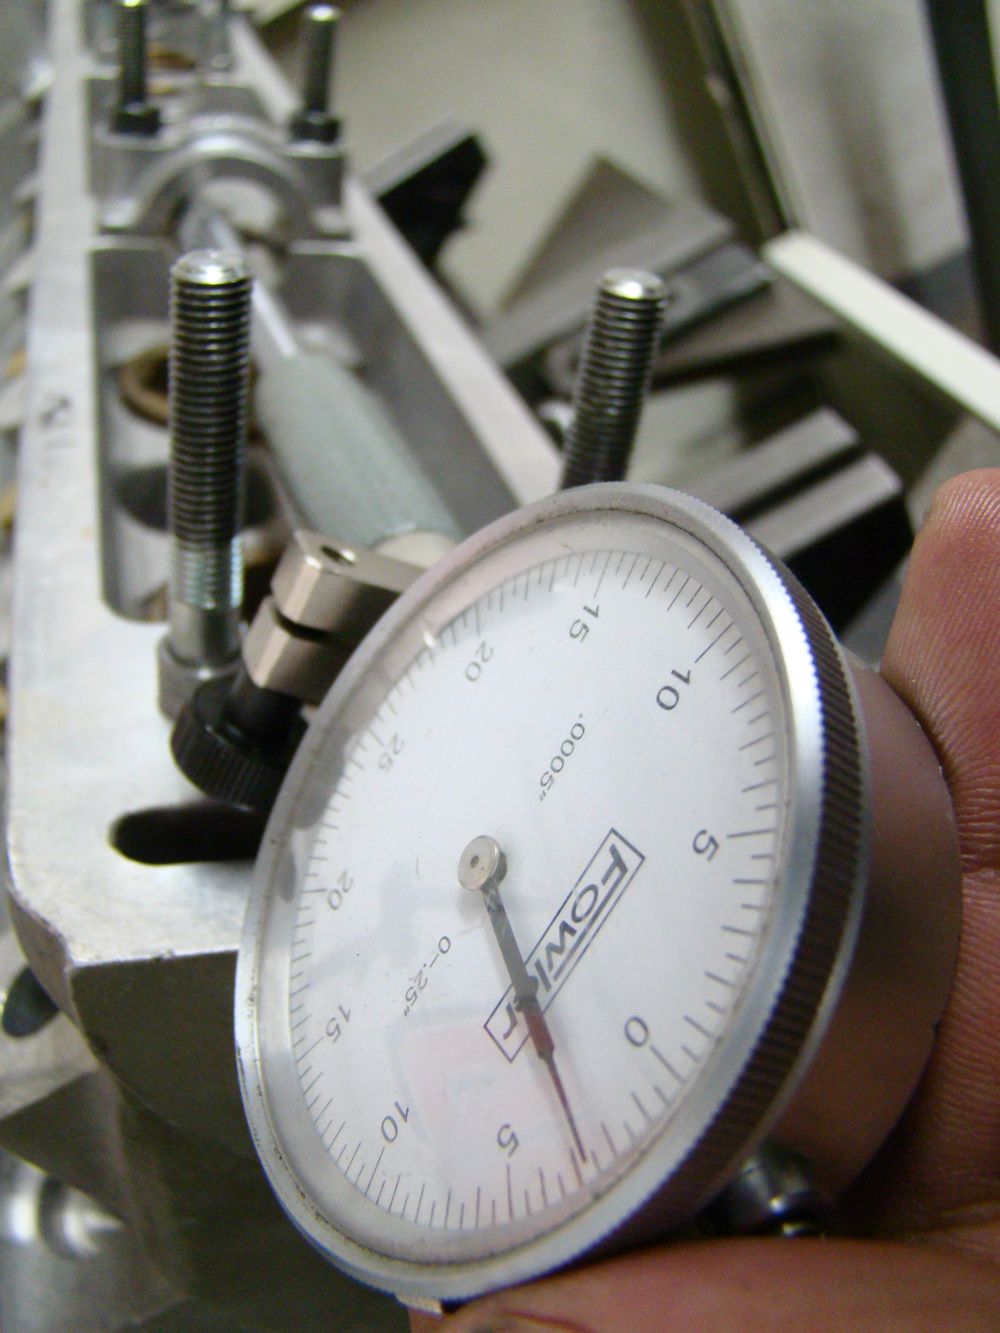
Checking for zero deck with gauge block
Surfacing the deck of the cylinder block
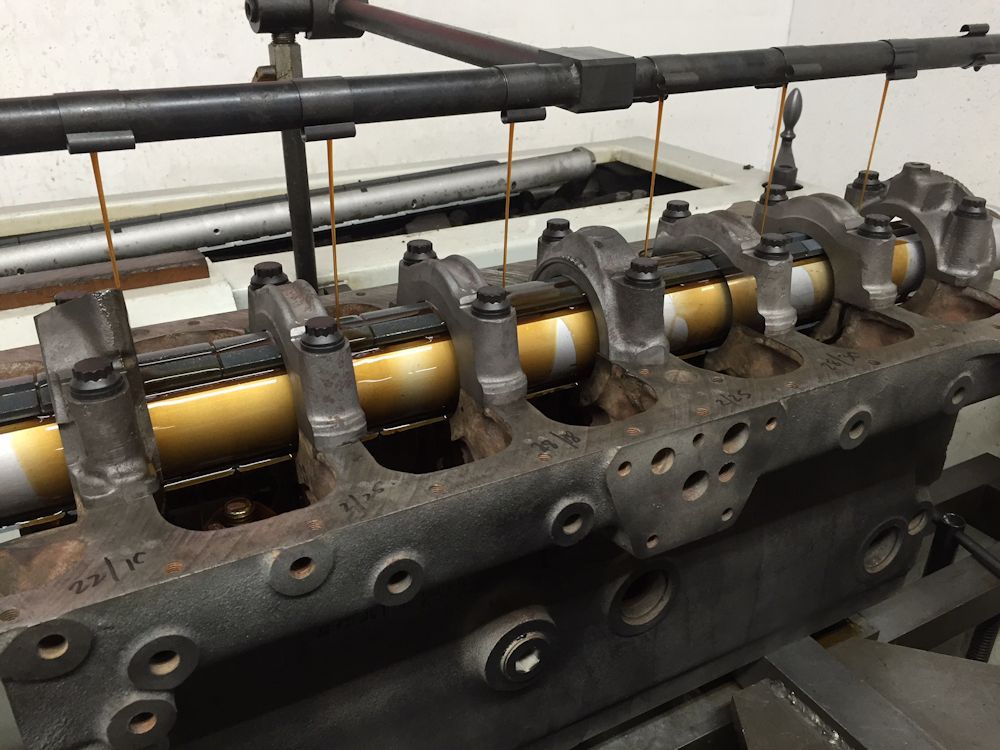
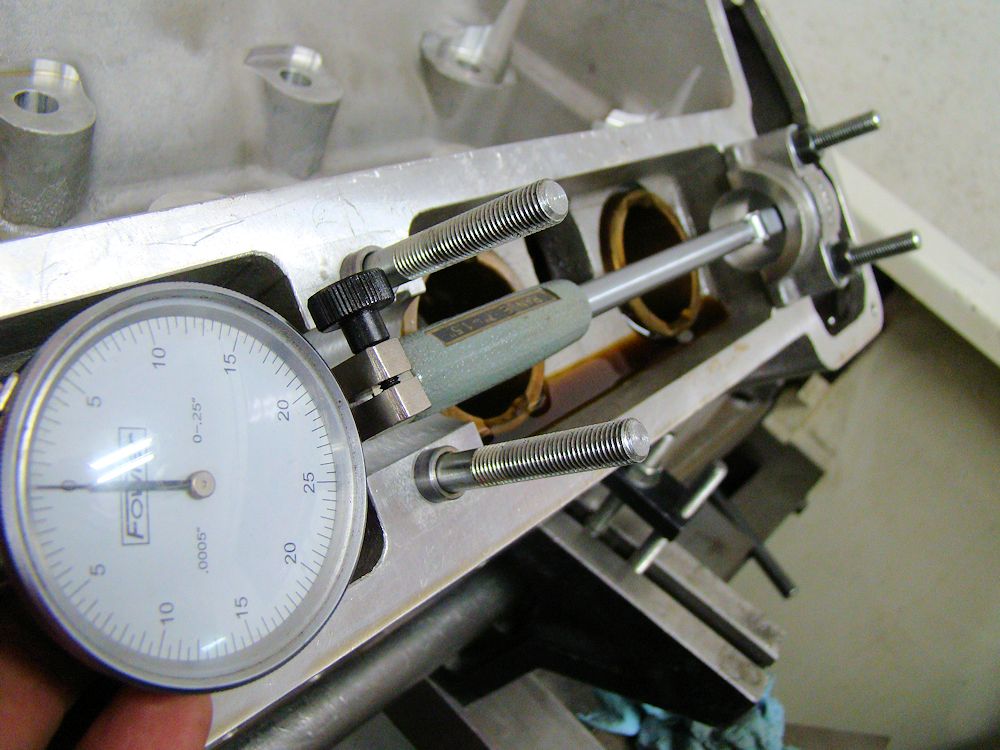
Align honing in progress
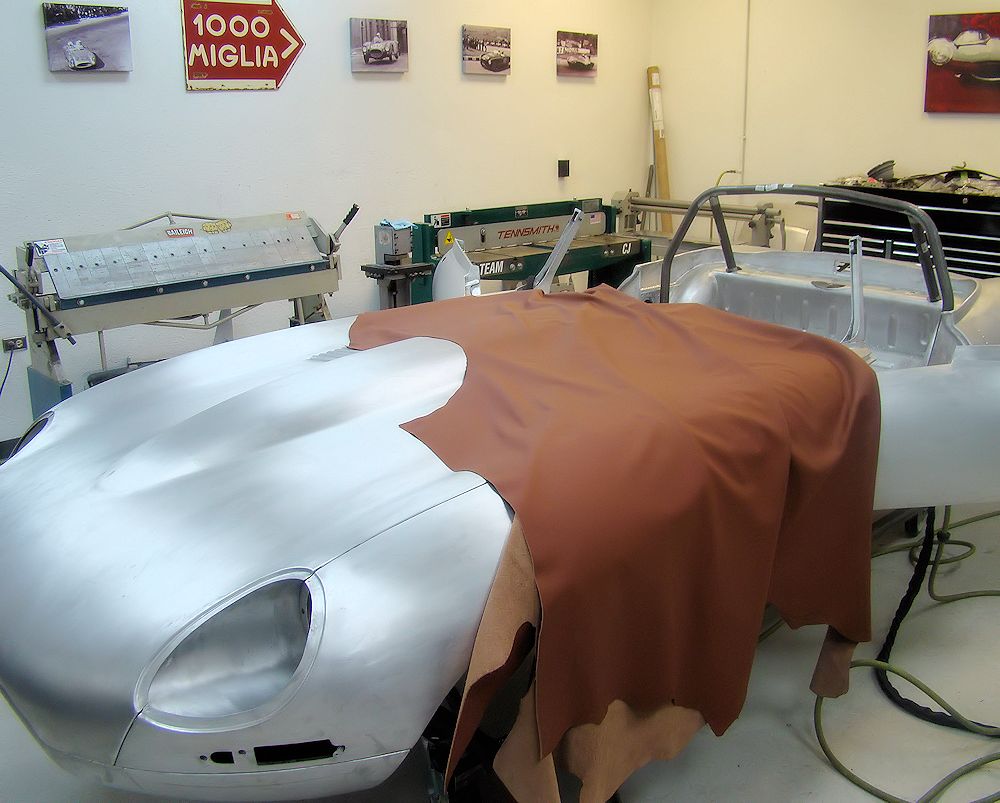
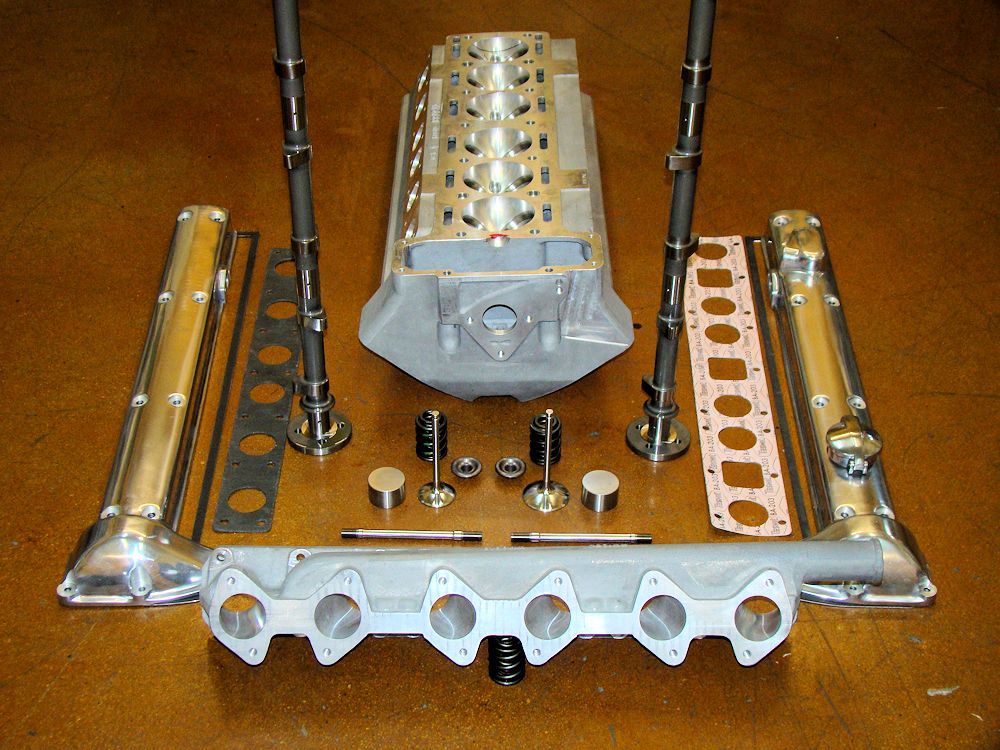
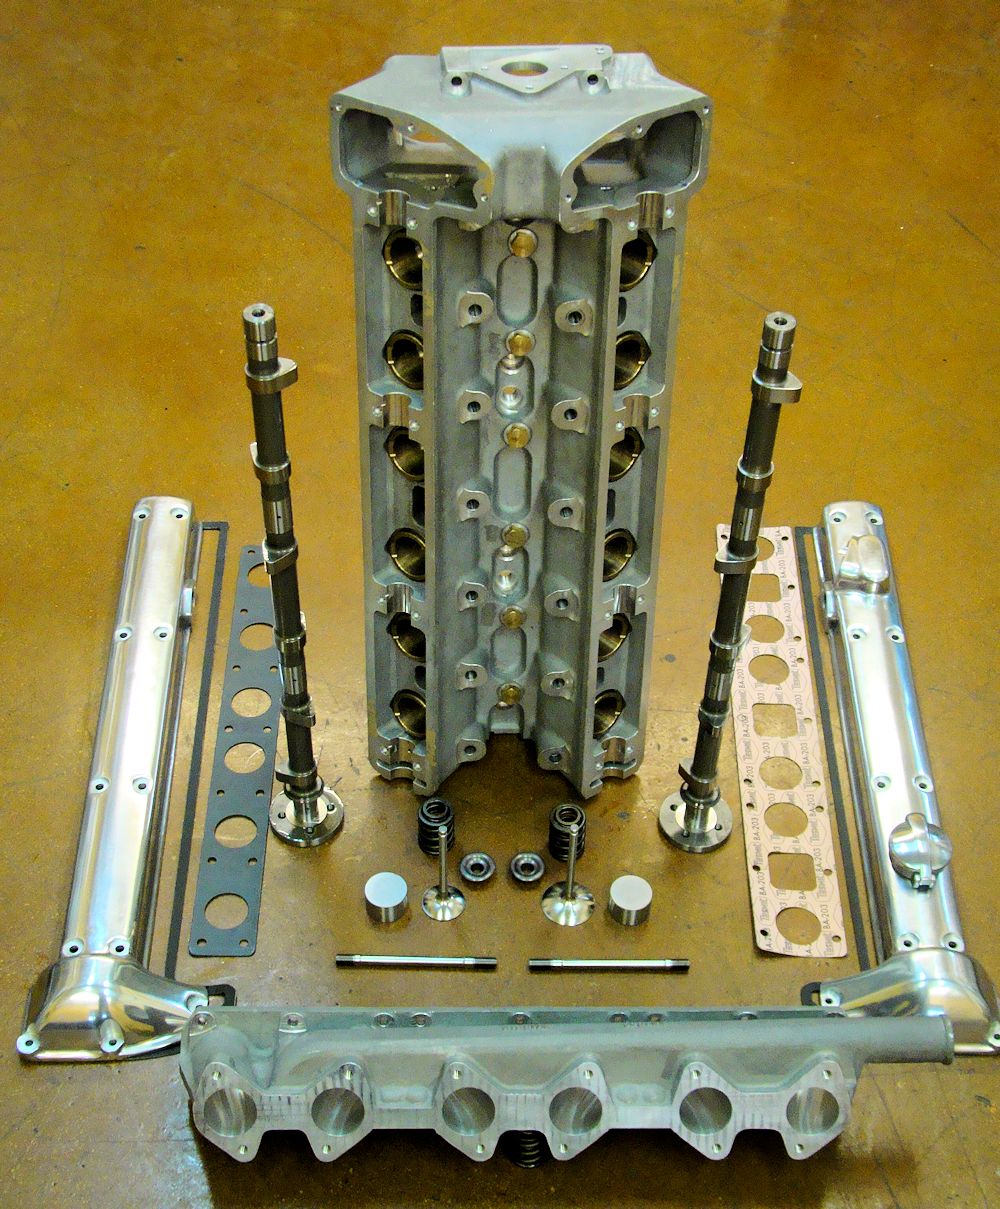
The following sequence of photographs show Matt starting to assemble and install the roll cage, the Suffolk & Turley tan hide we chose to trim the seats, and corrective work done to the wide angled cylinder head.
Block machine work now completed
Matt has huge experience with roll cages and is
enjoying working on the lightweight cage
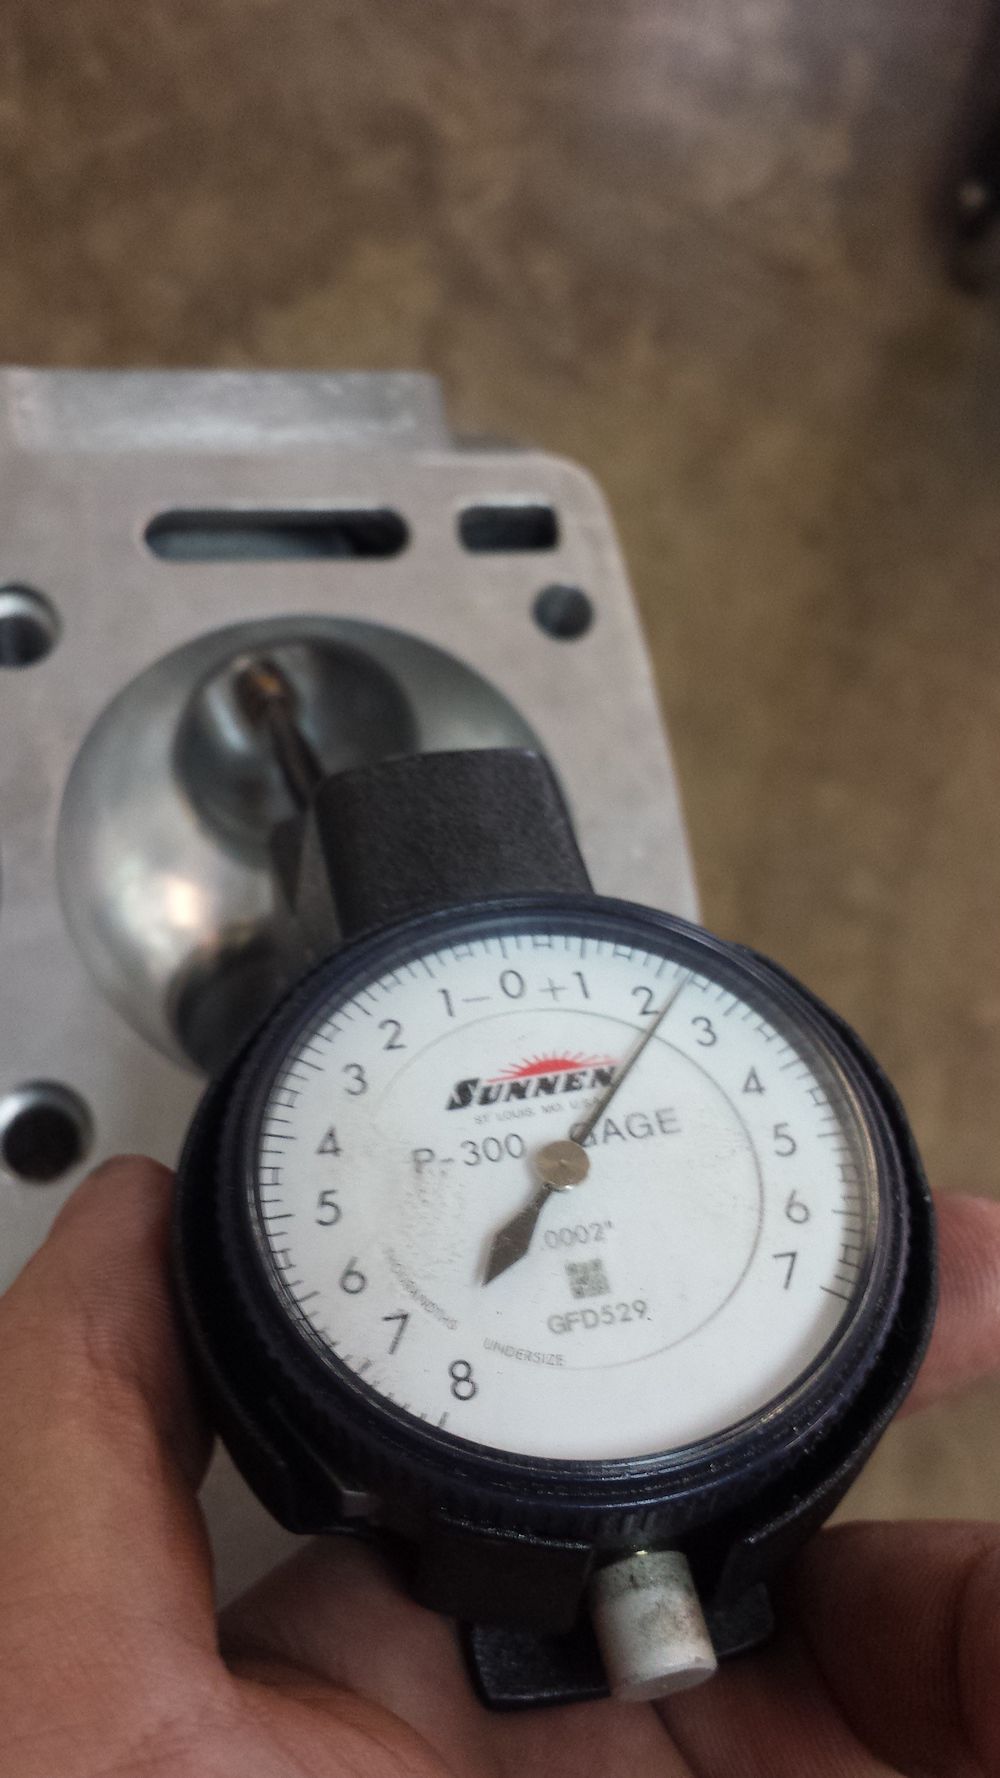
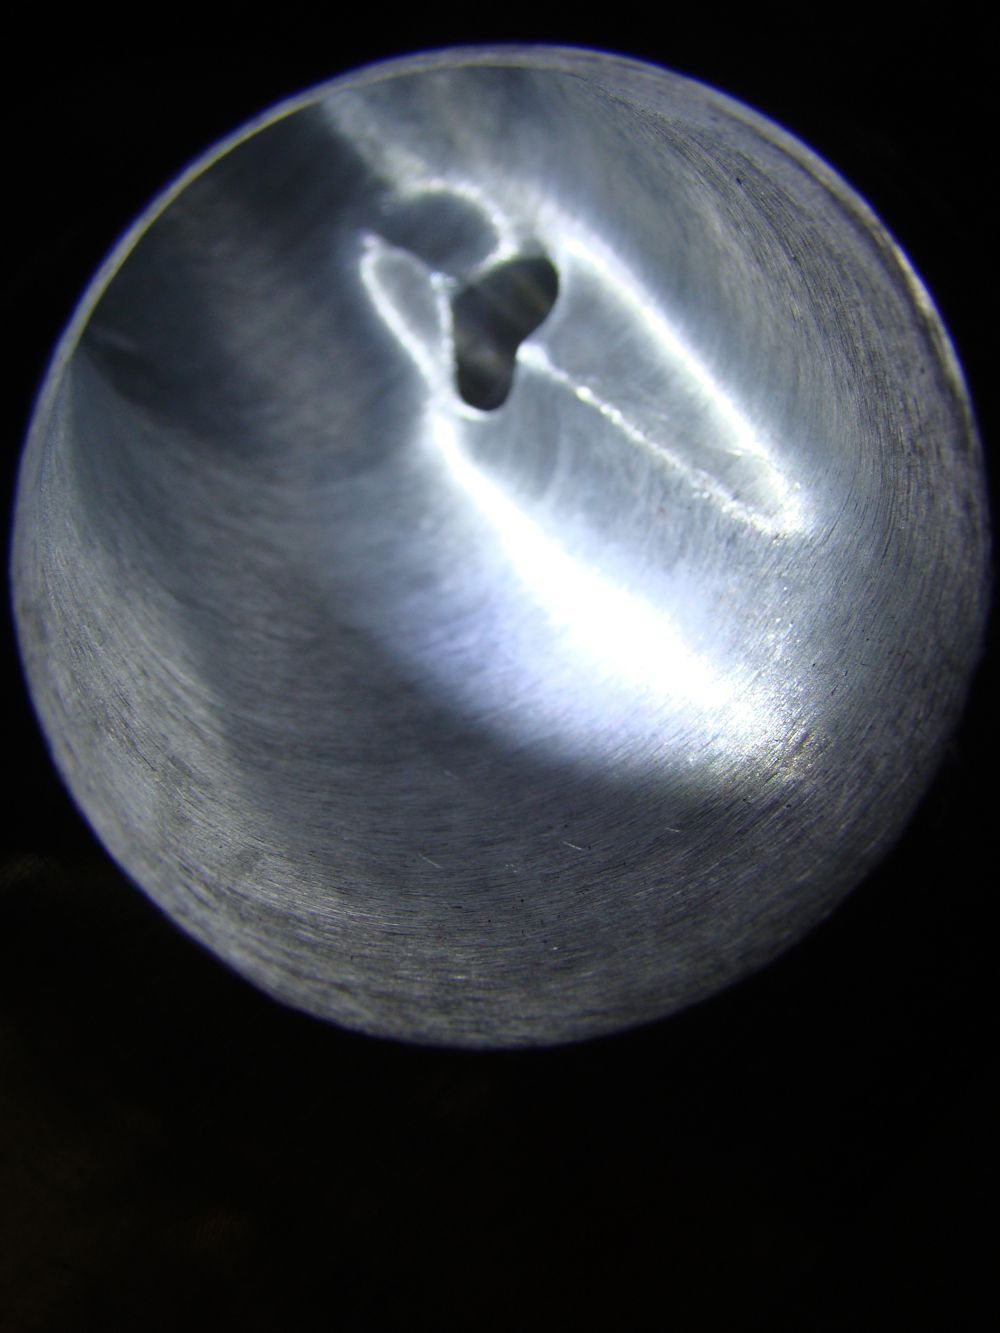
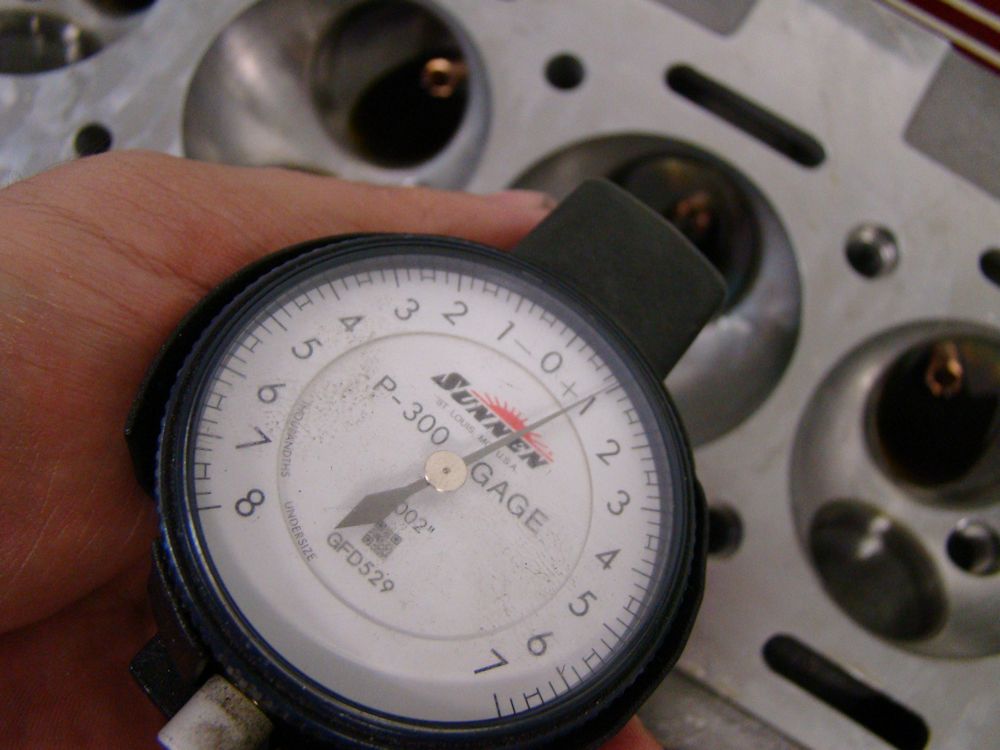
Valve stem to guide clearance was more than twice
what we like to see
Beautiful tan hide will be used to trim the seats
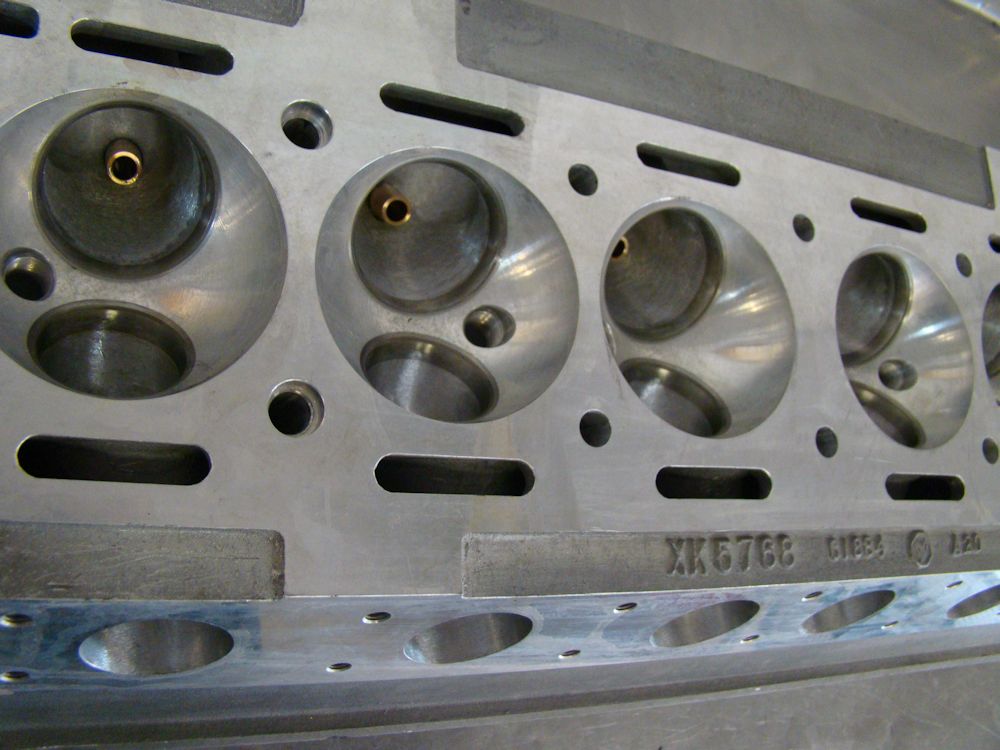
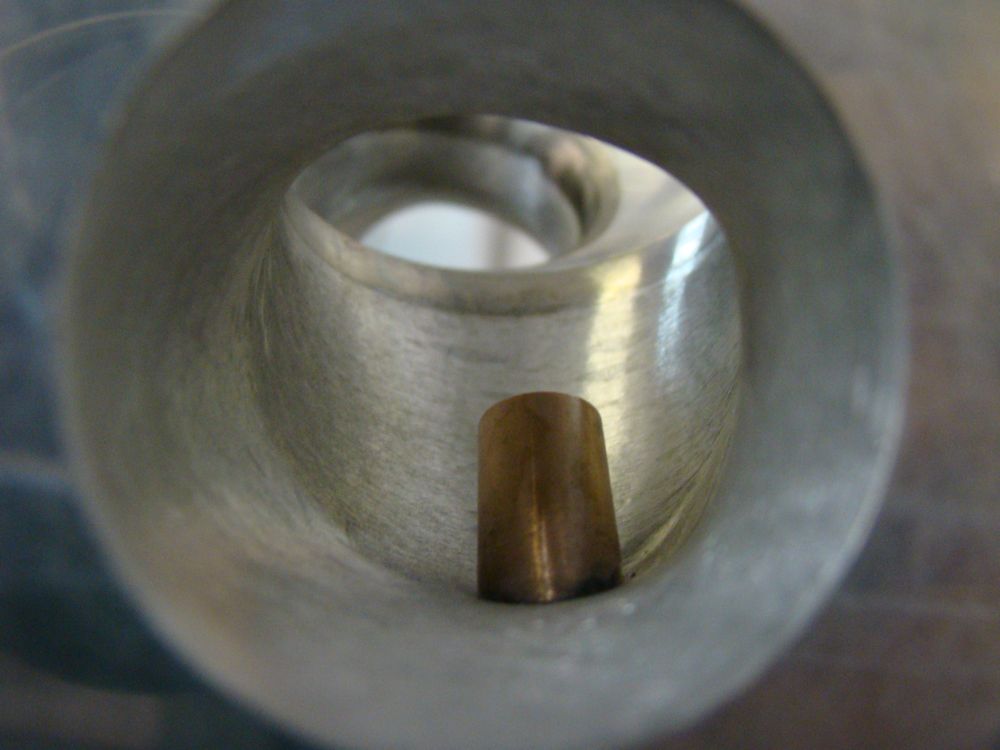
With guides removed, we ported intake and
exhaust runners
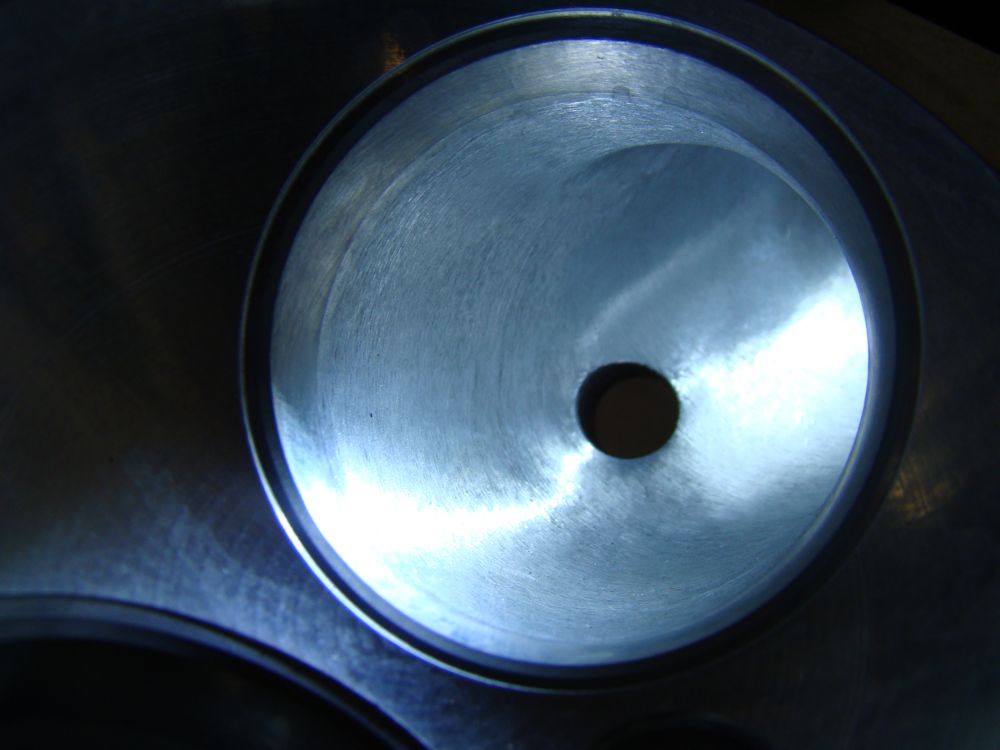
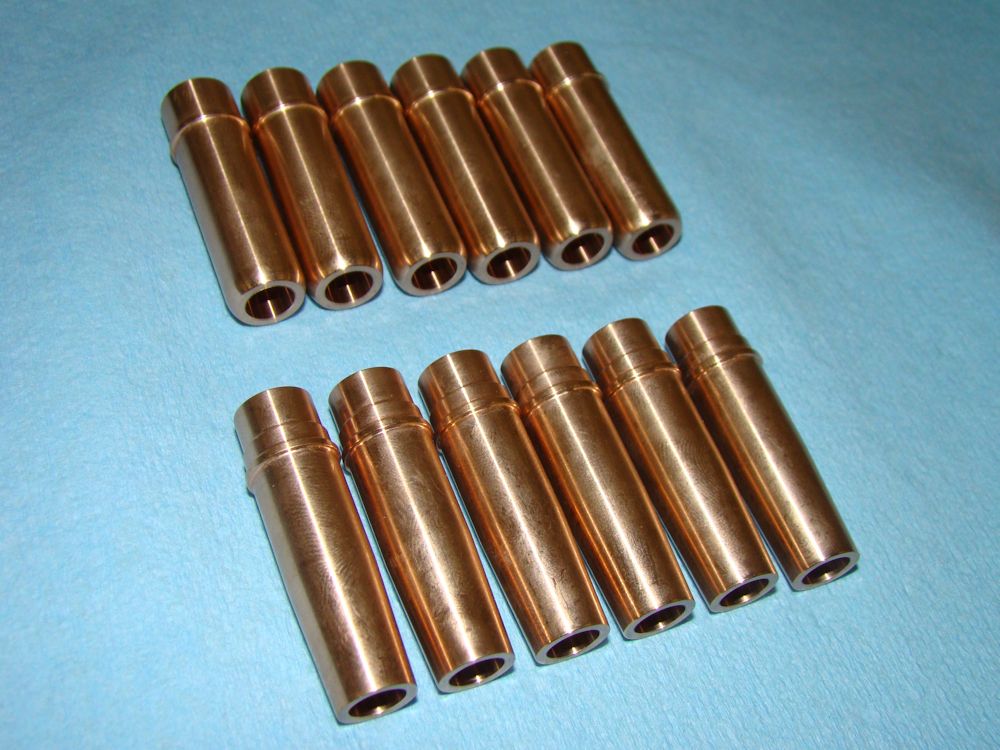
New CJ guides installed
Special 'Trojan' CJ guides bring F1 technology
to this special engine build
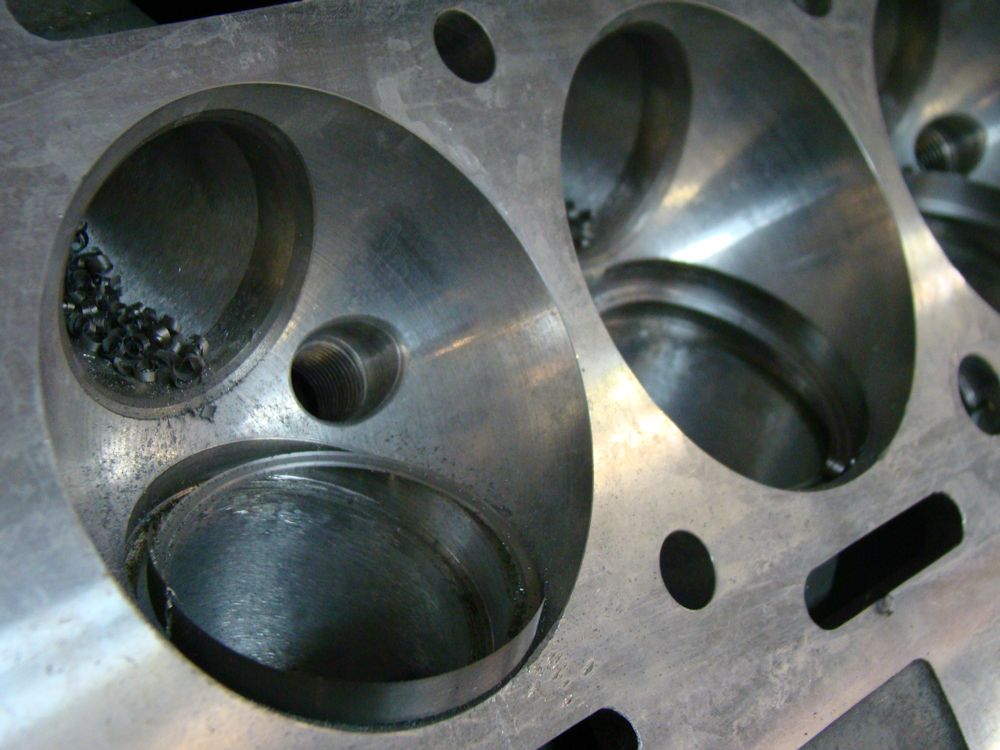
Machining out seats
Note stem to guide clearance now .001"
Head now flows 20 cfm more on the intake
side, 15 cfm on the exhaust
New custom CJ seats installed
Seat pockets sized for custom CJ valve seats
Machining multi angled valve job
After align hone, cam caps now perfectly
sized and aligned
Cam caps were between .003" and .006" out of
round on the intake side - align hone required
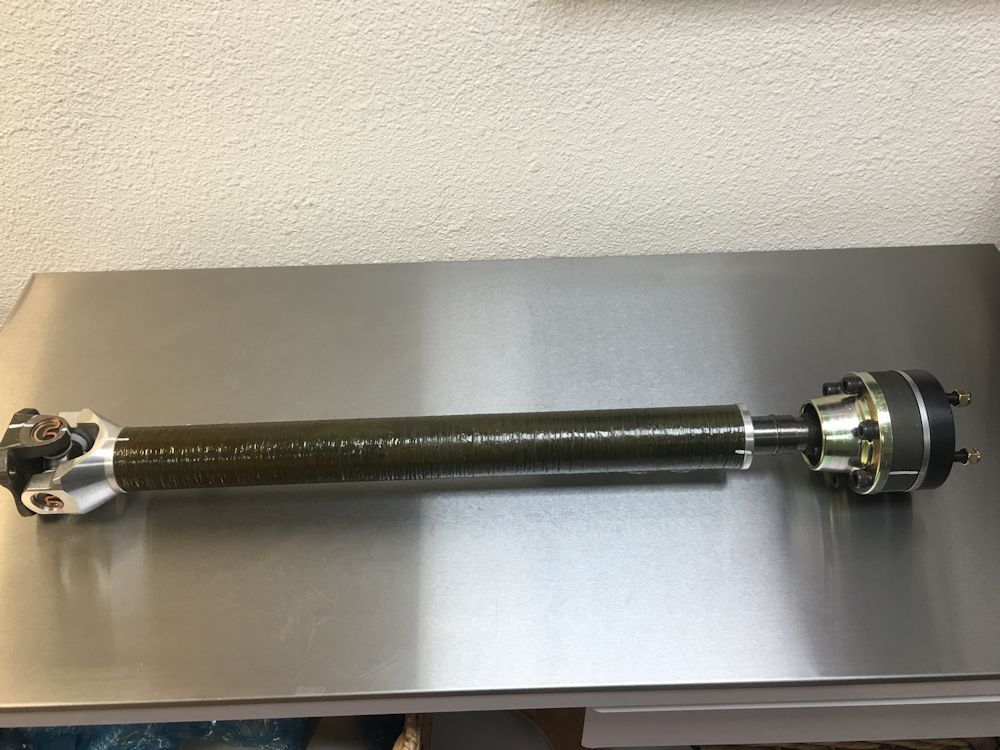
Team CJ Lightweights feature high tech CJ
carbon fiber driveshafts
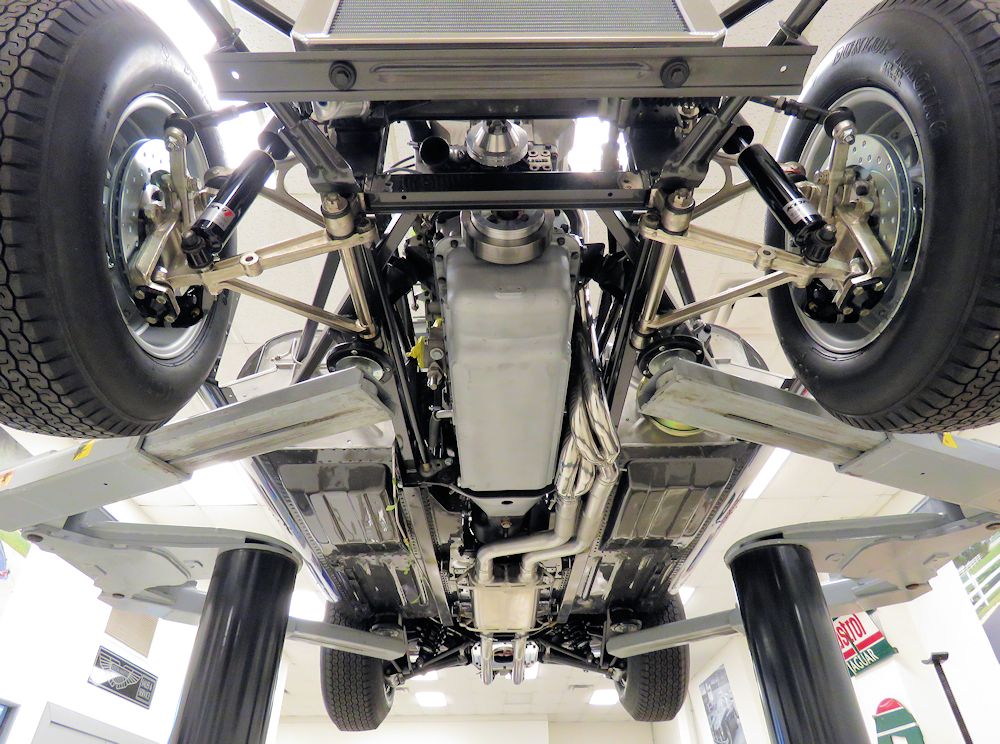
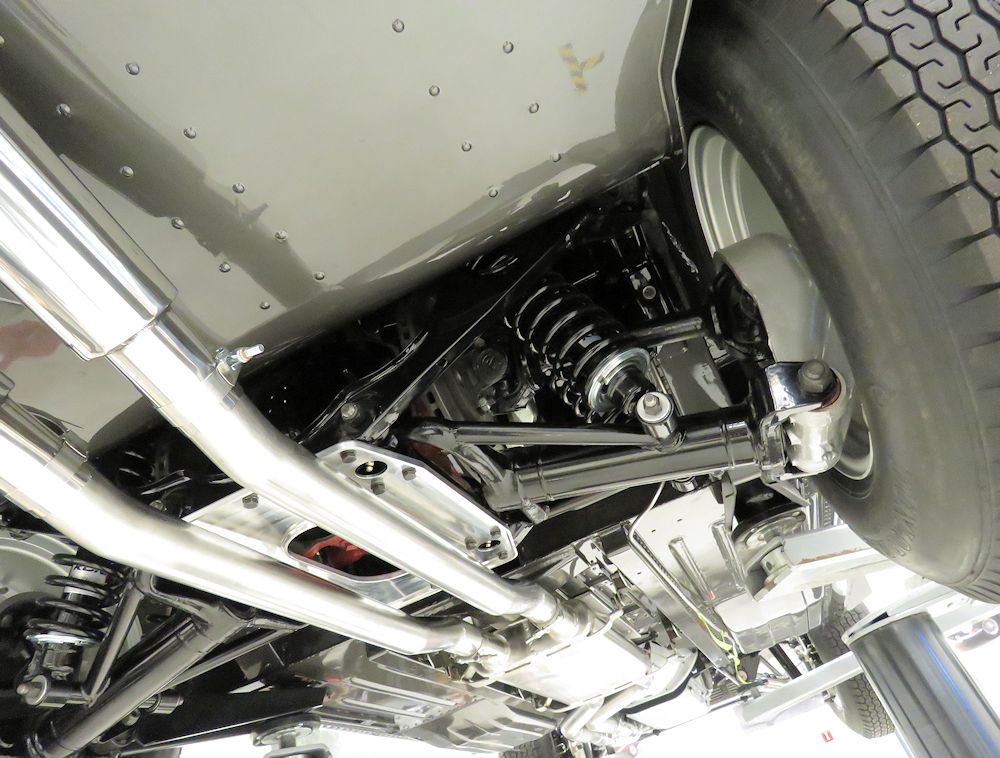
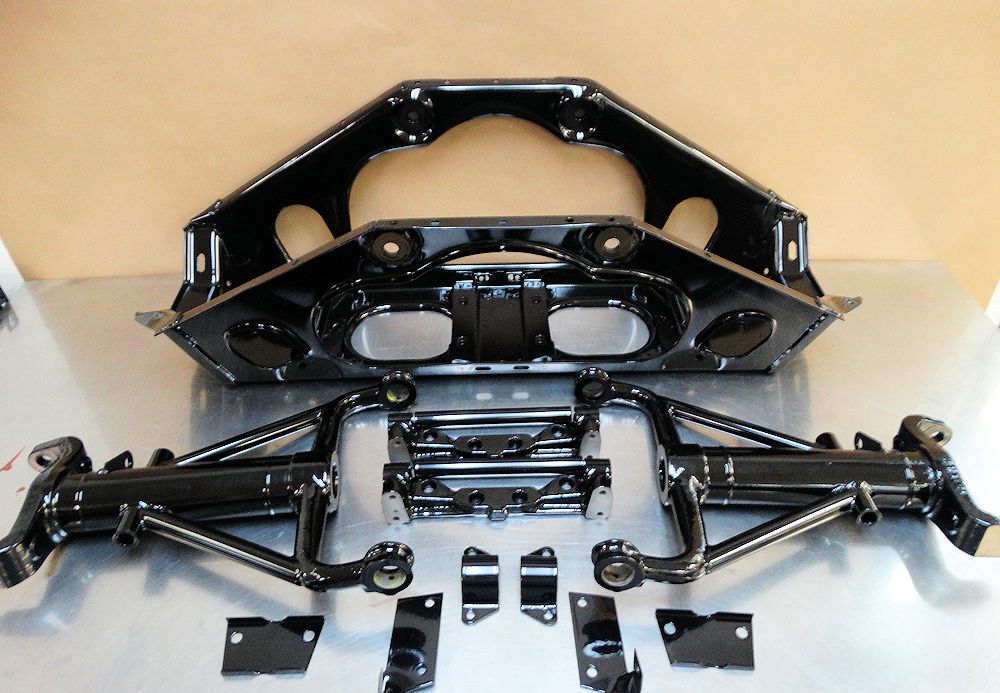
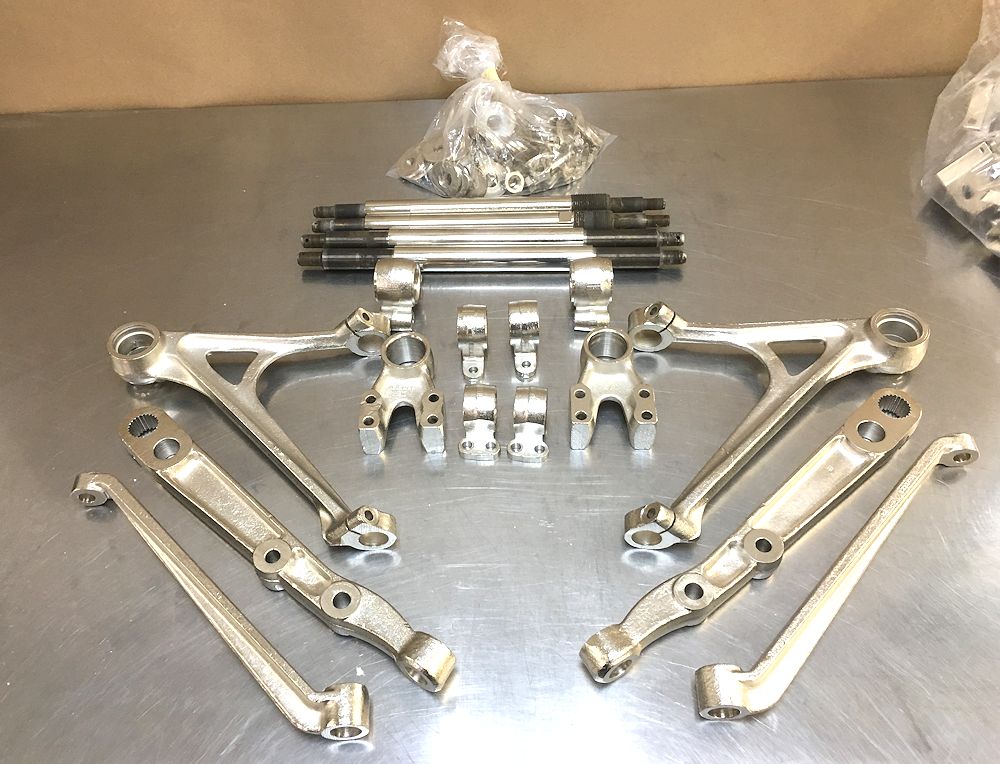
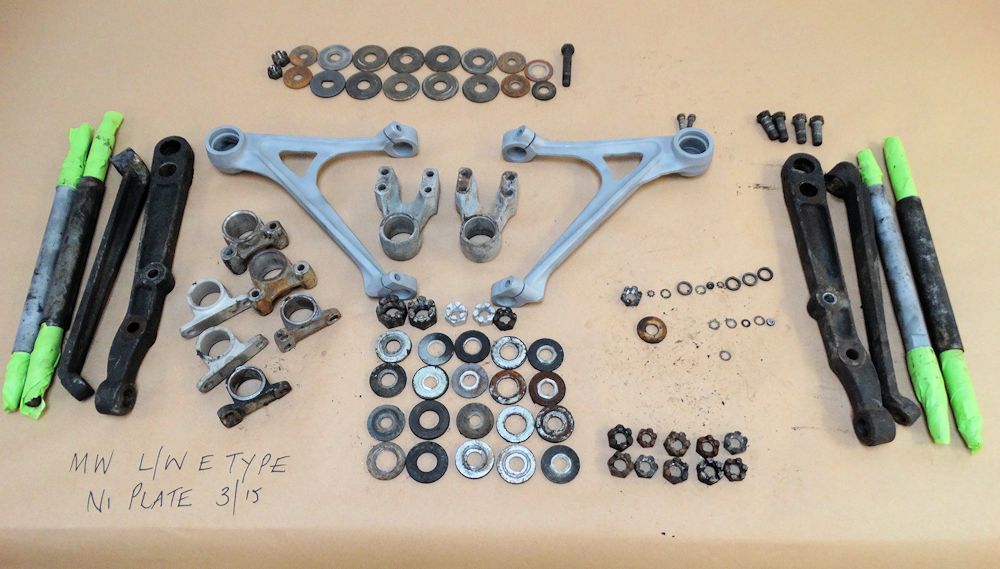
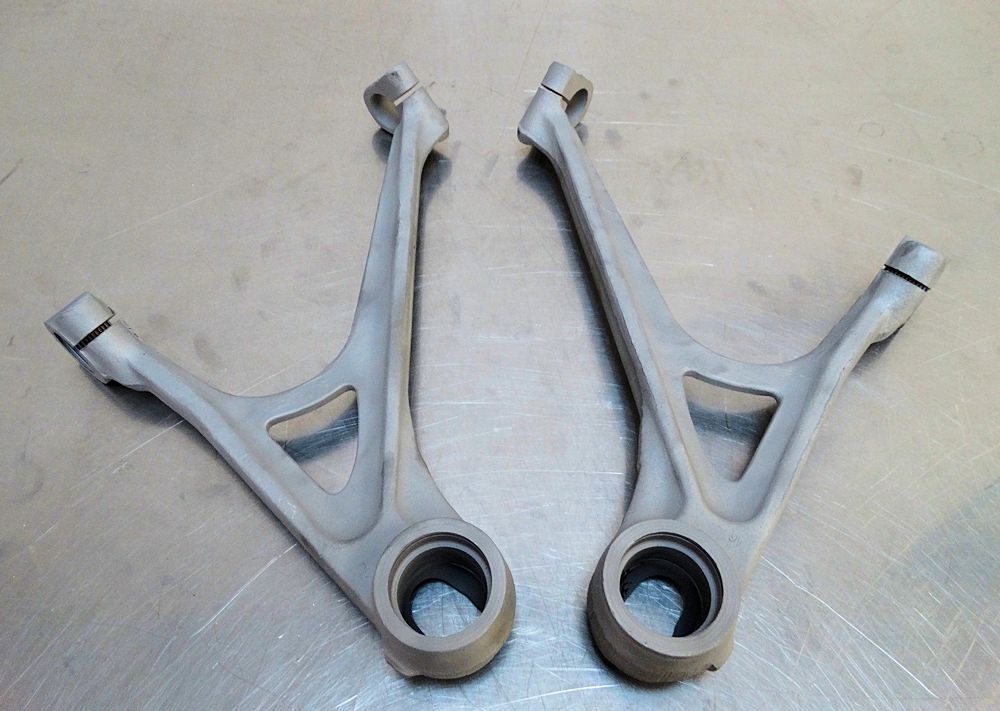
IRS components have been media blasted and powder coated, front suspension Nickel plated...
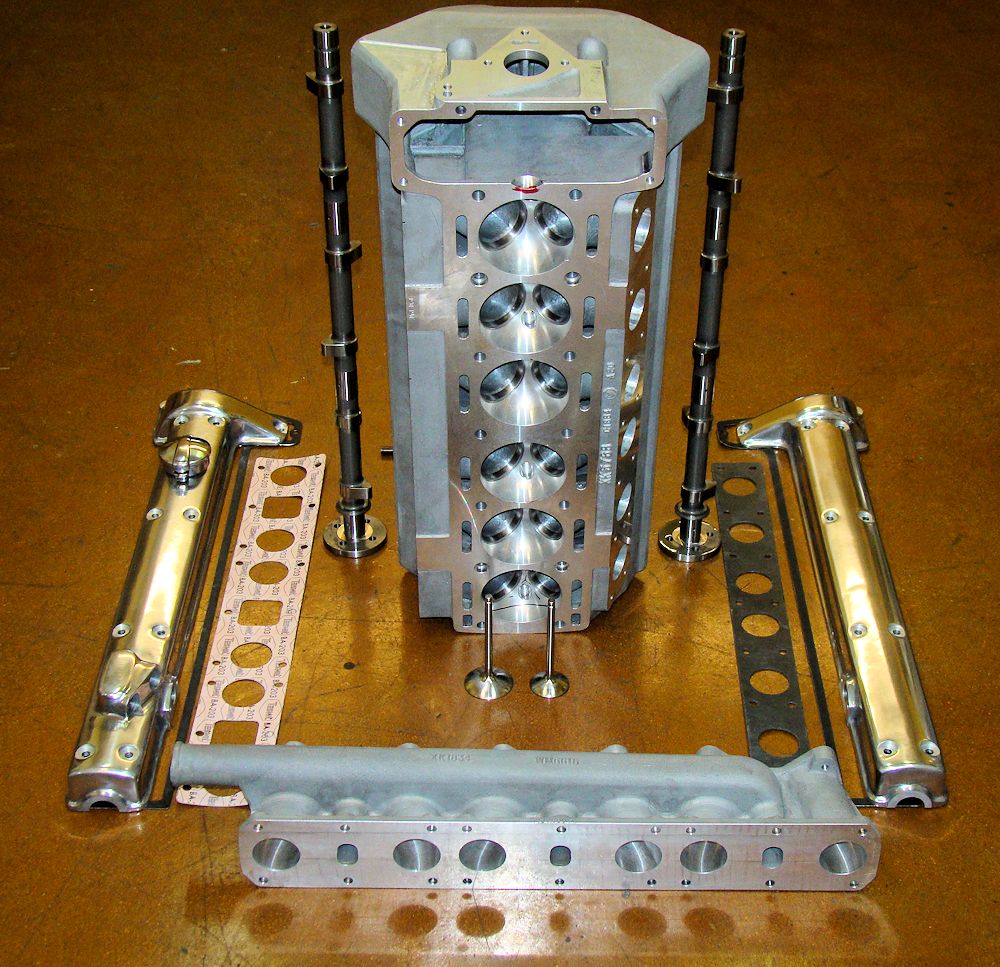
Wide angled head and special Weber manifold
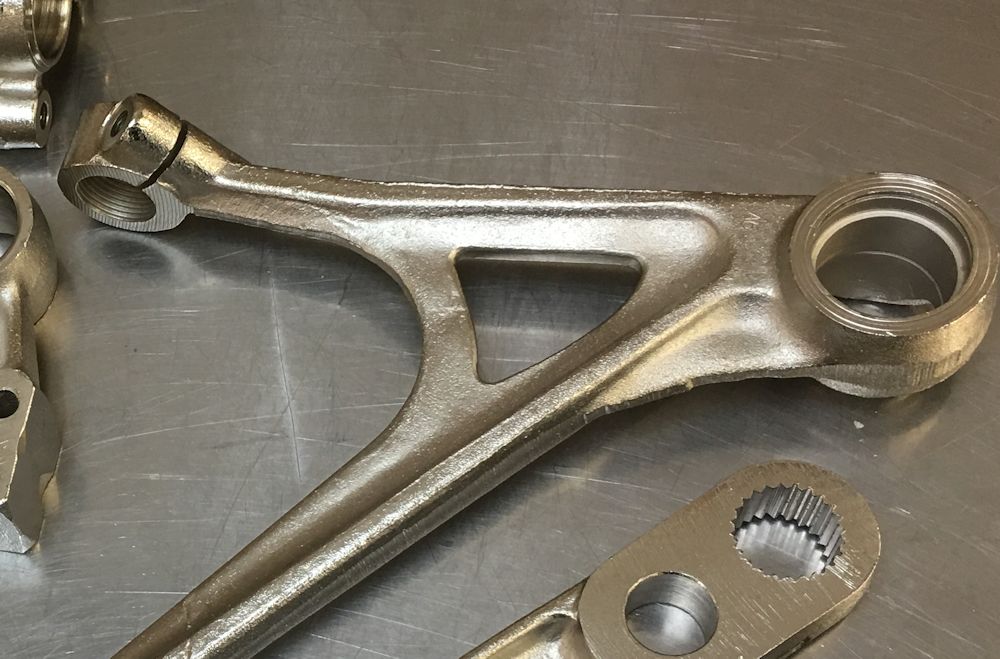
Note modified control arms, per original
Front suspension has been Nickel plated
Special Weber manifold for use with wide
angled head
Front suspension components going out for
Nickel plating
Upper control arms modified per the original
1963 Lightweights
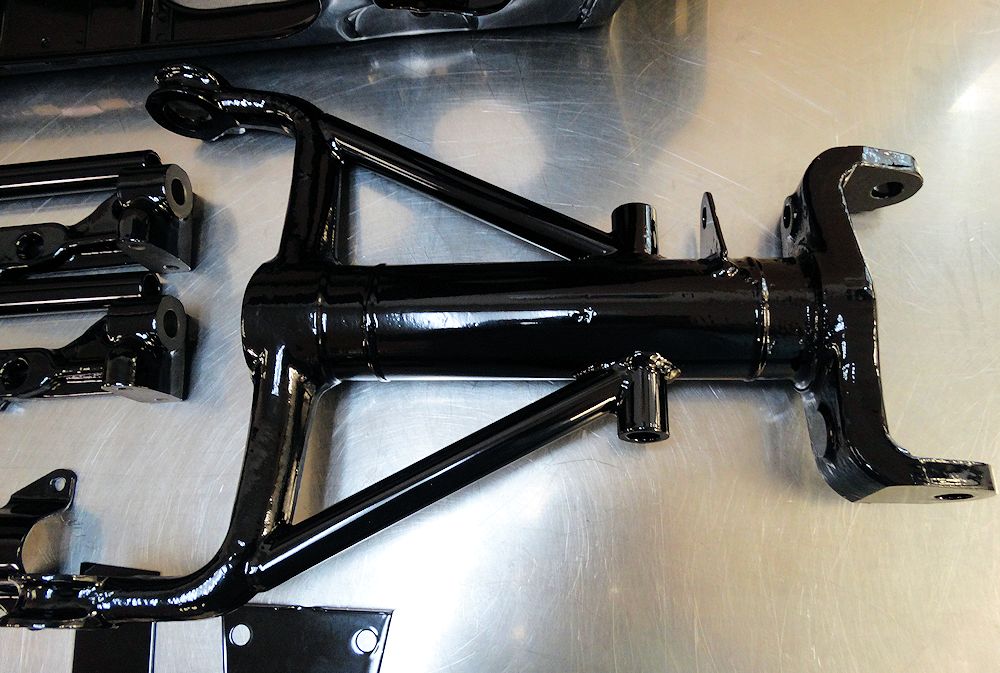
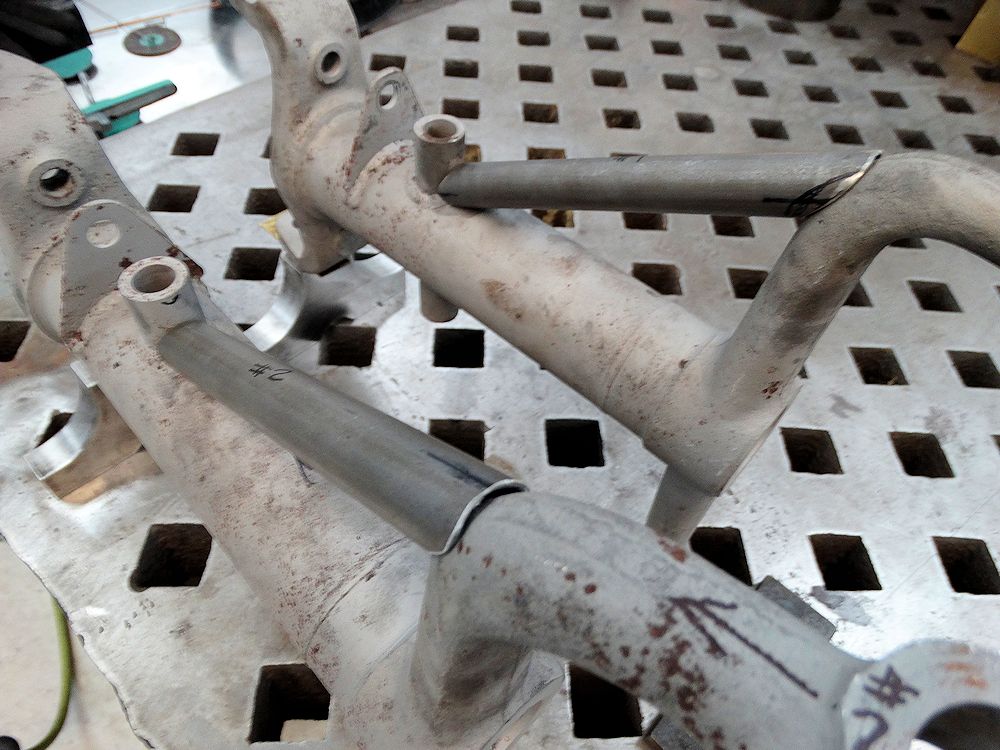
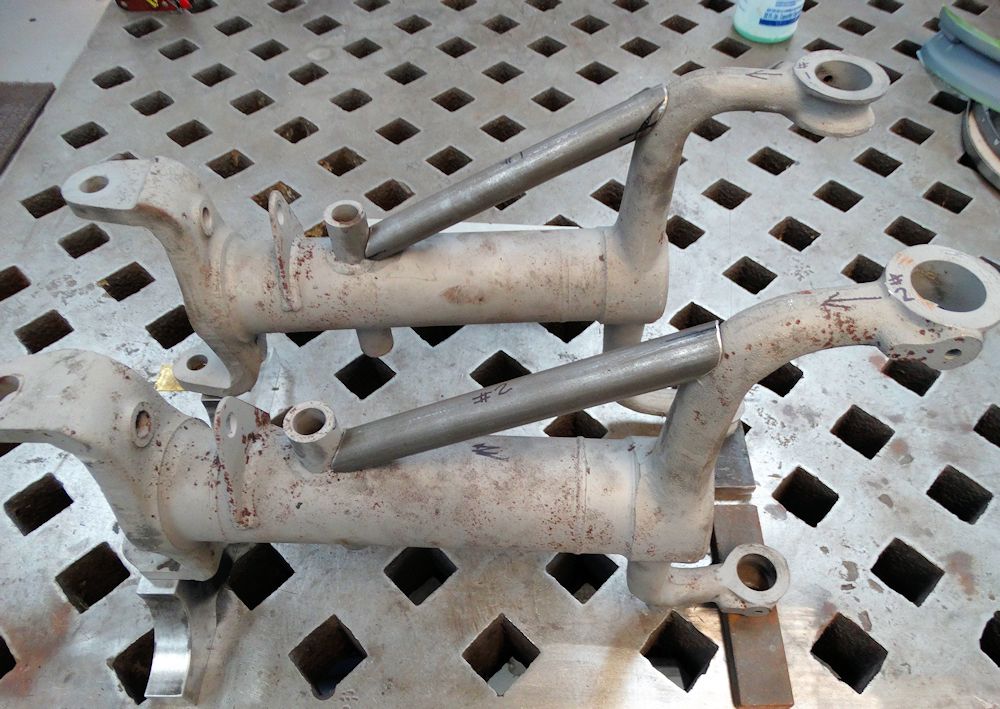
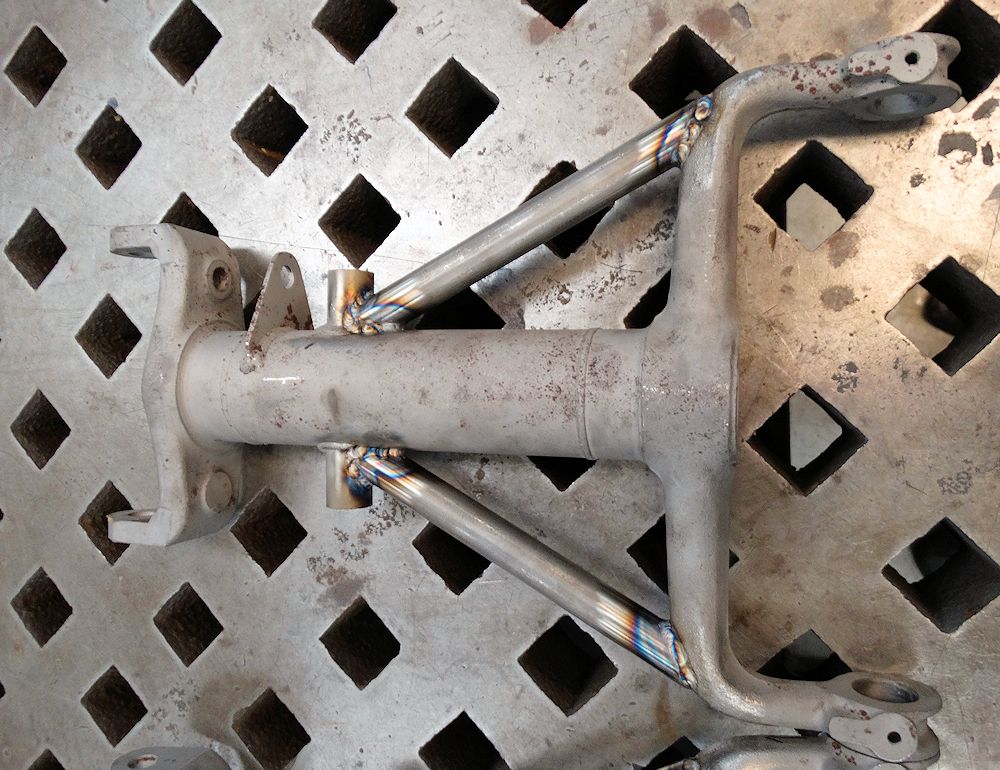
Bracing prevents flexing due to hugely increased
torque of the Stage Two engine
Reinforcing the rear wishbones with 7/8"
chromemoly tubing
Uprated rear calipers and vented rotors
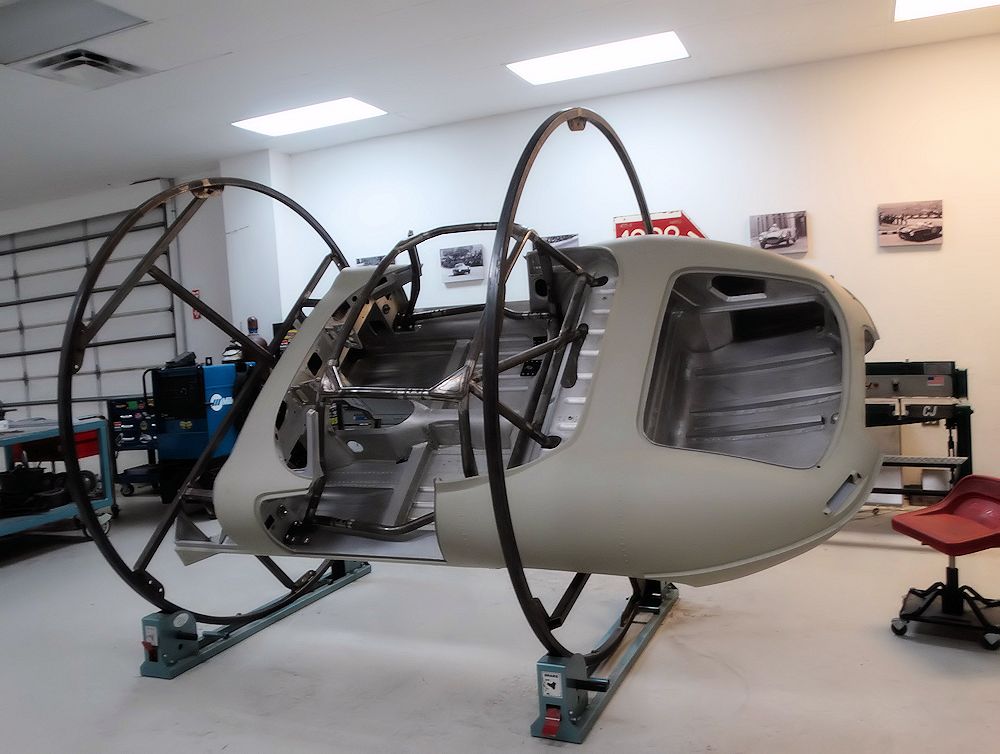
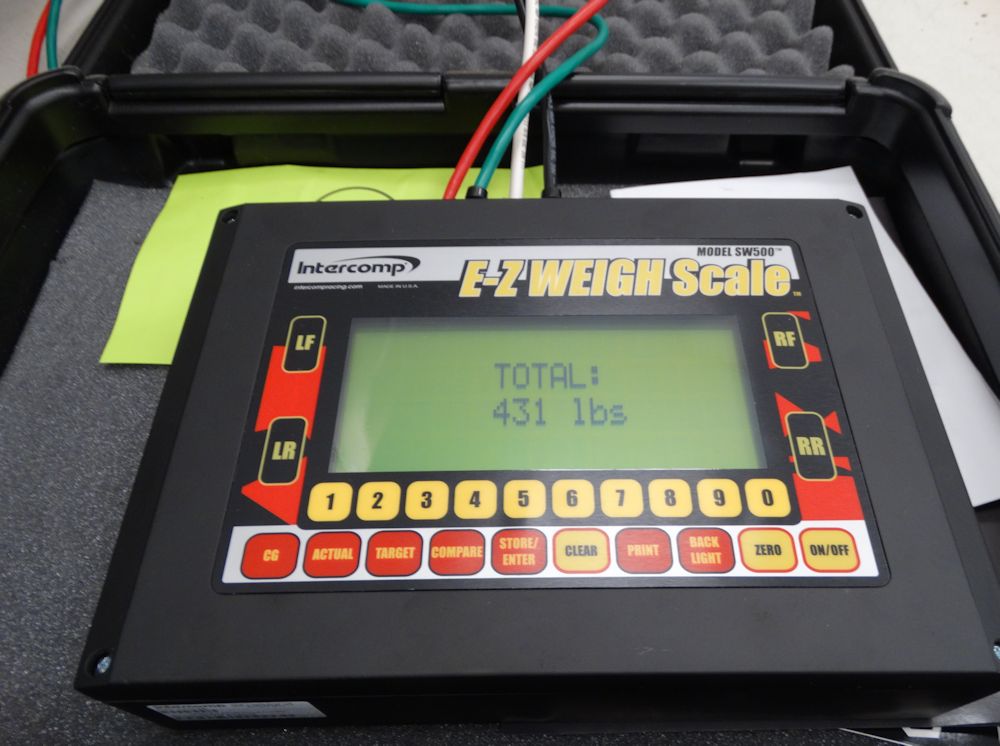
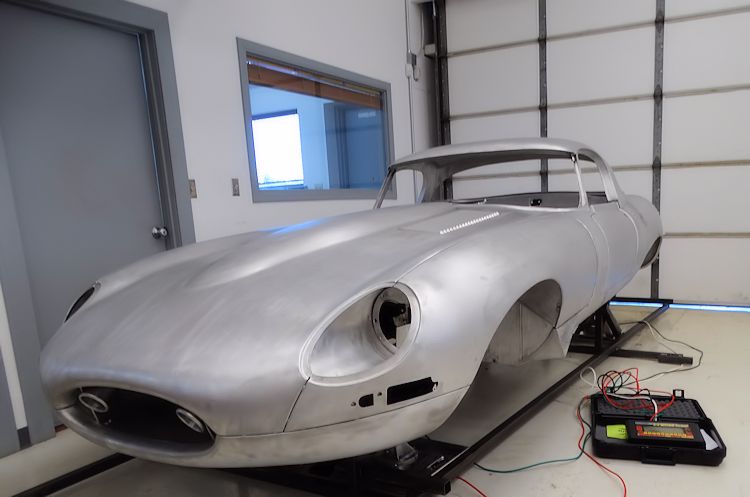
Just how much does a fully assembled Team CJ Lightweight E Type body weigh?
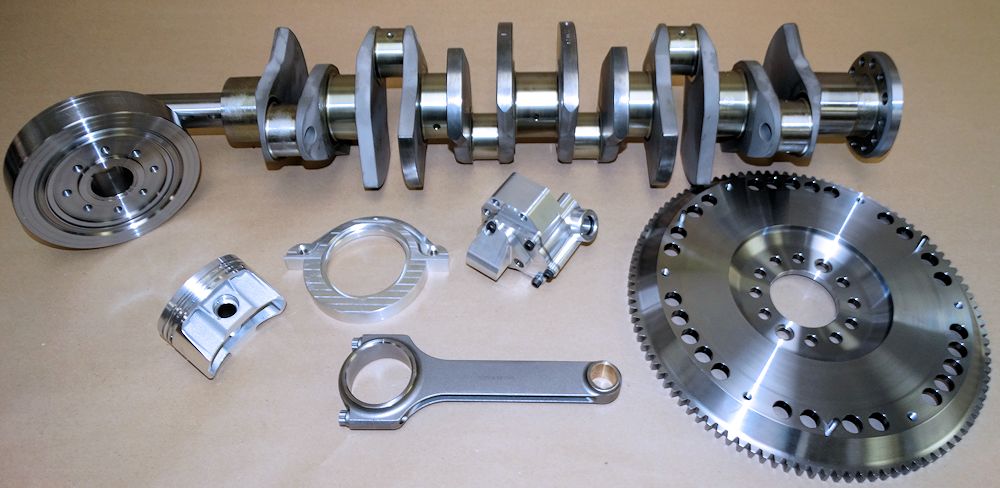
Setting aside some of the components for the Stage Two engine. The build will feature a billet crankshaft (stroked to 4.2L), forged Carrillo rods, ultra-light forged pistons, a high output billet oil pump and a 12lb Team CJ billet steel flywheel.
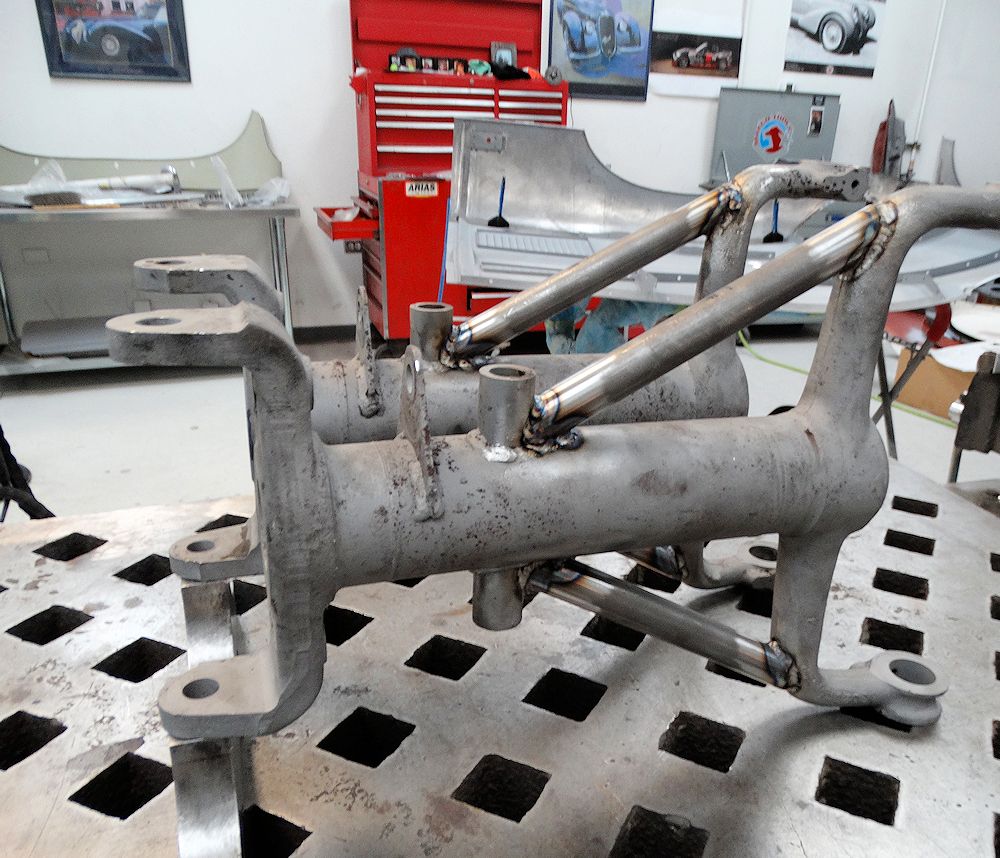
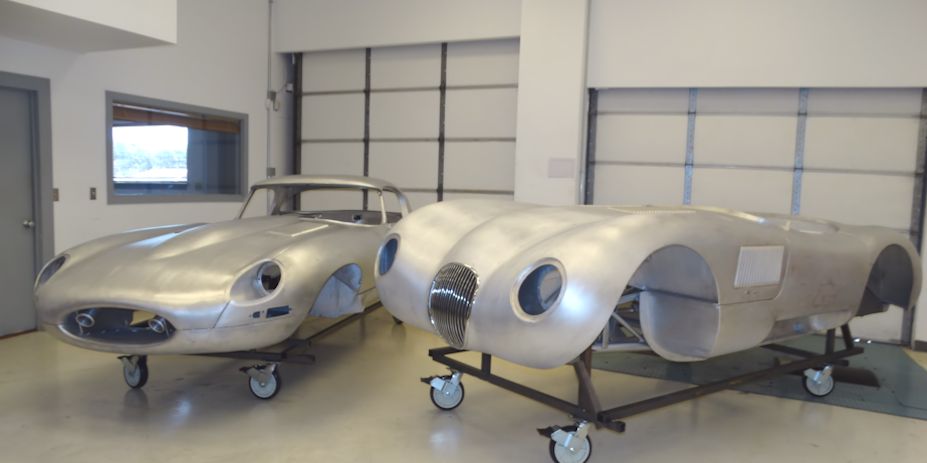
This car features a lightweight aluminum monocoque with chromium molybdenum engine subframes and steel reinforced suspension anchor points.
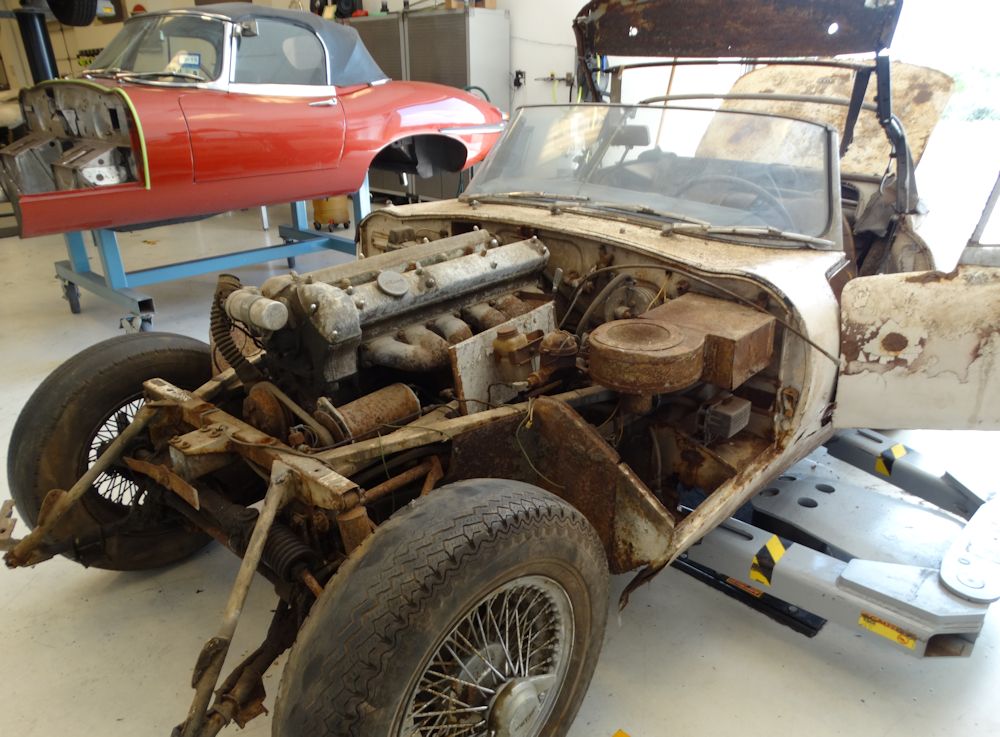
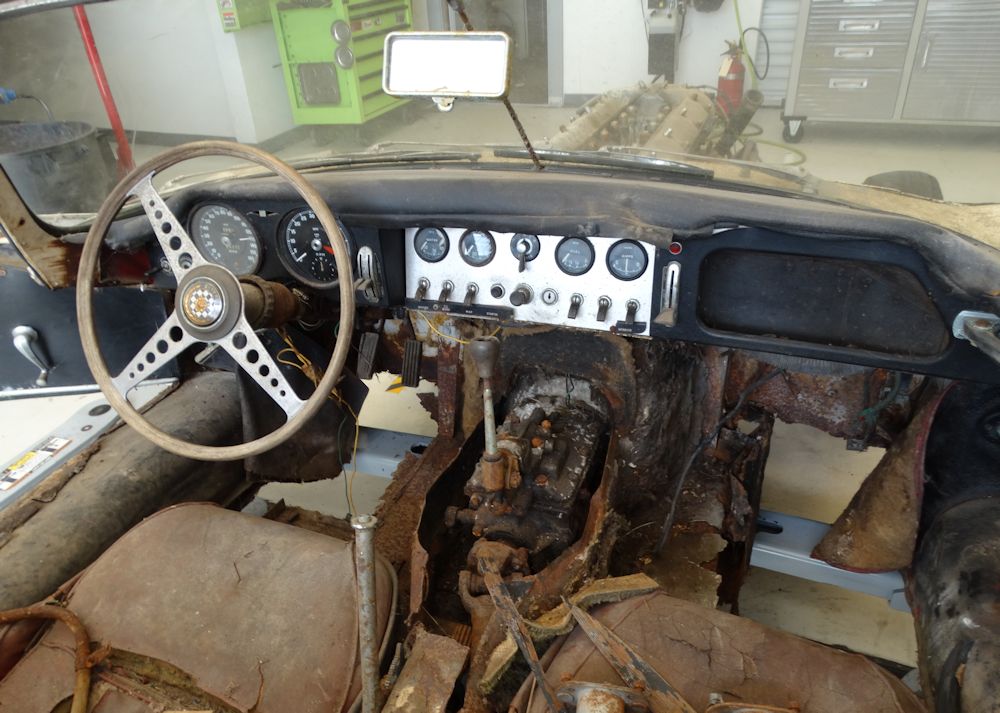
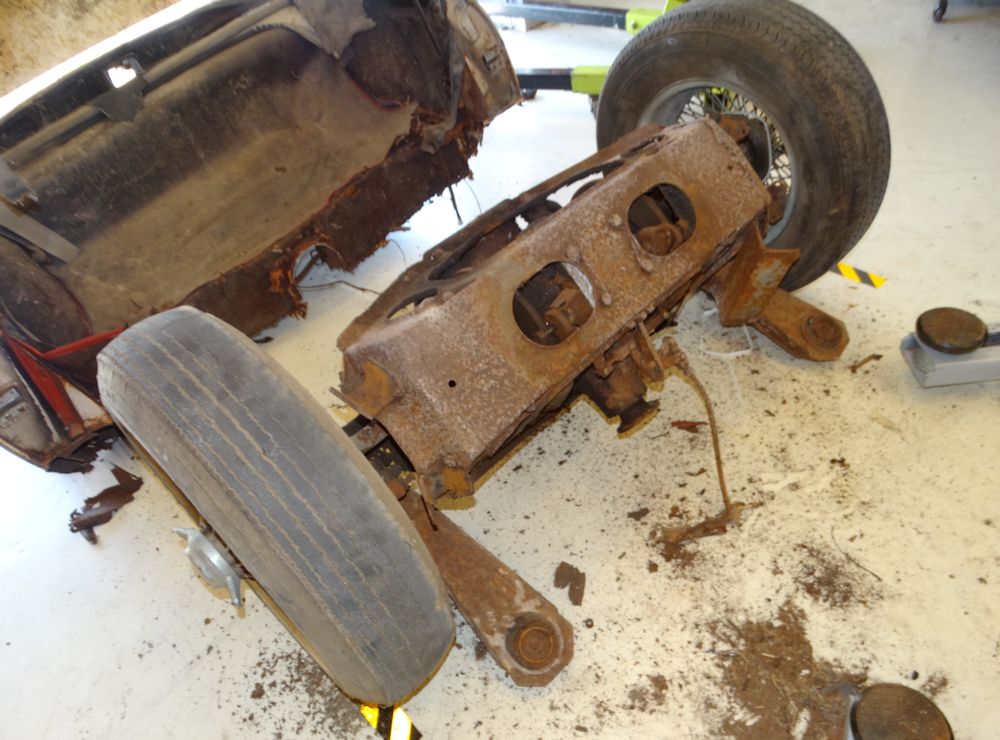
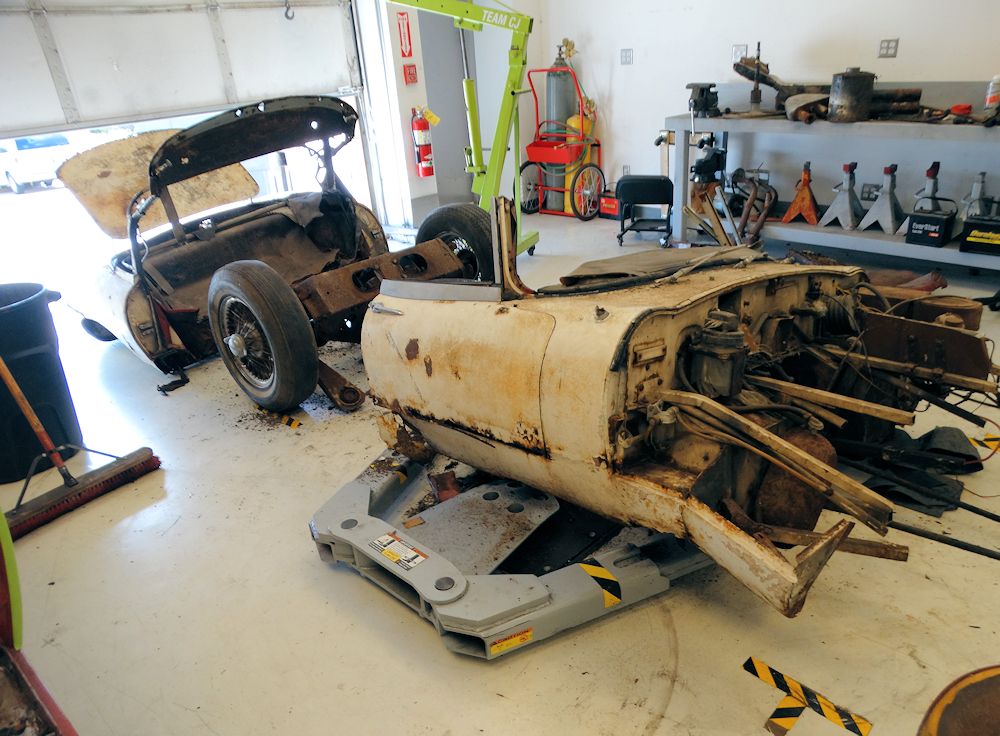
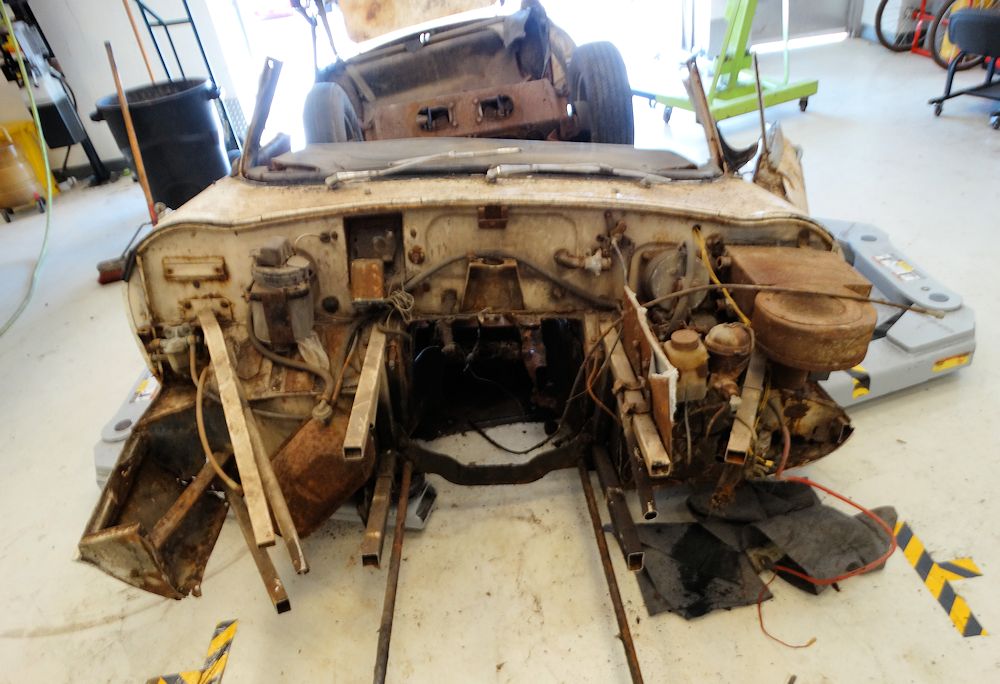
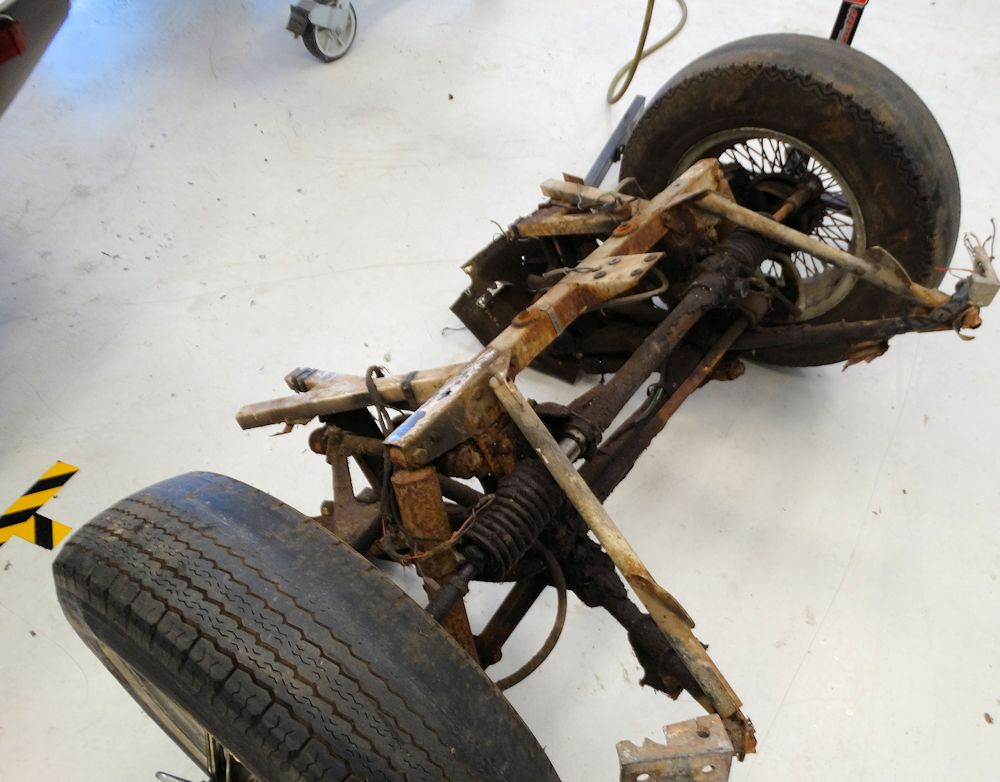
Time to tear down the donor car and harvest the parts we need for this Team CJ Lightweight E Type.
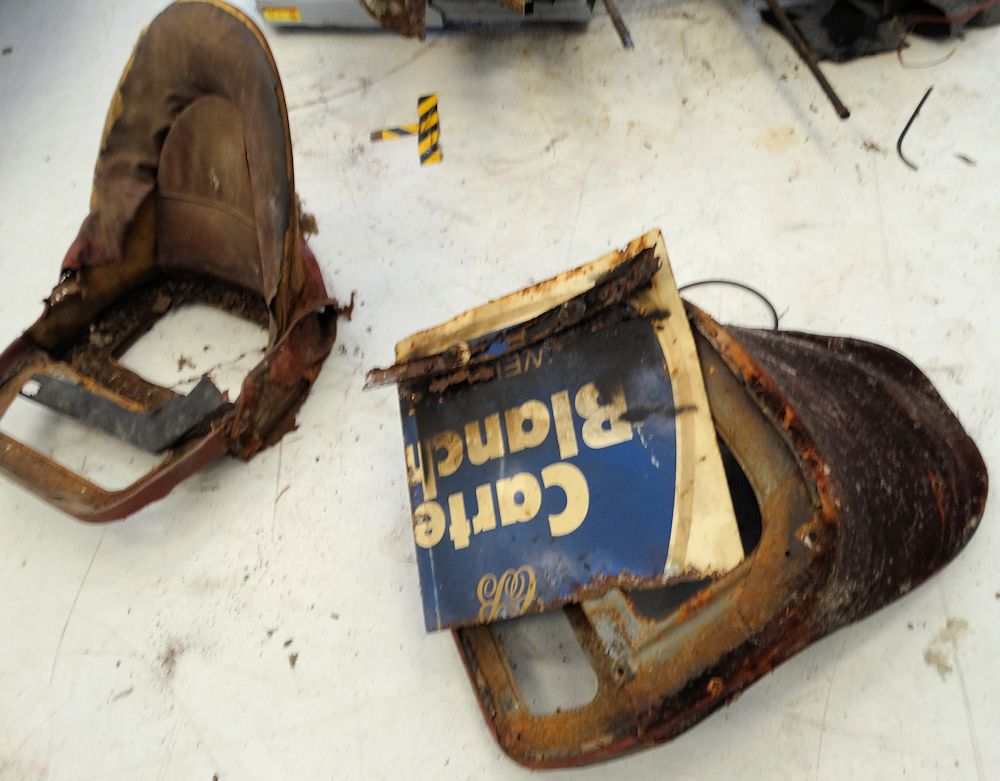
Gauges are about the only things we need from
the cabin
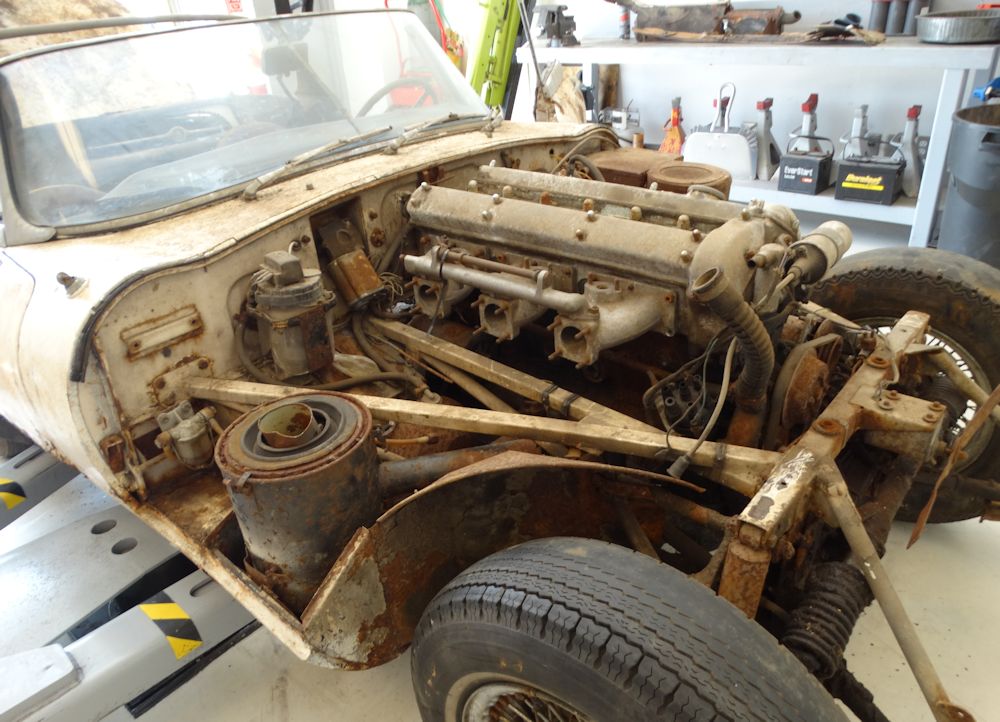
Matching number engine block will be used with a
wide angled head
IRS will be rebuilt and upgraded
Body shell cut in two during tear down
Not much of use left in the engine bay!
Carte Blanche...indeed
Steering and suspension components will be
salvaged and upgraded
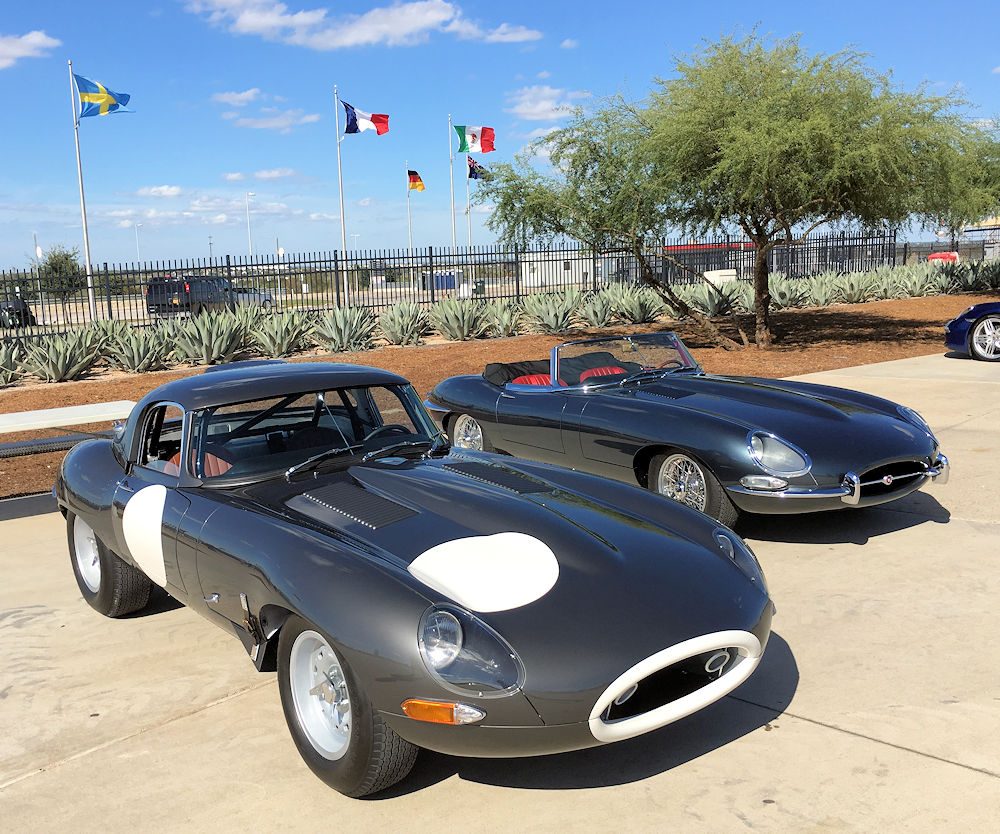
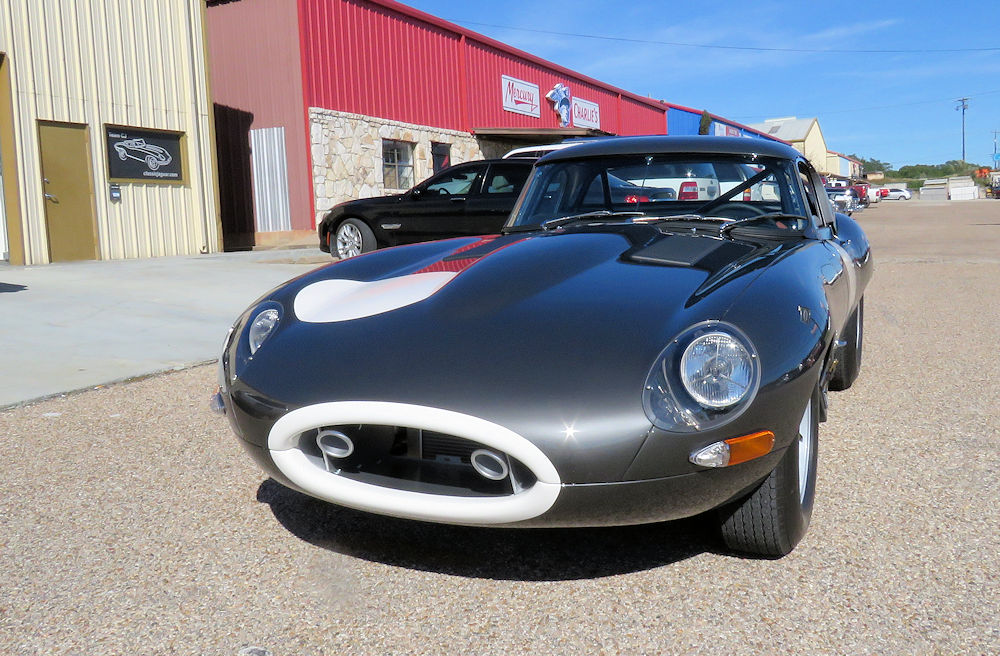
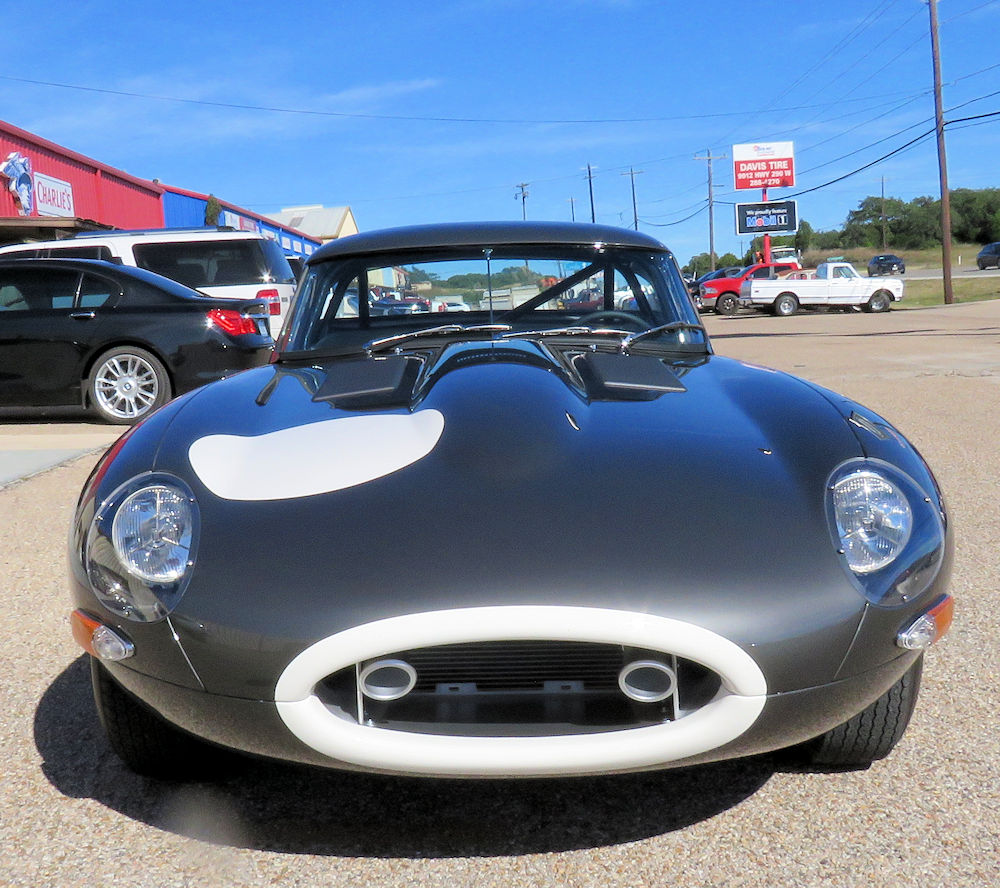
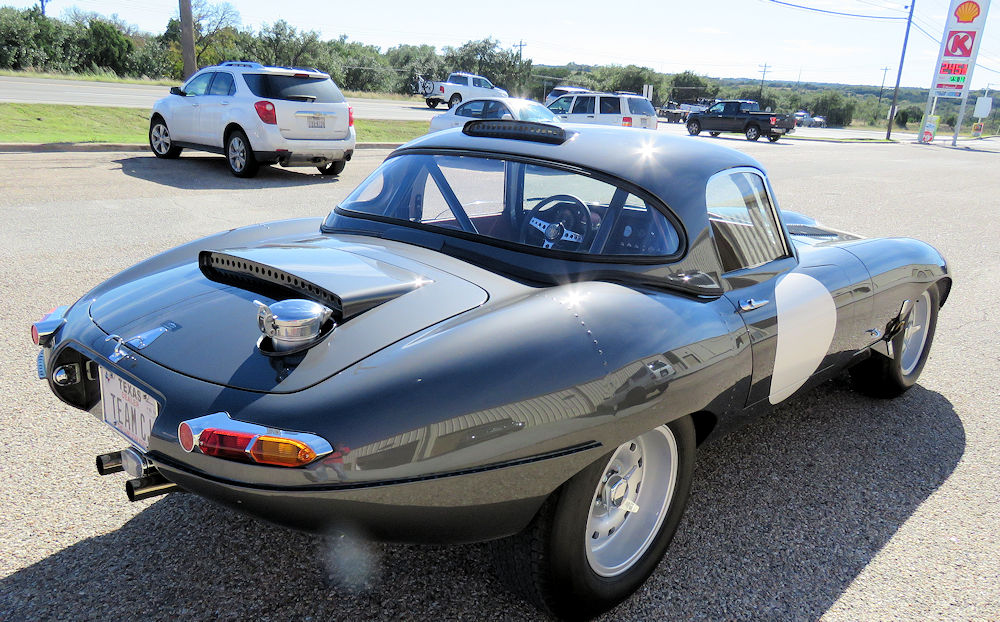
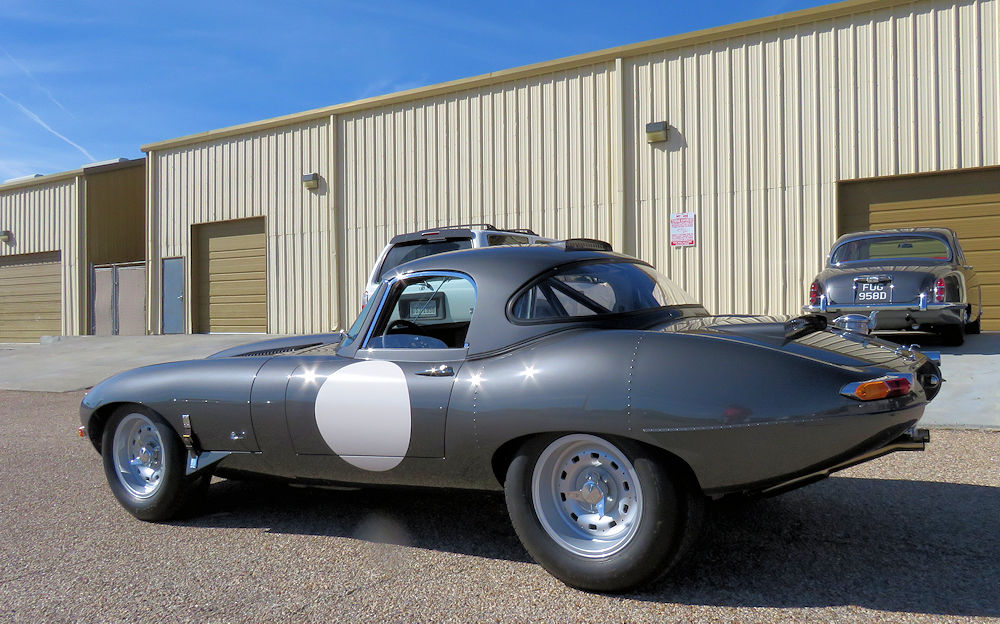
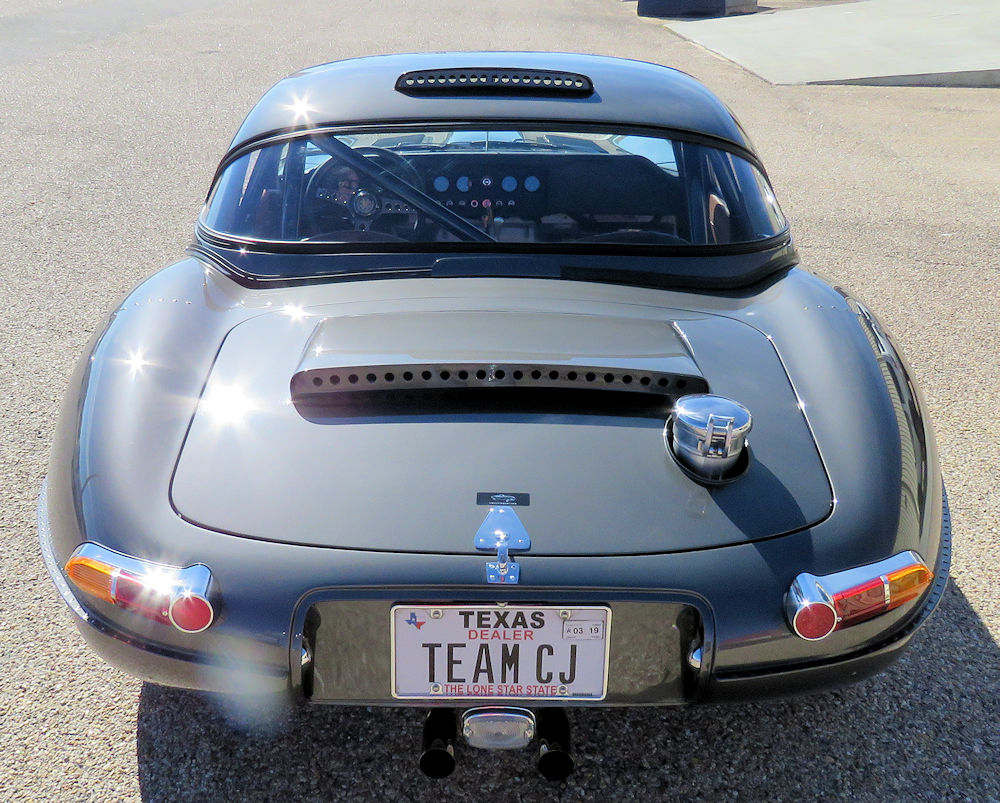
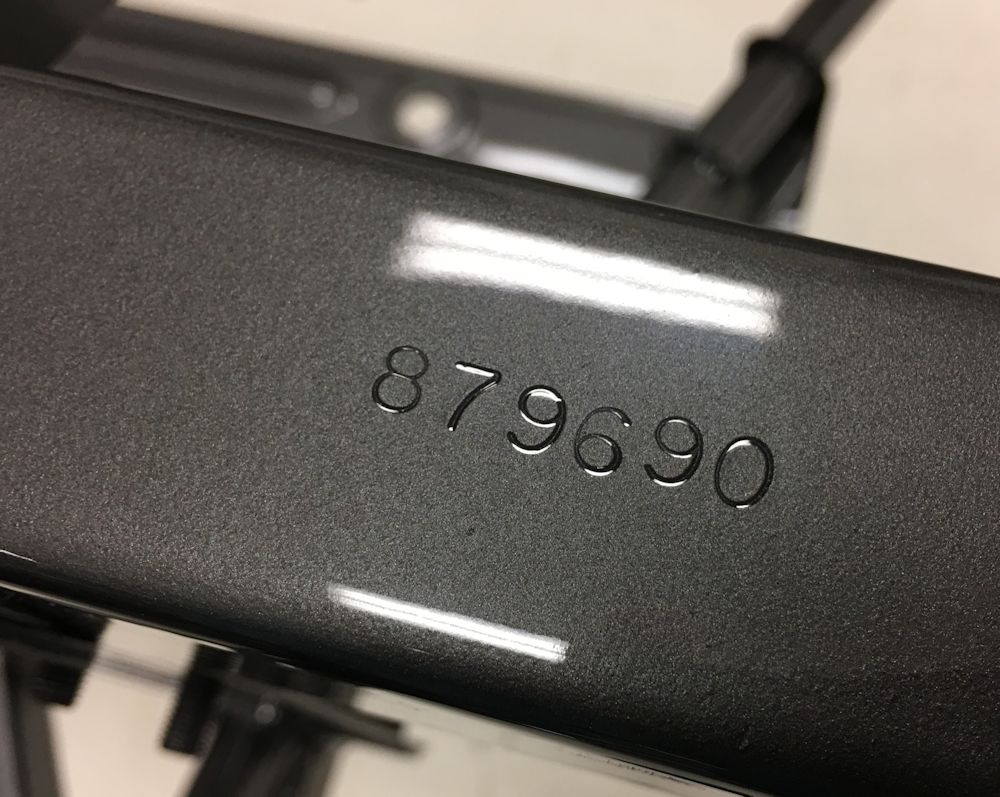
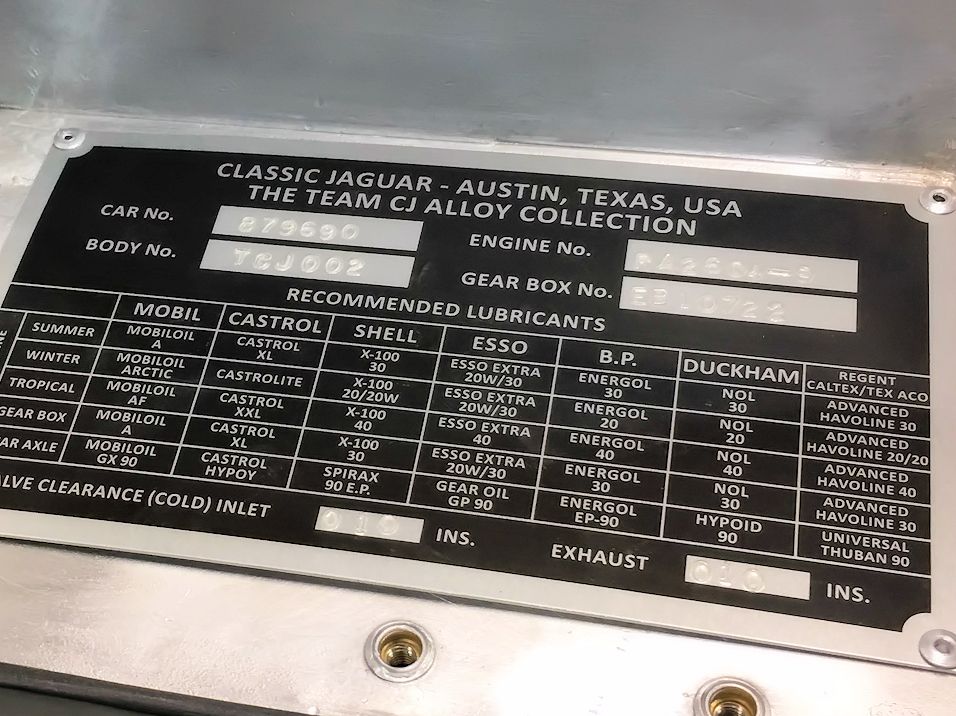
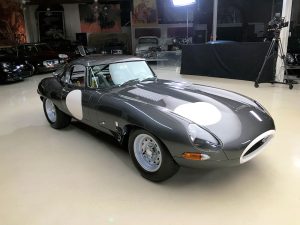 This matching numbers 1963 Series One E Type is being restored as a Team CJ lightweight alloy roadster in the style of the 1963 factory lightweight racing E Types. It will be finished in Opalescent Gunmetal over Dark Tan hides.
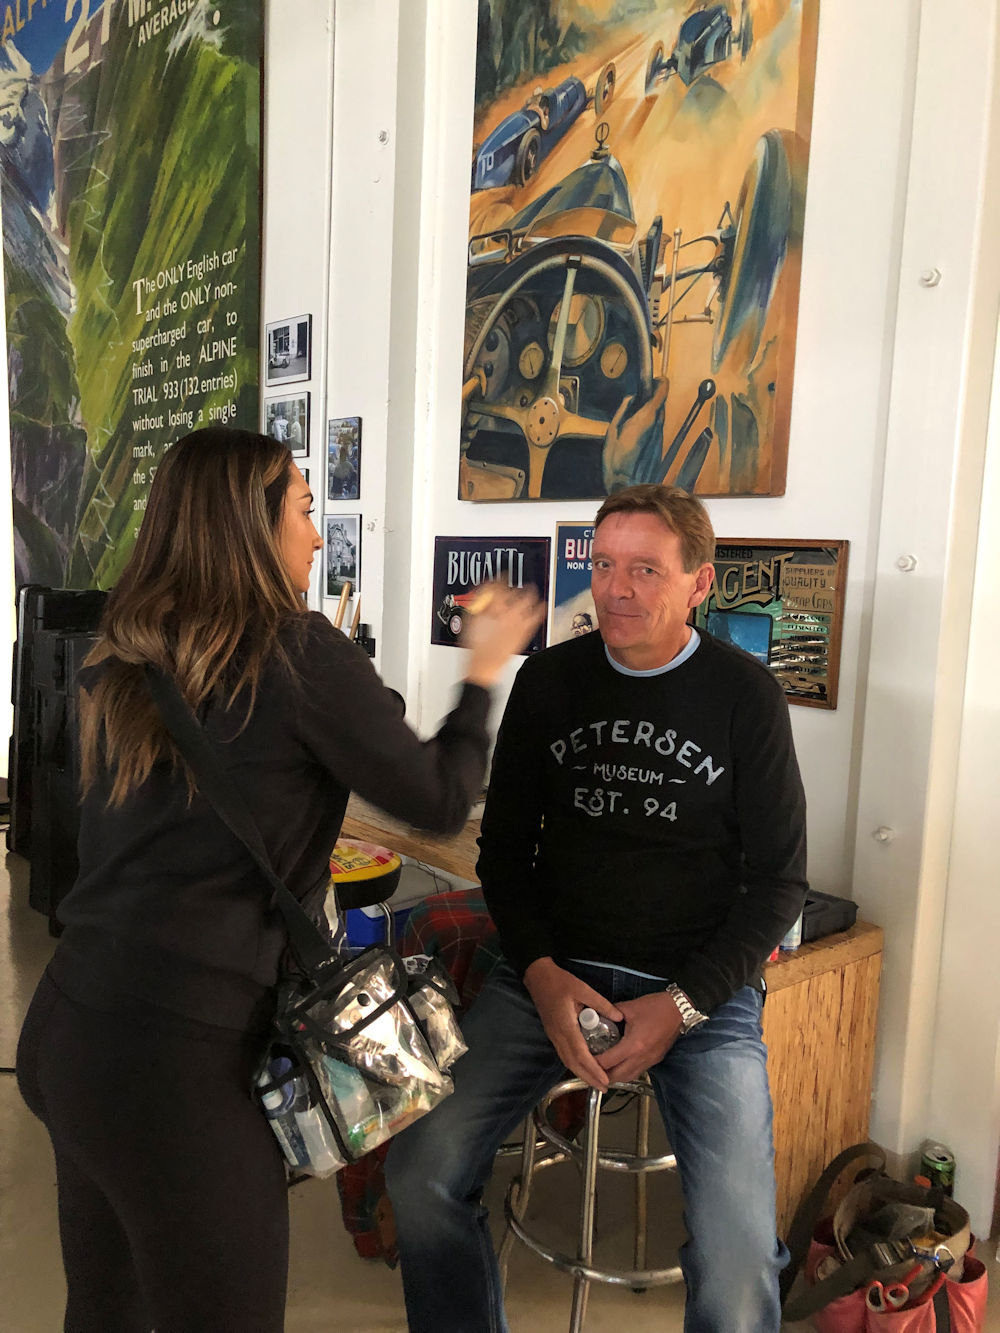