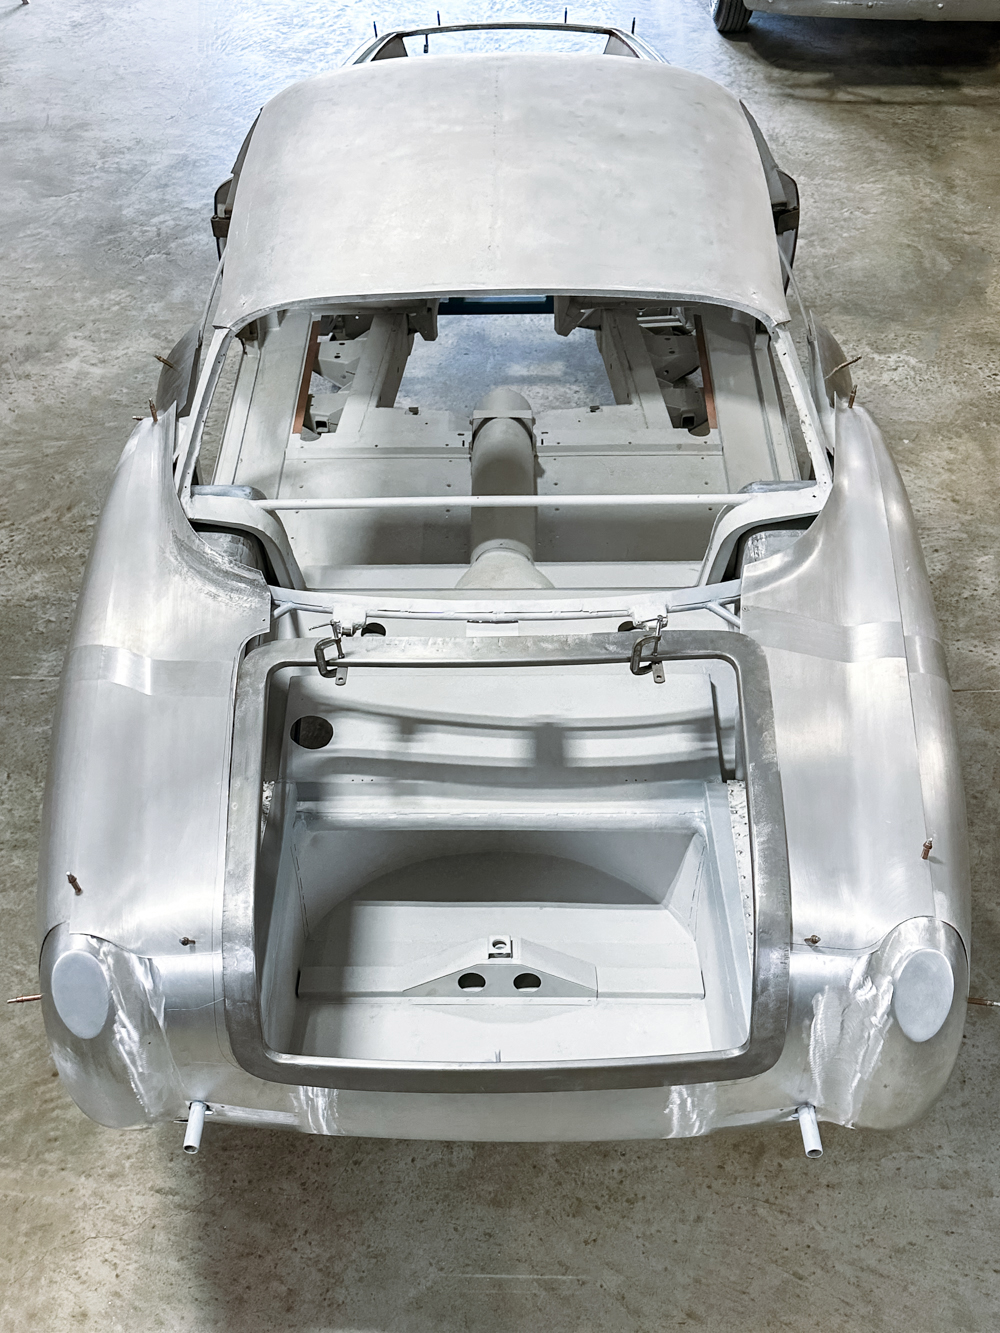
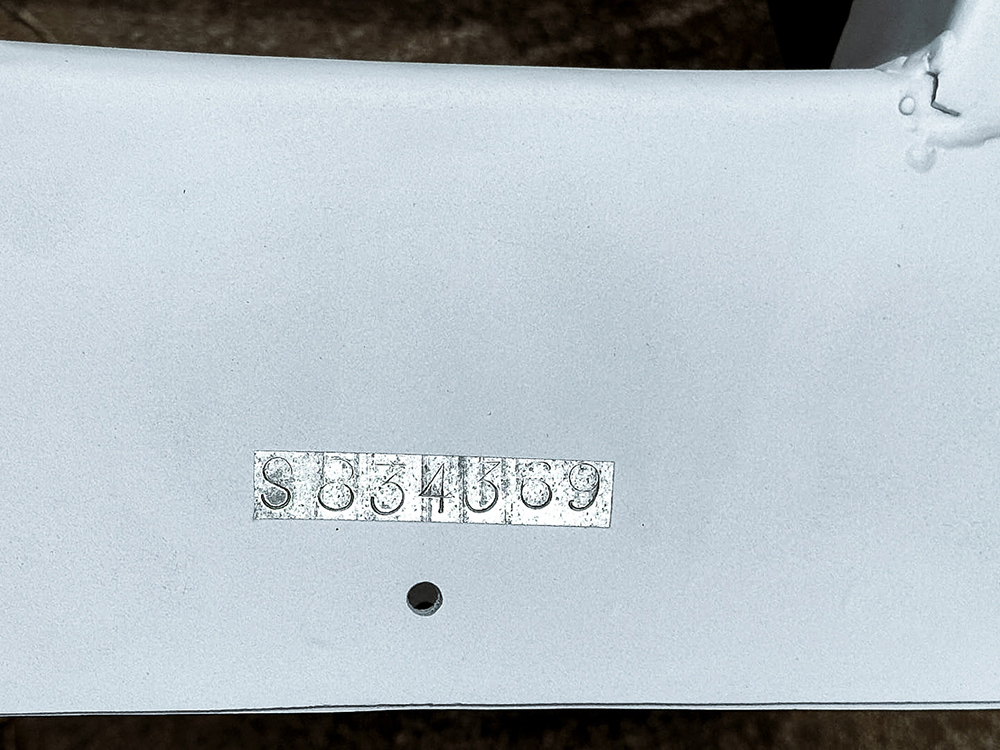
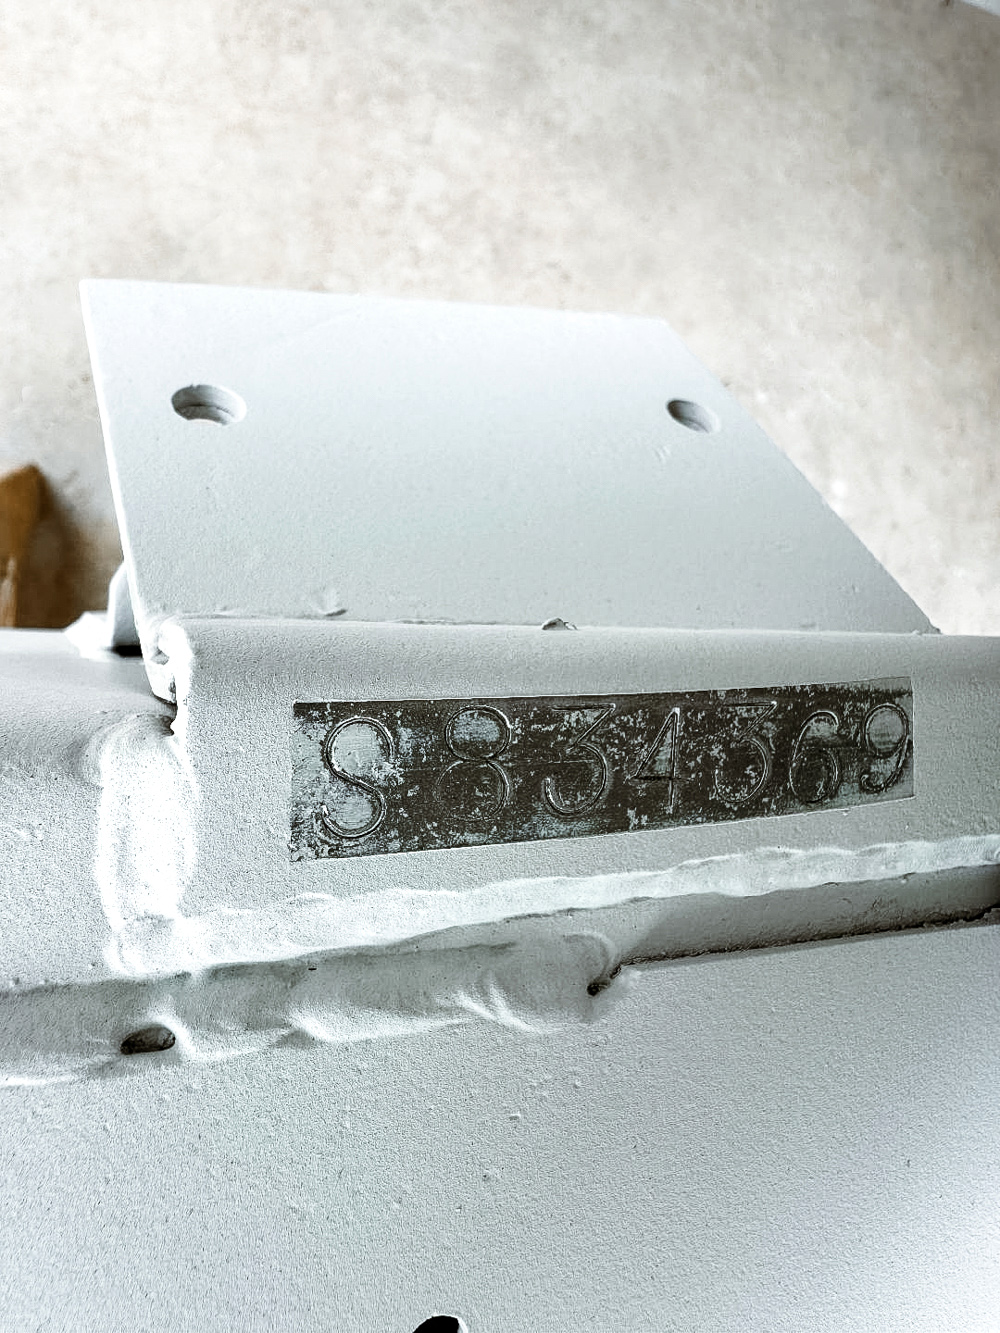
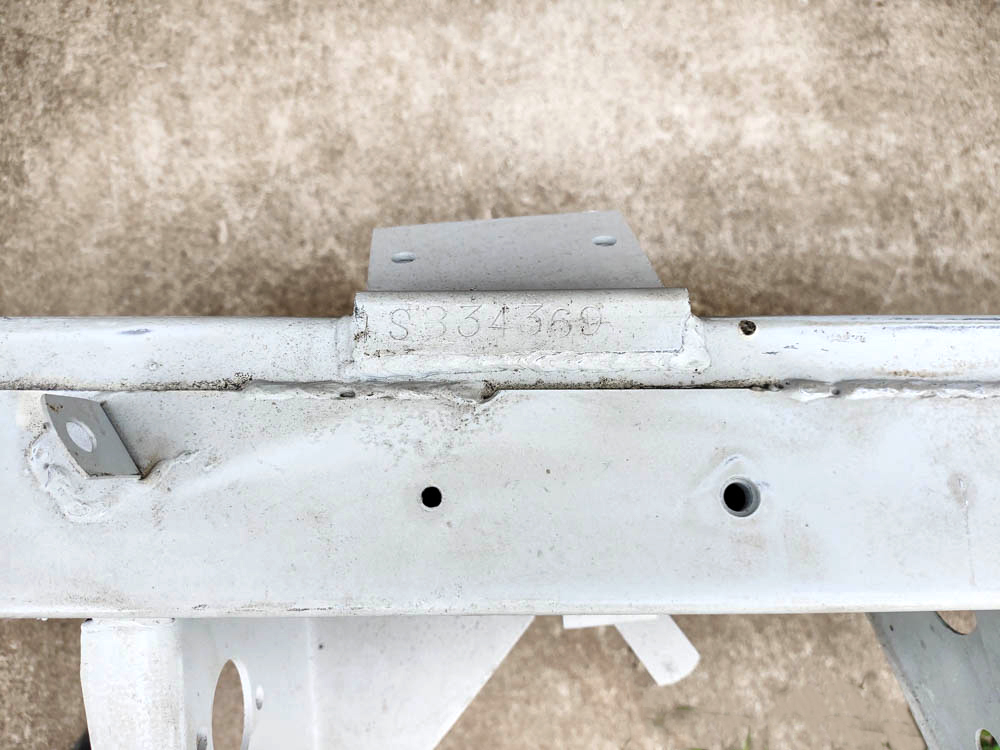
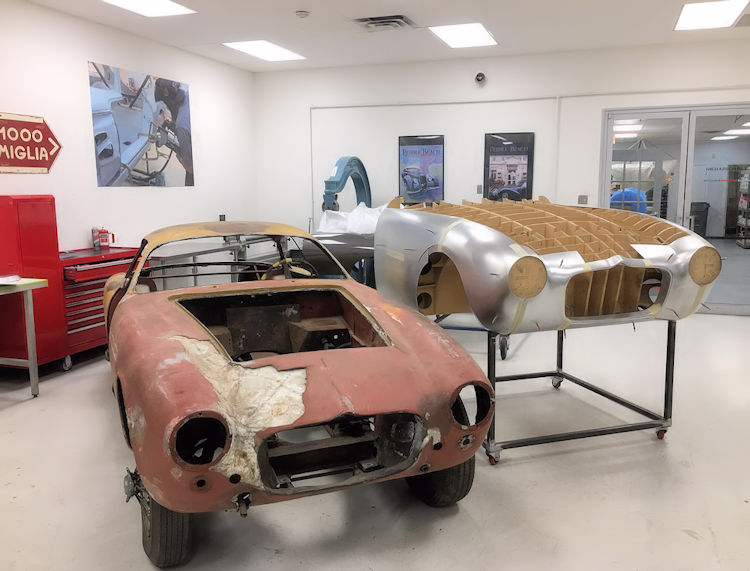
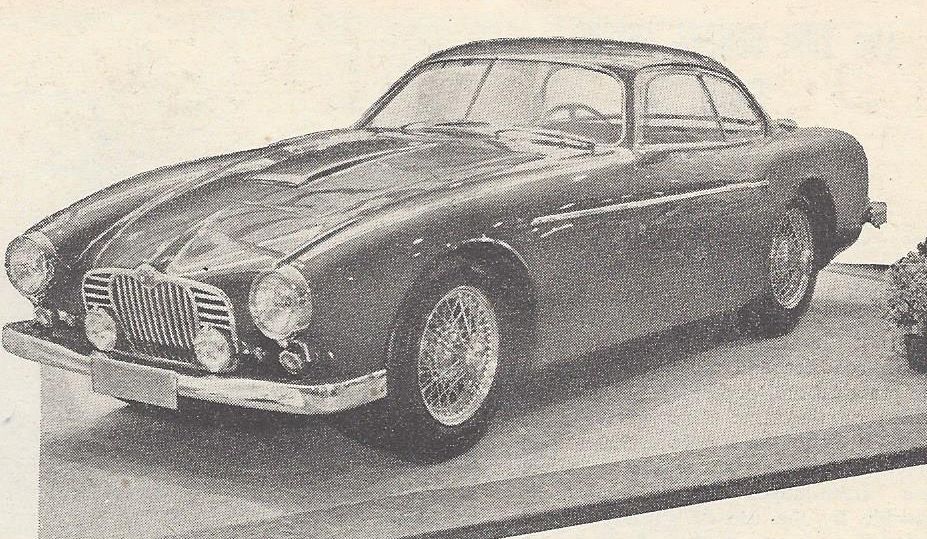
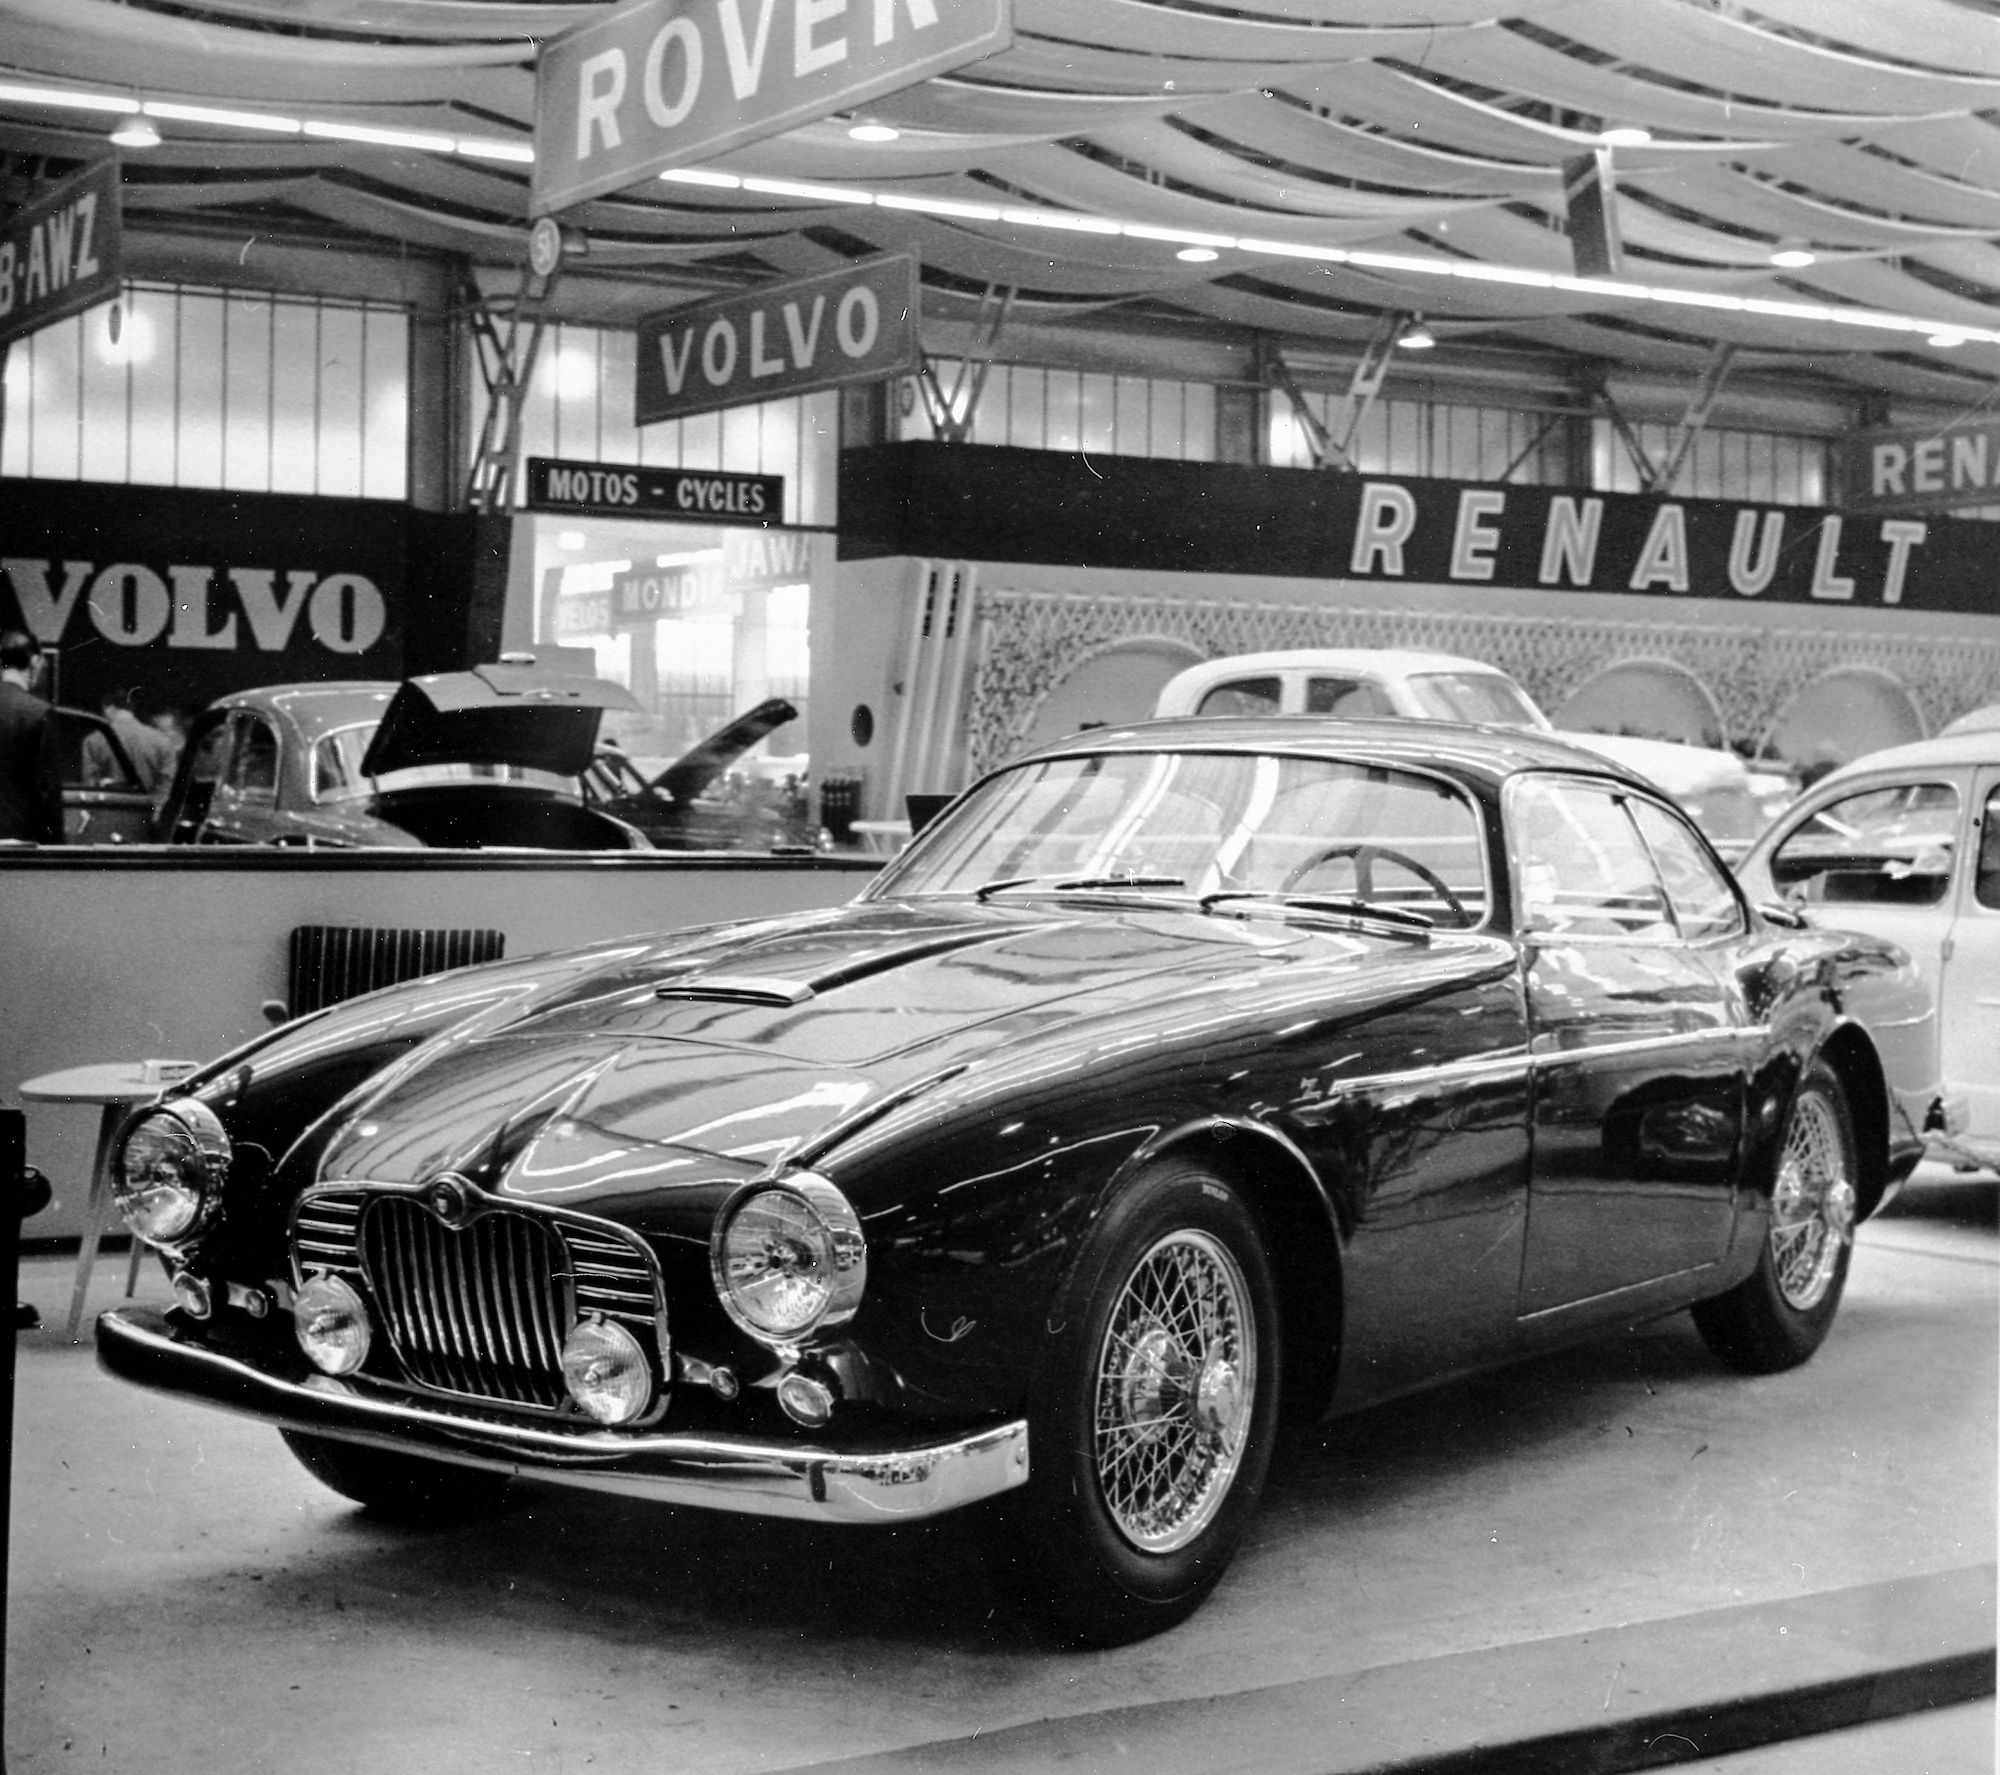
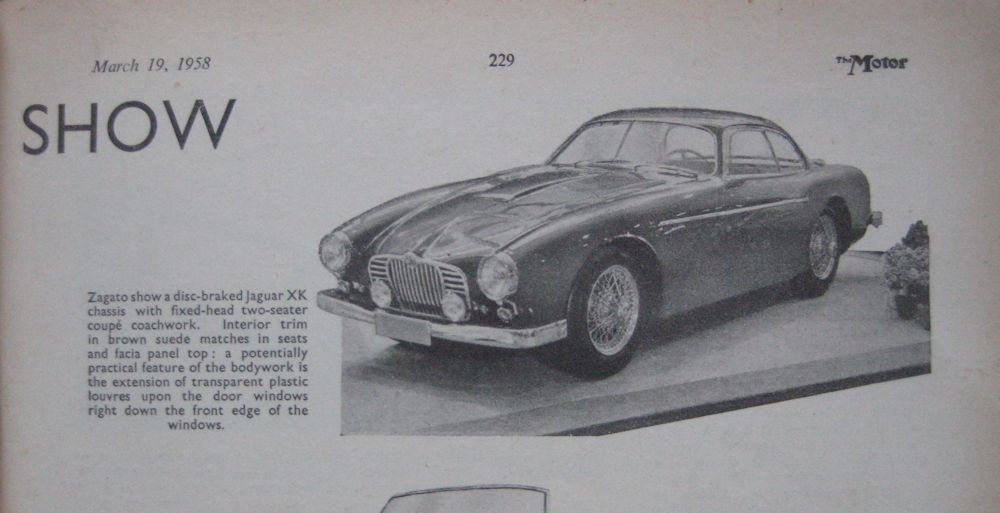
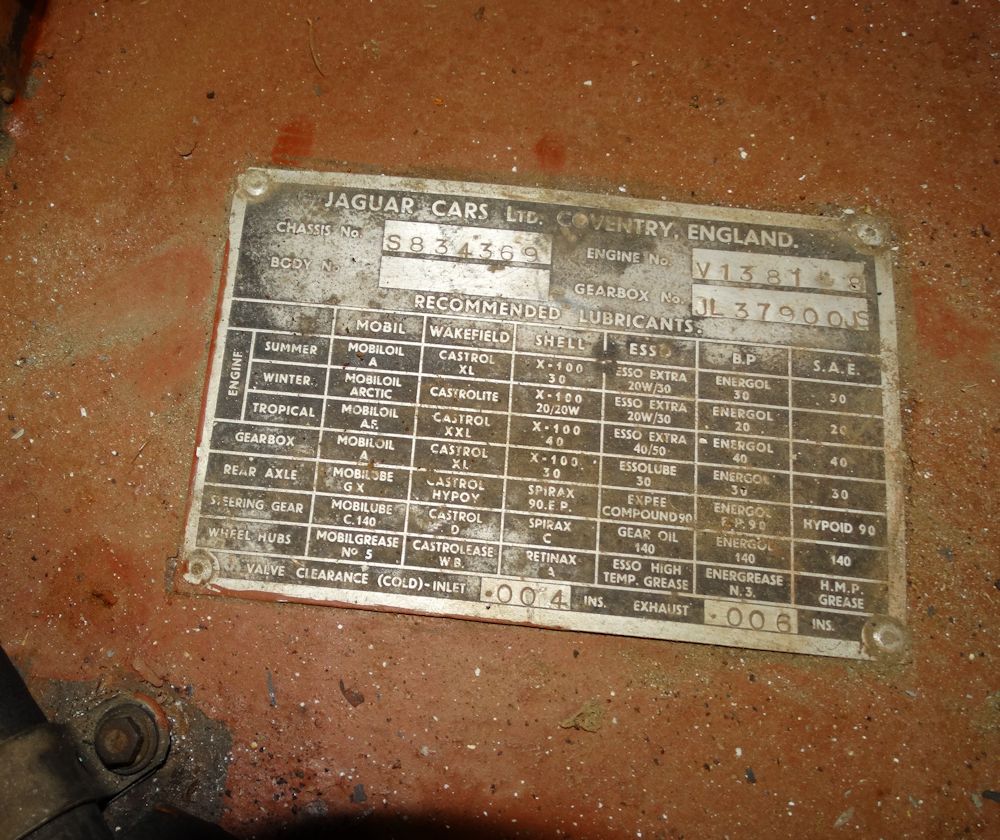
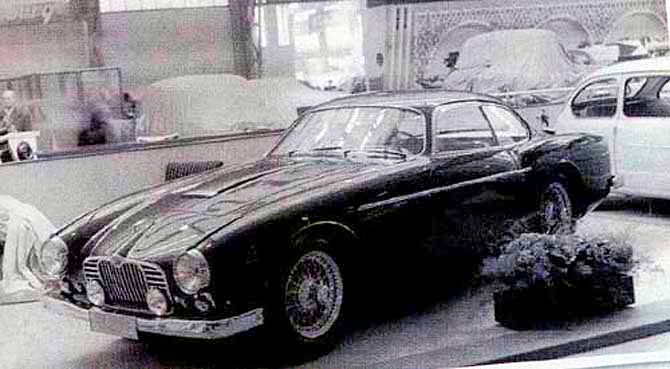
Our car on the Zagato stand at the 1958 Geneva Motor Show This very special car (S834369) was assembled as a rolling chassis at the Browns Lane factory in August 1957 as a special order for the Jaguar dealer in Geneva, who commissioned Zagato, the legendary Milanese coachbuilder, to design and build the unique alloy body. The finished car appeared on the Zagato stand at the Geneva Motor Show in March 1958.
At one time it was thought that Zagato may have built three cars on XK150 chassis, one of which was displayed in Geneva in 1958, with a second shown at the Paris Salon in 1960. The current owner’s father was under the impression that his car was the Paris car, although we have now established that it was, in fact, the 1958 Geneva car. Photos of this car, which had previously been mistakenly attributed to the 1960 Paris show, appear in a Motor (UK magazine) Geneva Show report dated March 1958.
This discovery, together with the existence of several photographs of a clearly different XK150 Zagato, supports the theory that only two Jaguar XK150 Zagatos were ever built. The whereabouts of the second XK150 Zagato are unknown.
At some point in the very early 1960’s, our Jaguar XK150 Zagato made its way to the United States where it was purchased by the current owner’s father in 1964.
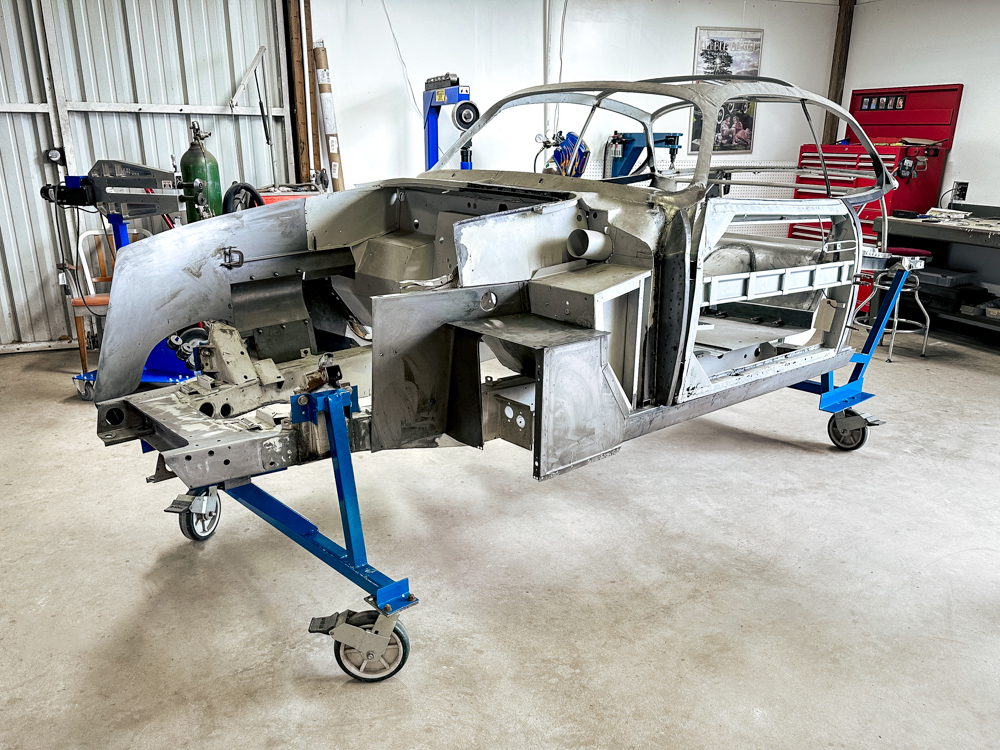
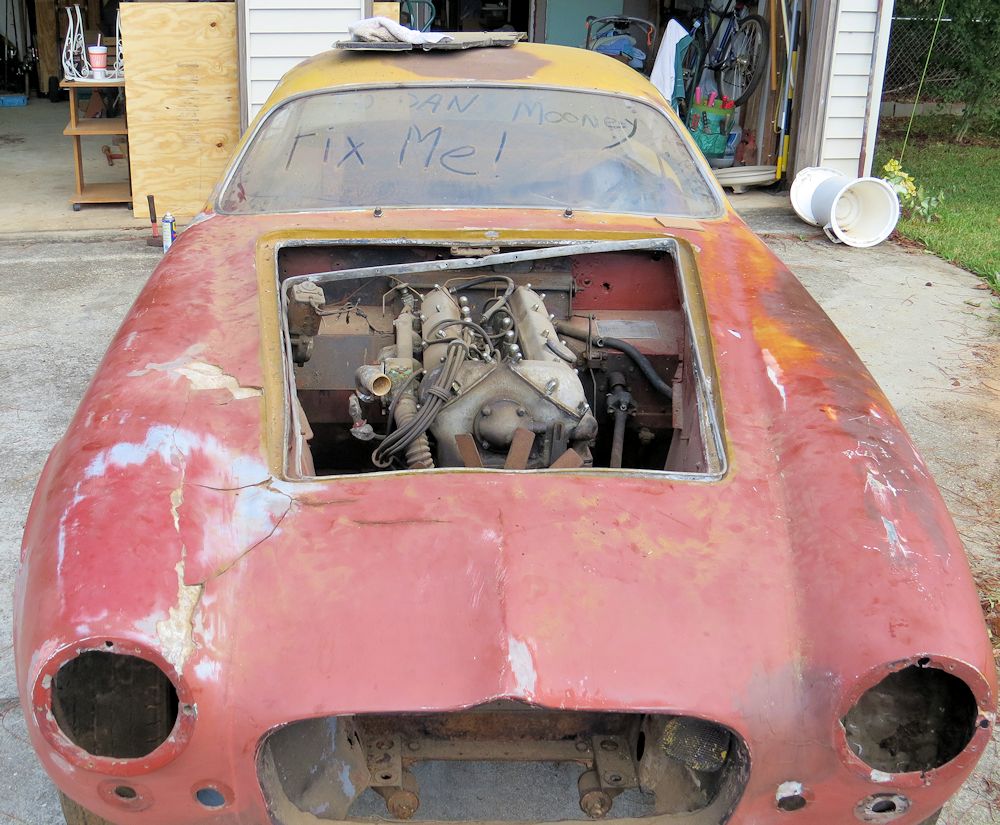
We are honored to have been entrusted with the restoration of this very special and unique motor car.
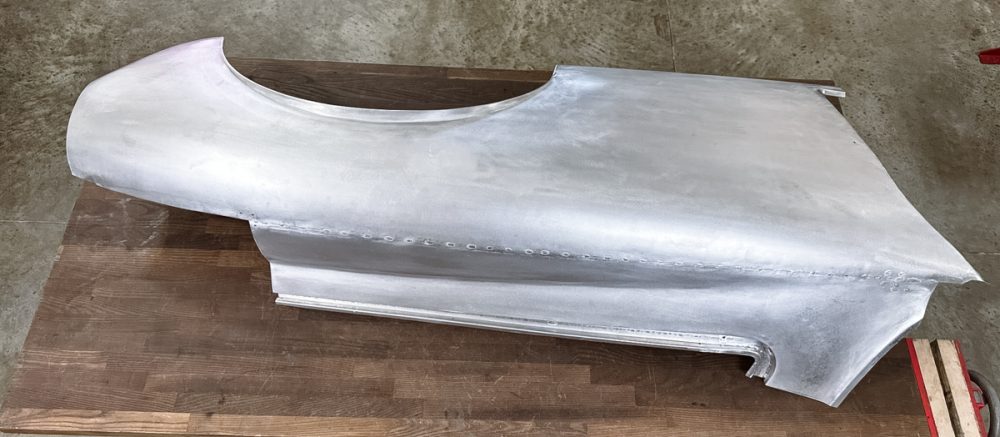
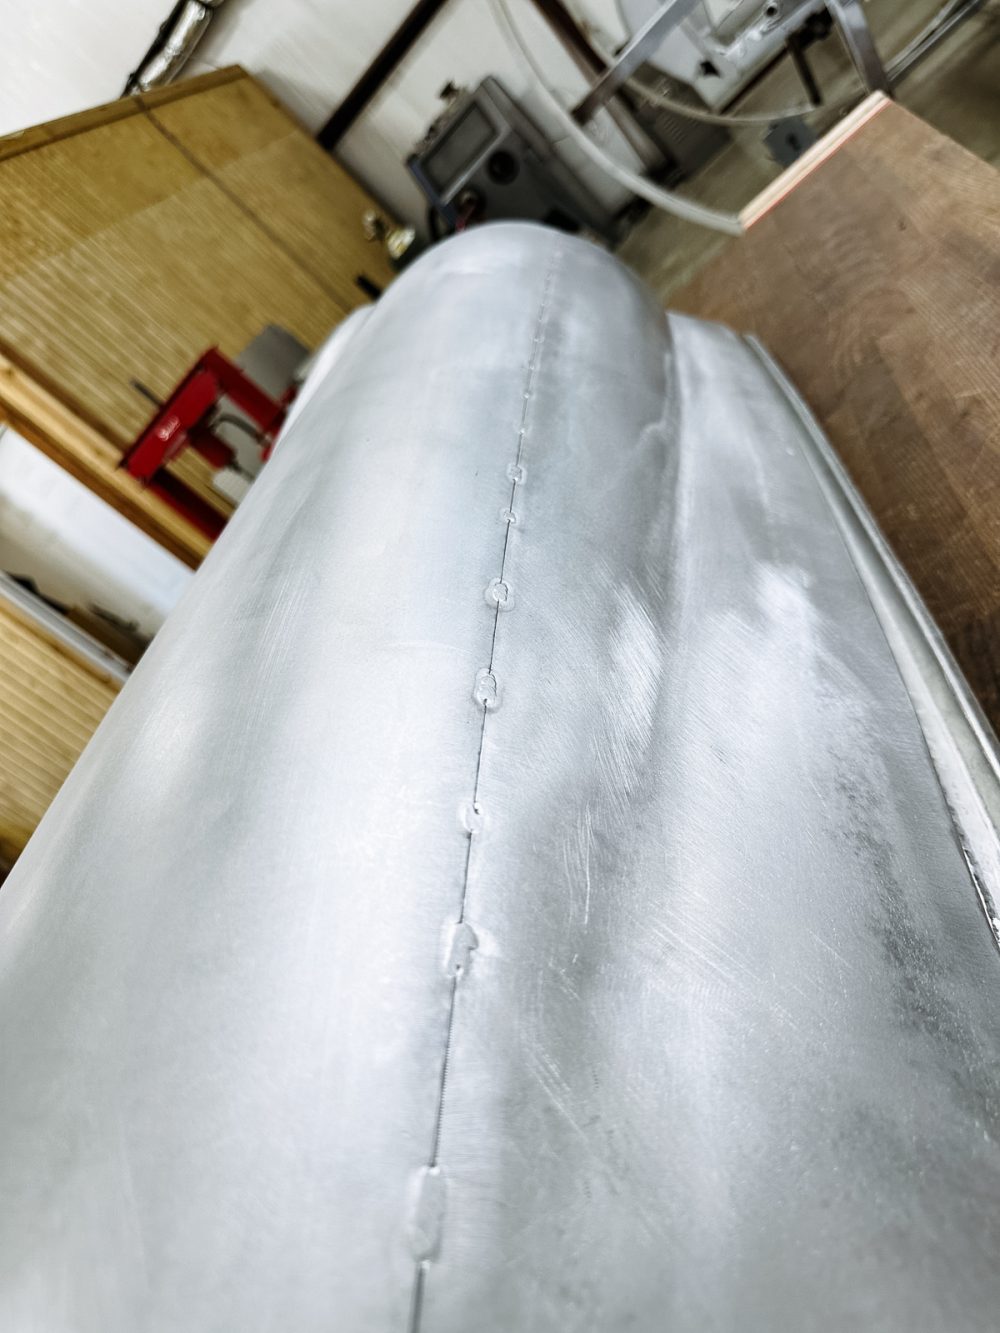
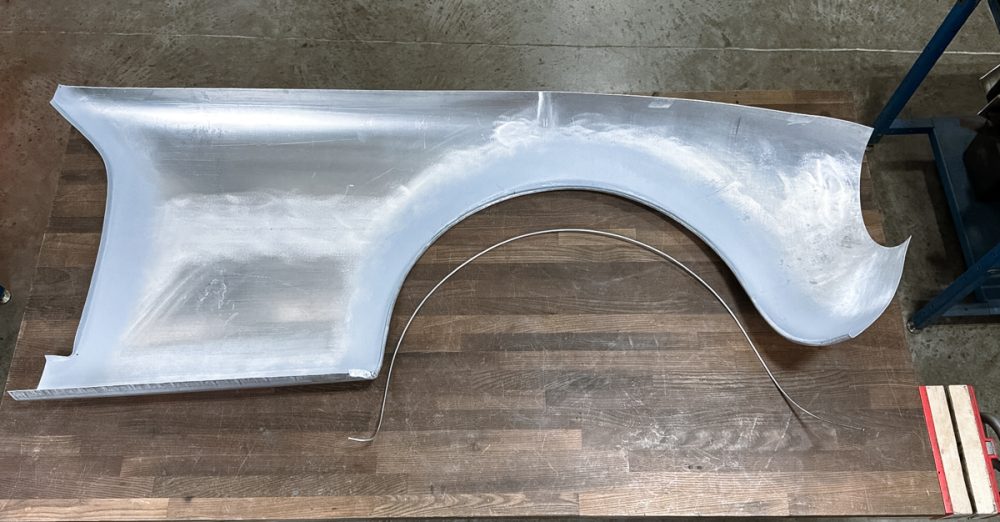
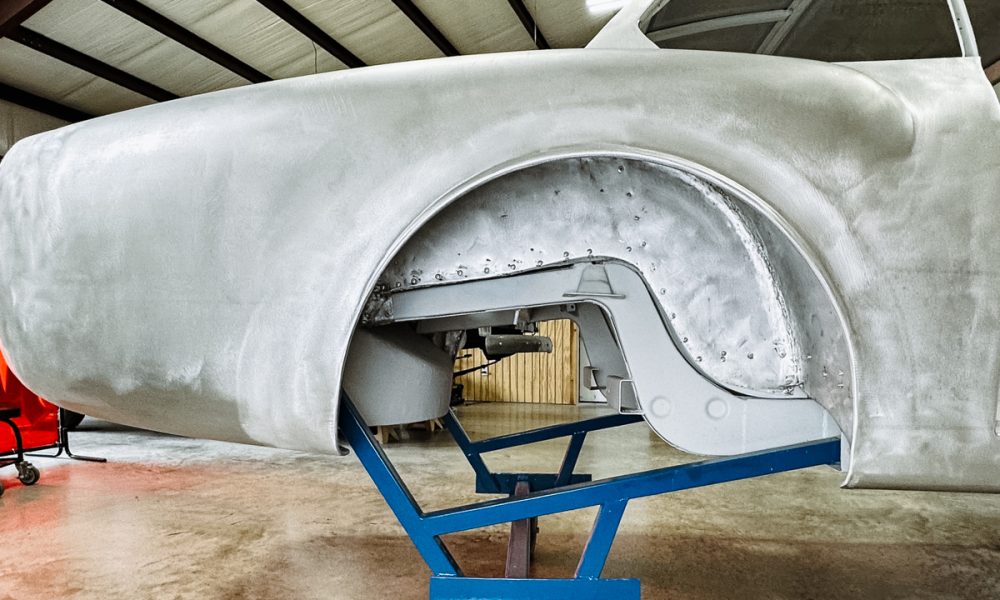
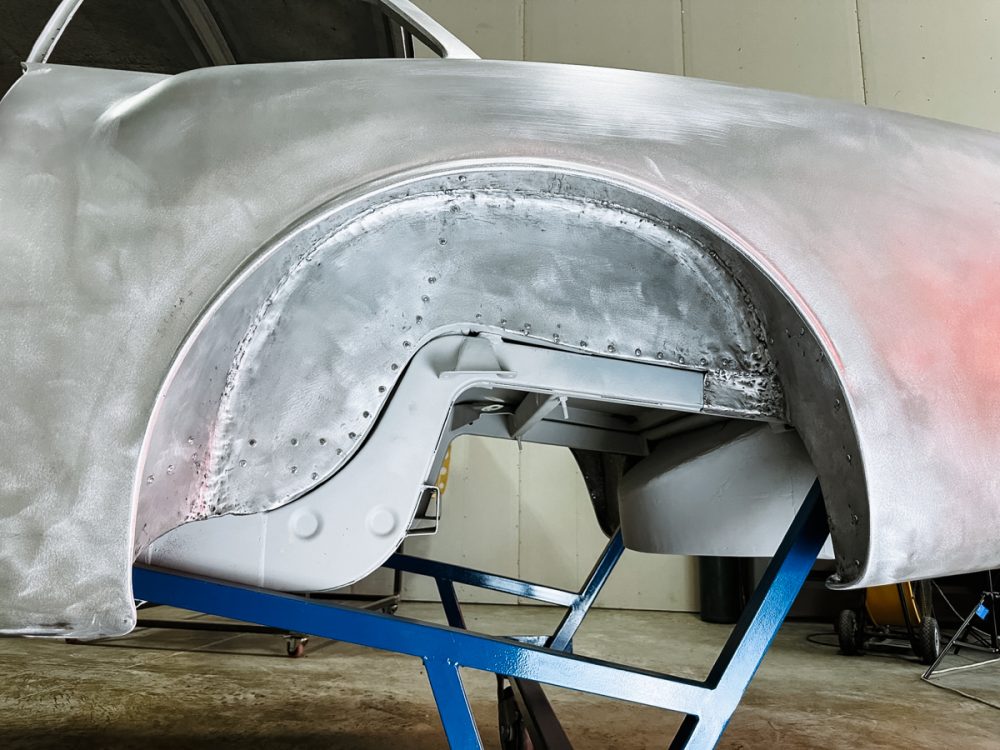
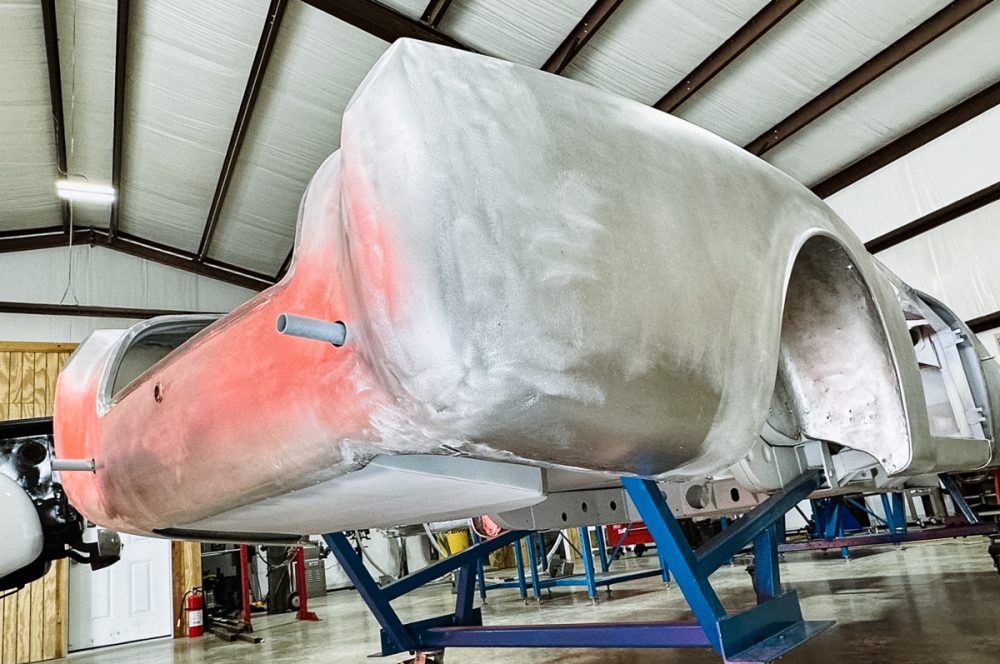
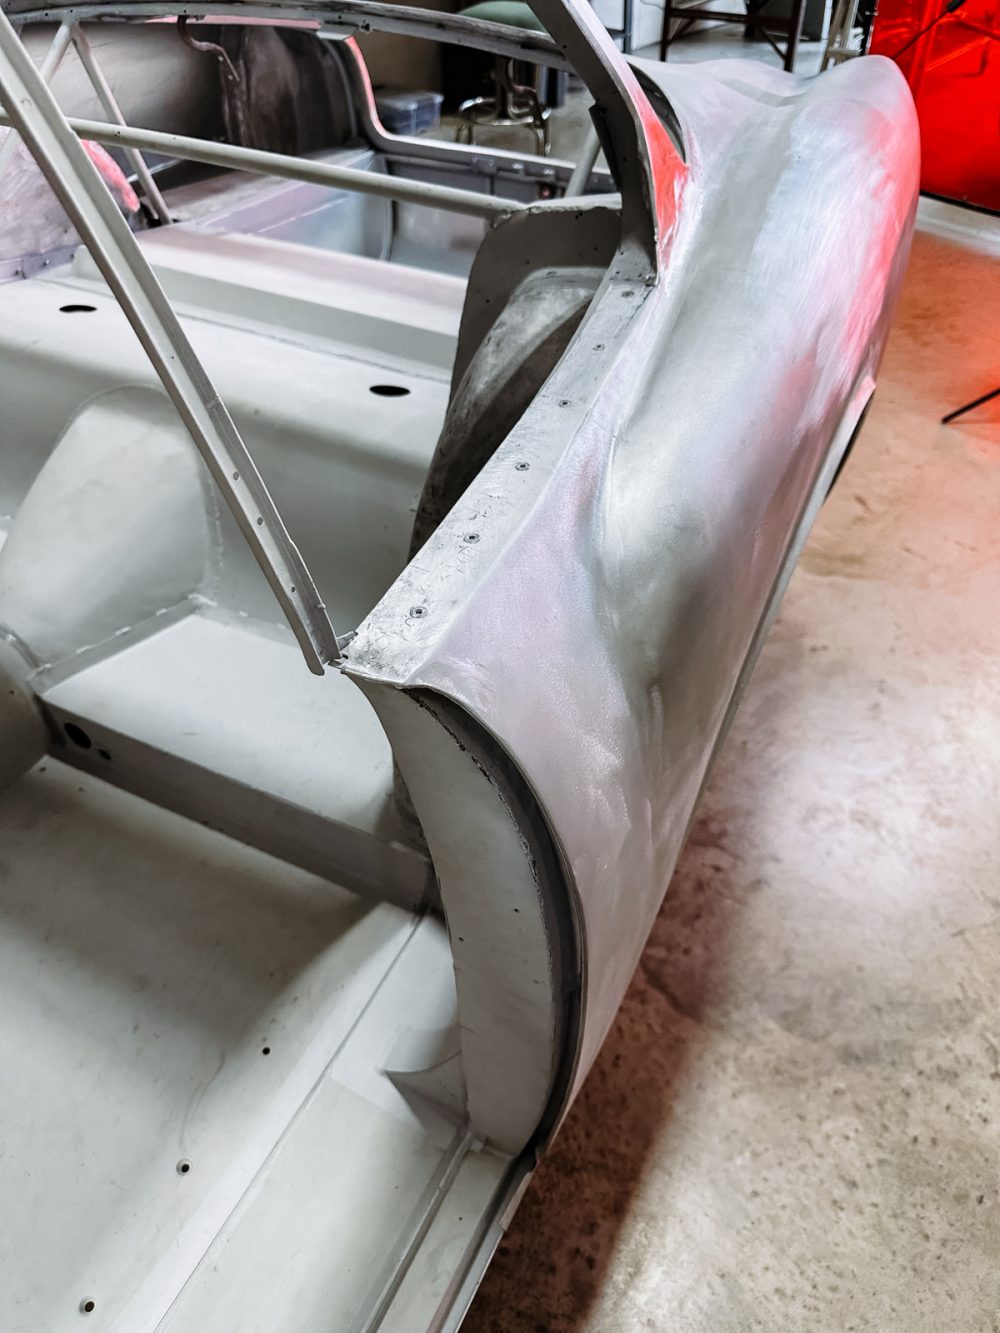
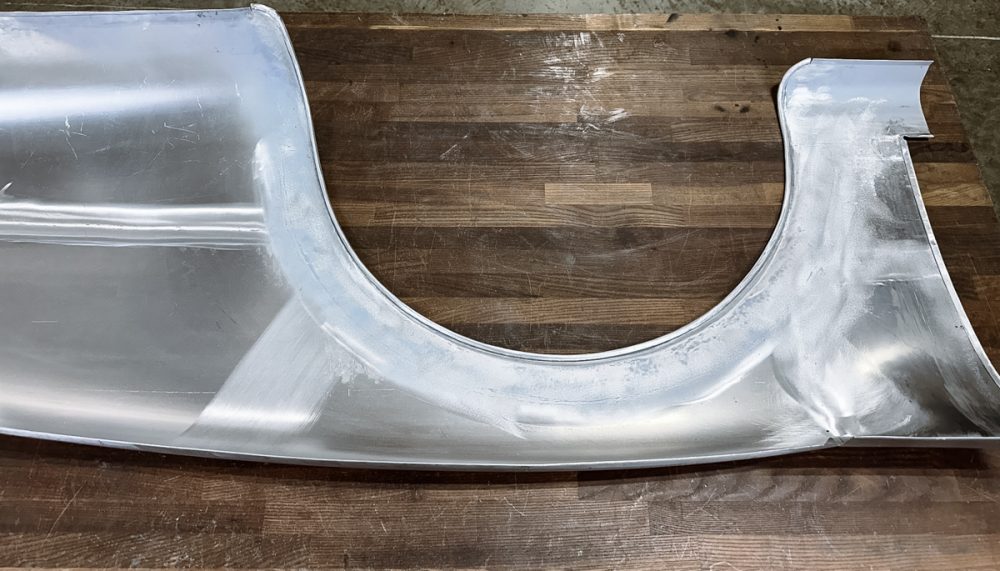
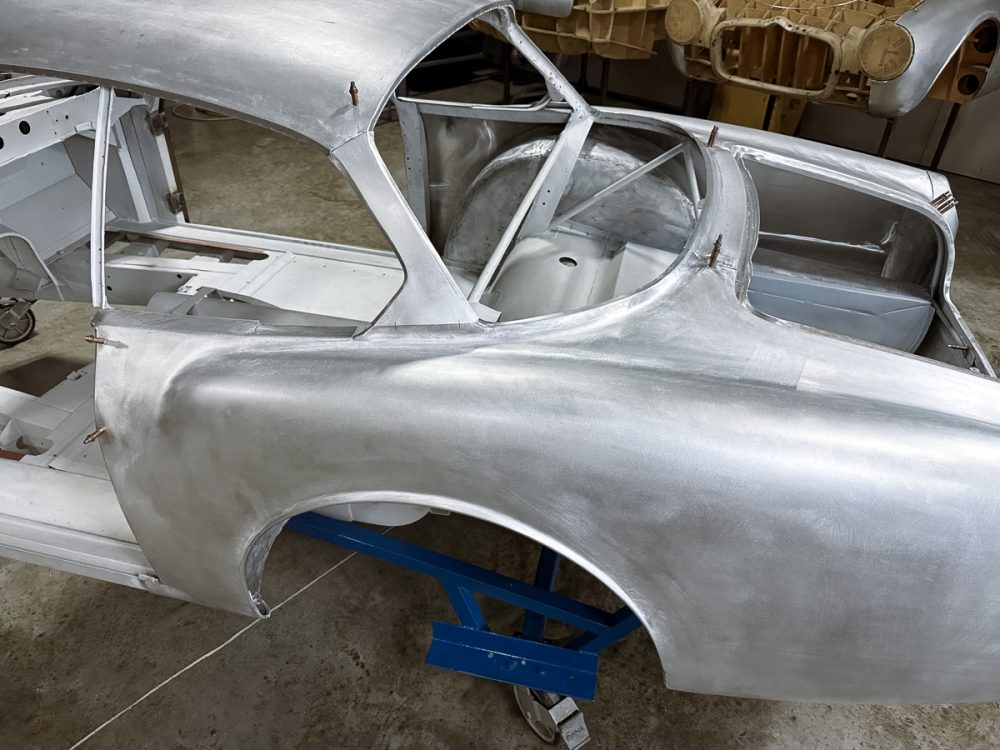
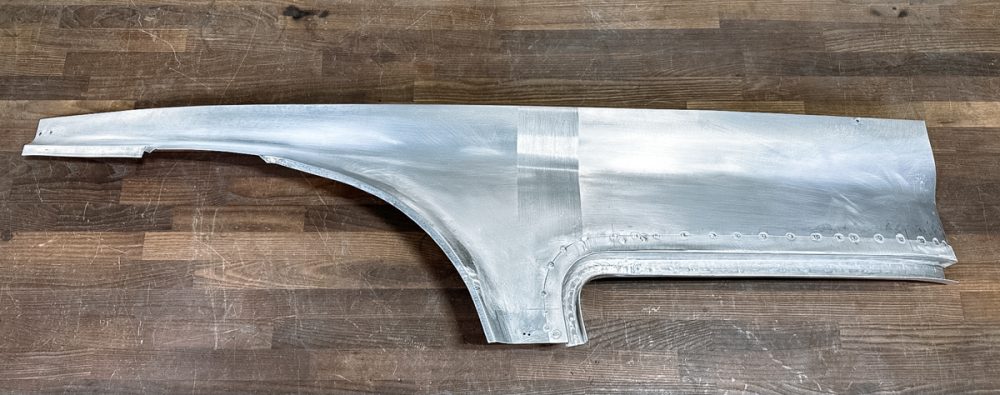
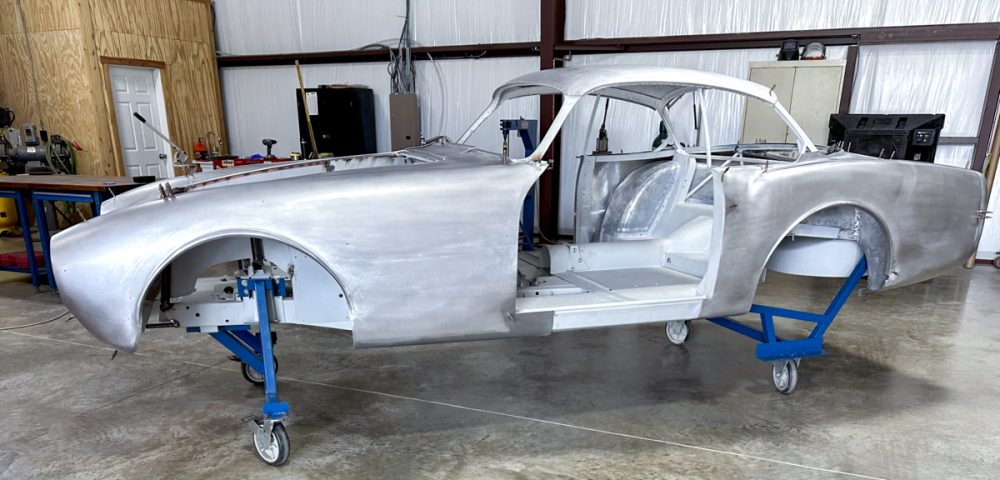
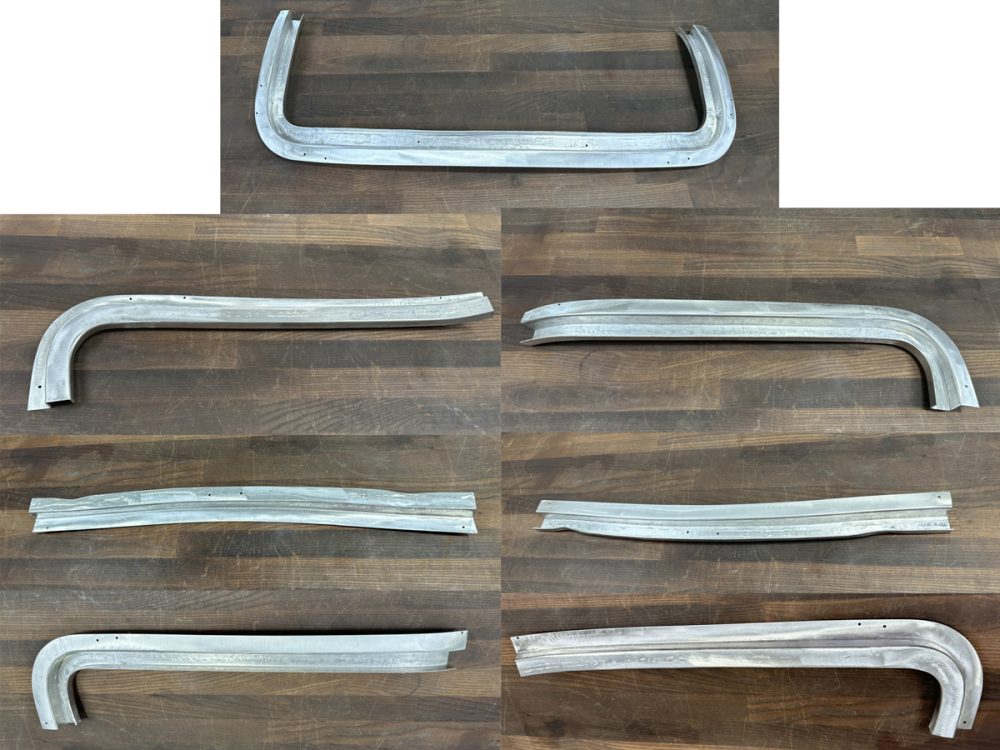
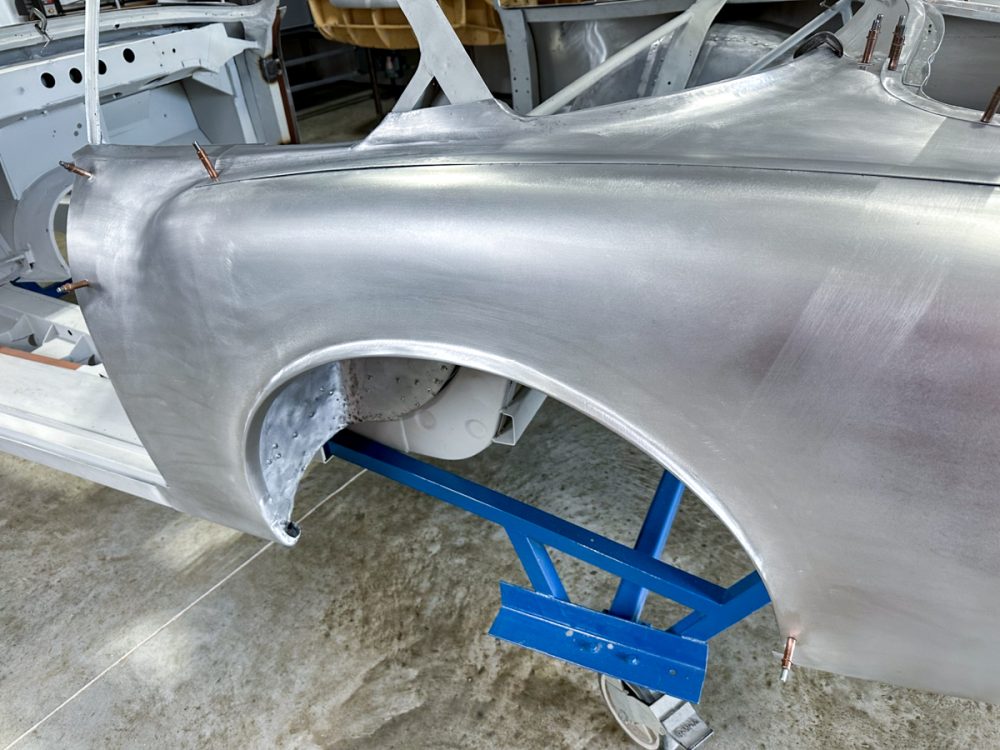
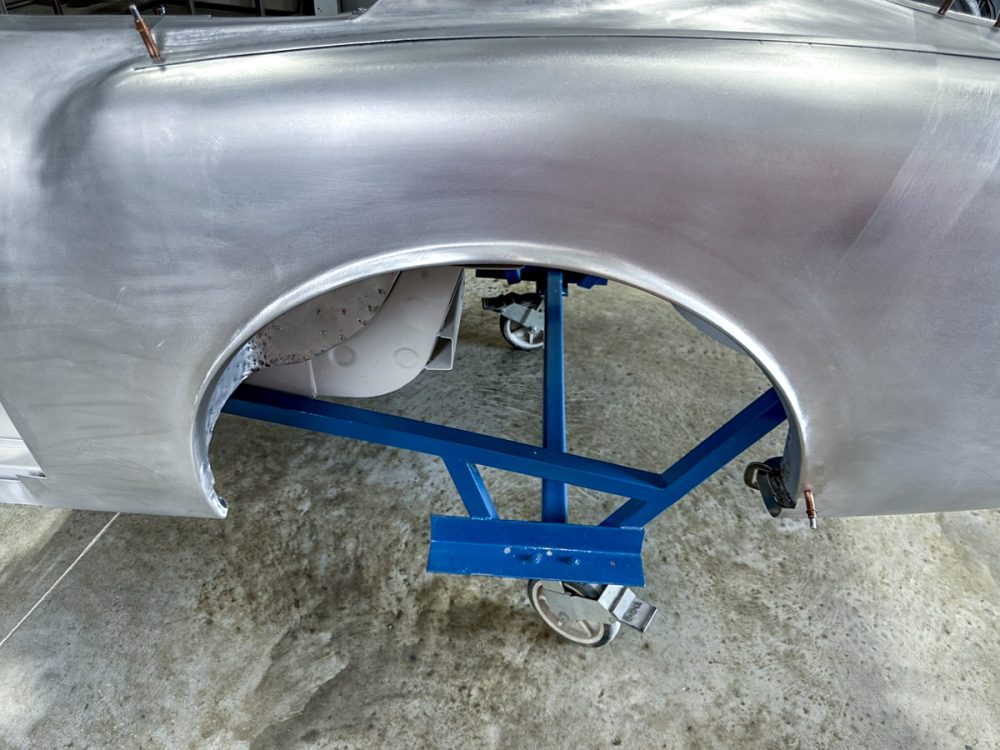
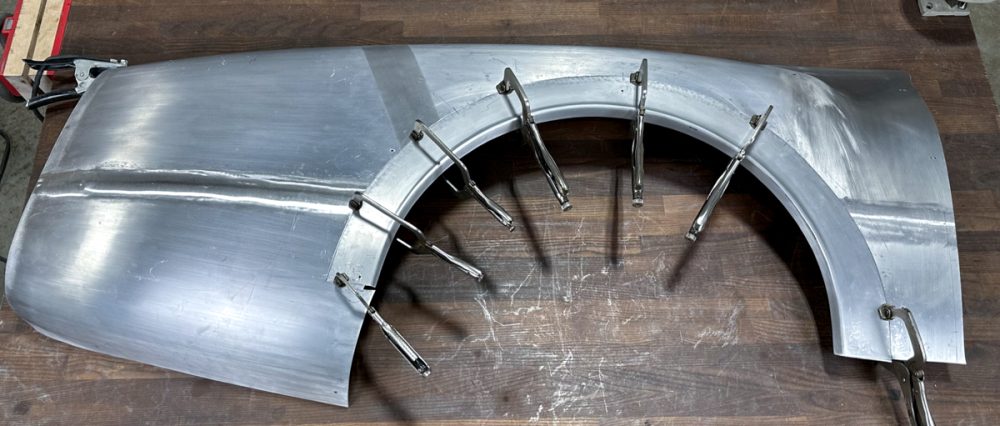
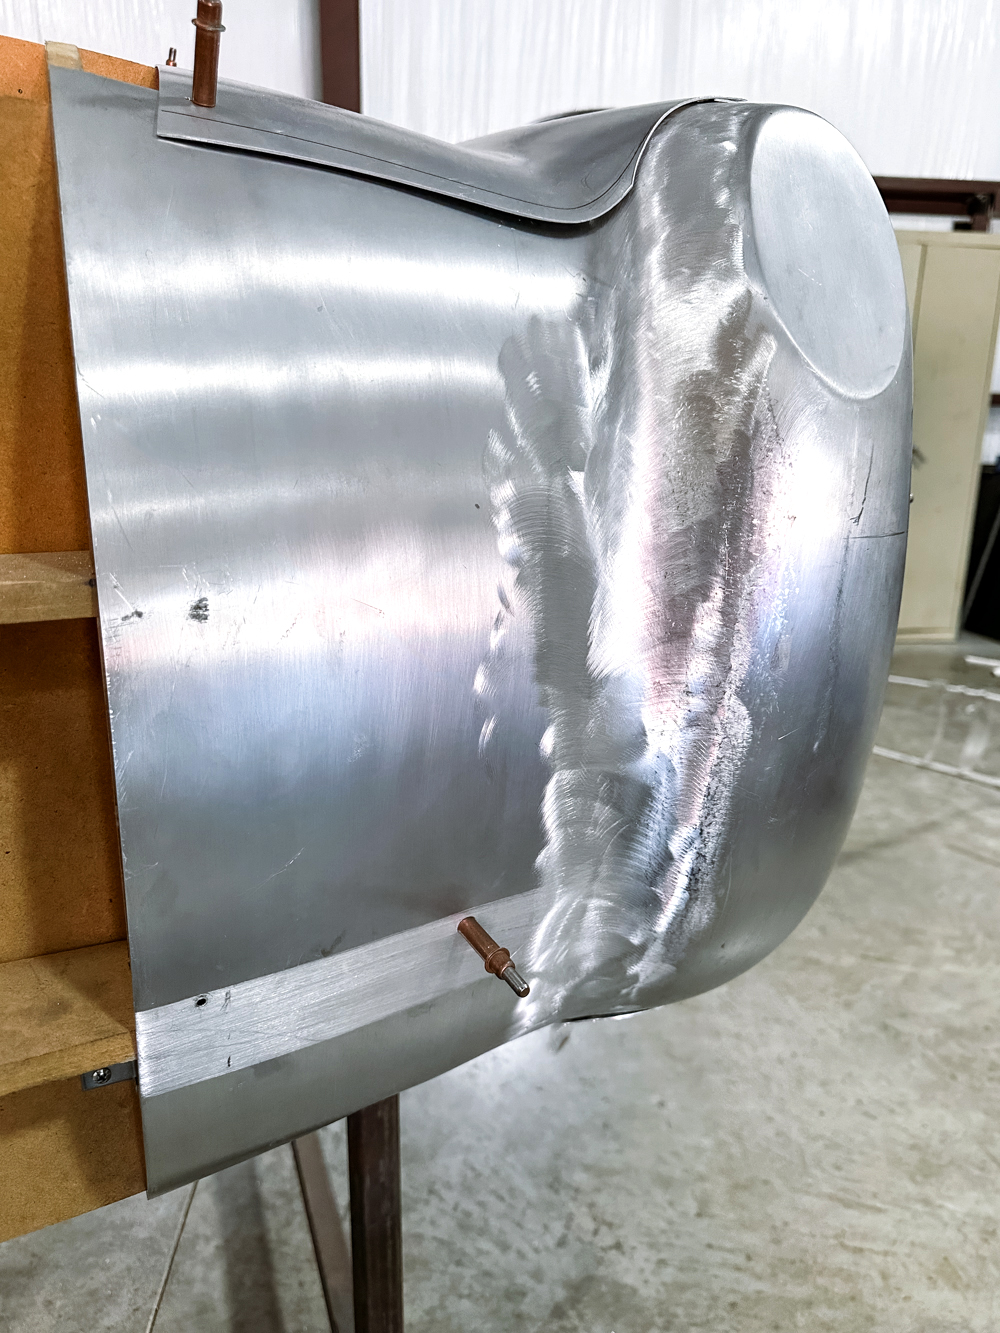
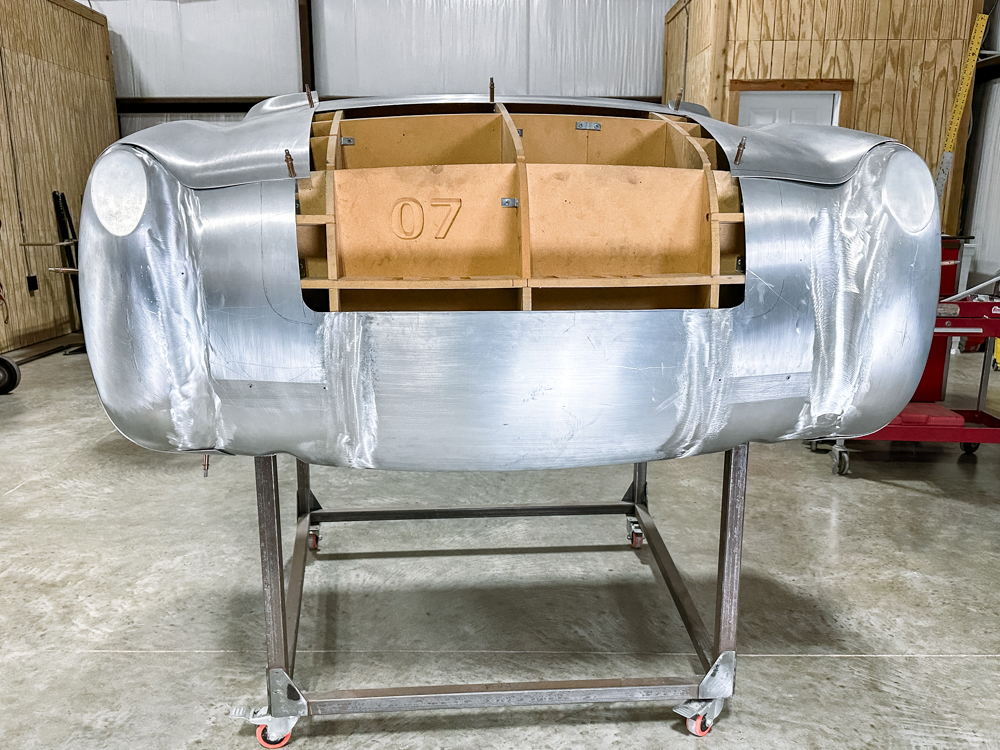
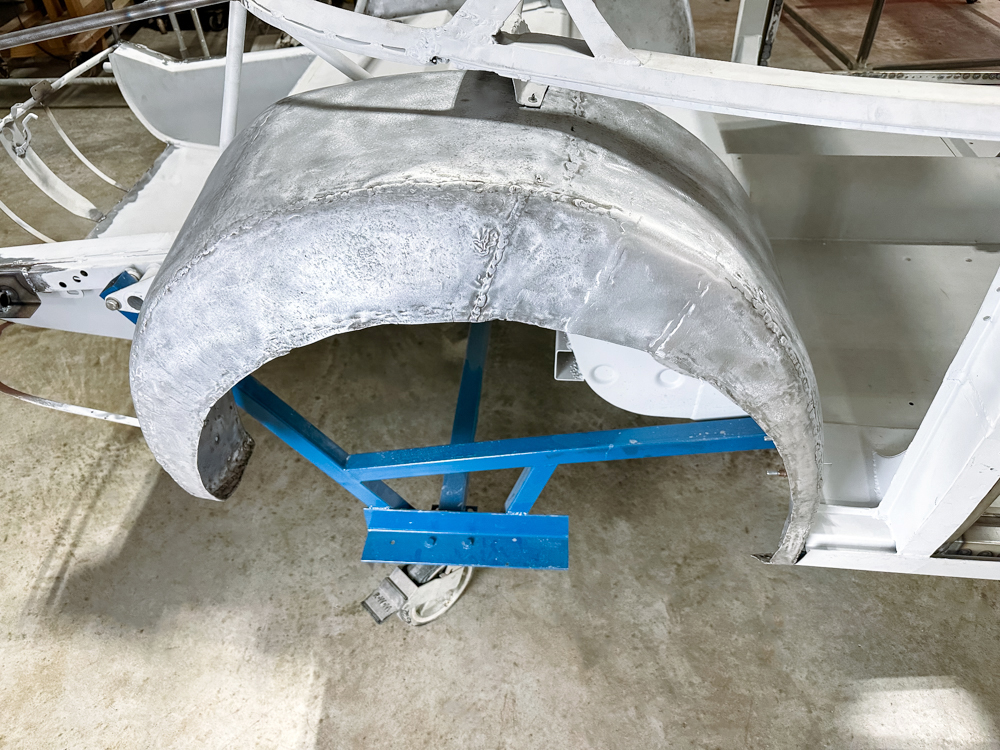
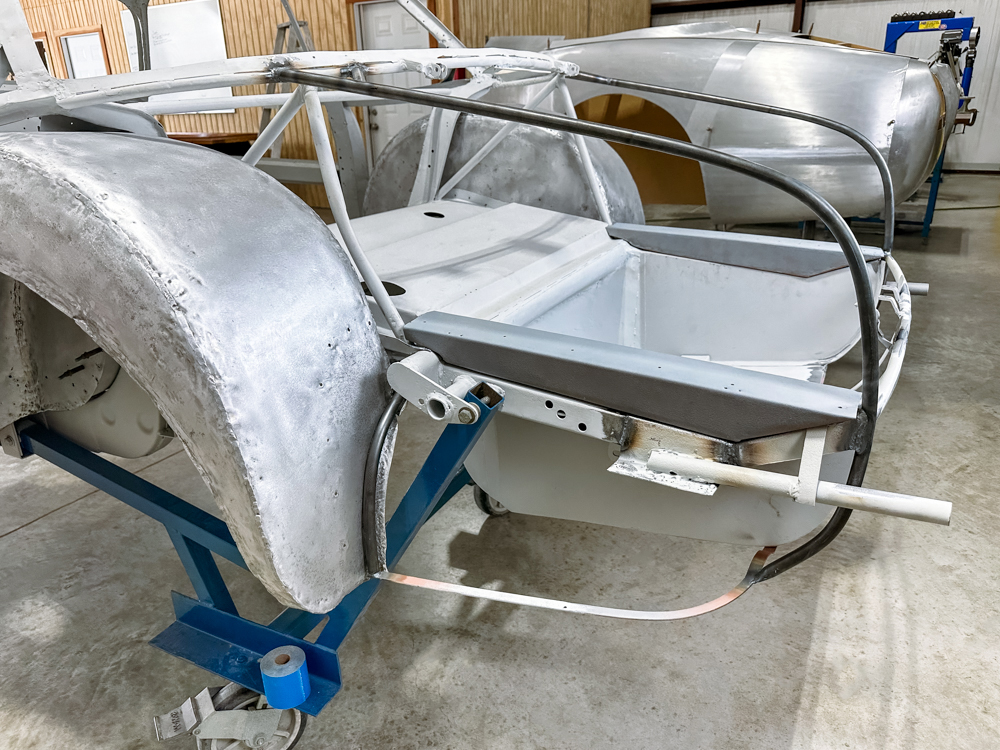
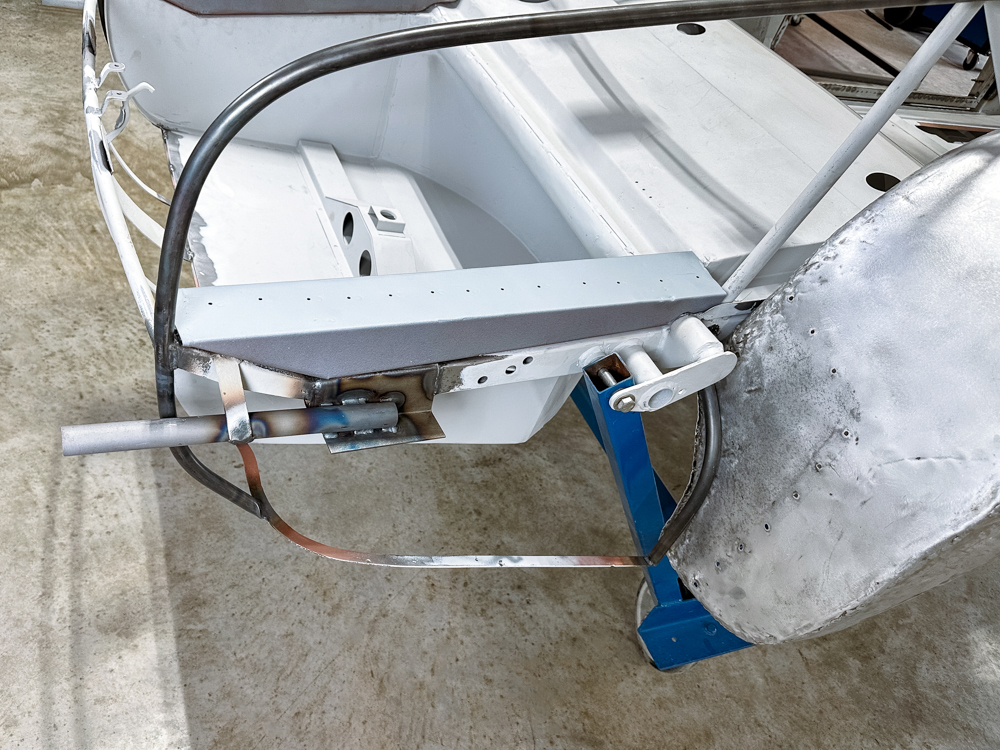
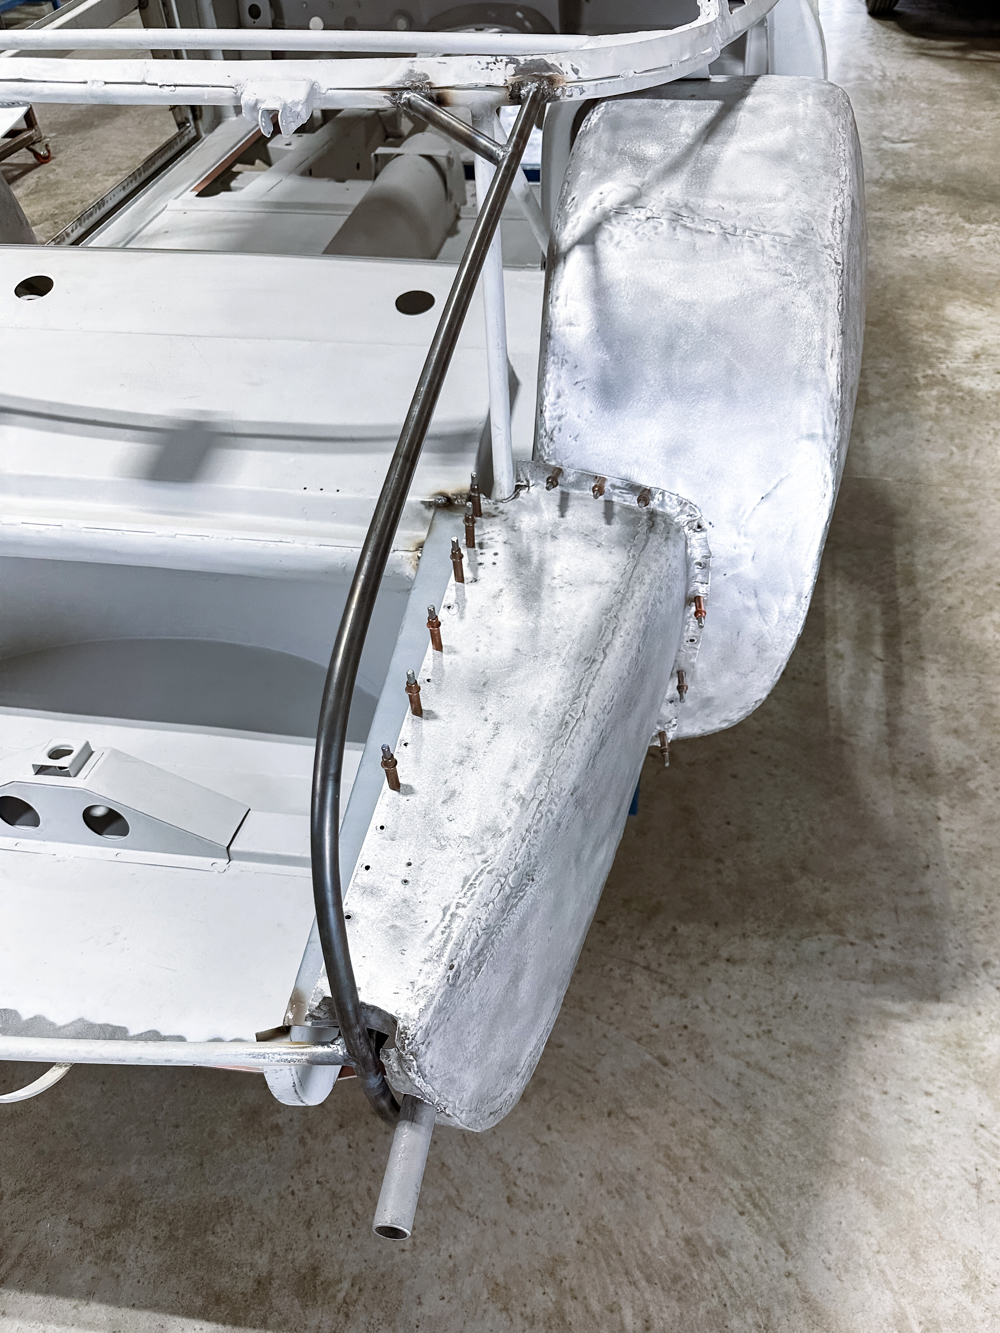
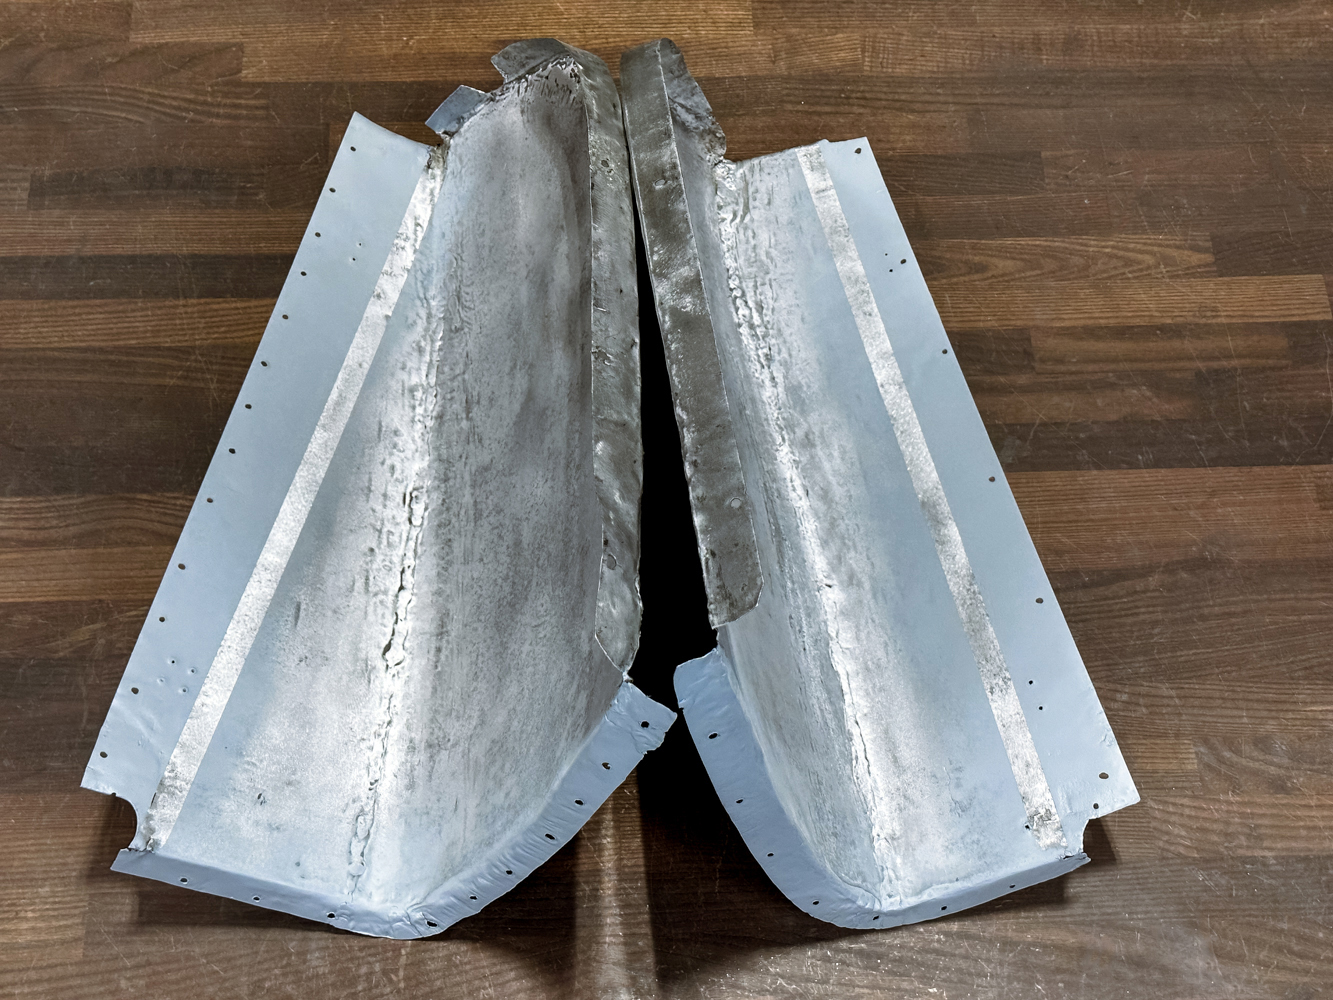
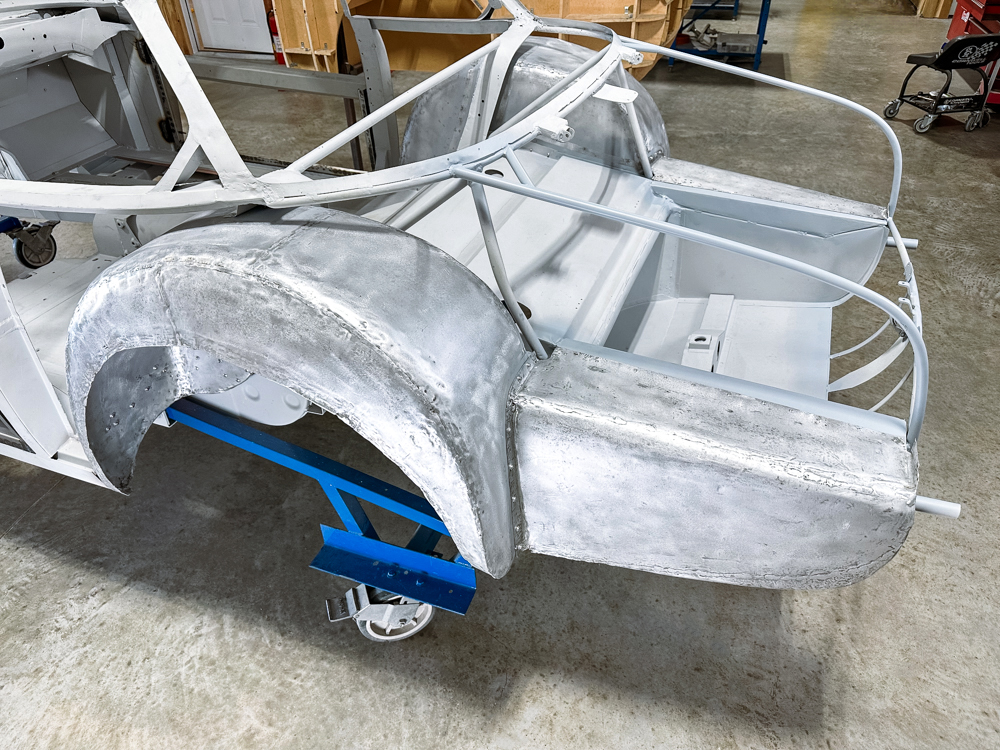
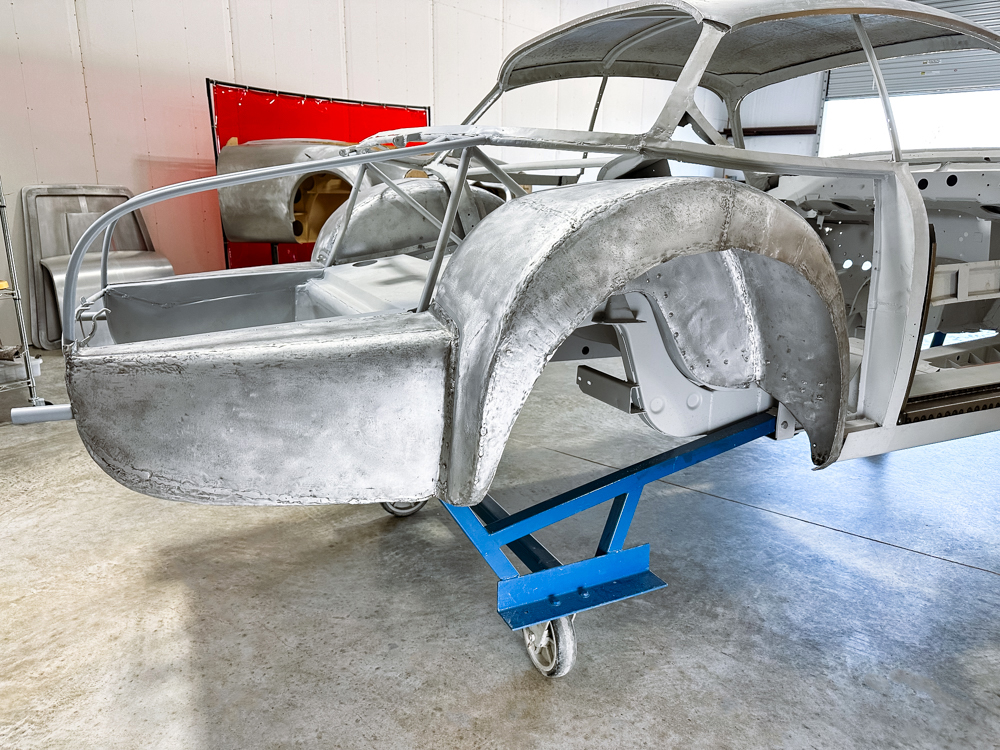
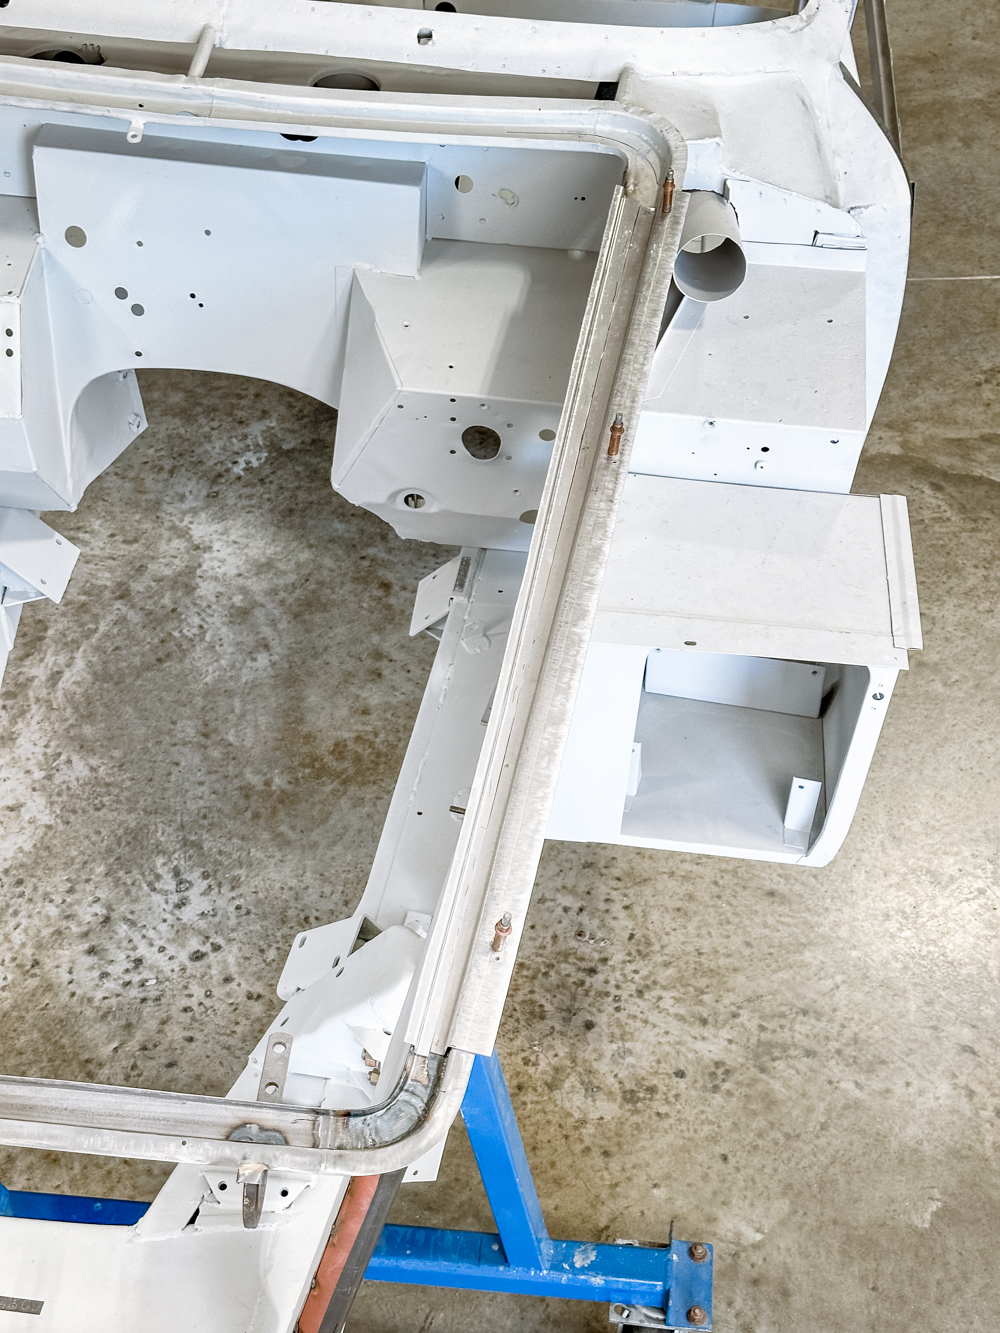
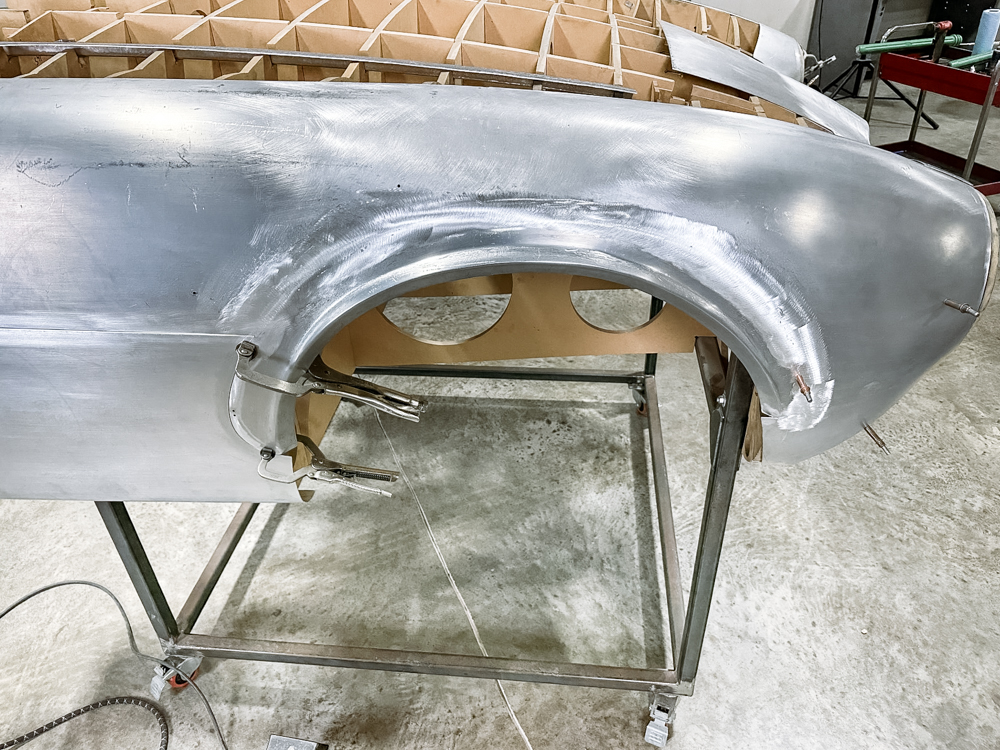
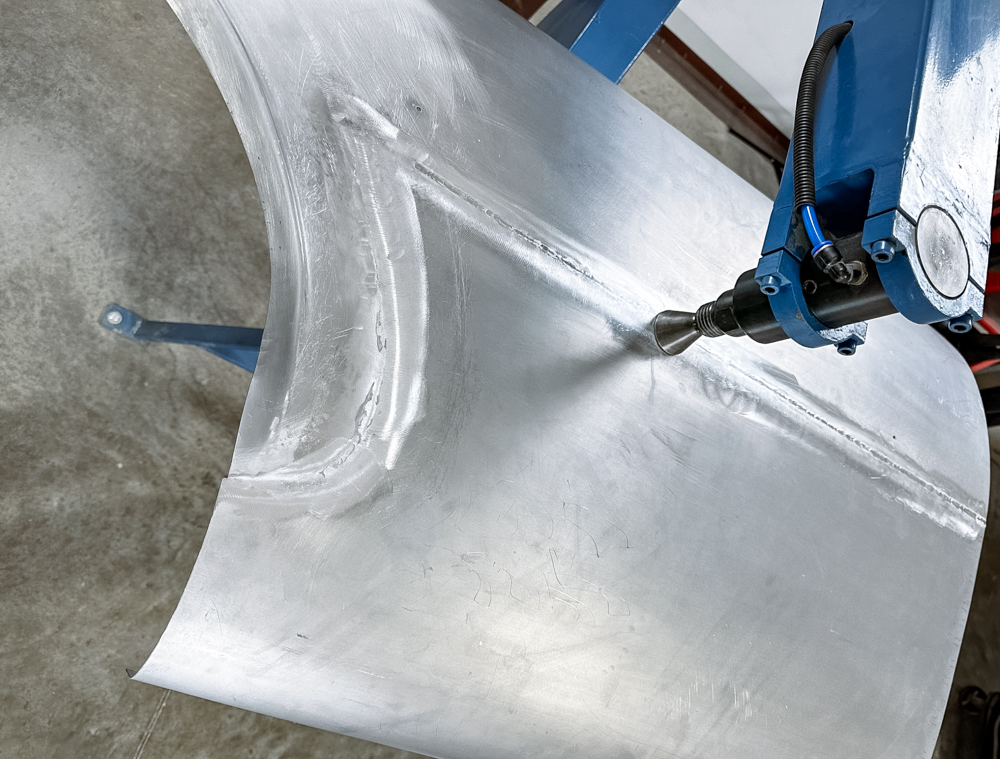
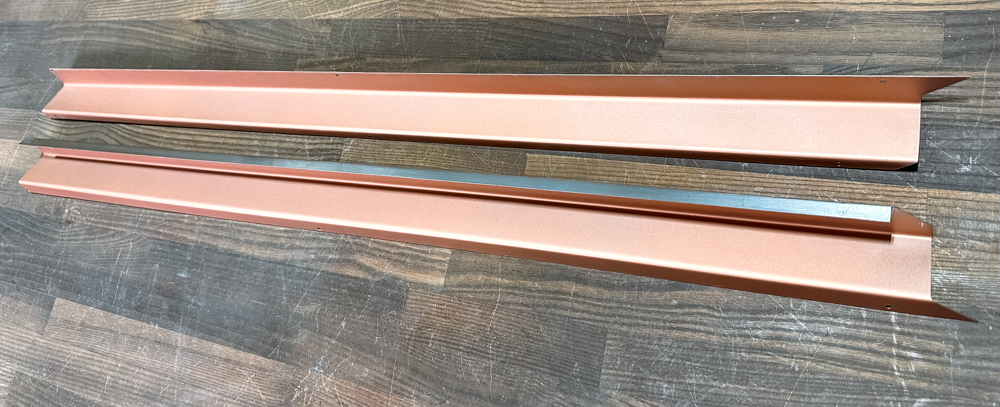
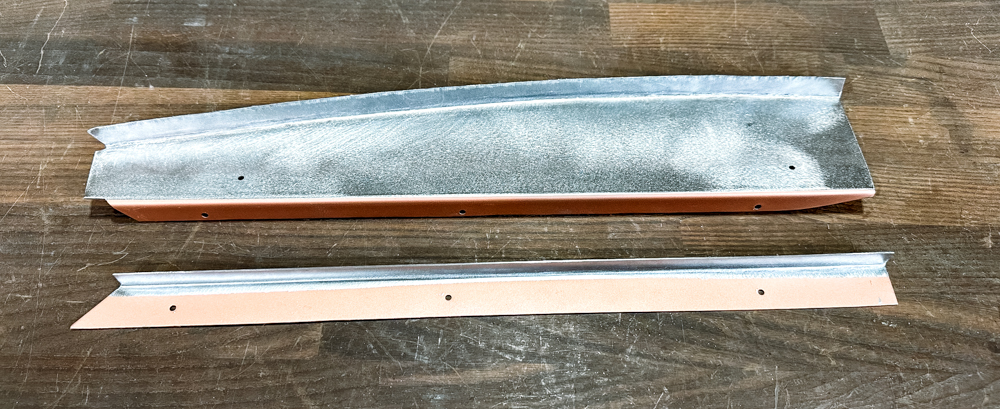
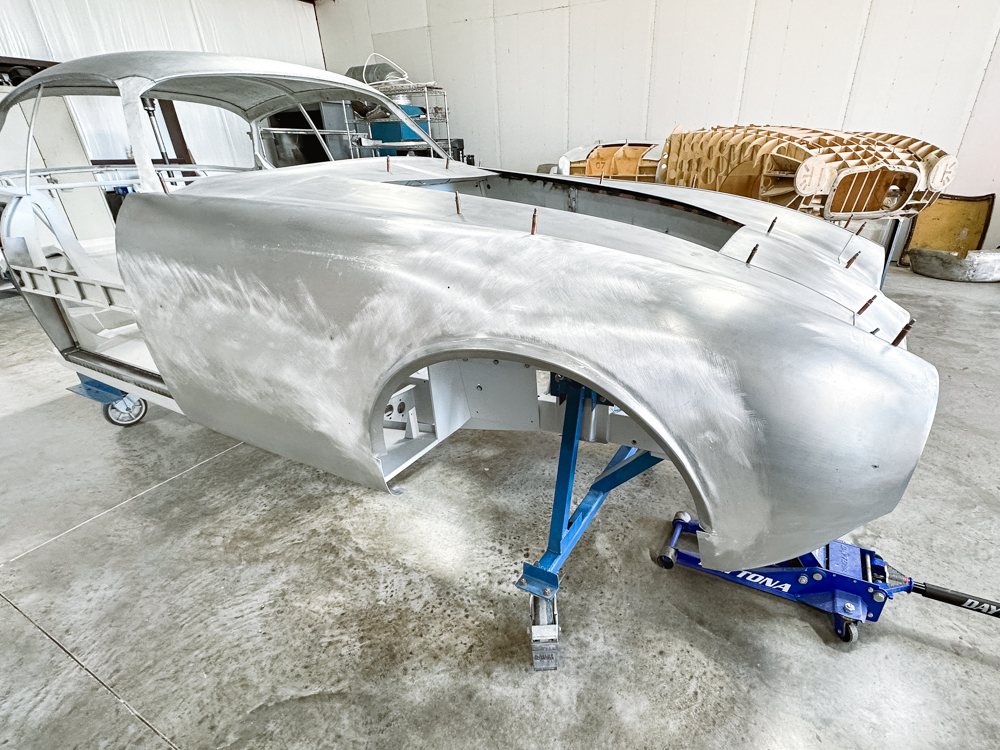
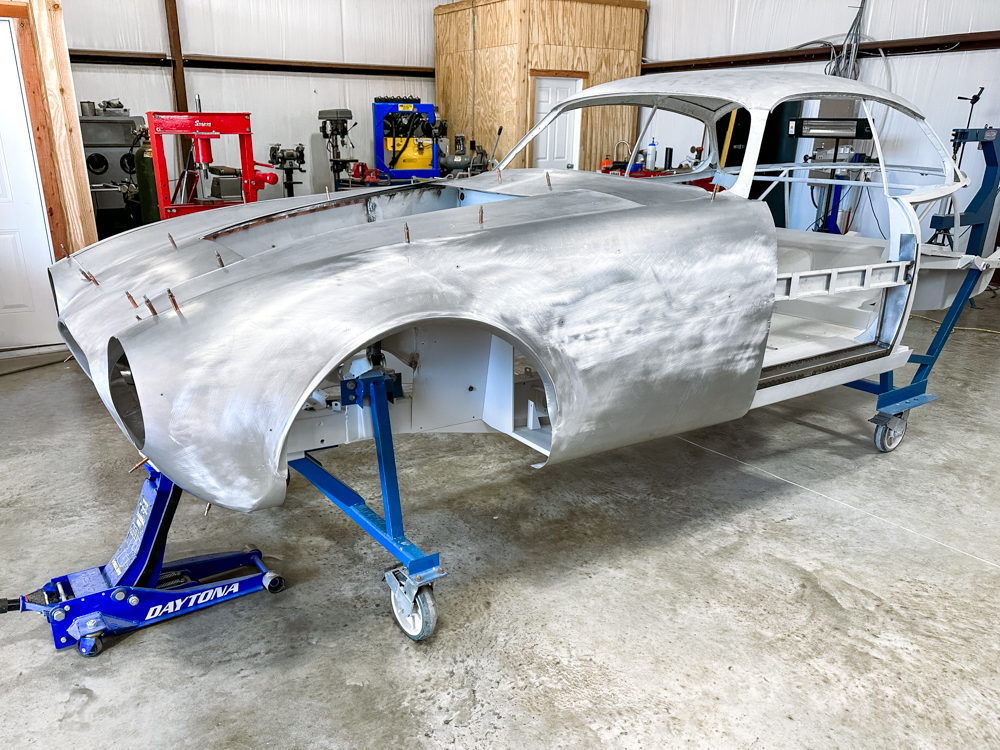
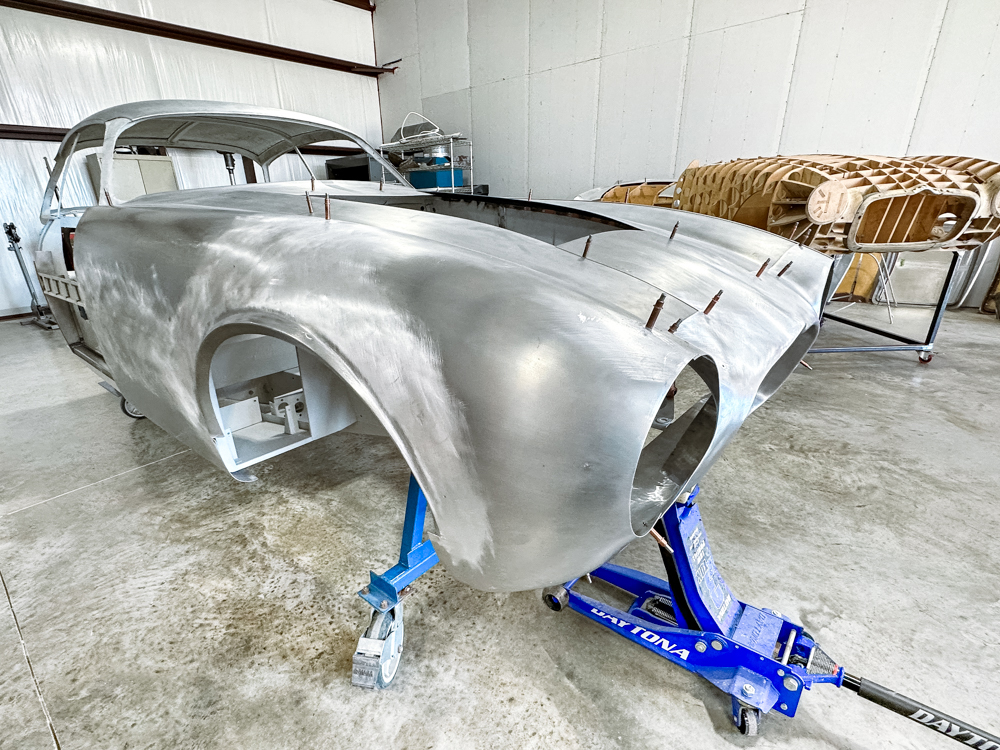
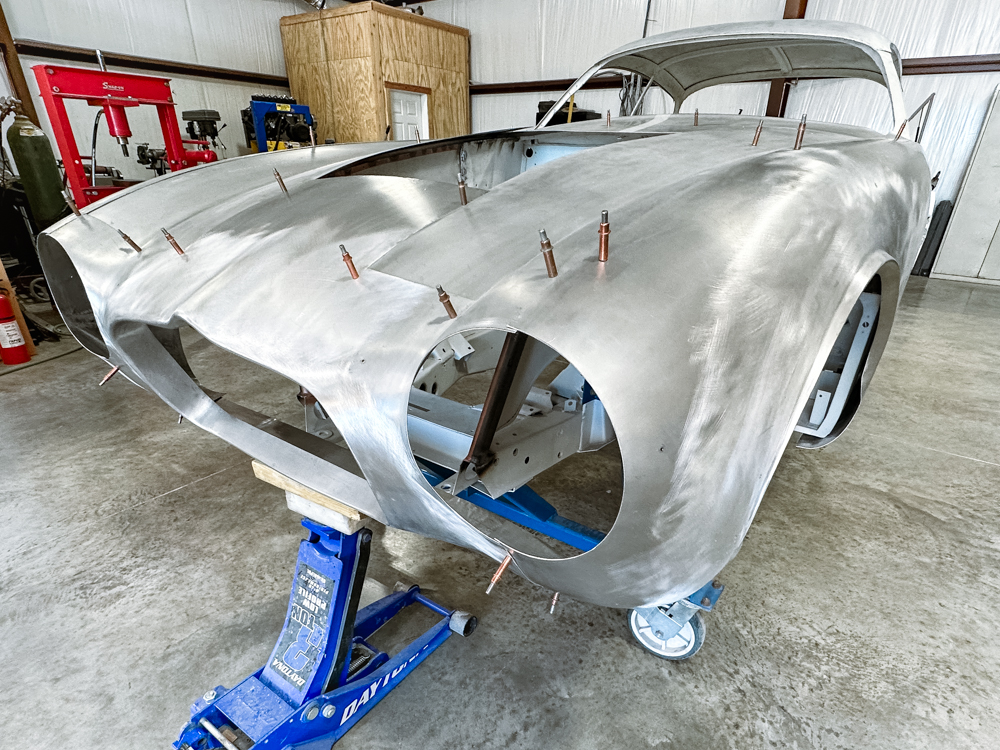
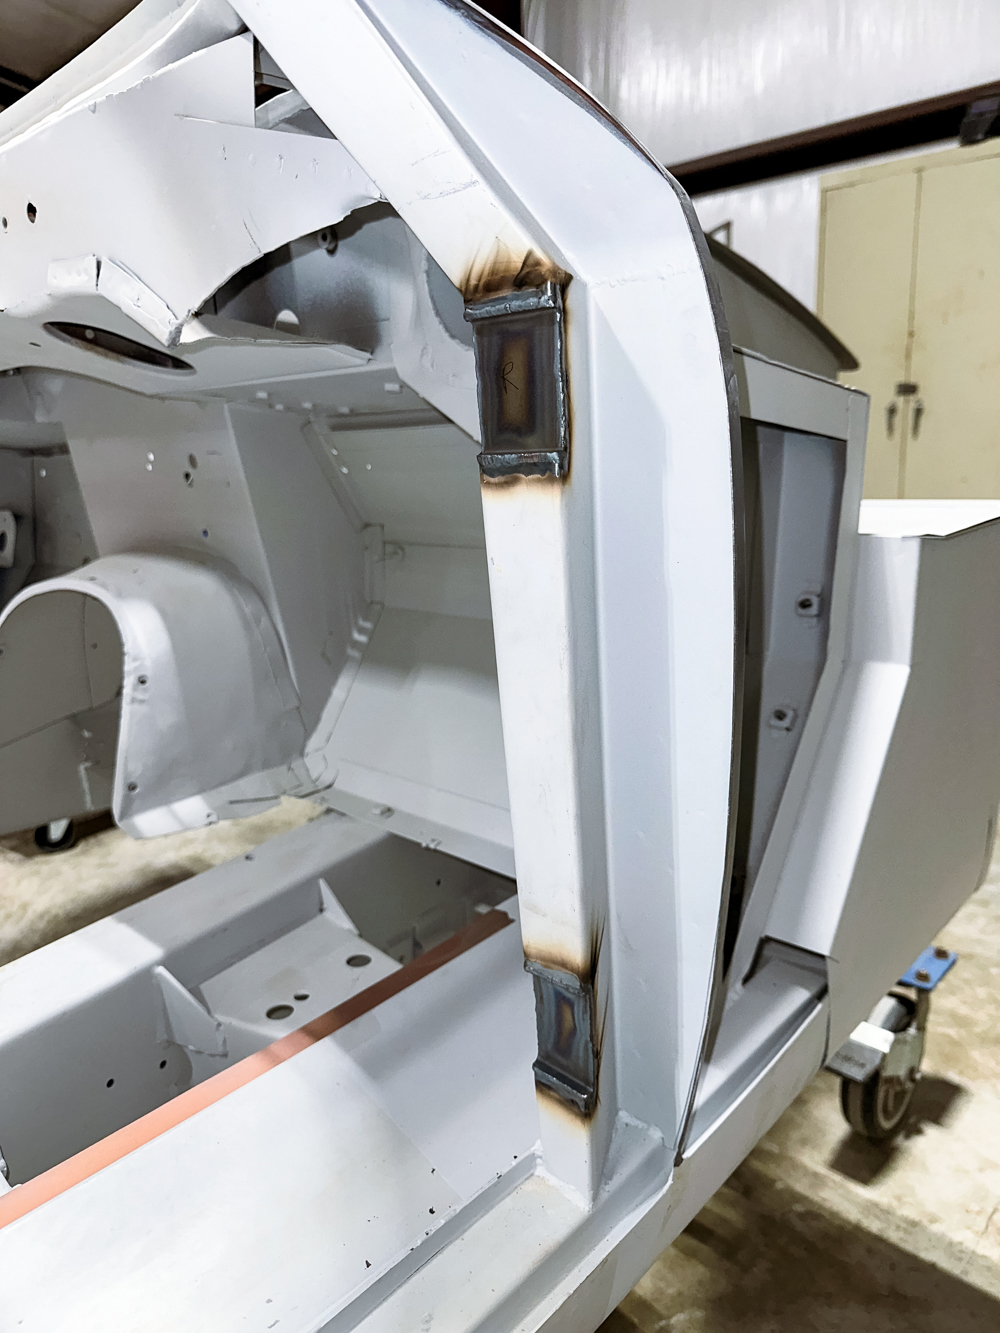
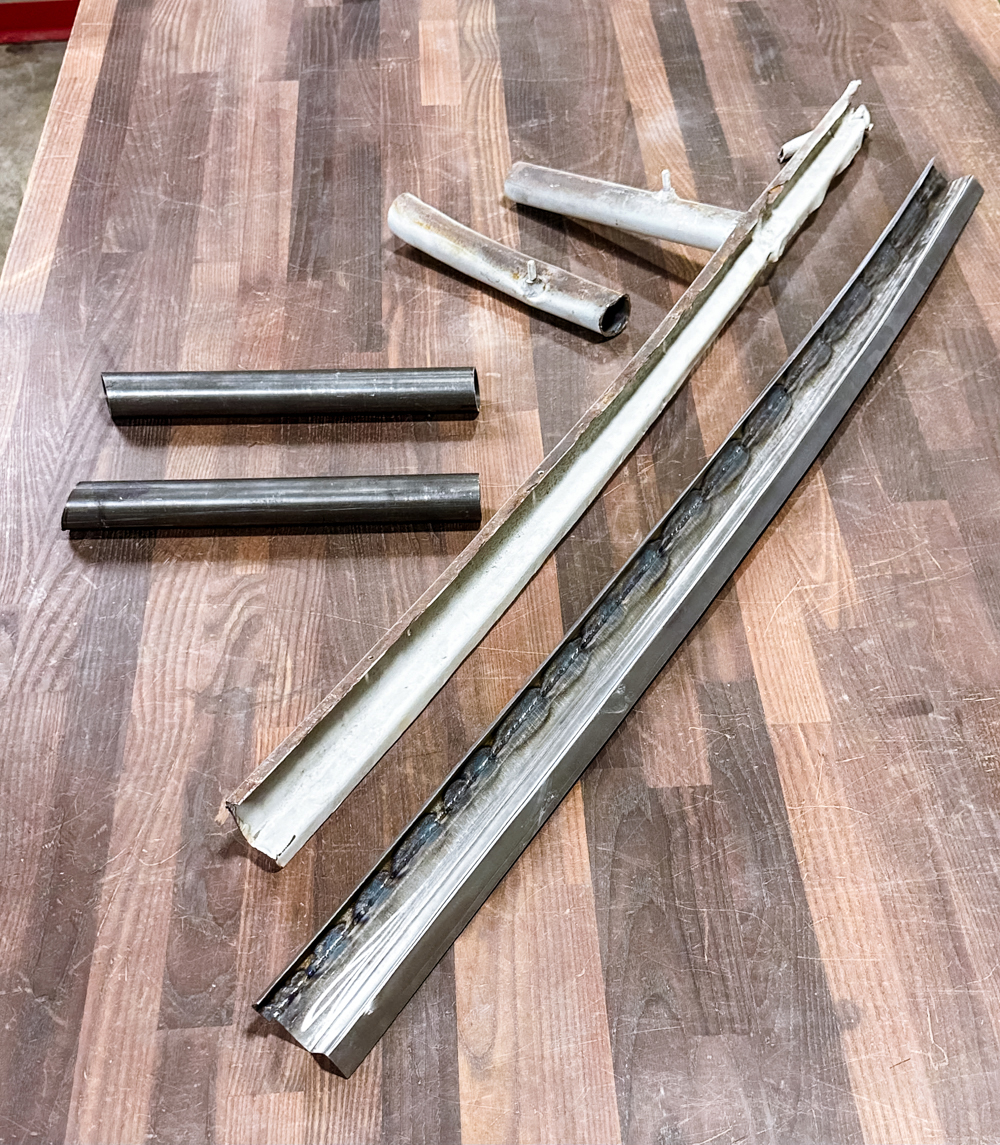
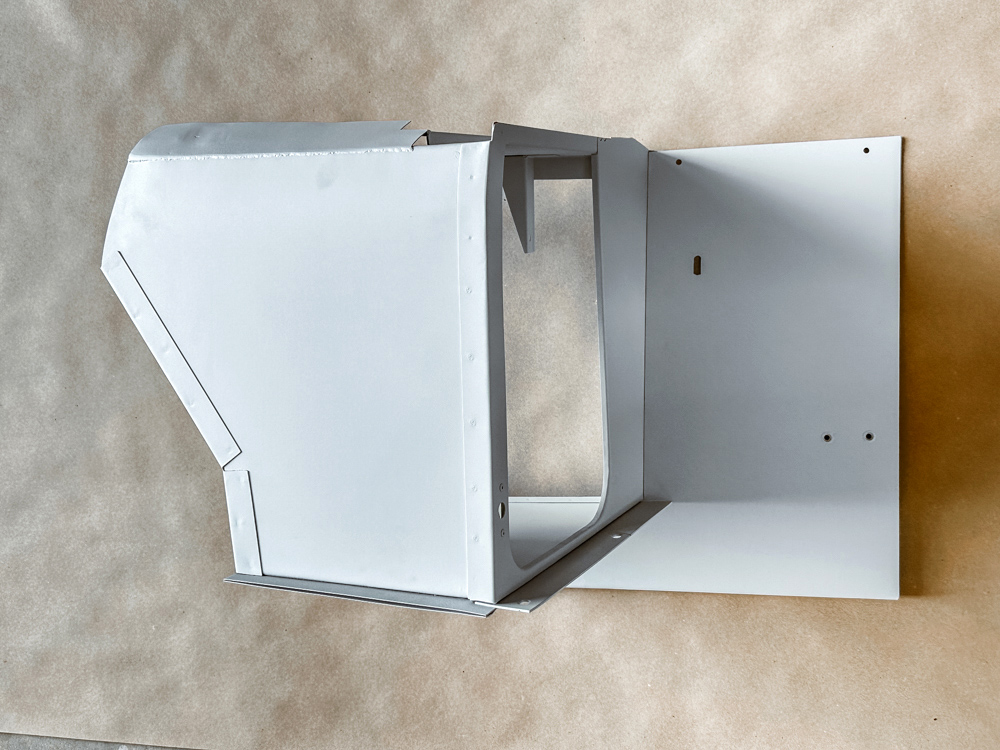
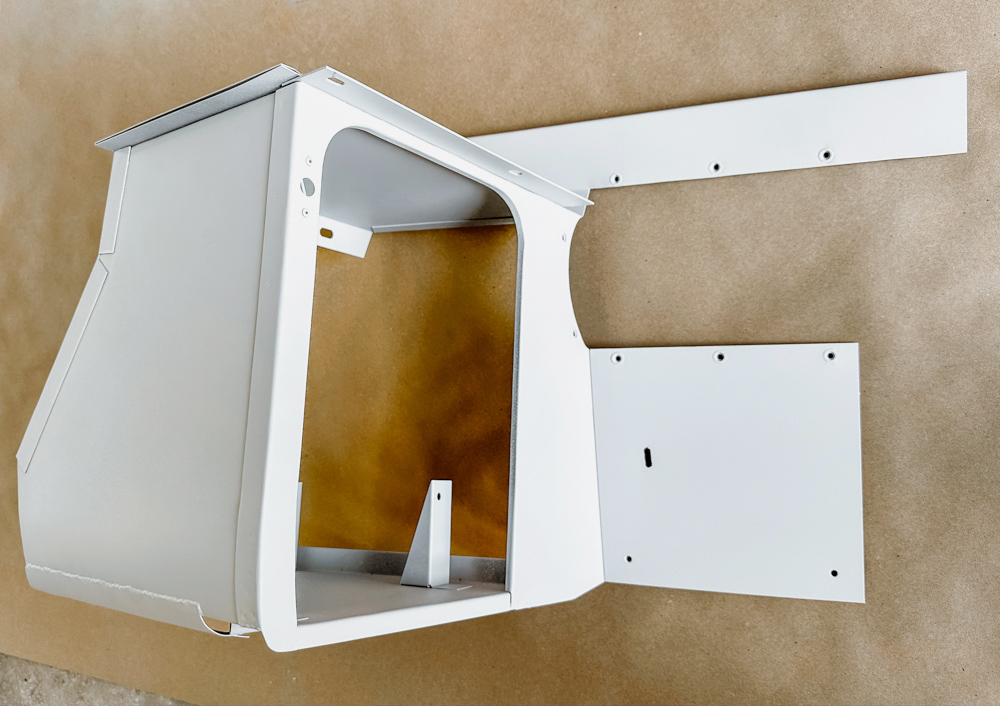
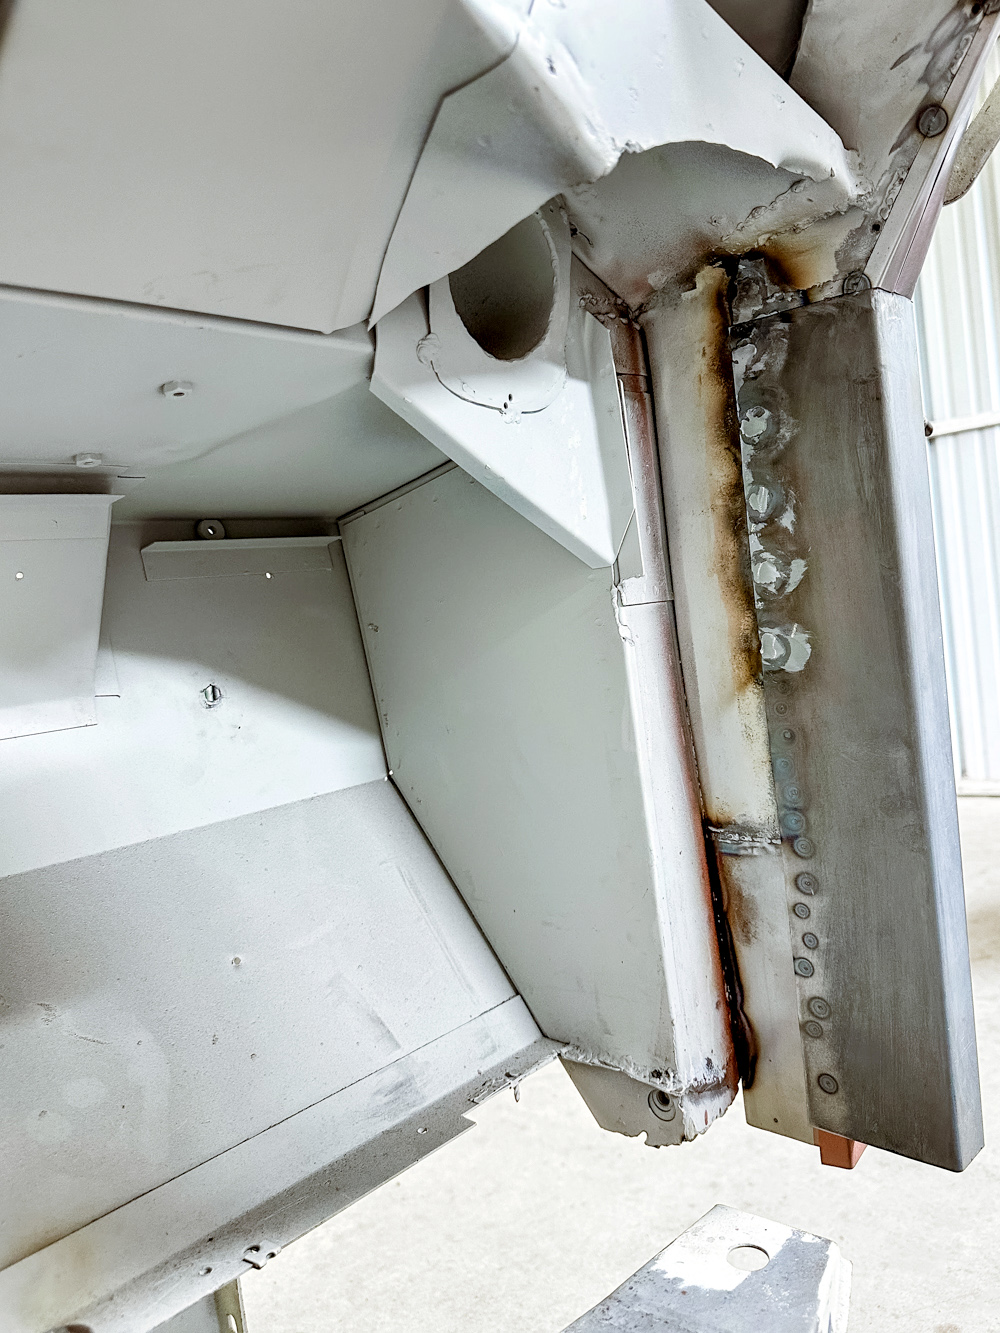
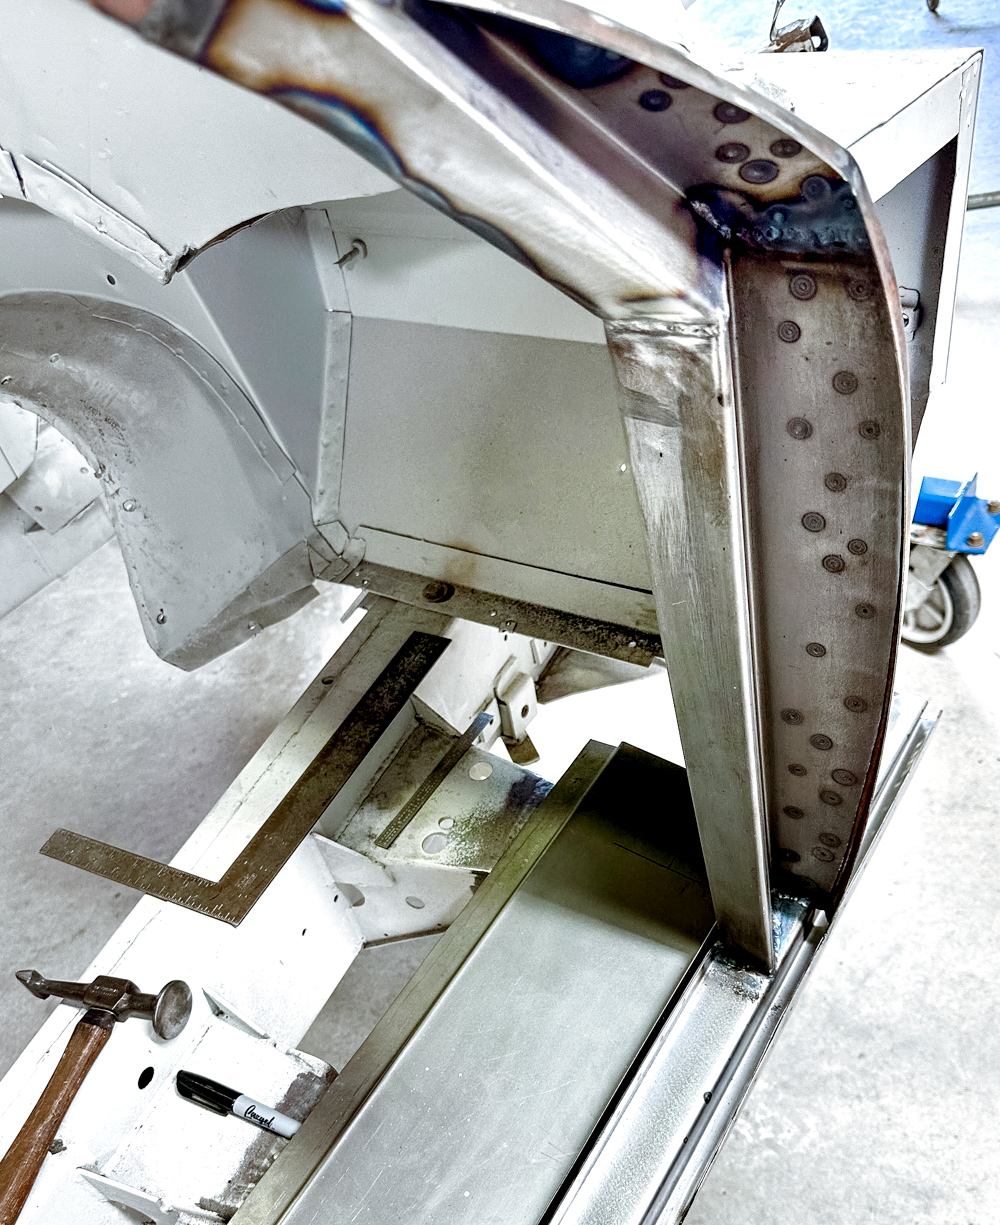
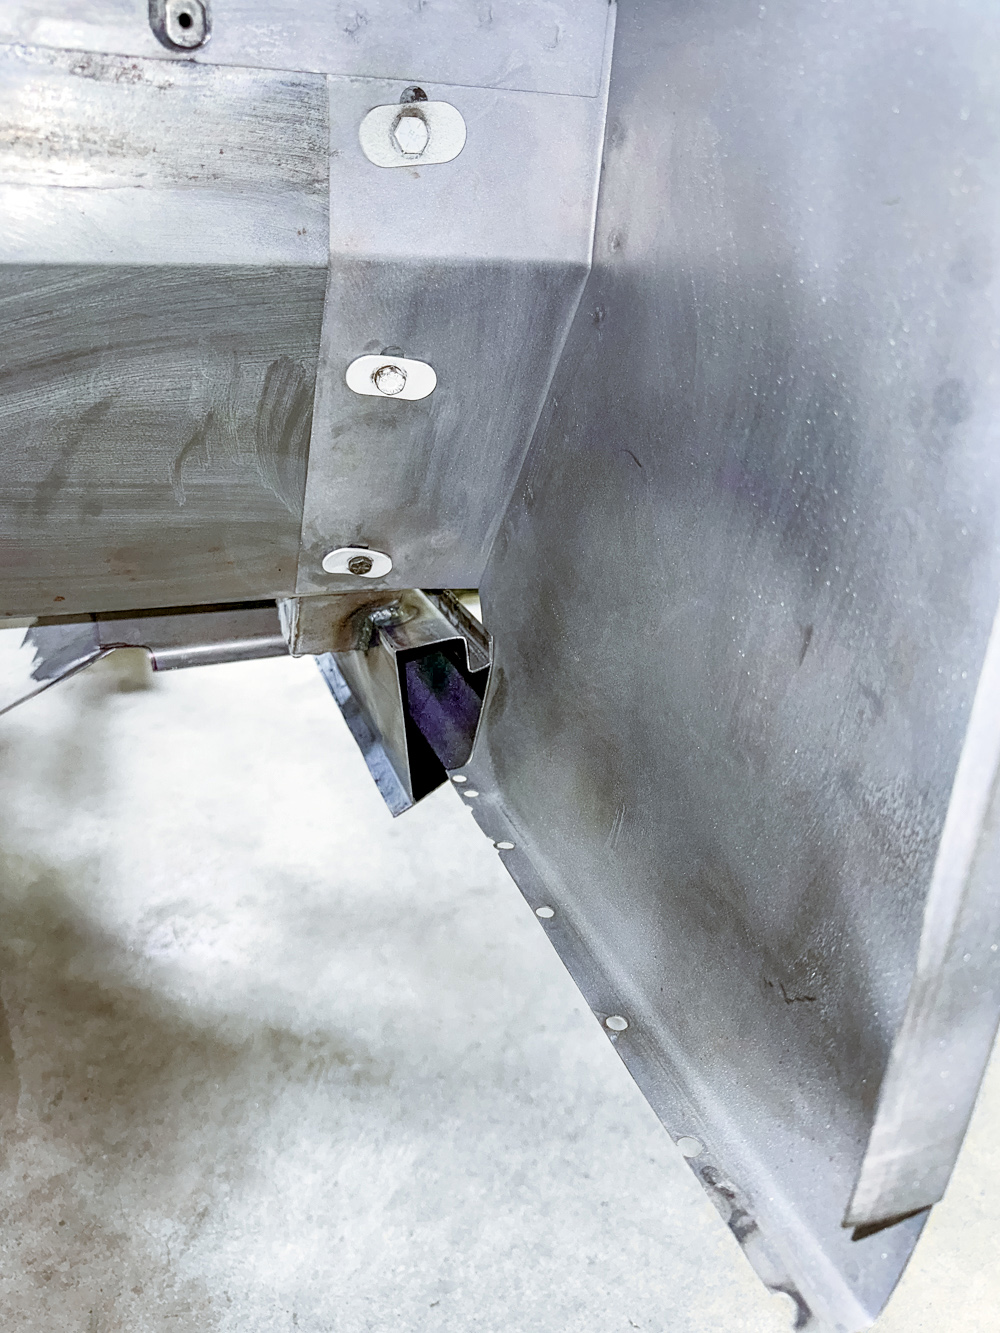
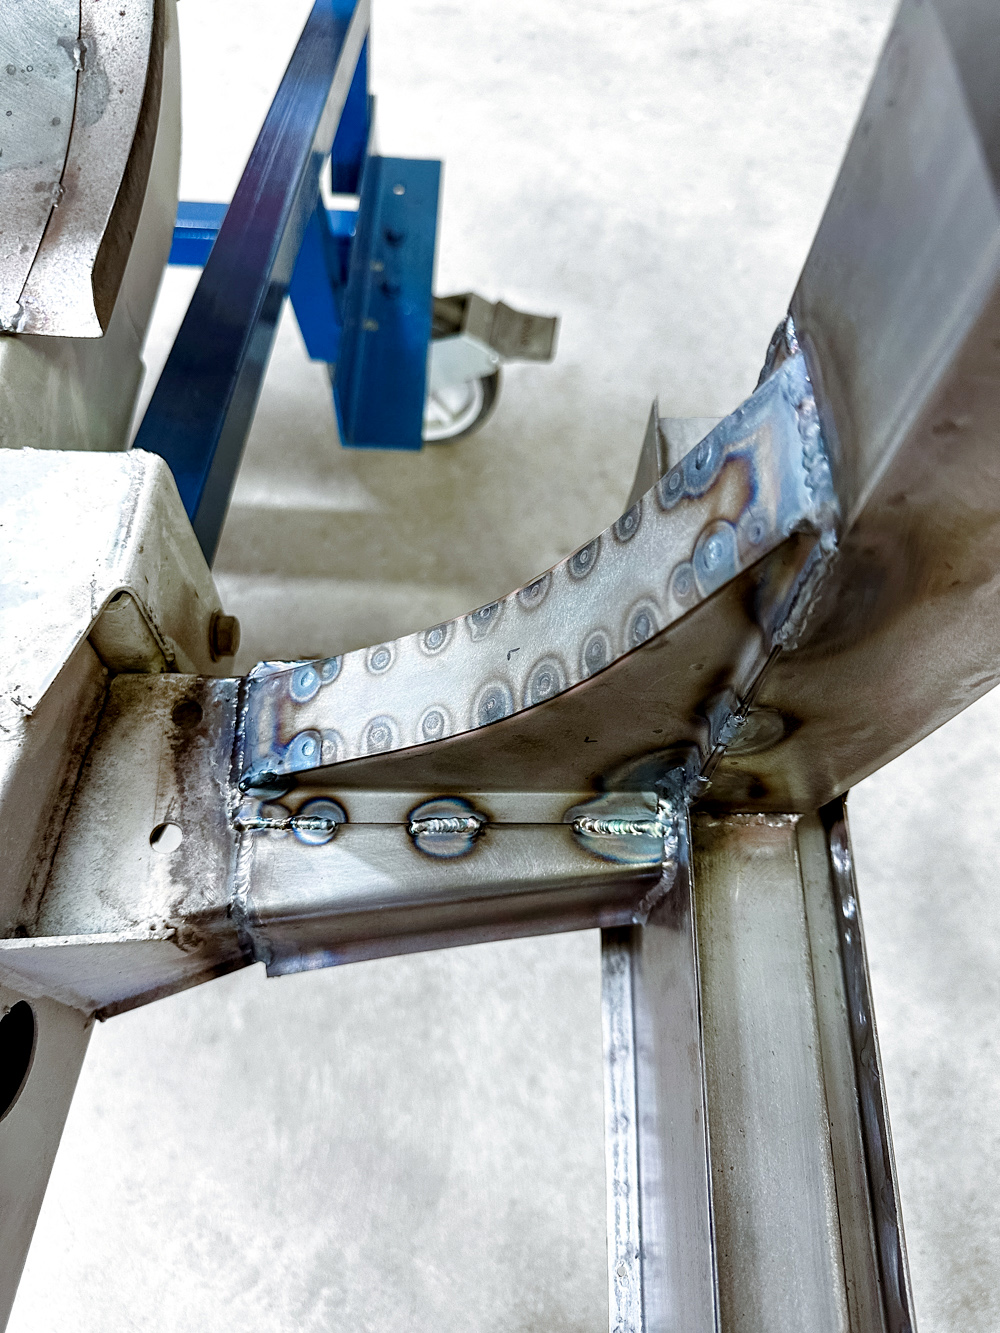
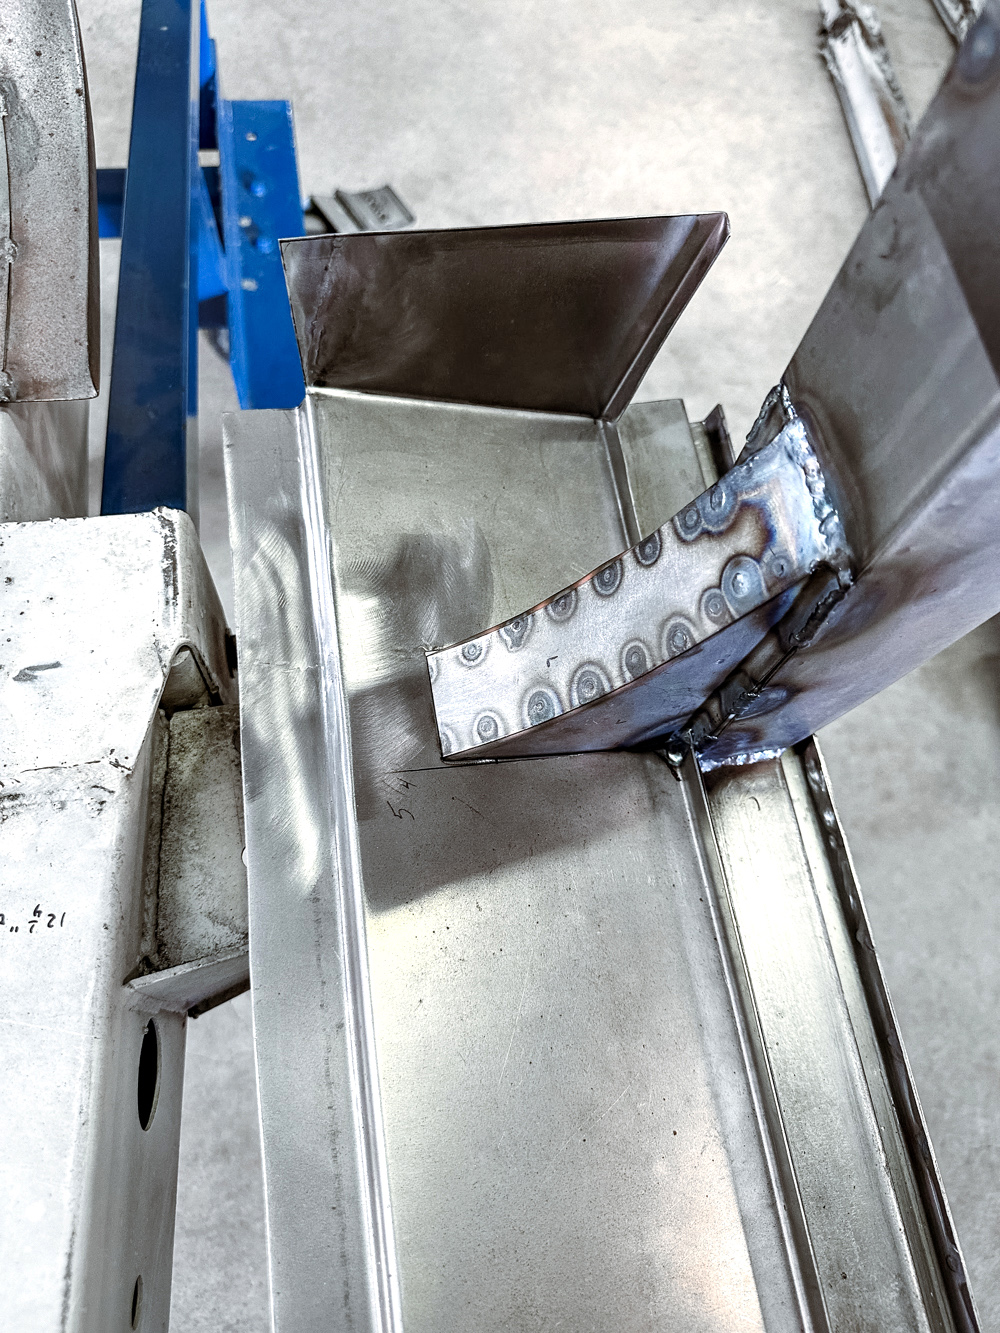
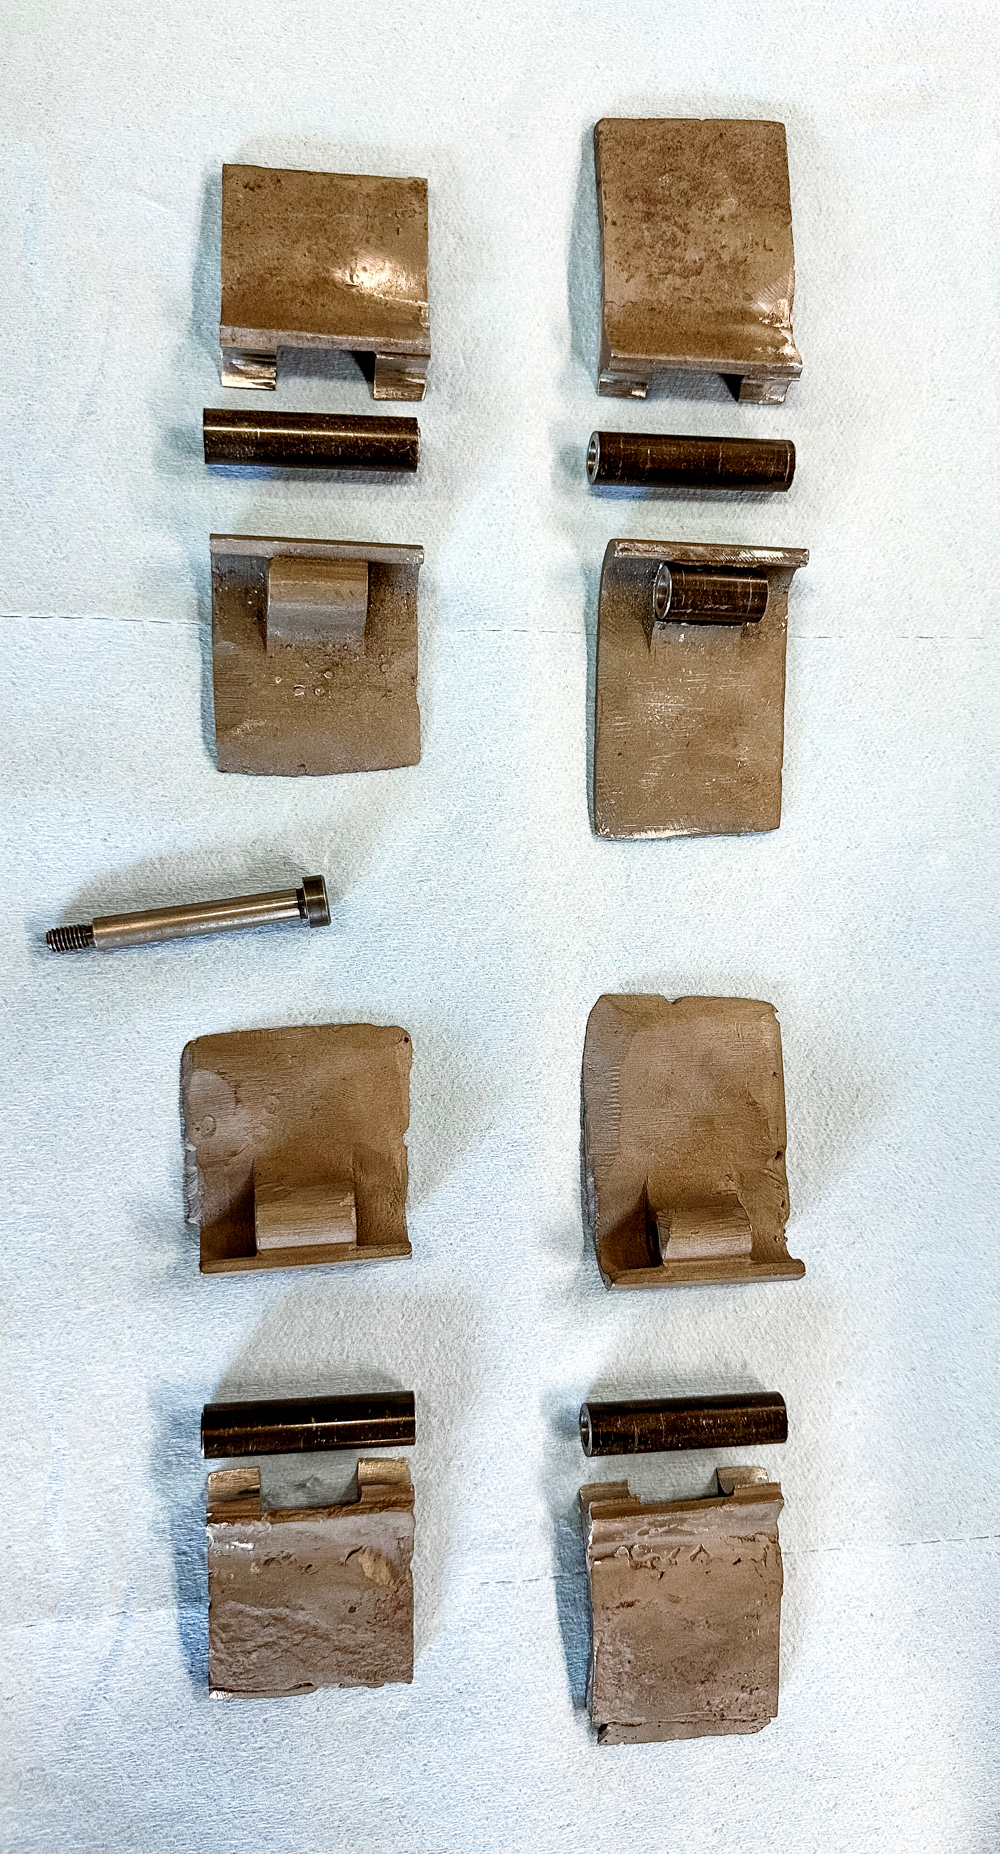
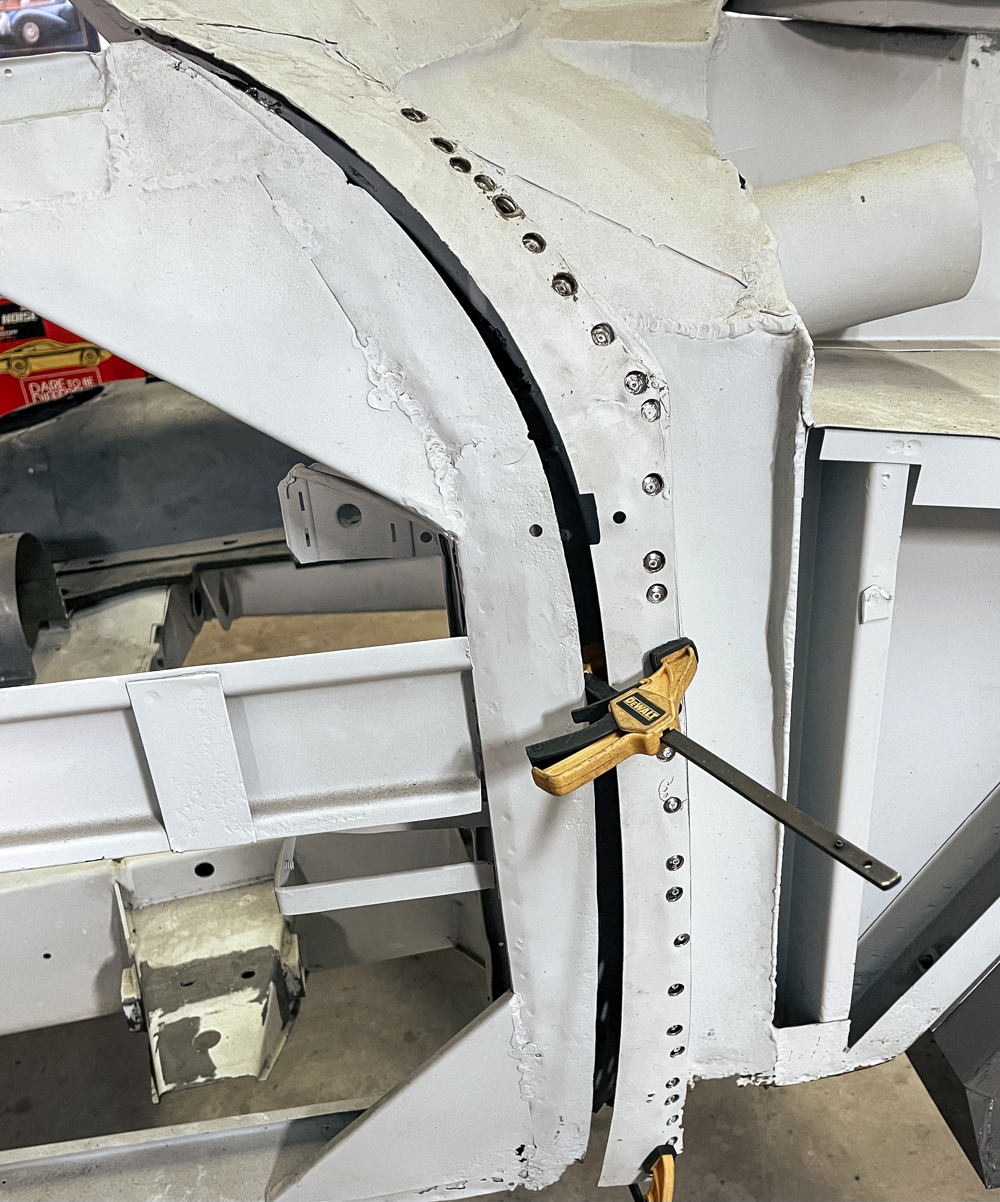
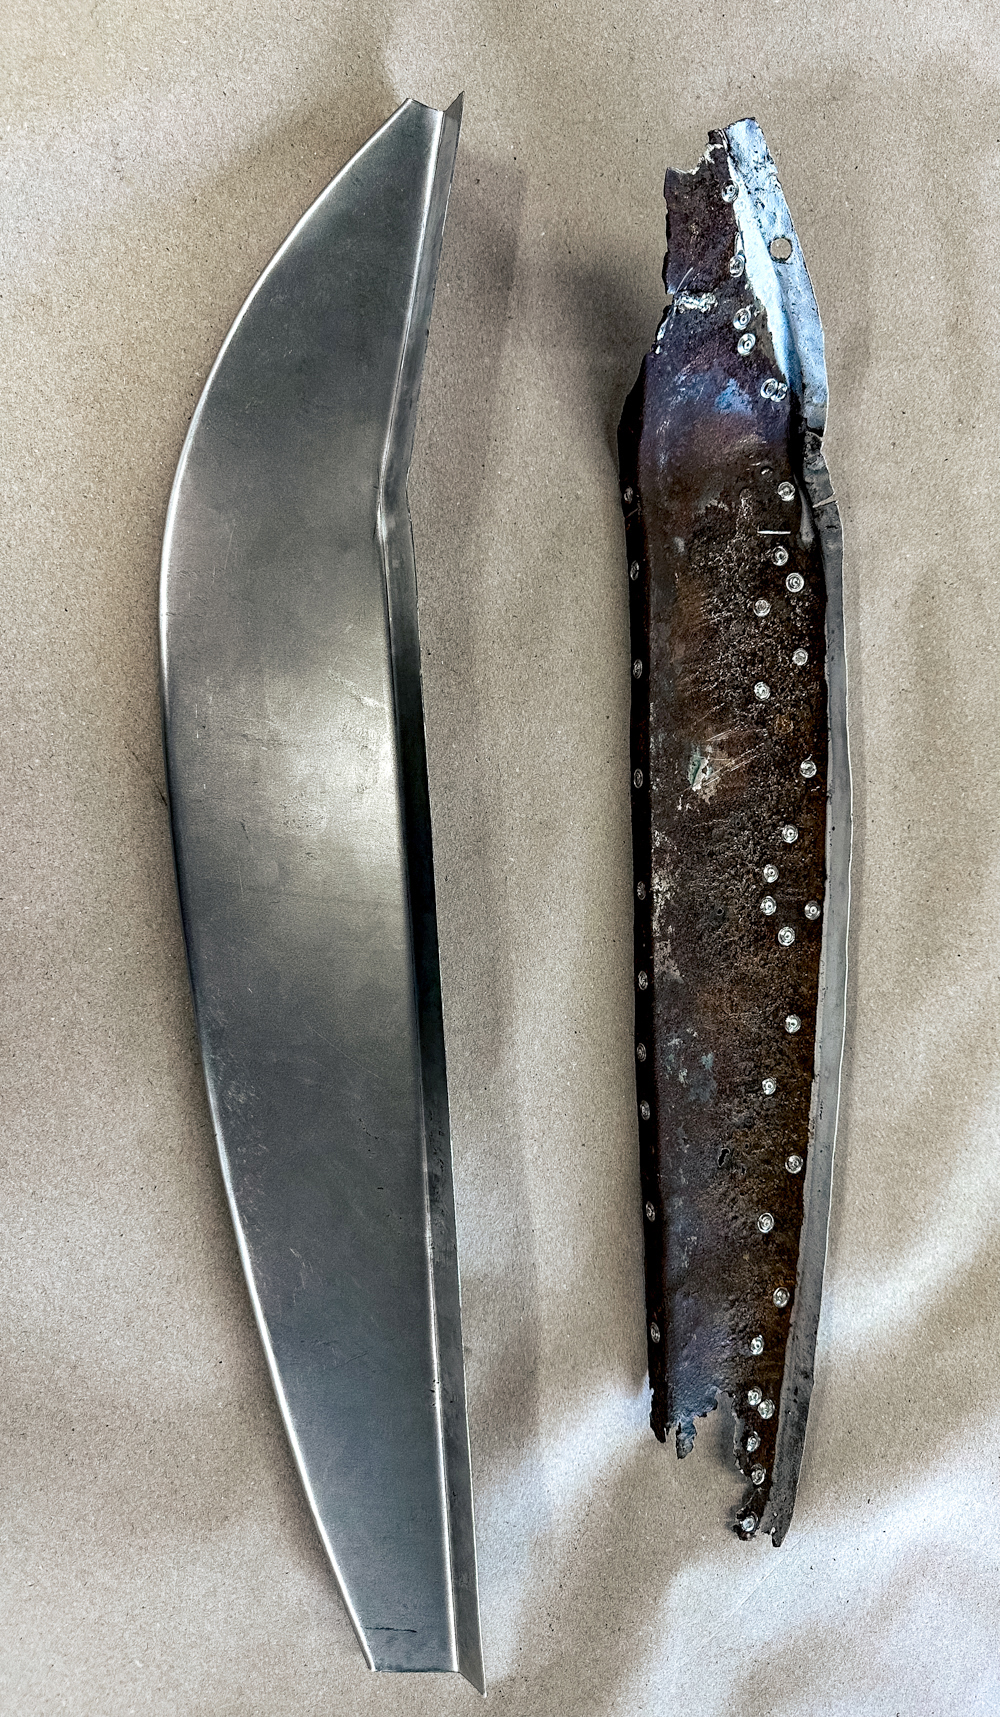
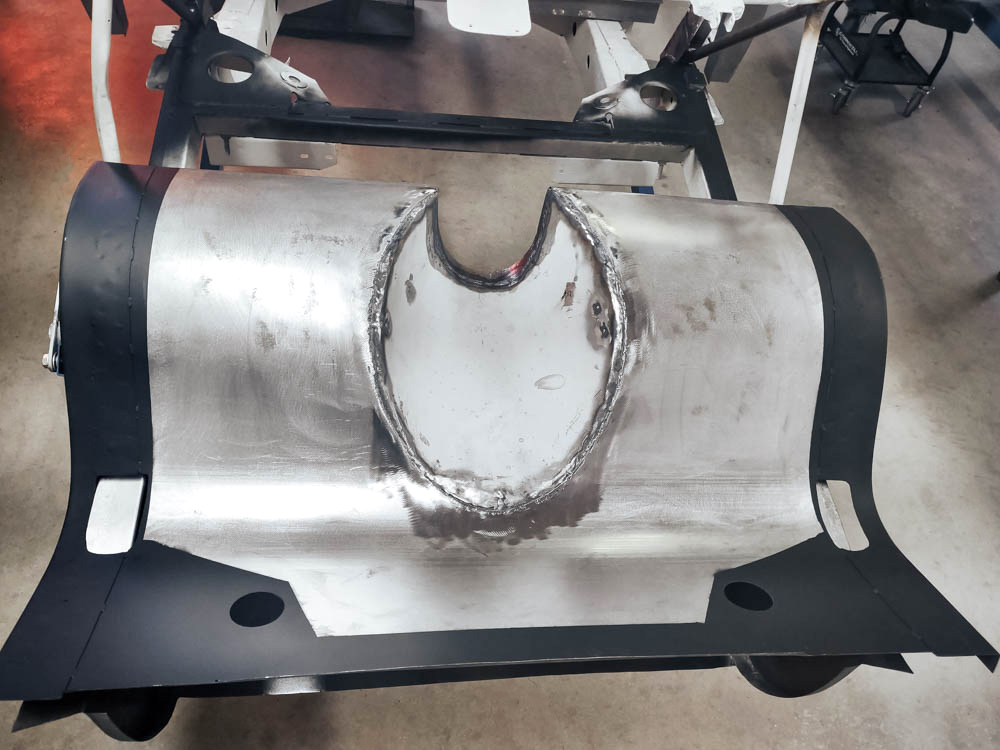
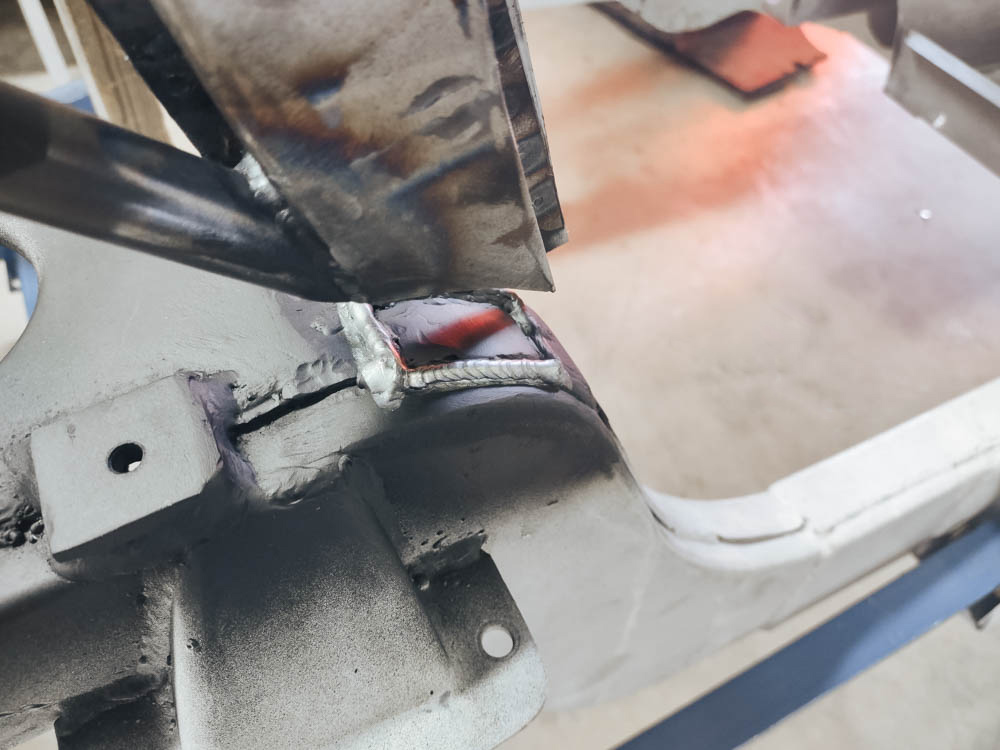
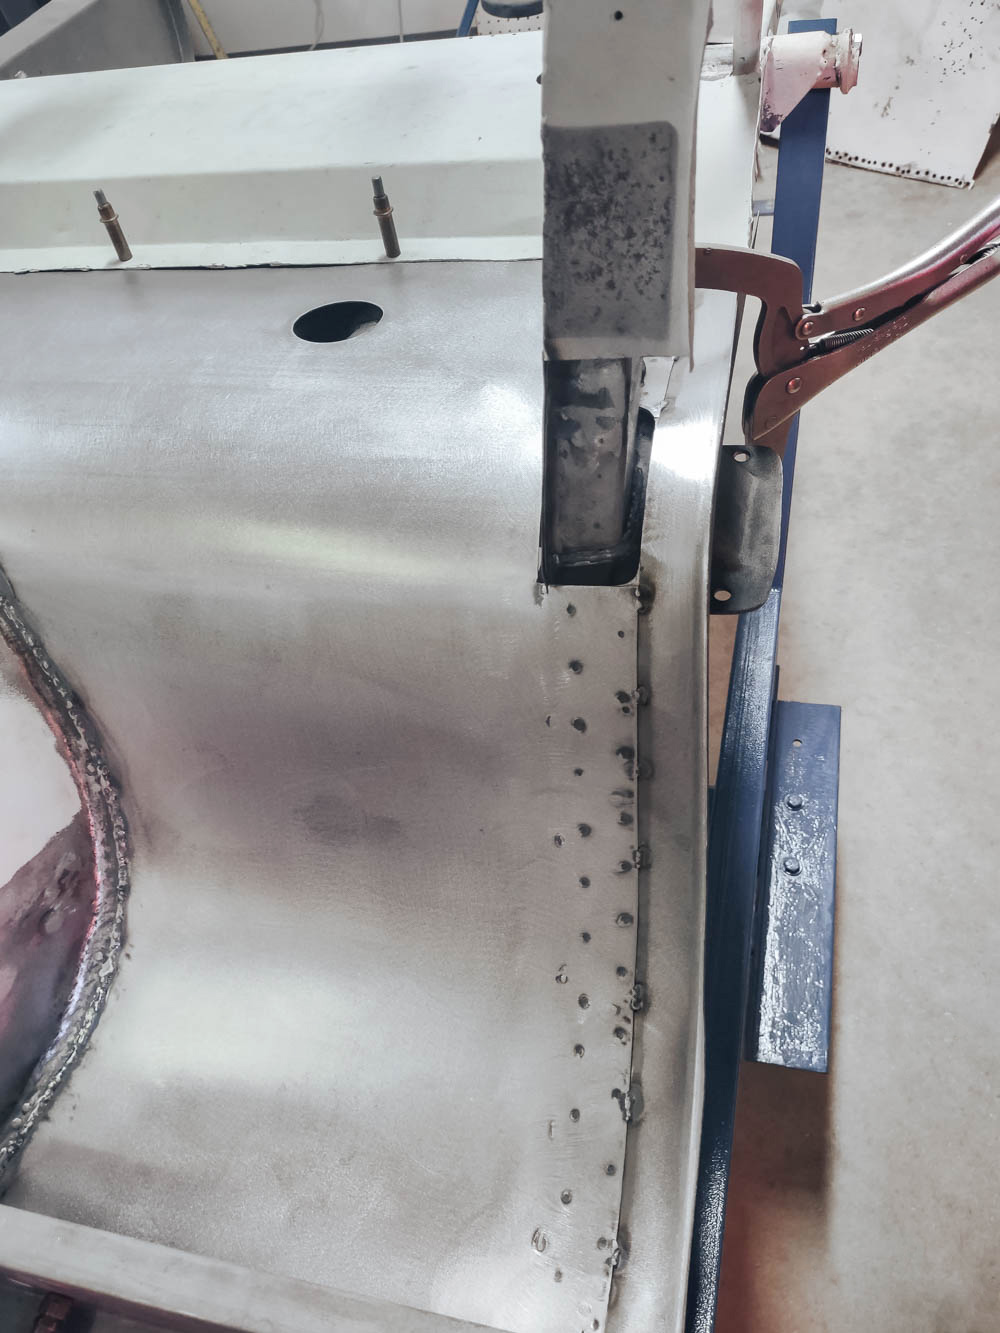
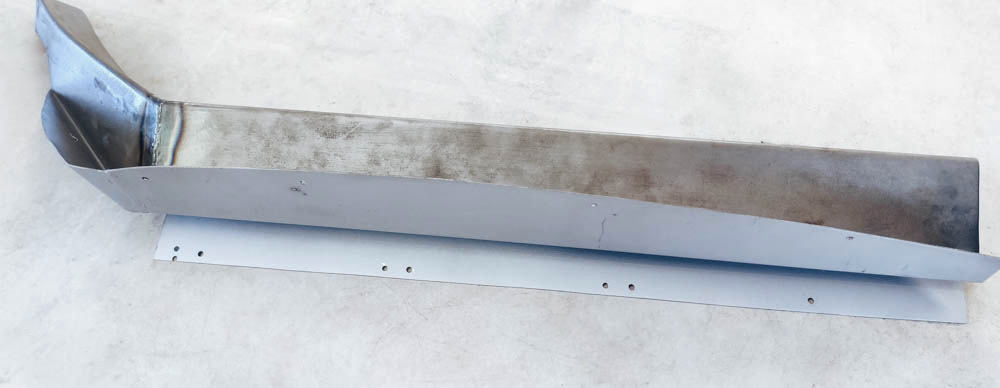
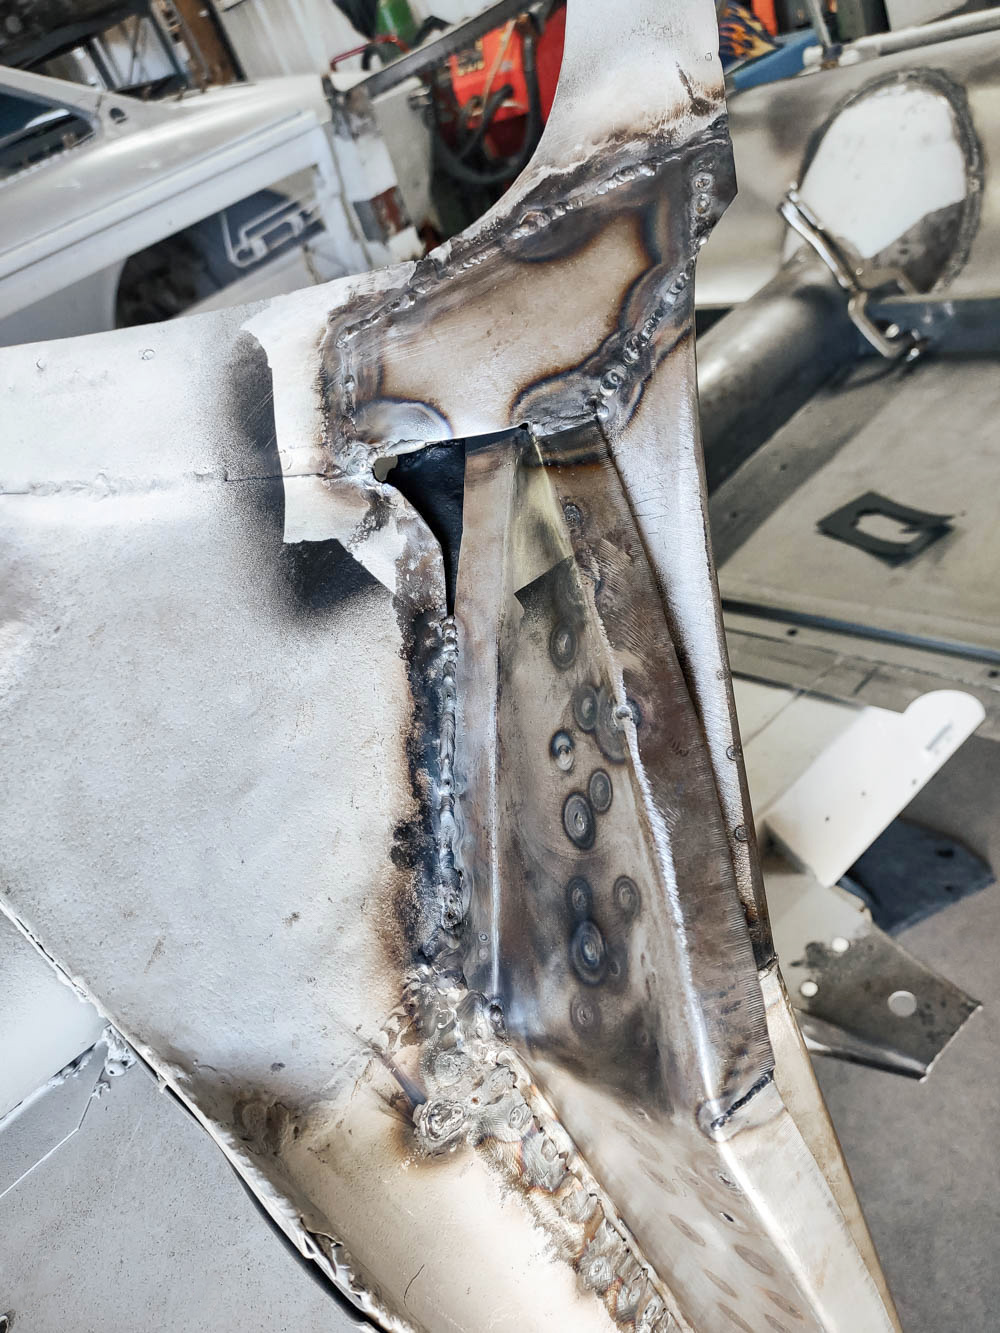
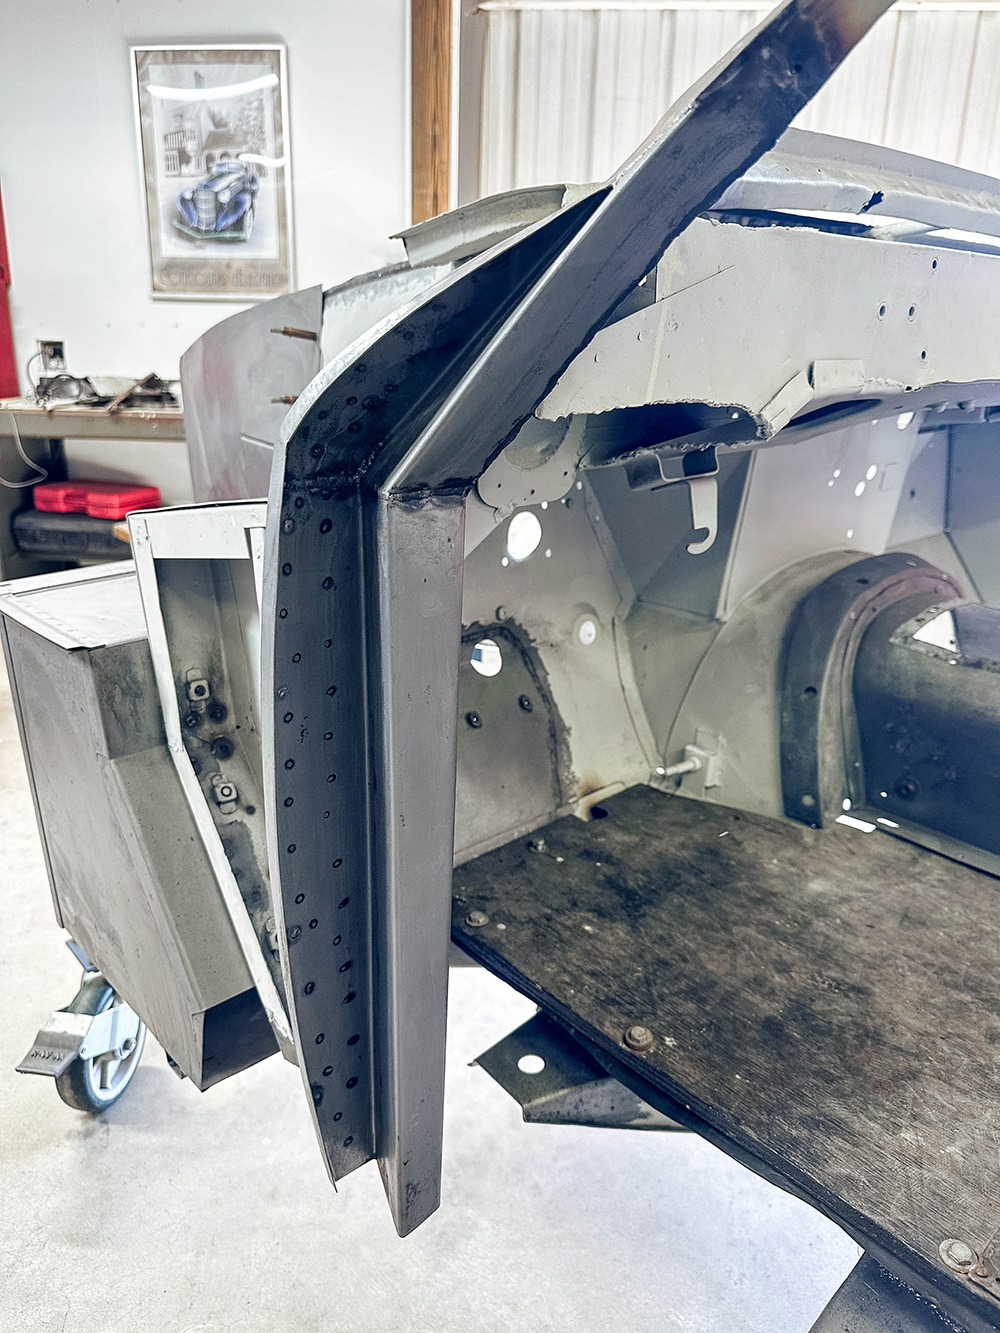
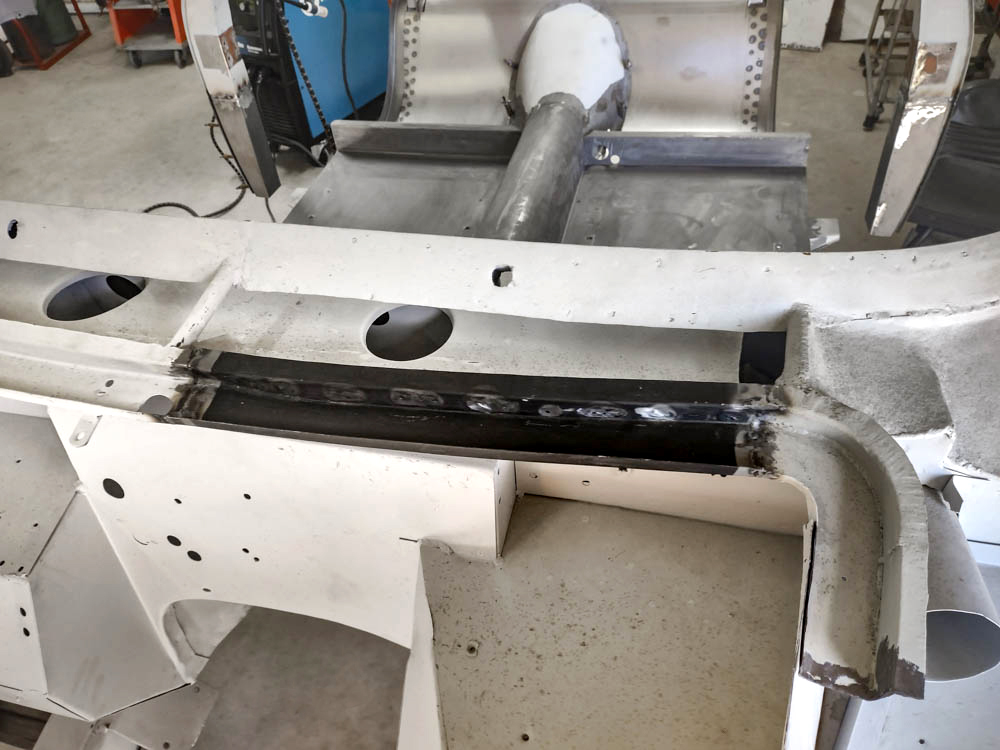
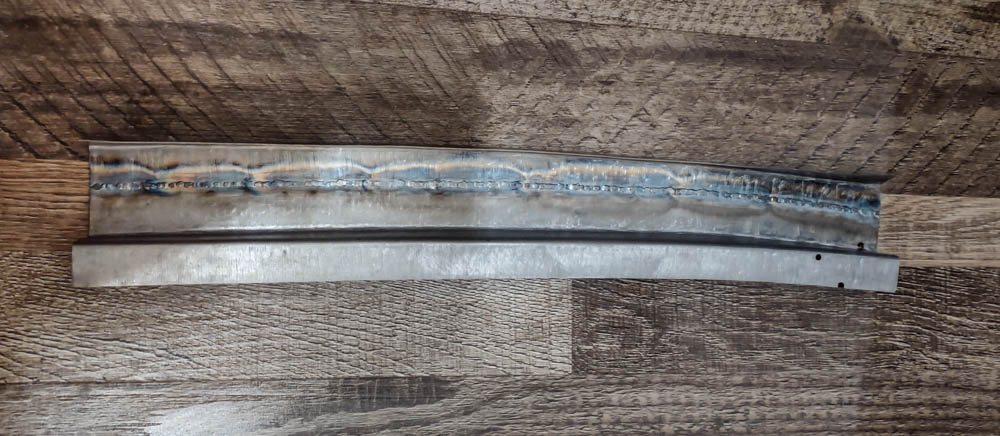
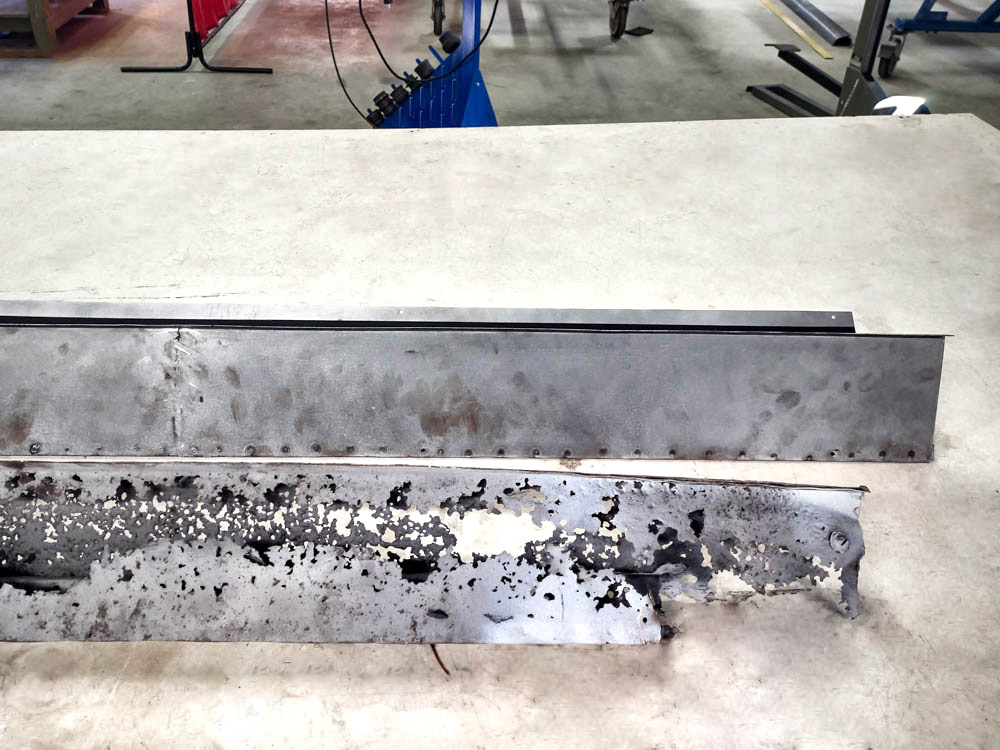
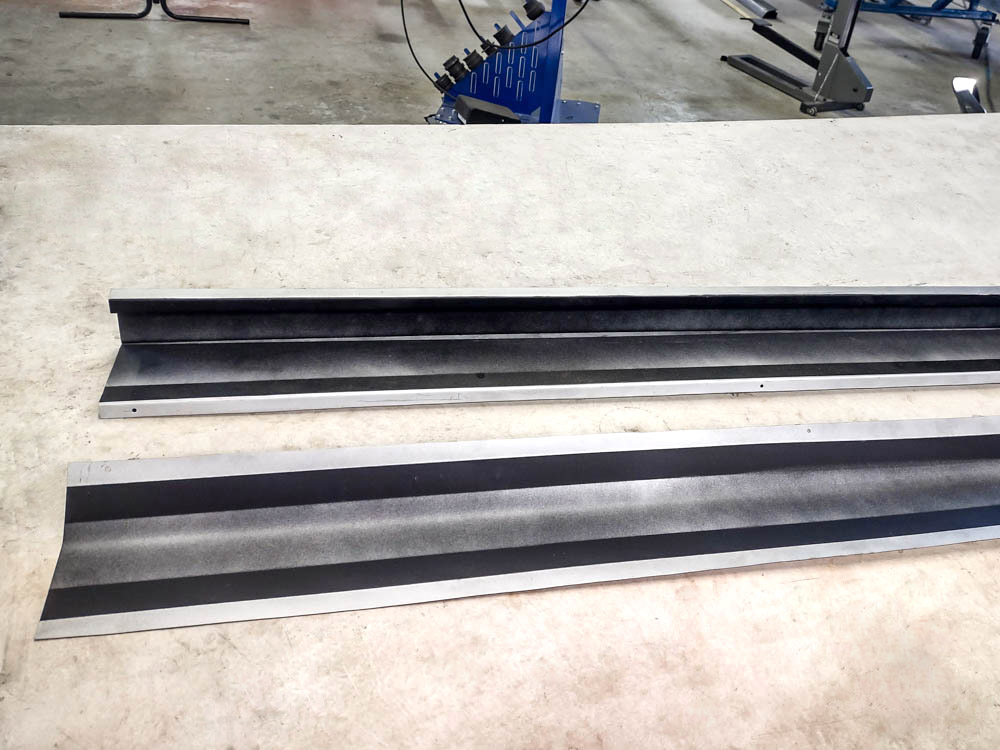
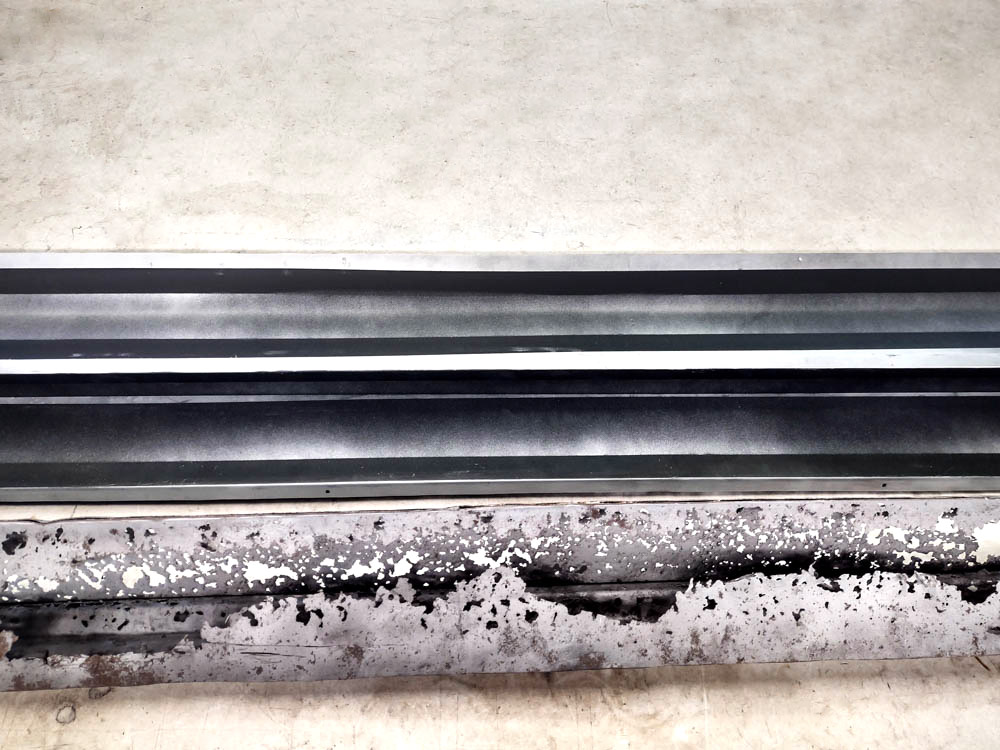
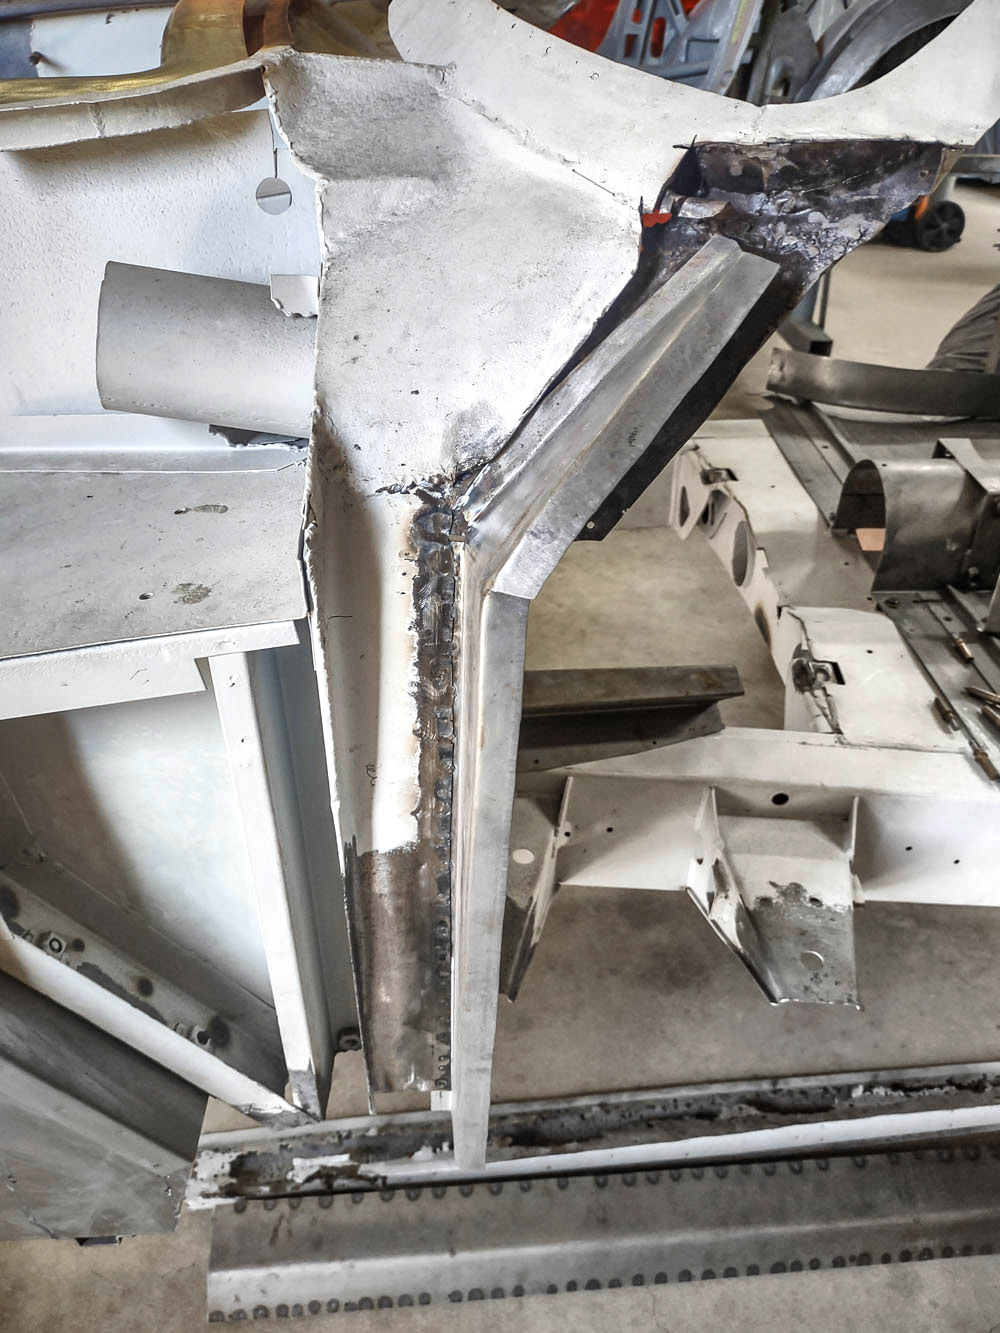
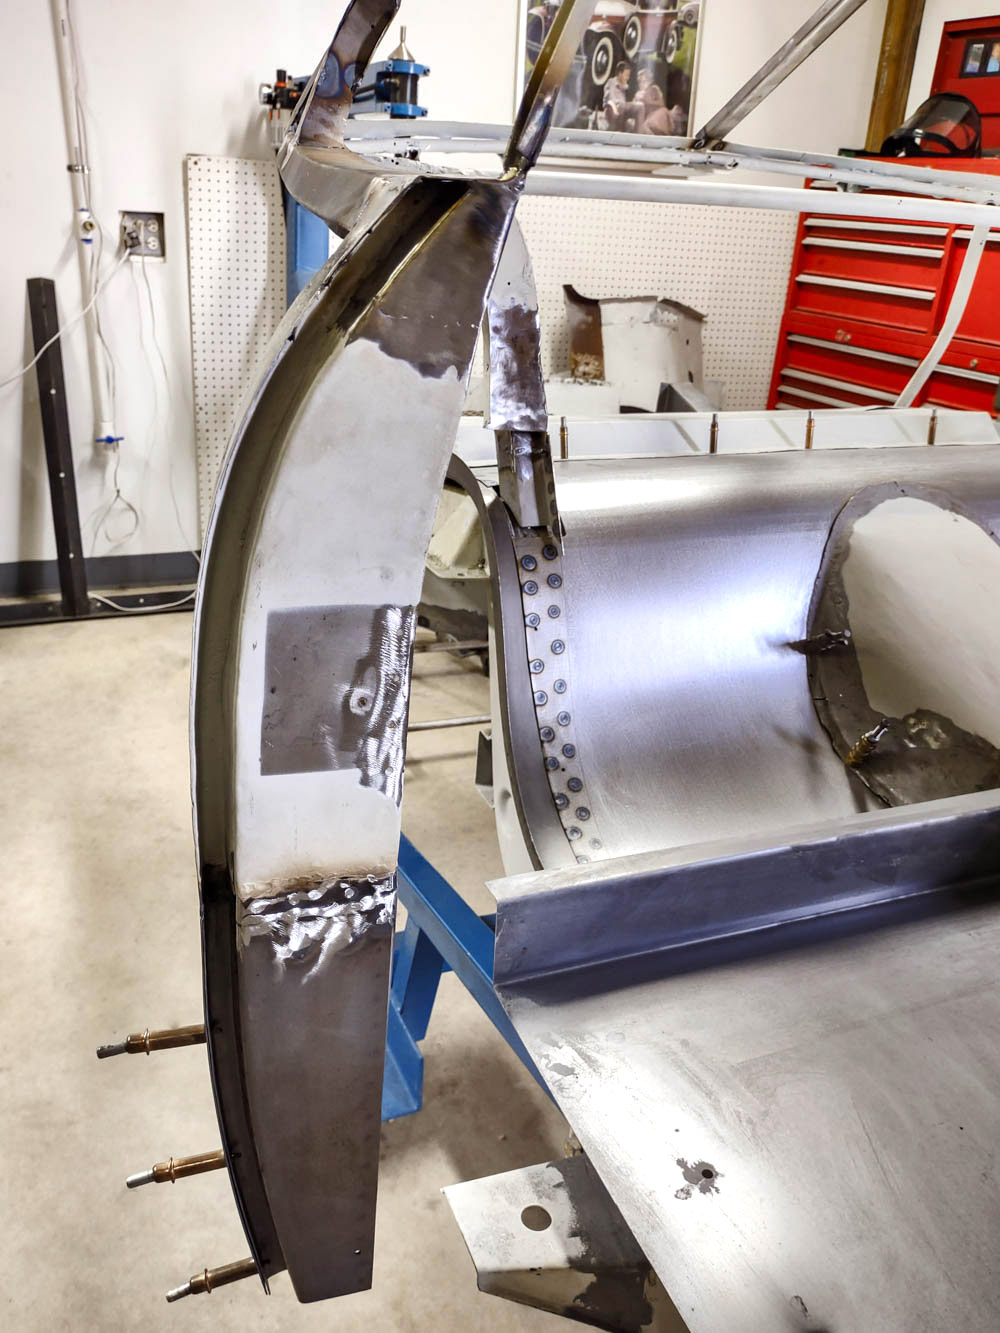
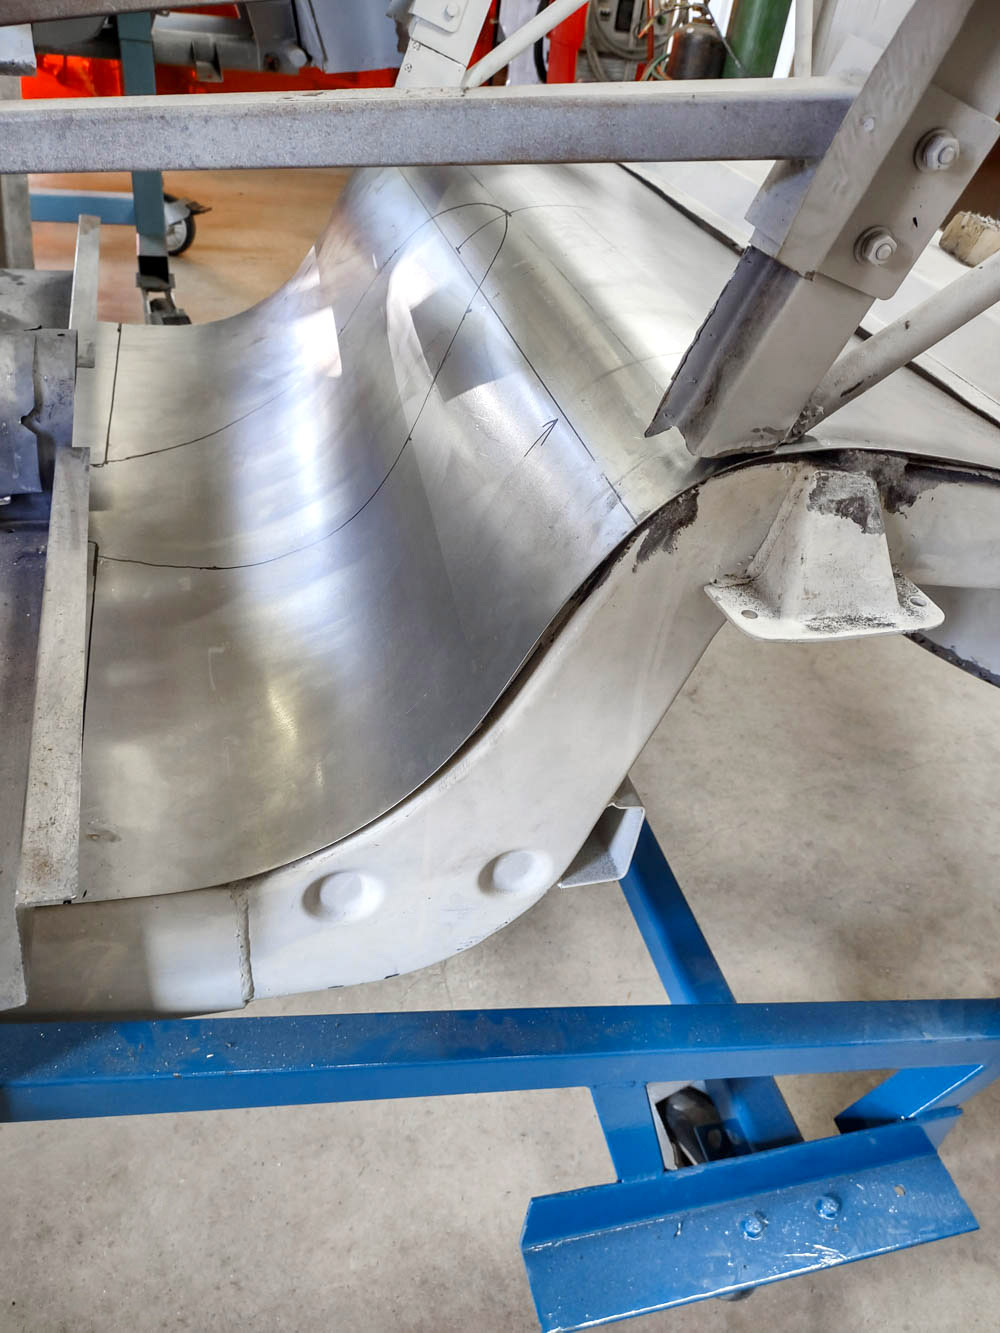
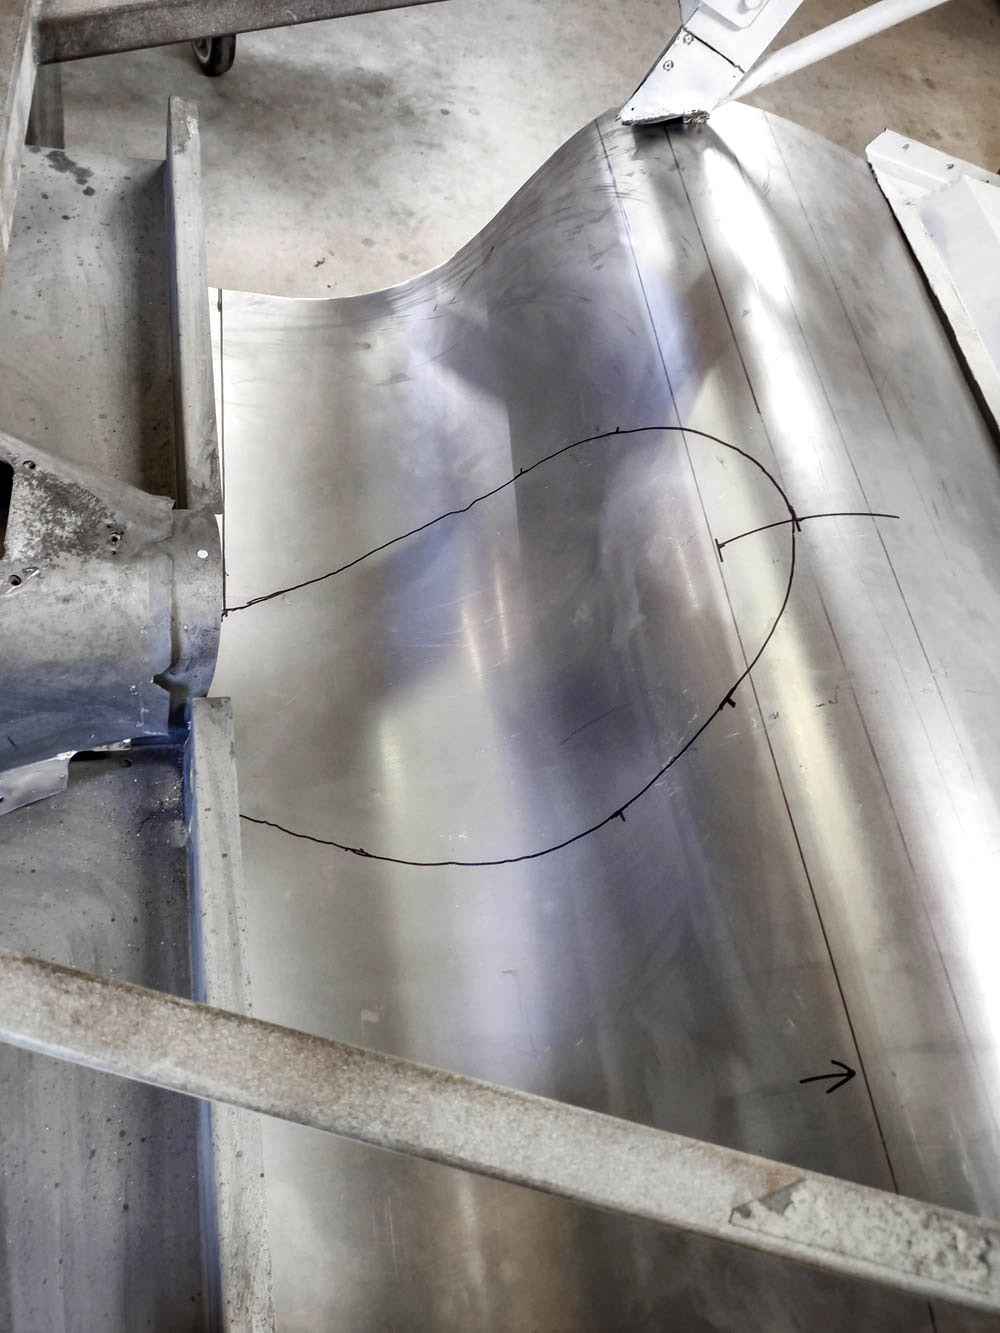
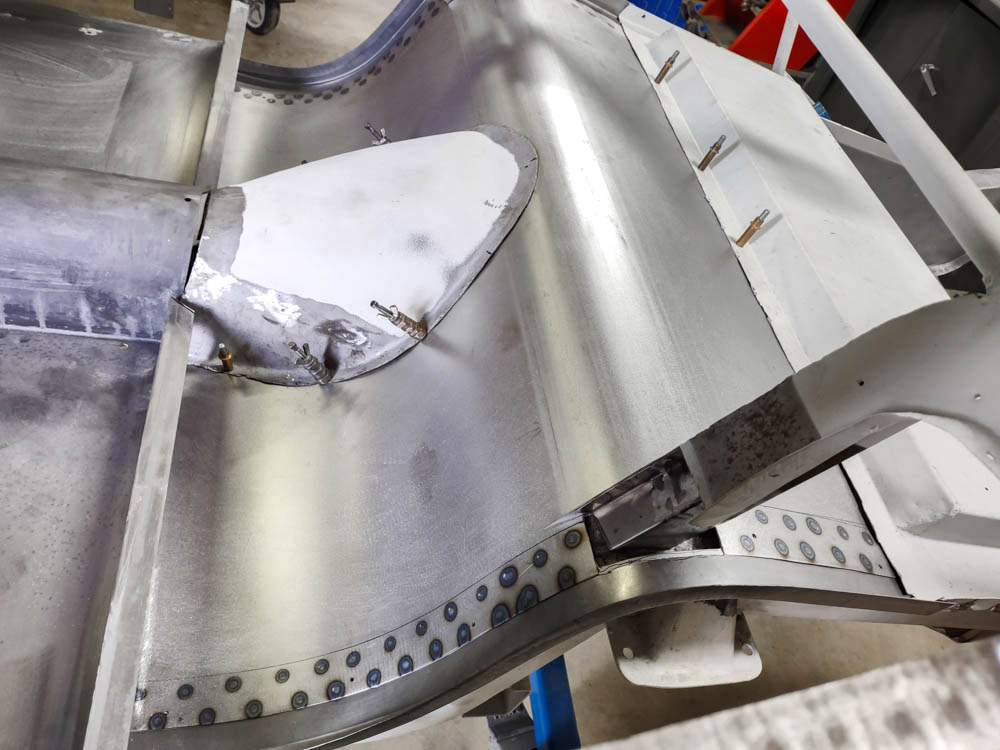
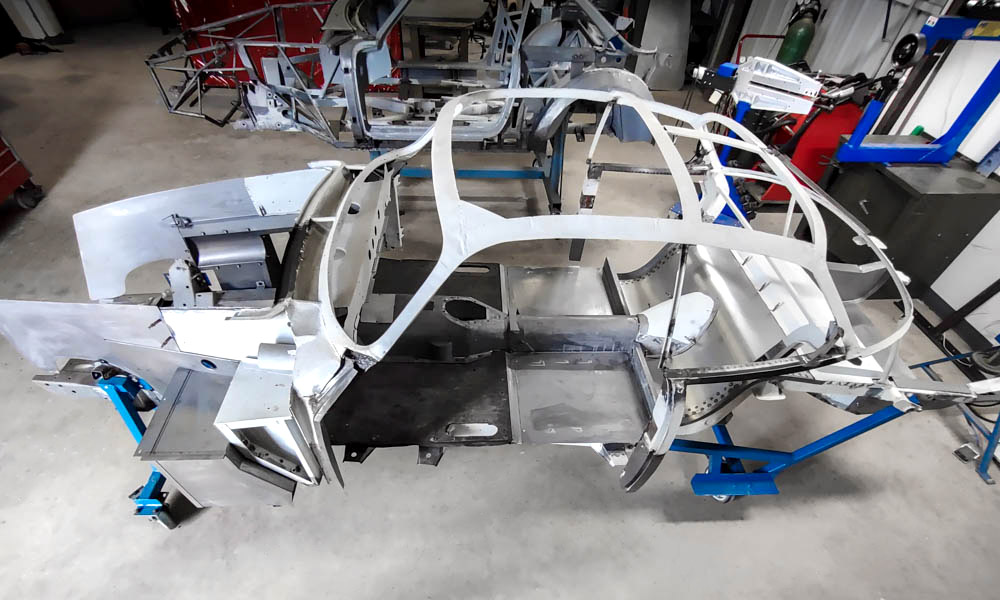
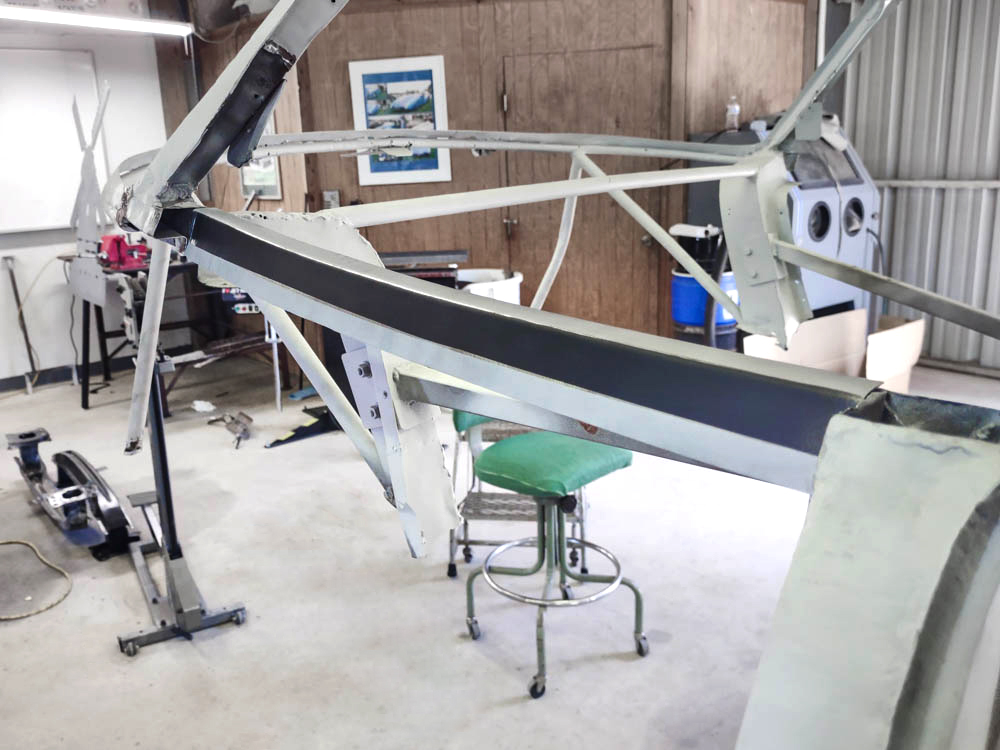
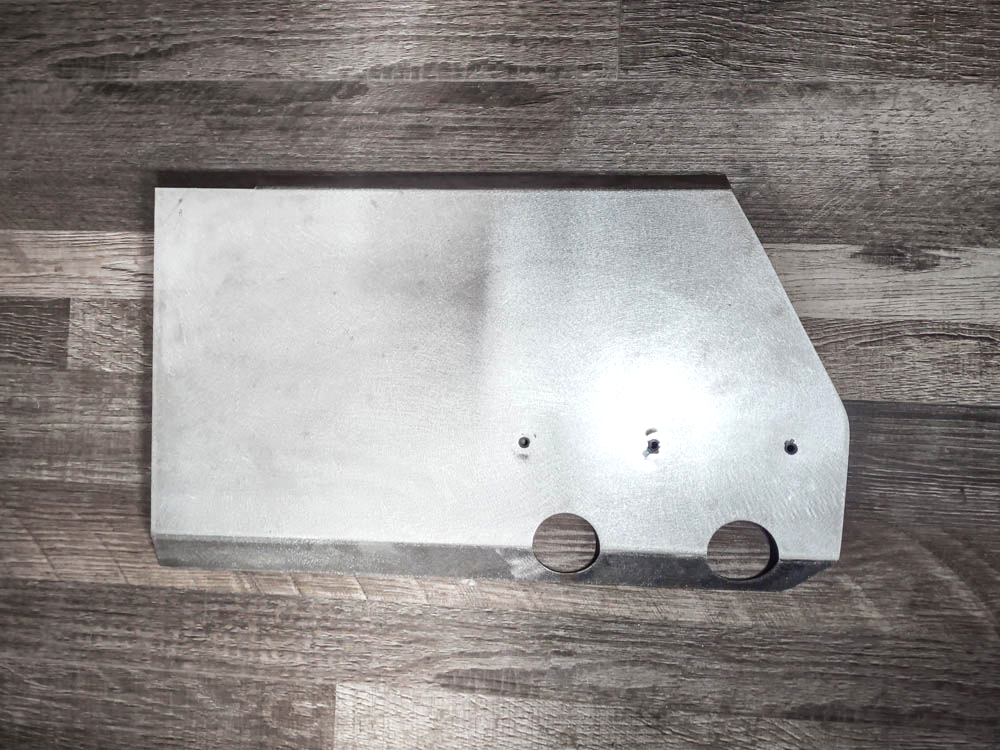
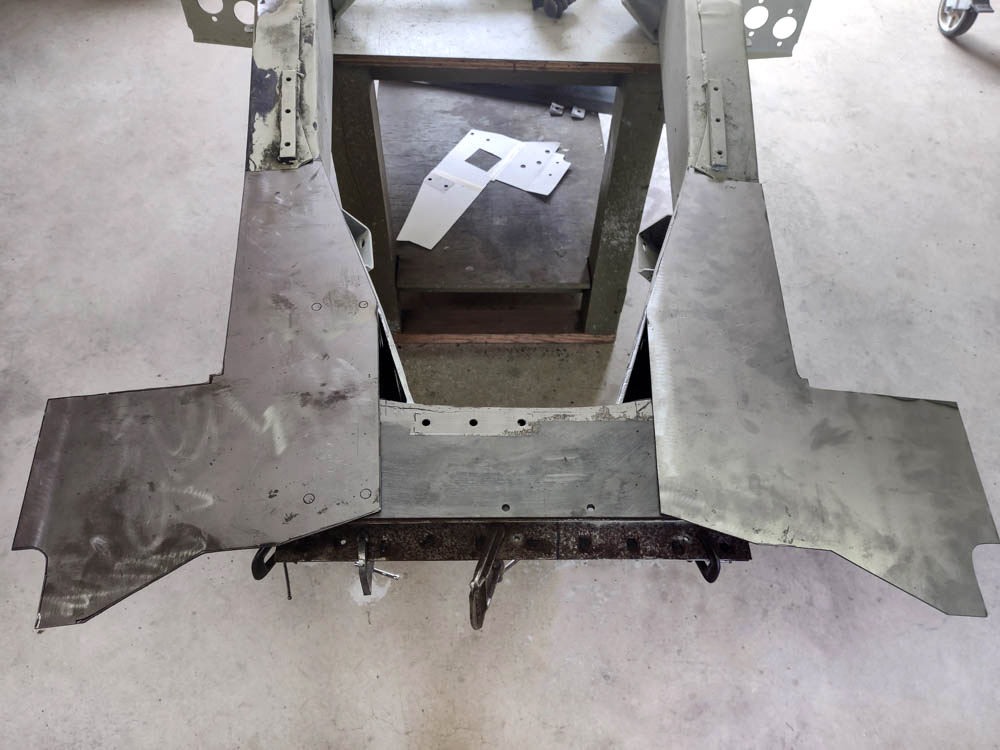
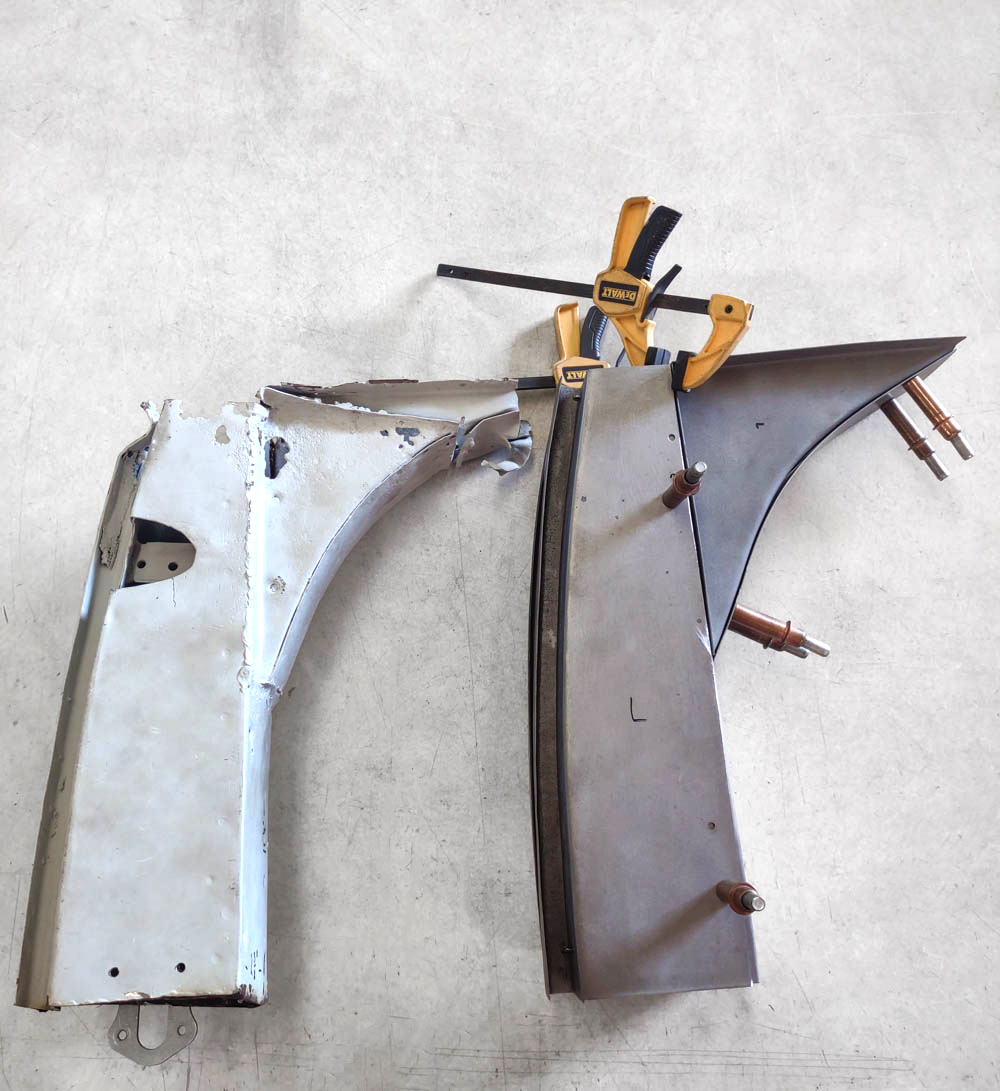
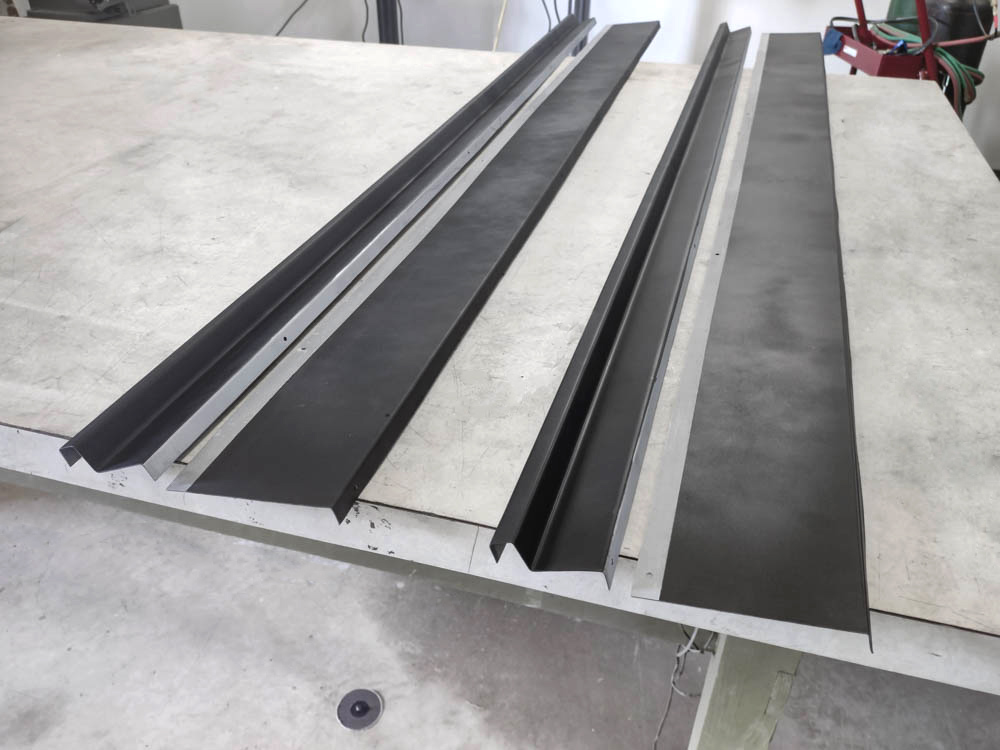
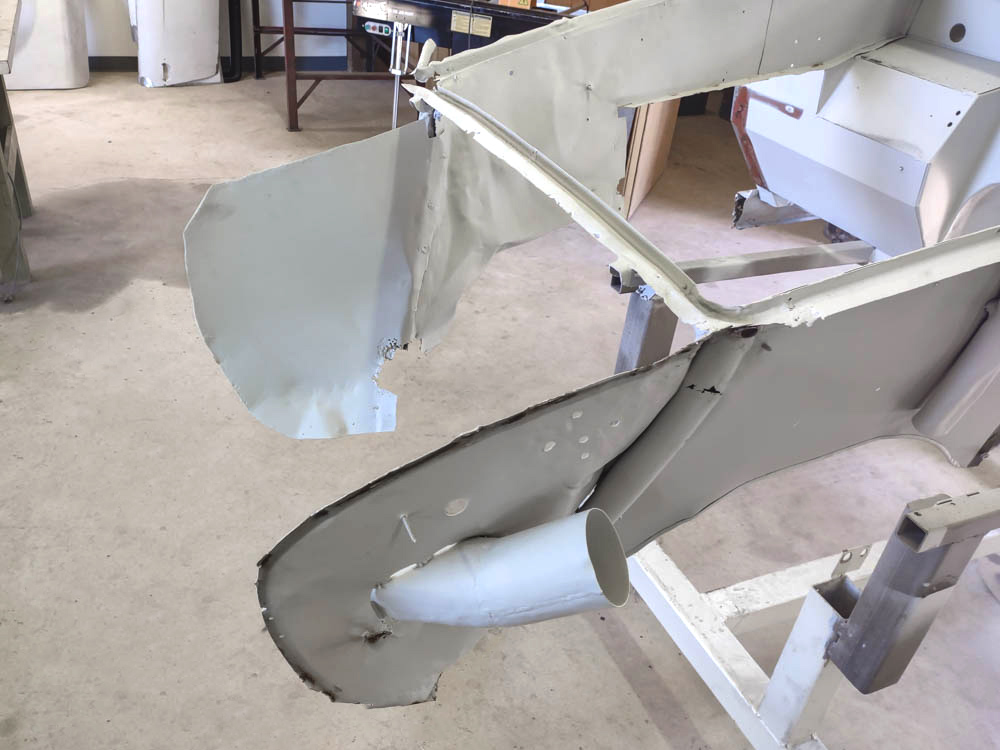
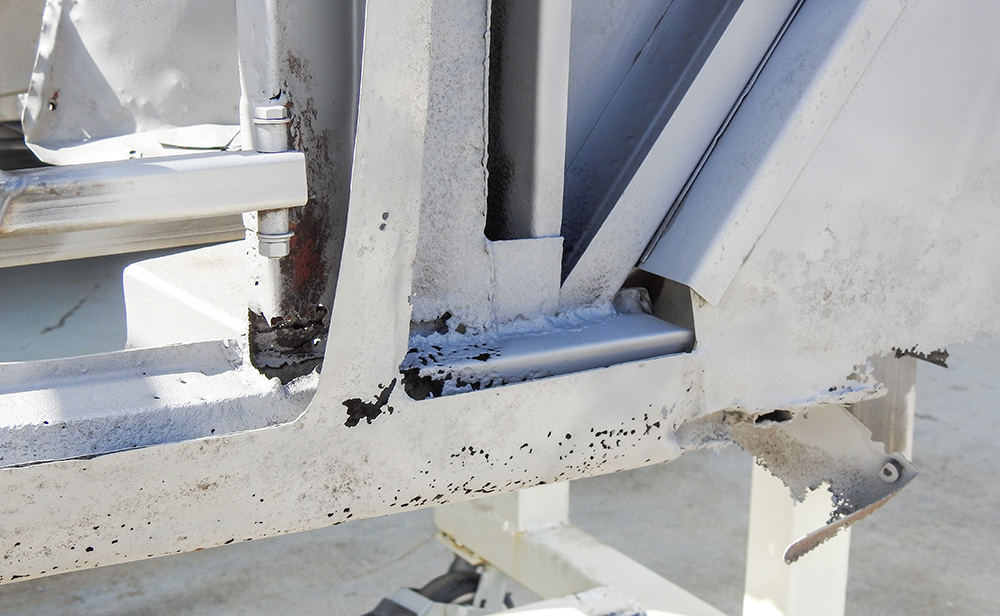
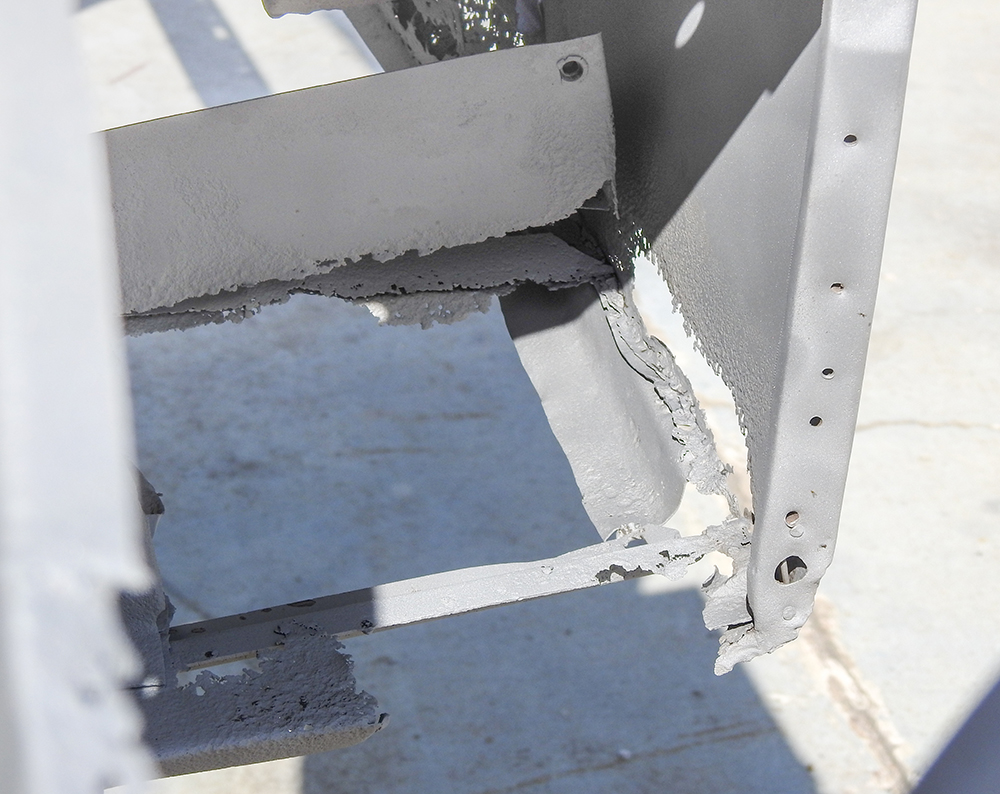
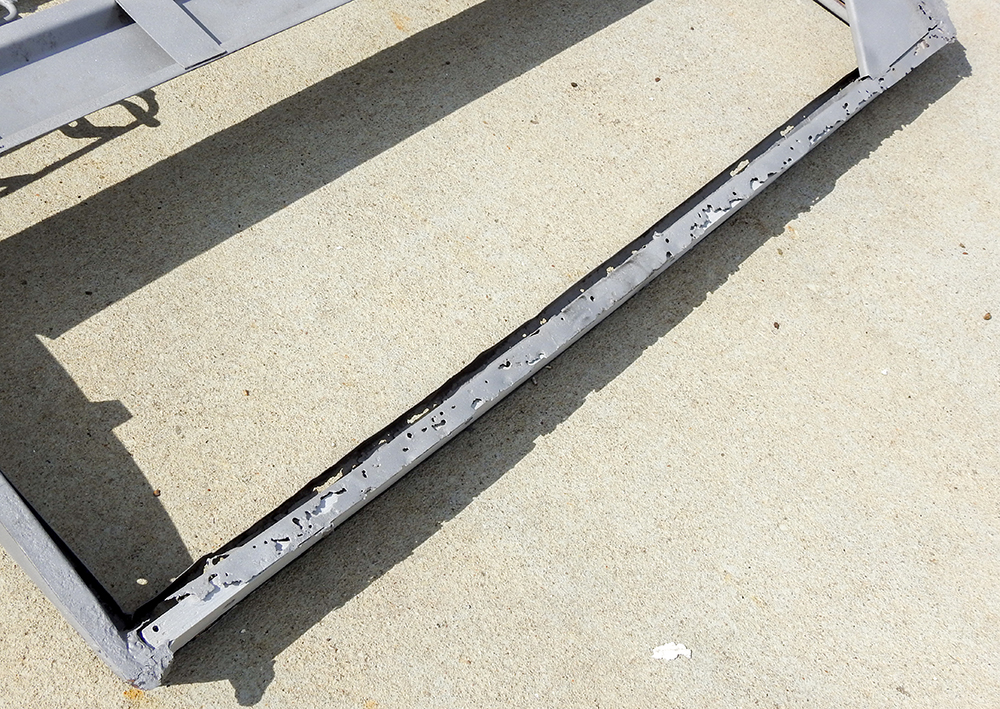
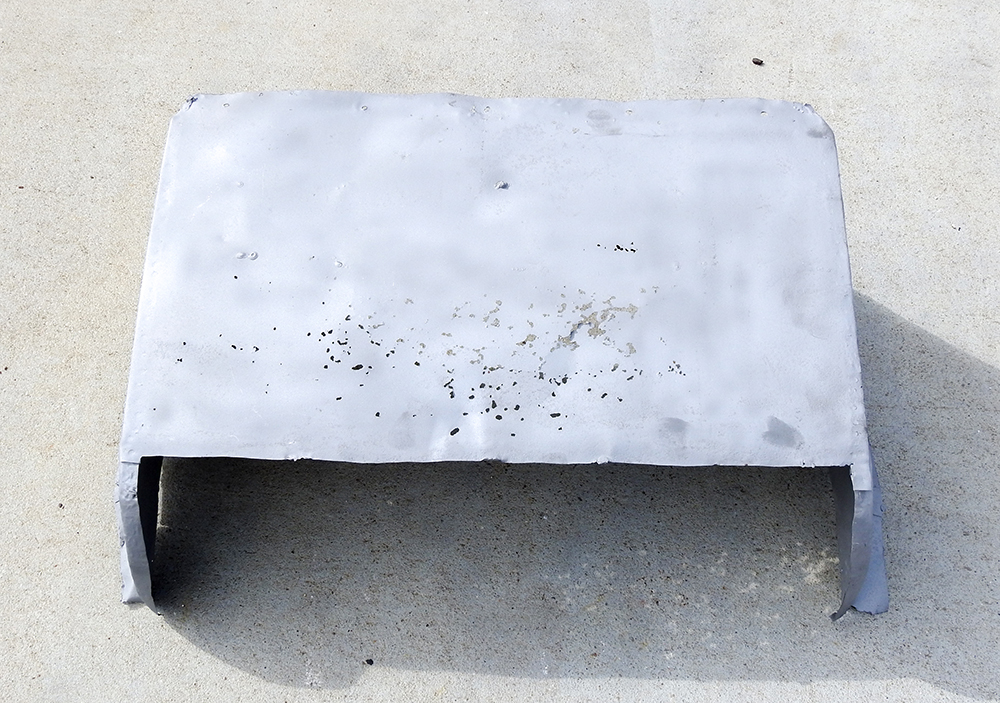
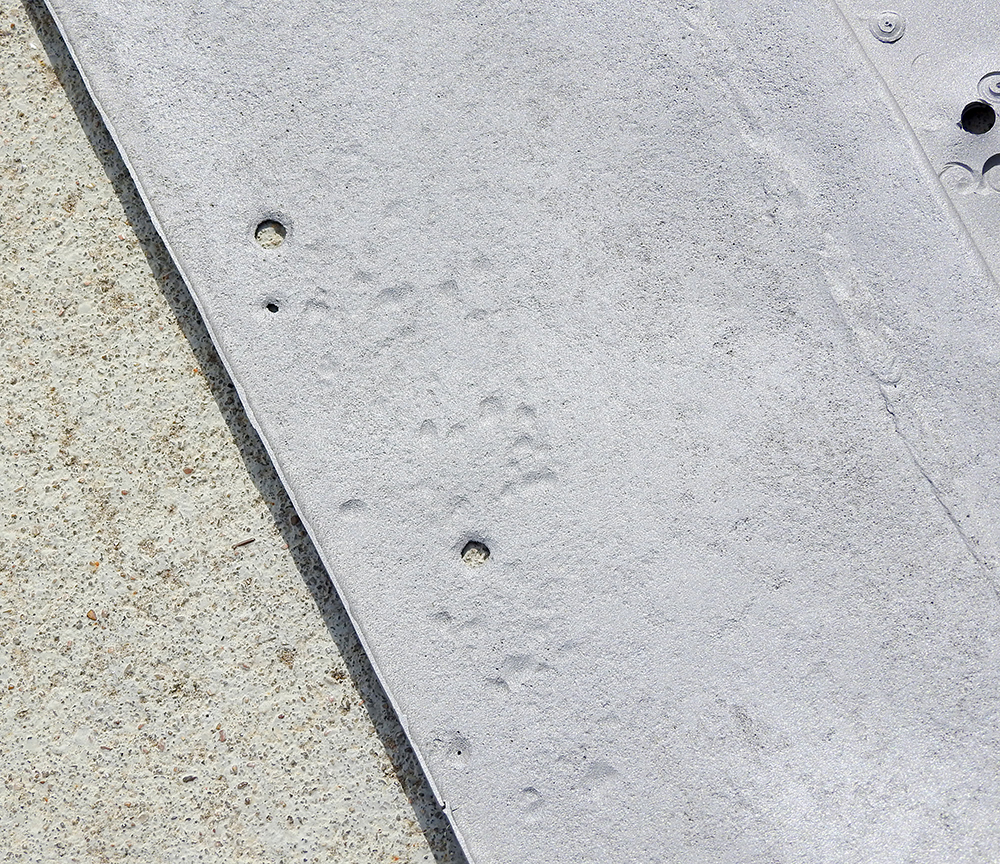
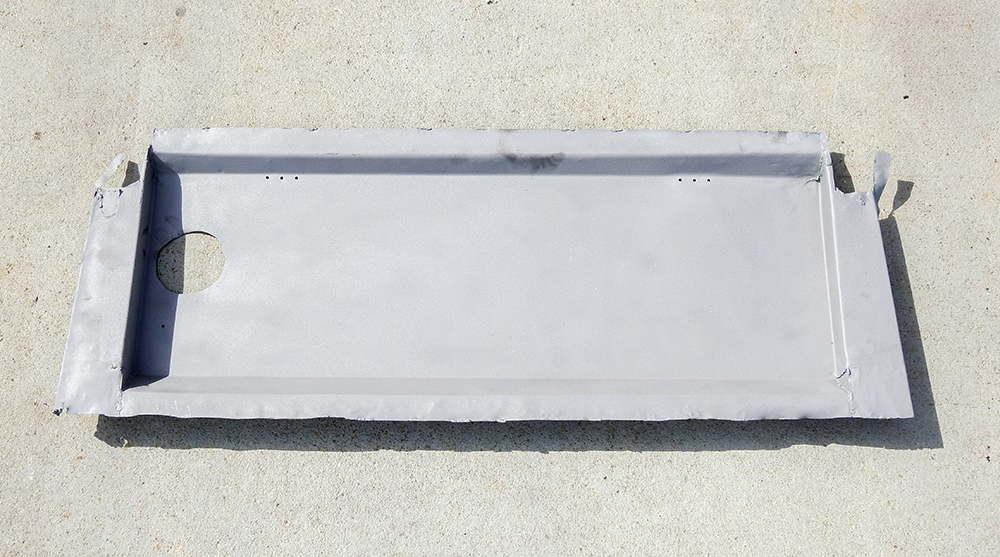
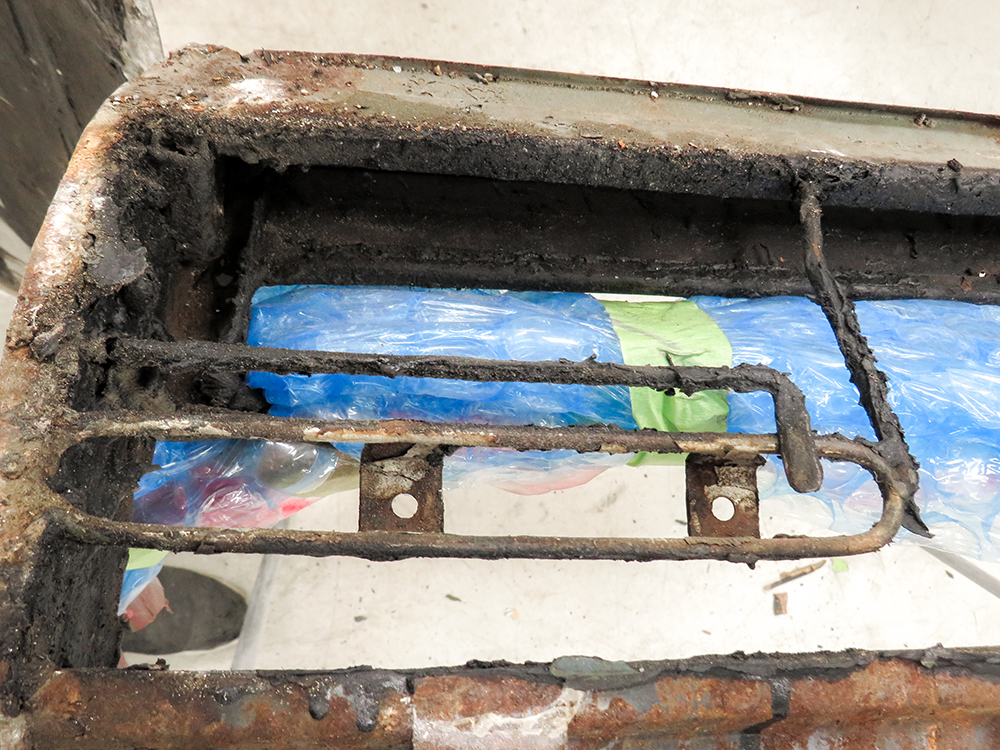
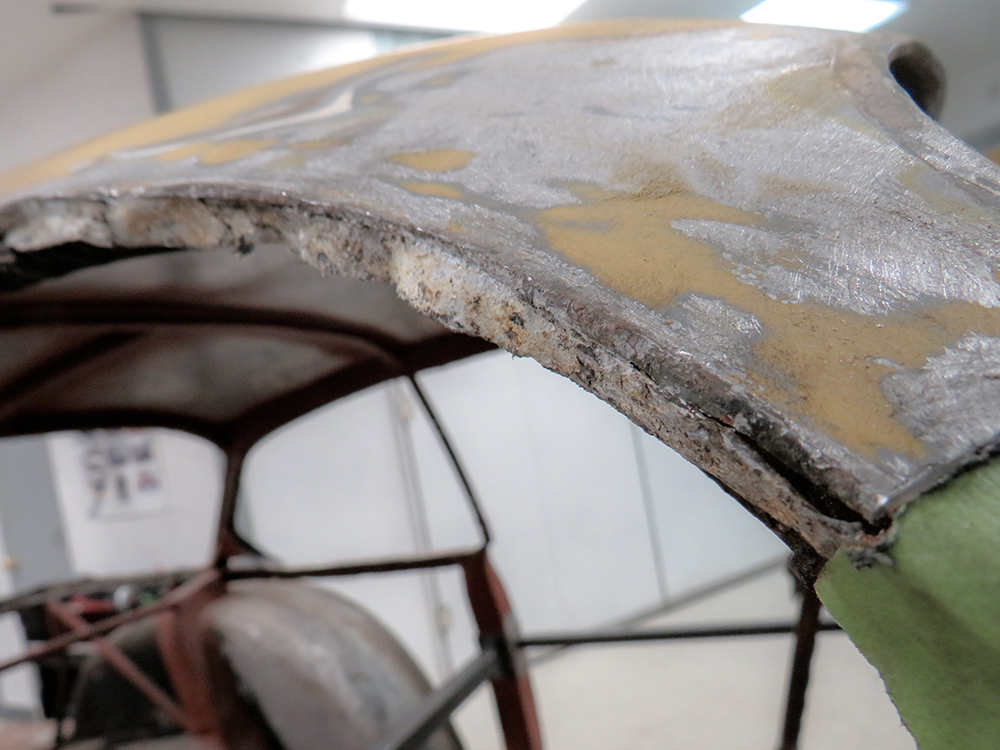
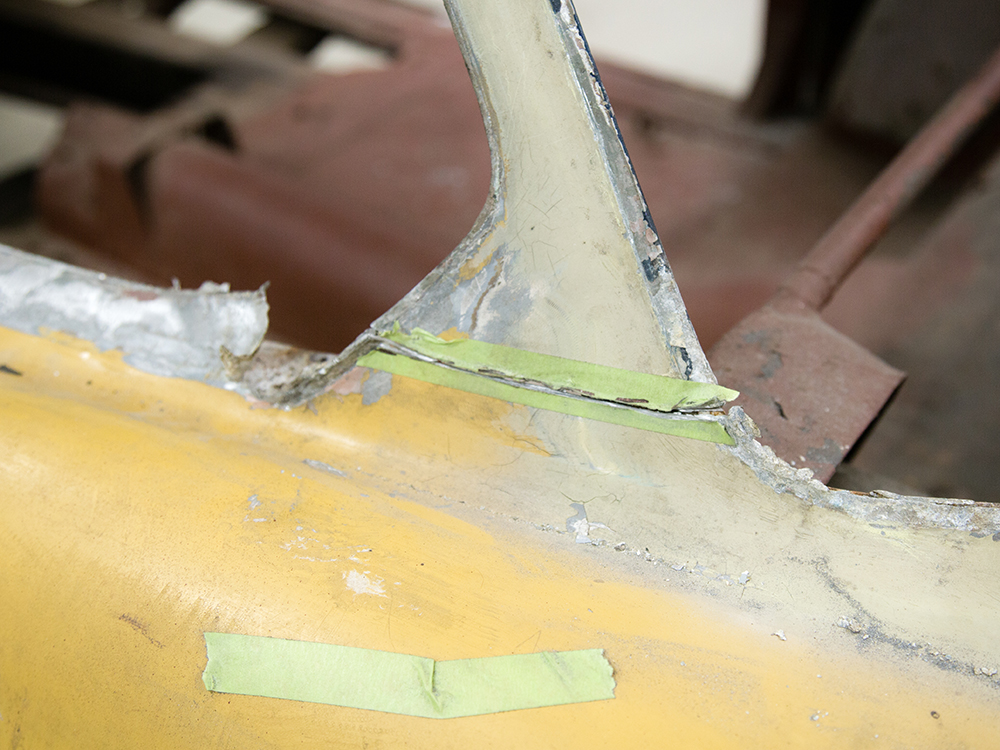
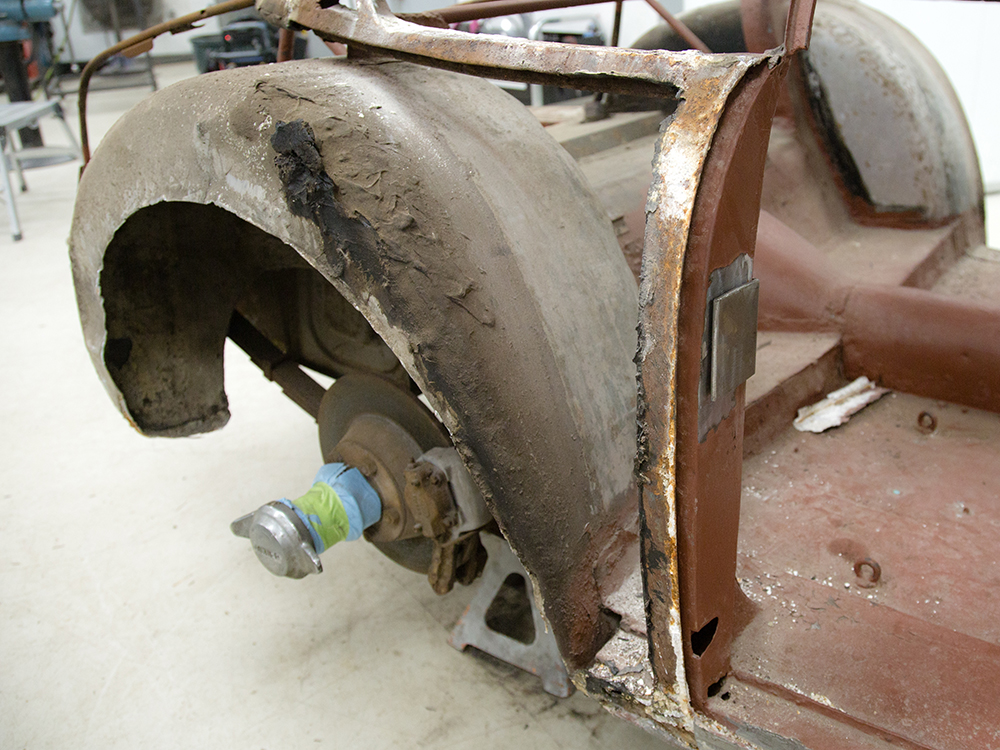
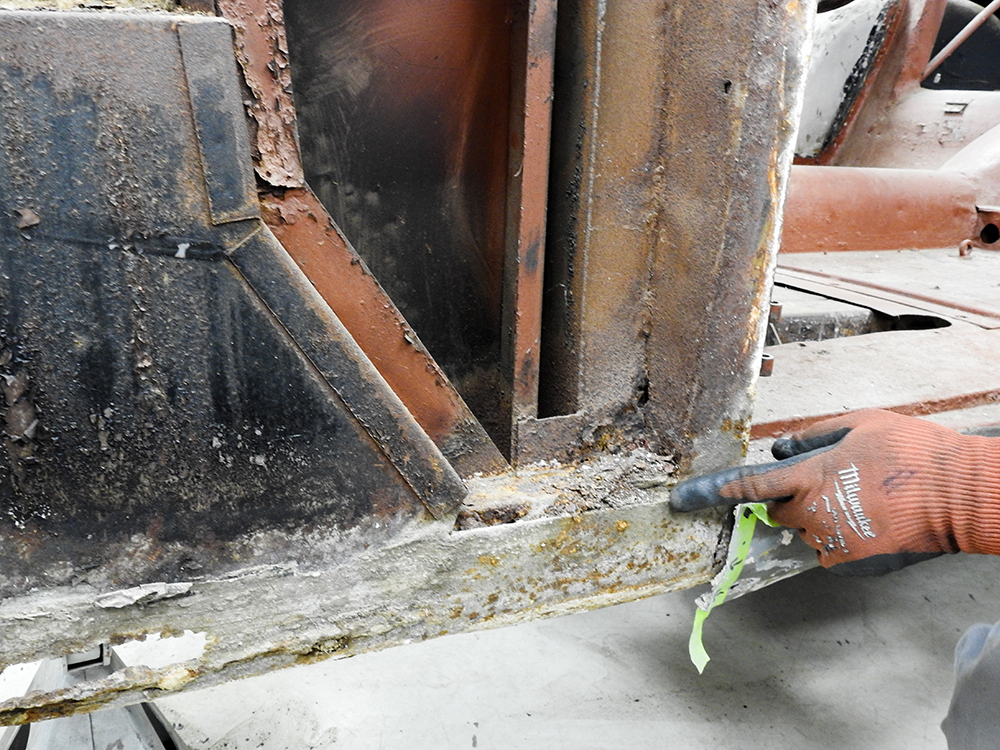
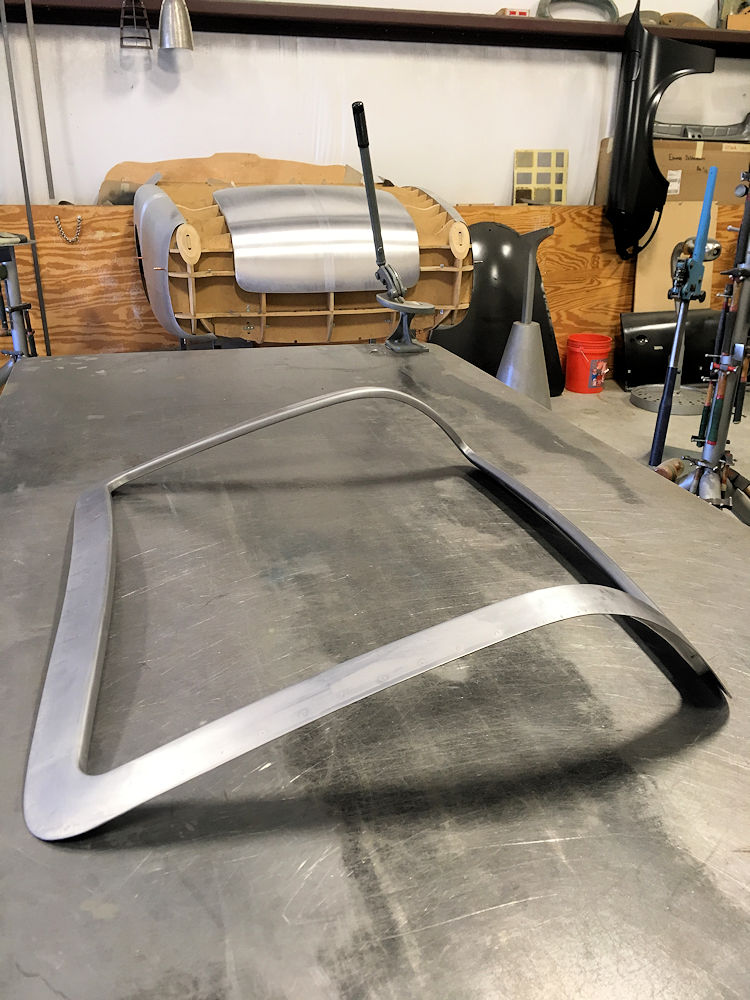
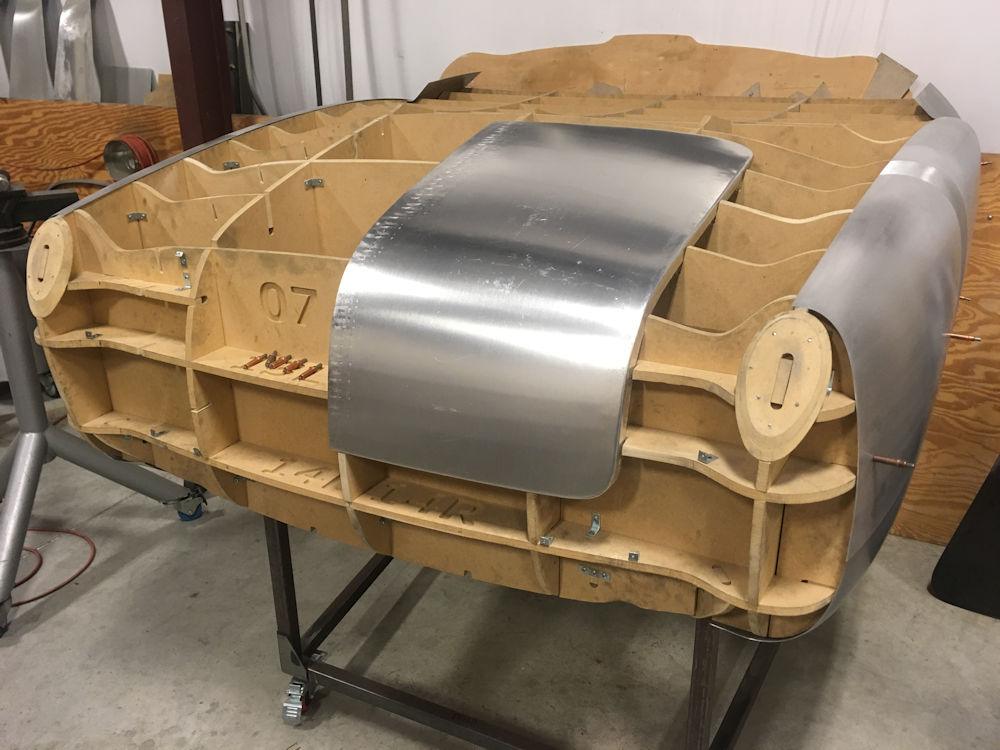
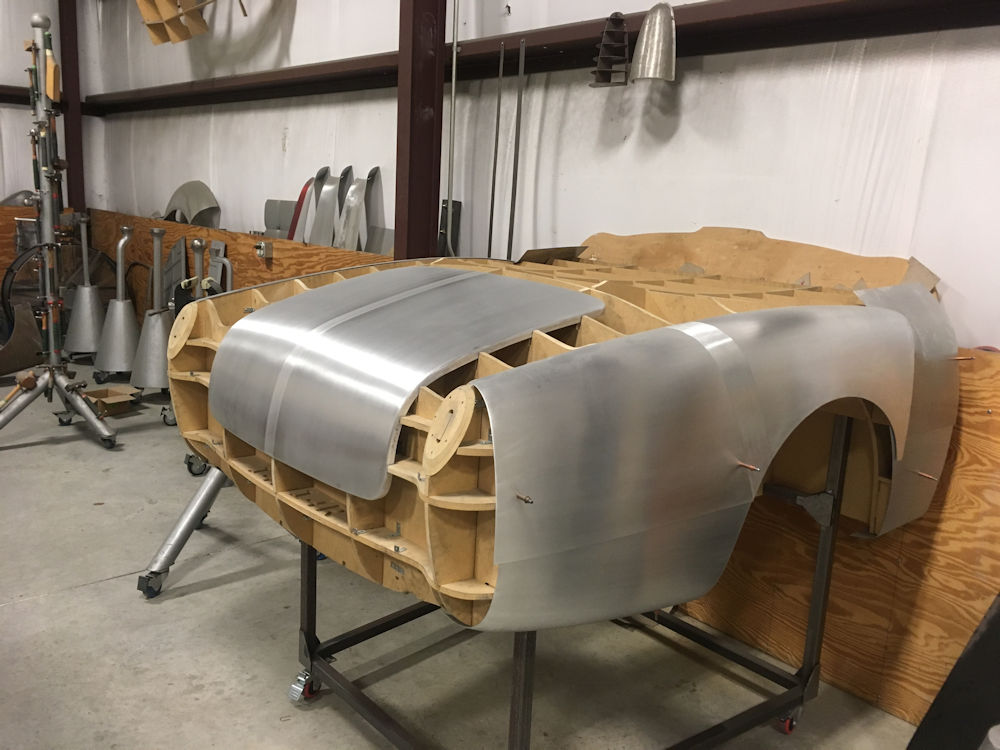
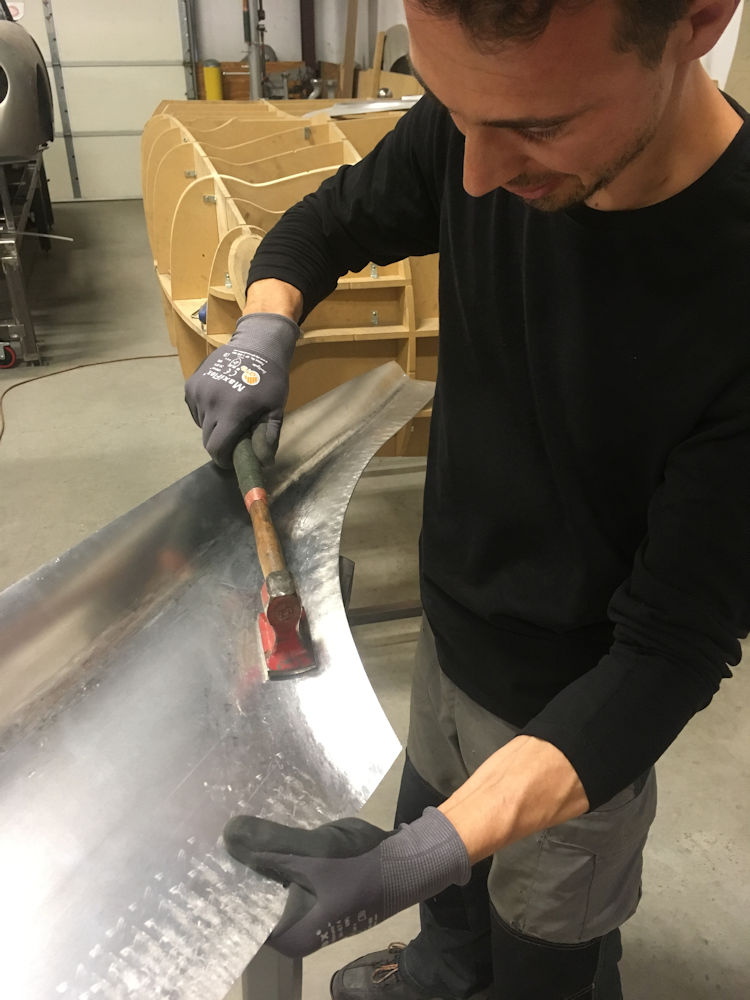
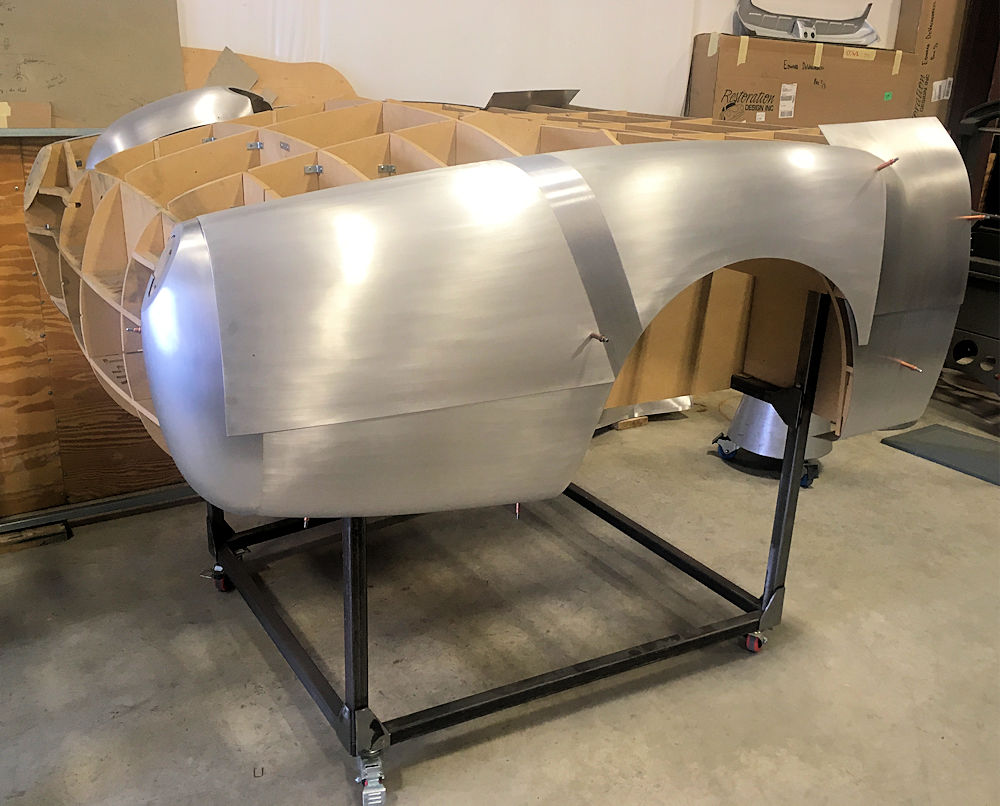
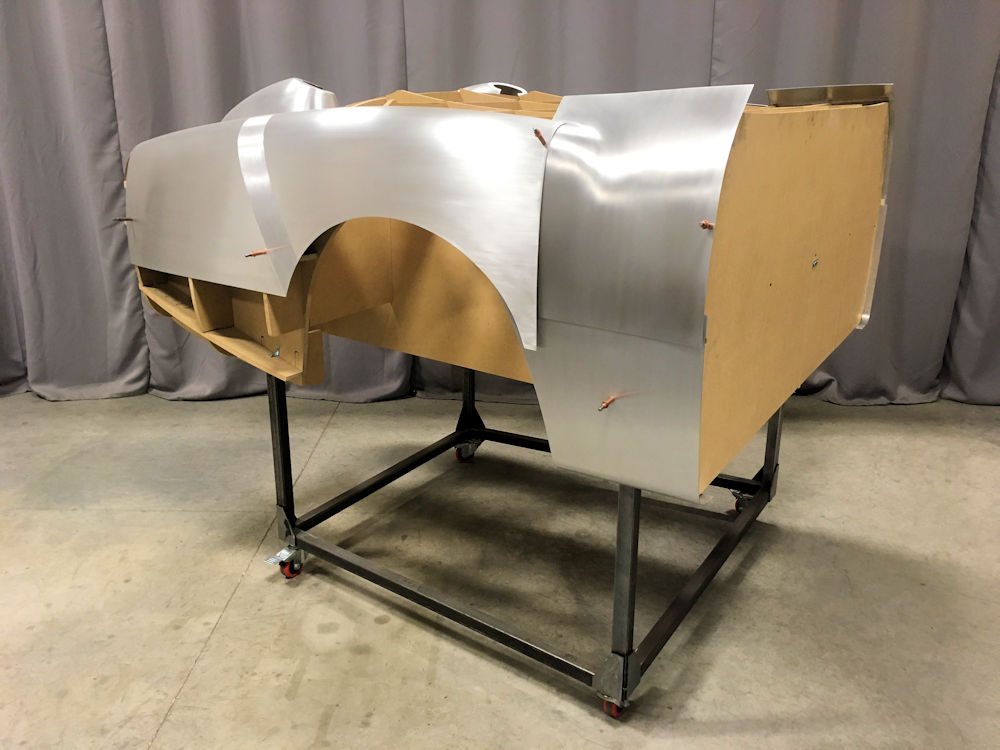
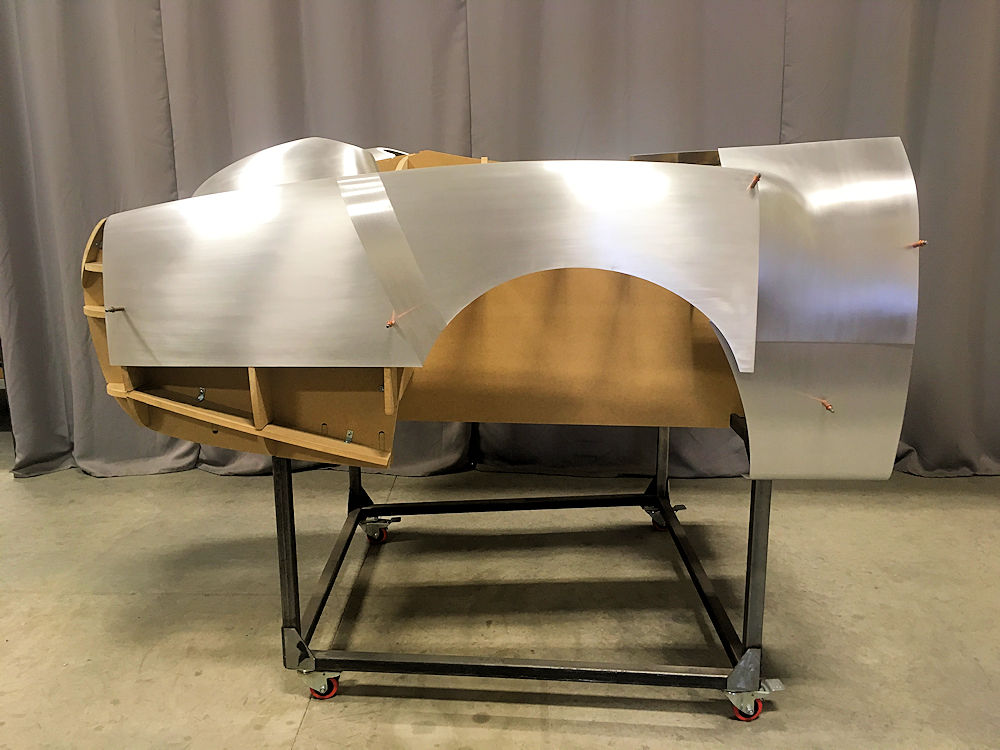
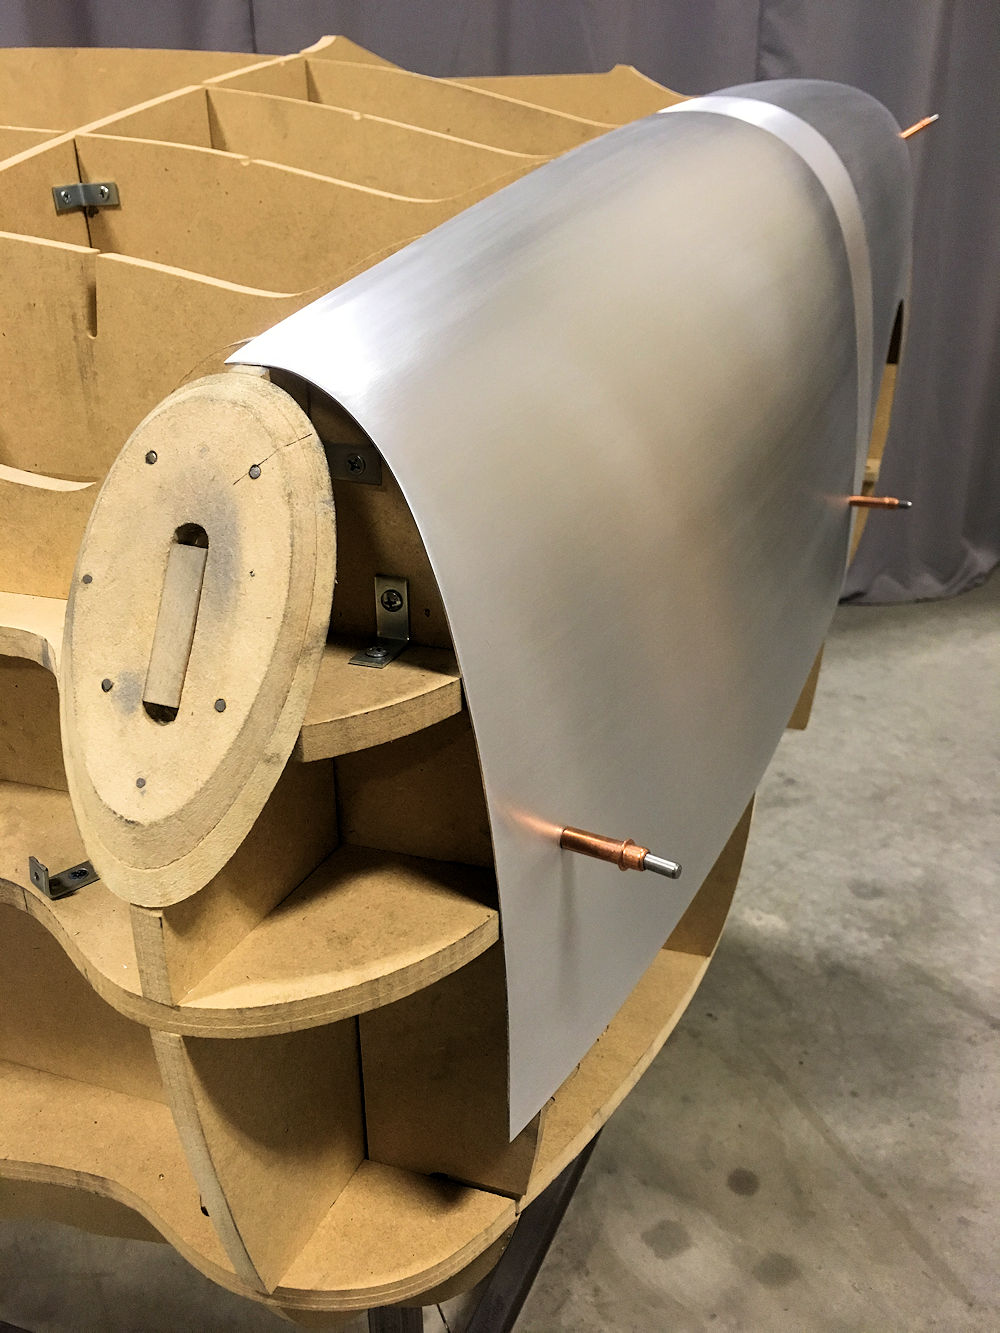
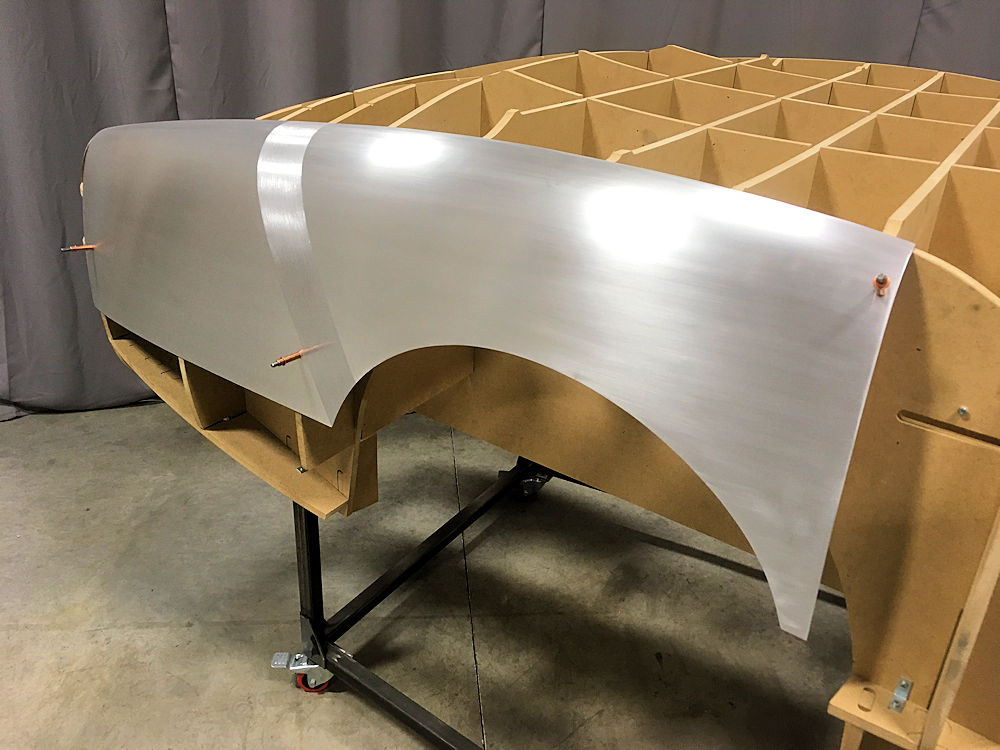
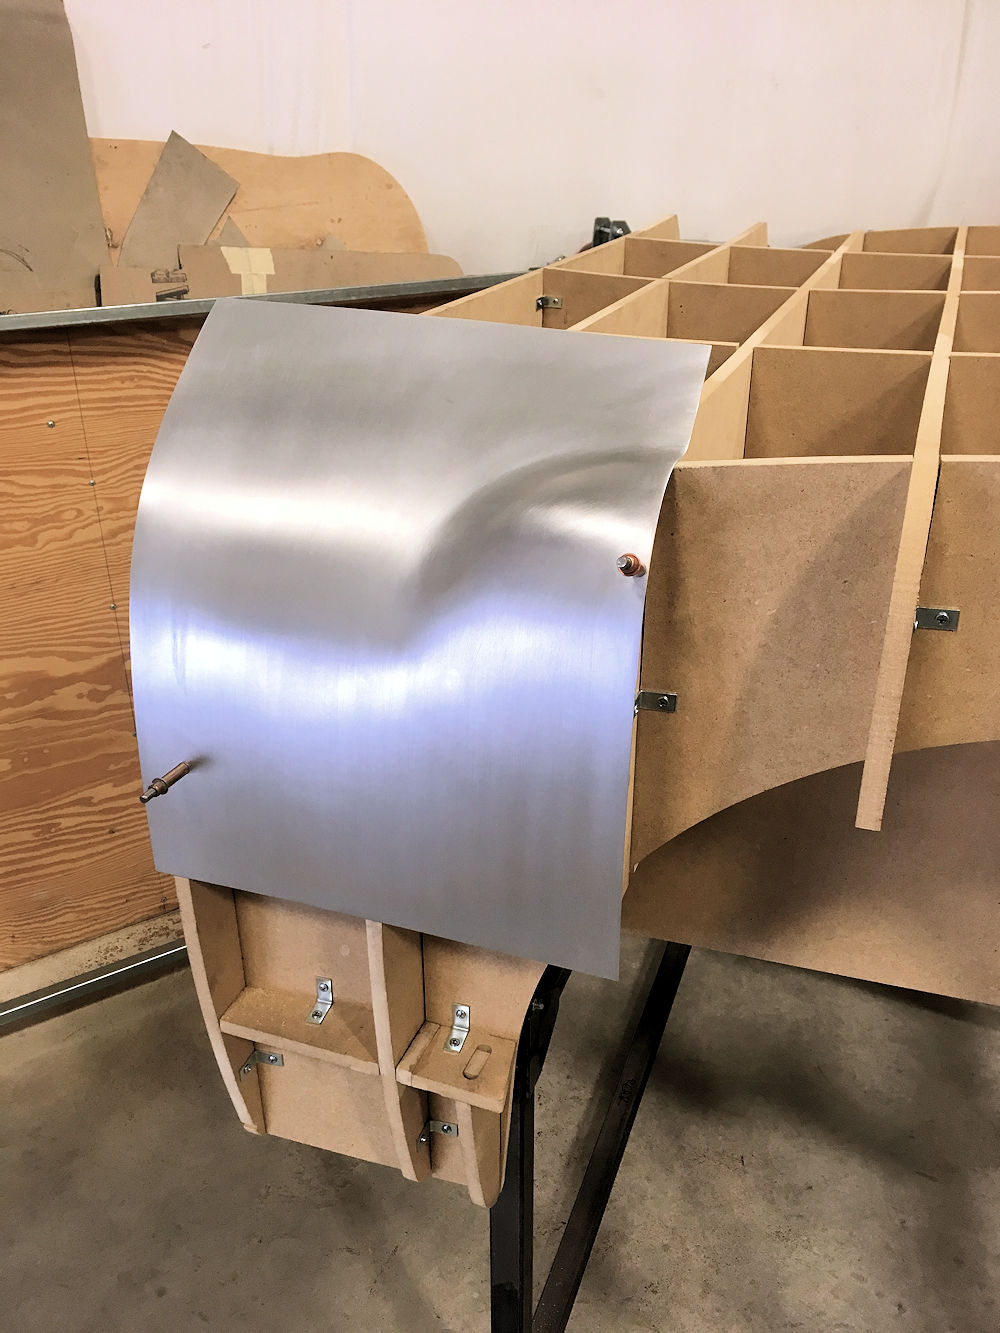
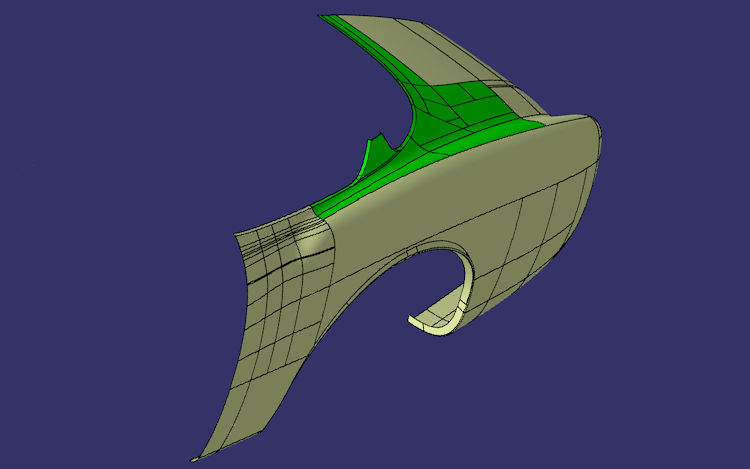
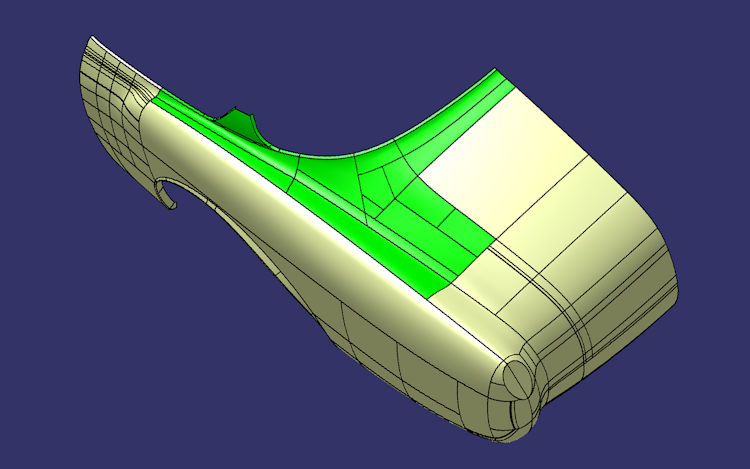
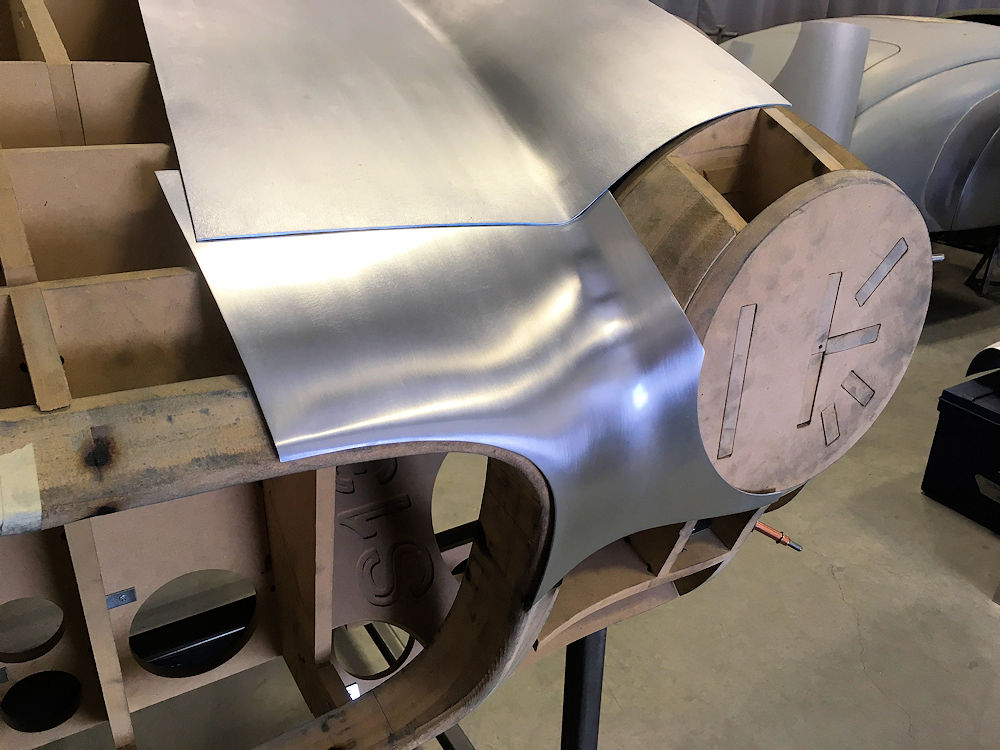
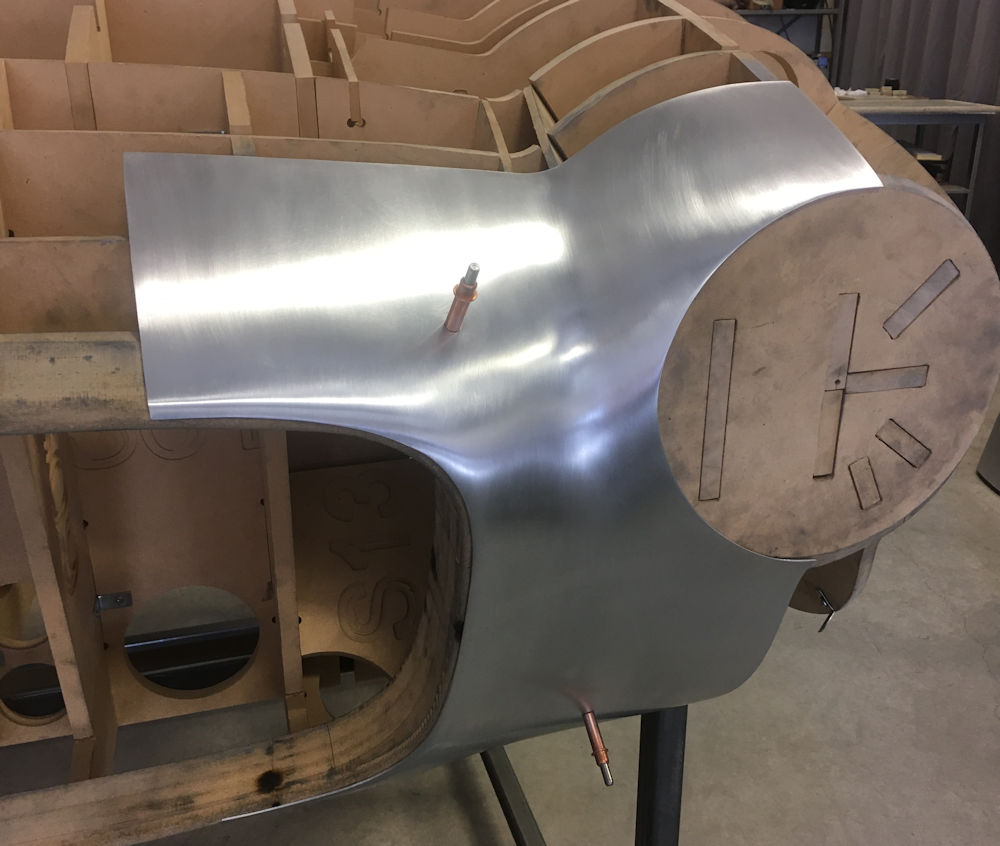
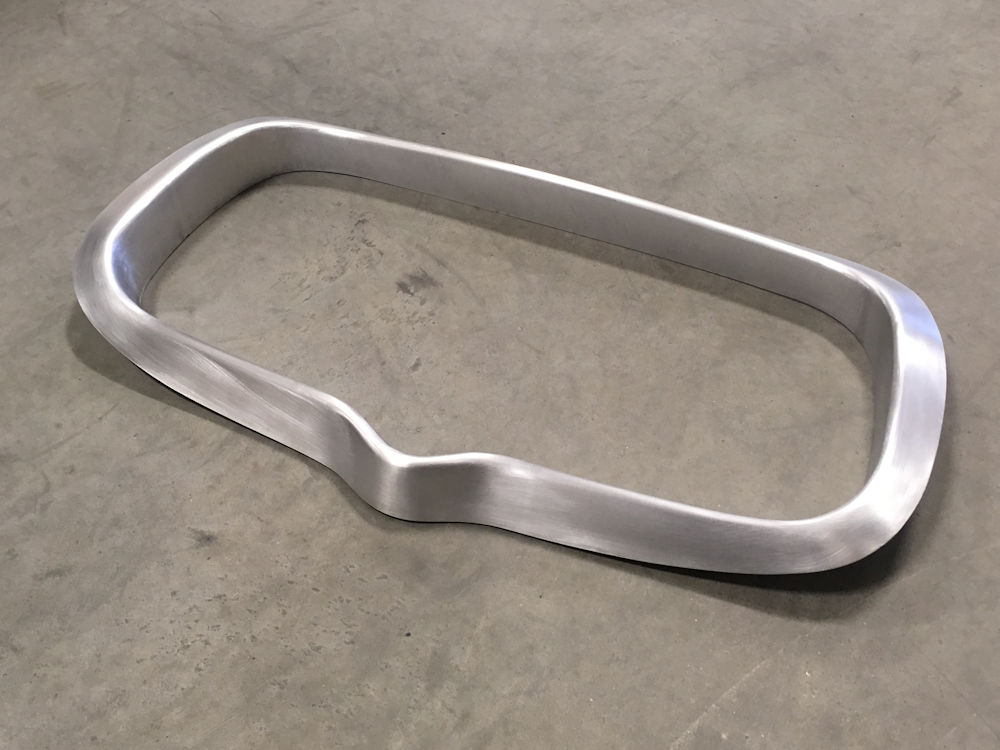
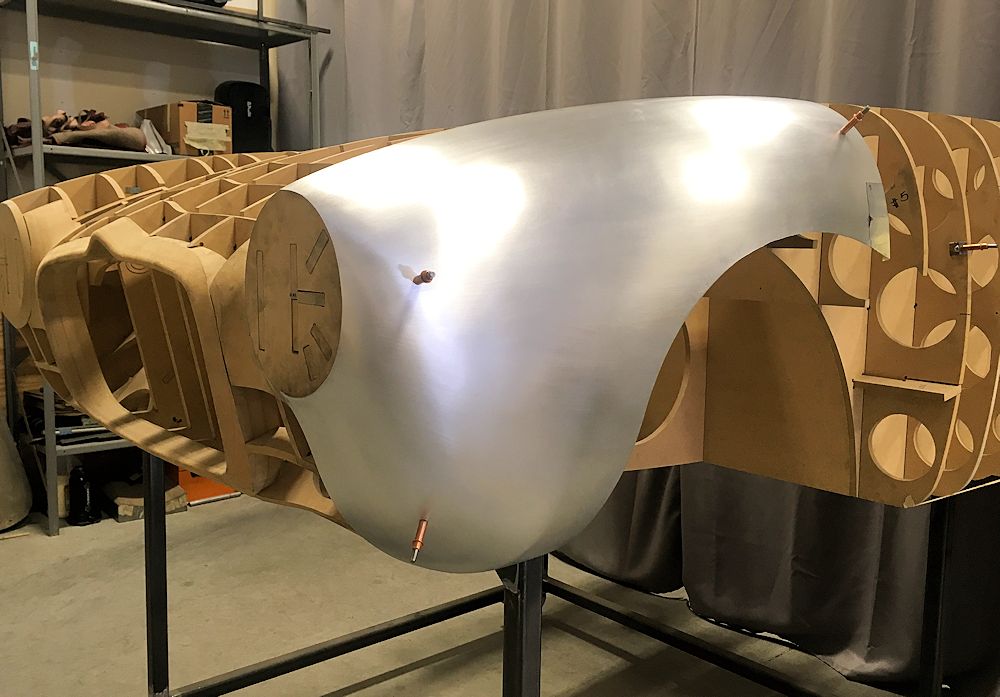
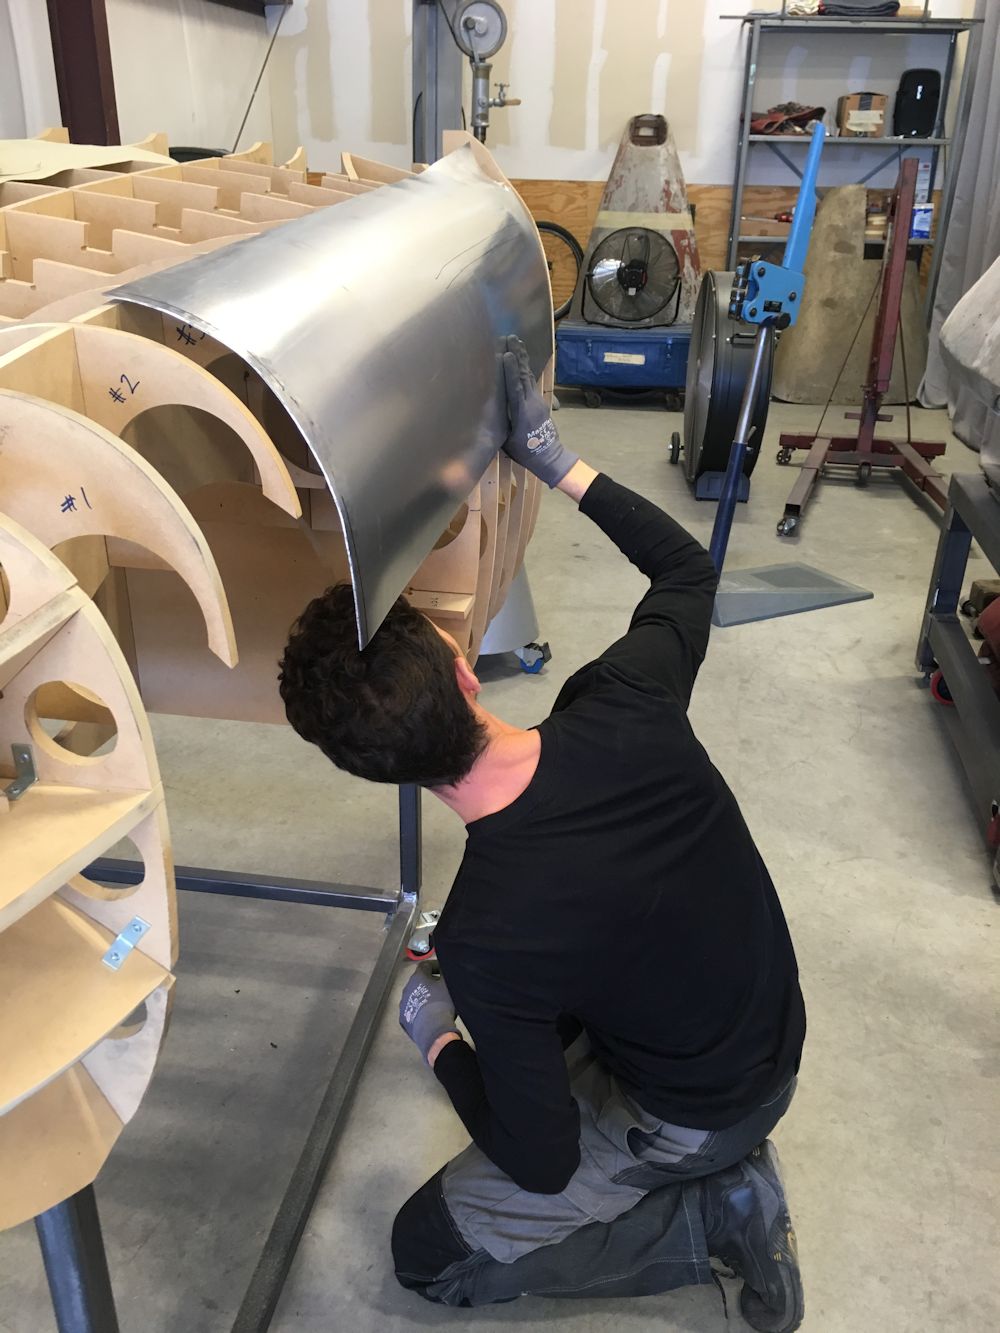
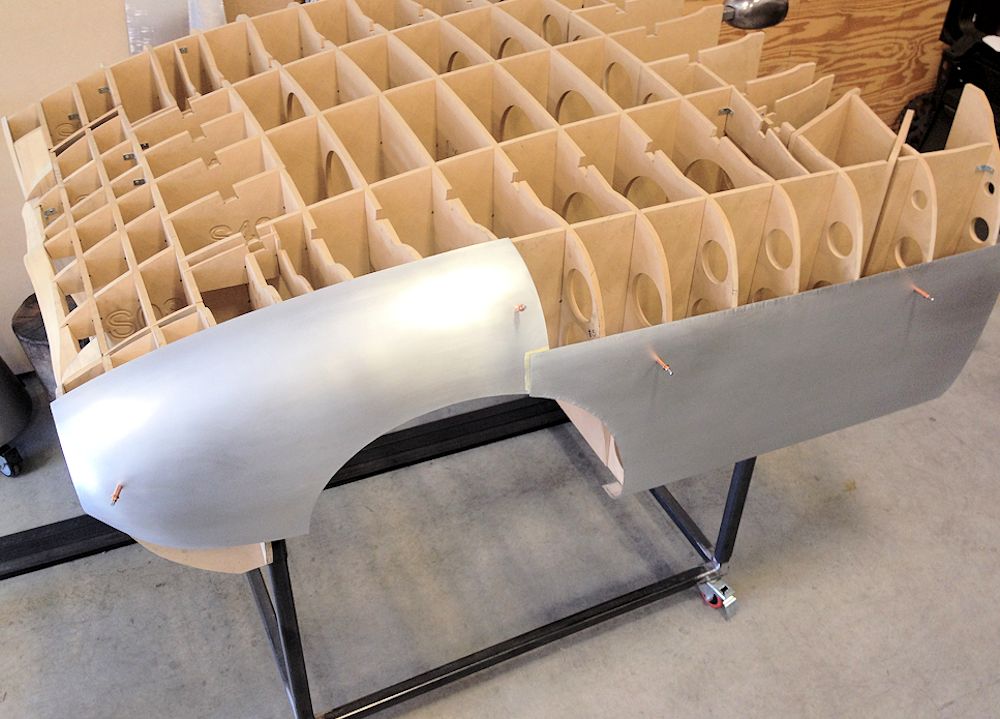
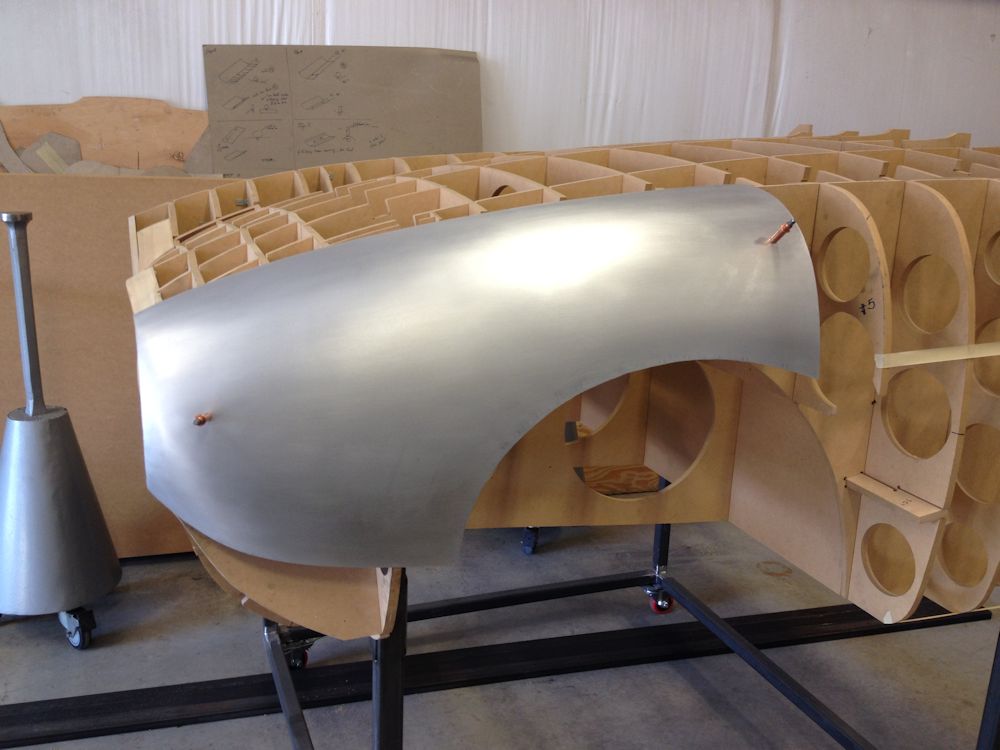
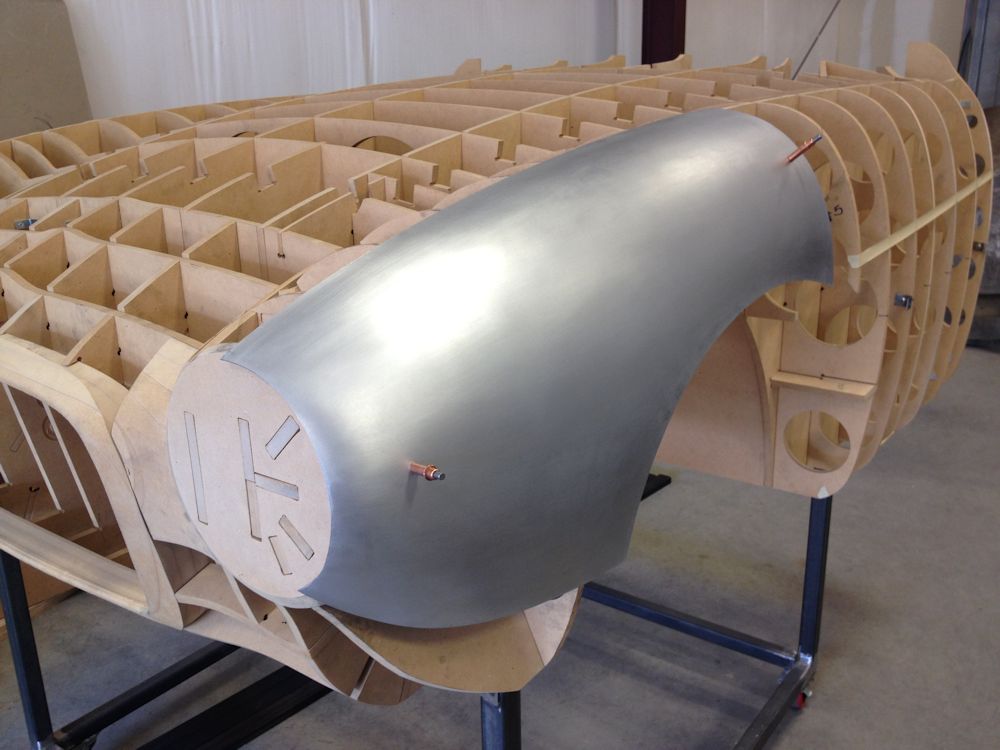
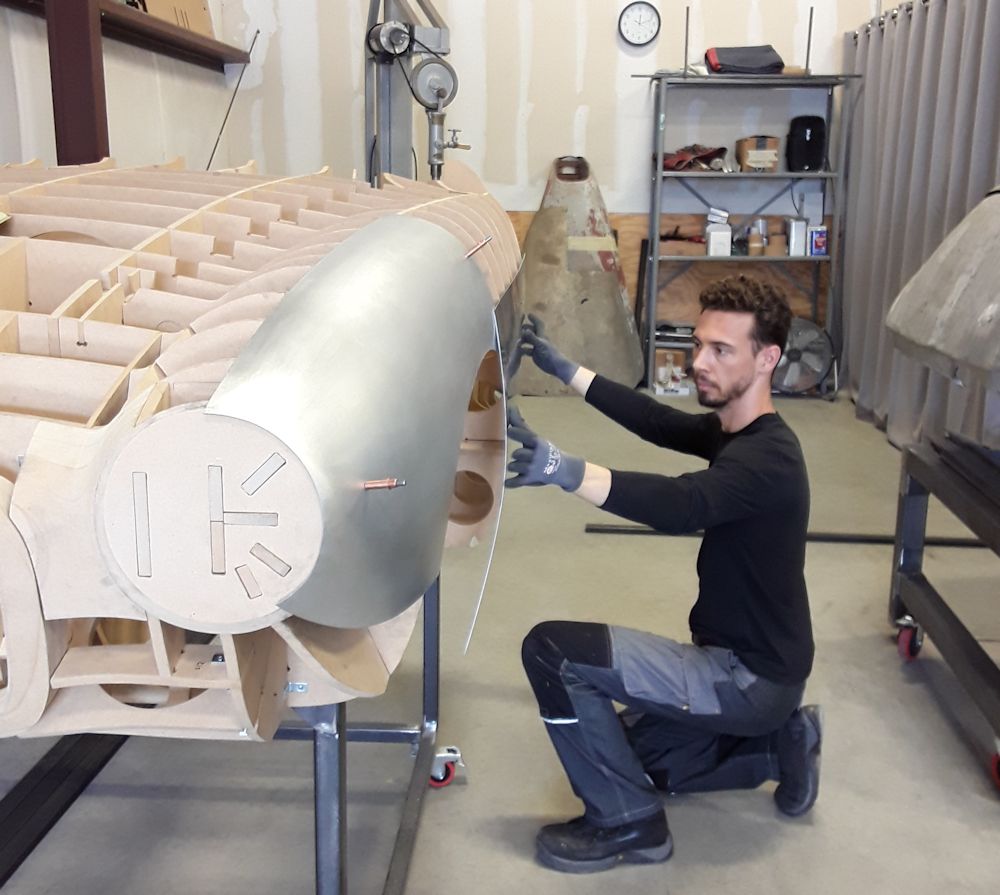
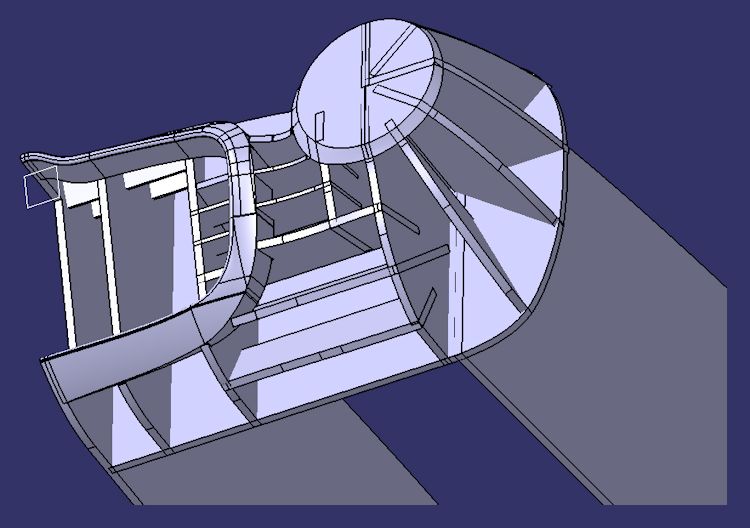
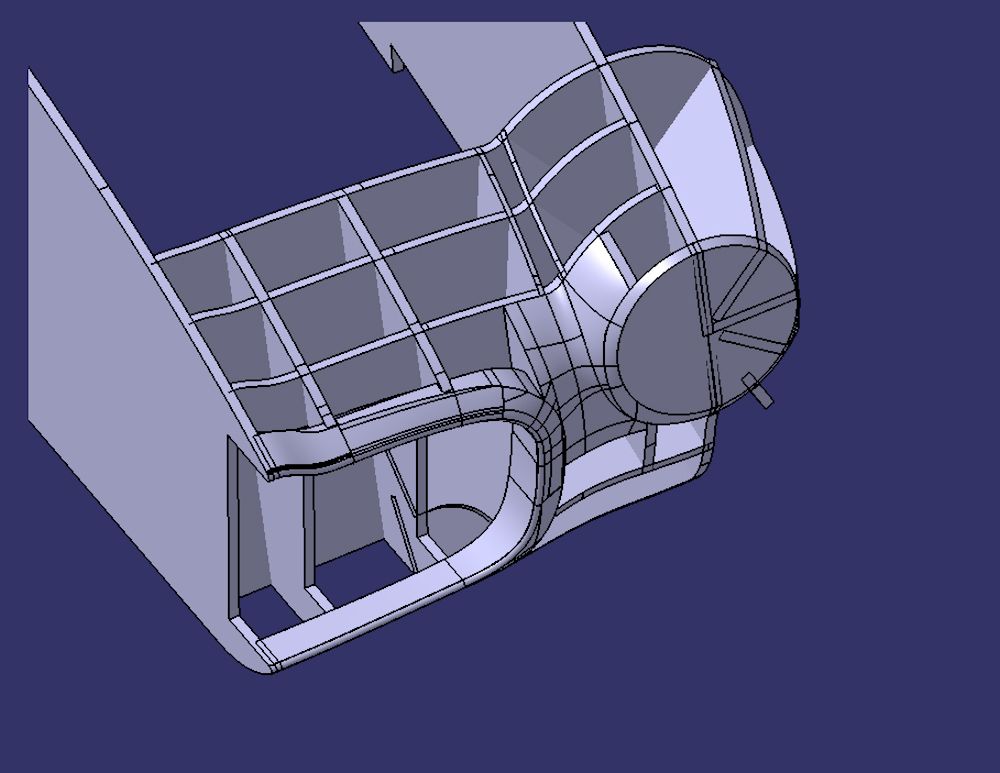
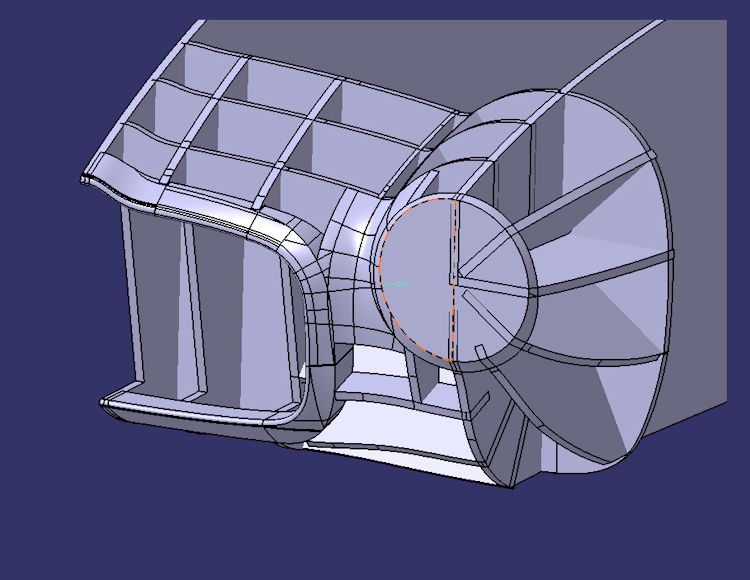
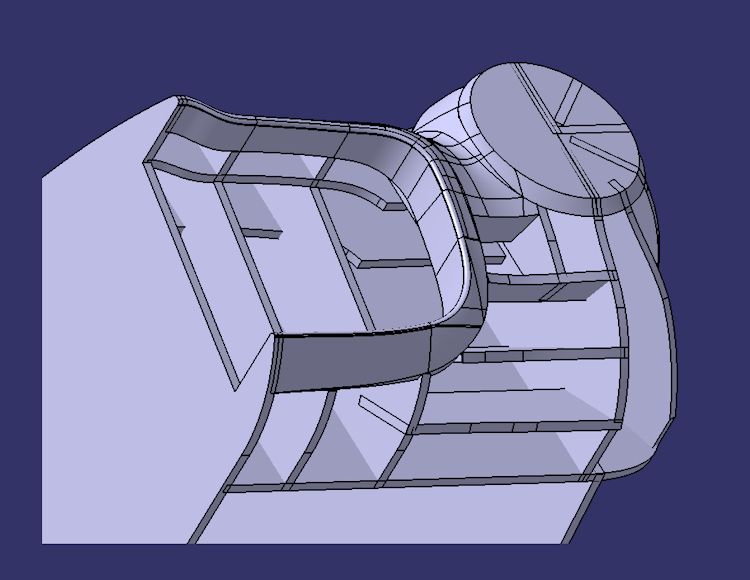
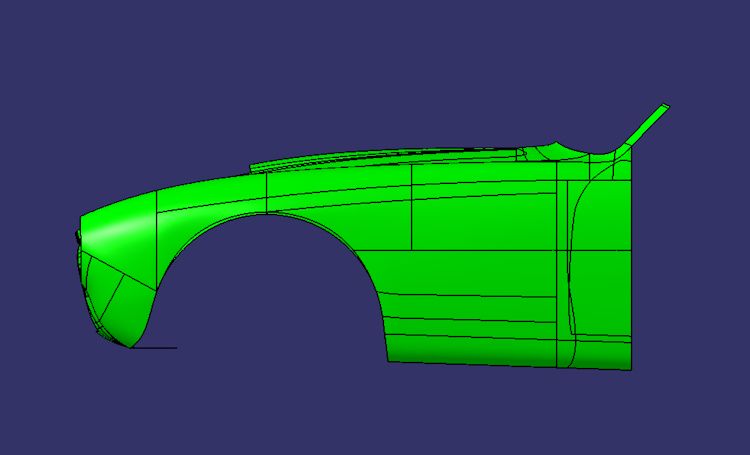
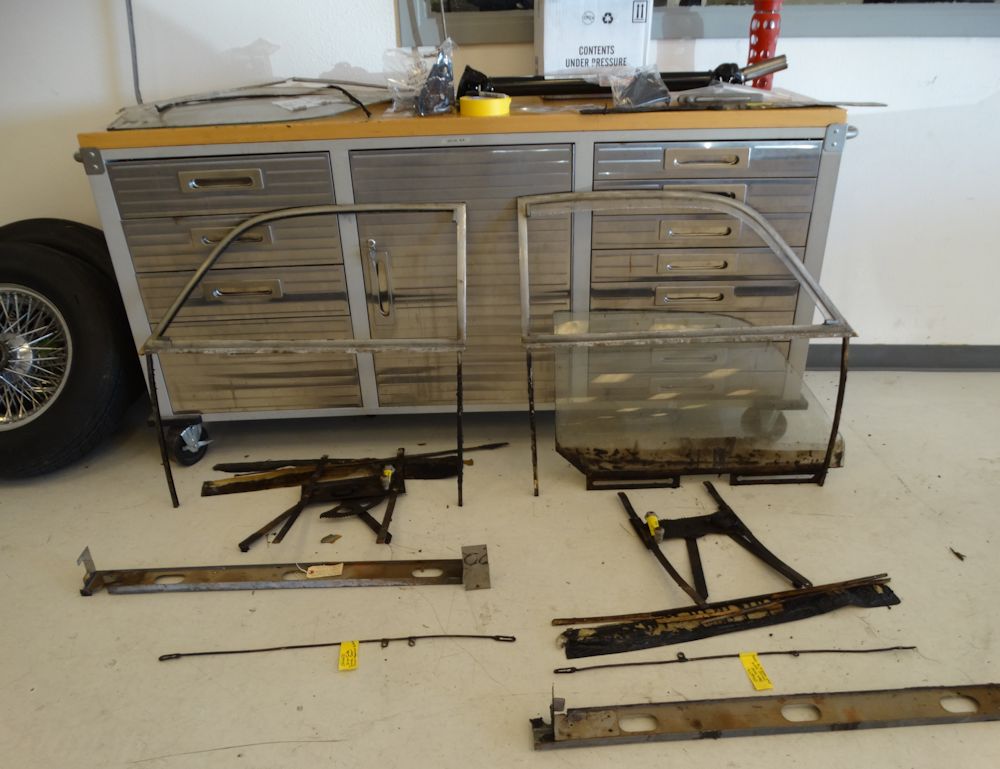
Front fender weld out
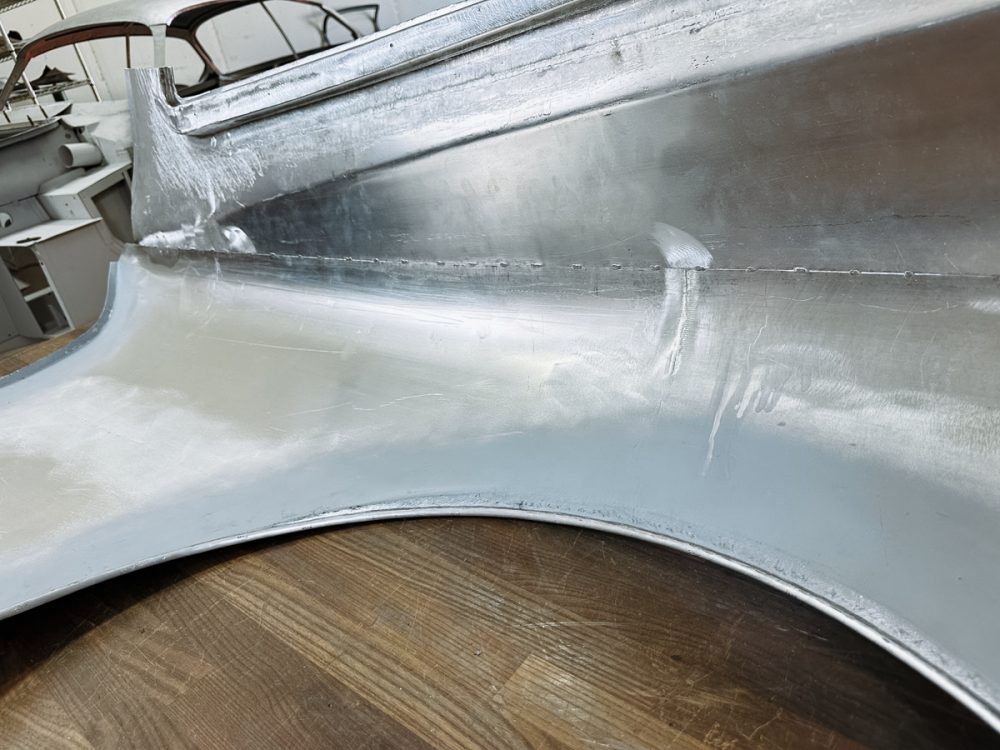
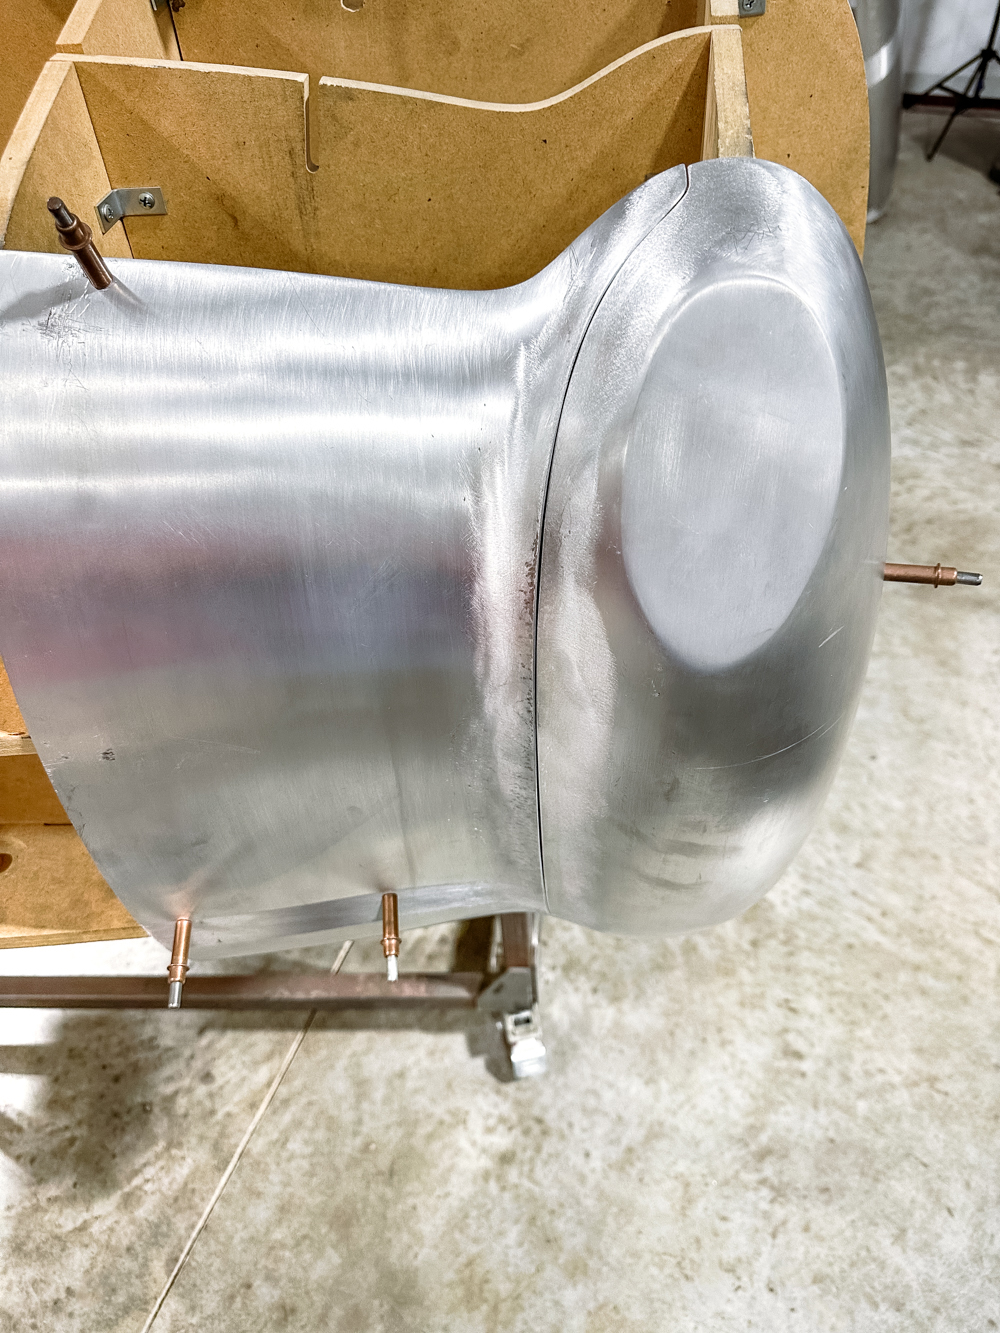
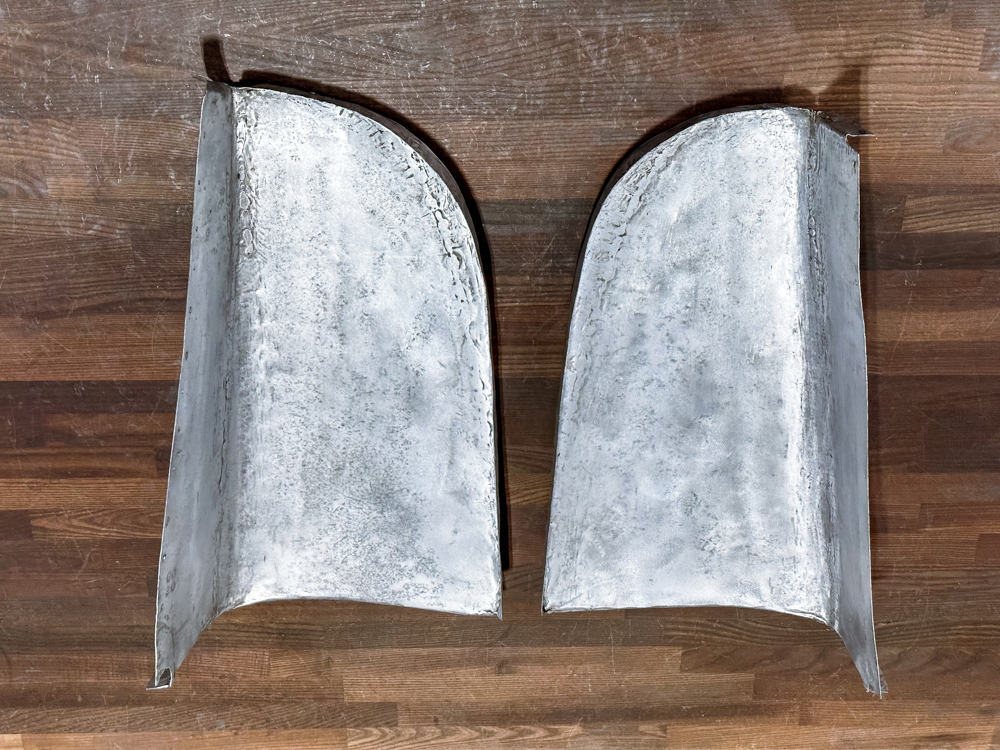
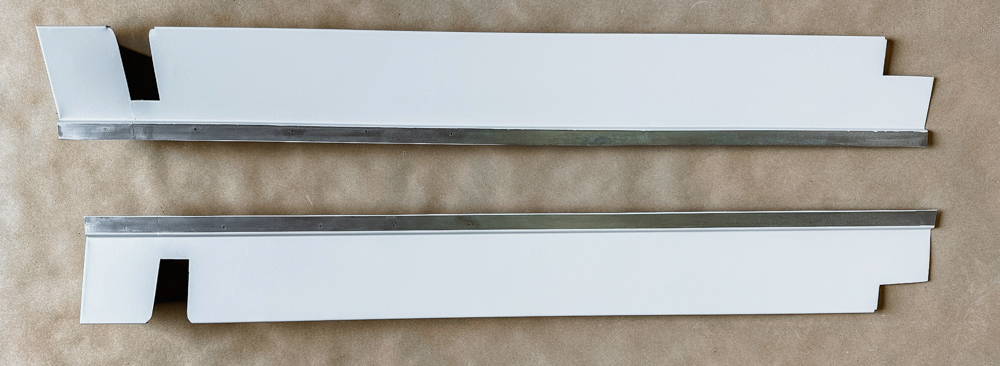
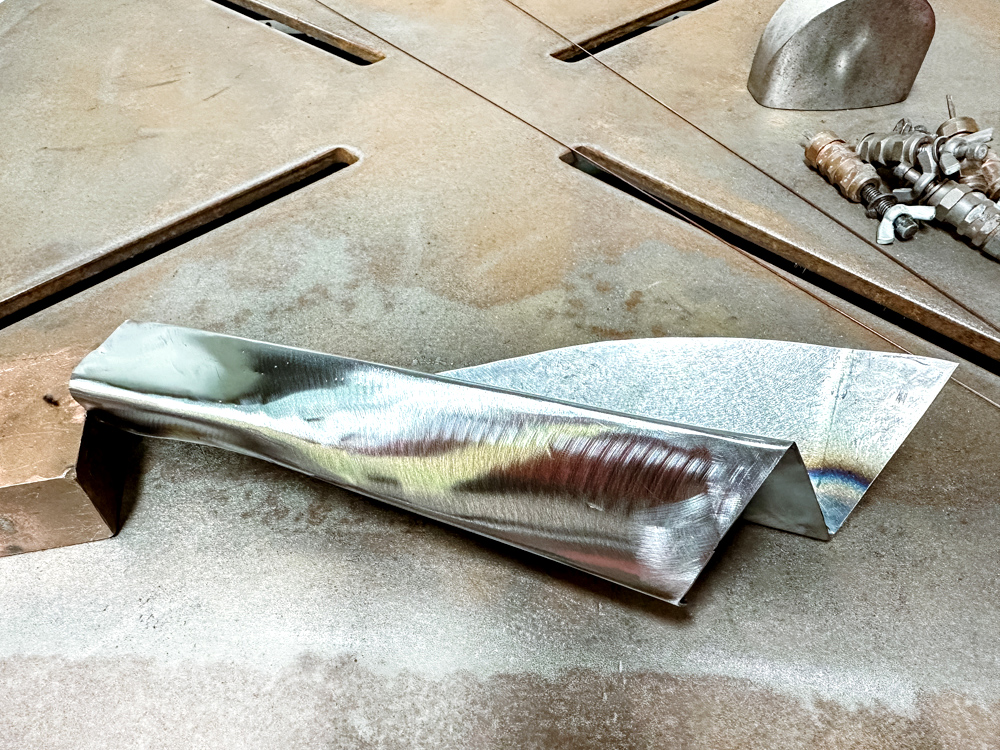
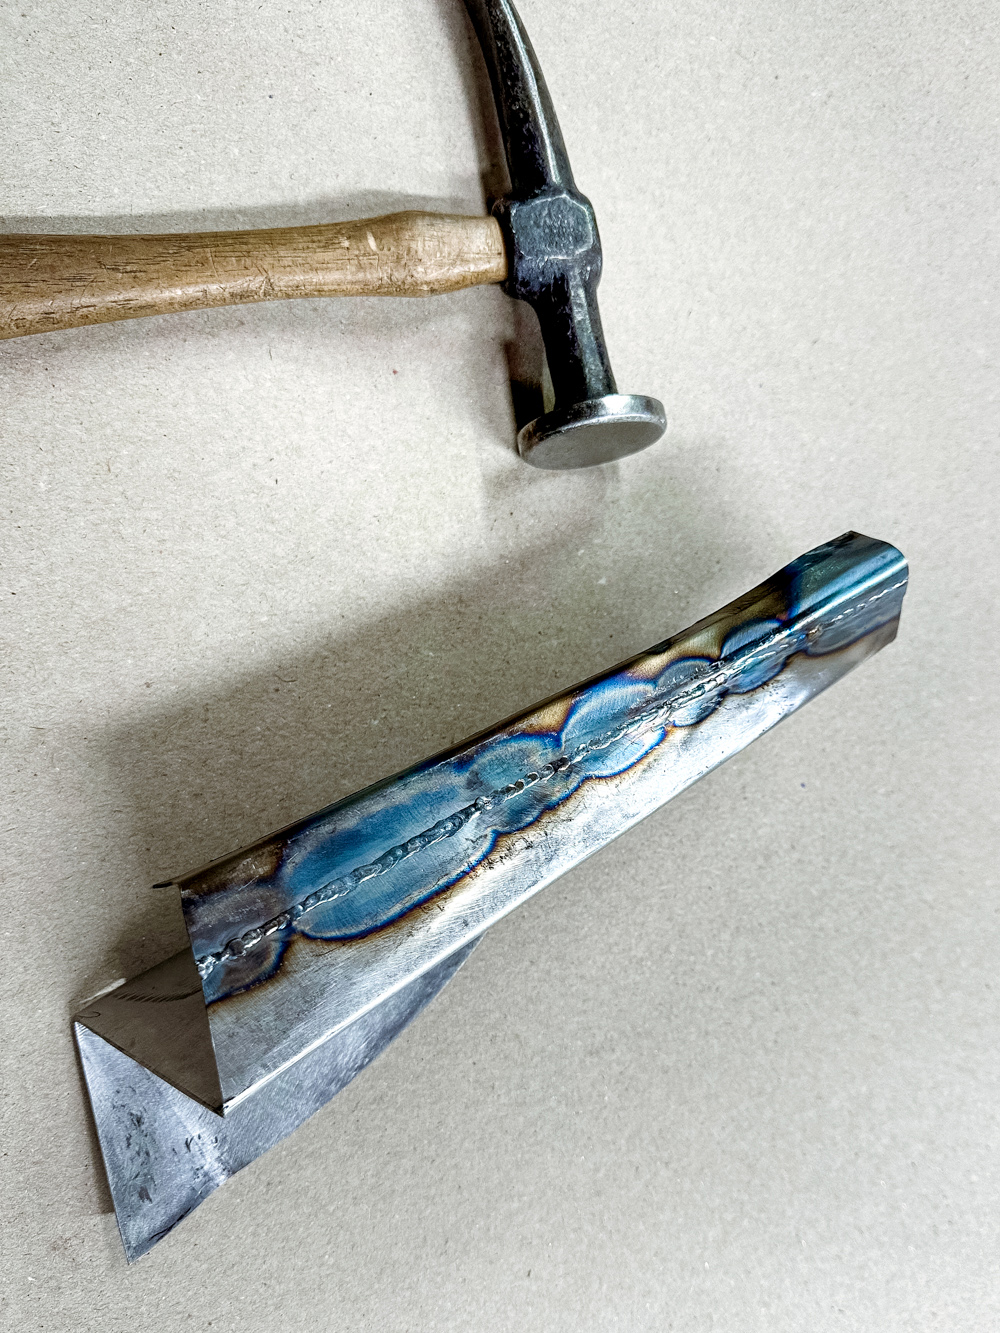
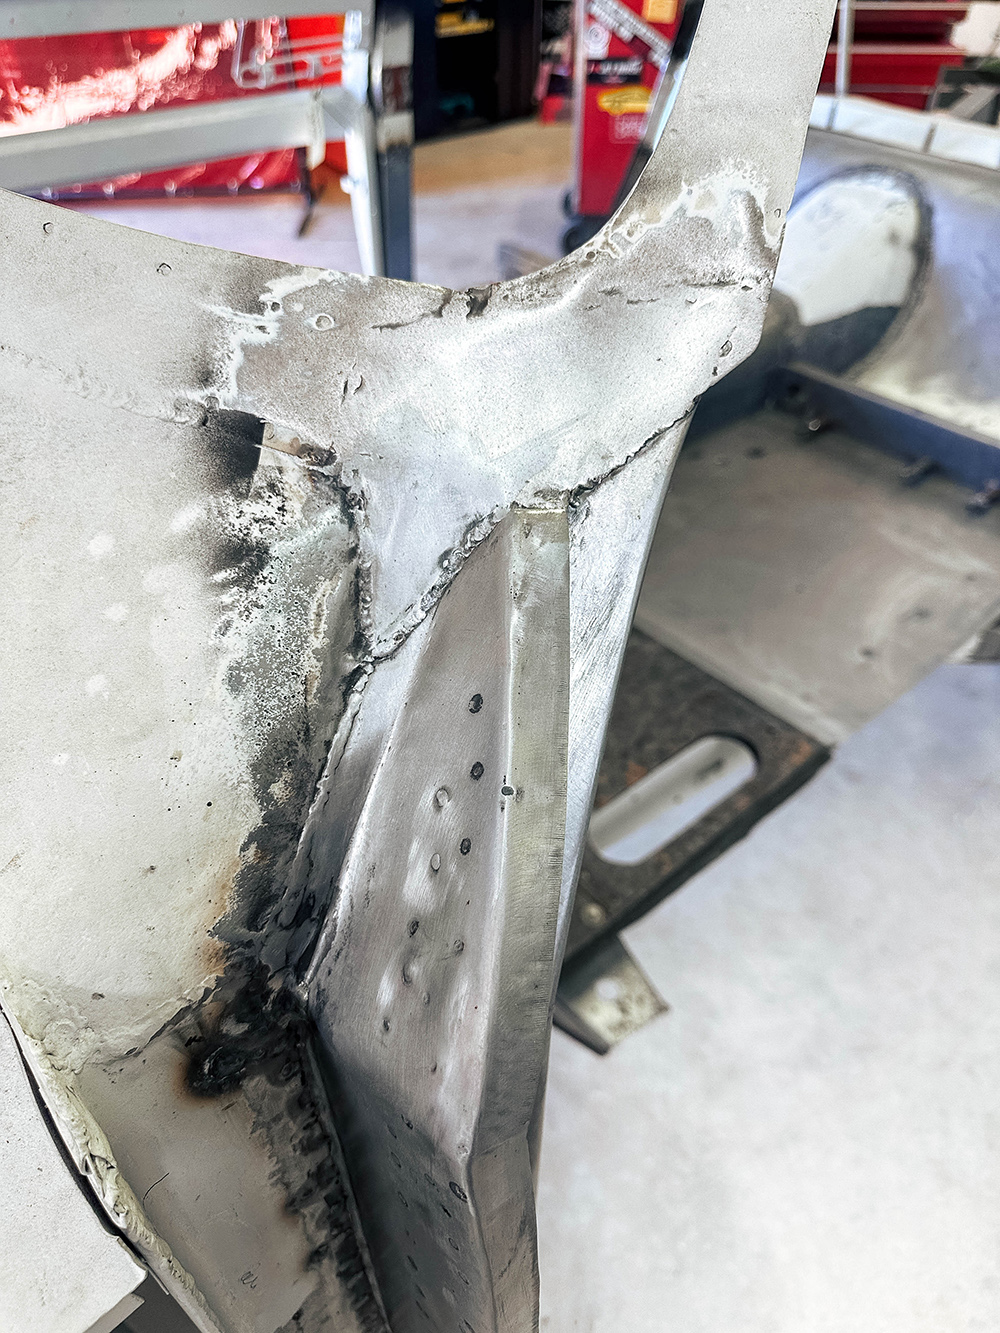
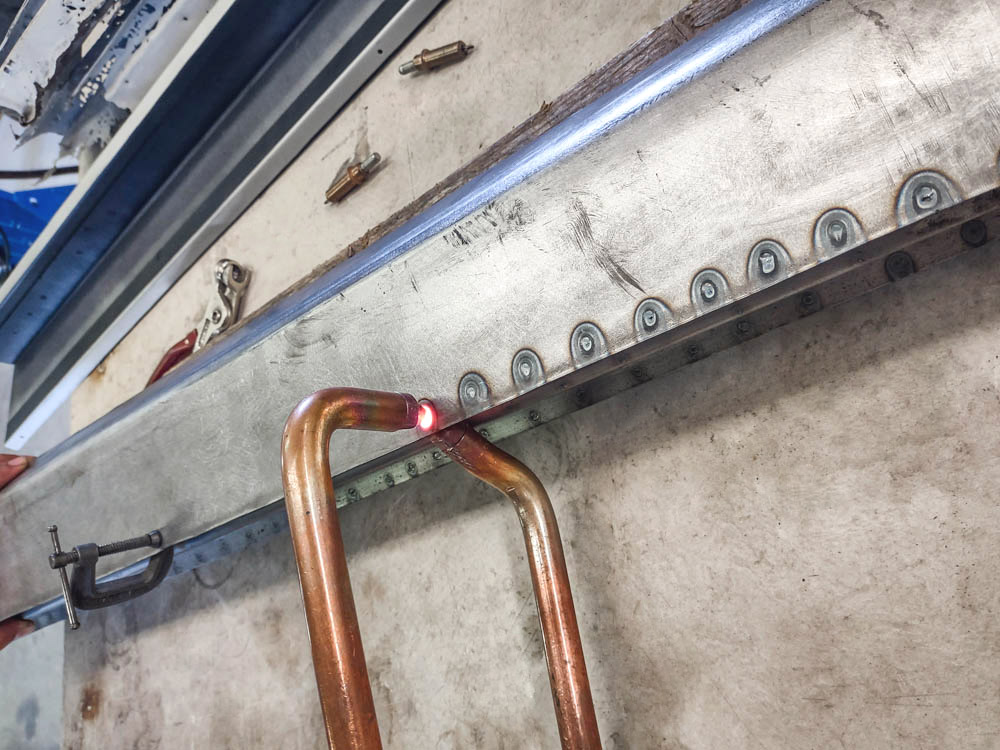
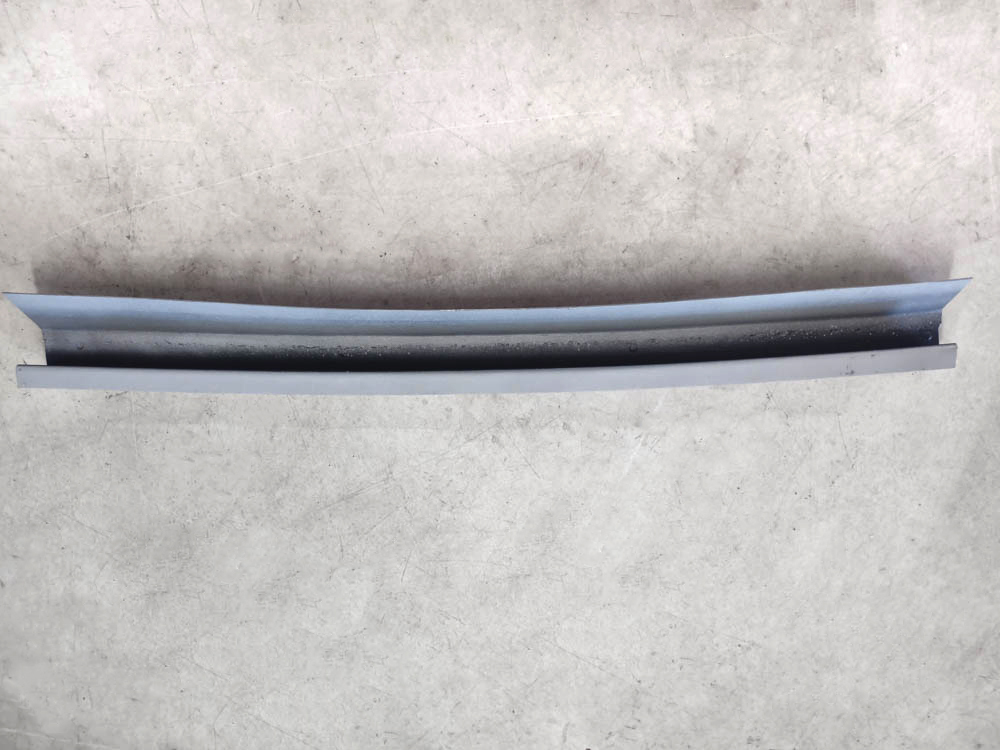
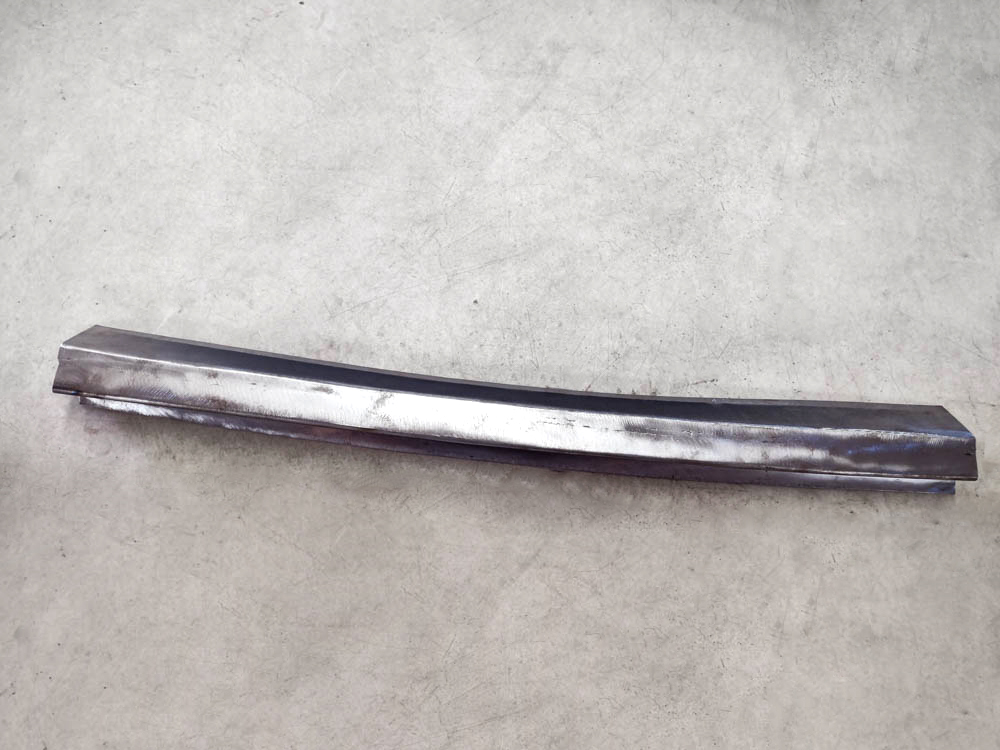
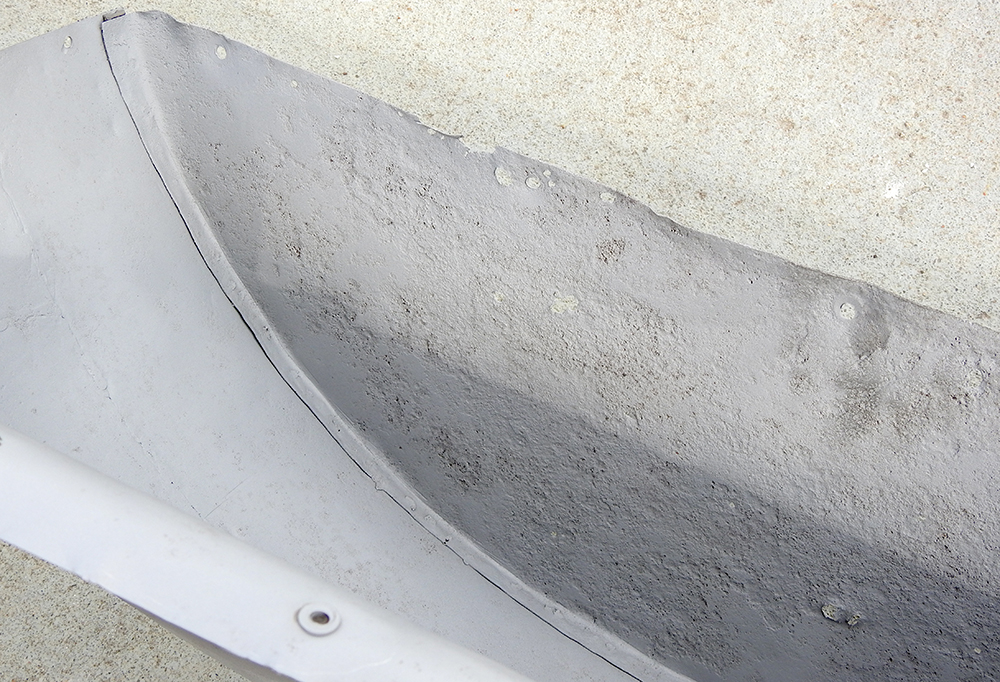
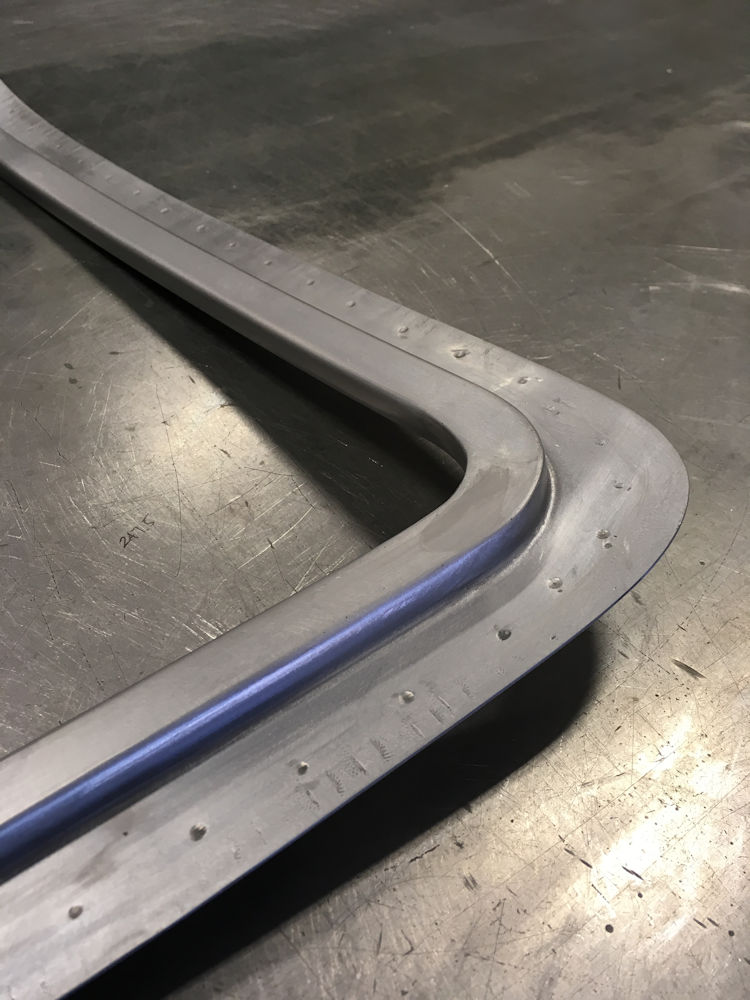
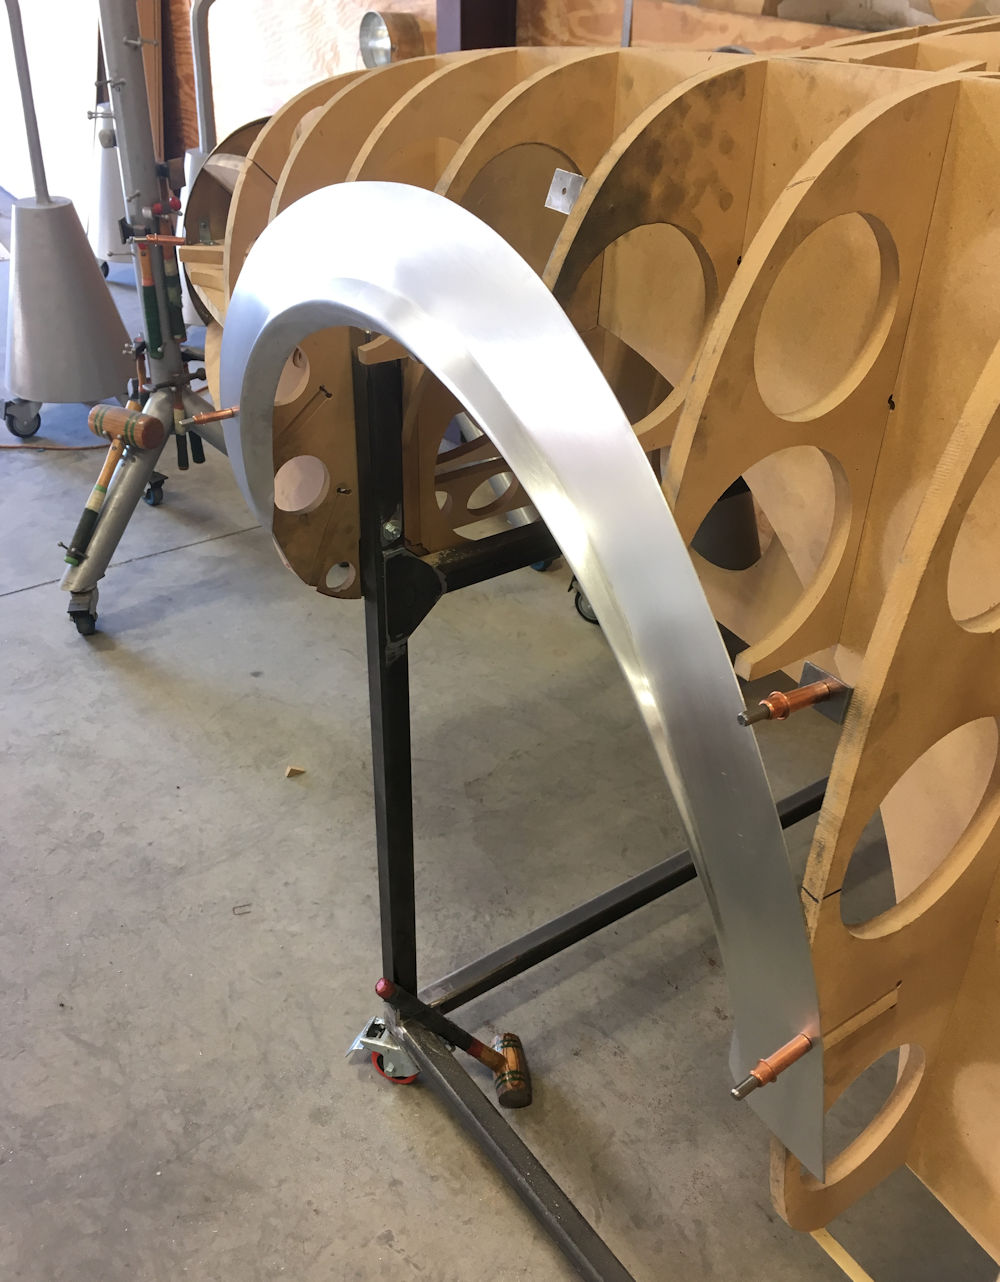
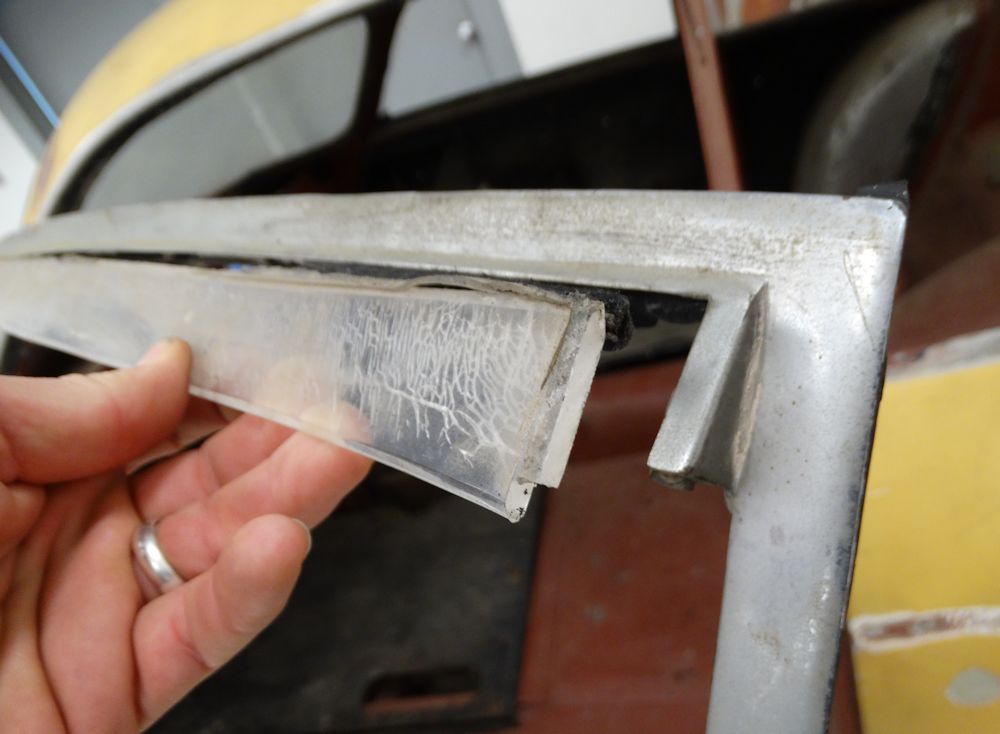
Front fender flare wire edging
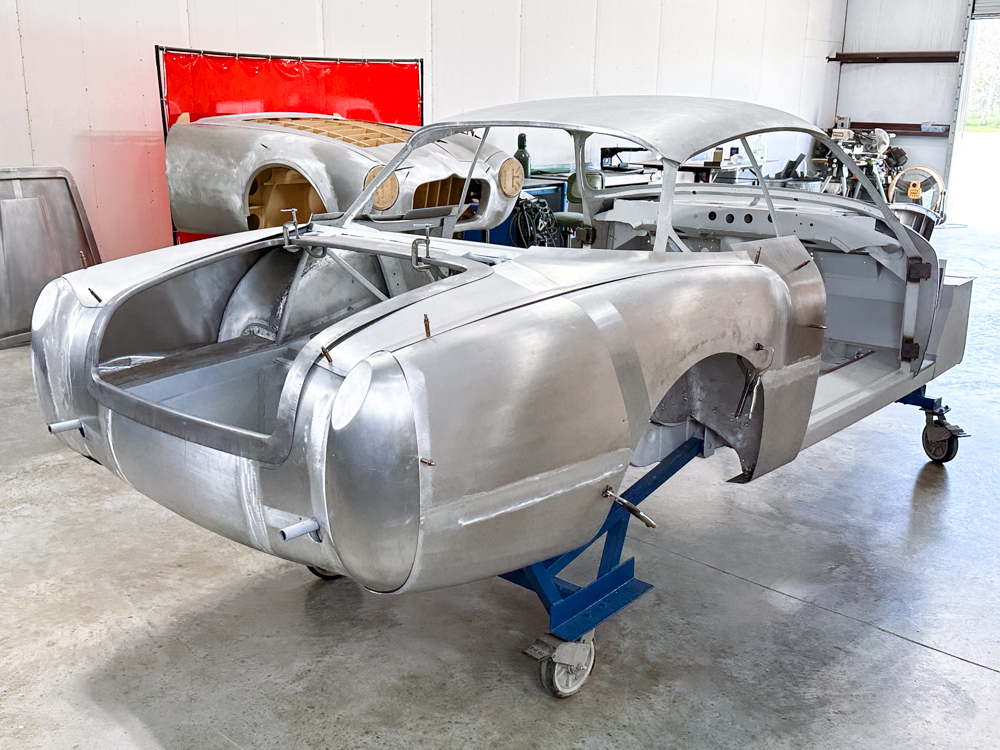
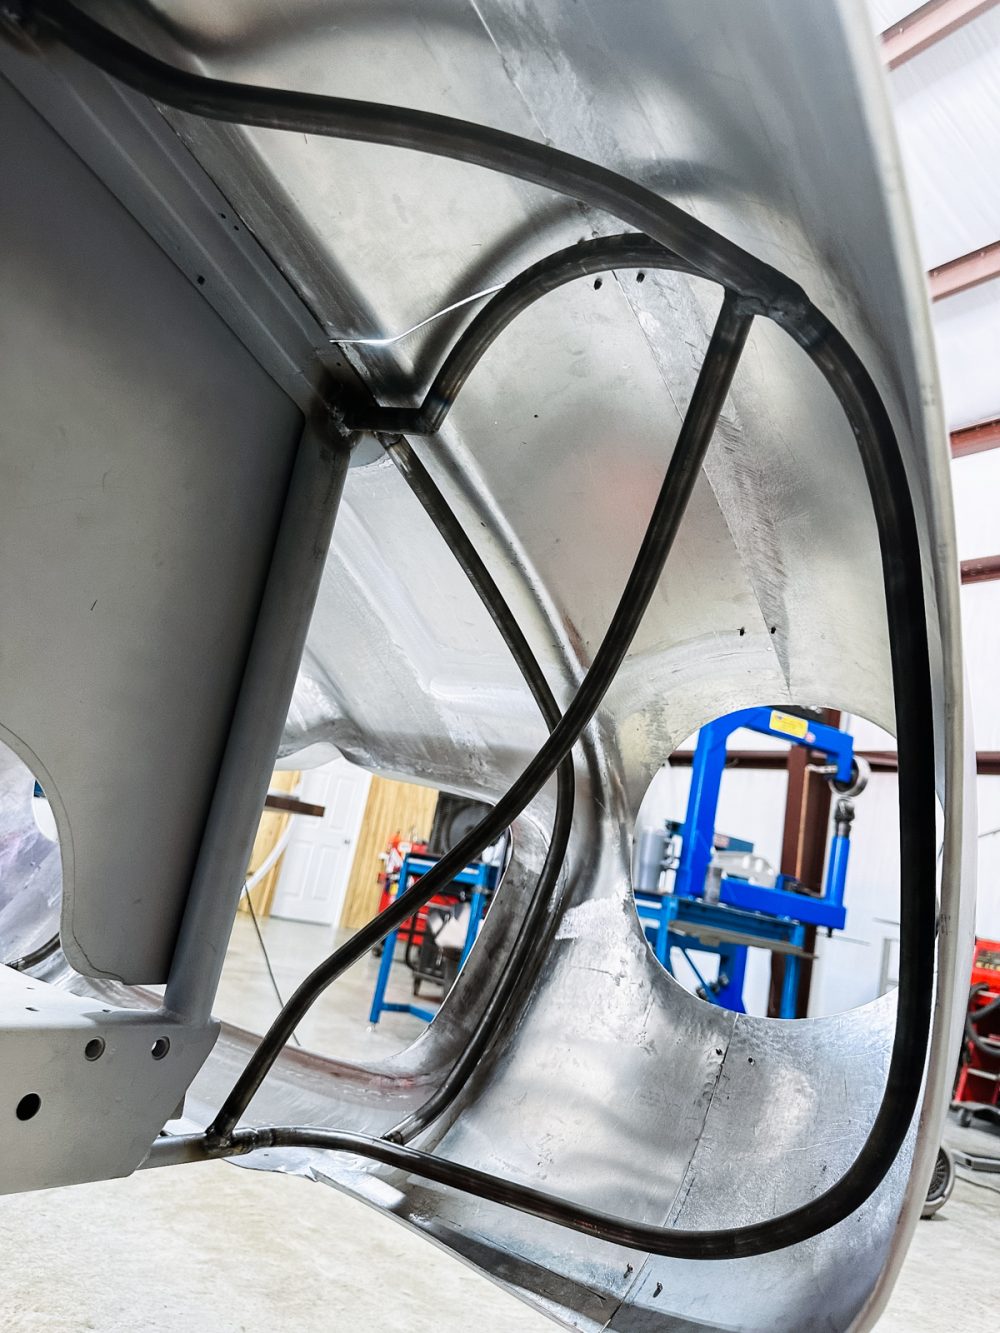
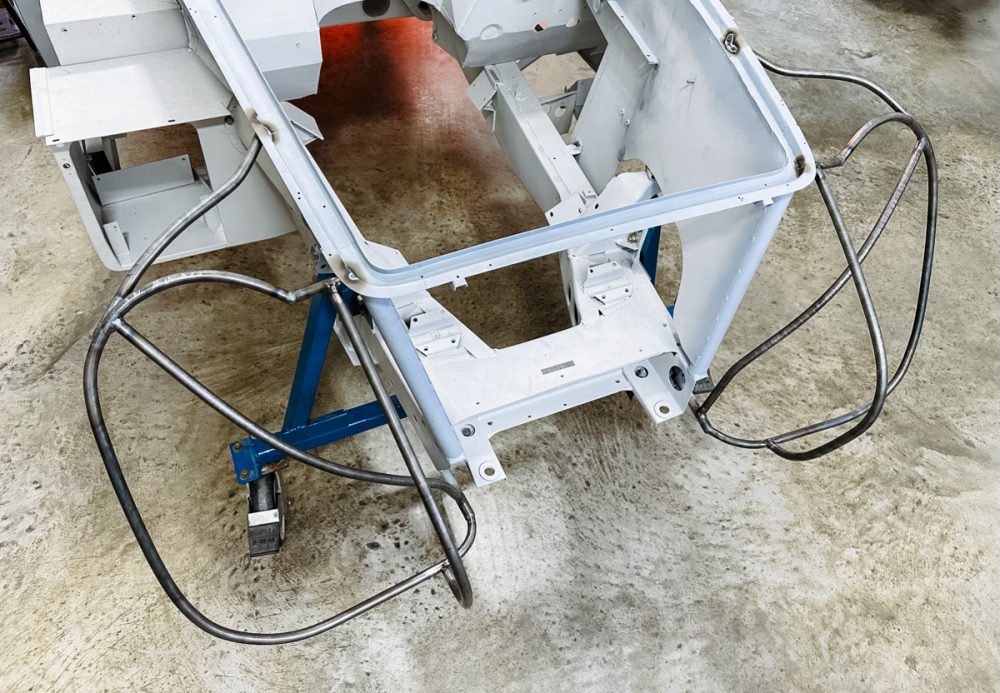
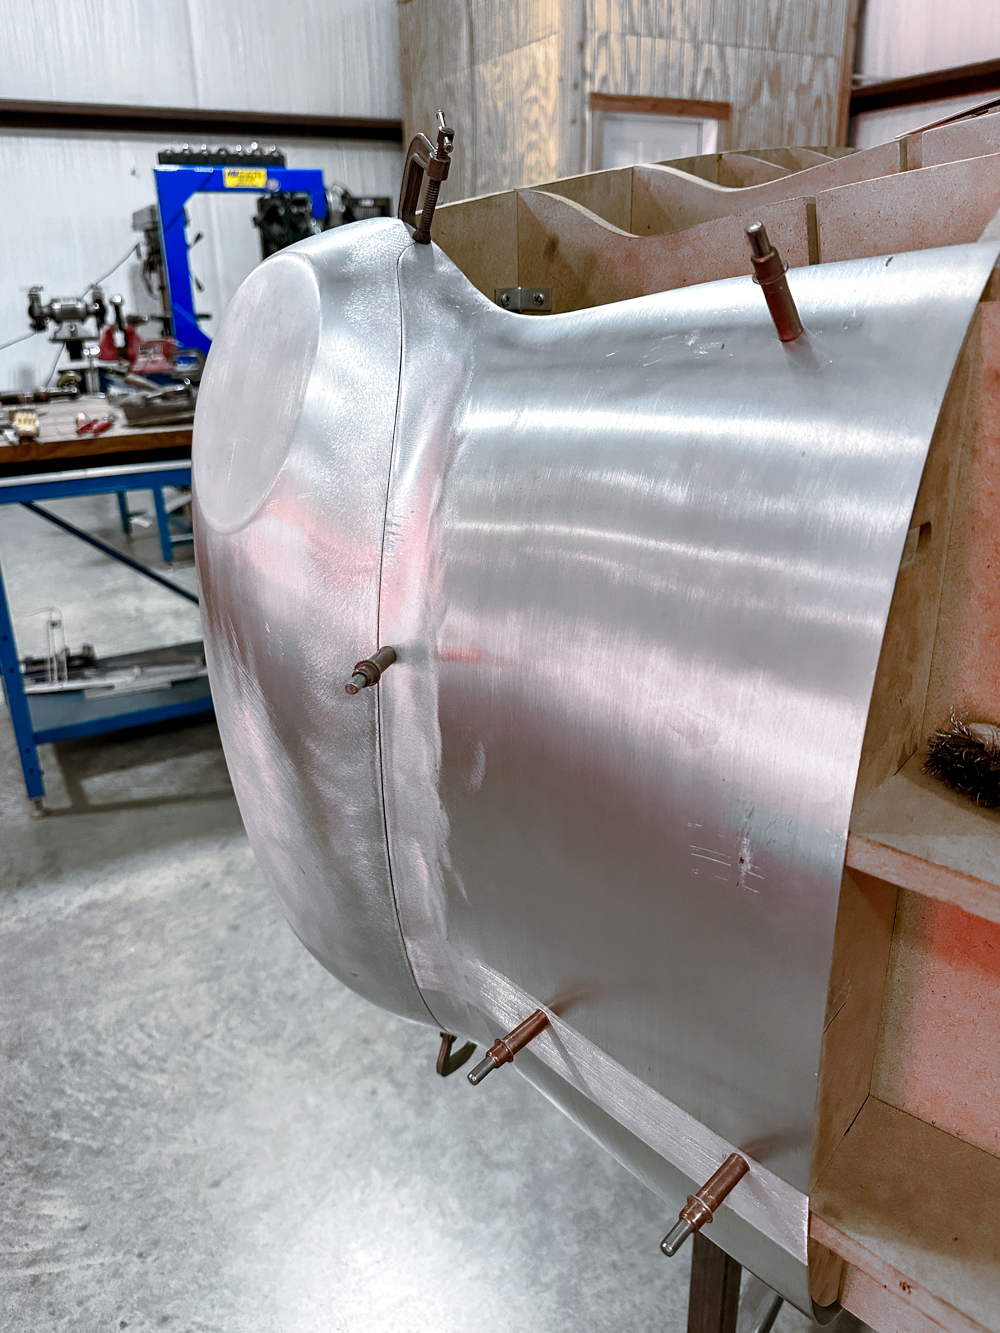
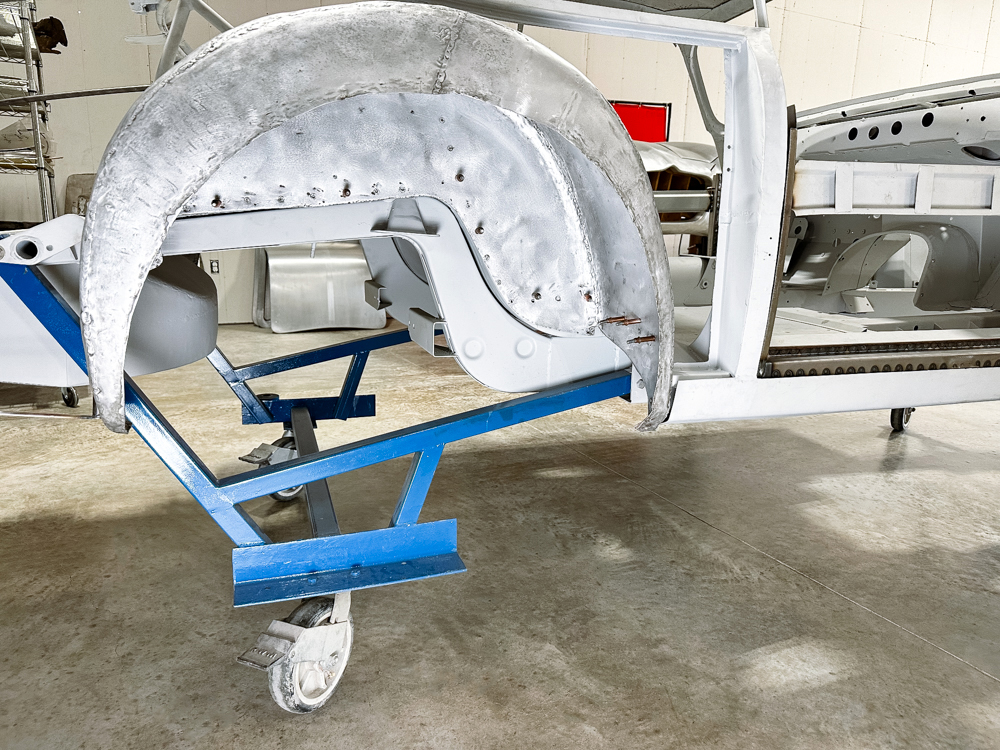
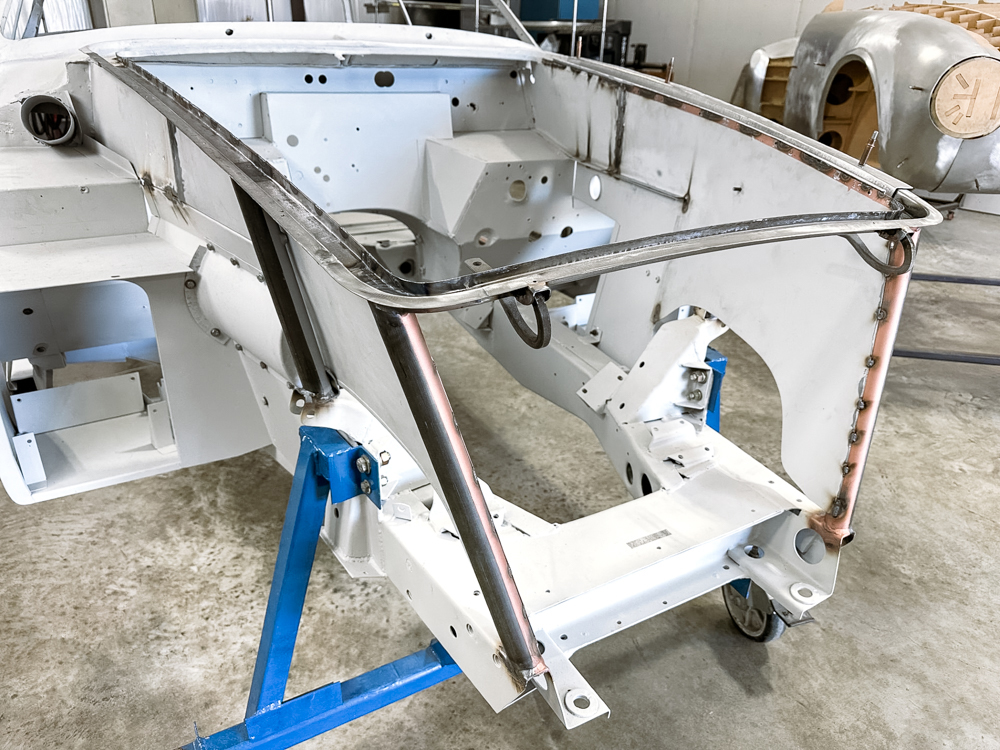
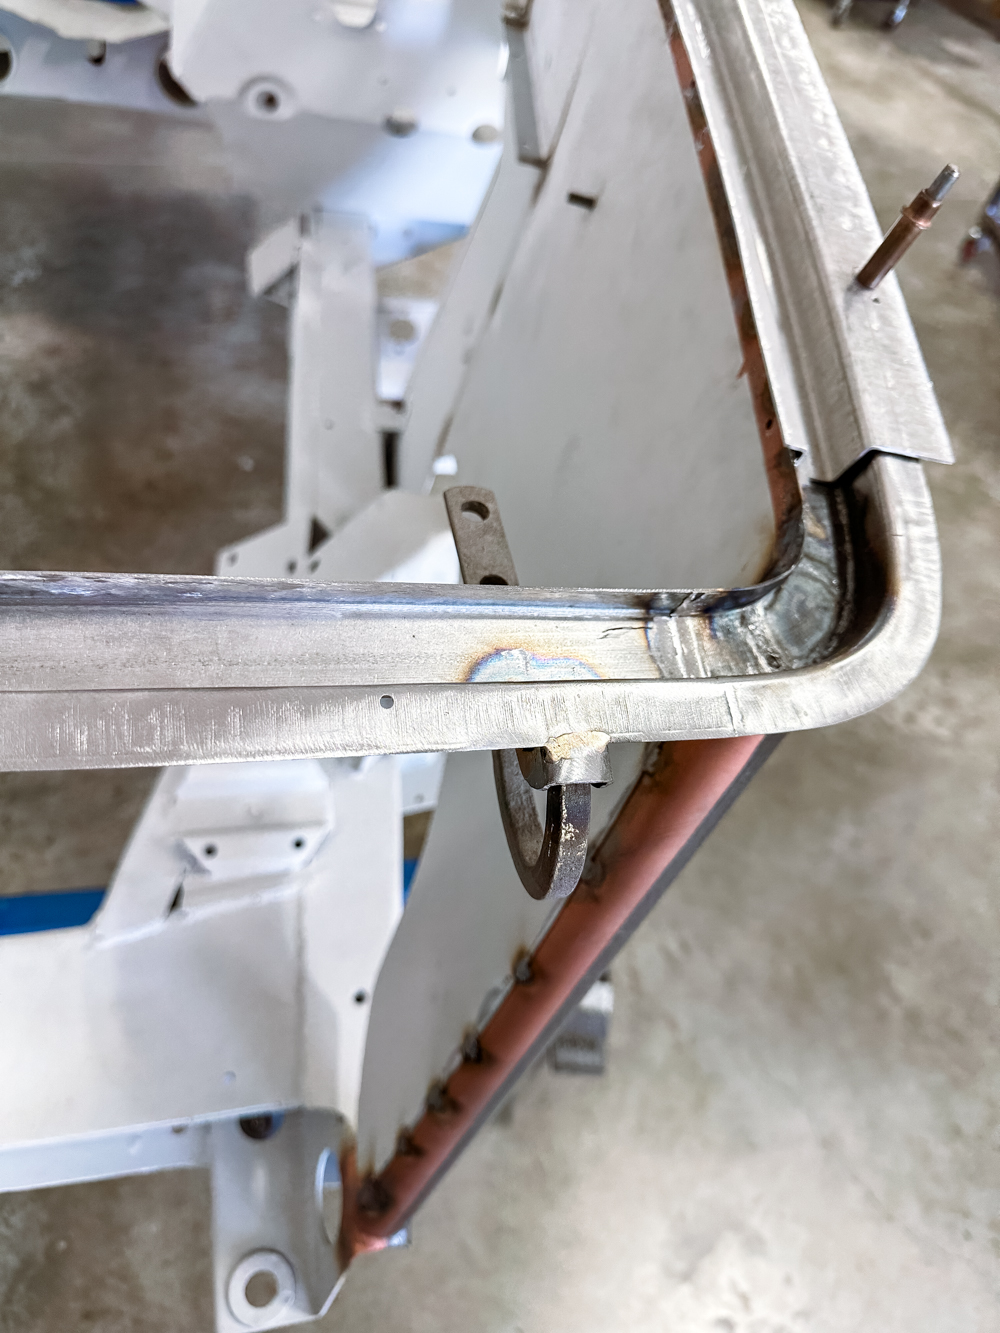
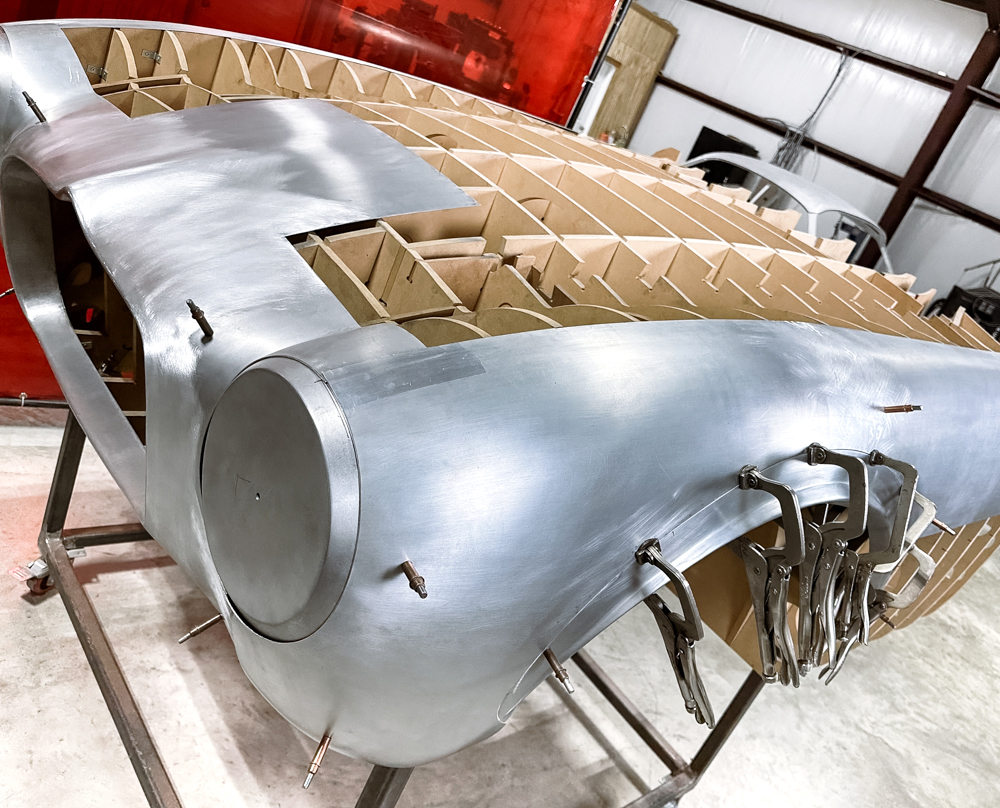
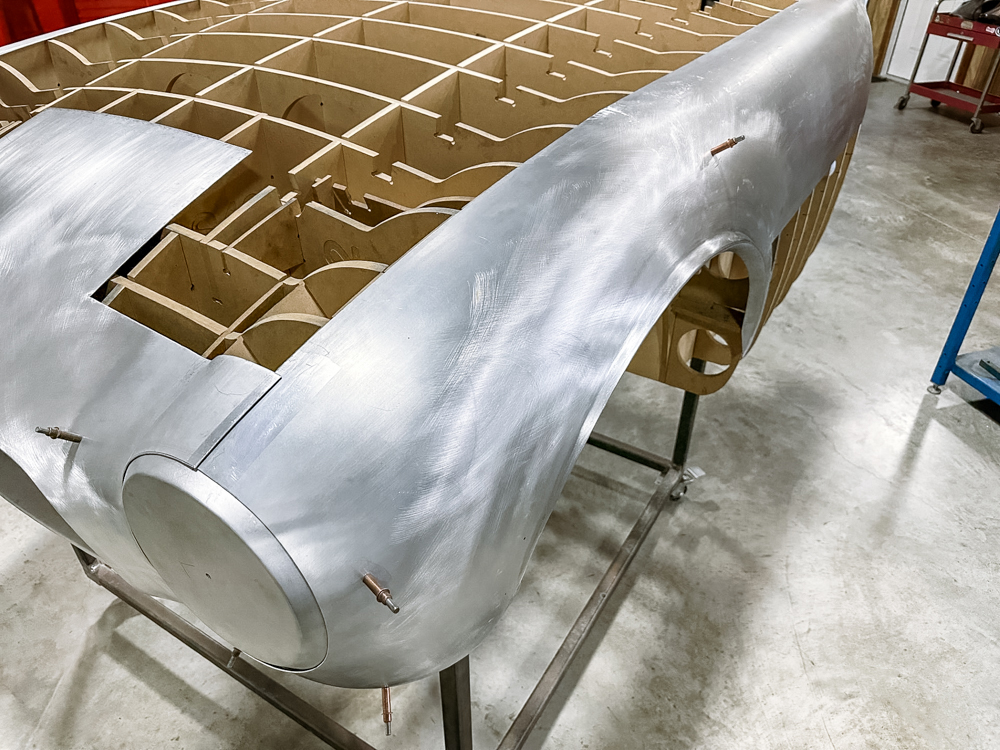
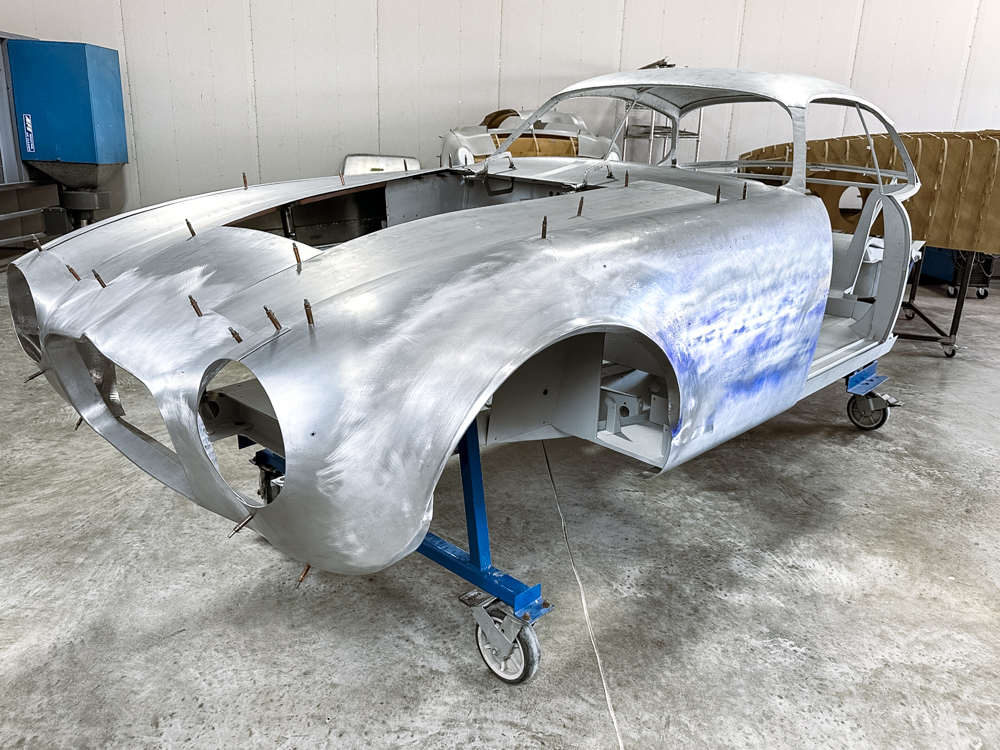
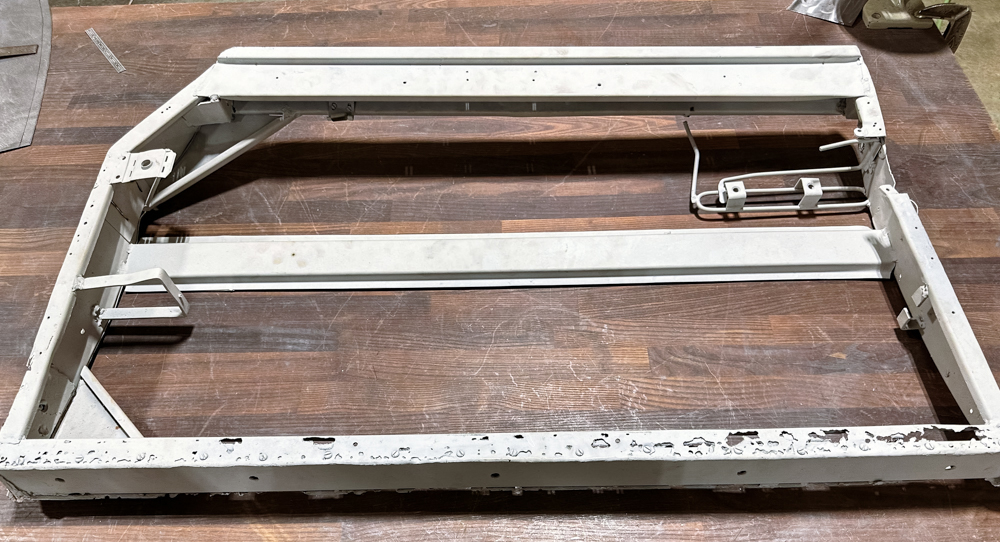
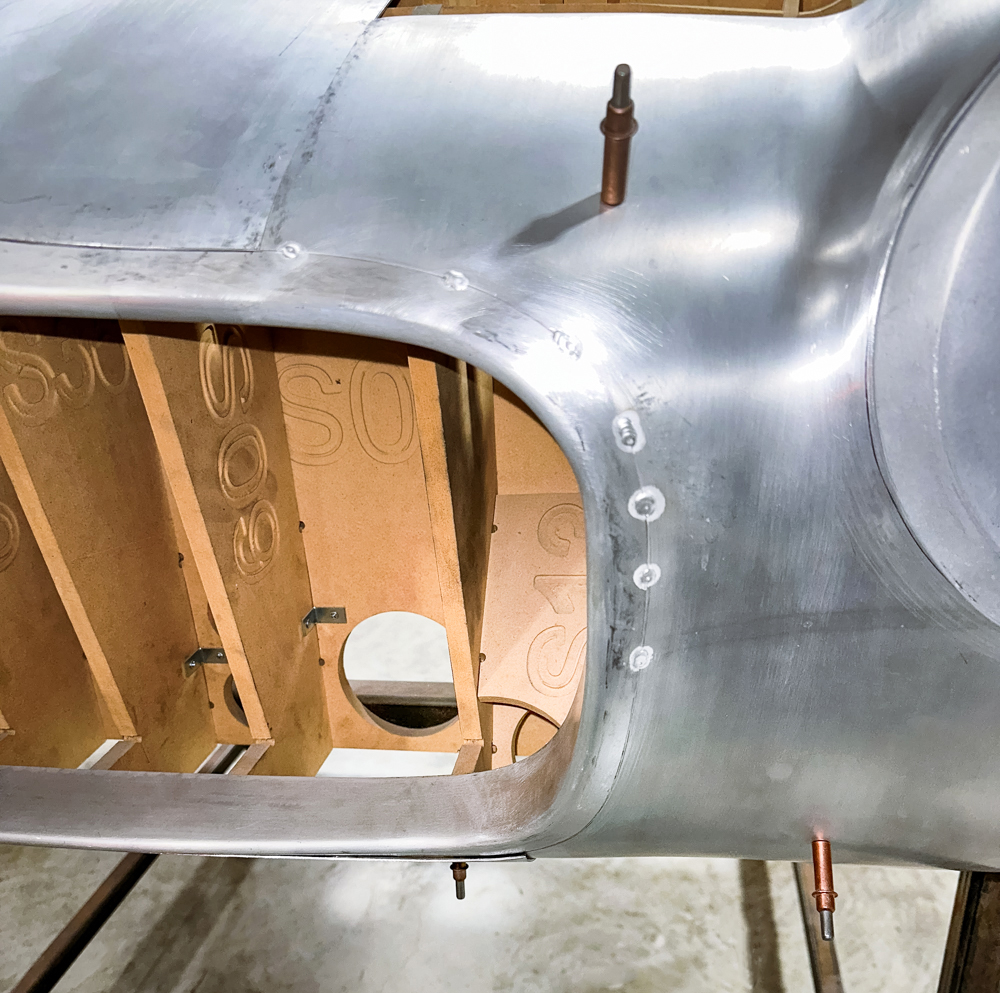
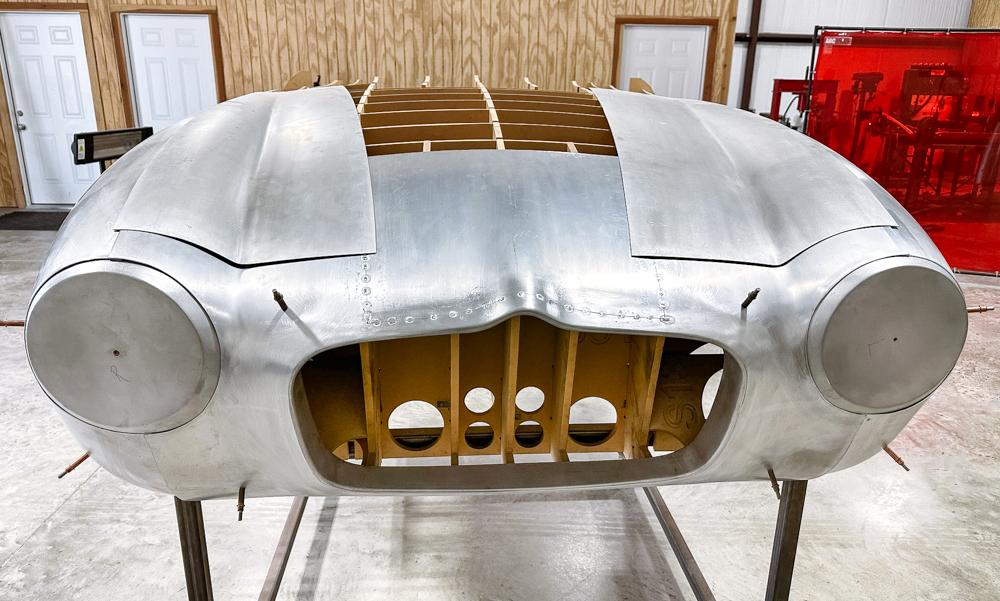
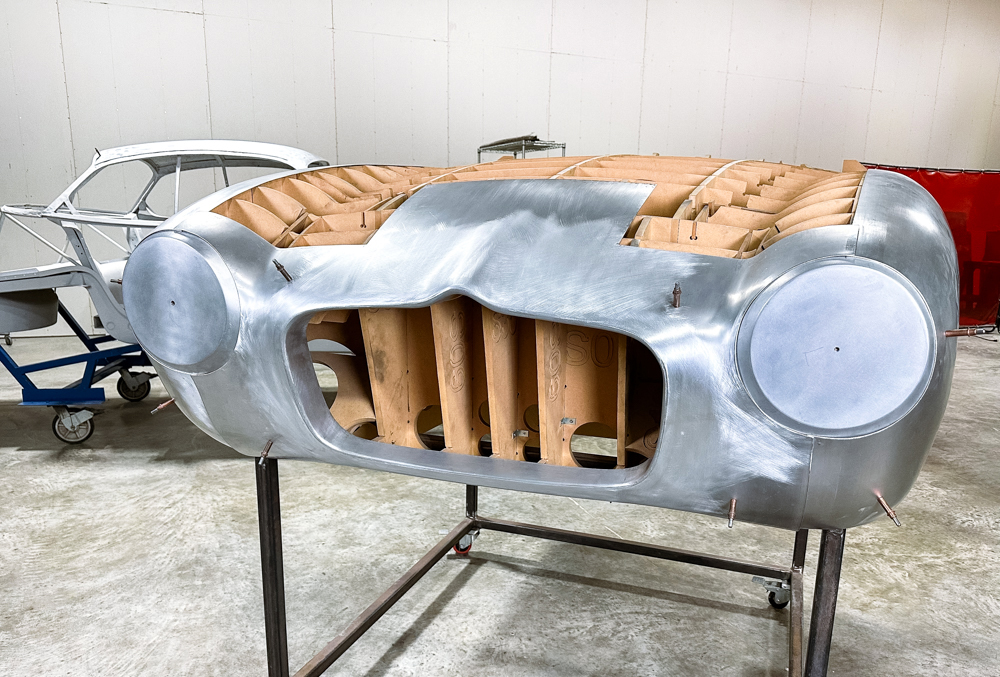
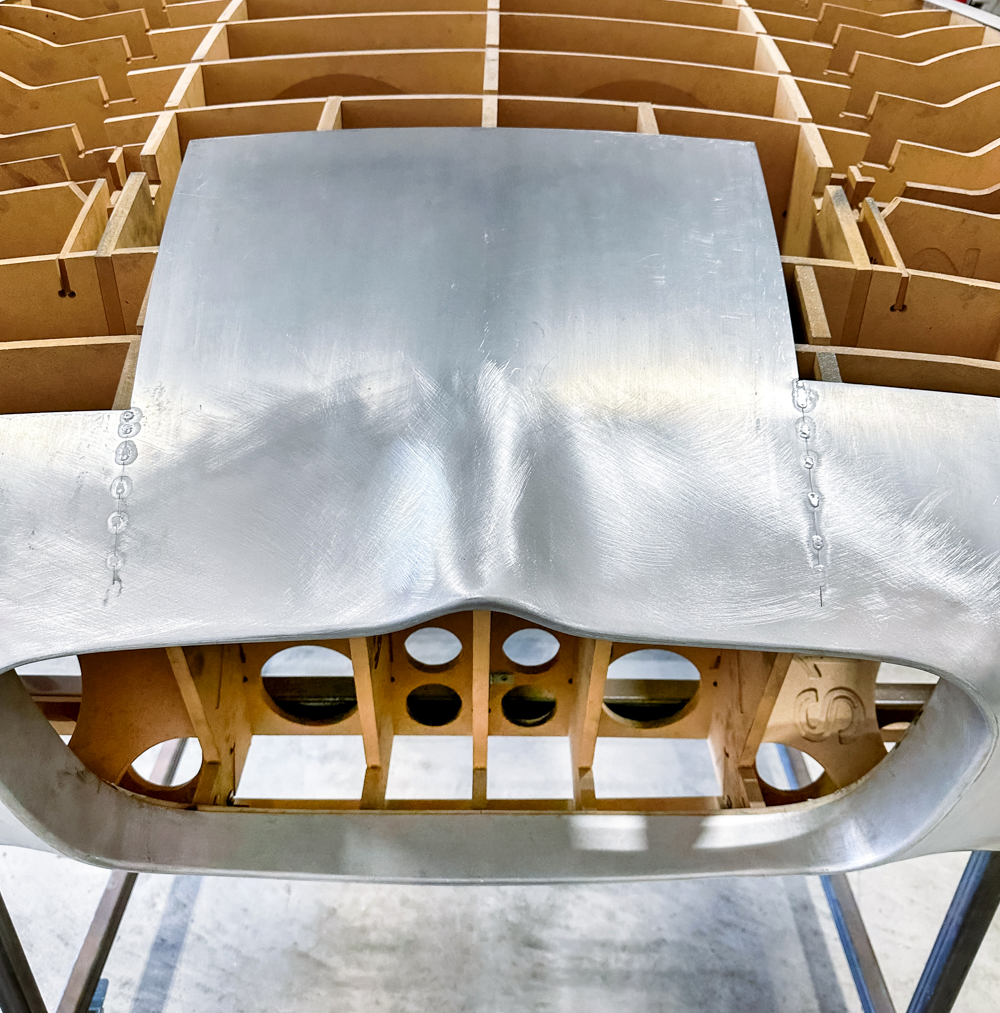
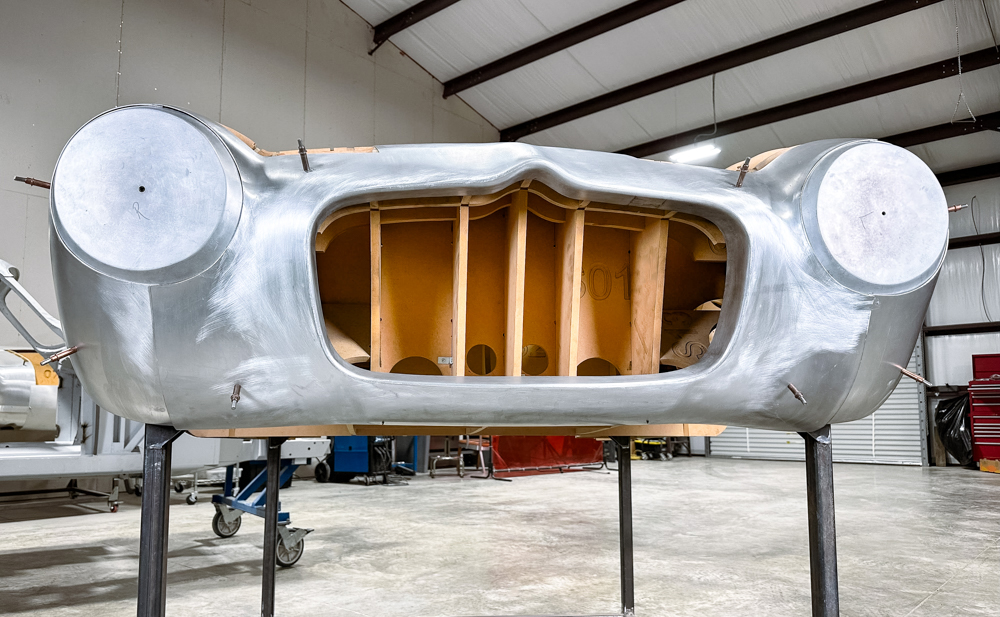
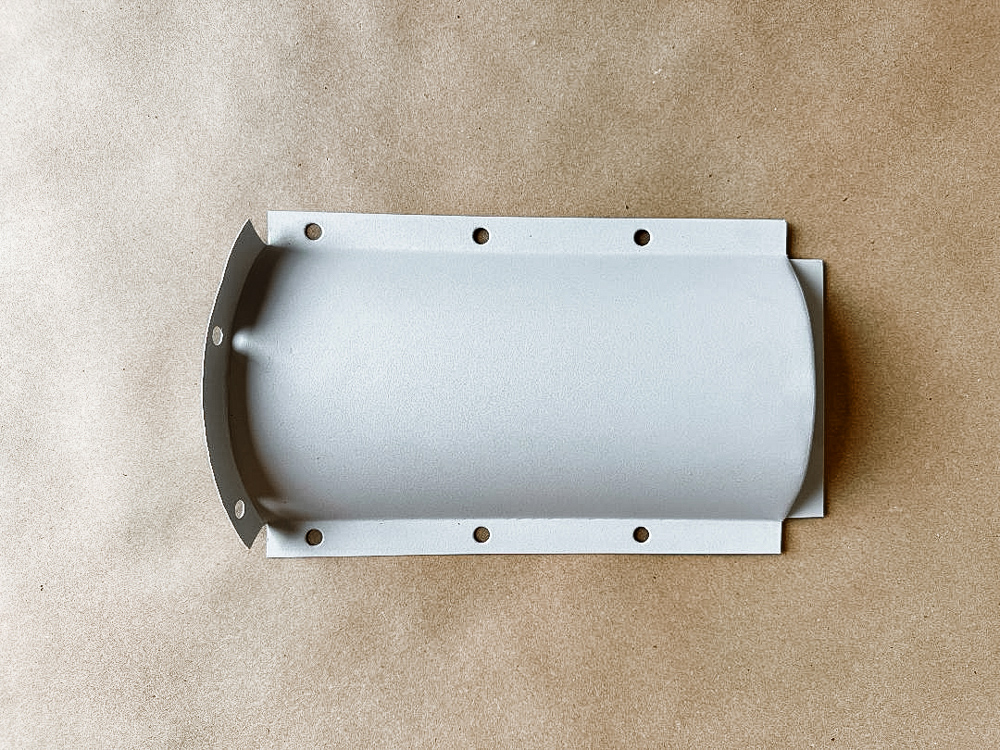
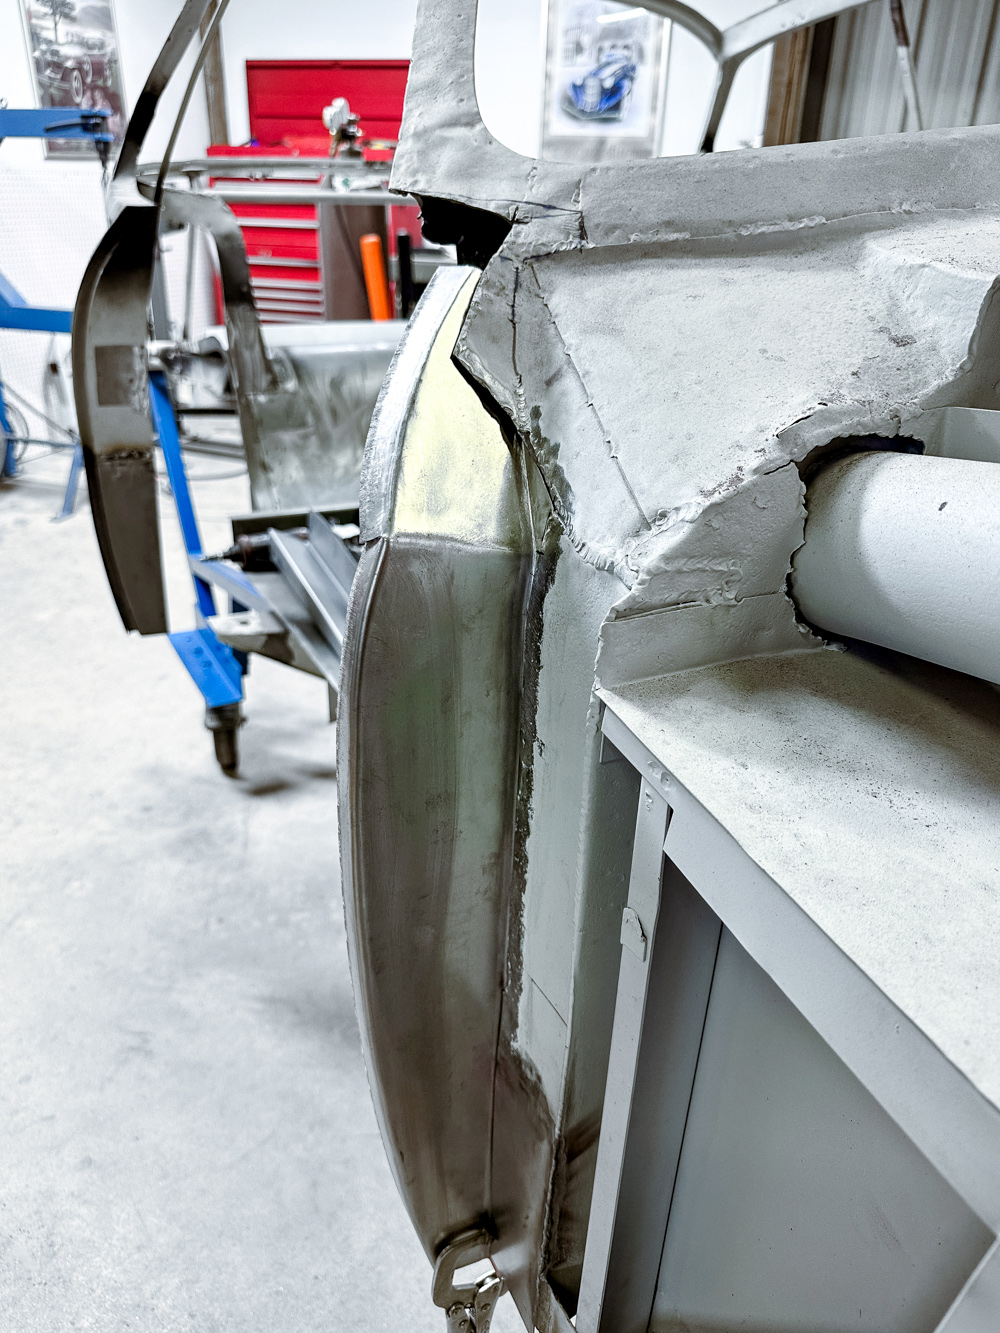
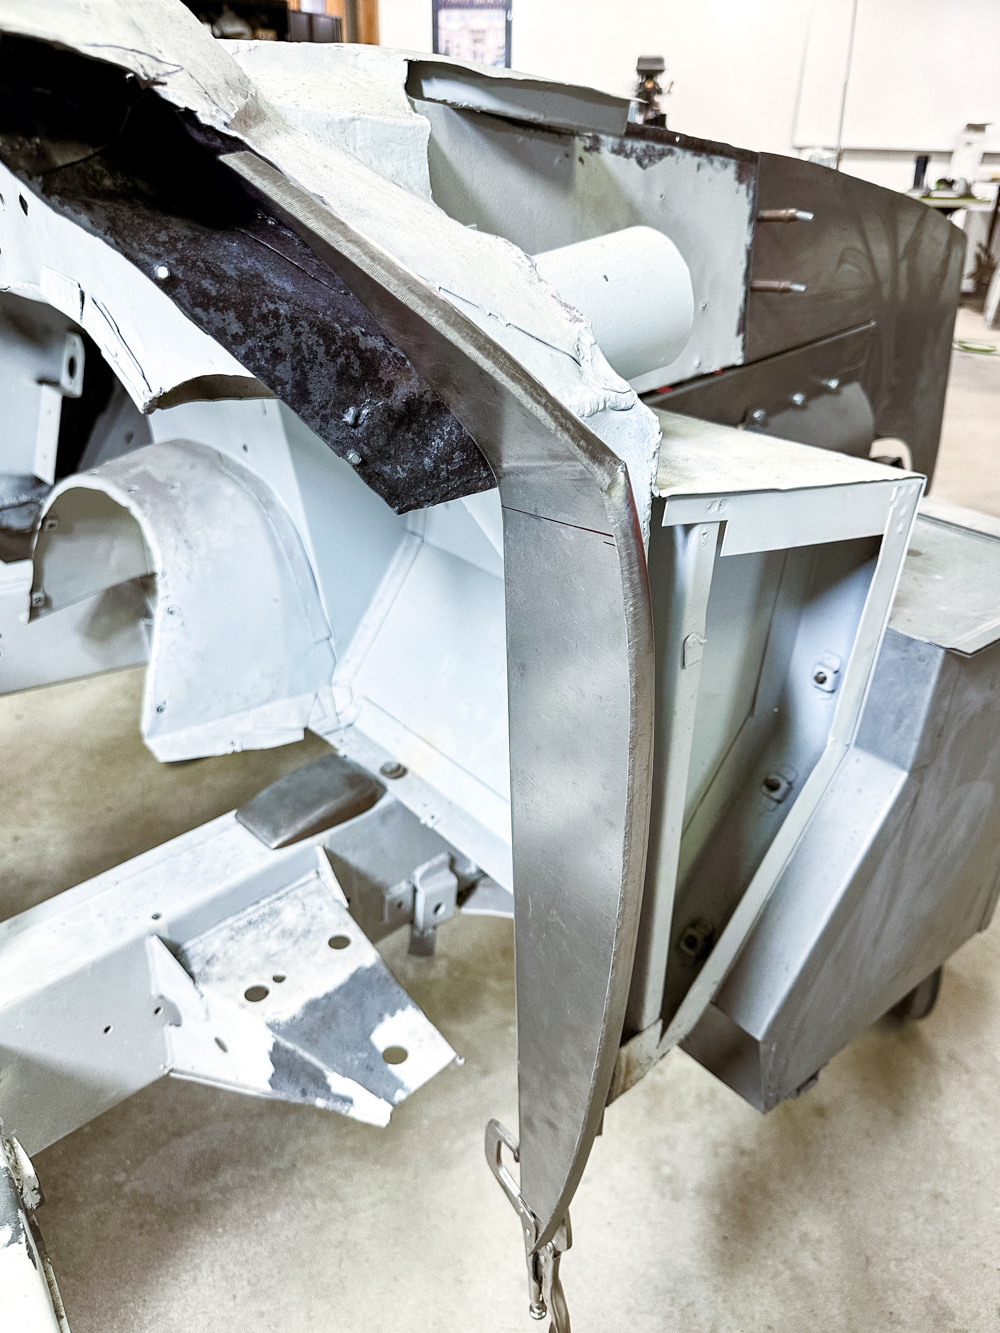
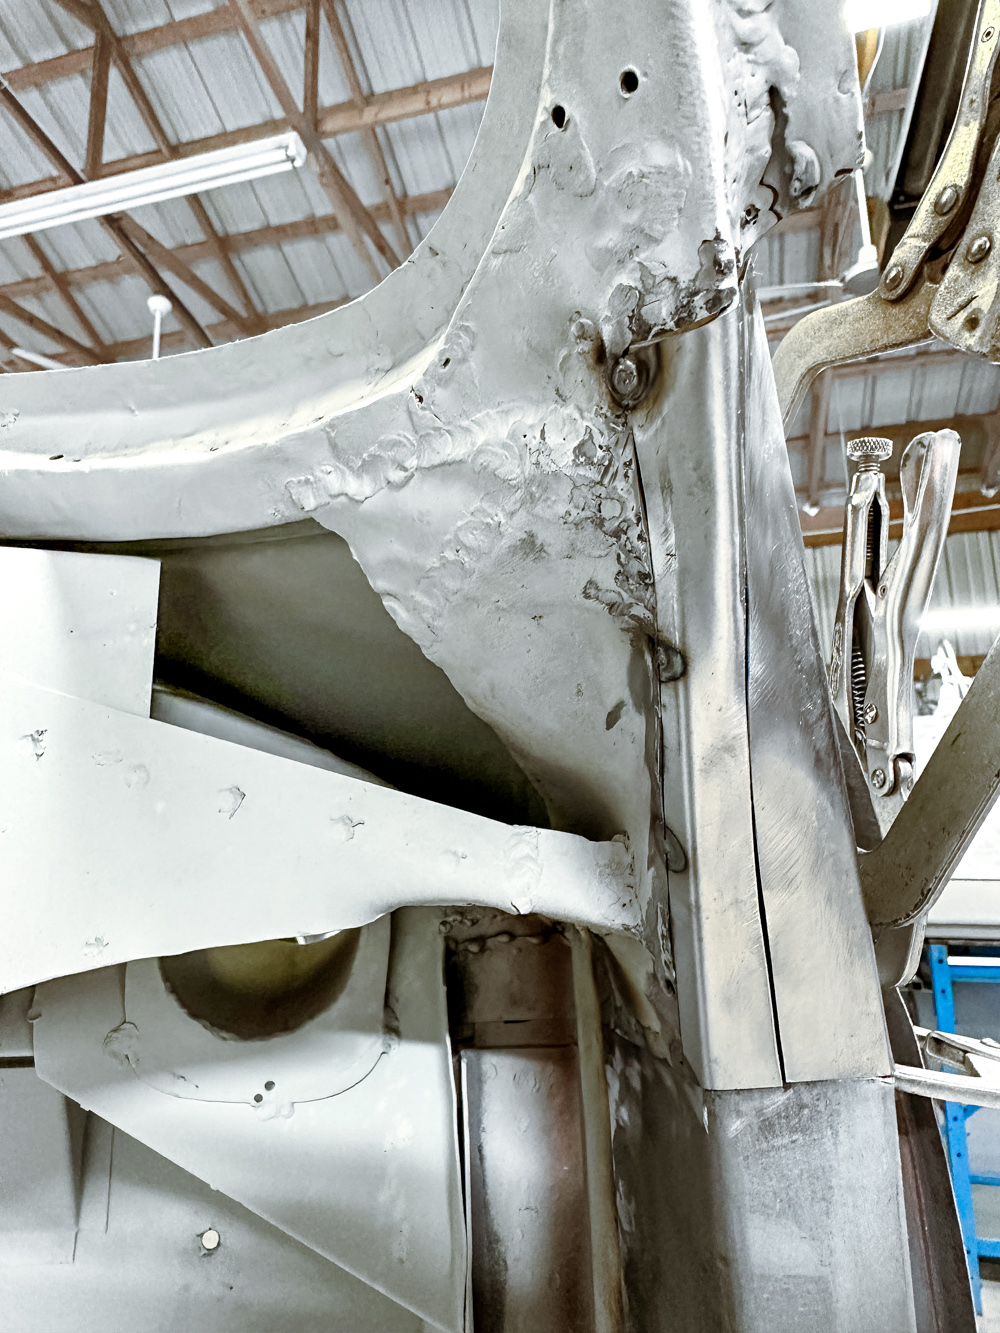
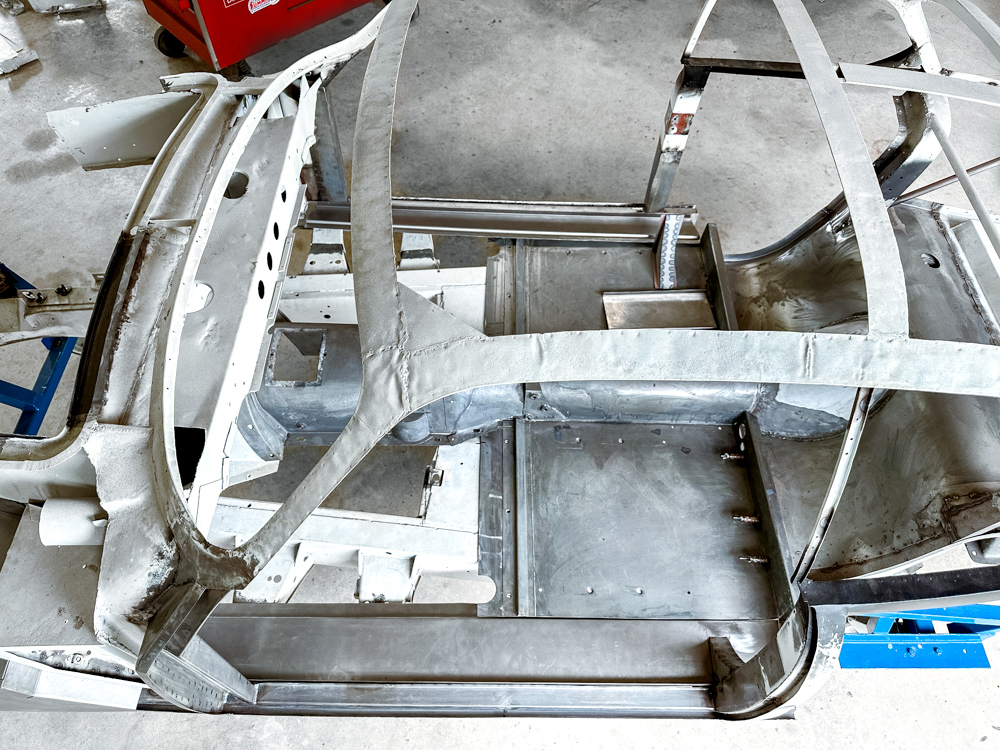
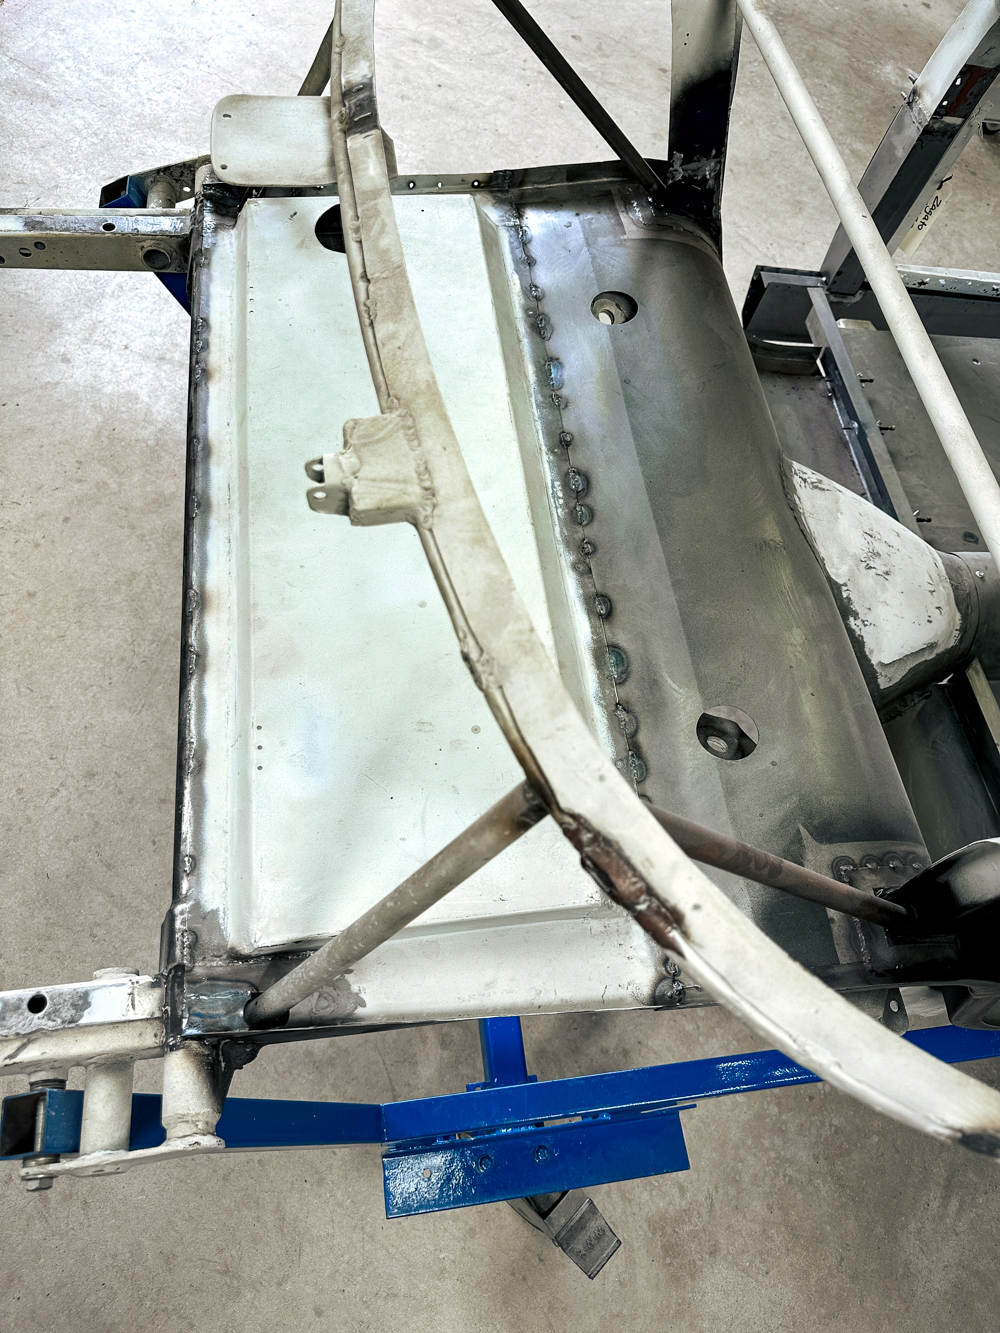
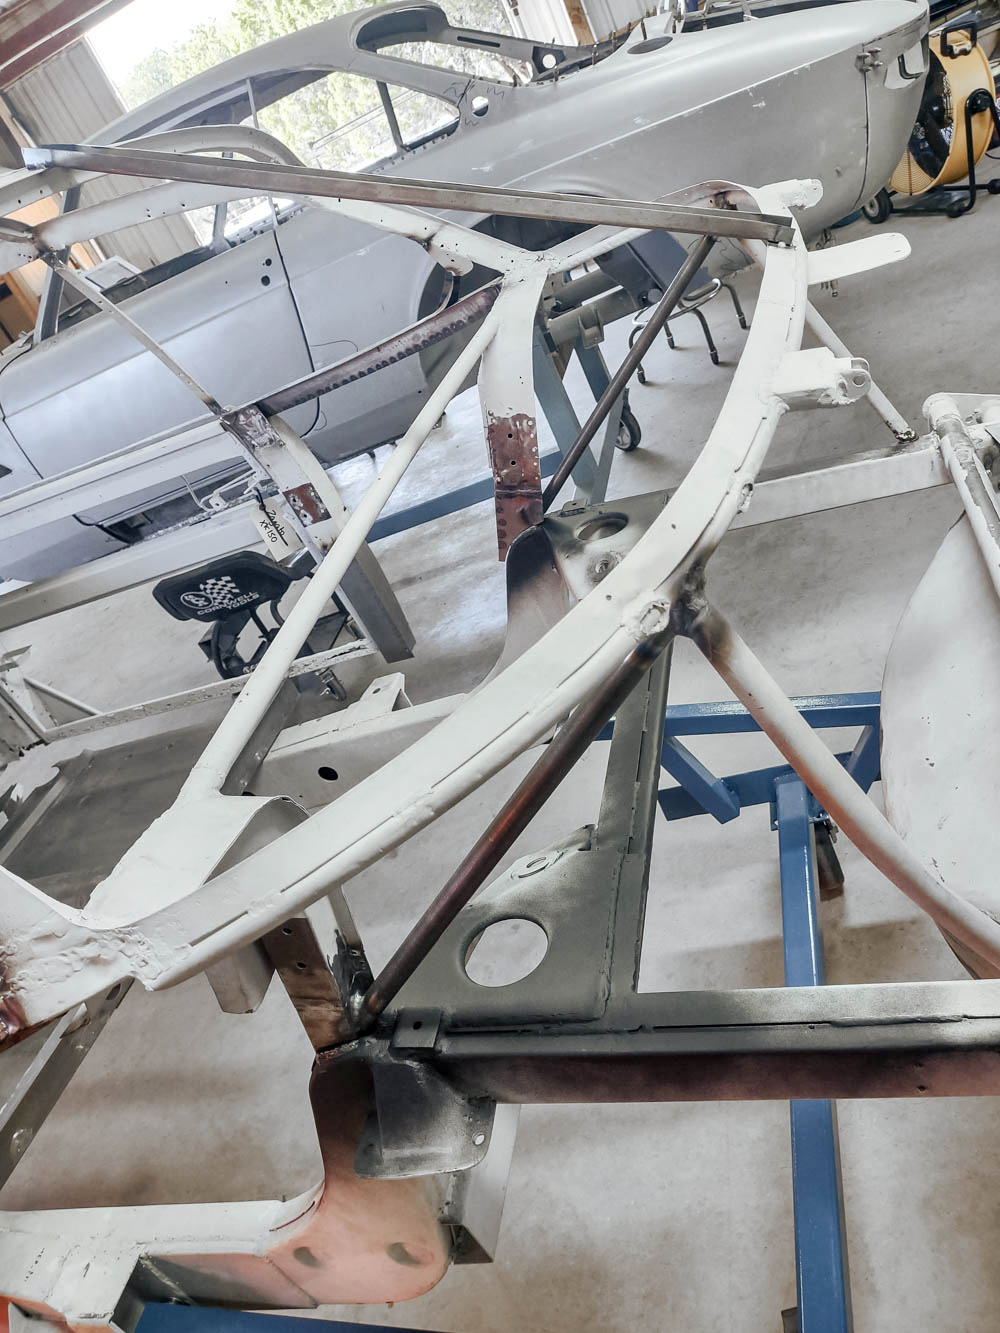
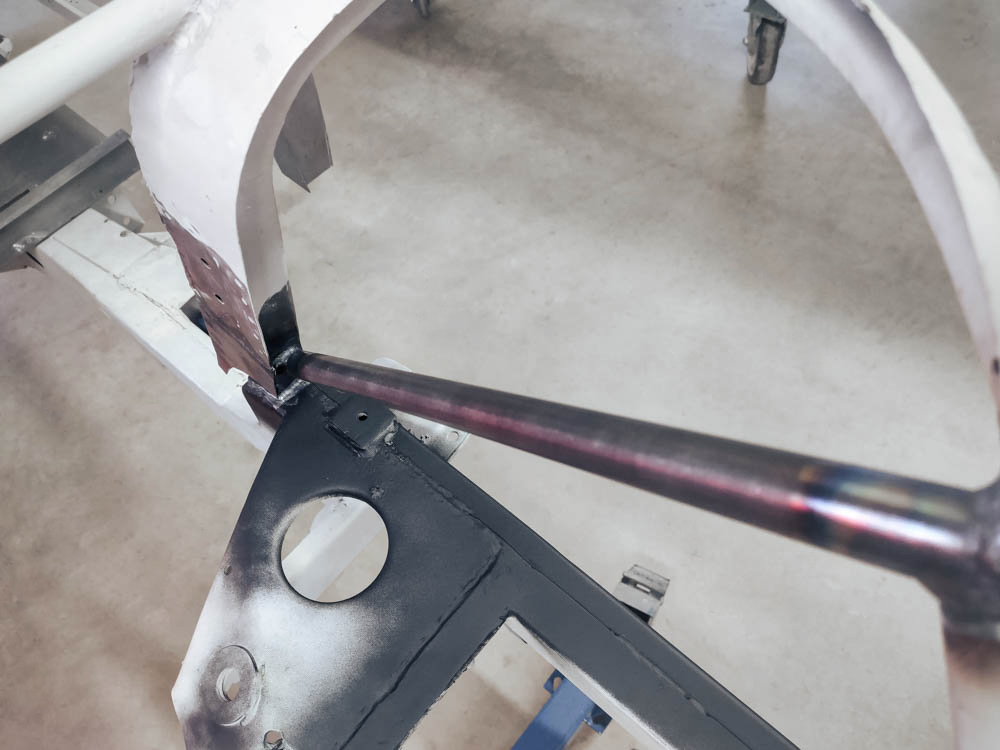
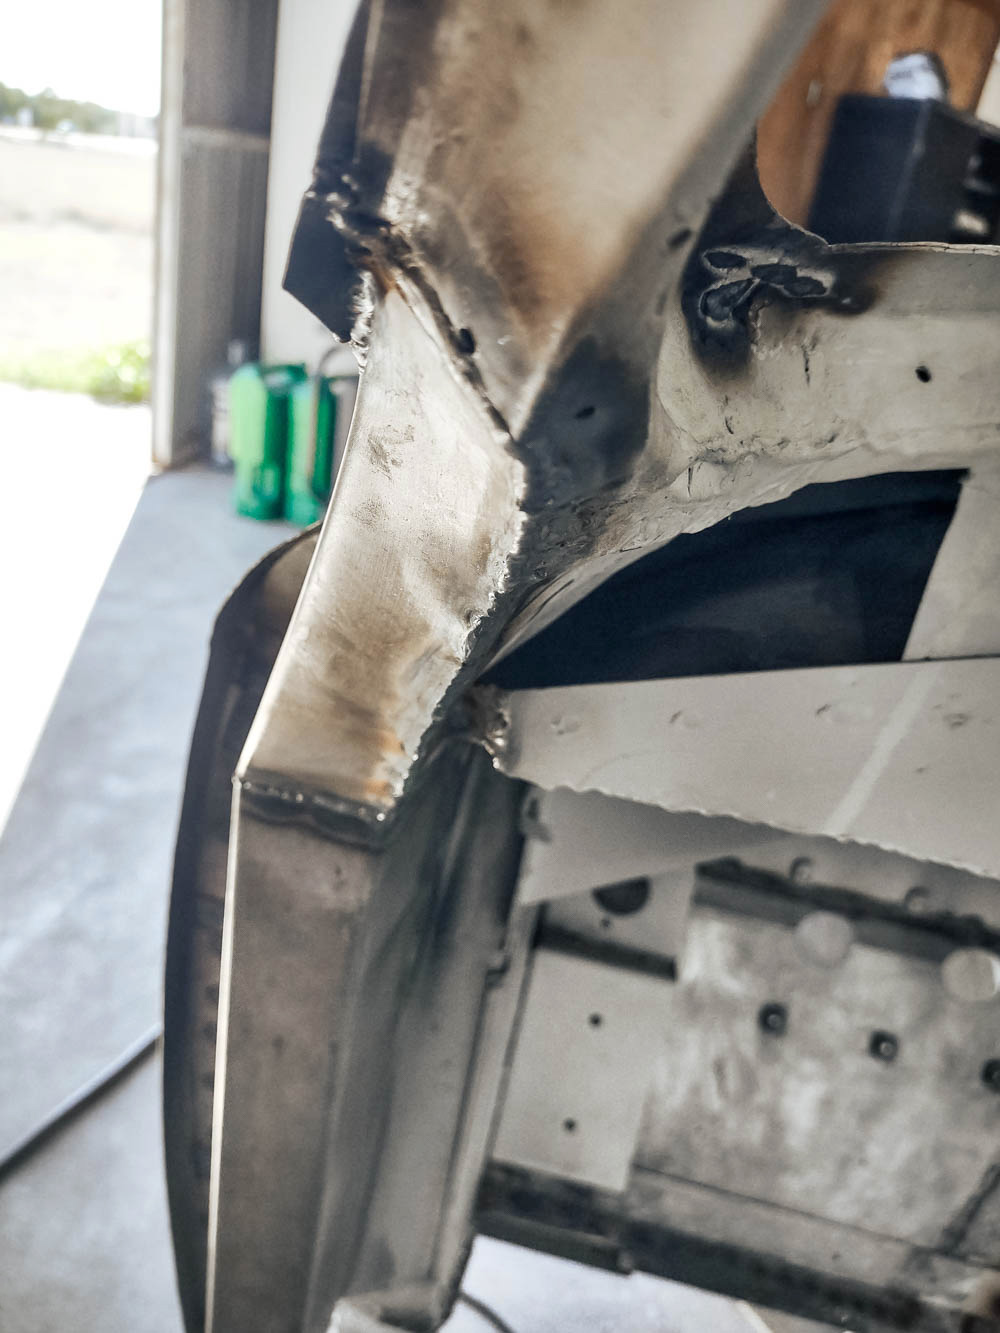
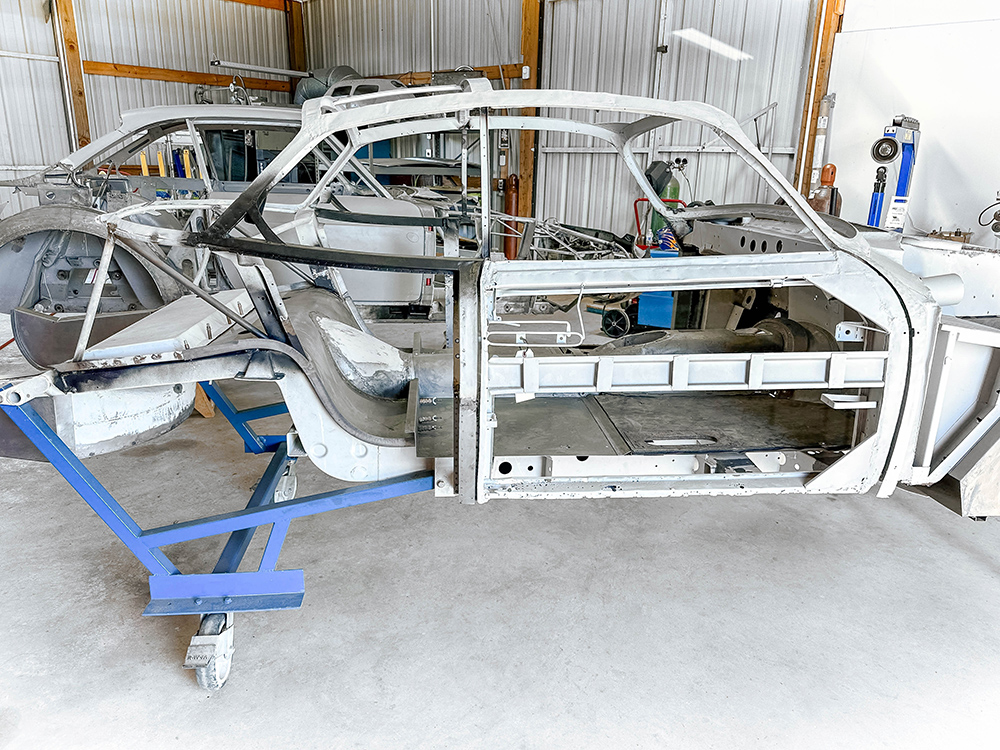
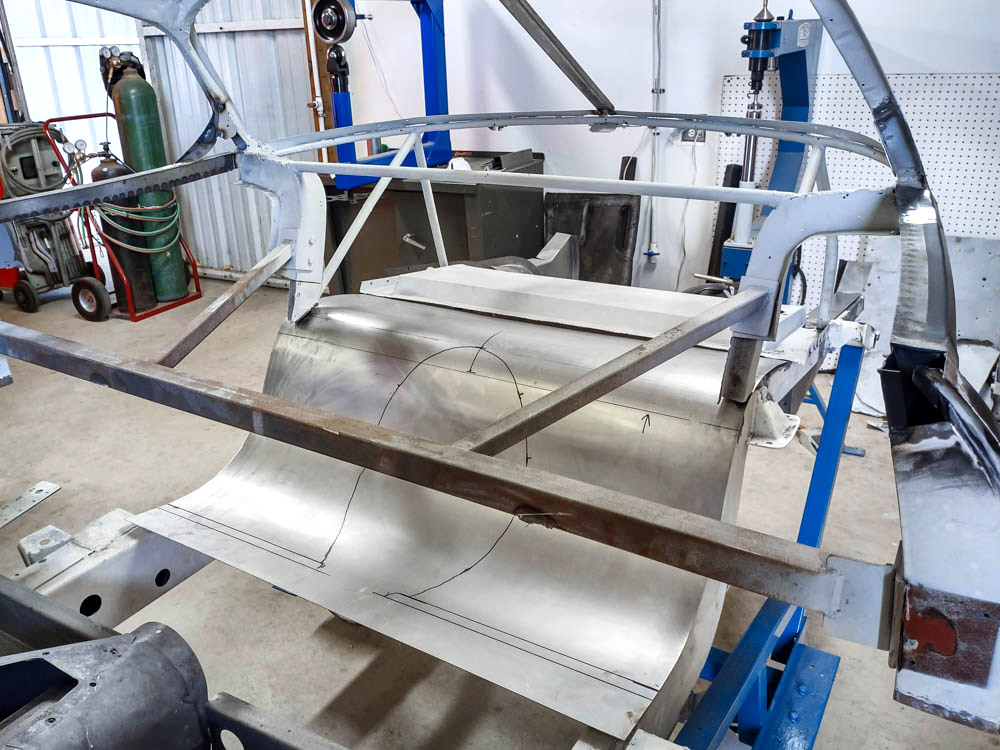
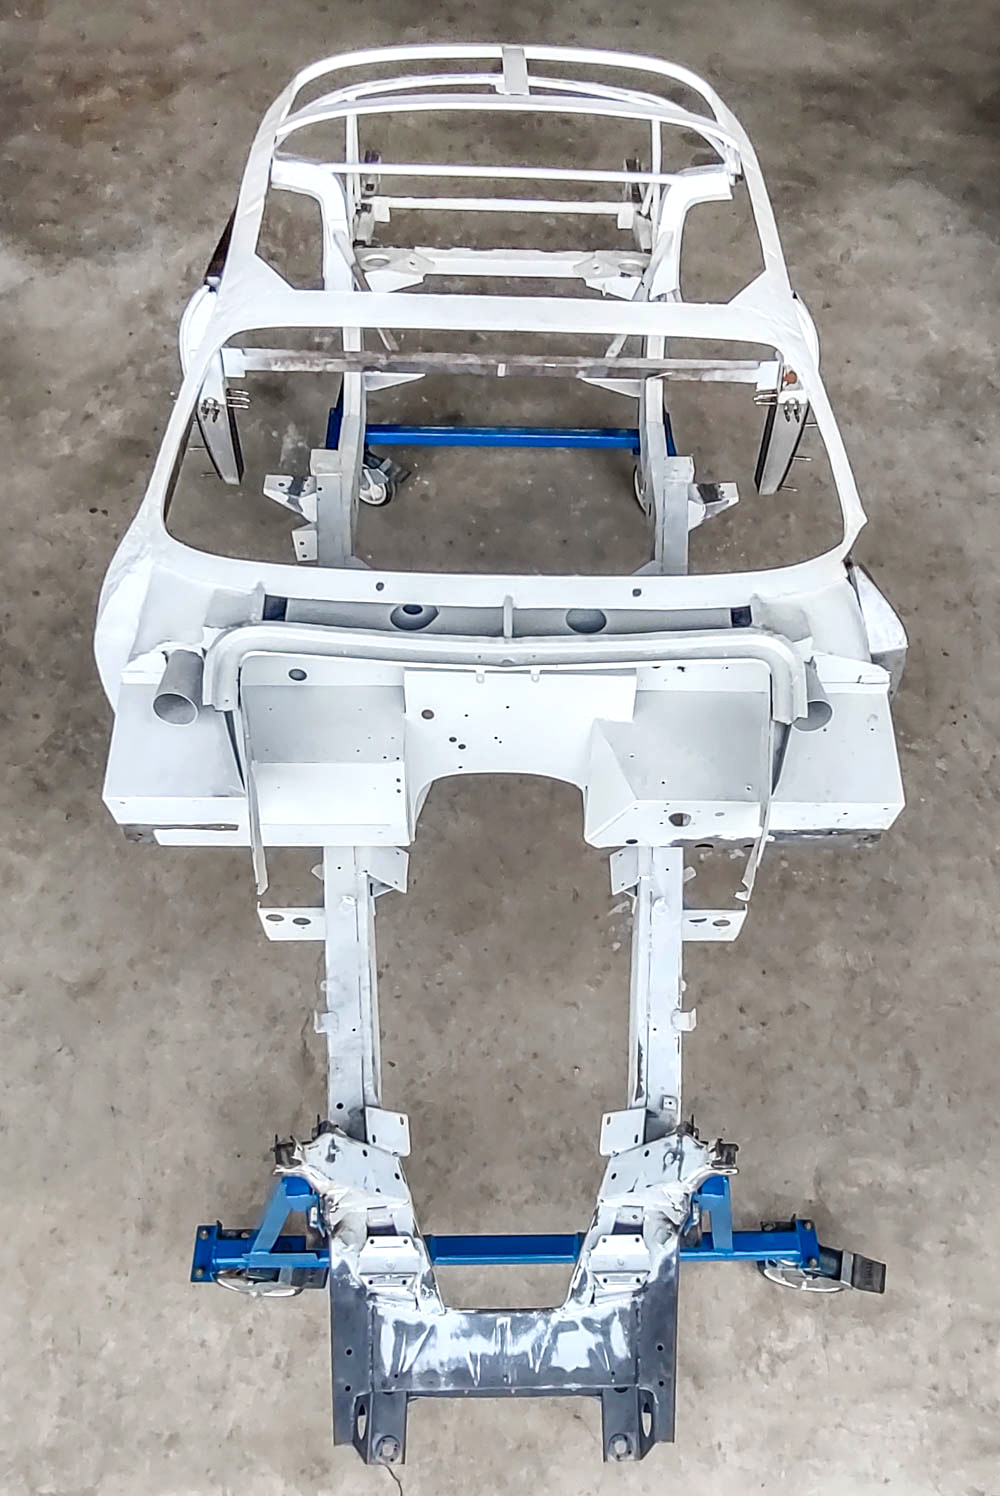
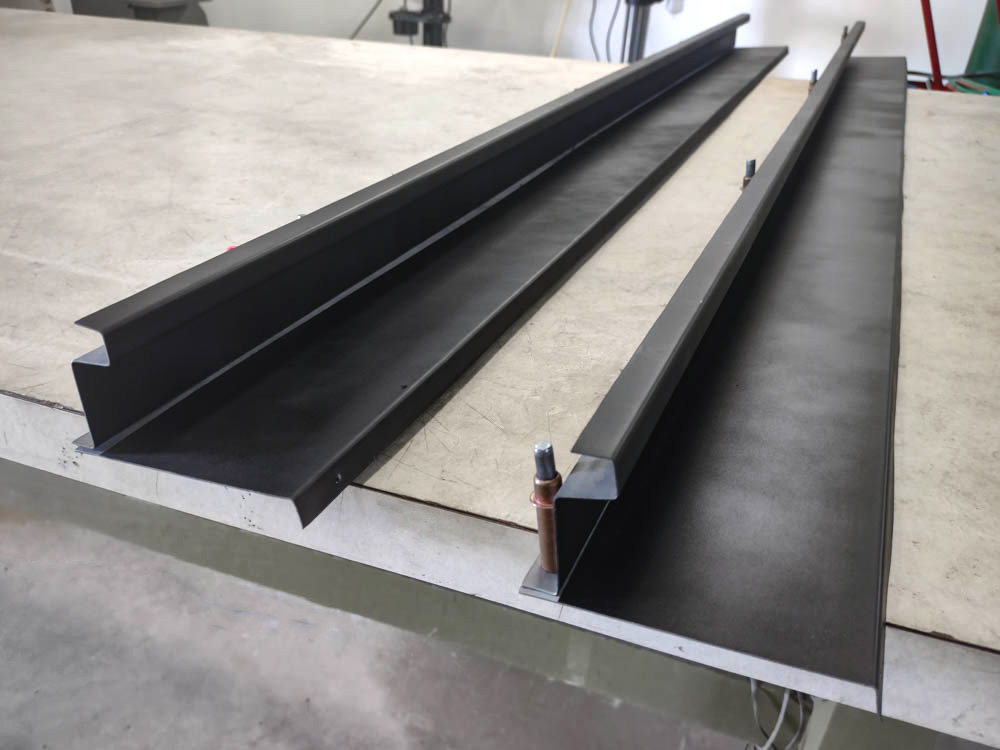
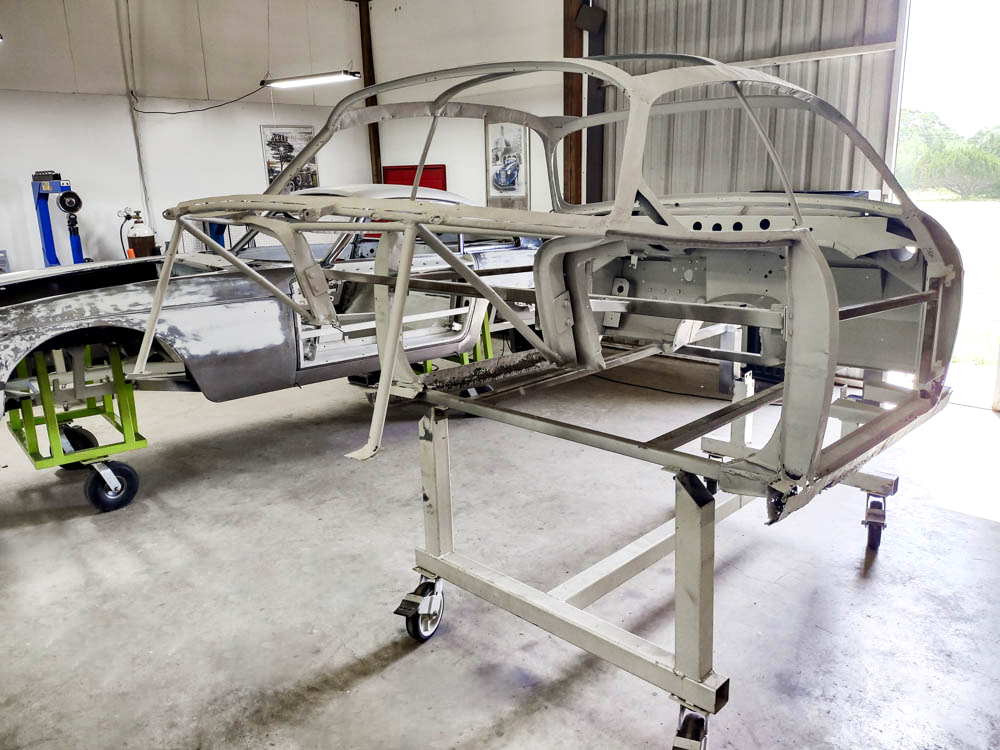
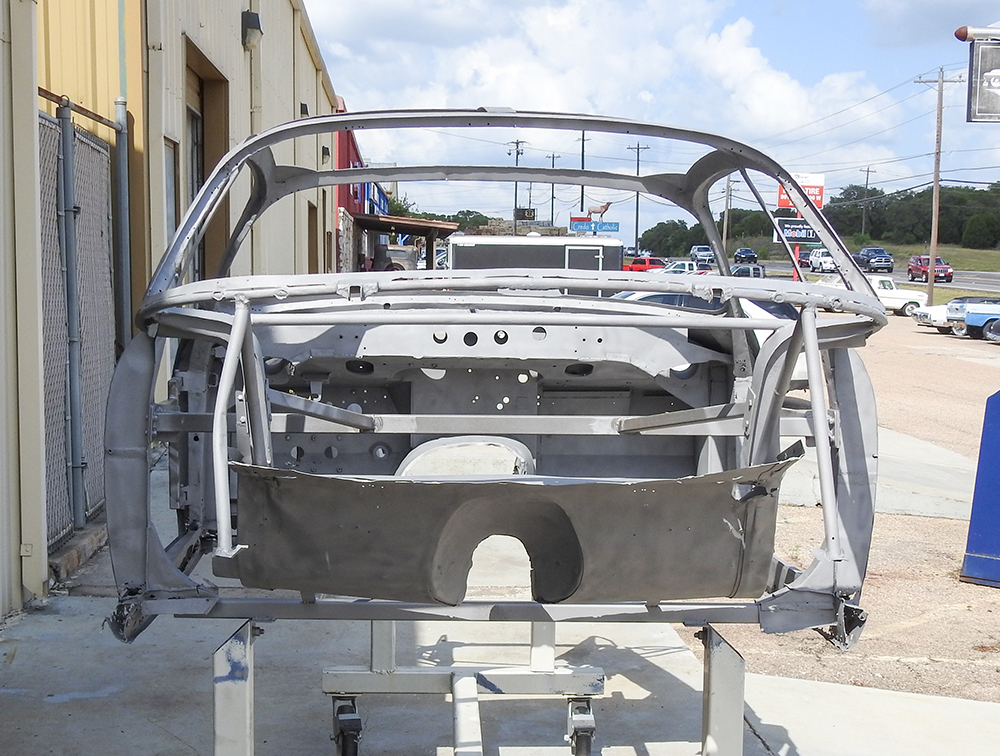
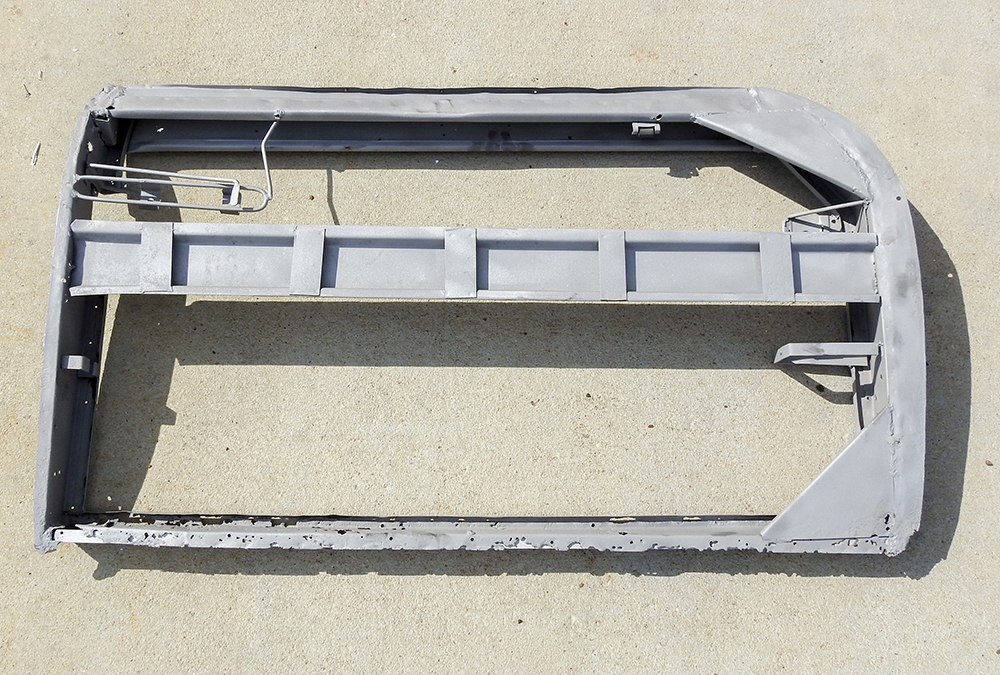
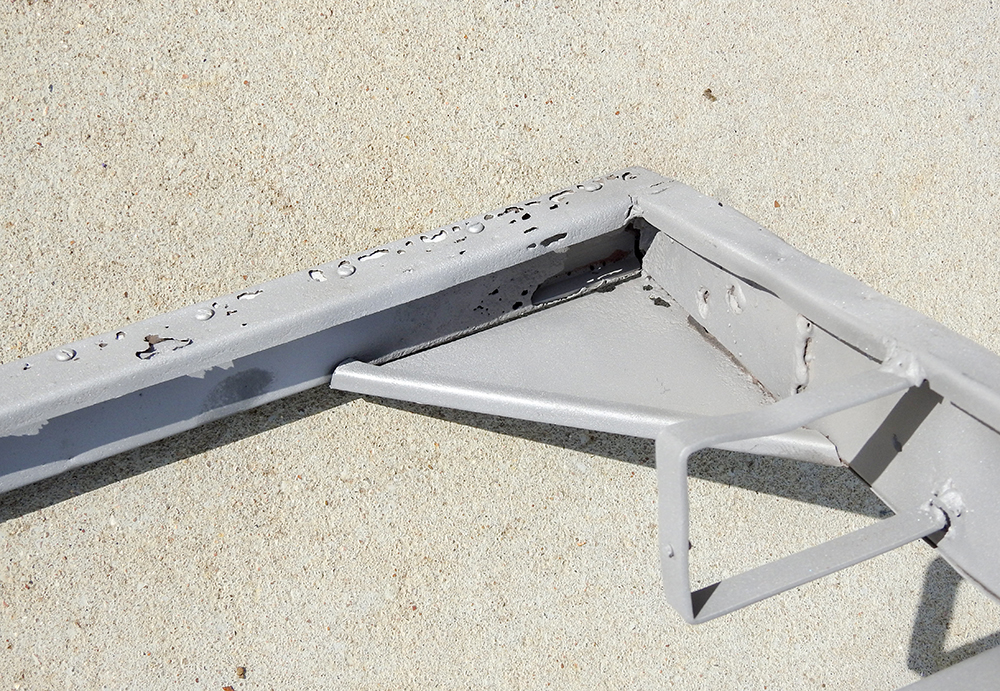
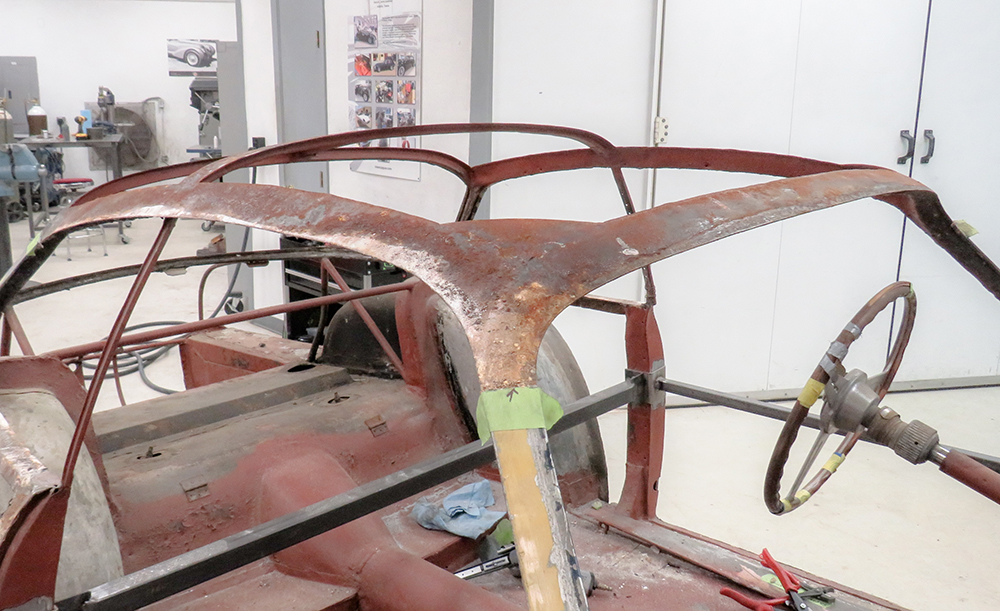
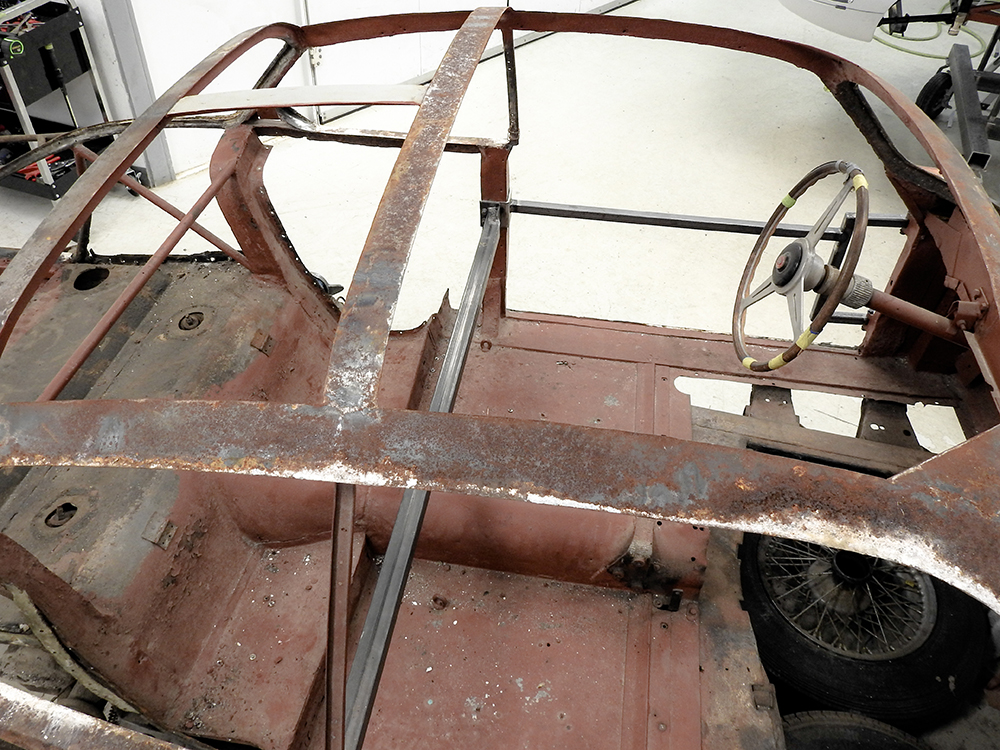
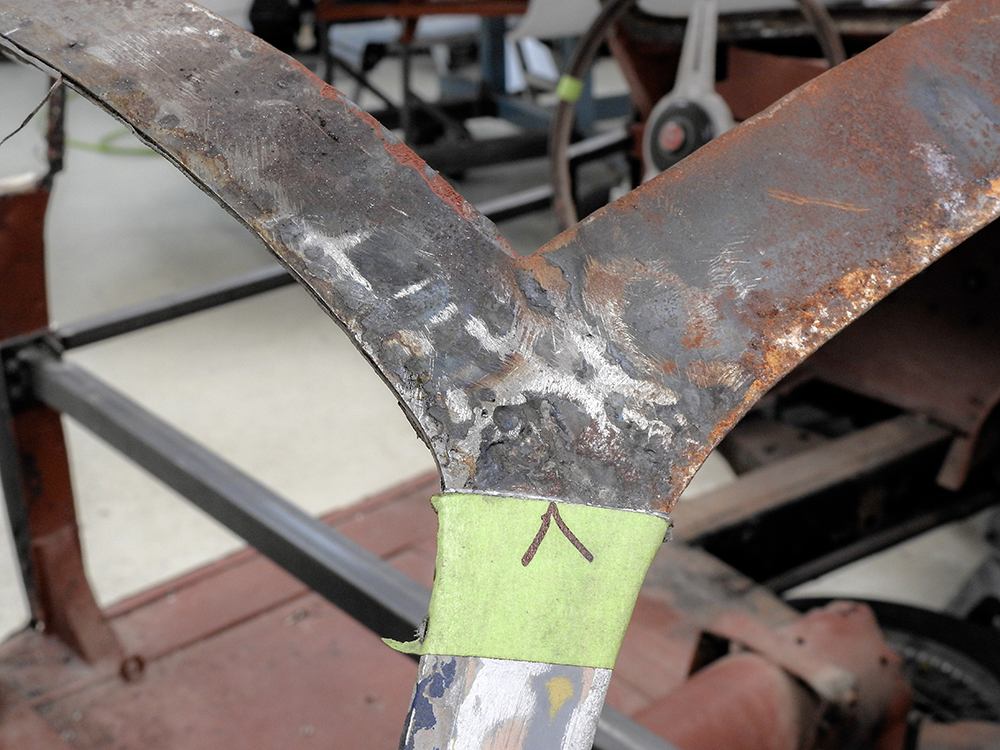
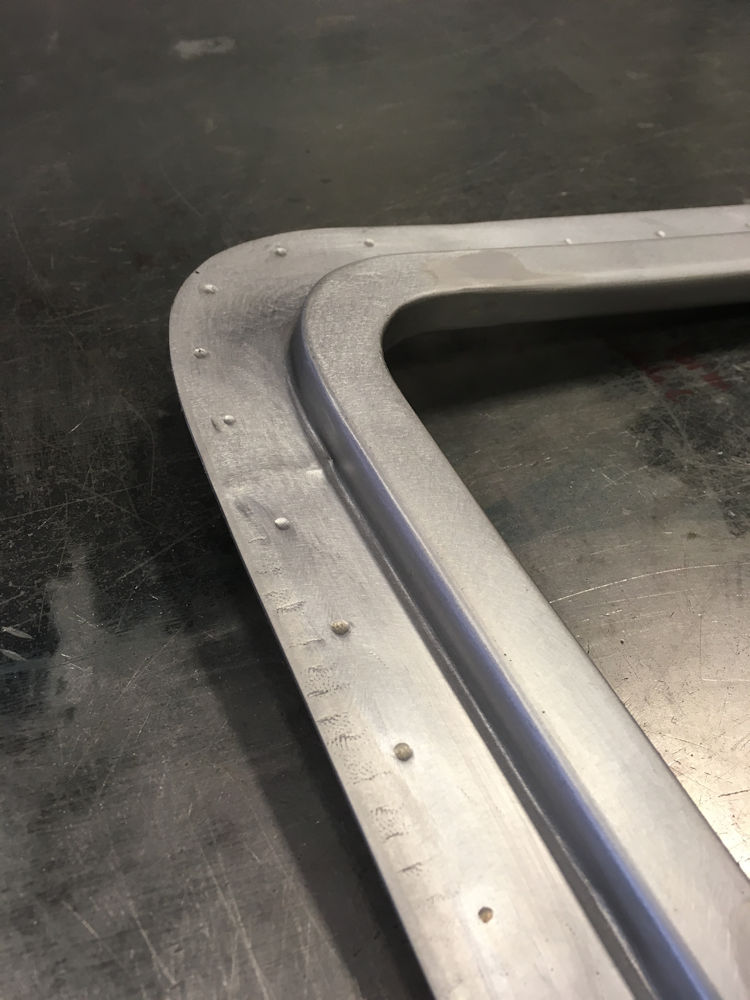
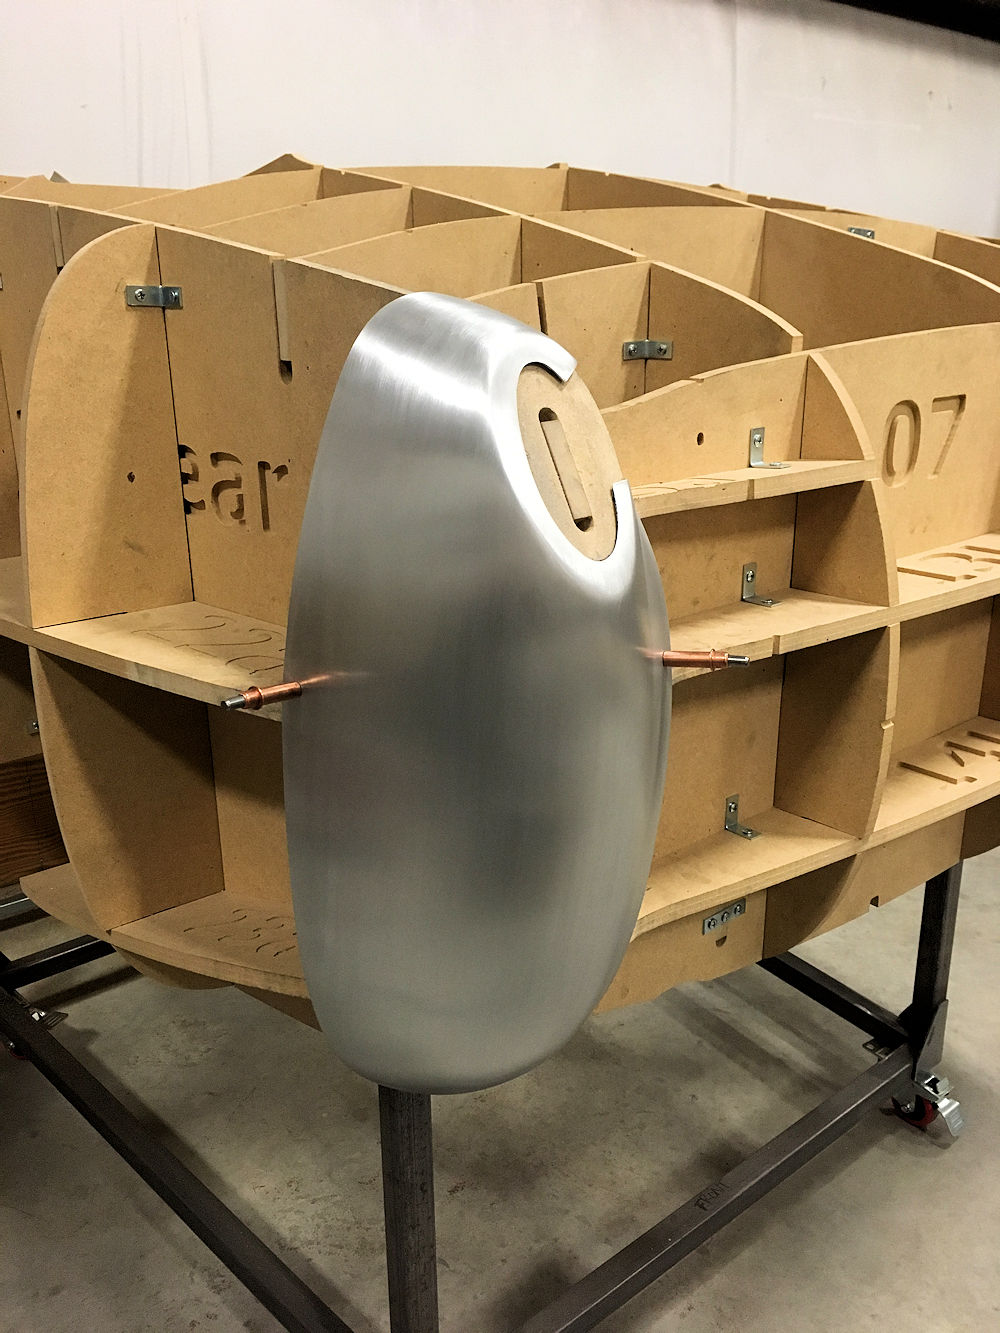
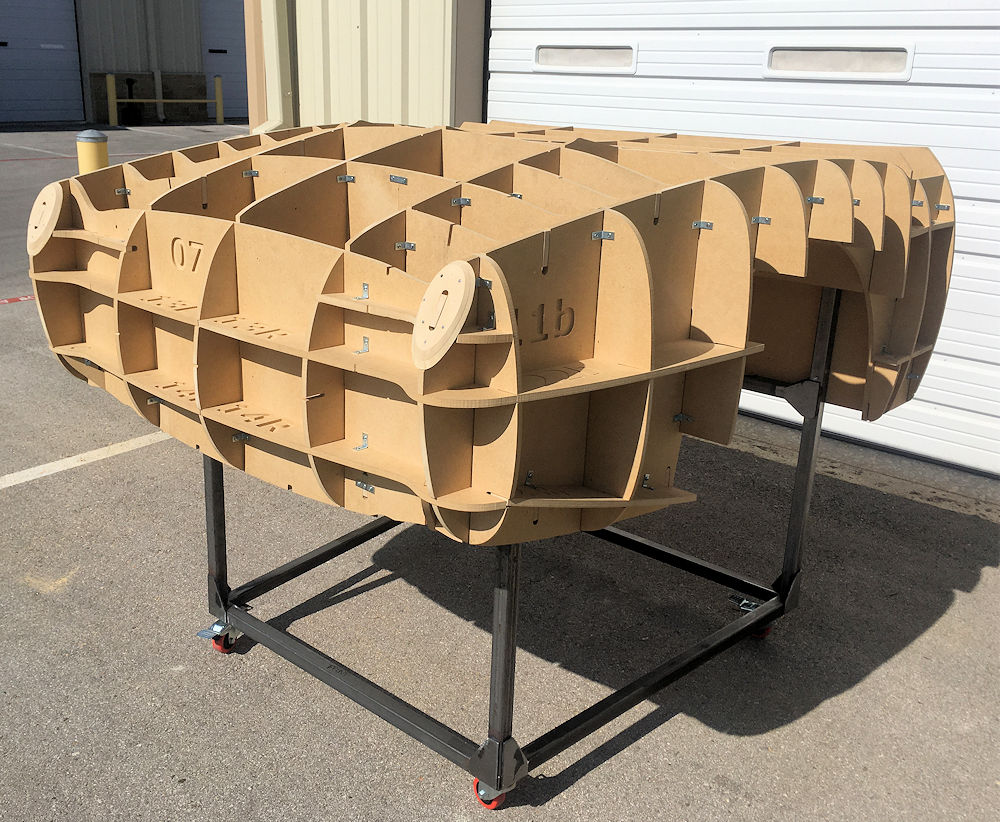
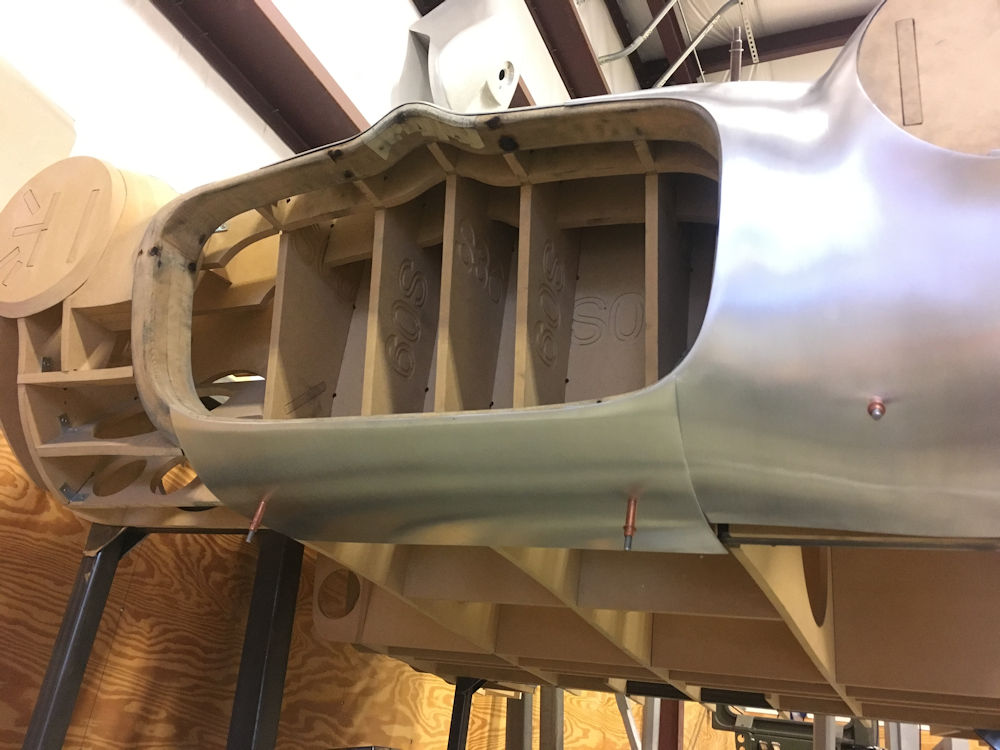
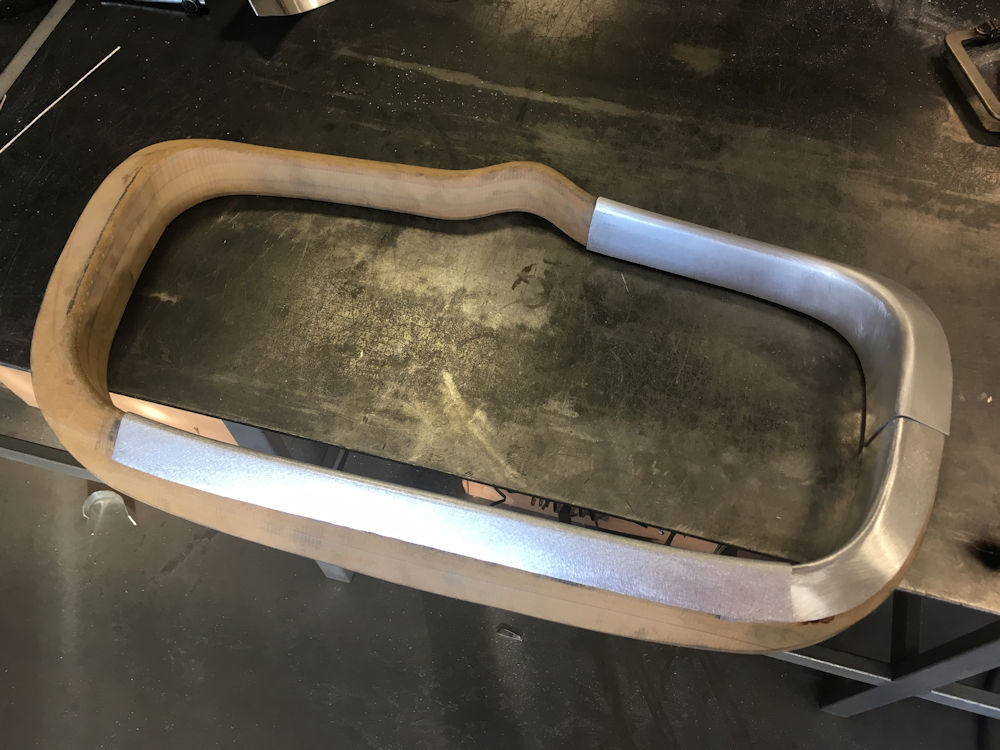
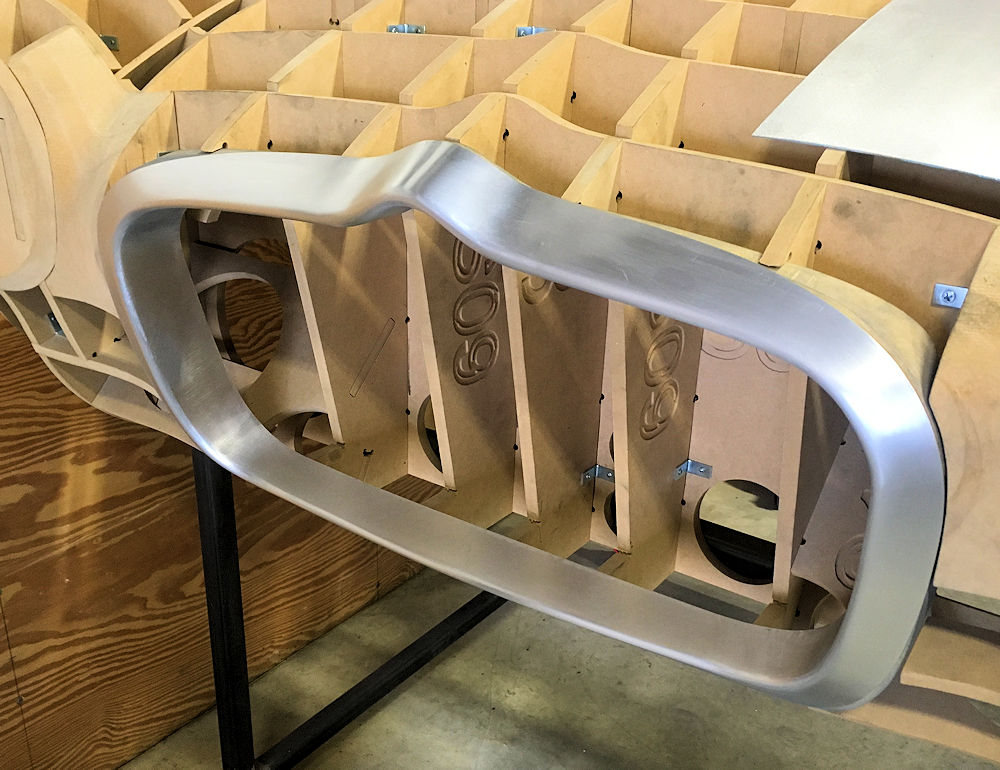
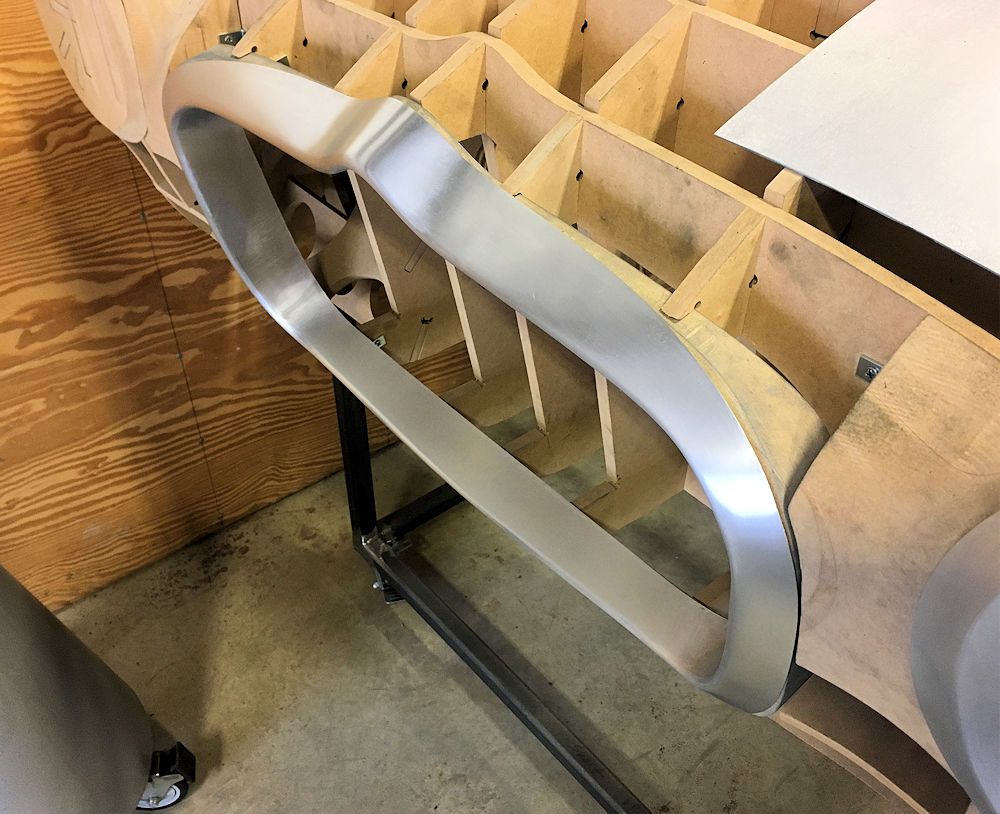
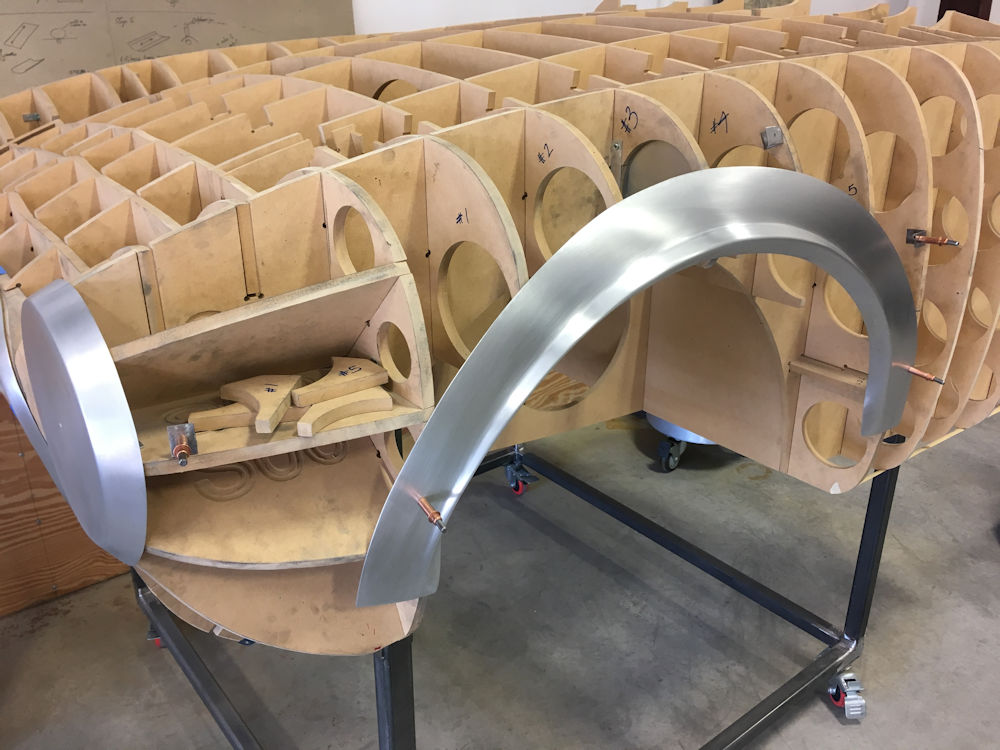
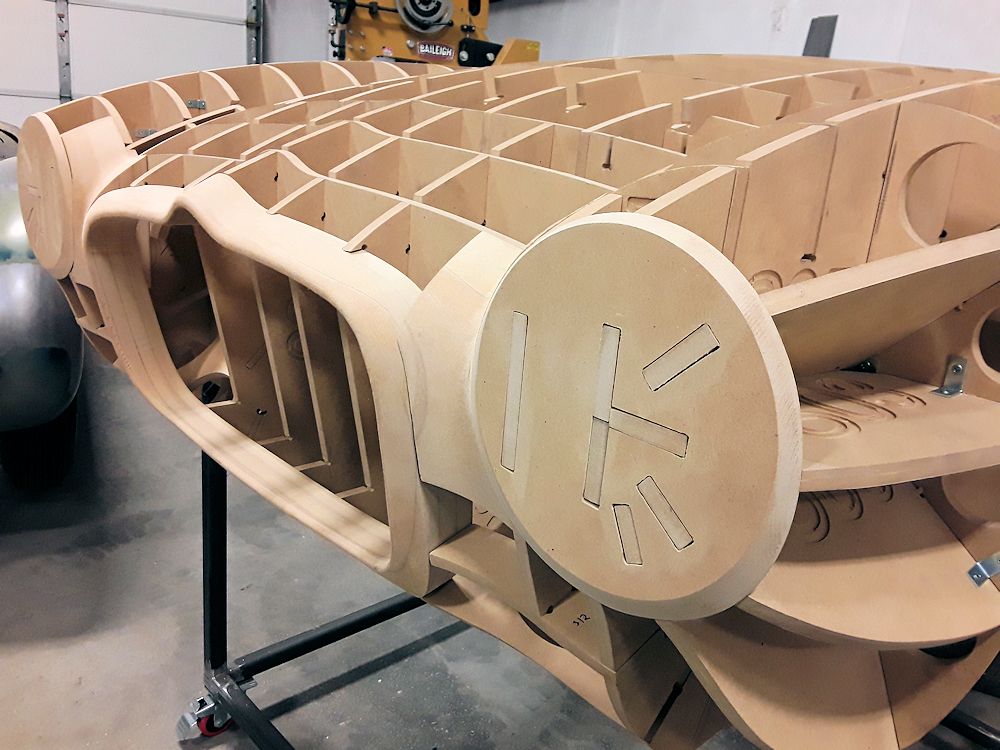
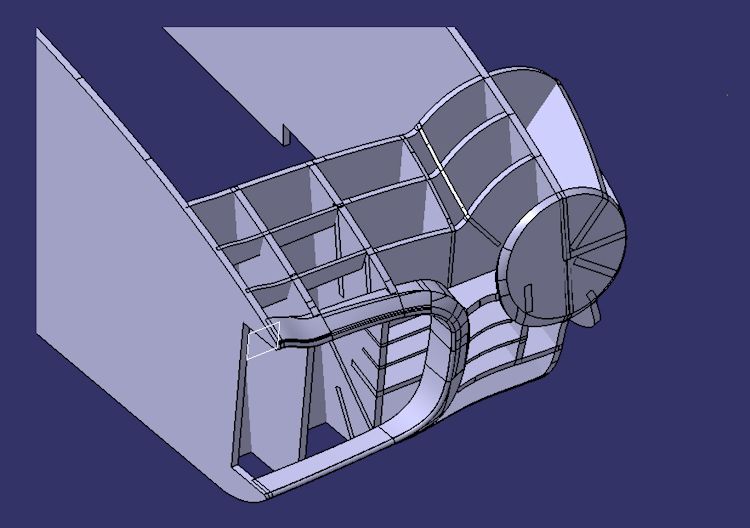
Front superleggera tubing structure
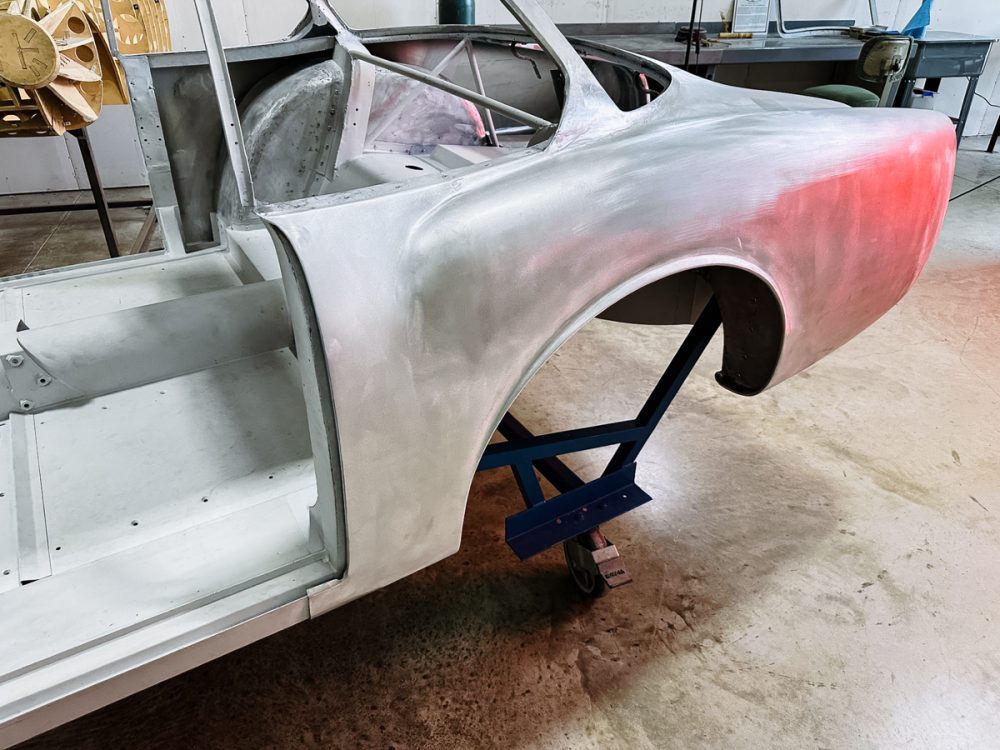
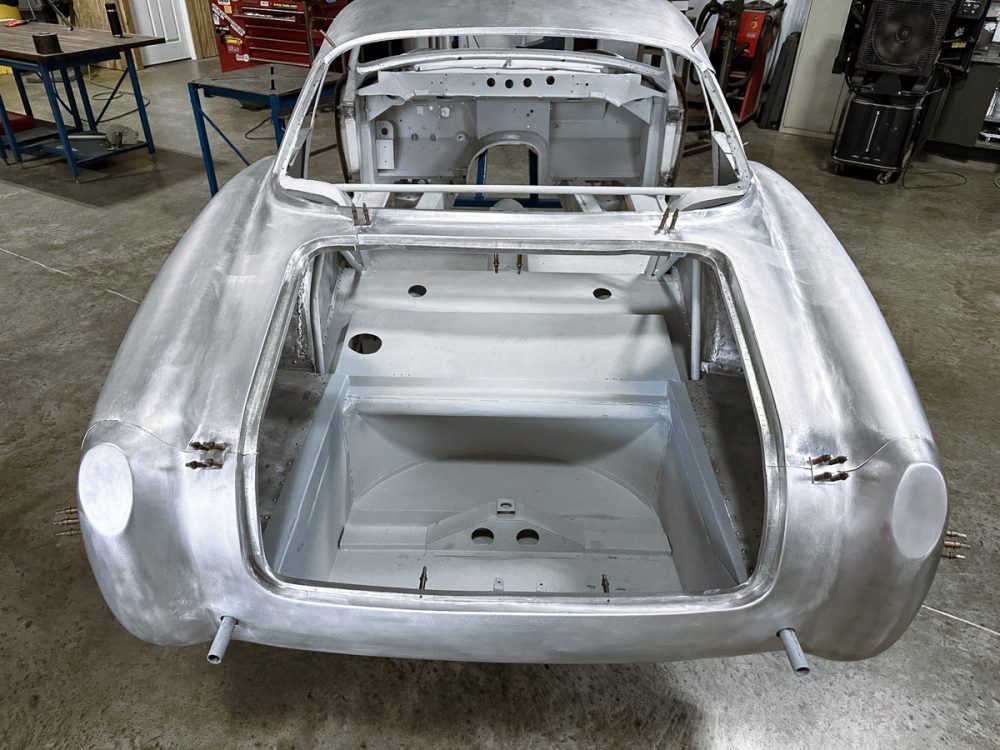
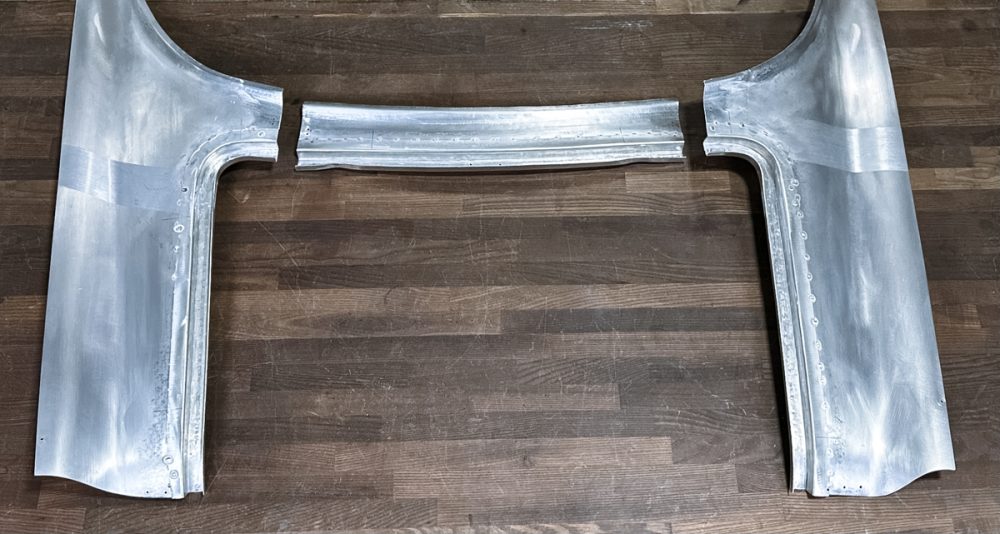
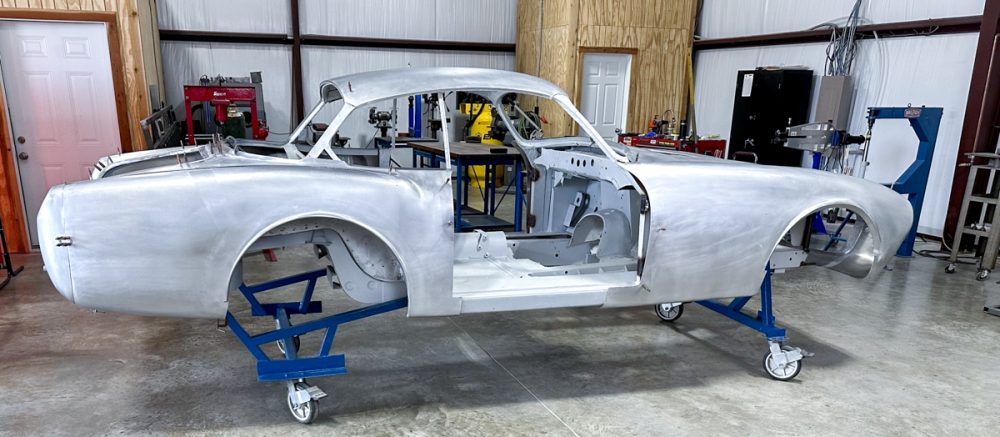
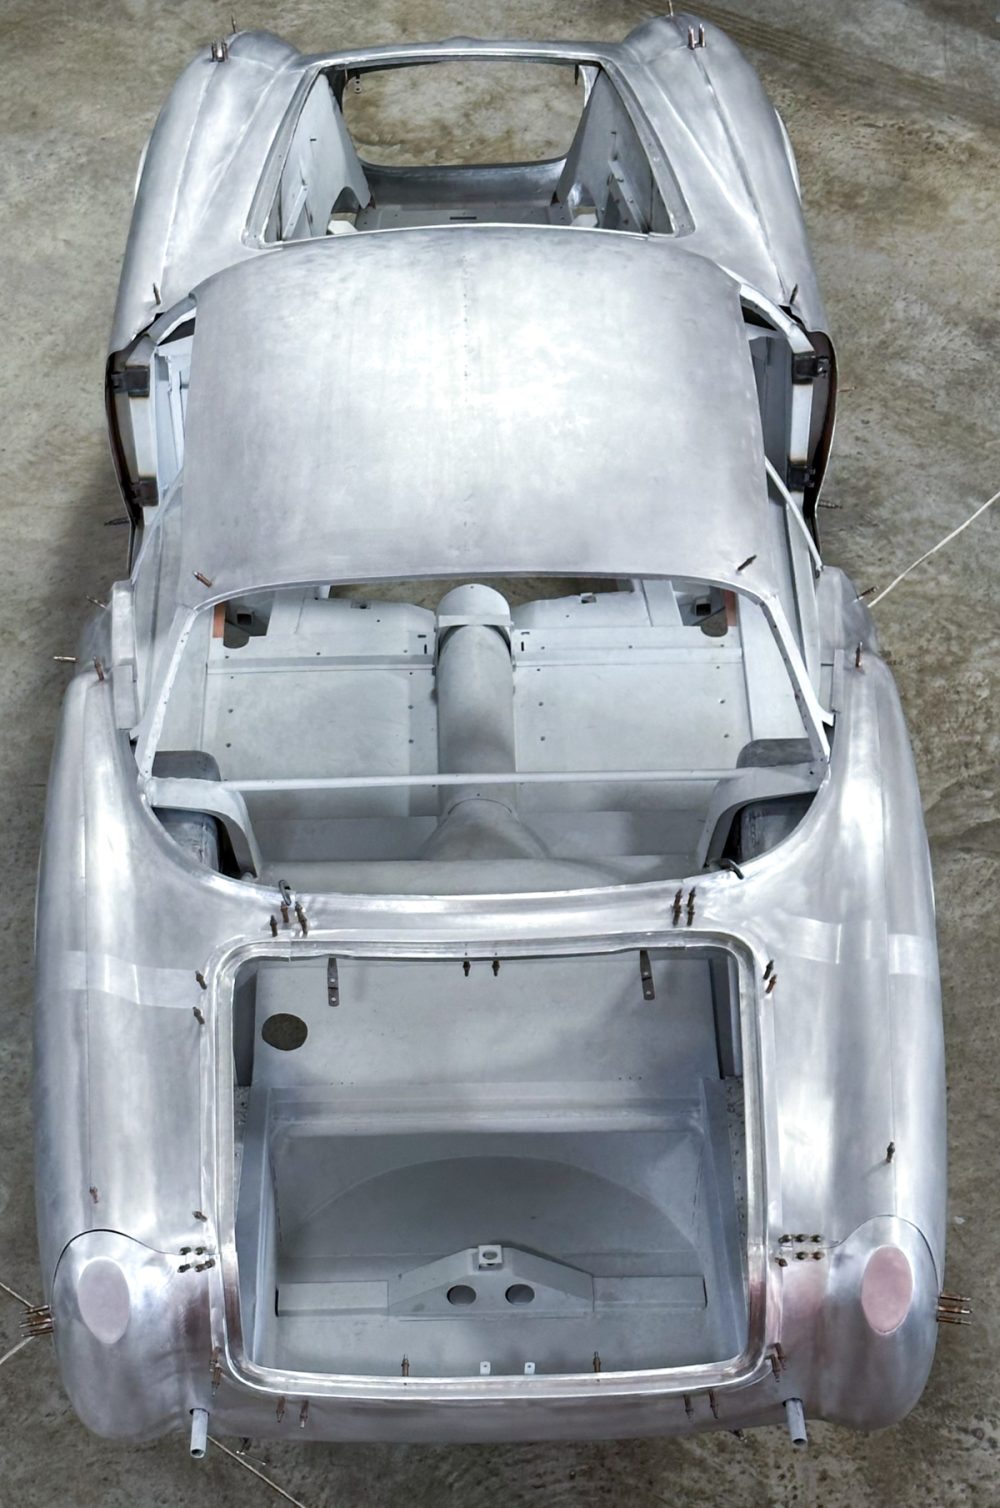
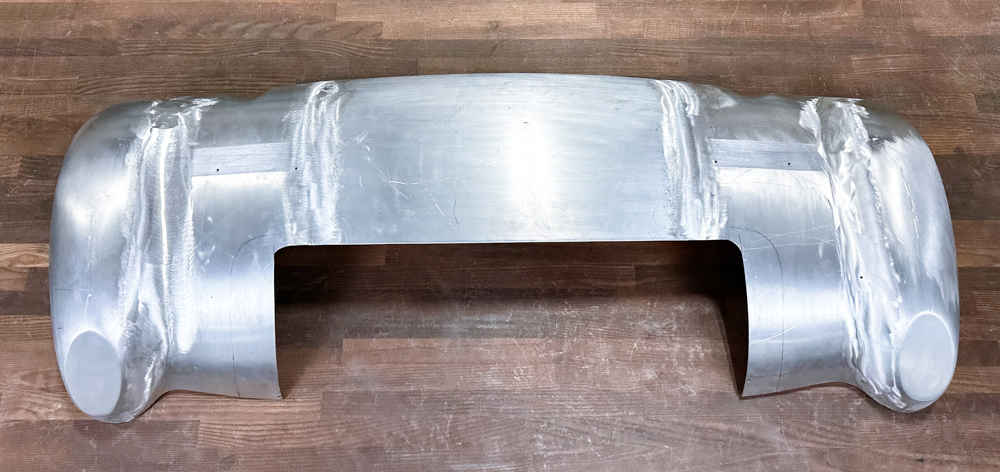
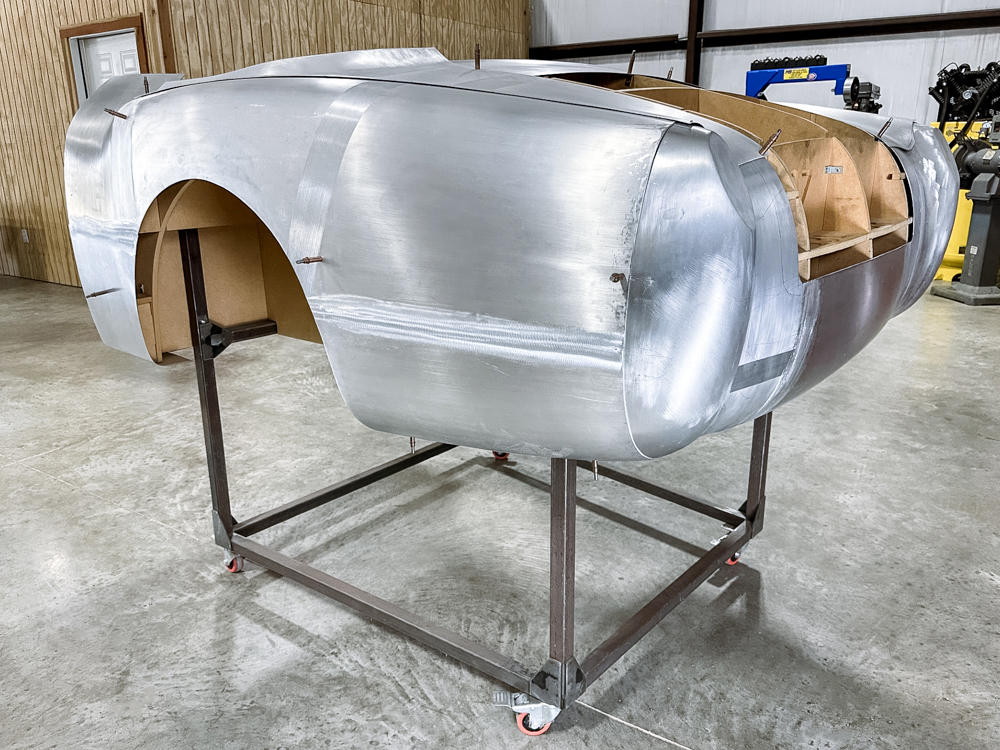
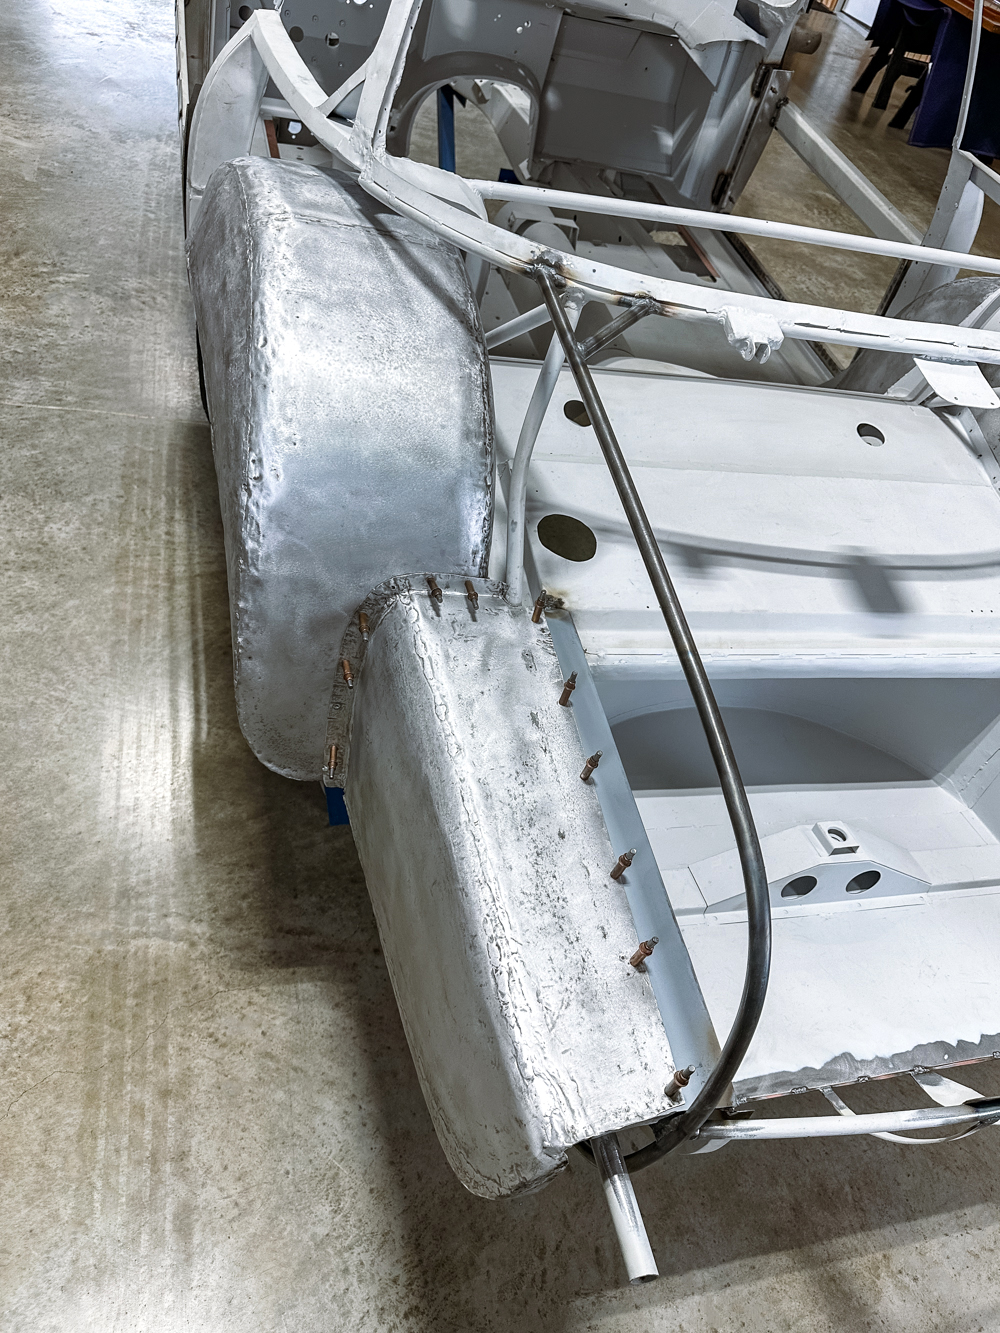
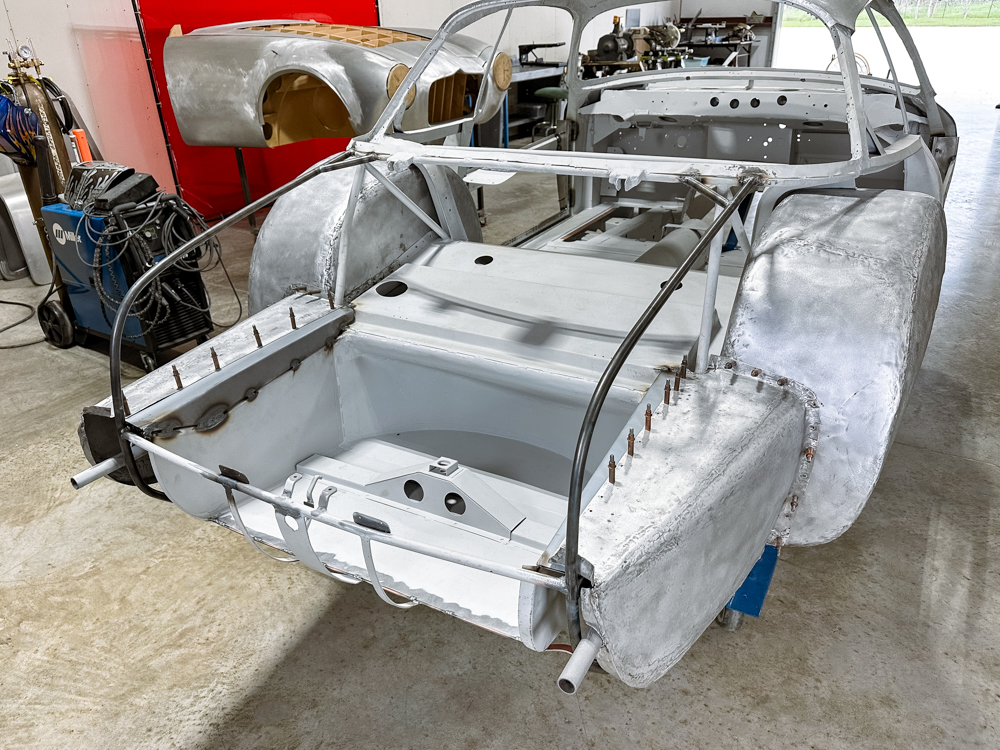
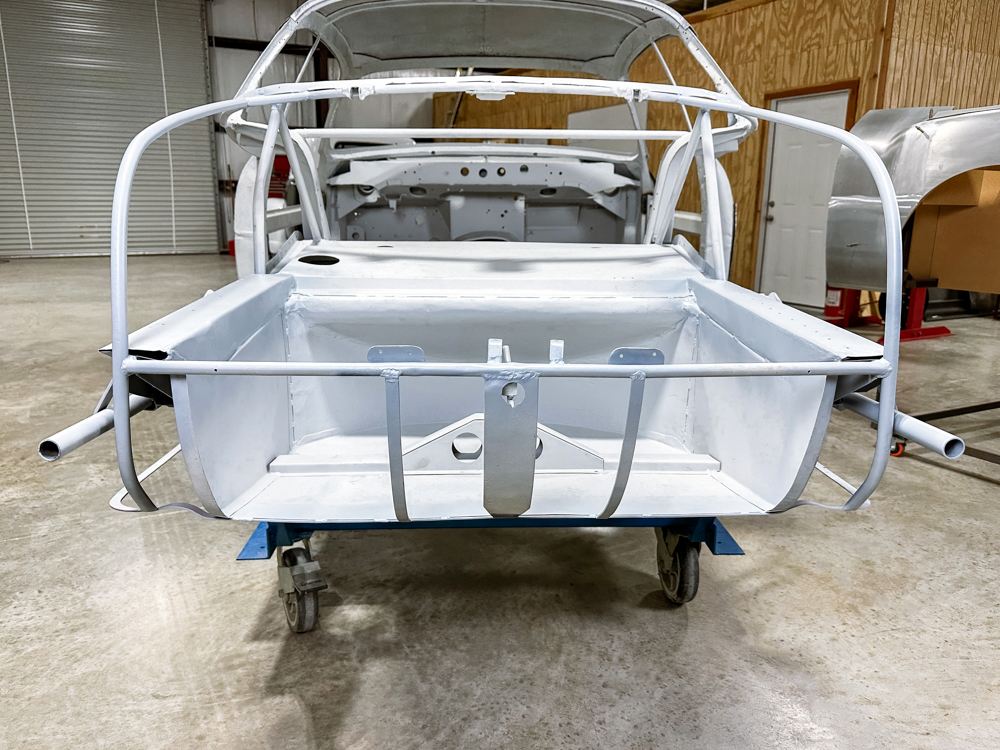
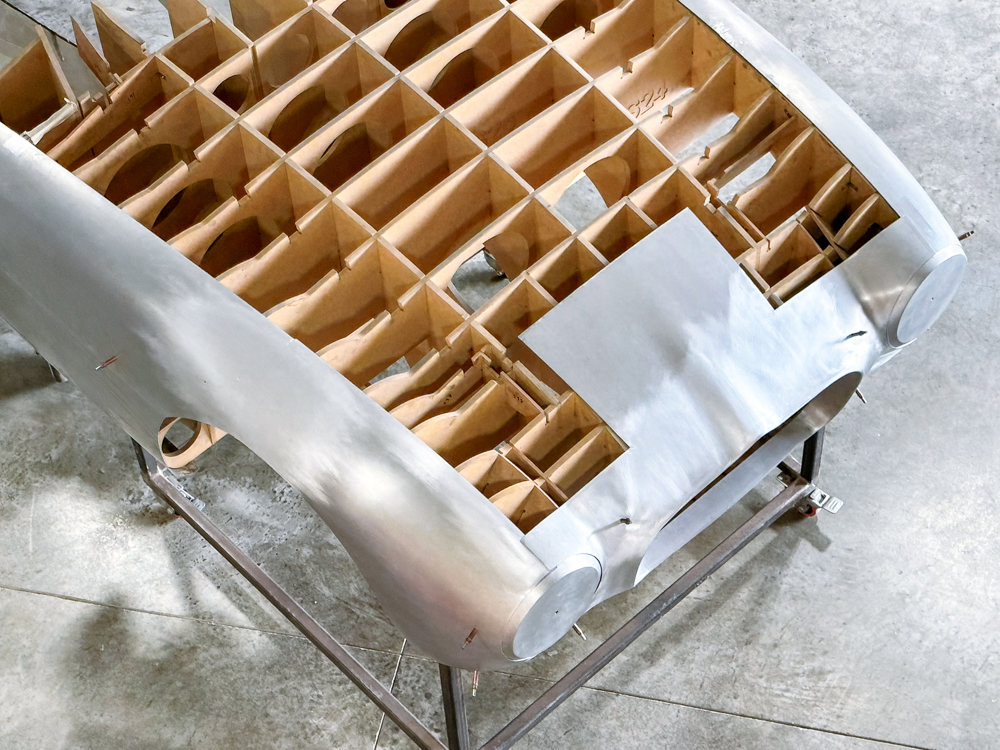
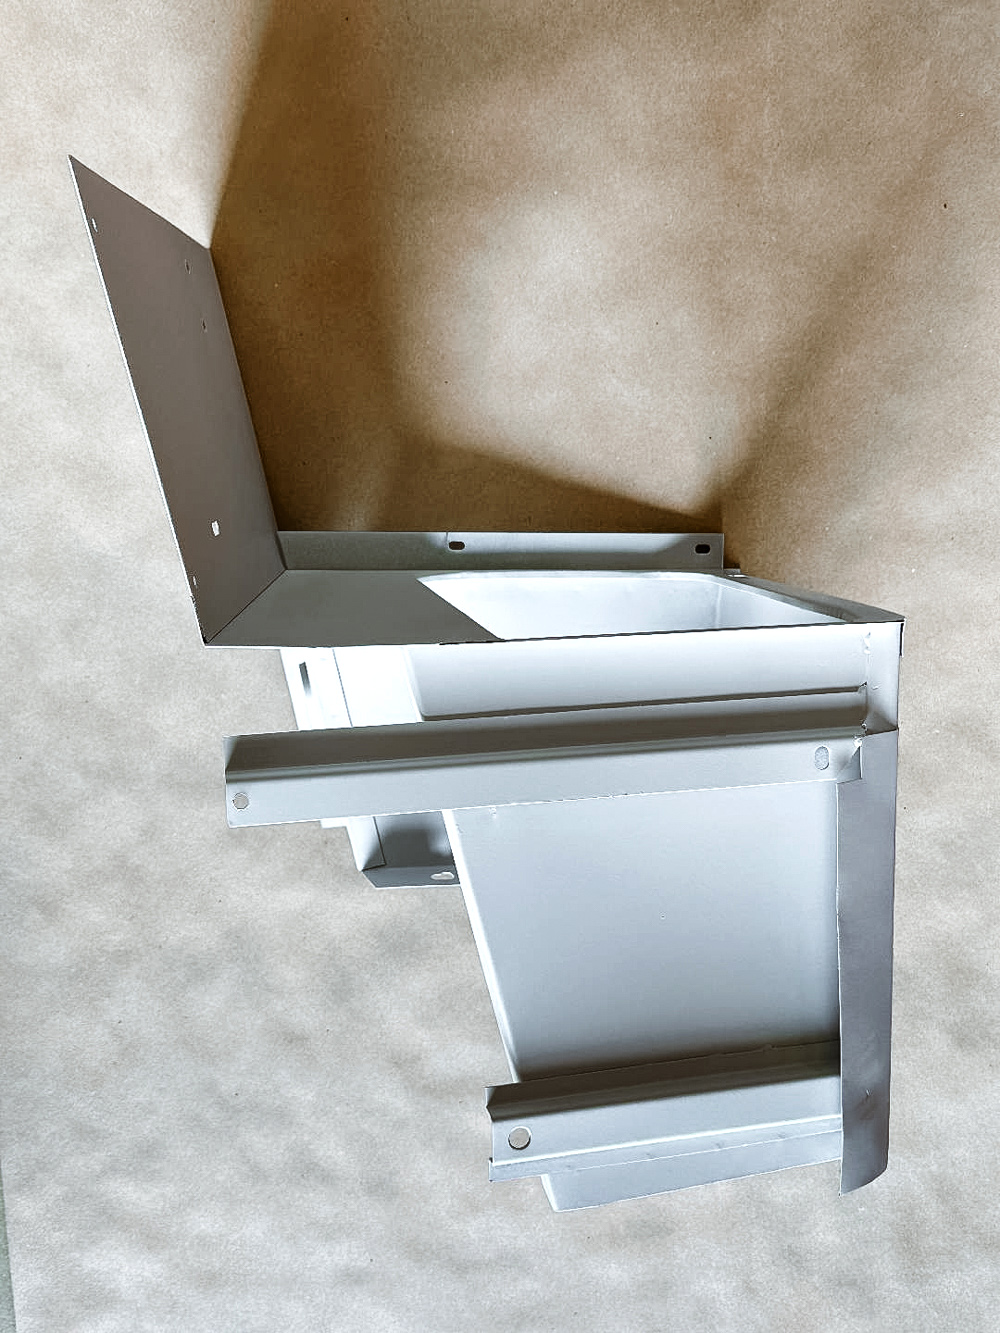
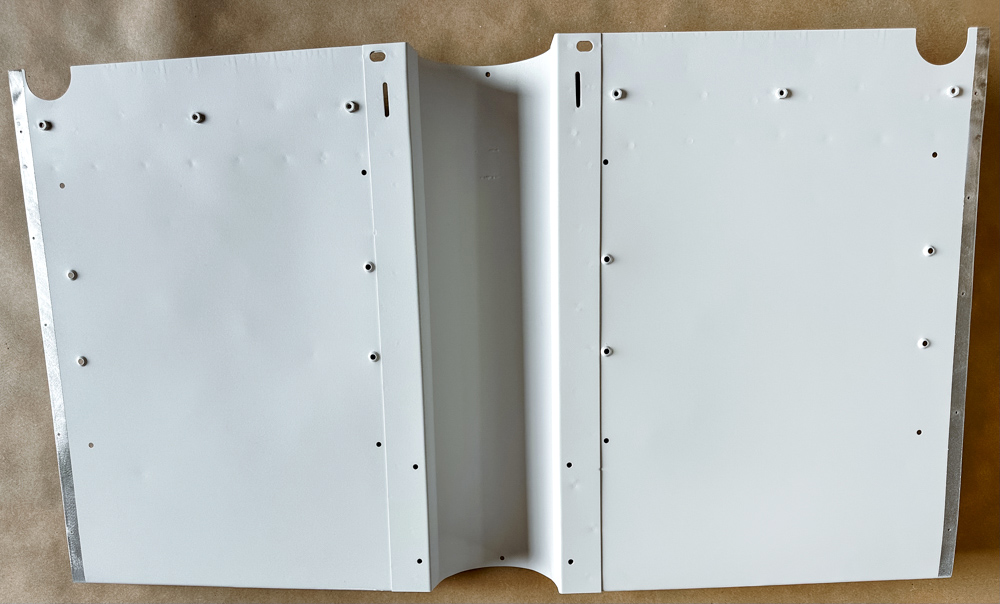
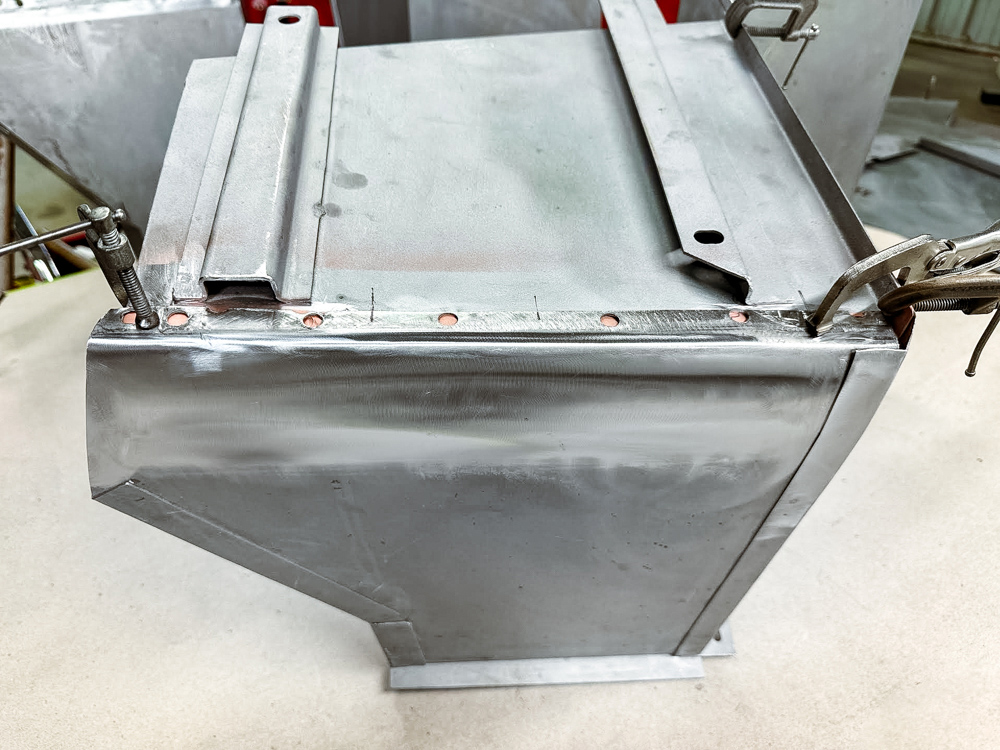
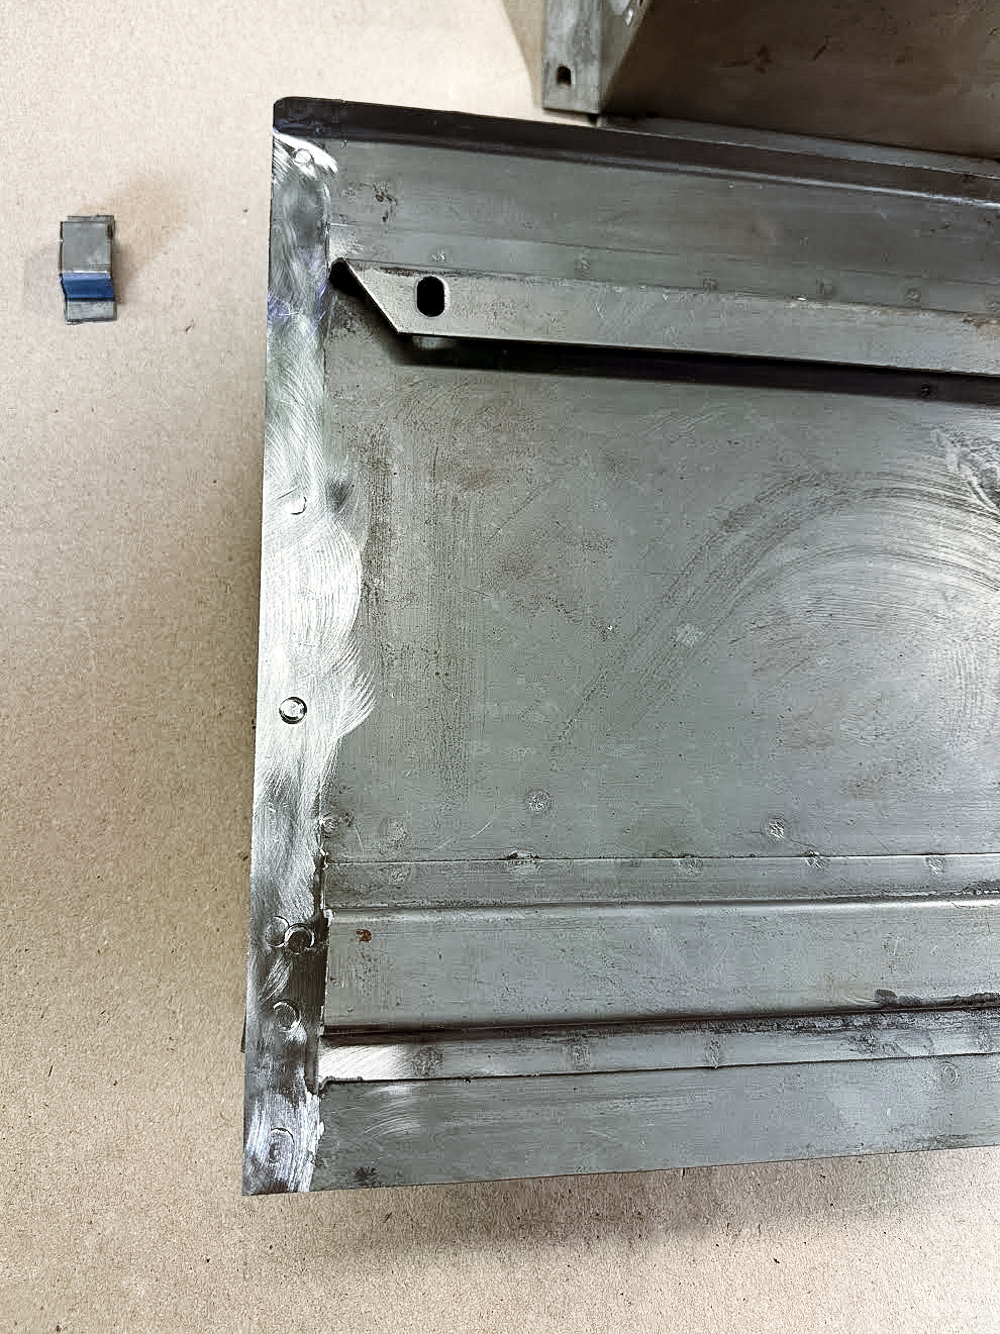
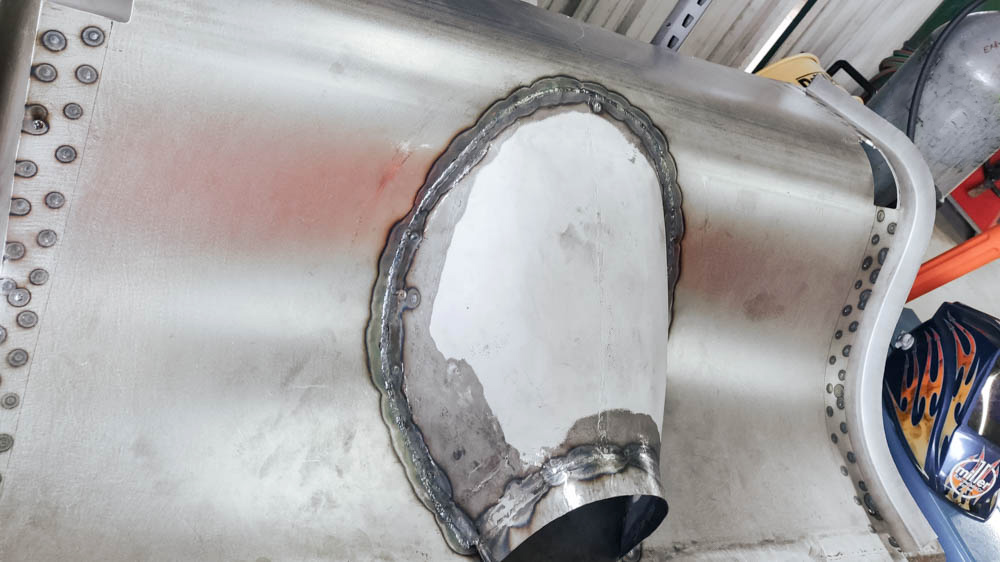
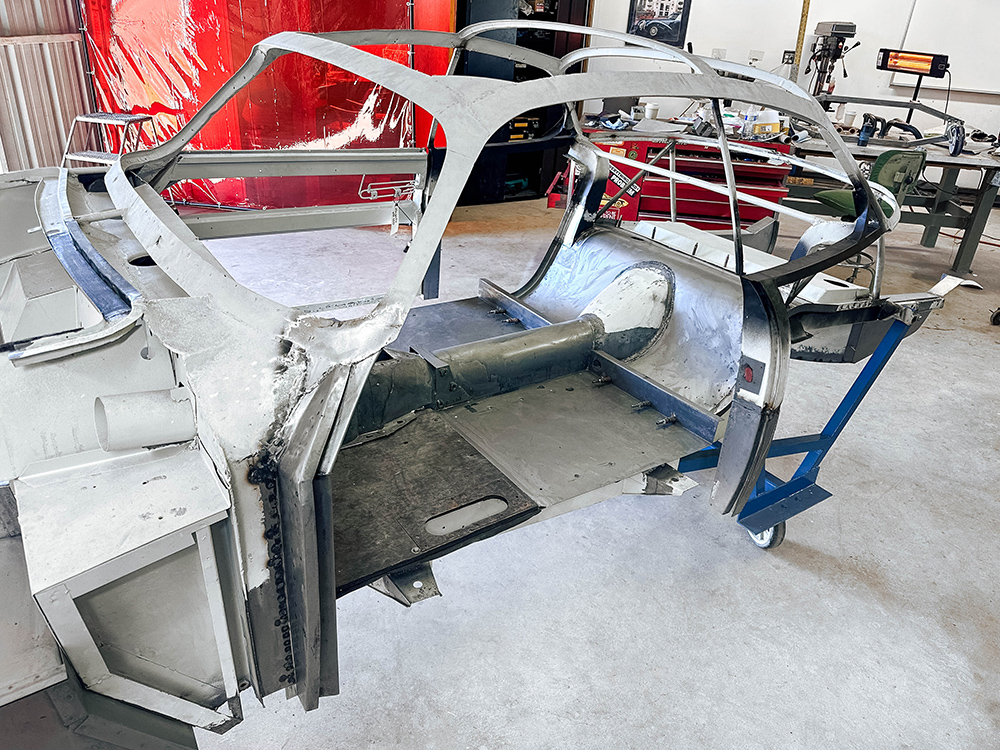
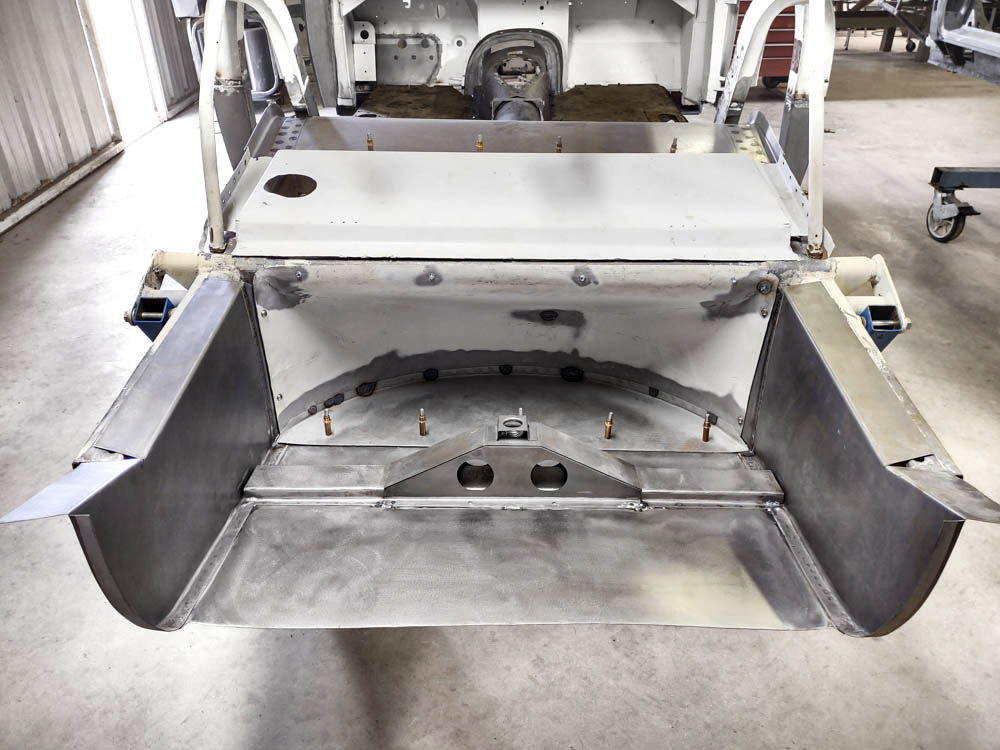
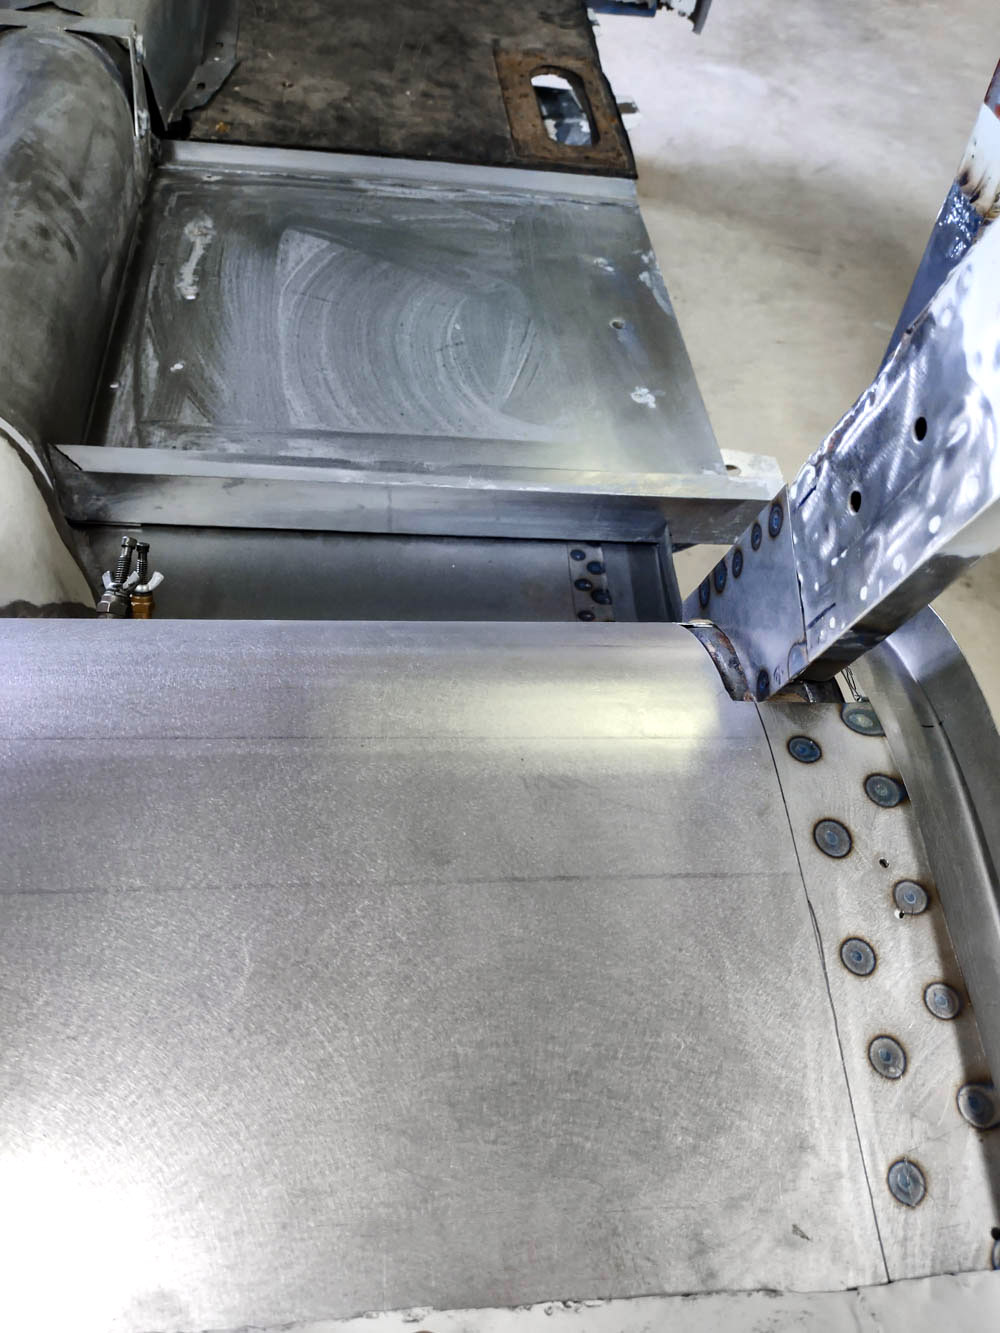
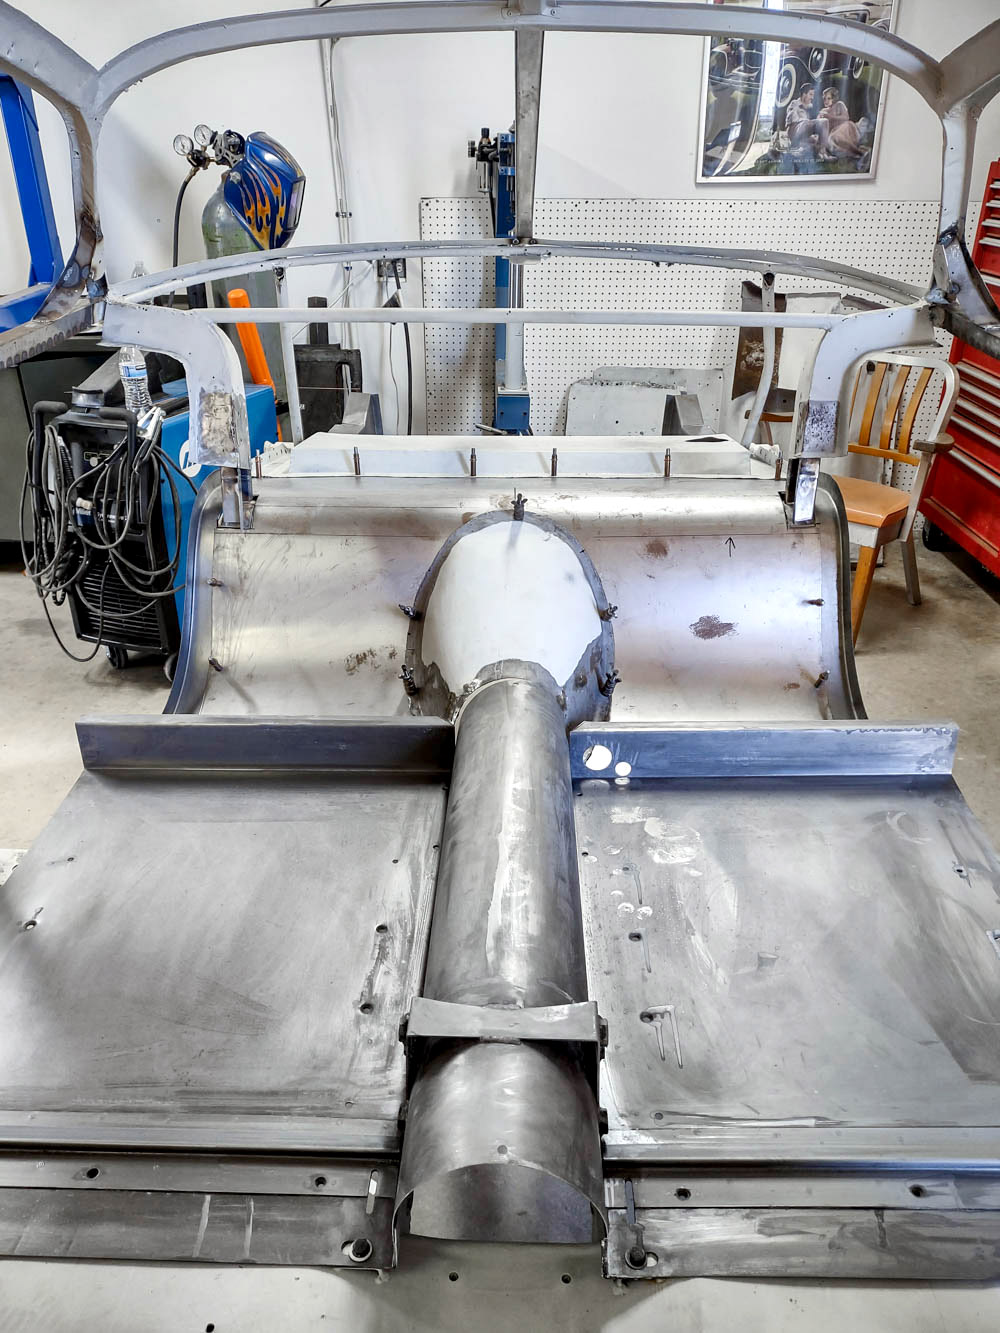
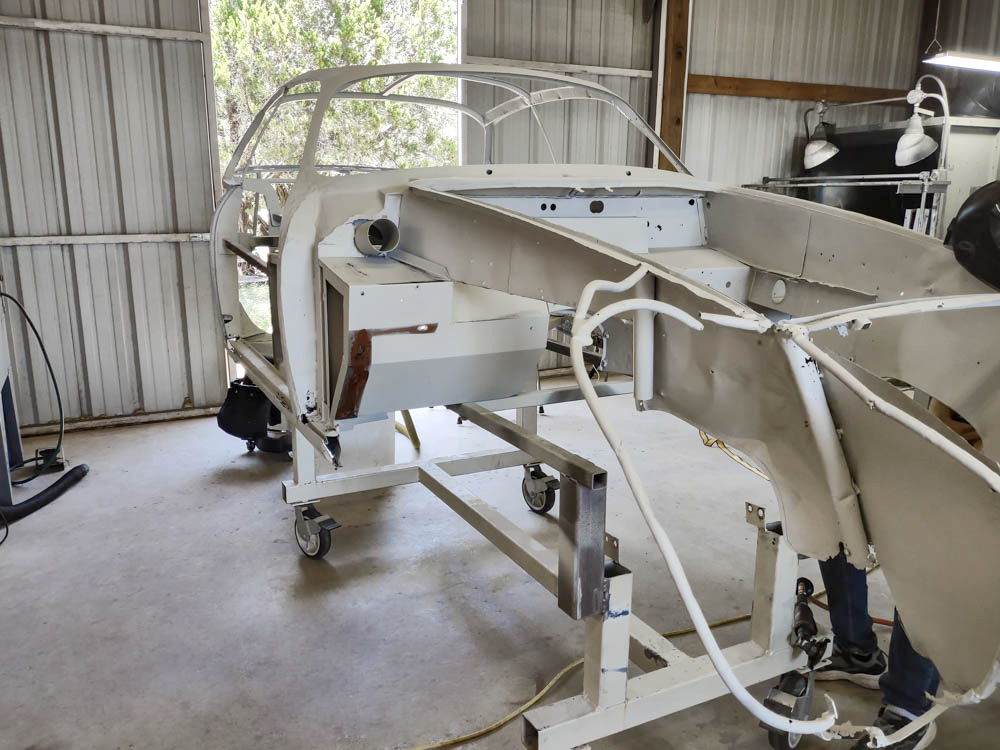
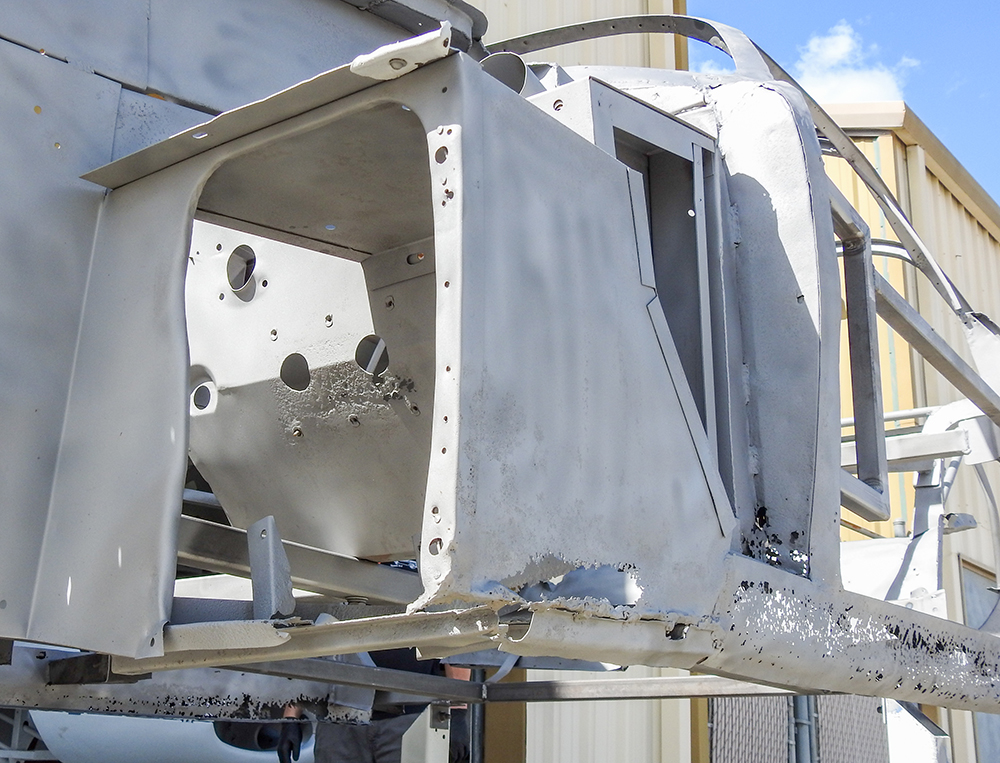
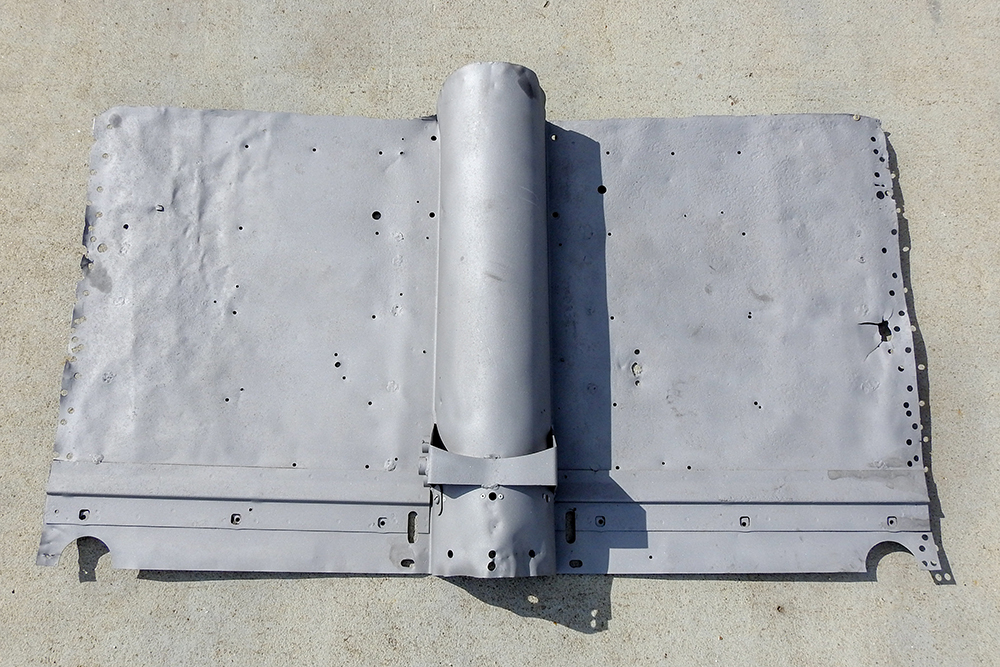
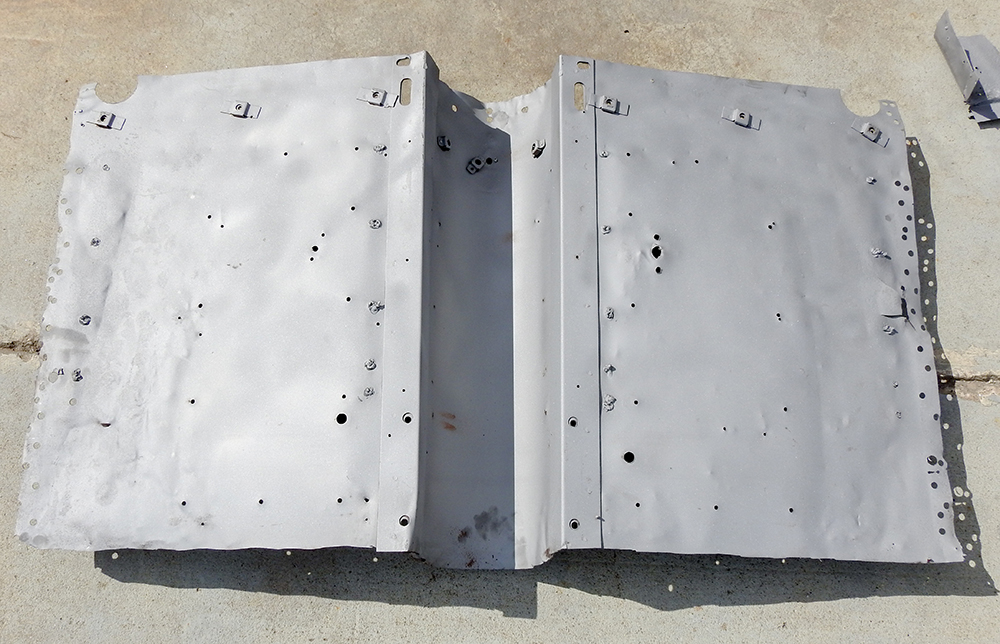
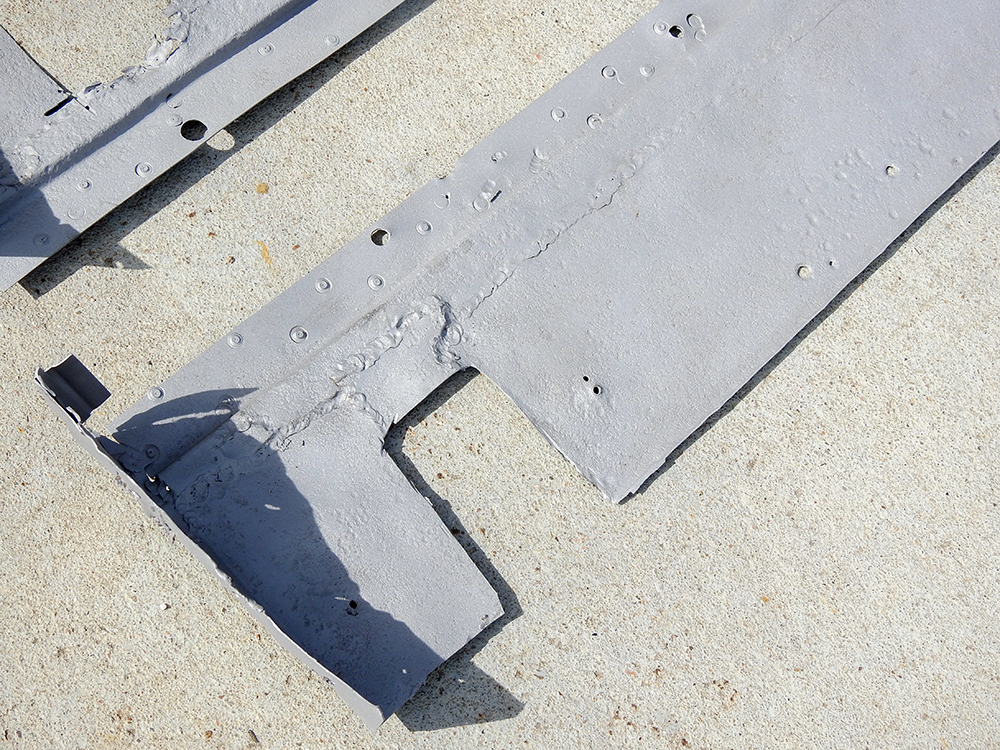
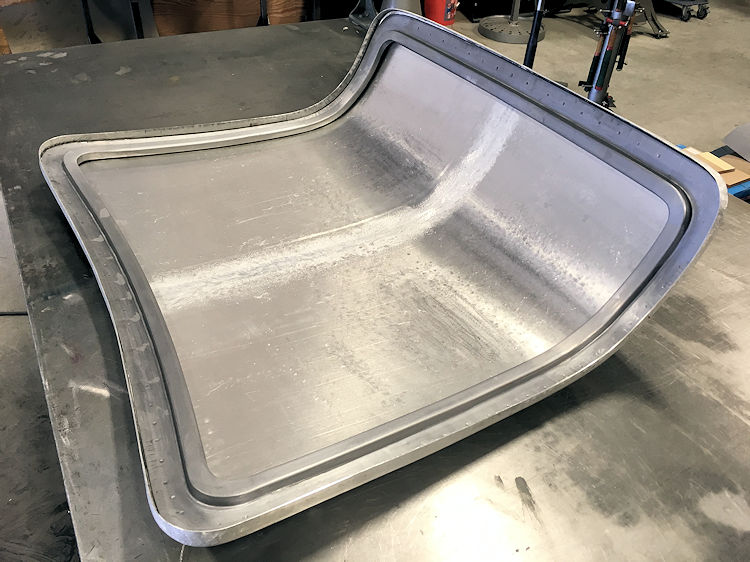
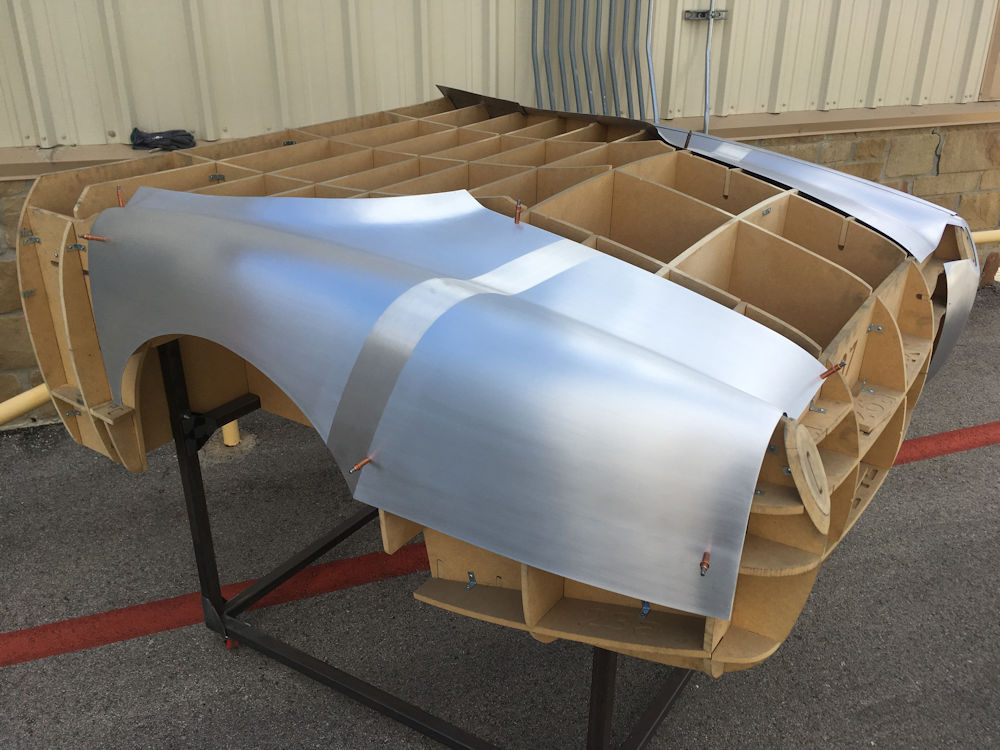
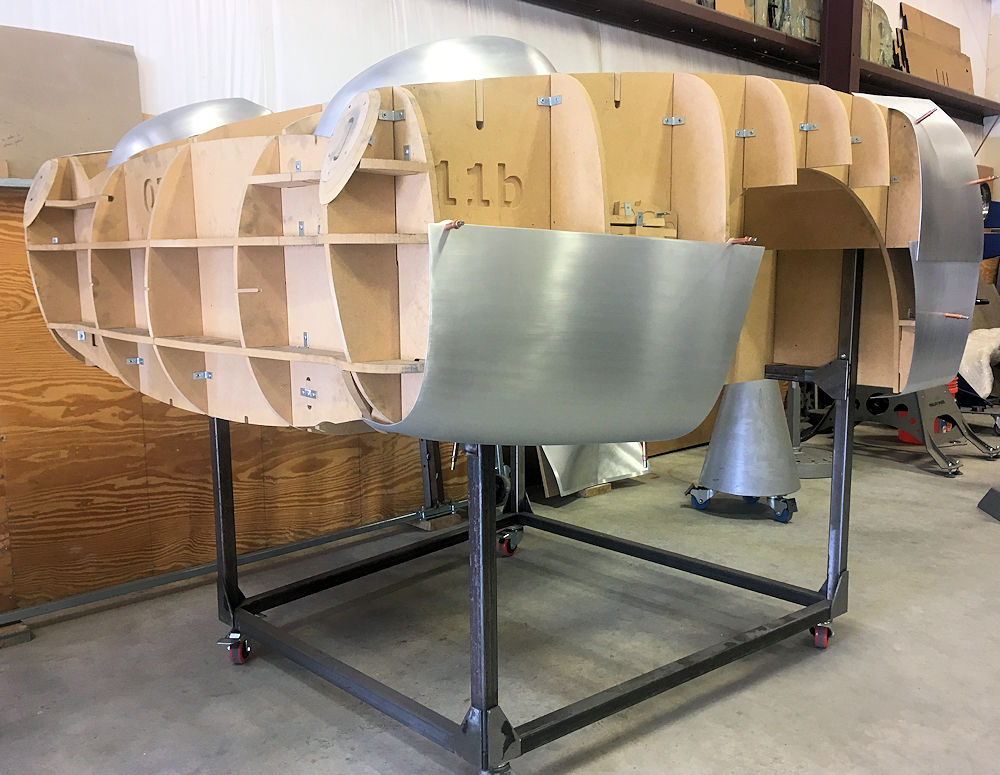
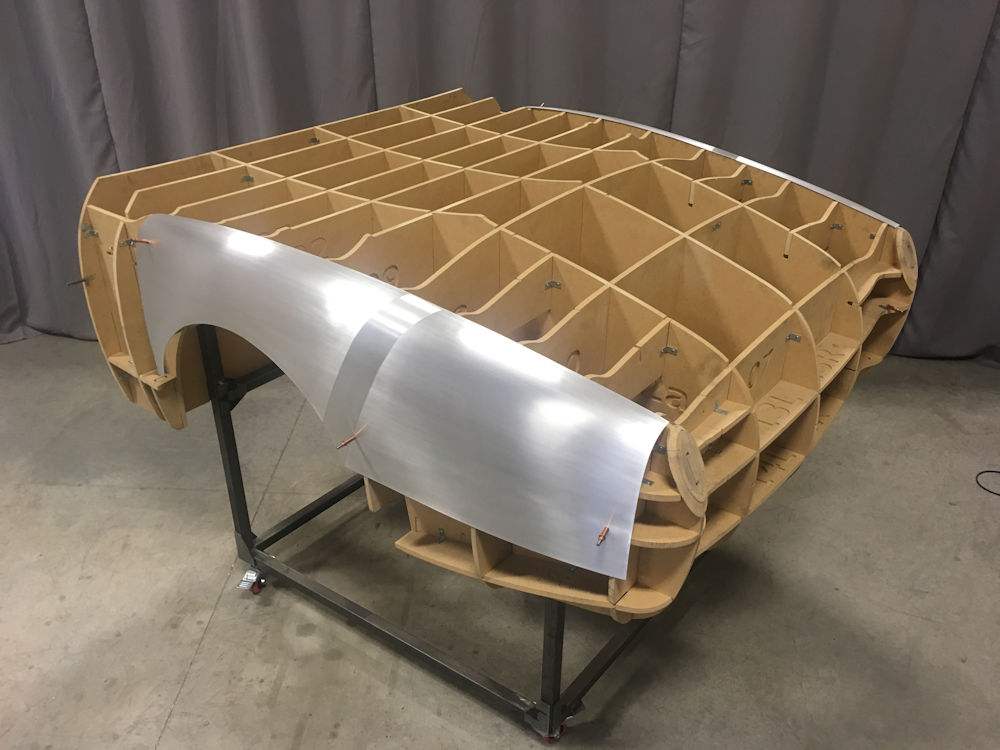
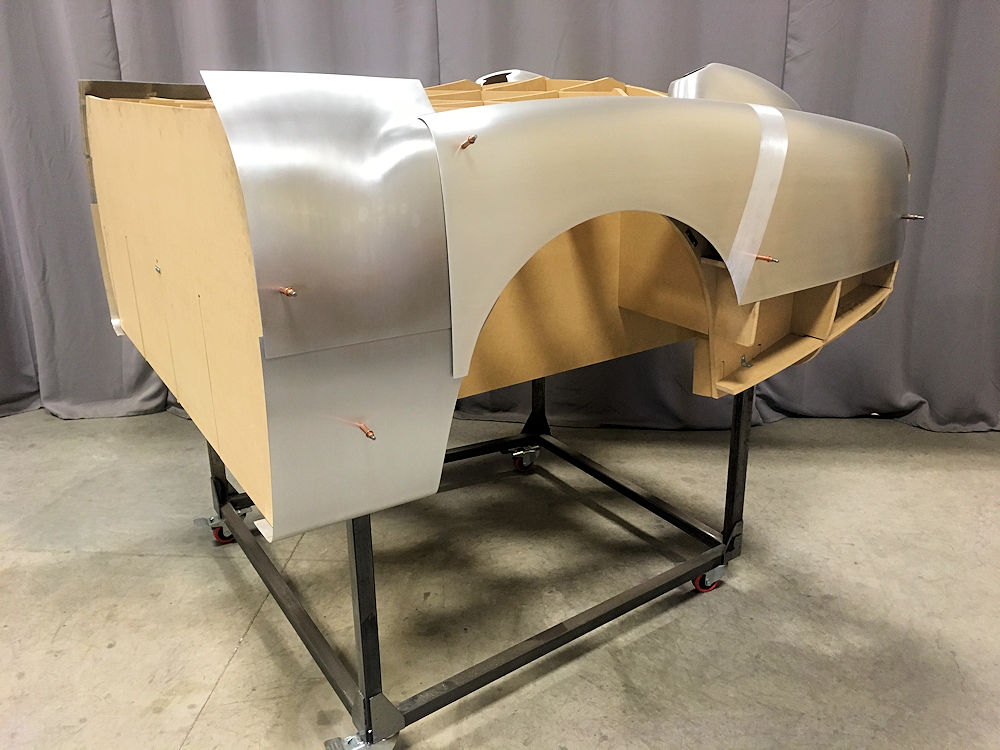
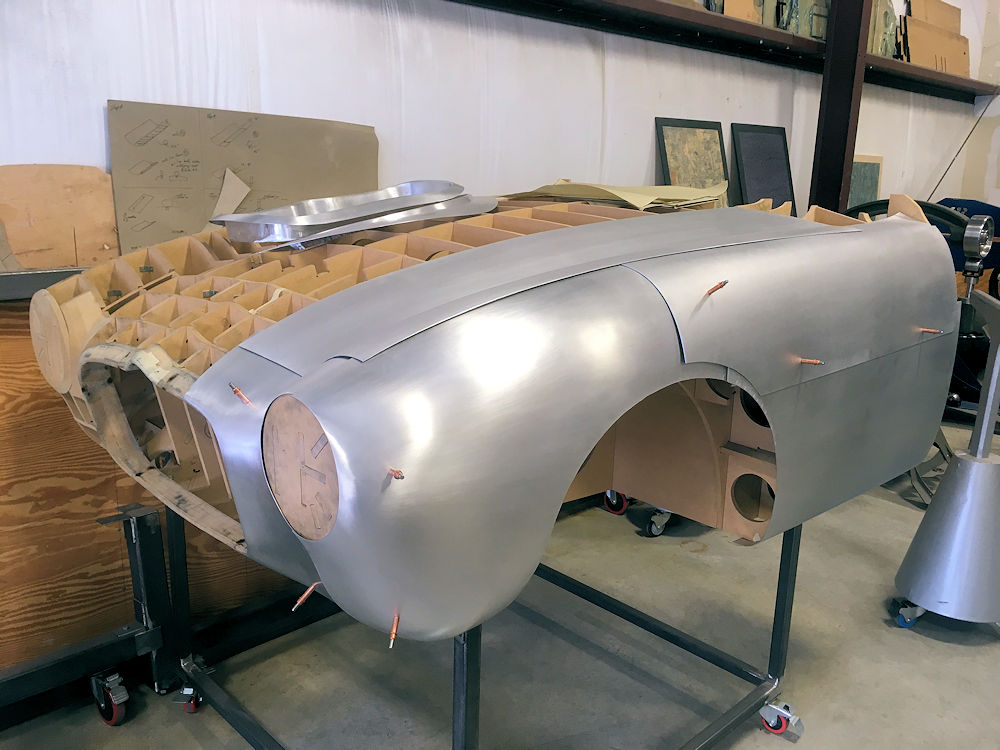
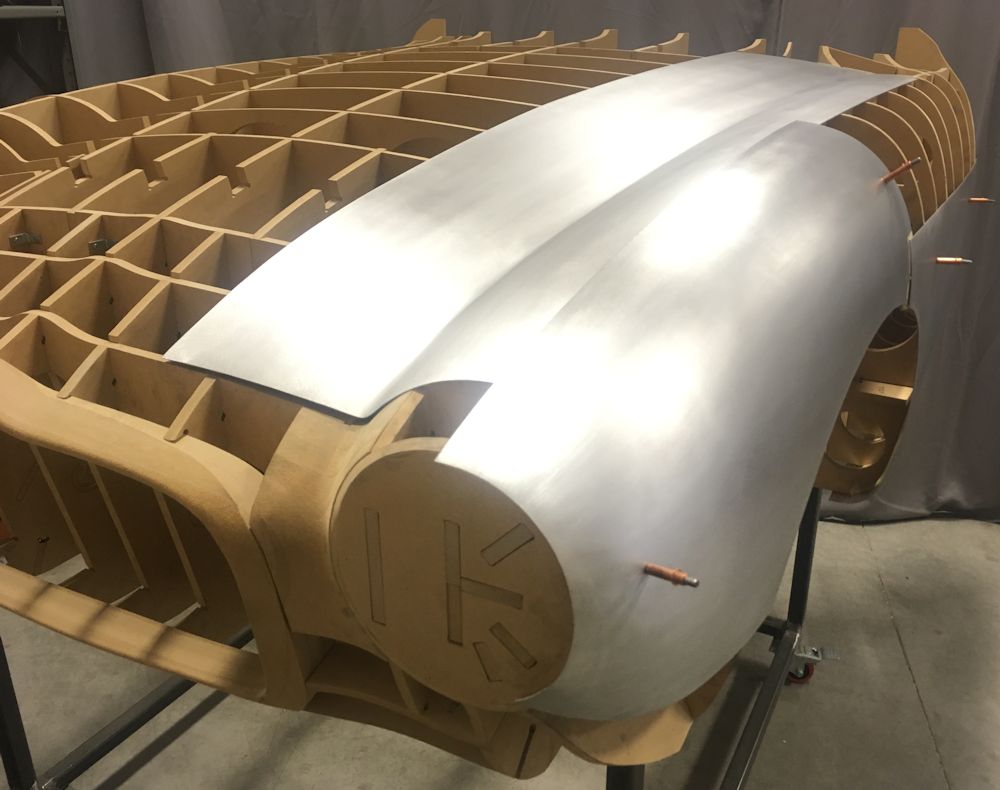
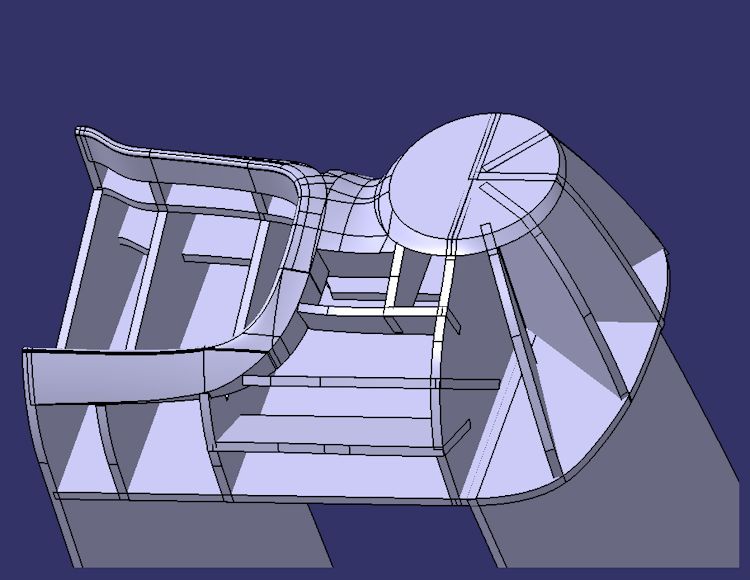
Rear body panels installed
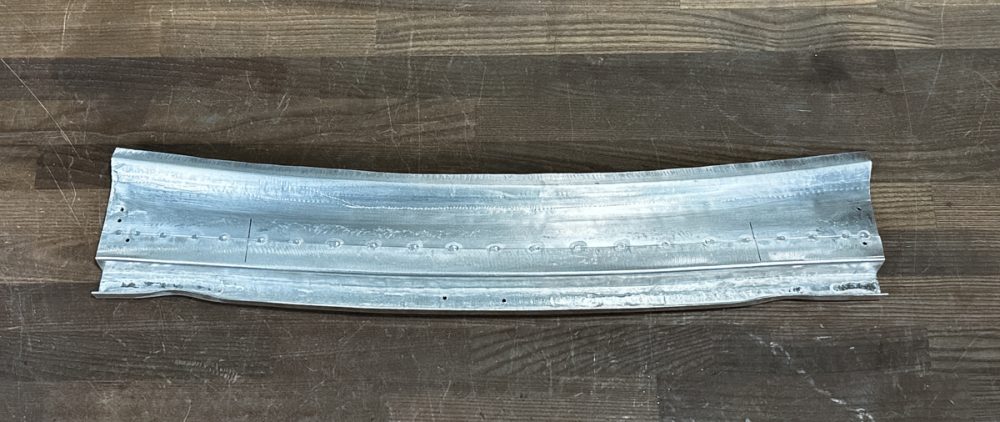
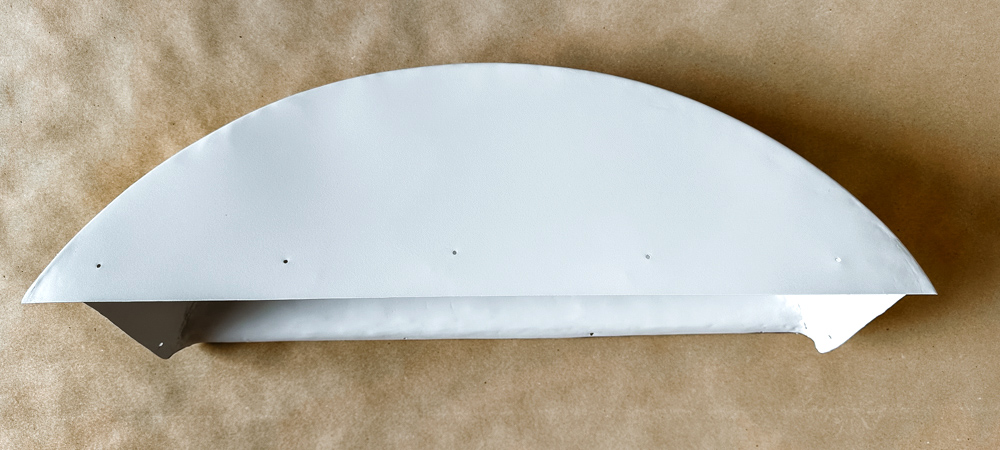
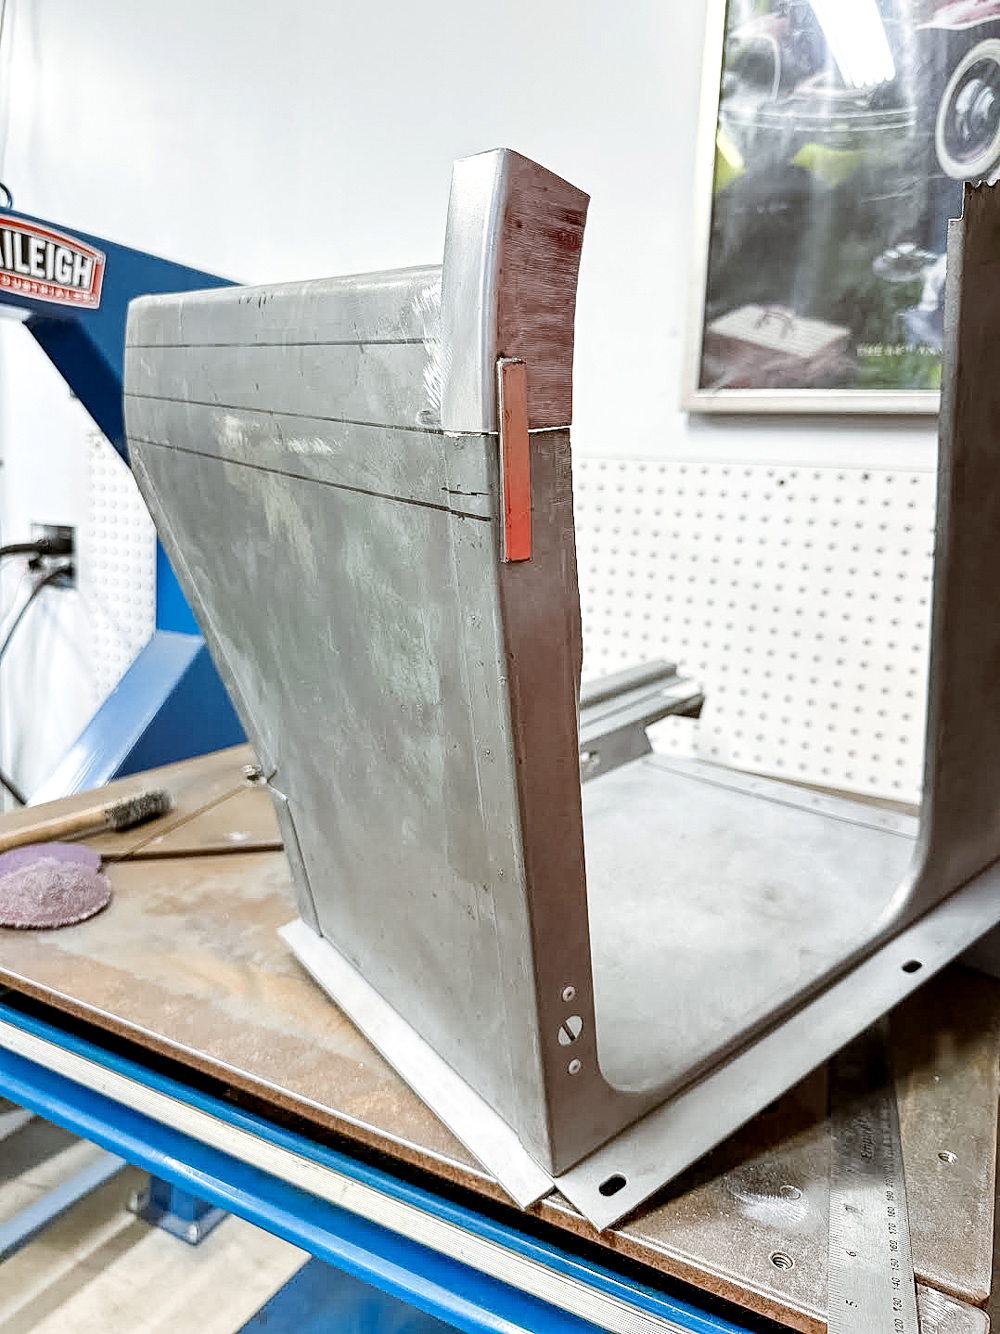
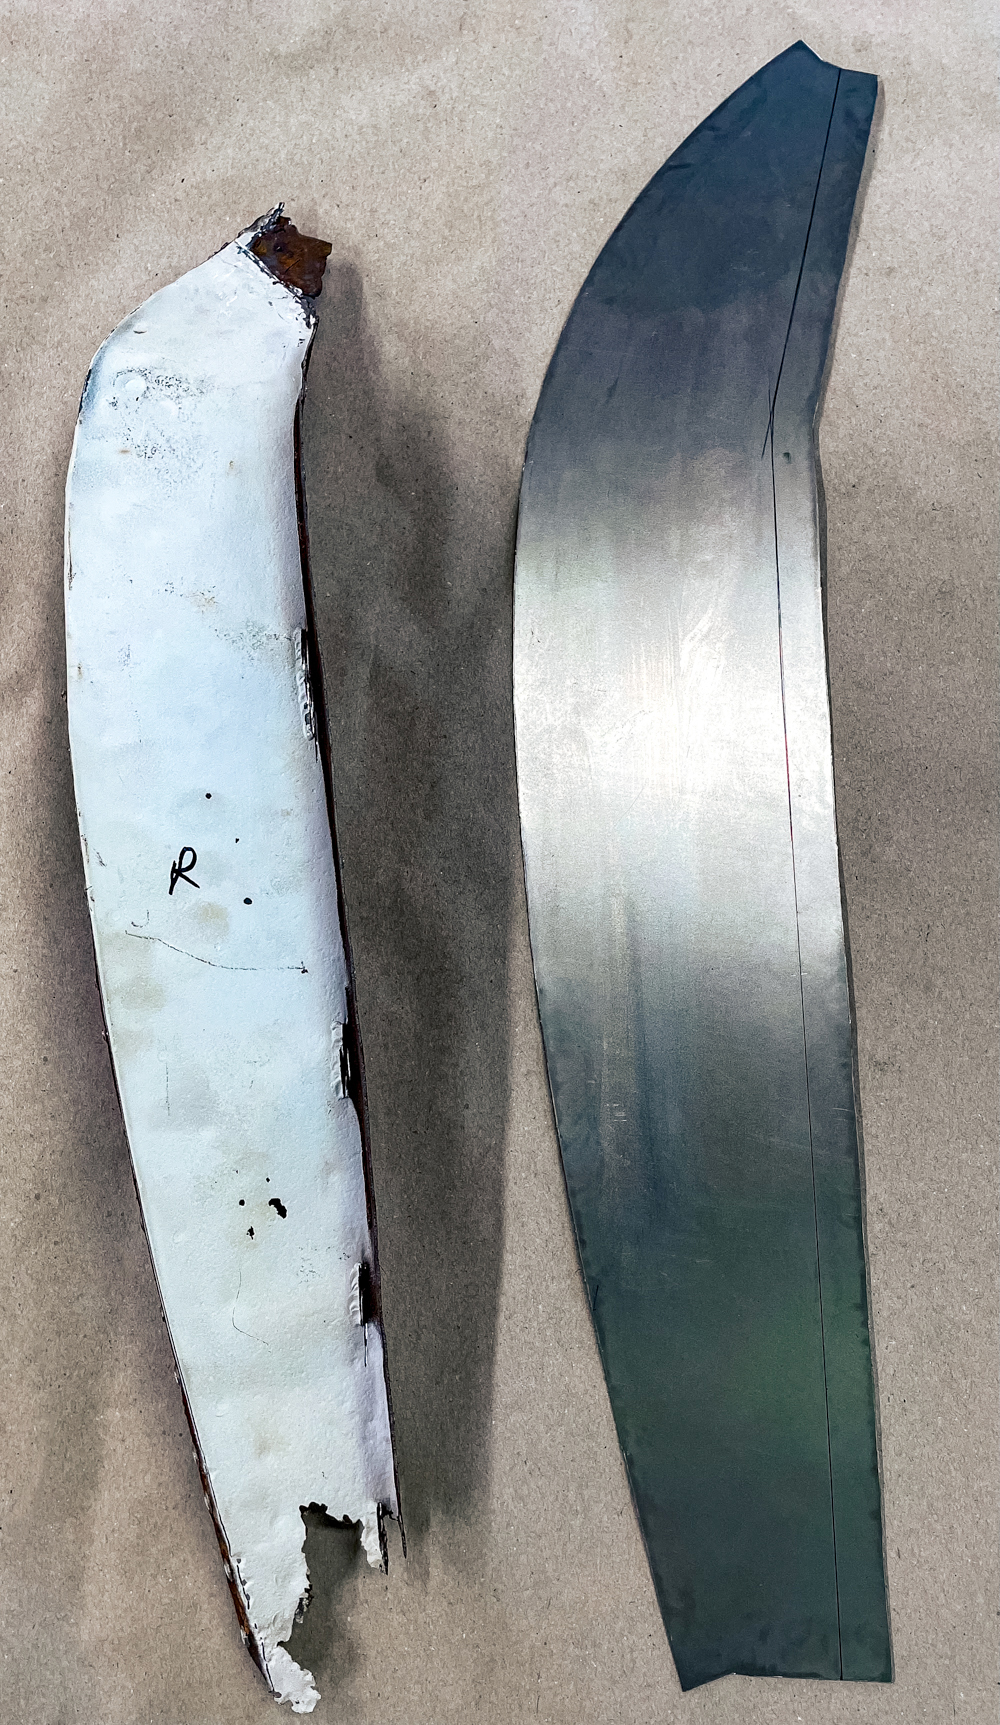
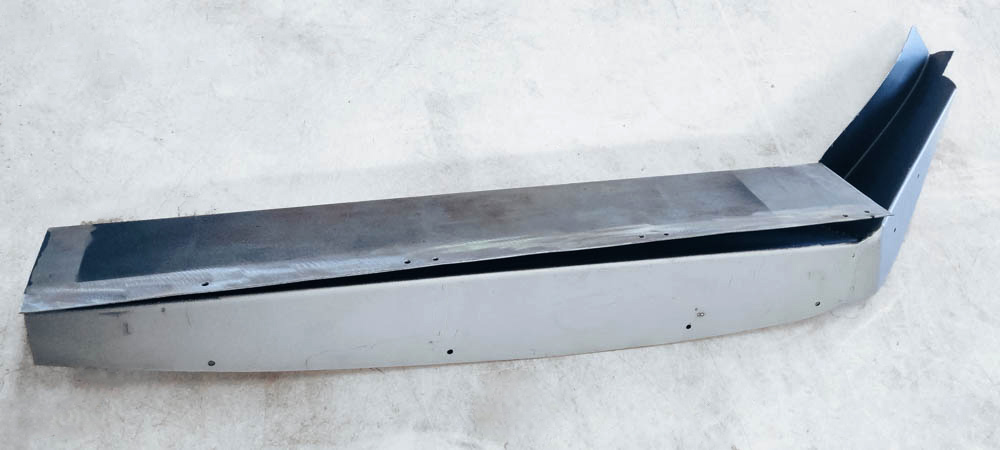
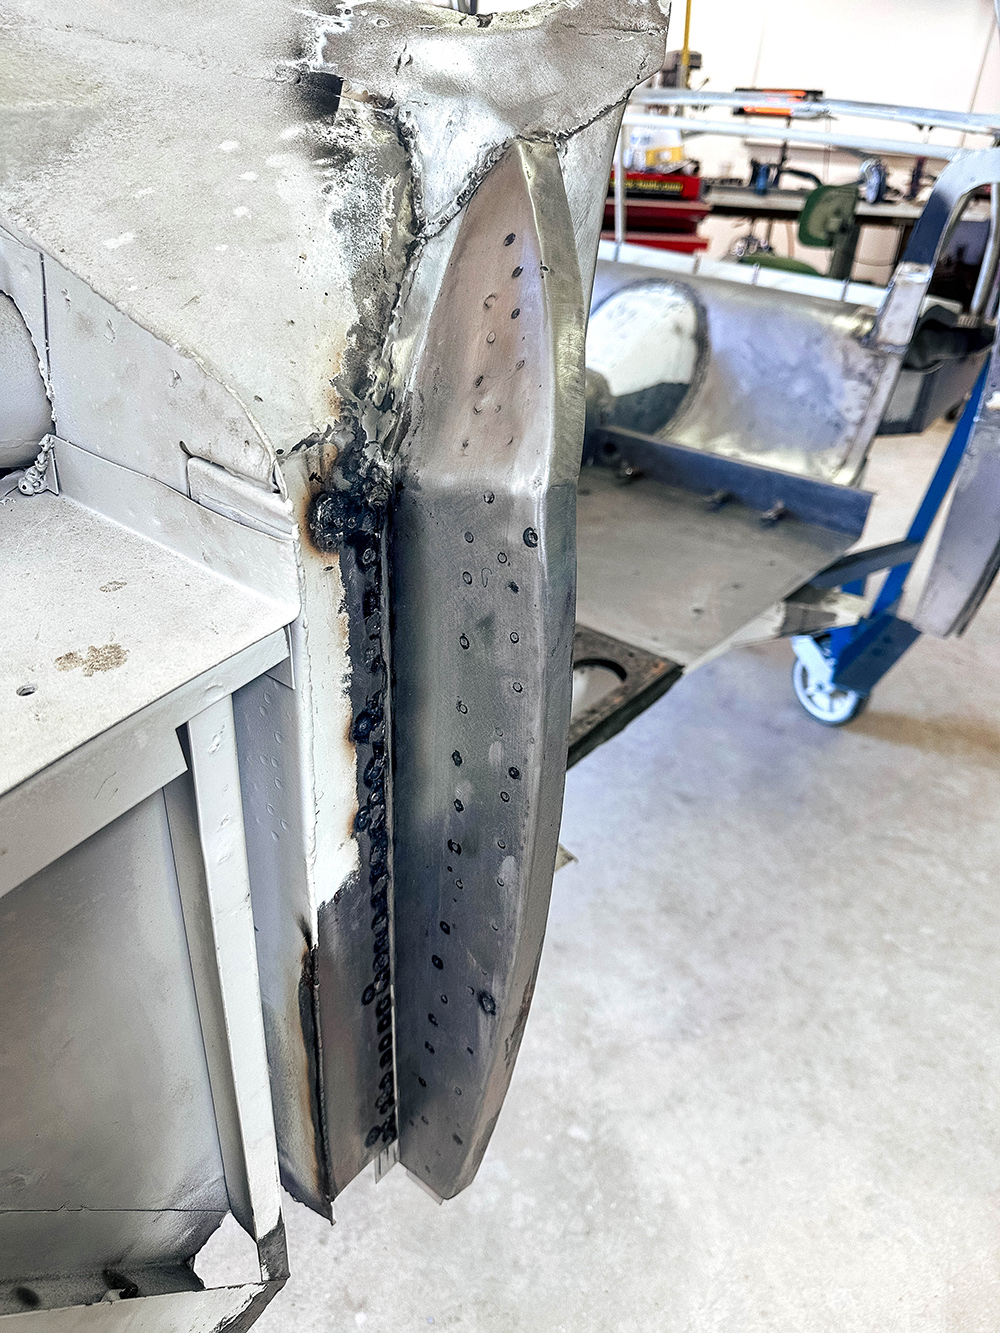
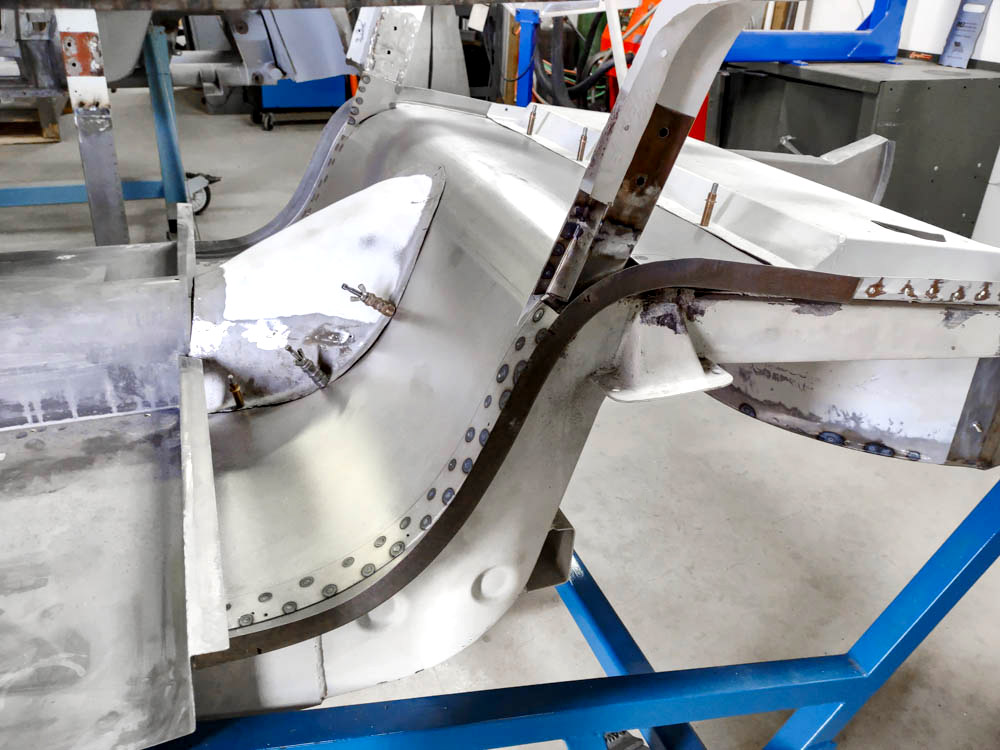
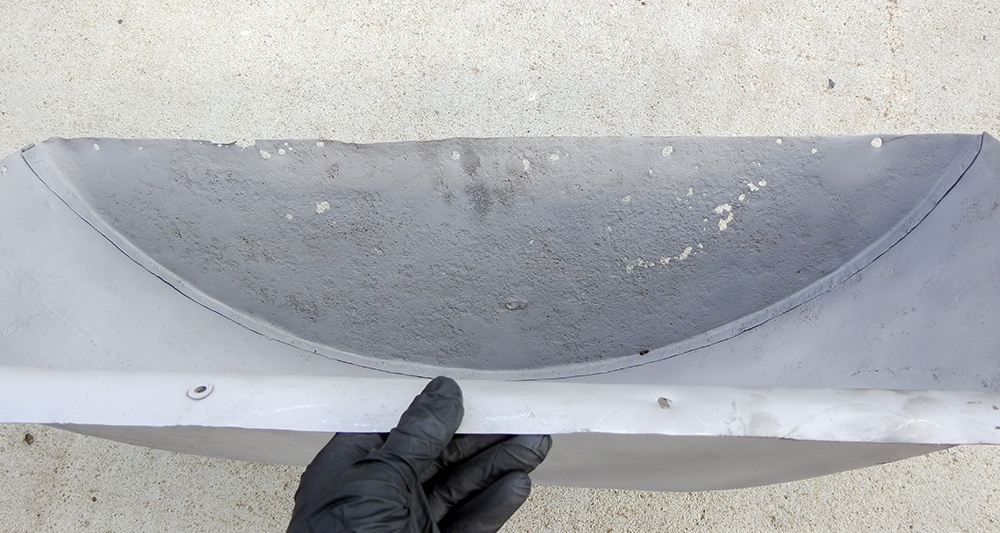
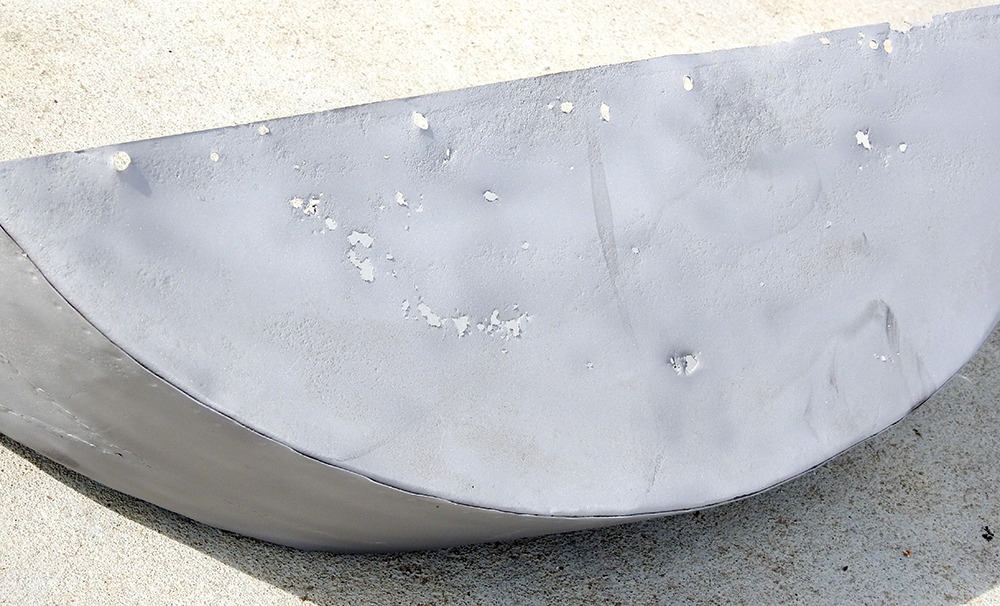
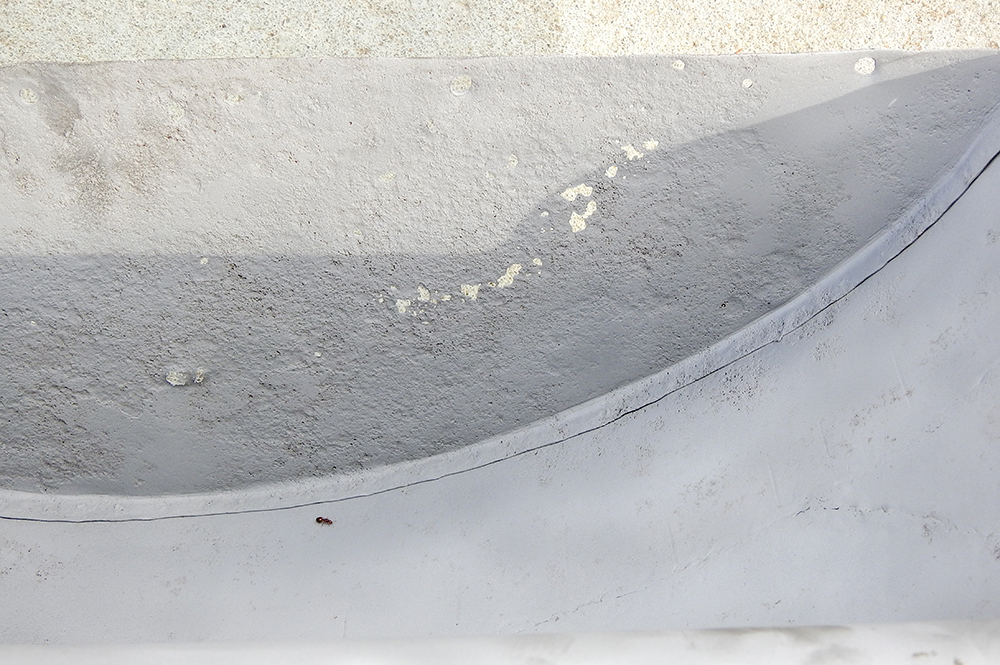
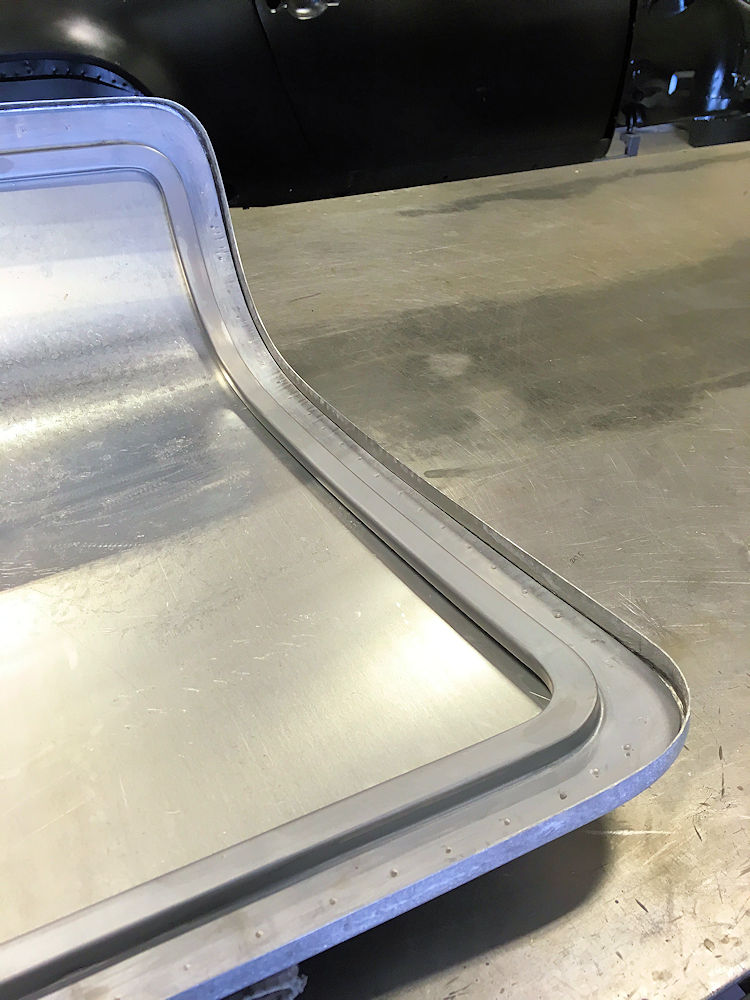
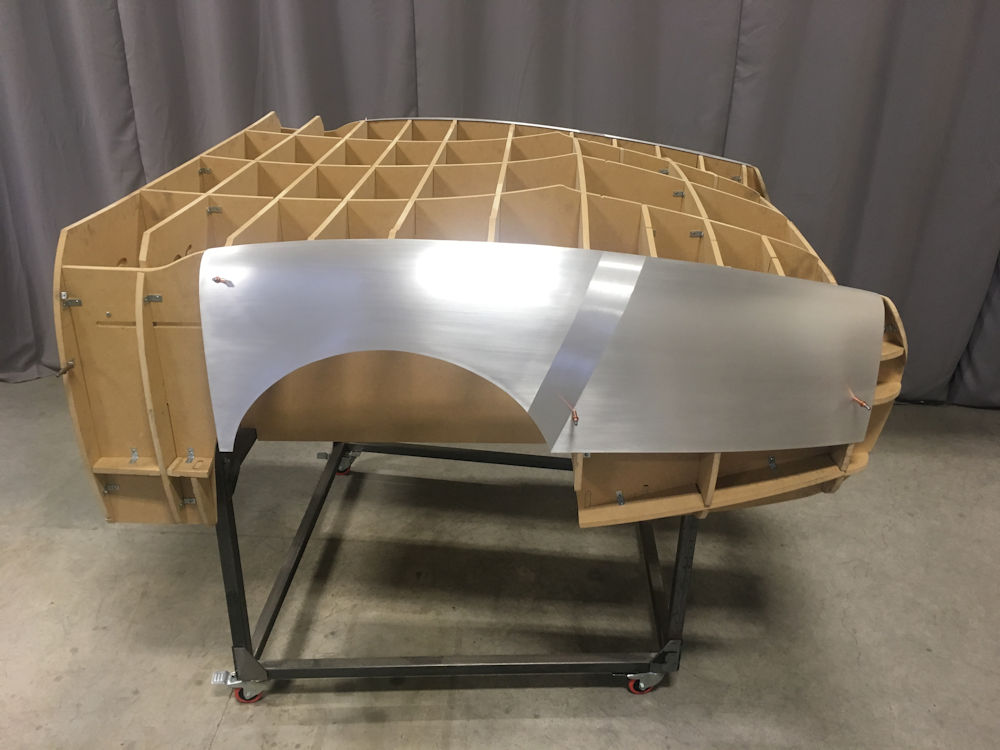
Rear fender flare edge
Weld out of rear body panels
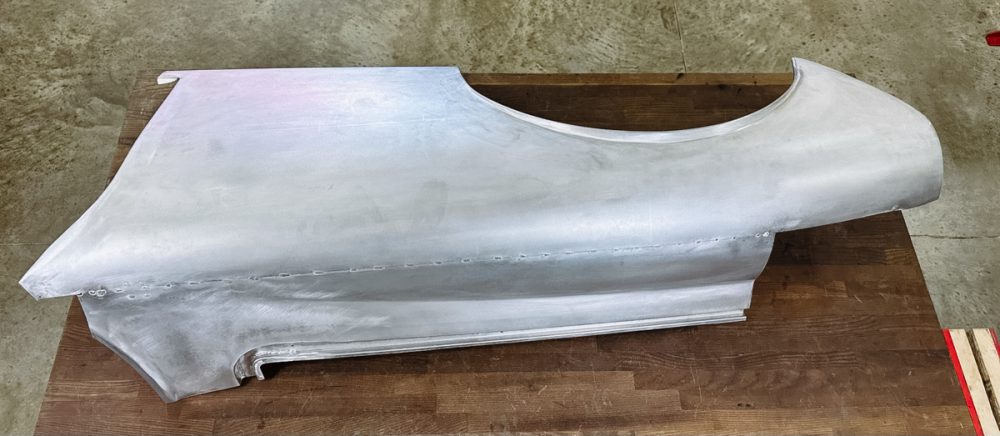
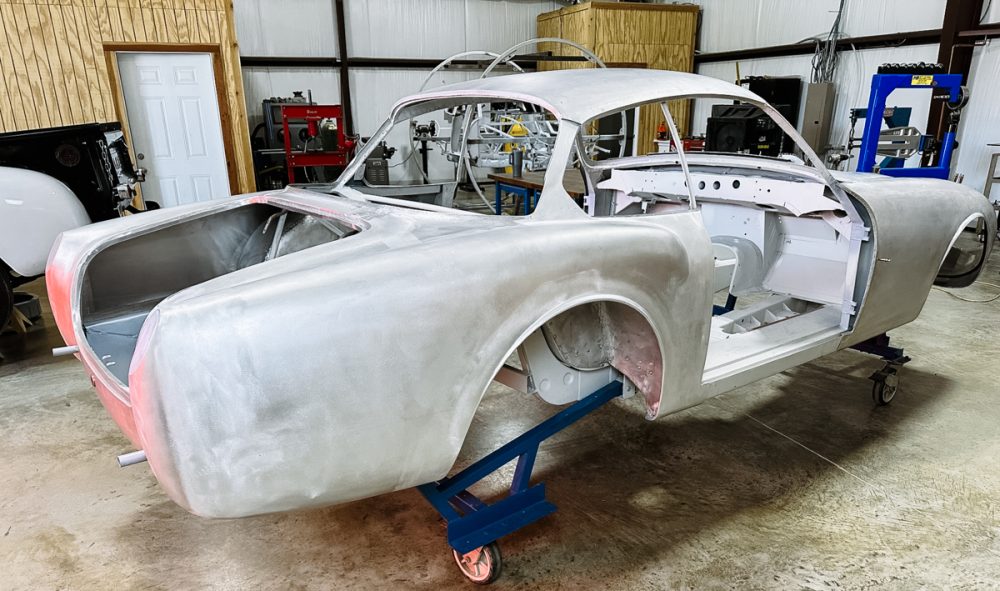
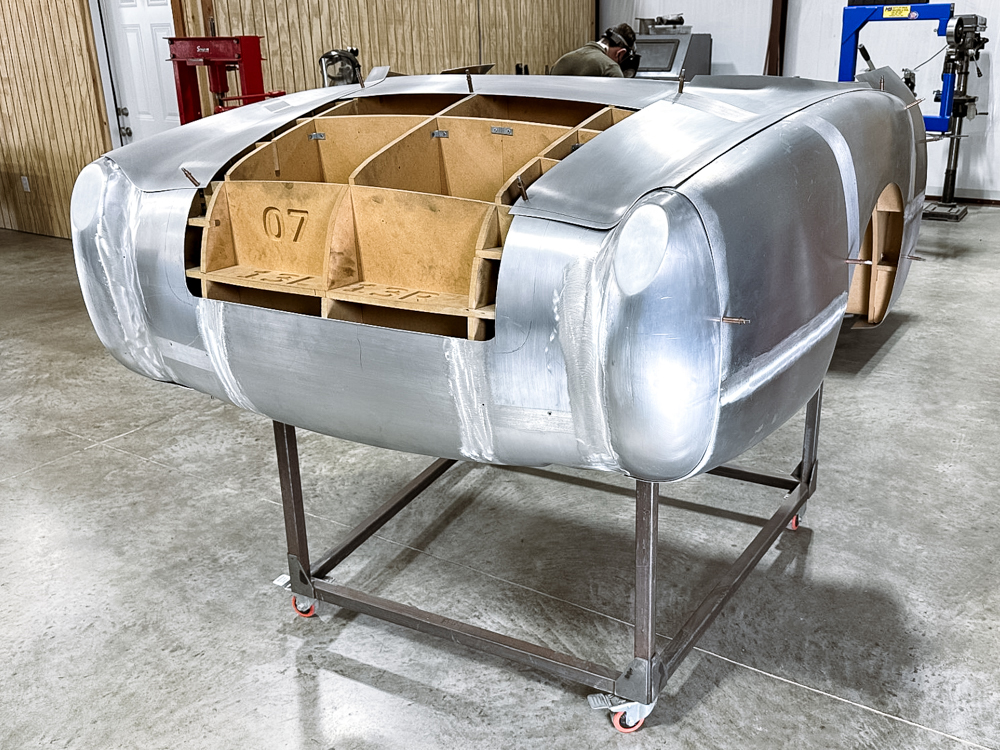
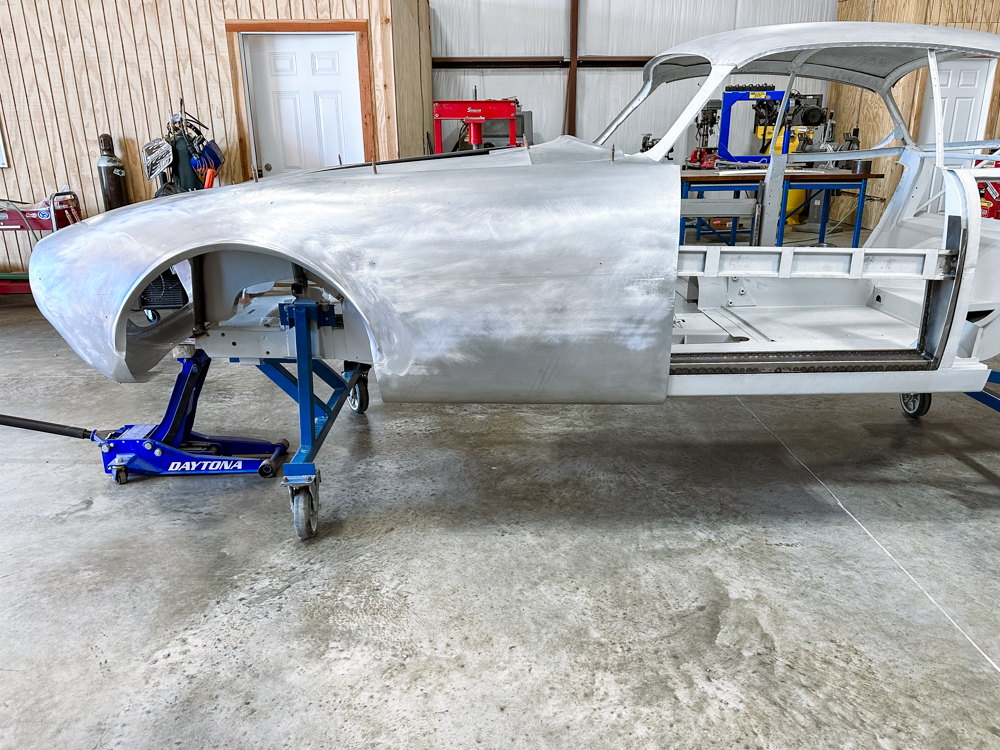
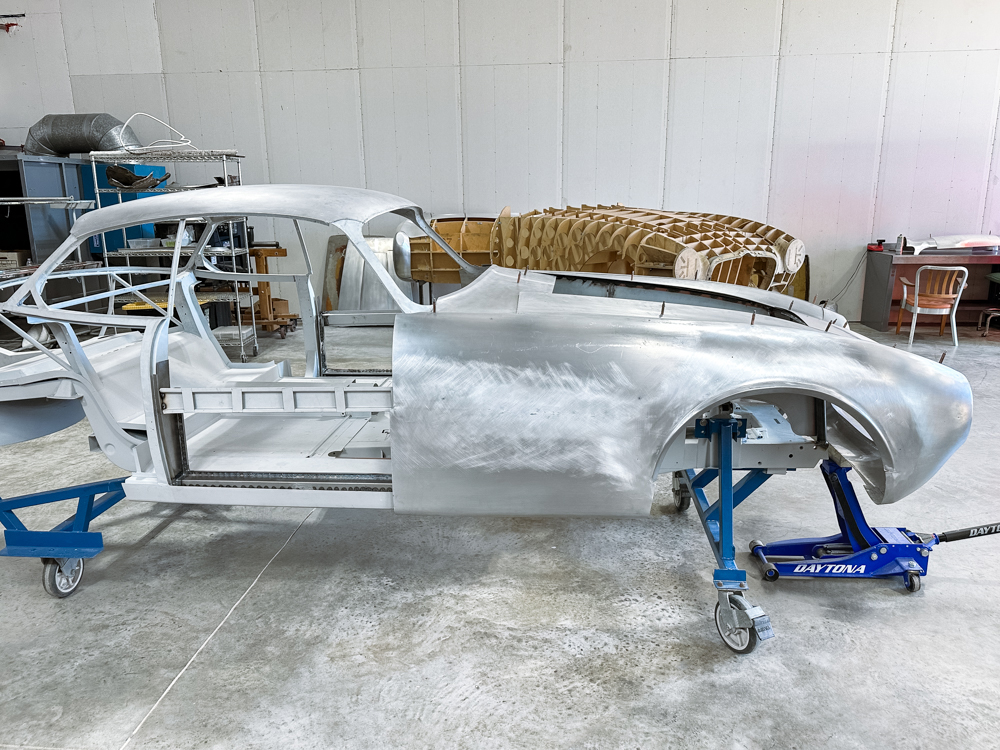
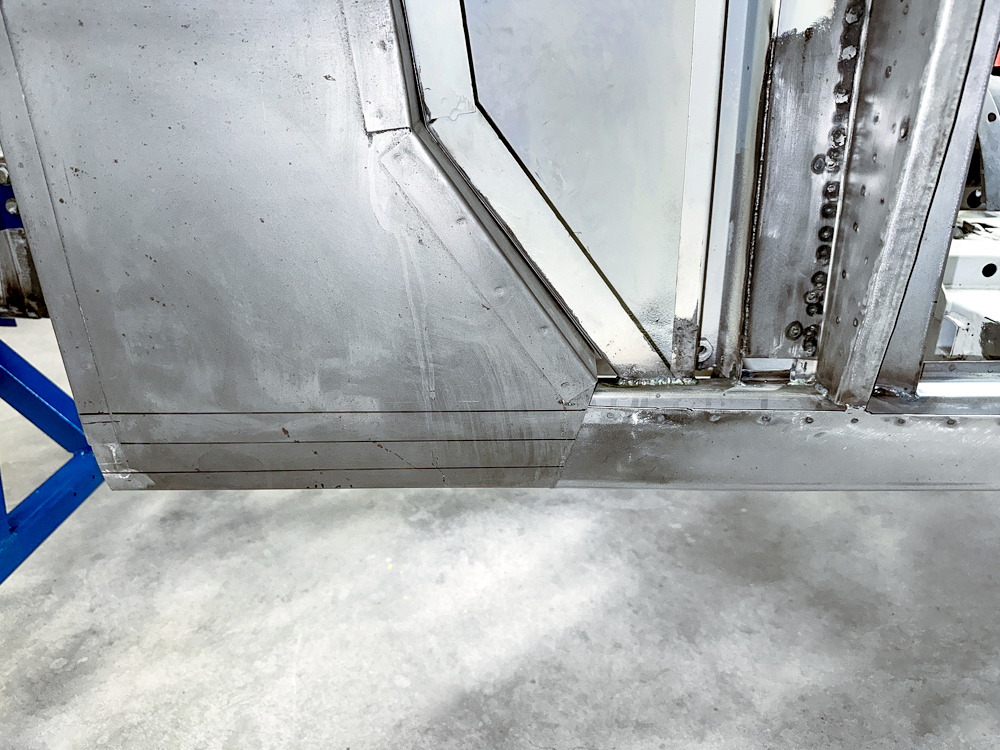
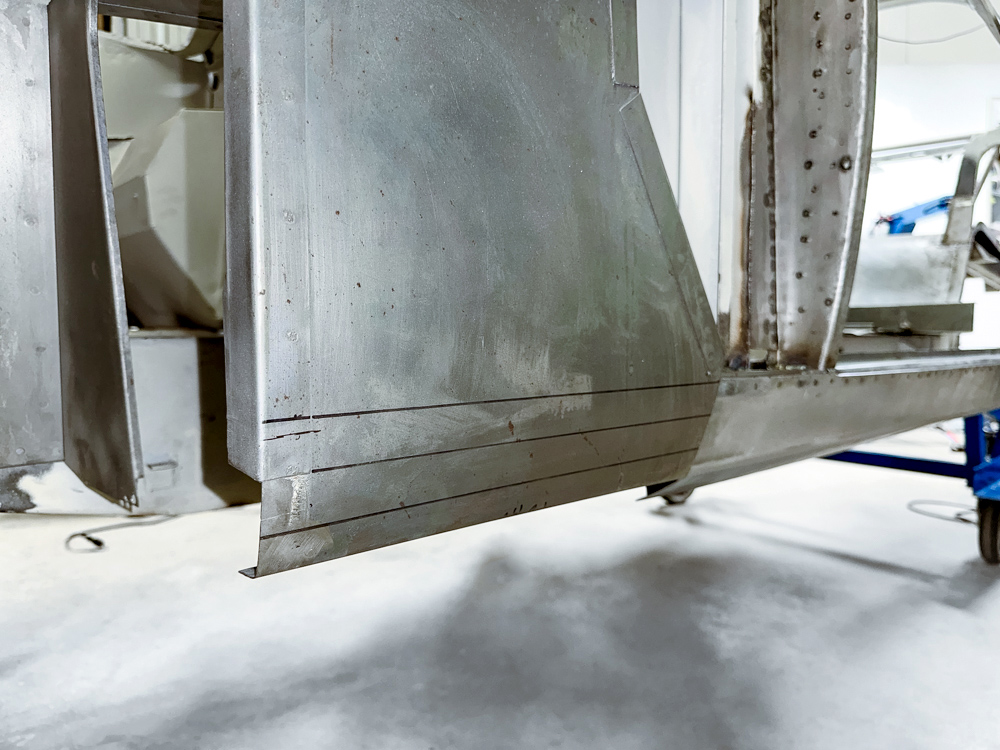
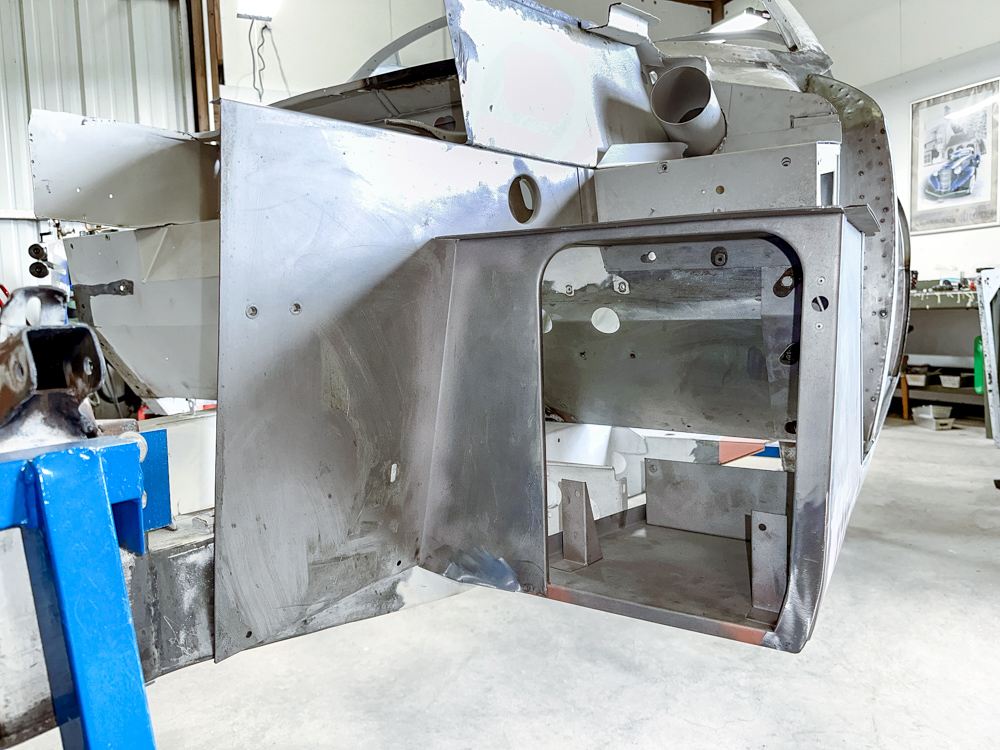
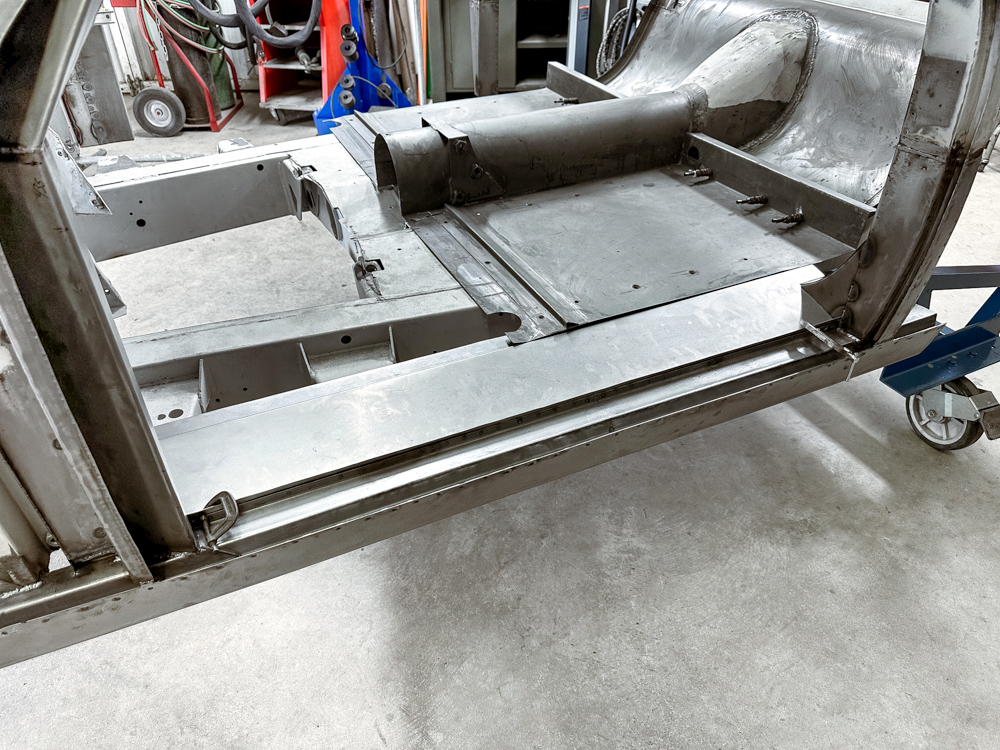
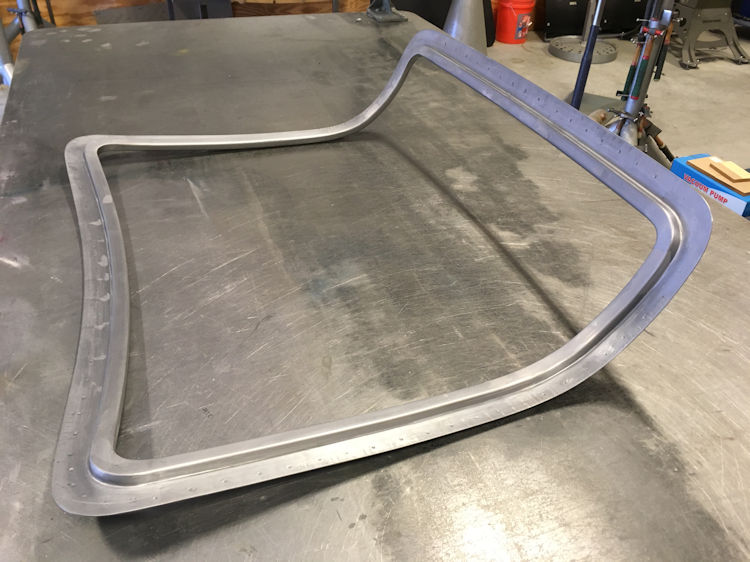
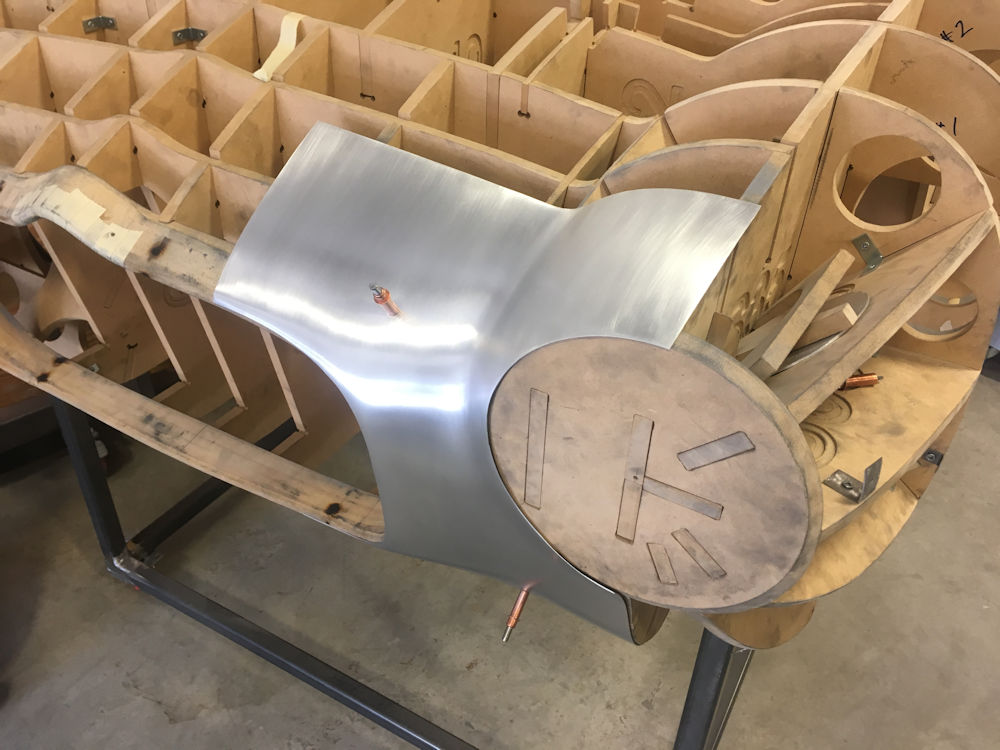
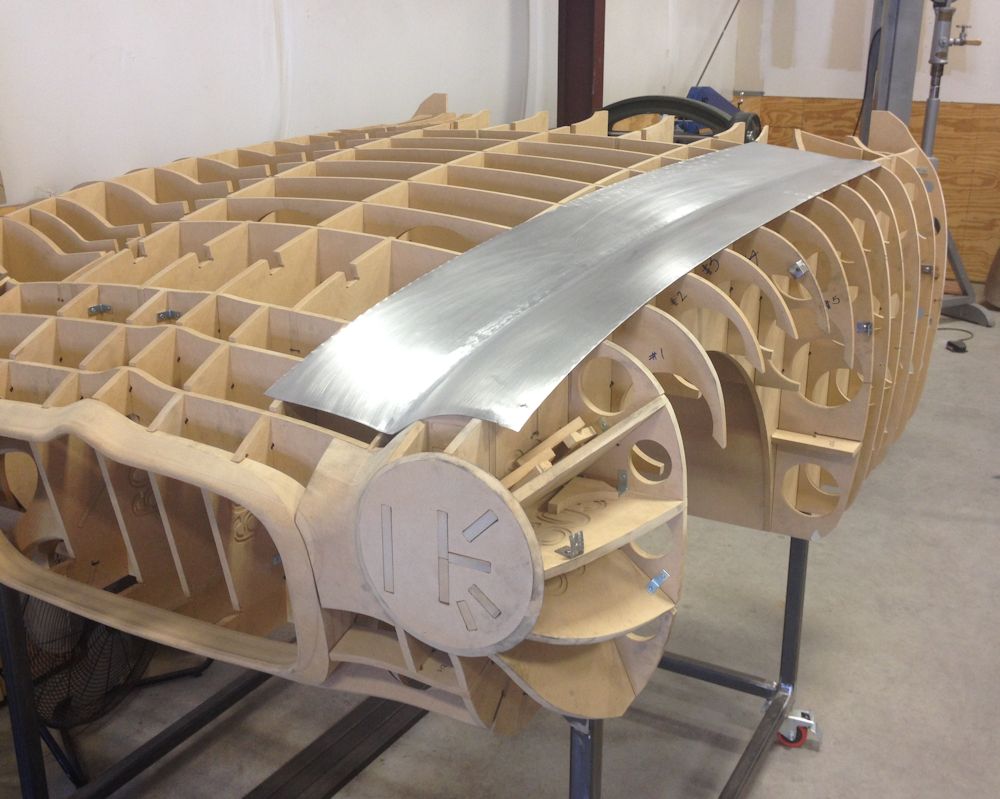
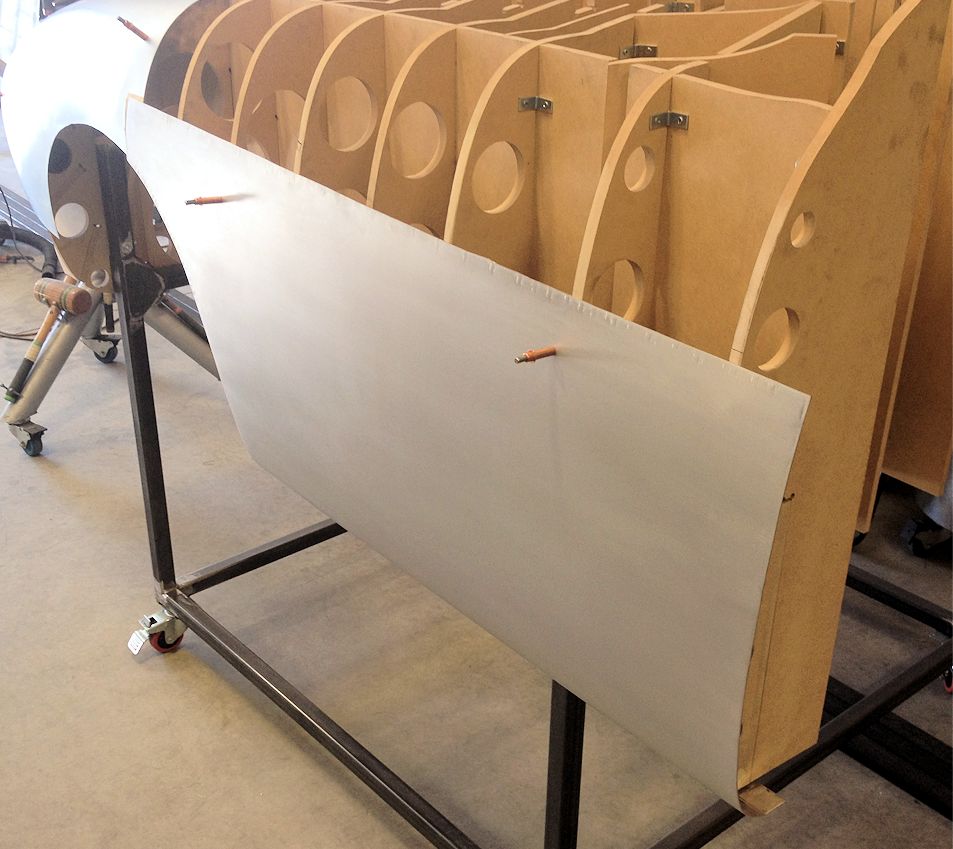
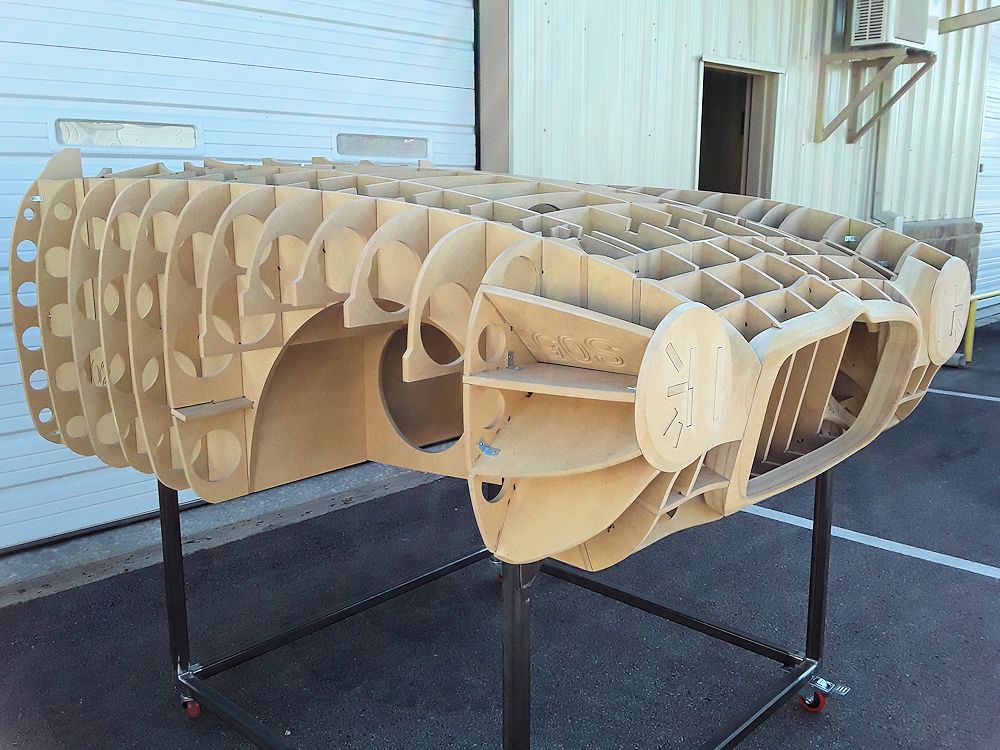
Body panels fit to superleggera framework
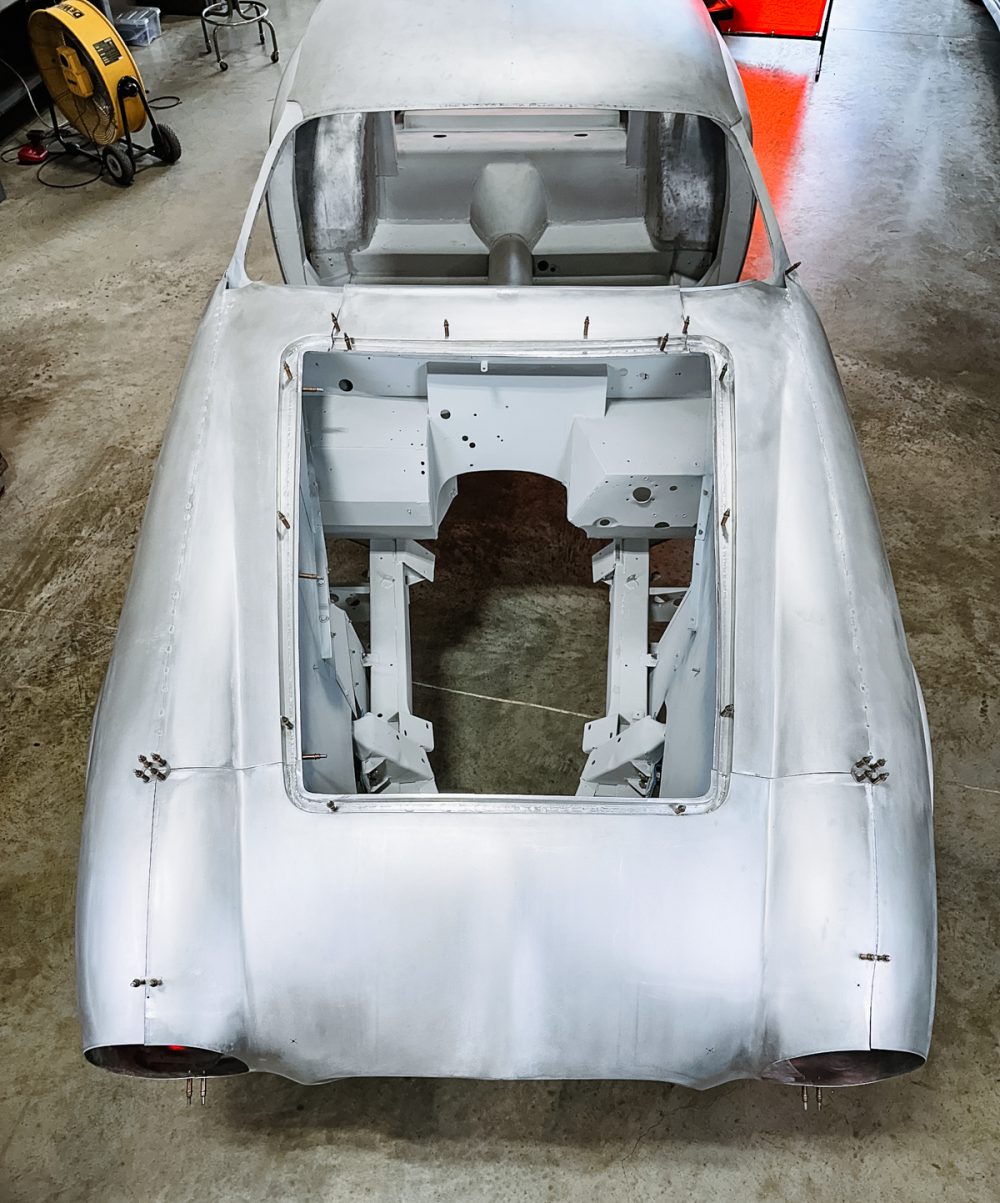
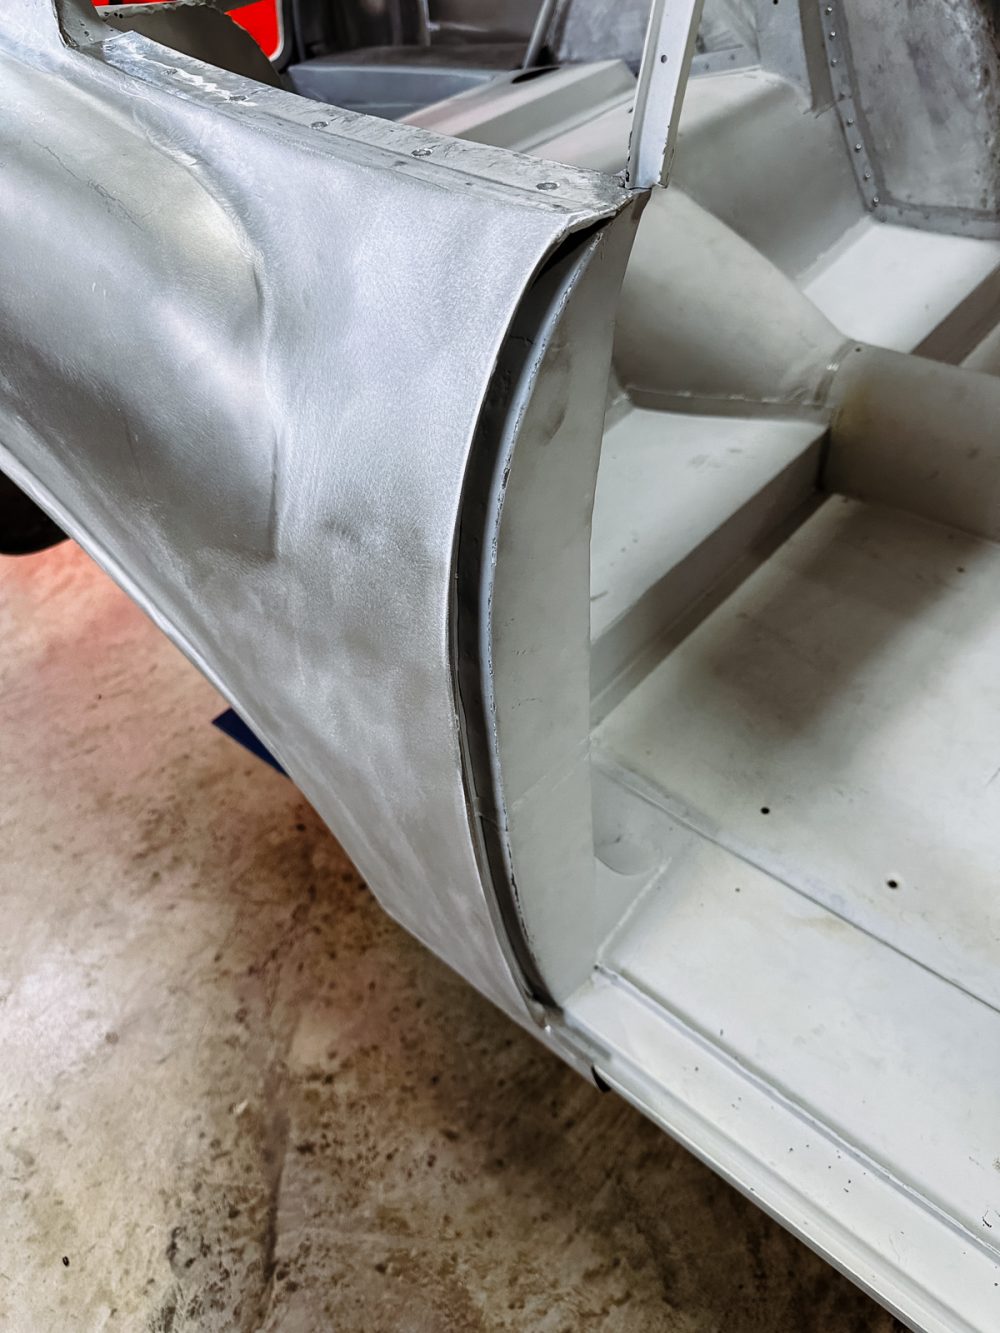
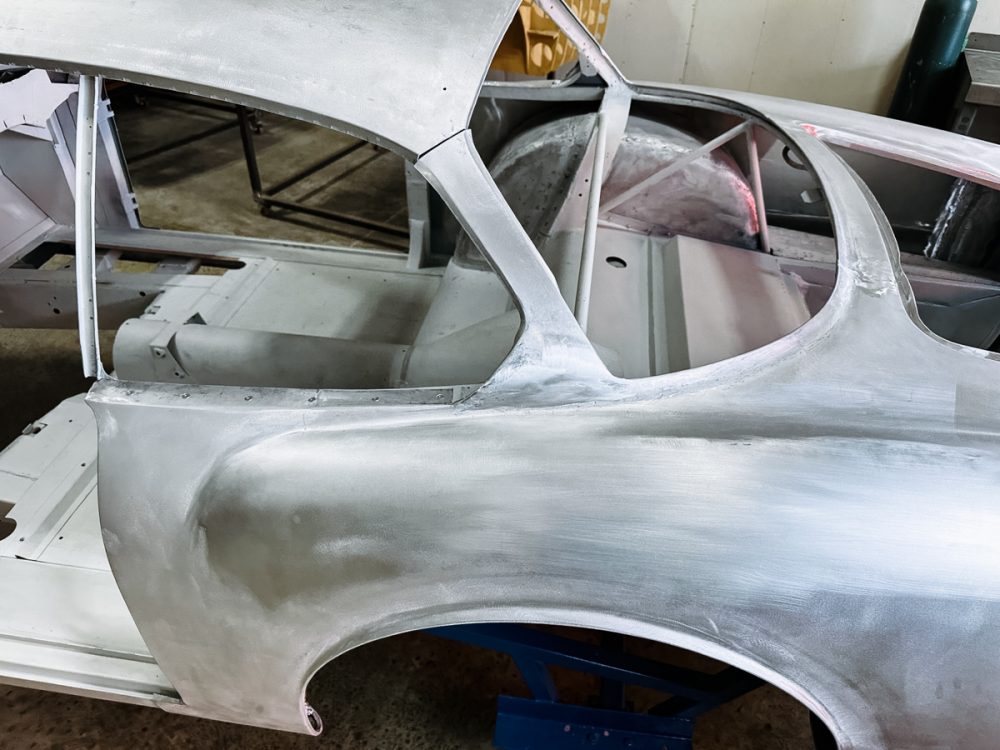
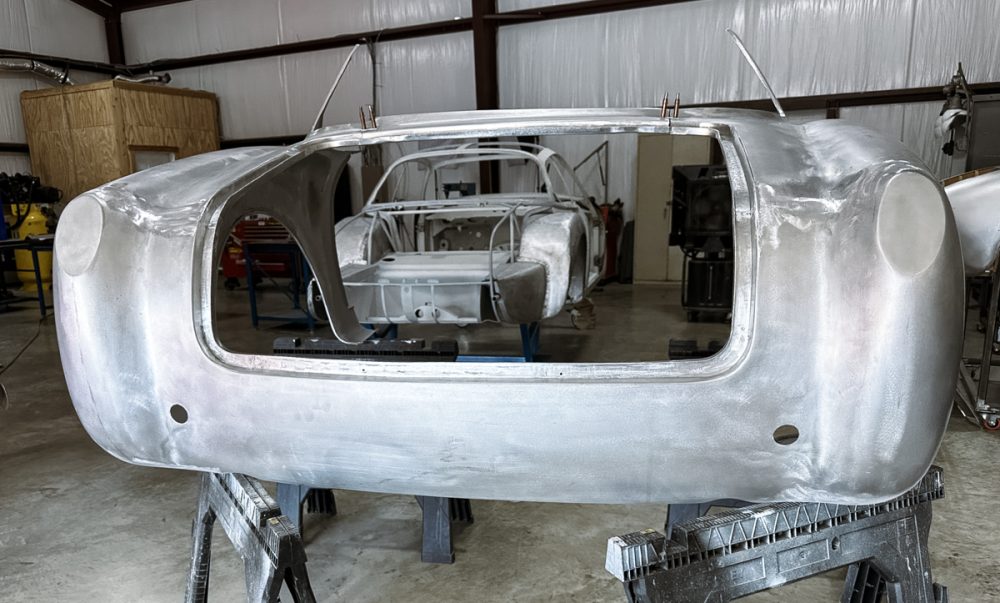
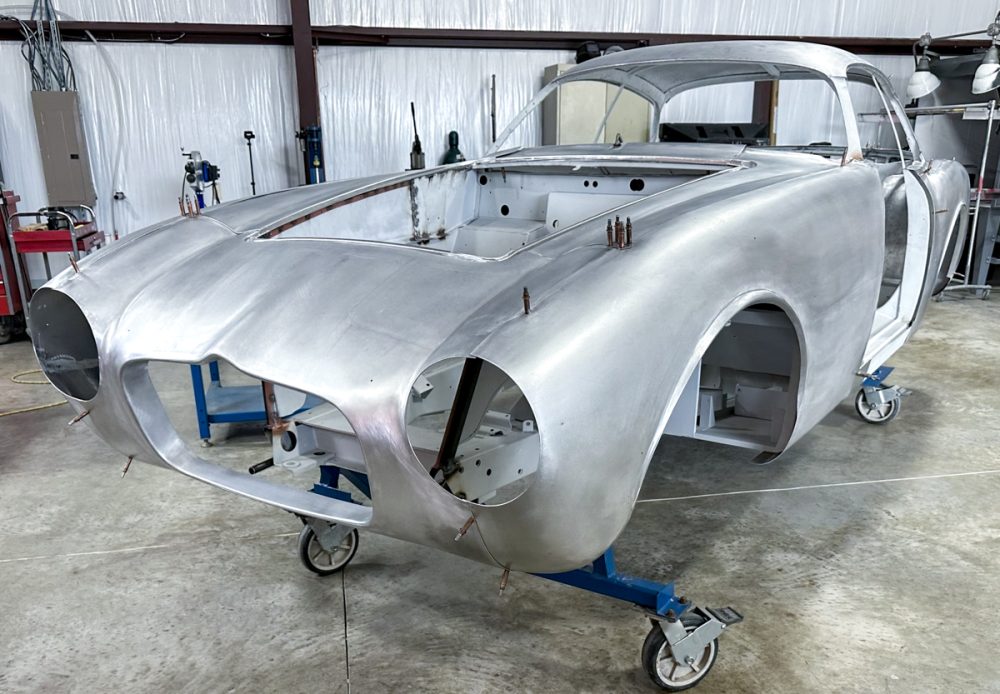
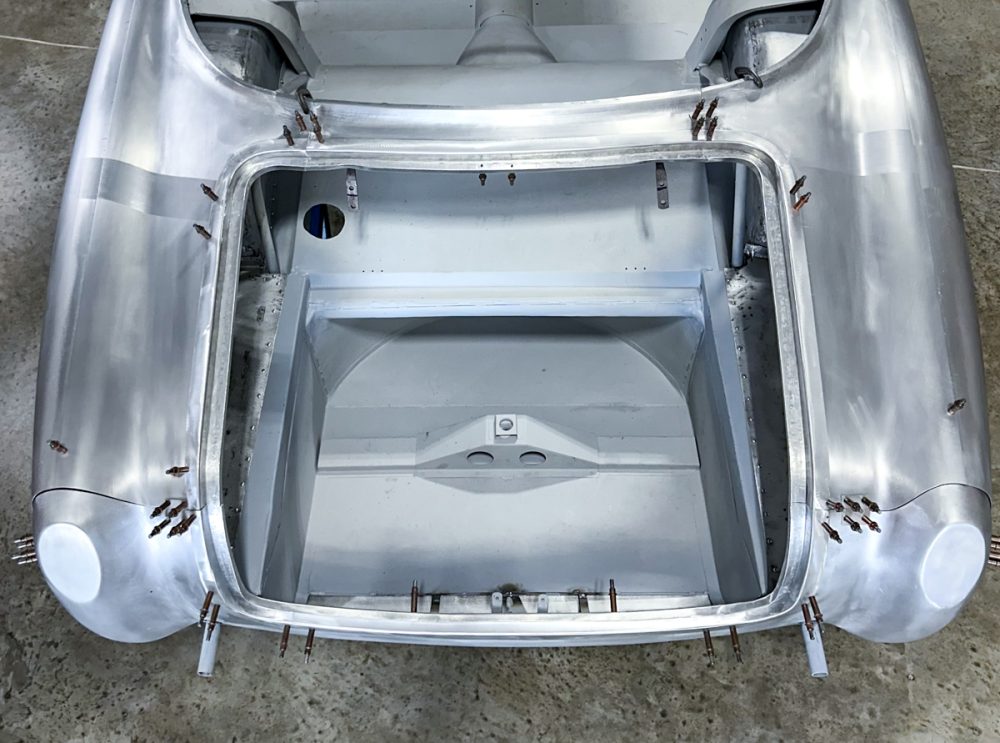
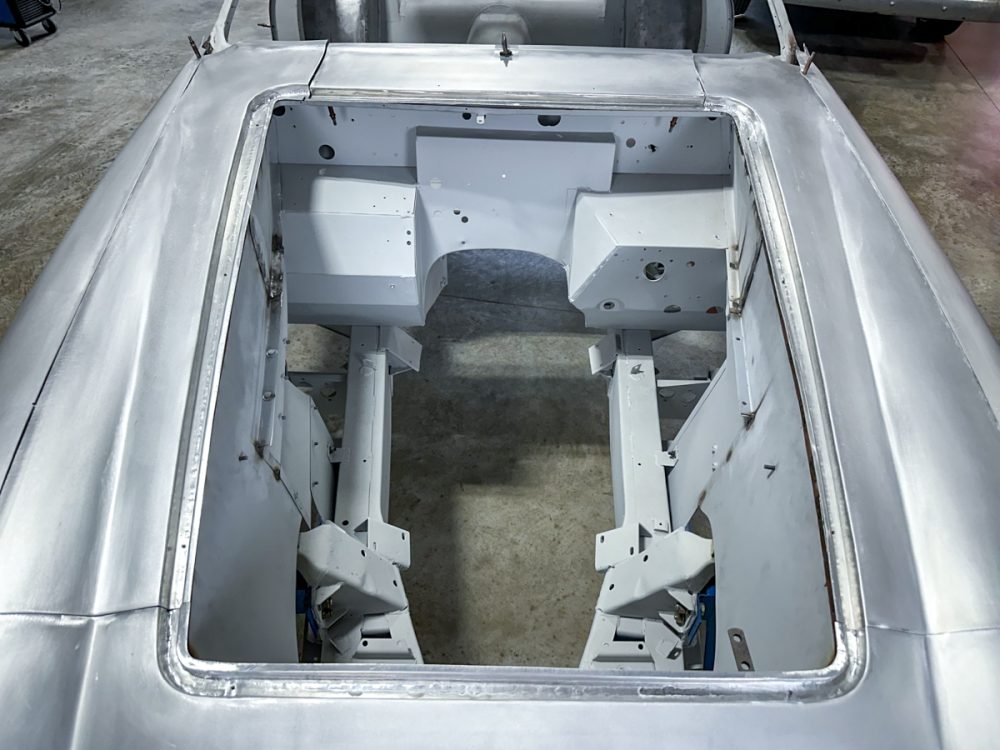
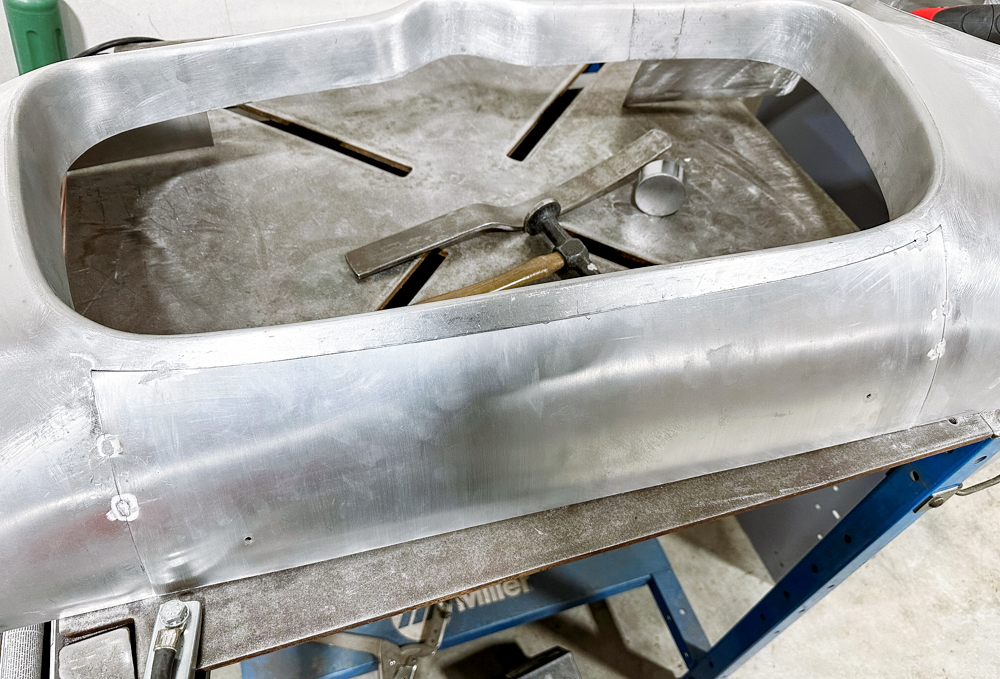
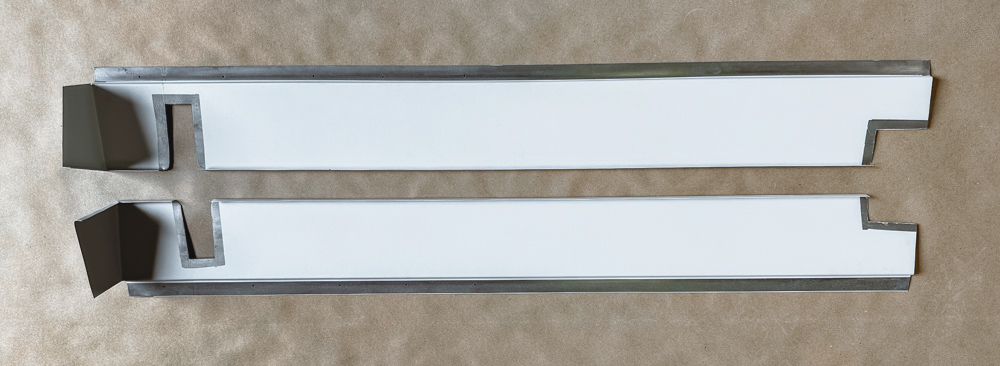
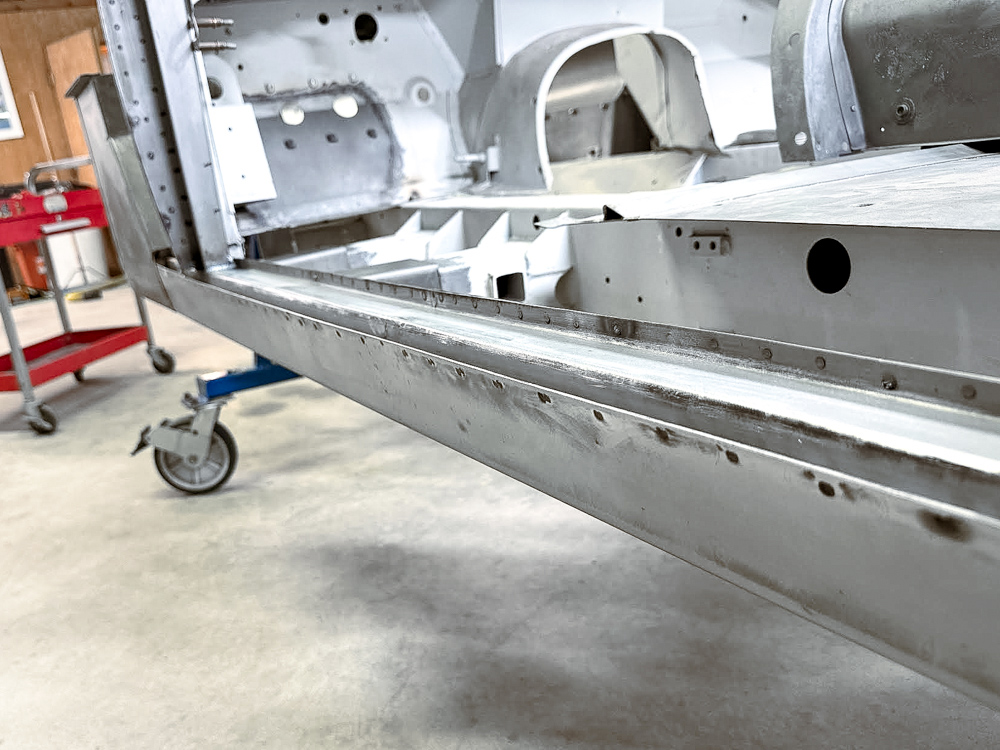
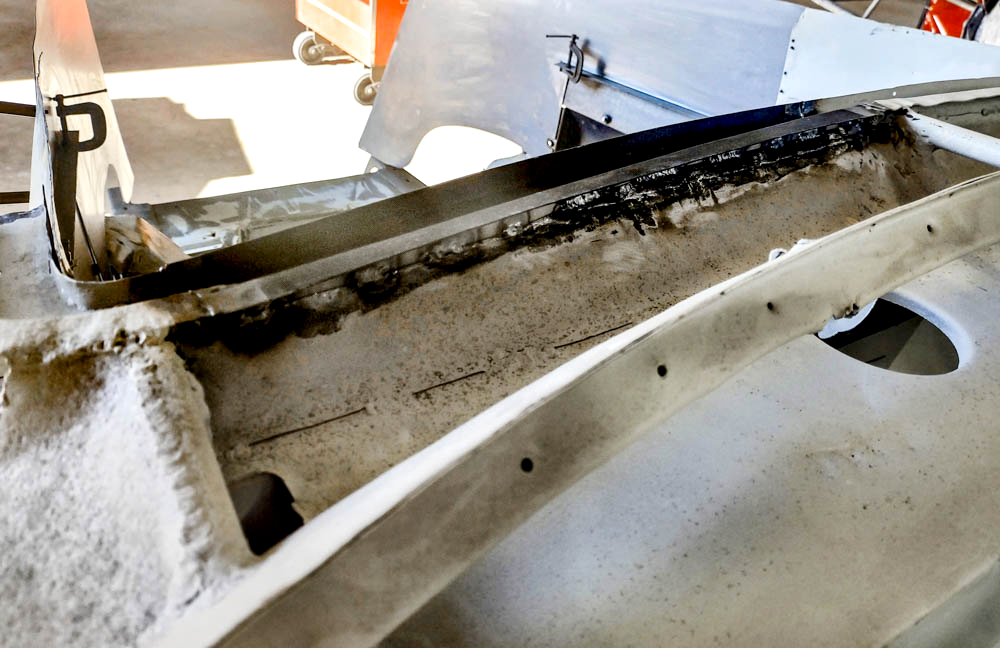
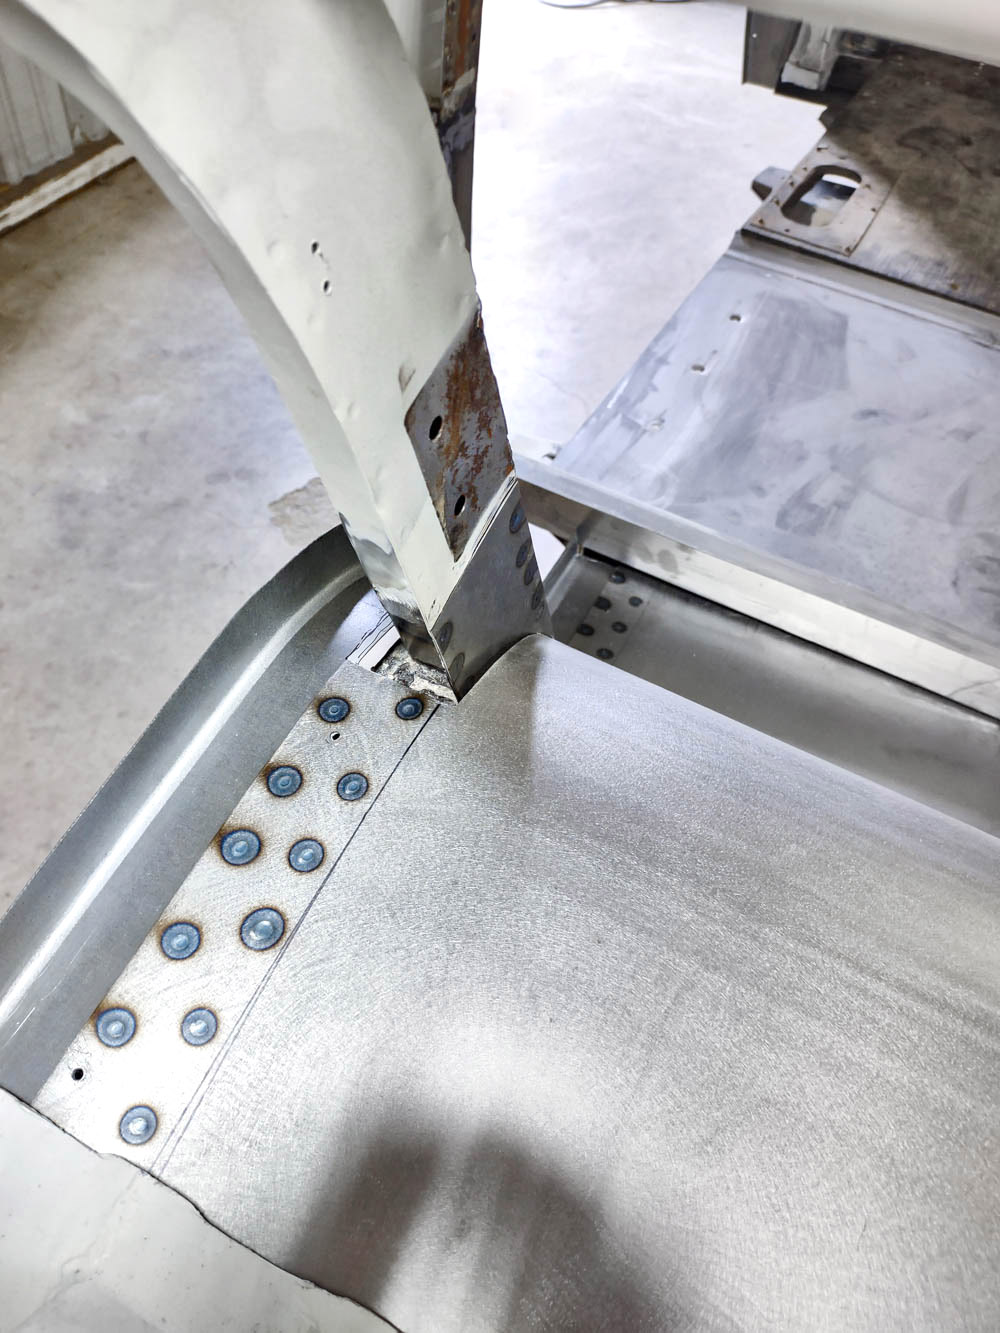
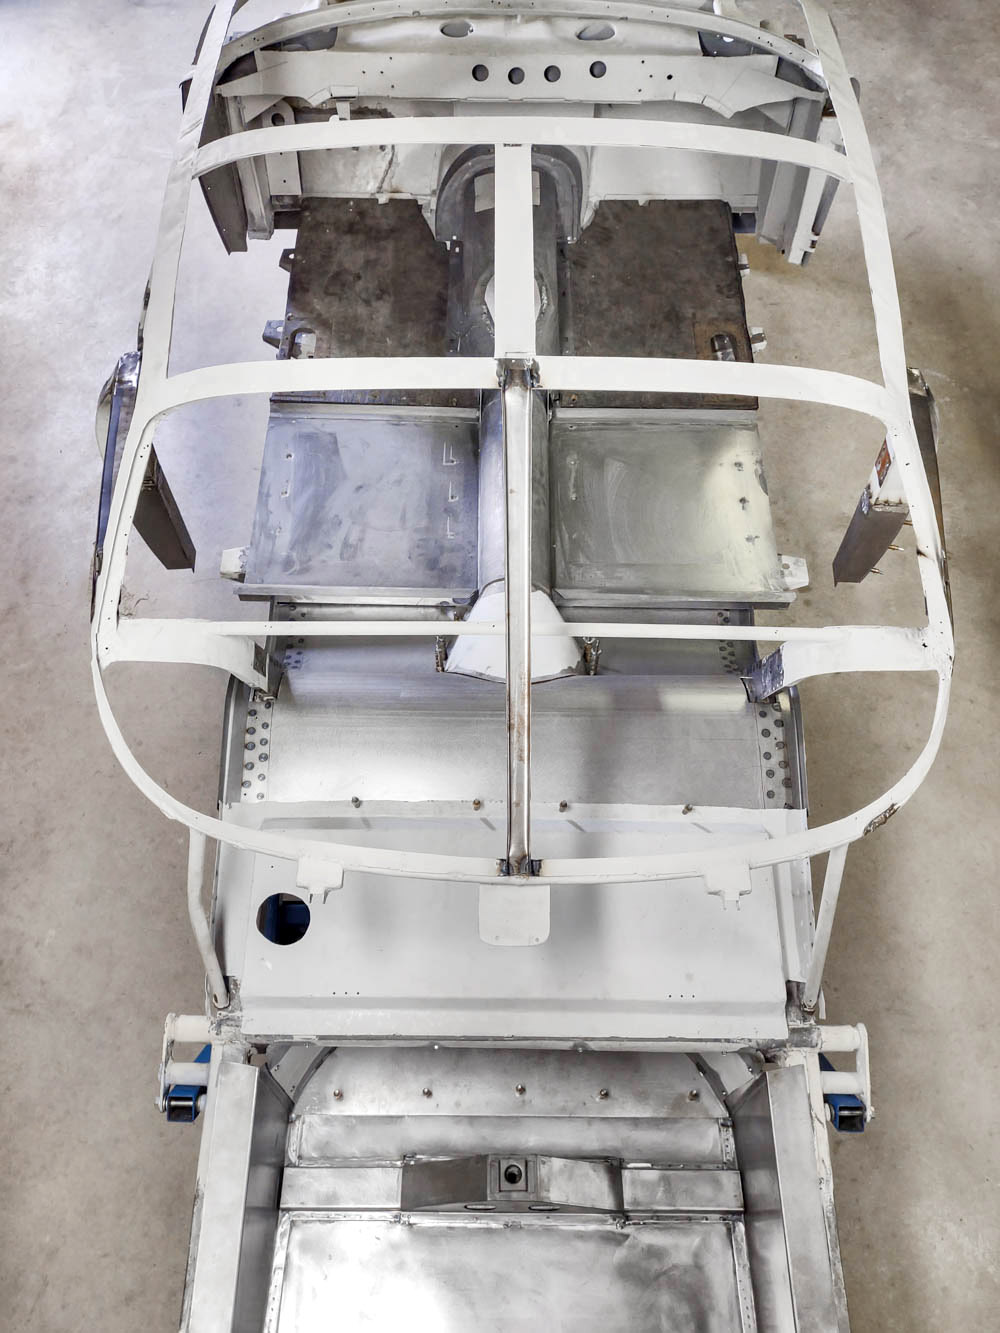
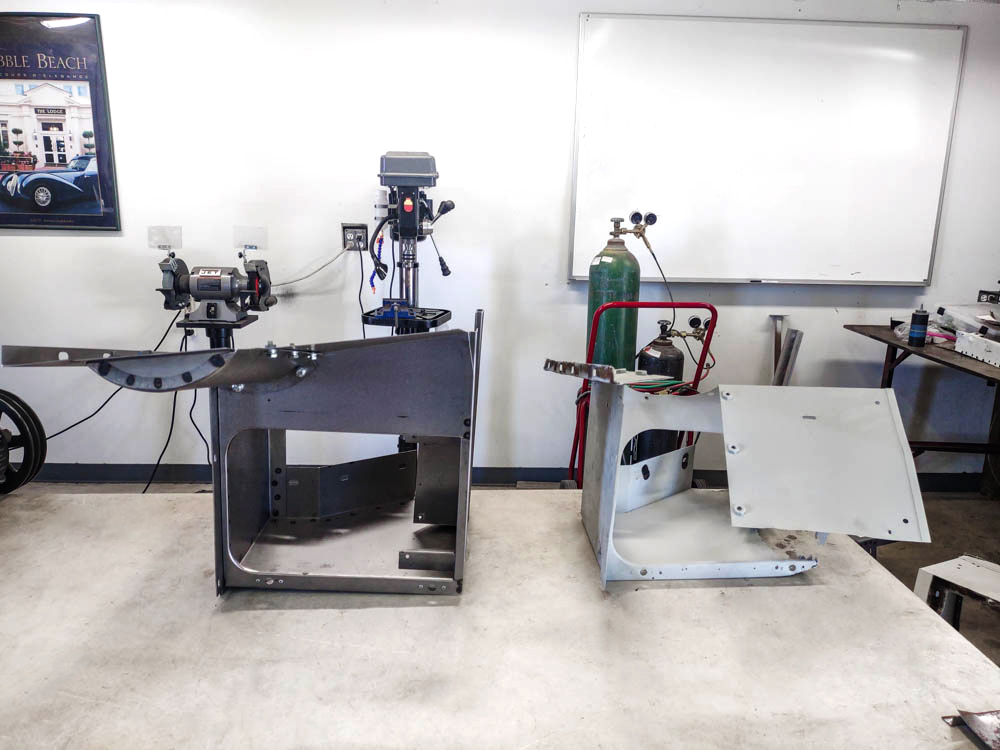
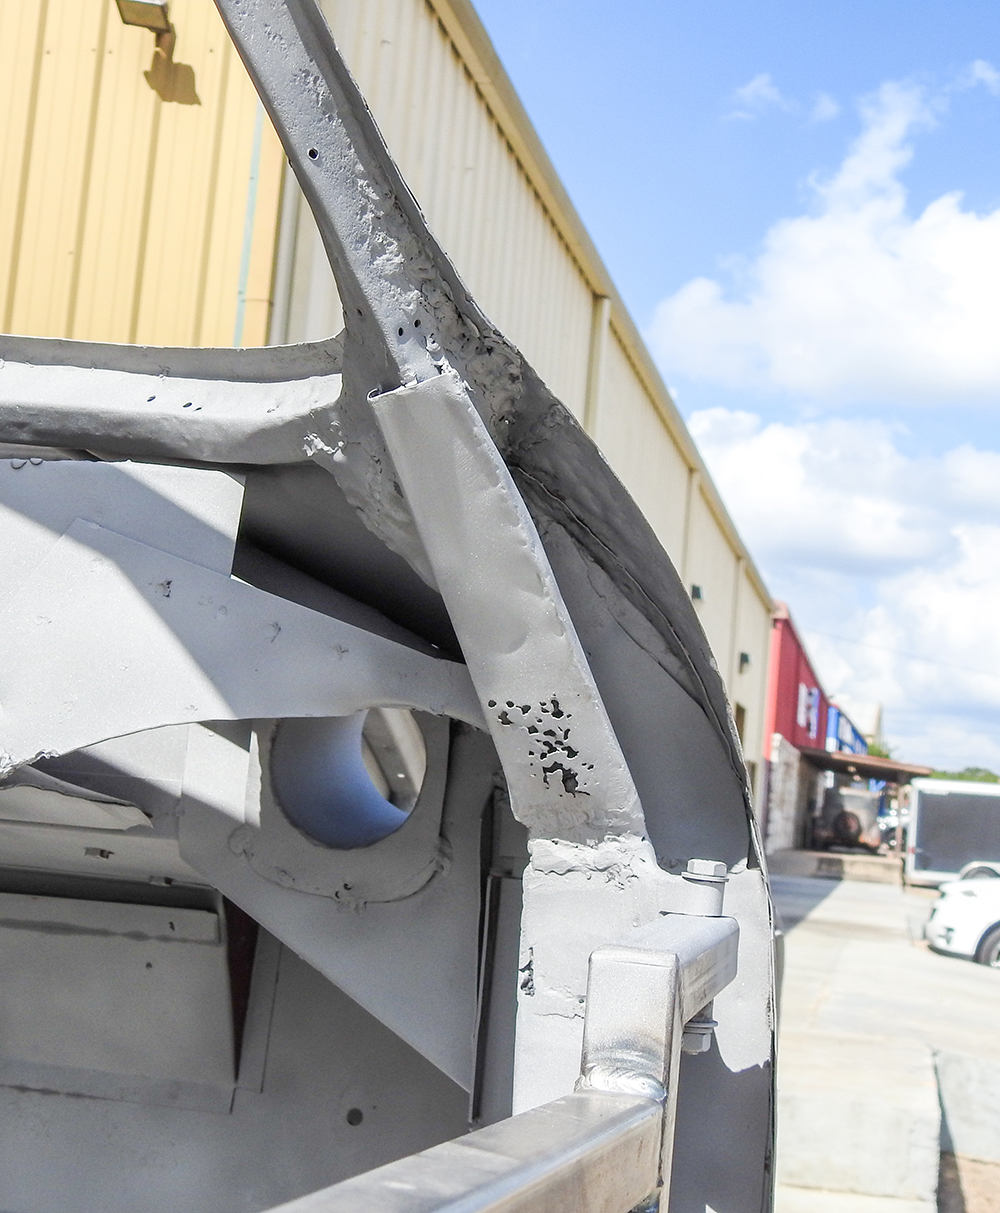
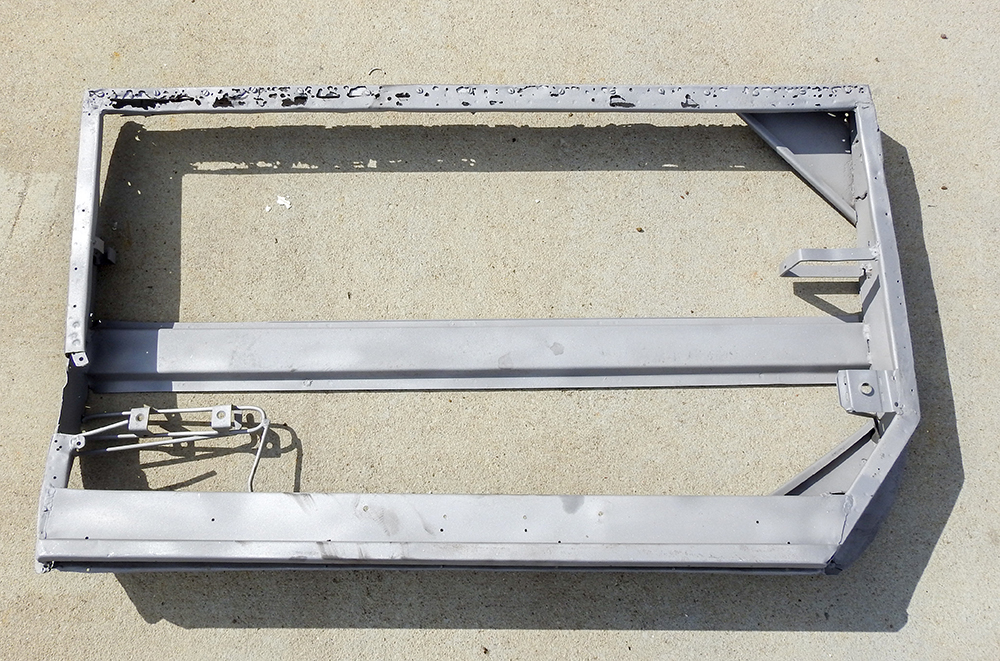
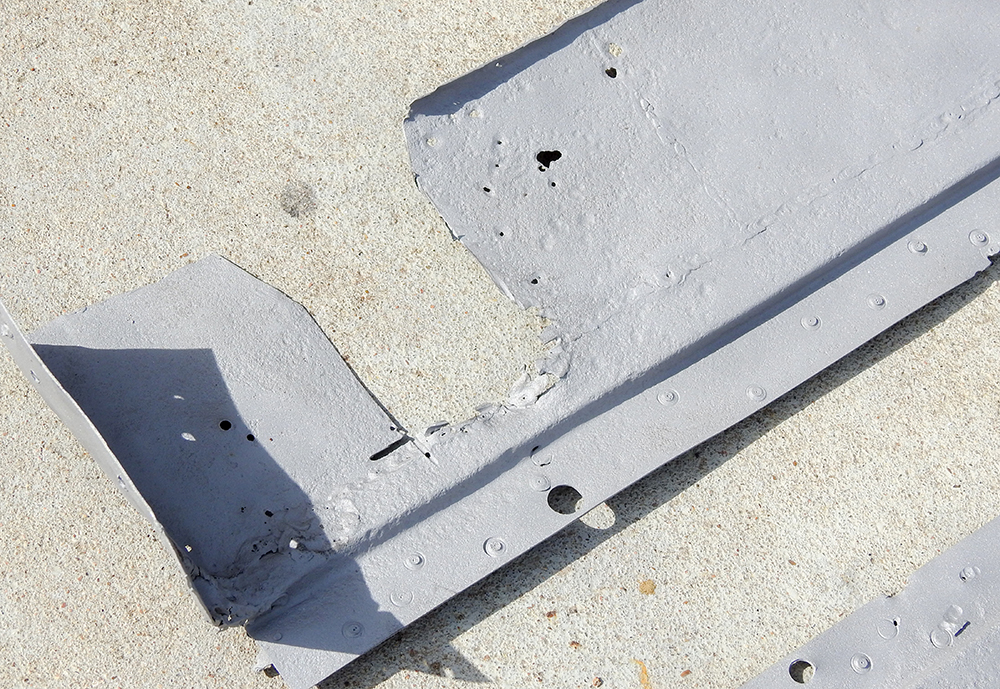
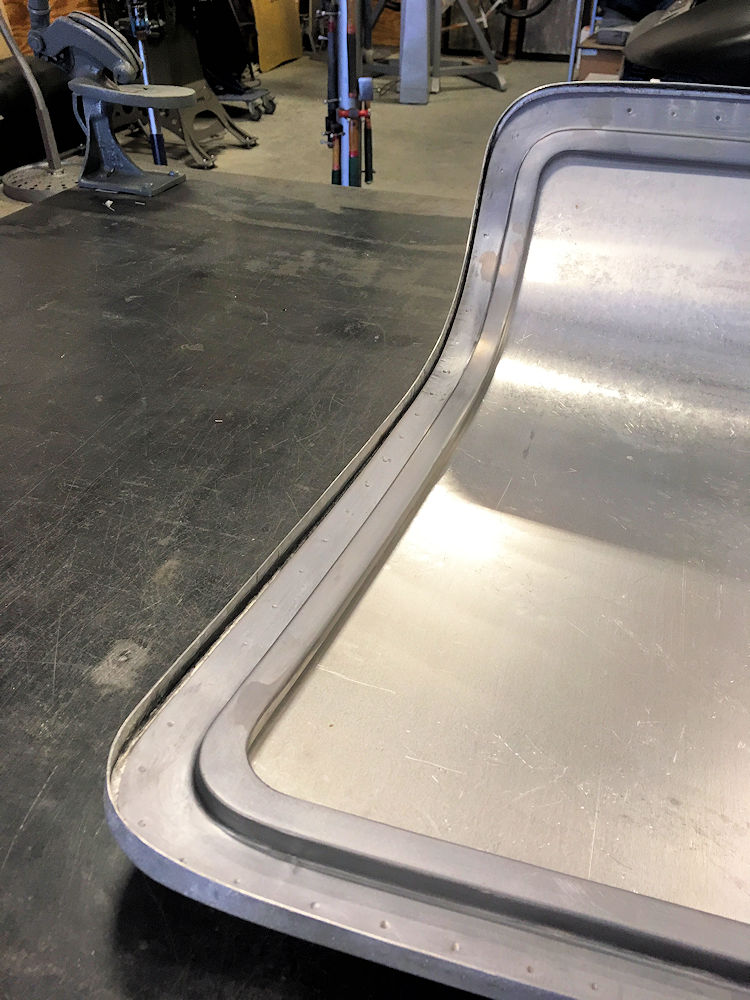
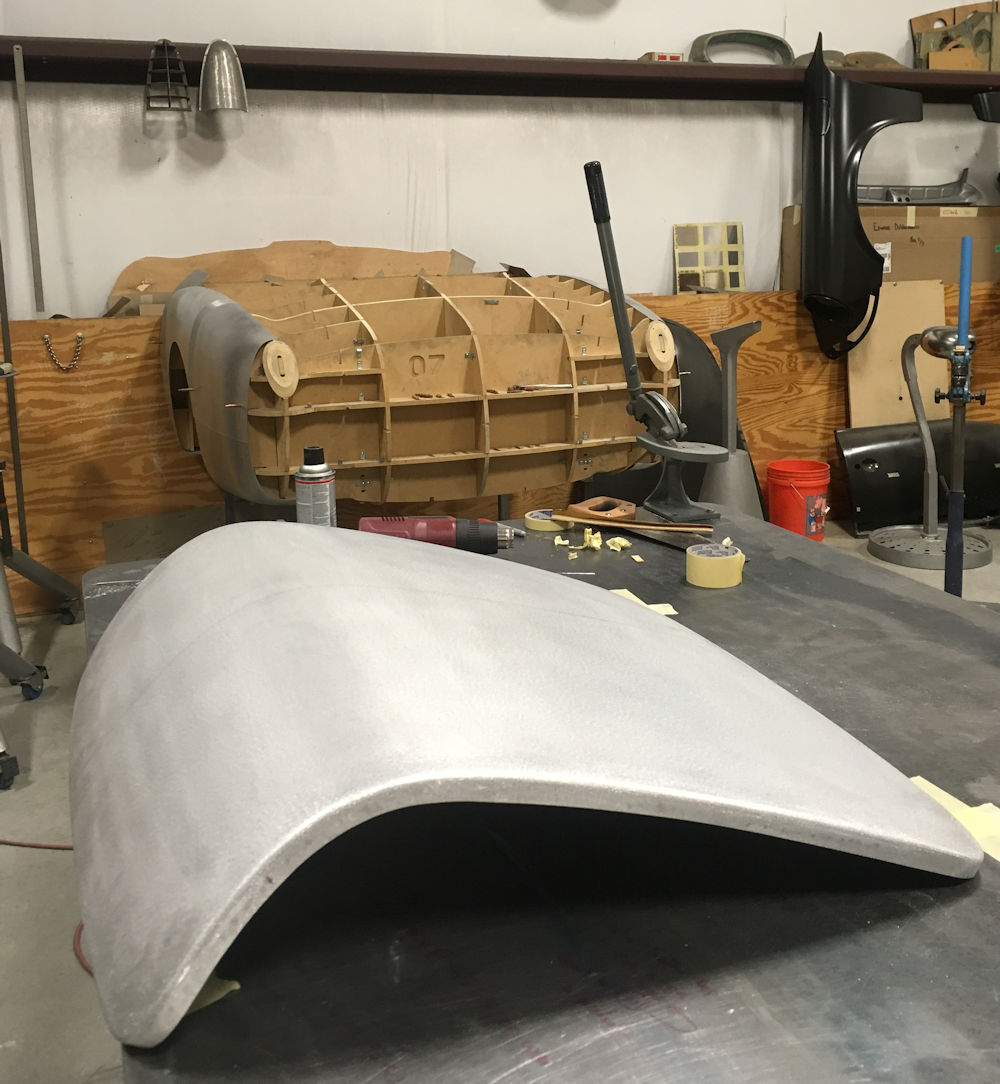
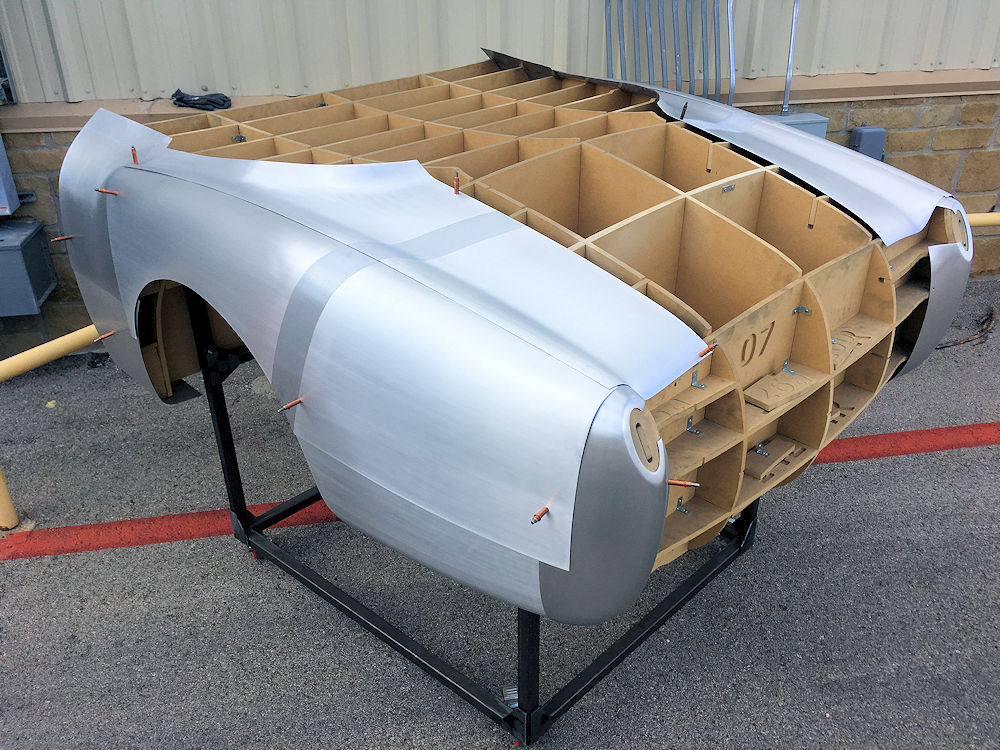
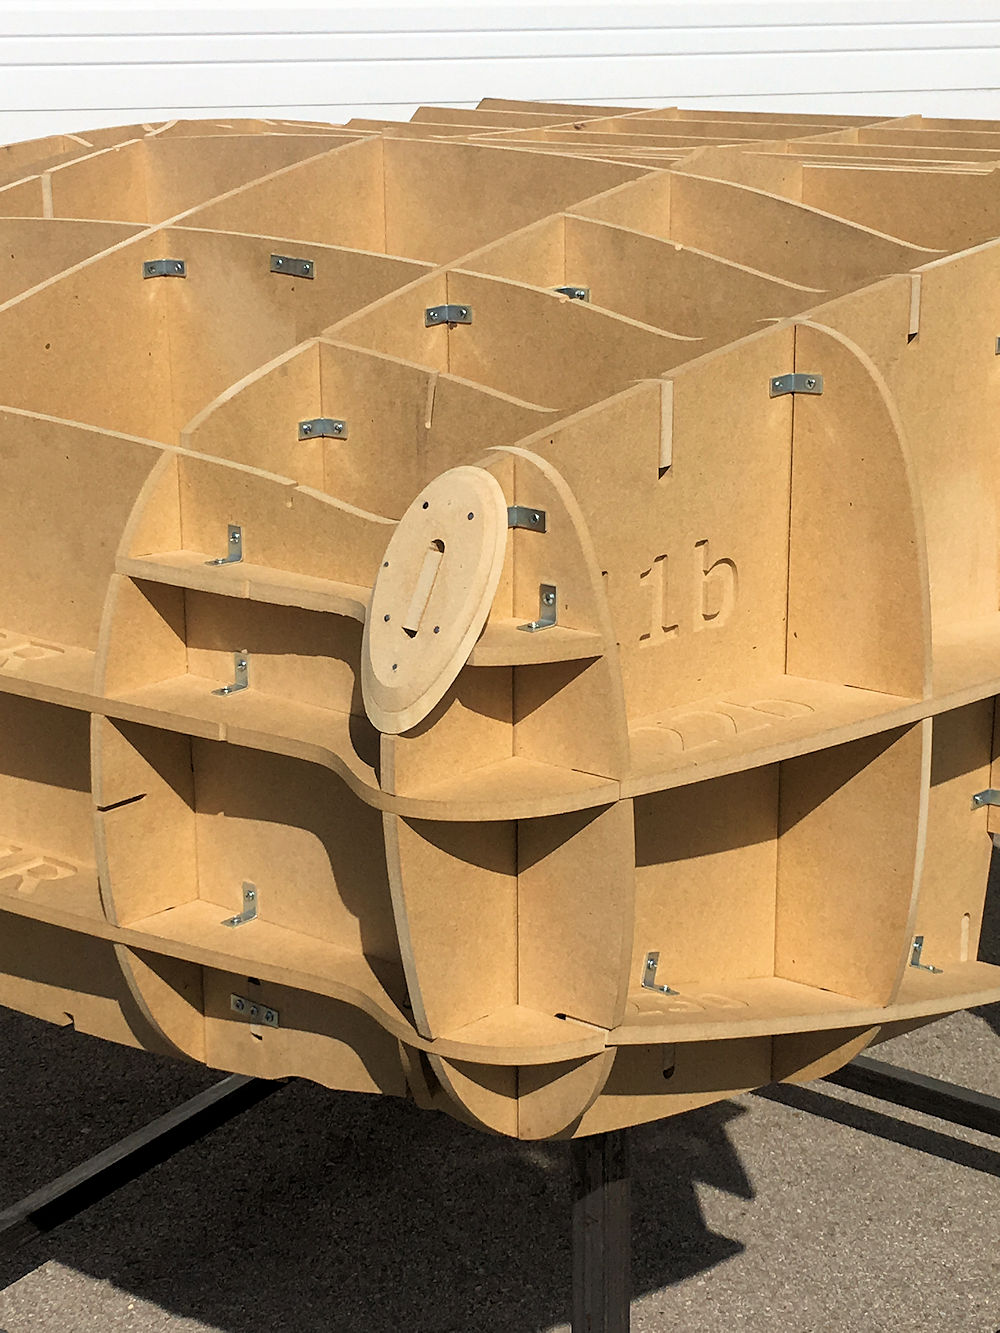
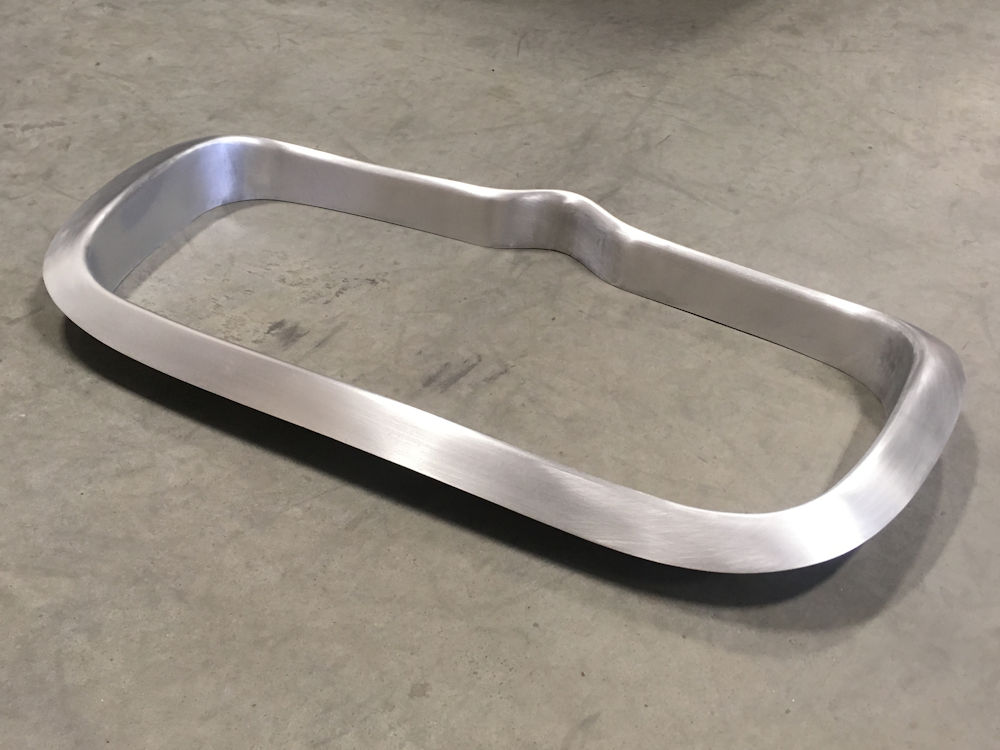
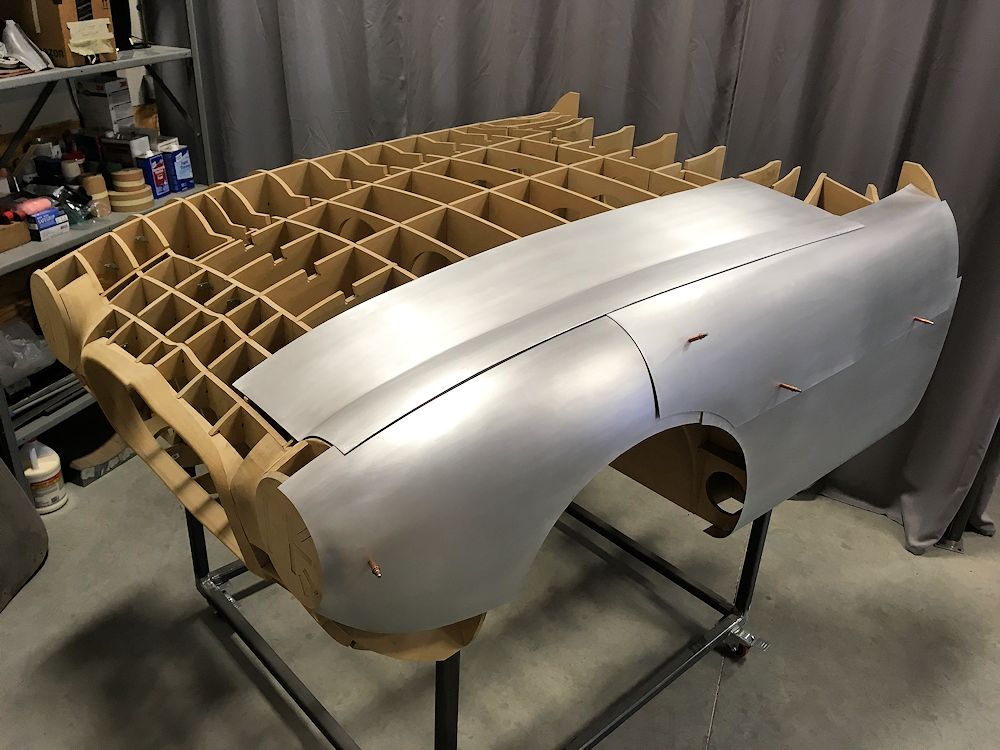
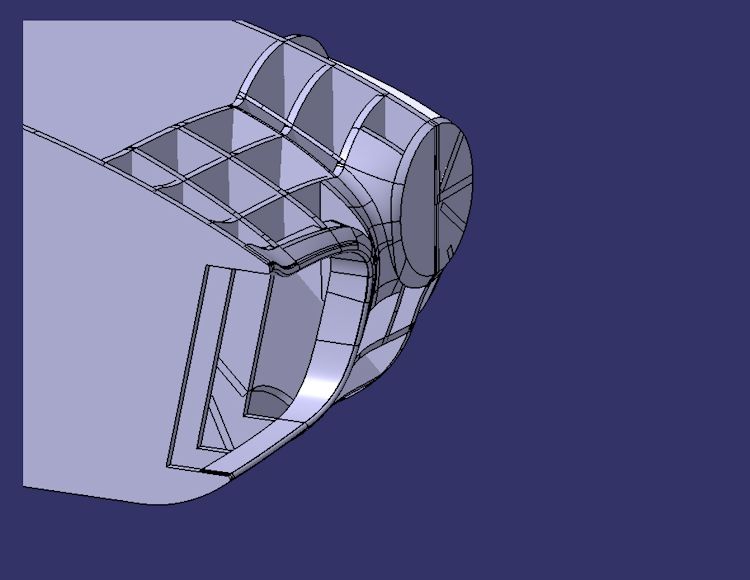
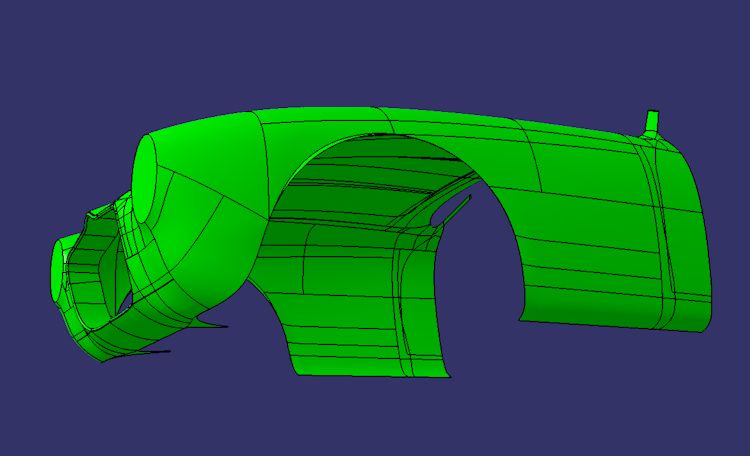
Boot opening / drip rail
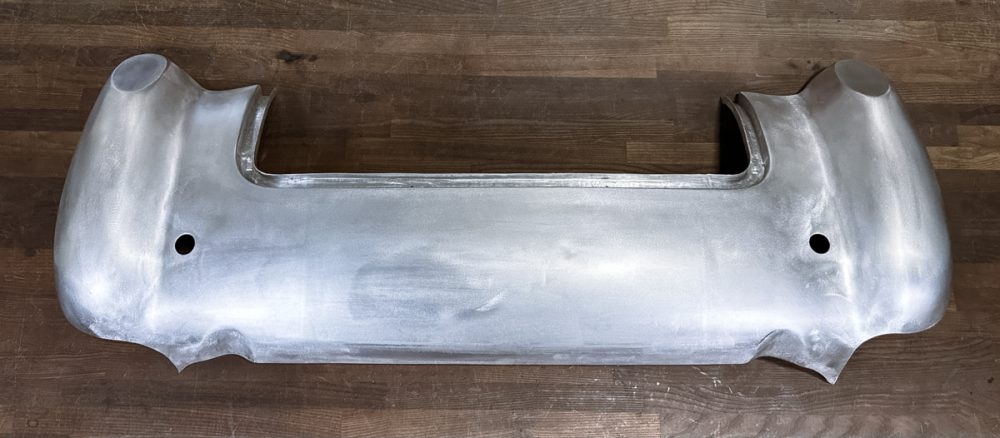
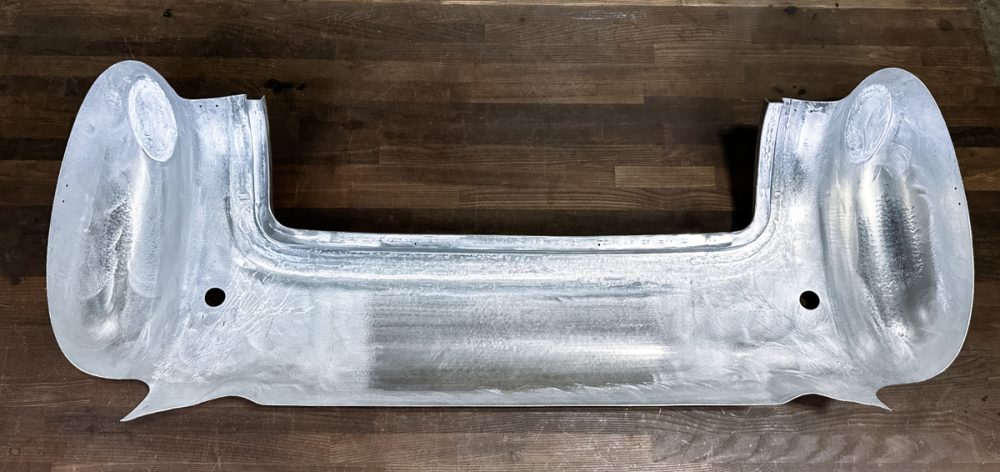
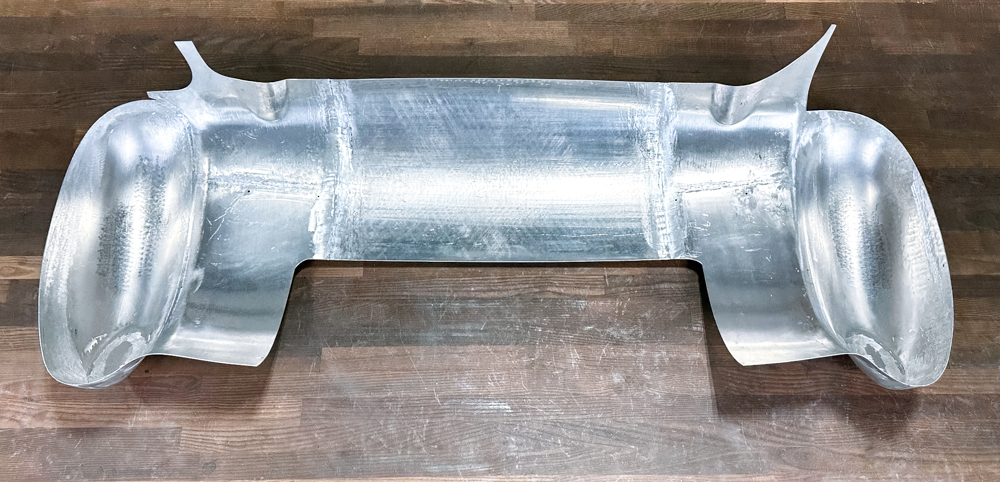
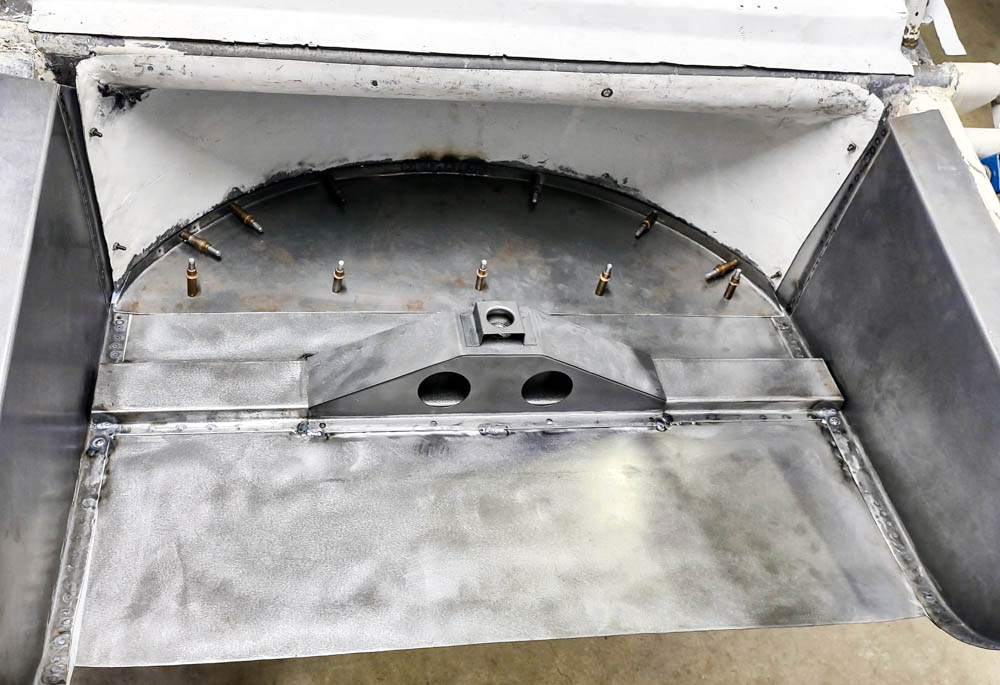
Tail panel
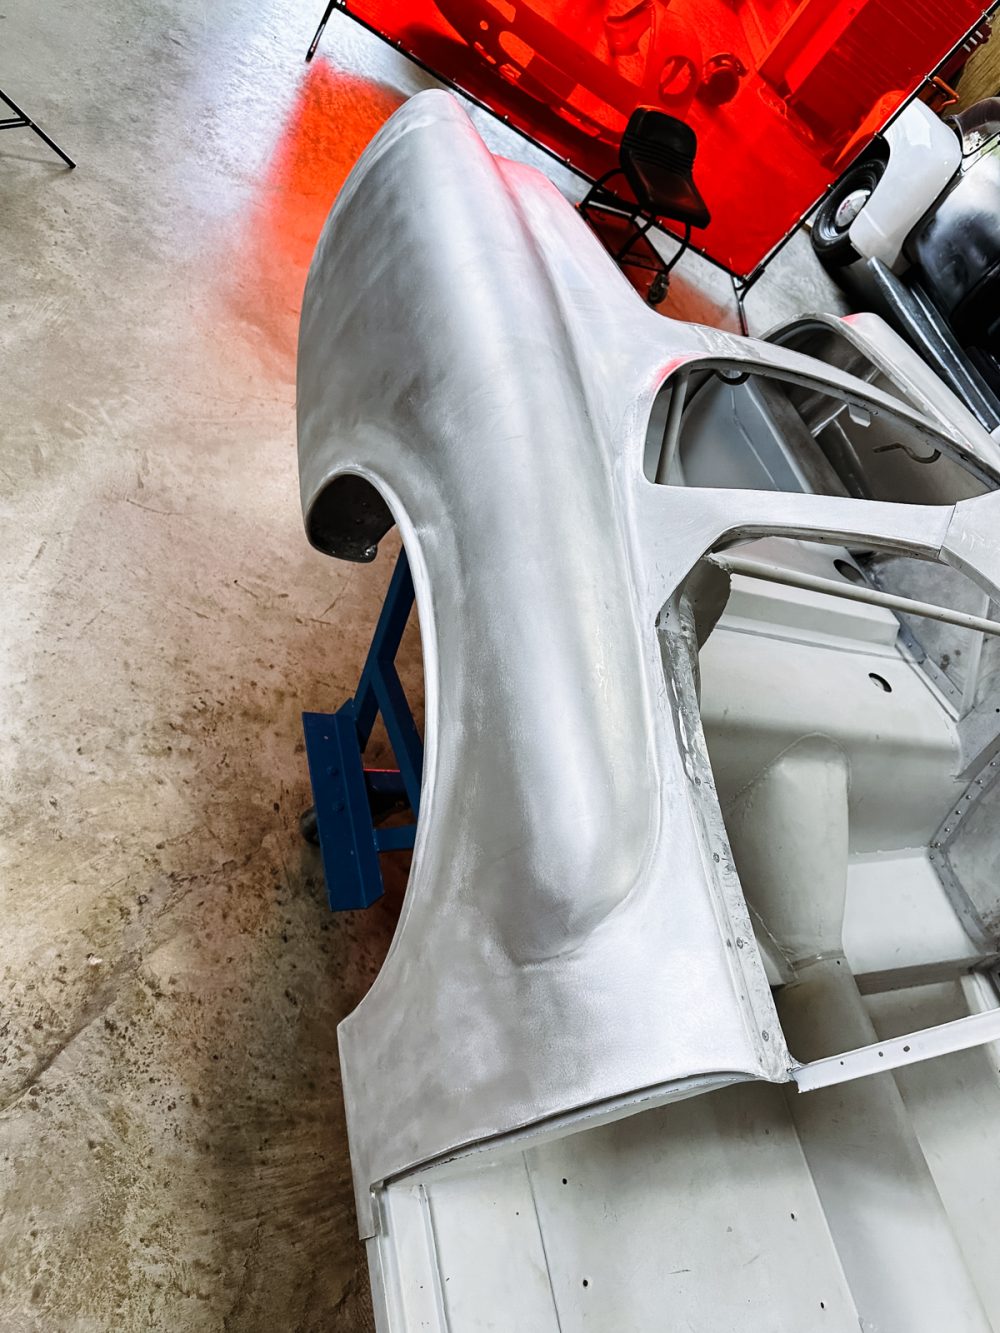
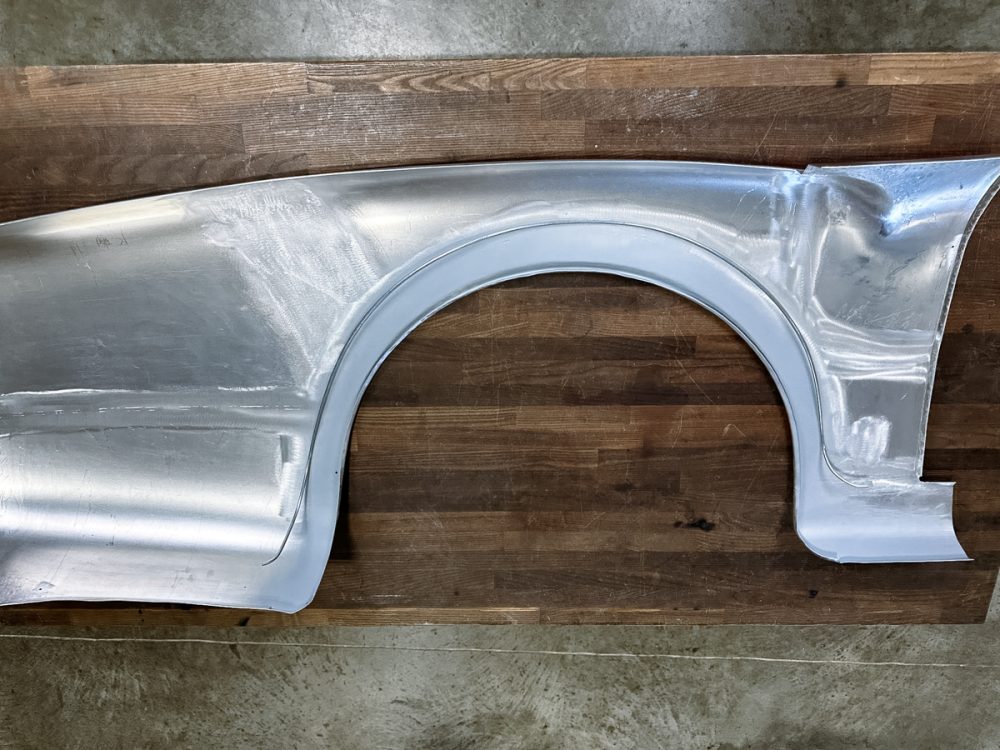
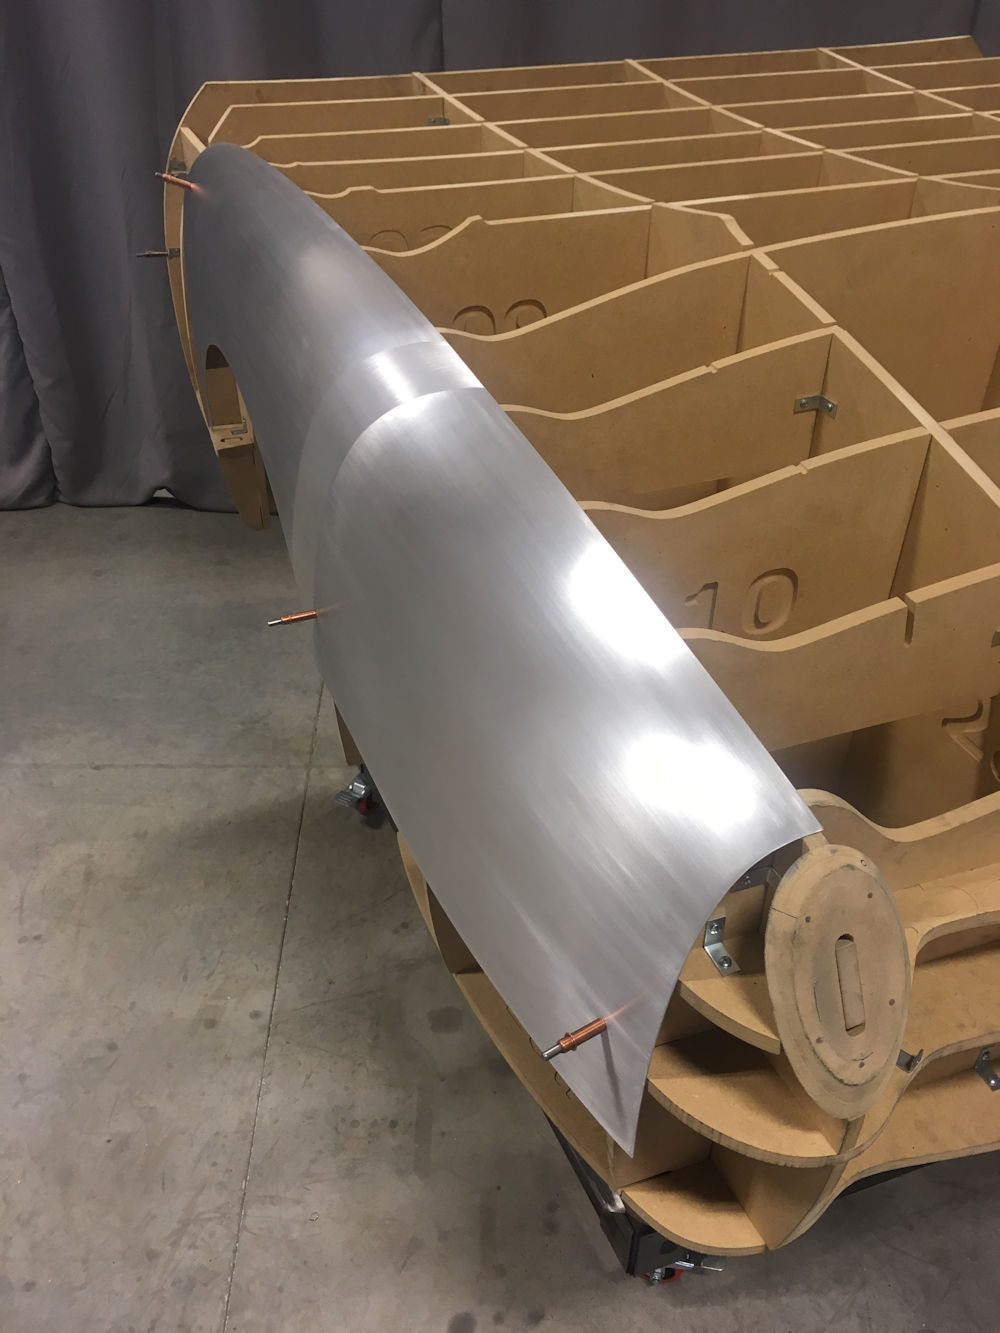
Rear fender wheel arch / fender flares
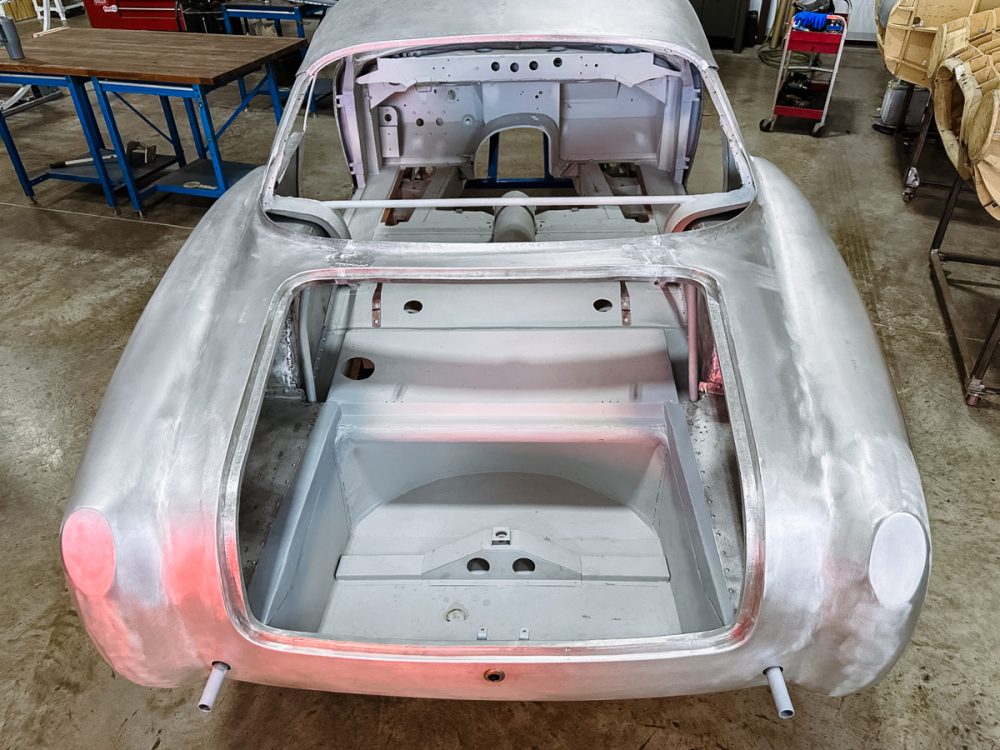
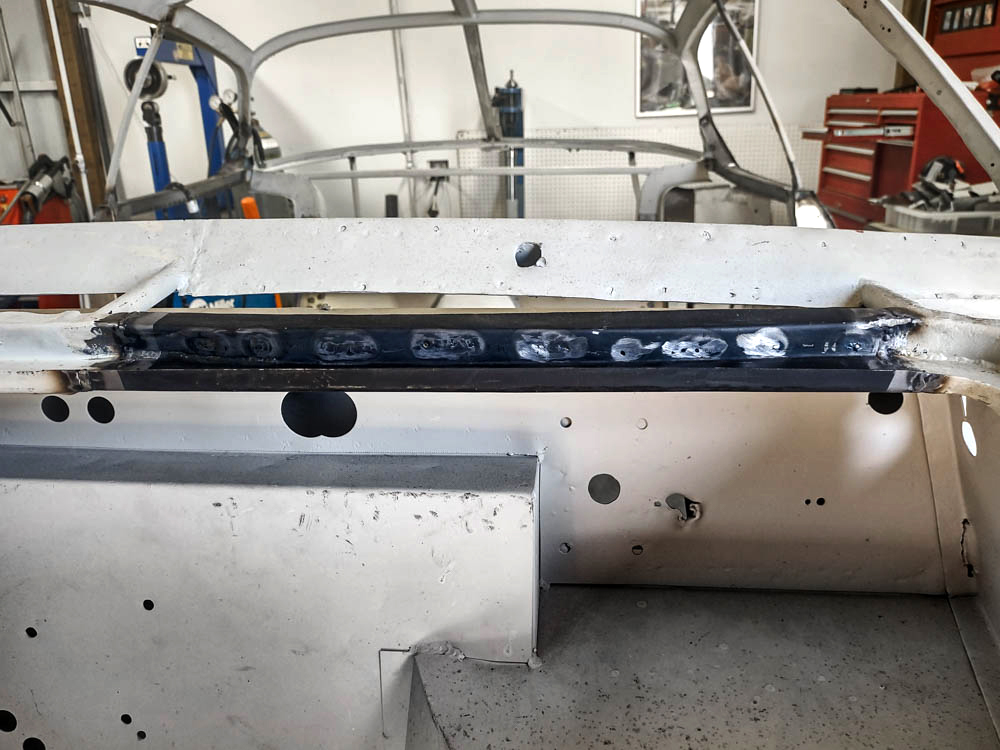
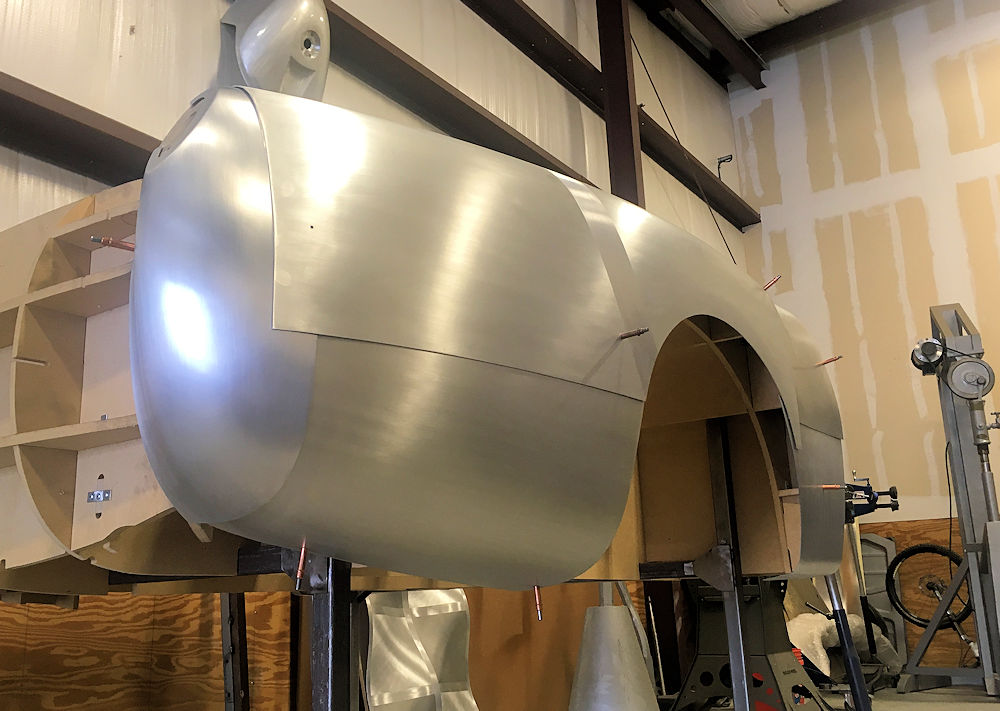
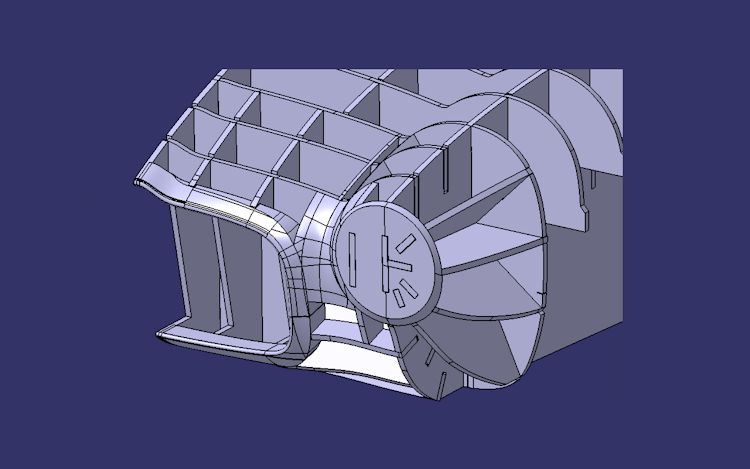
Drip rail weld out
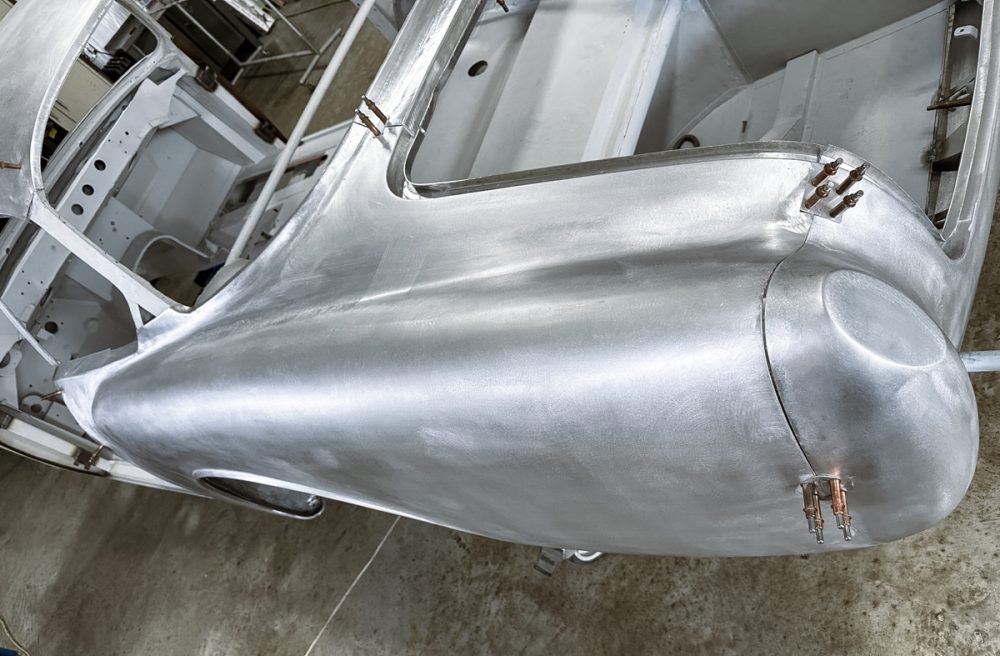
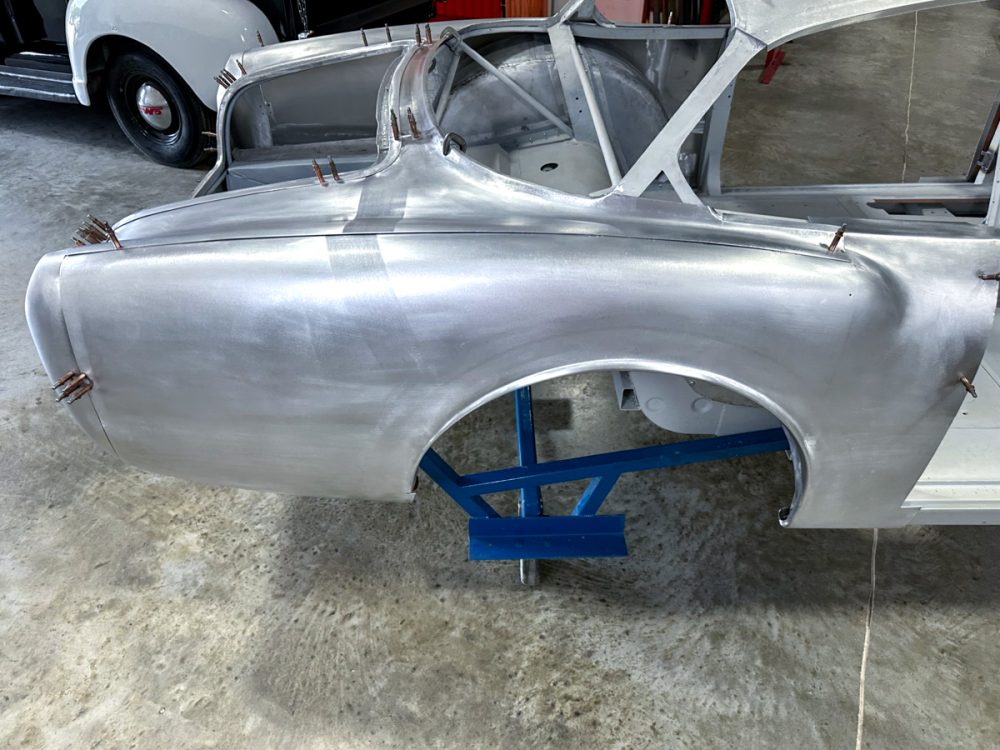
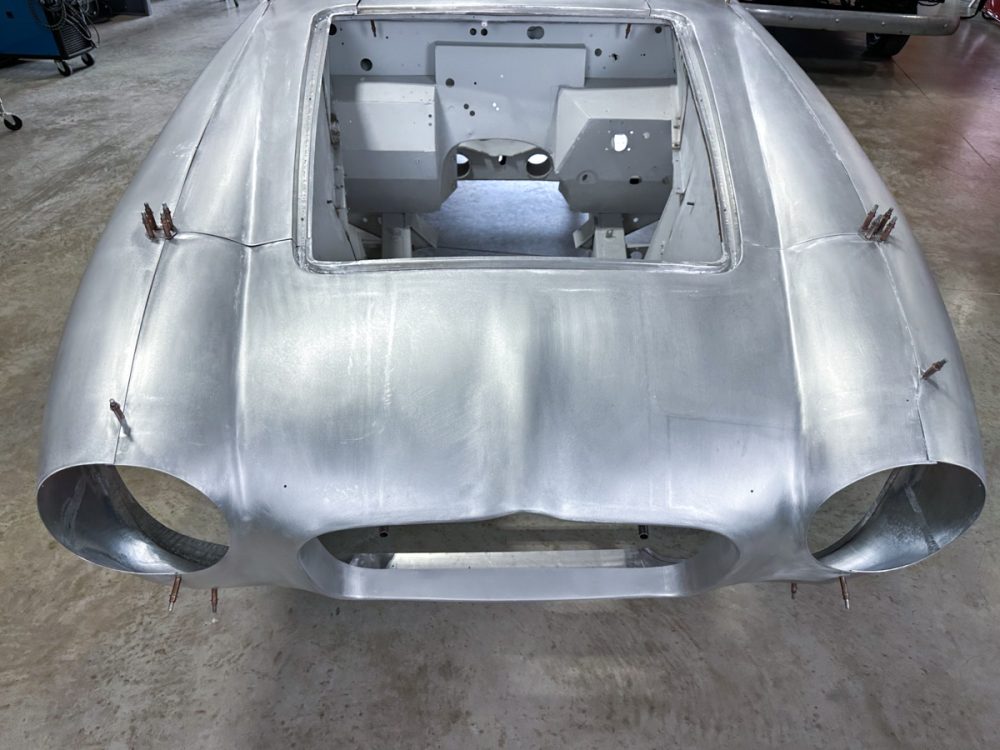
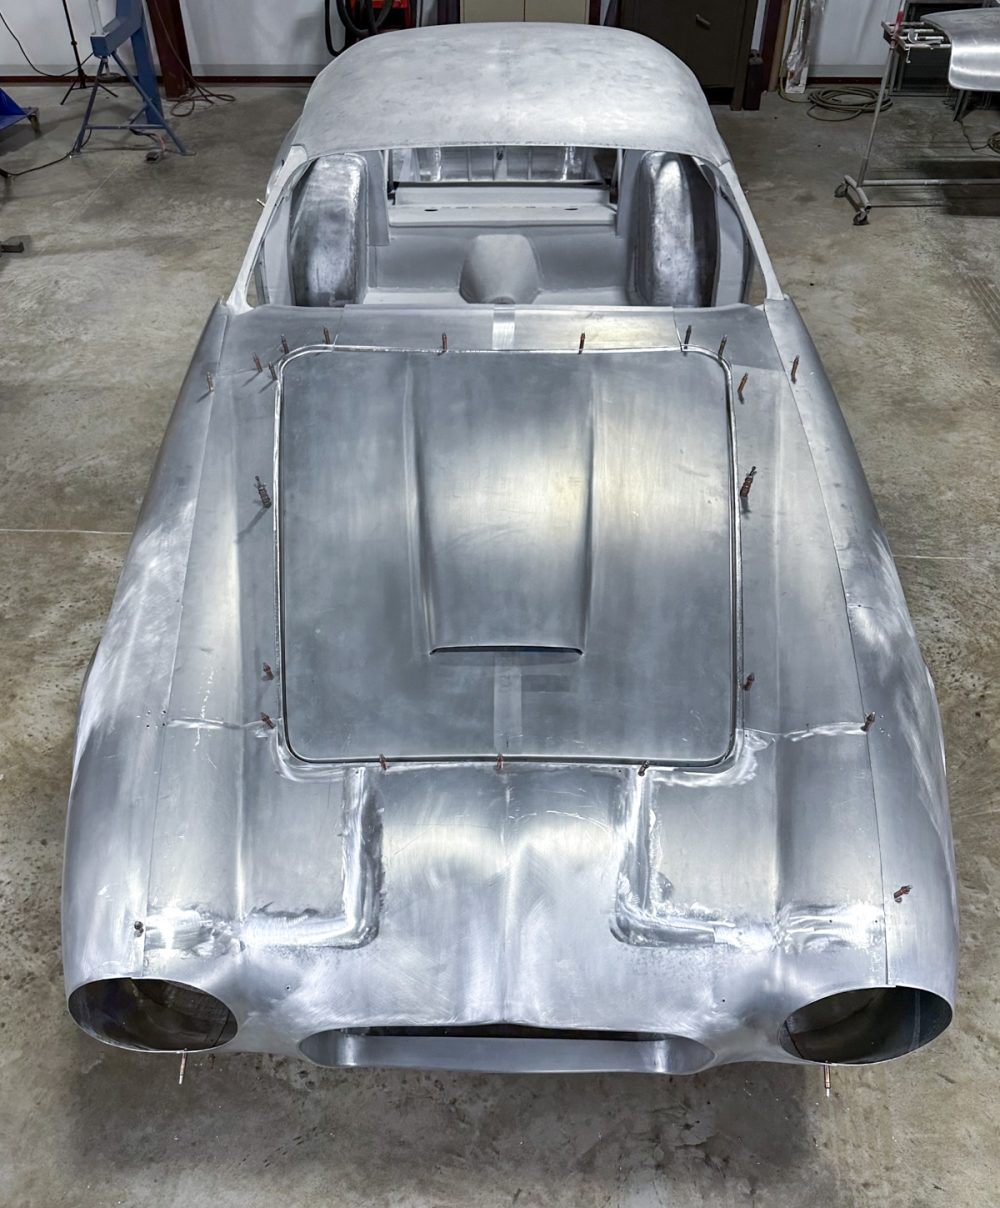
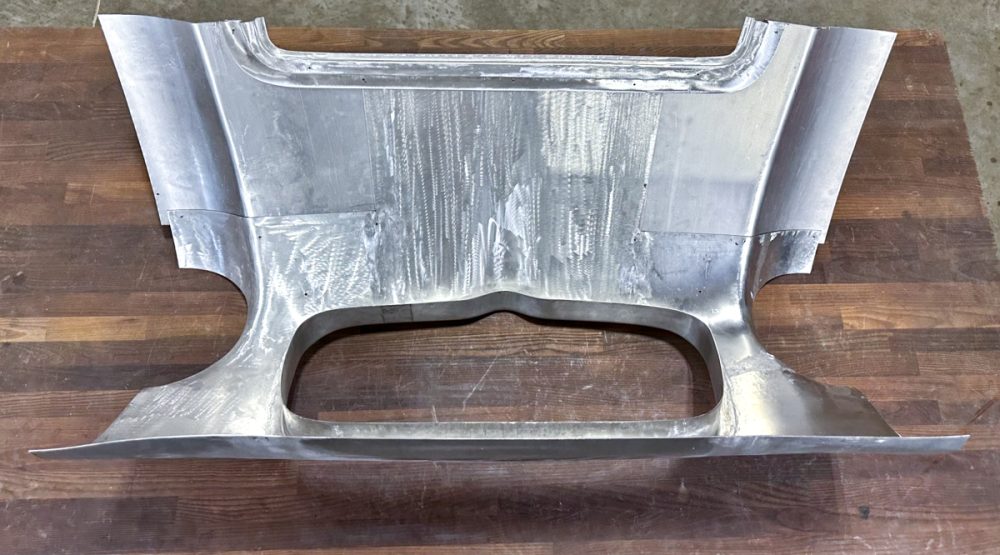
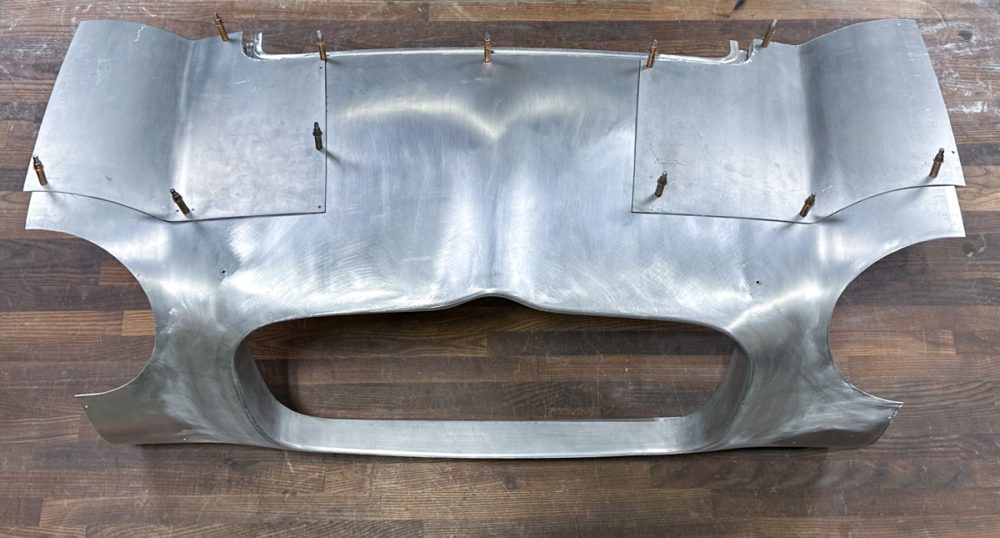
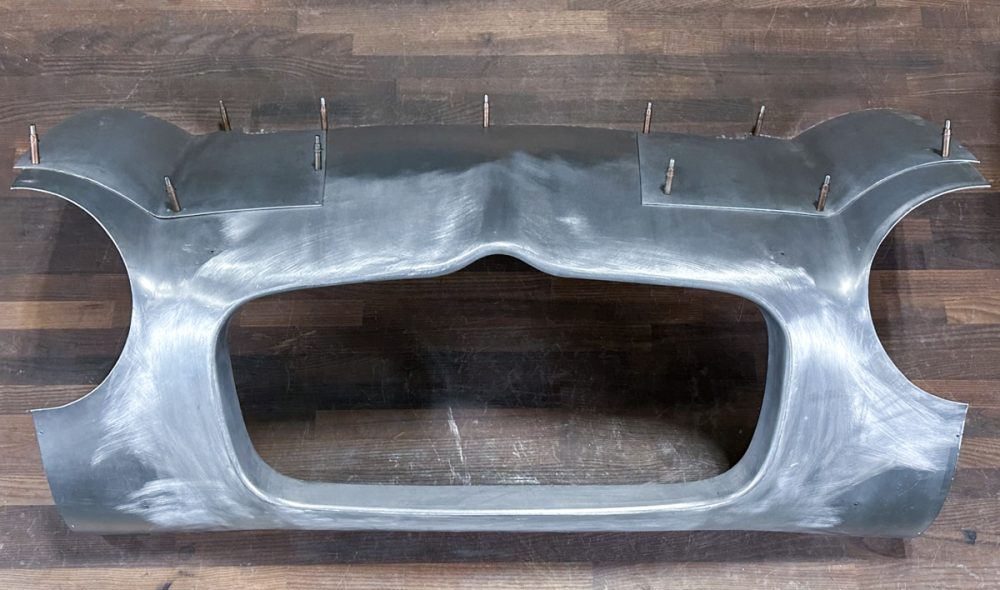
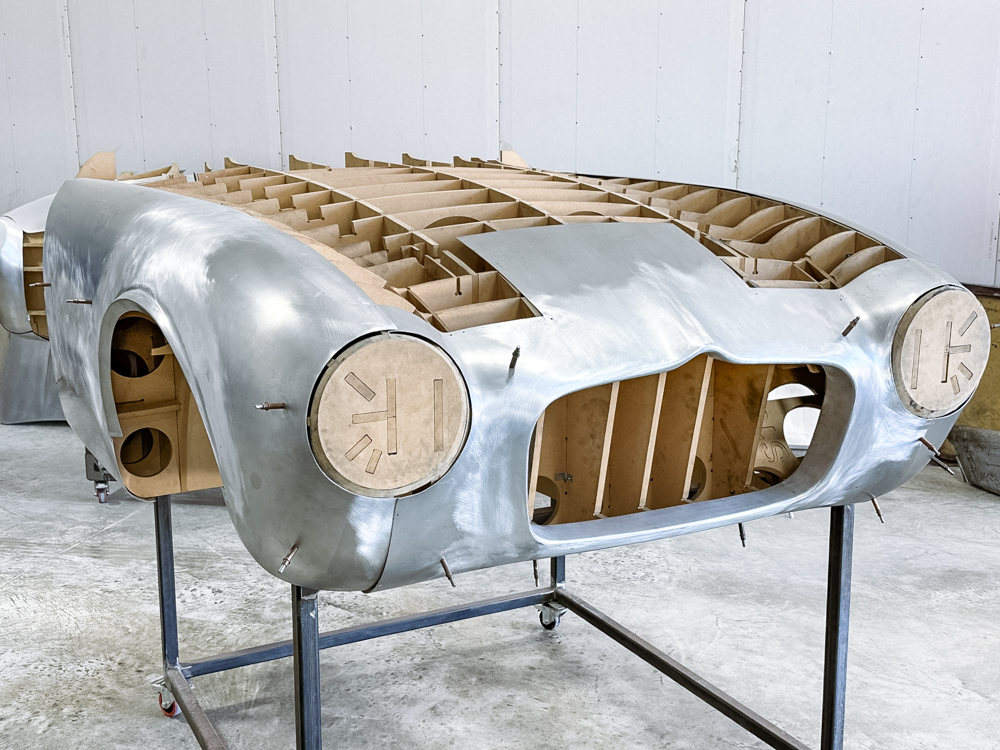
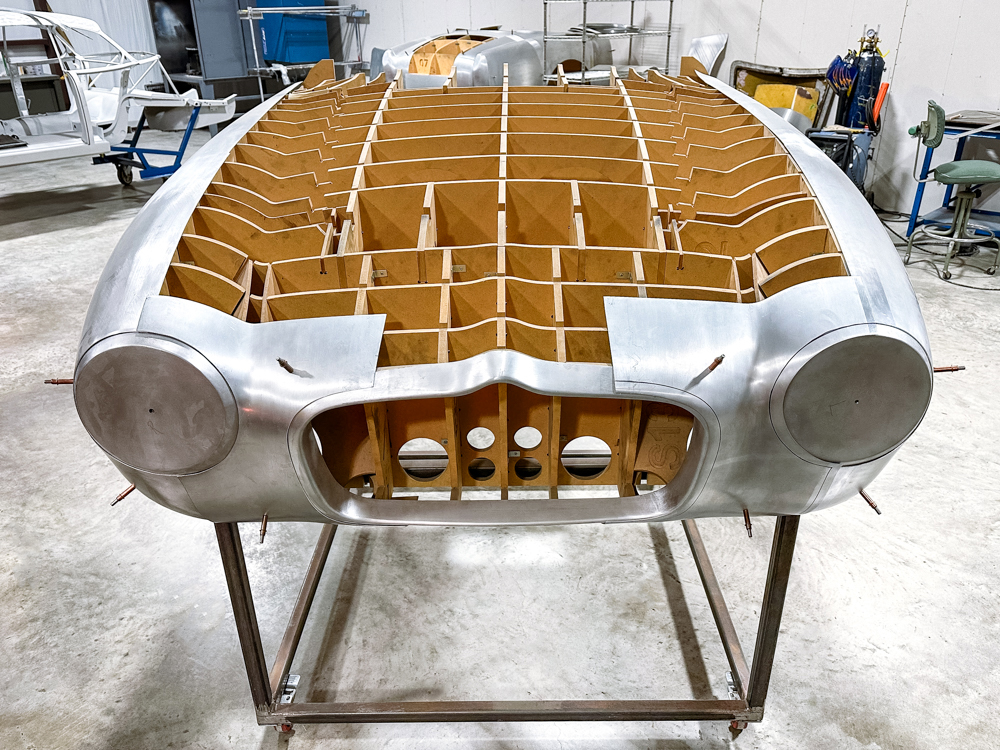
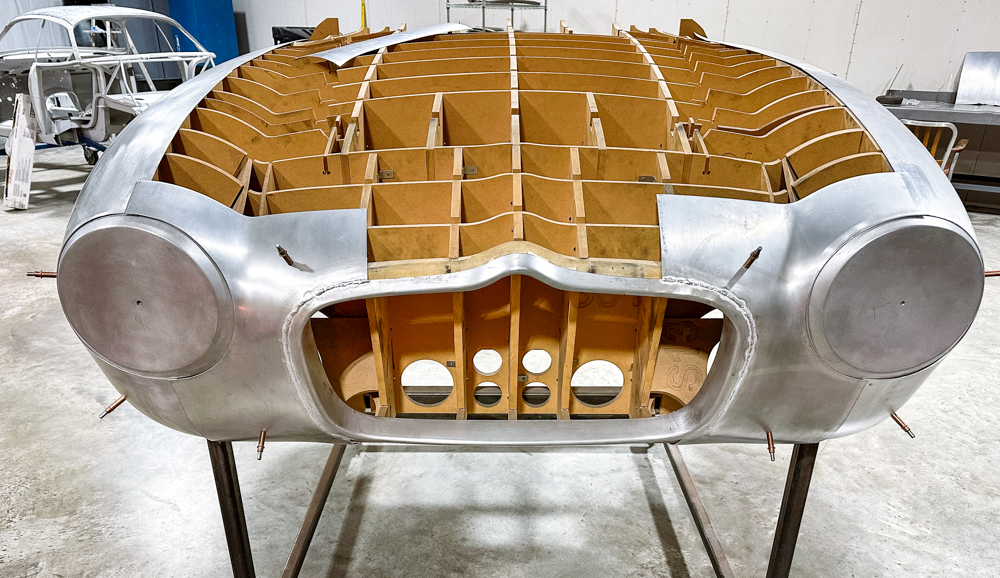
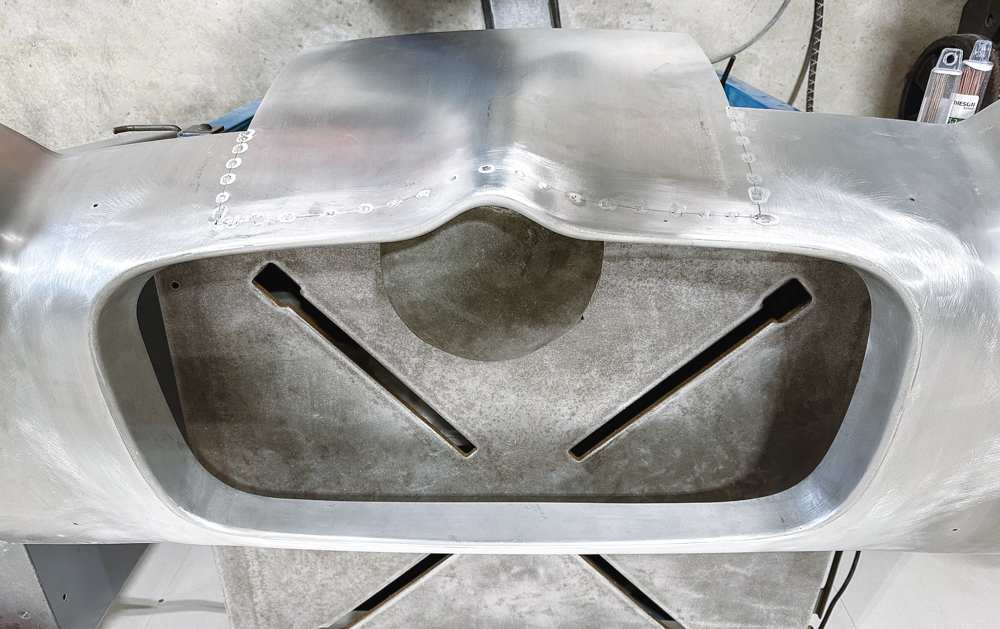
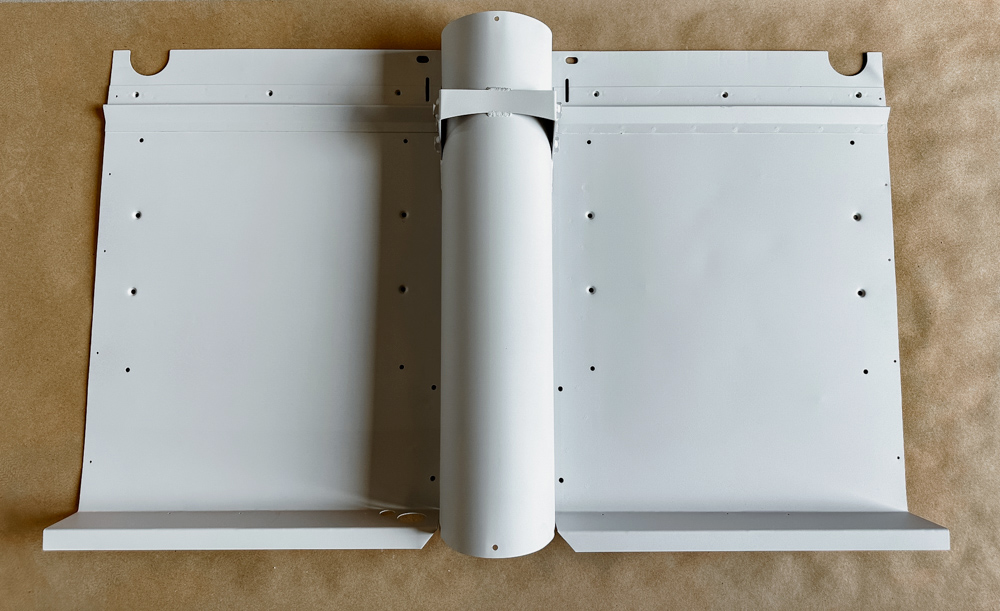
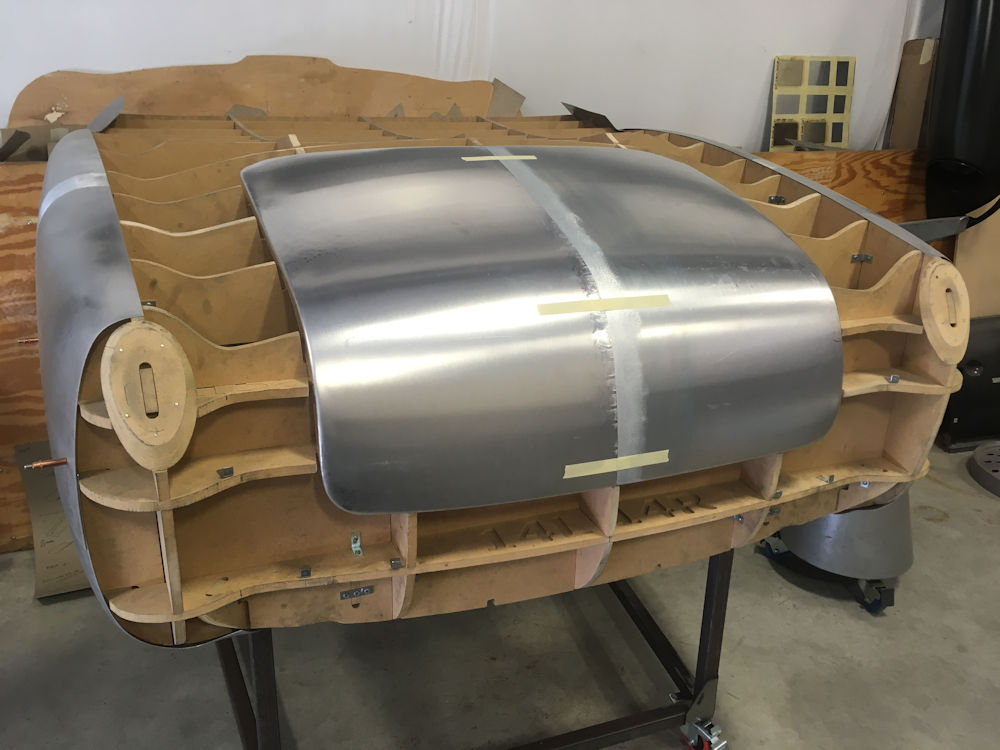
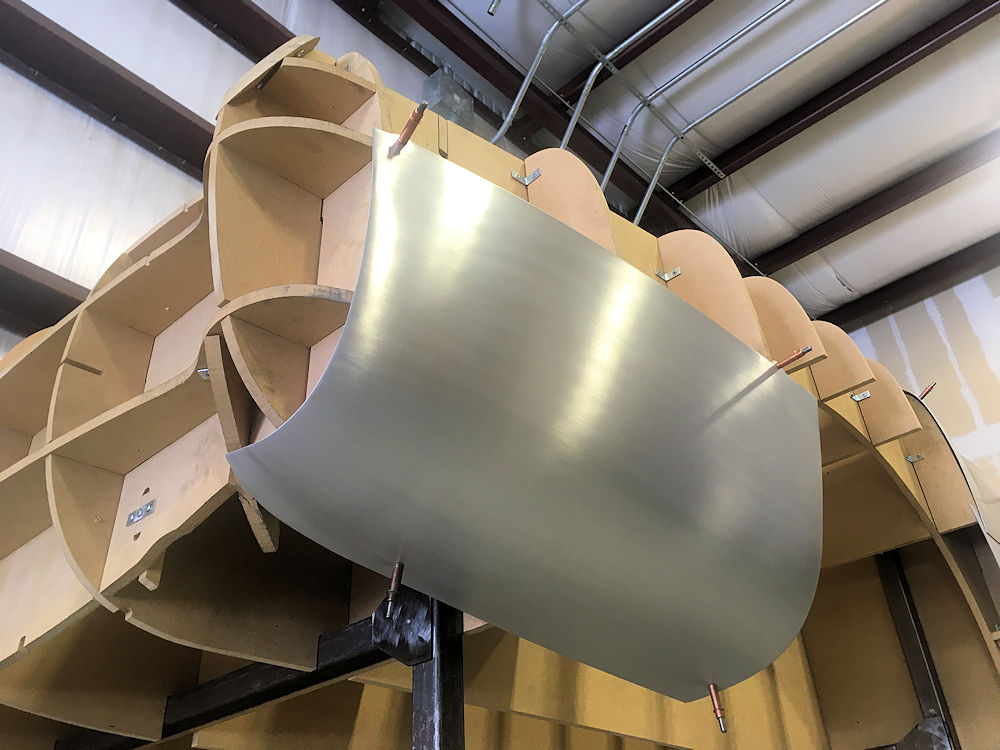
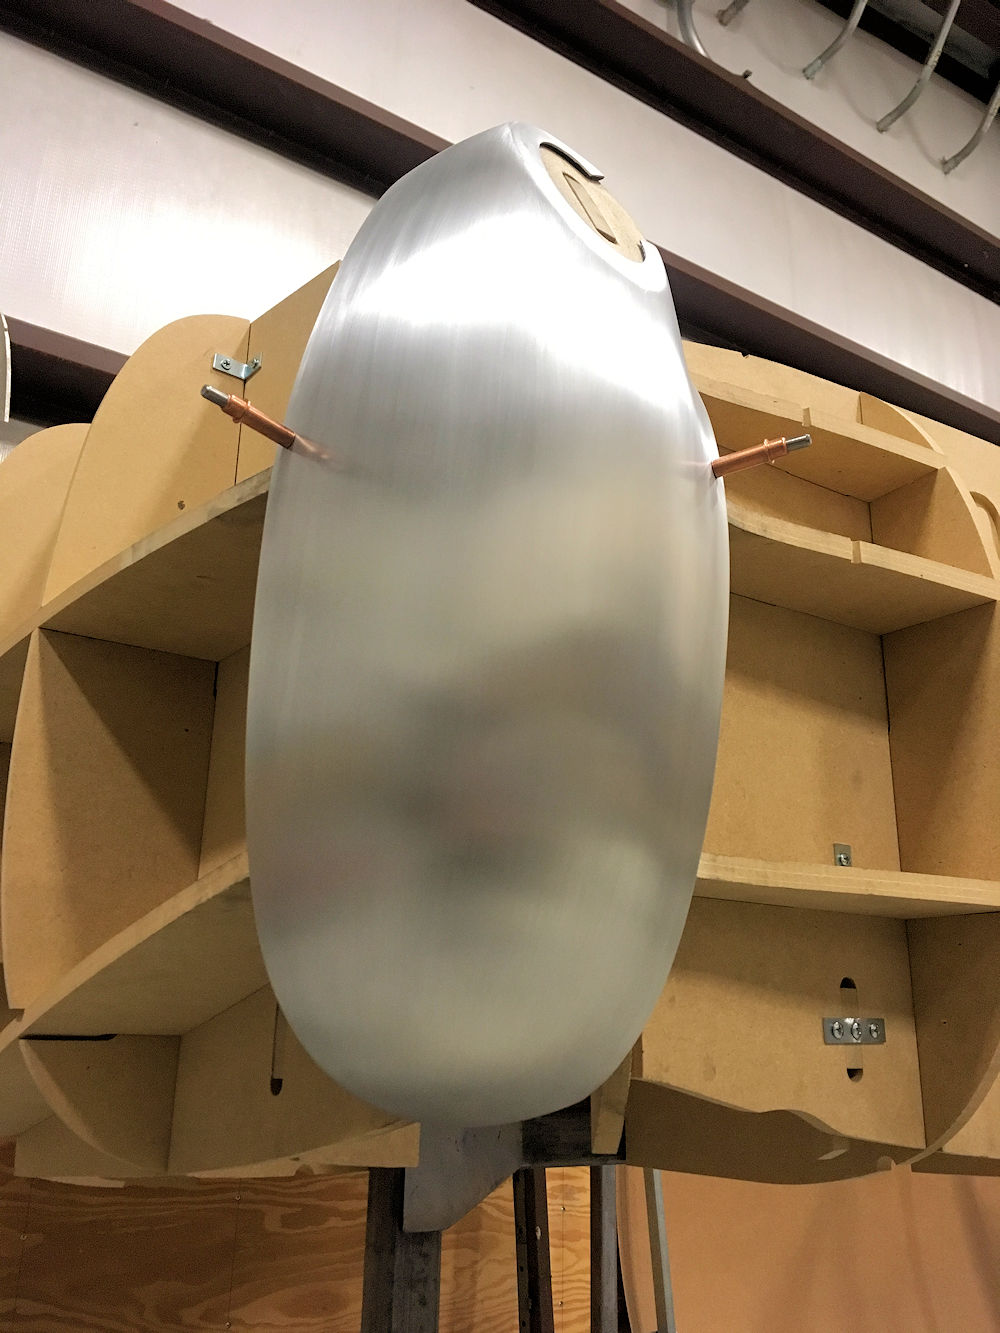
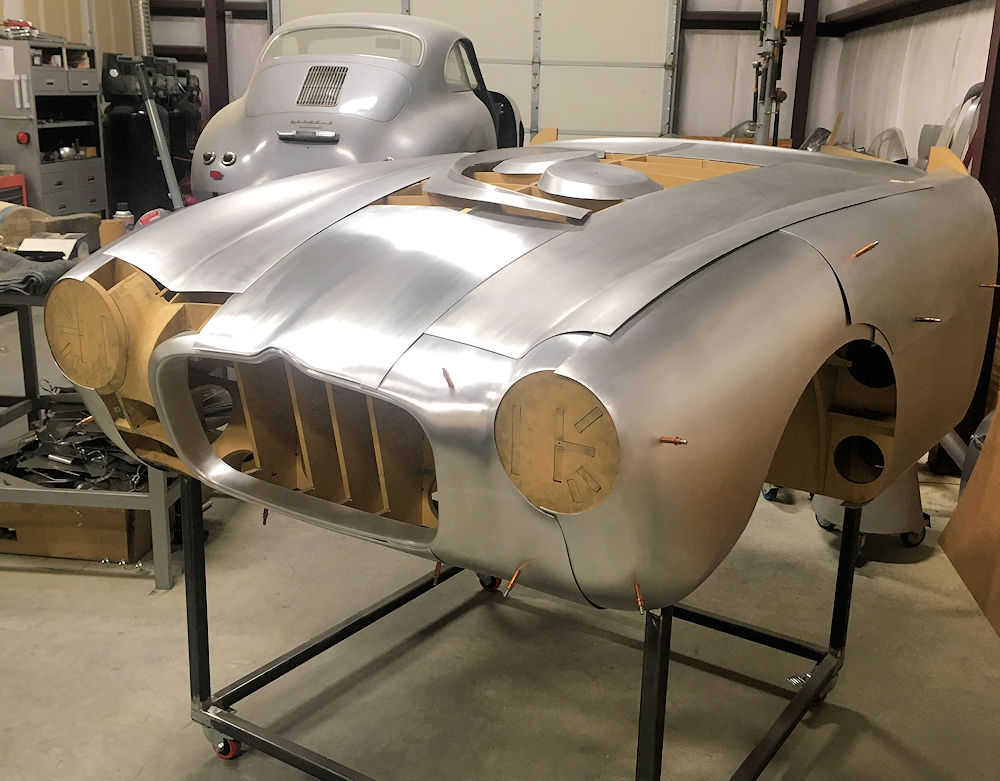
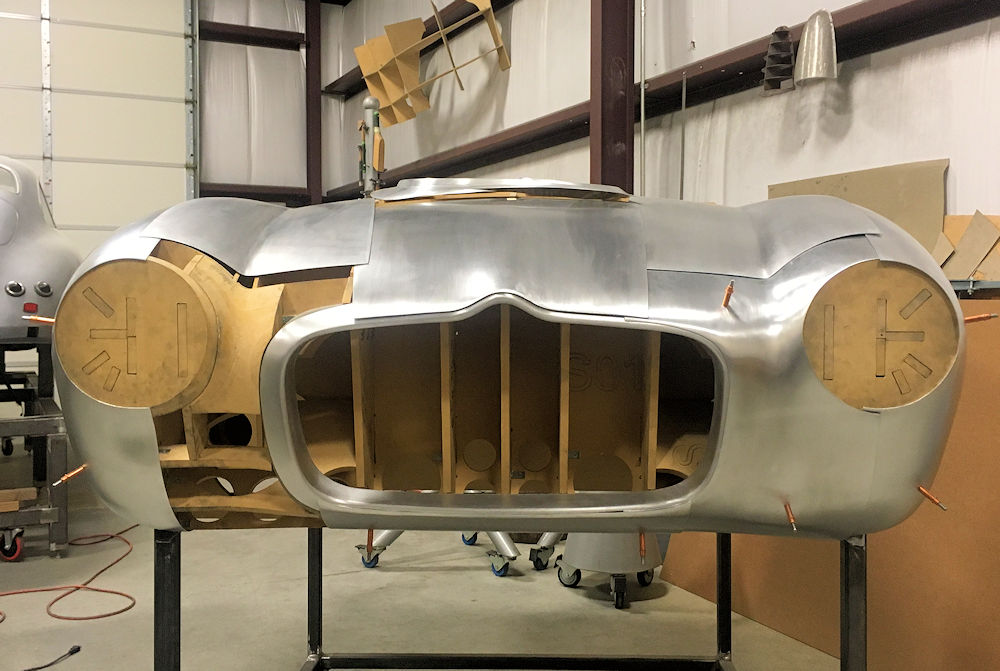
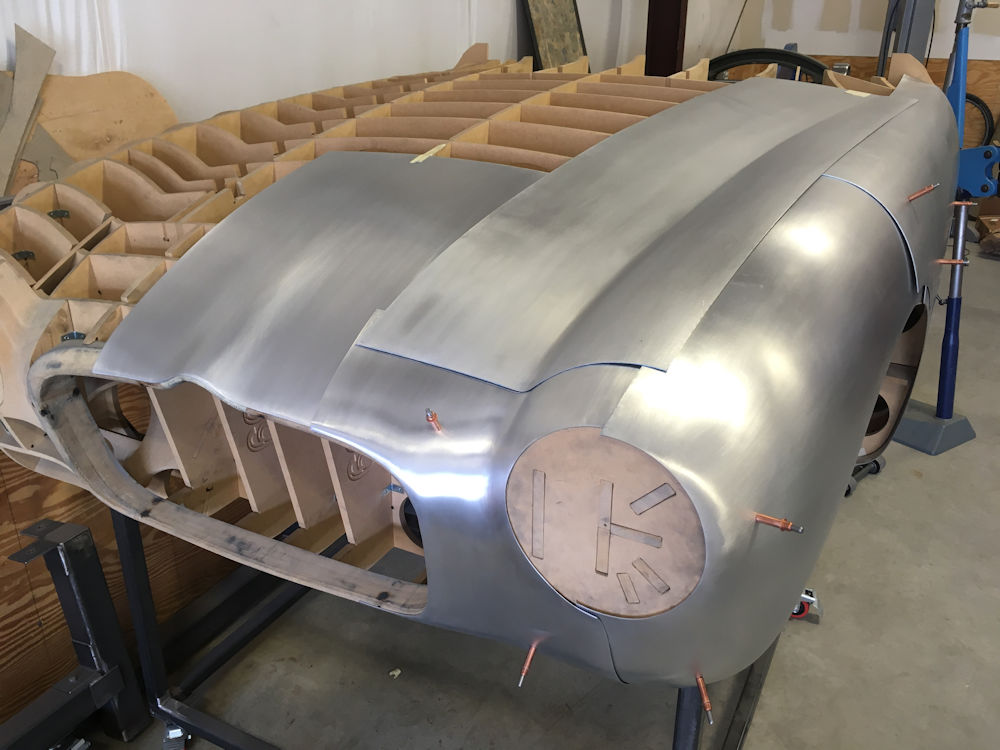
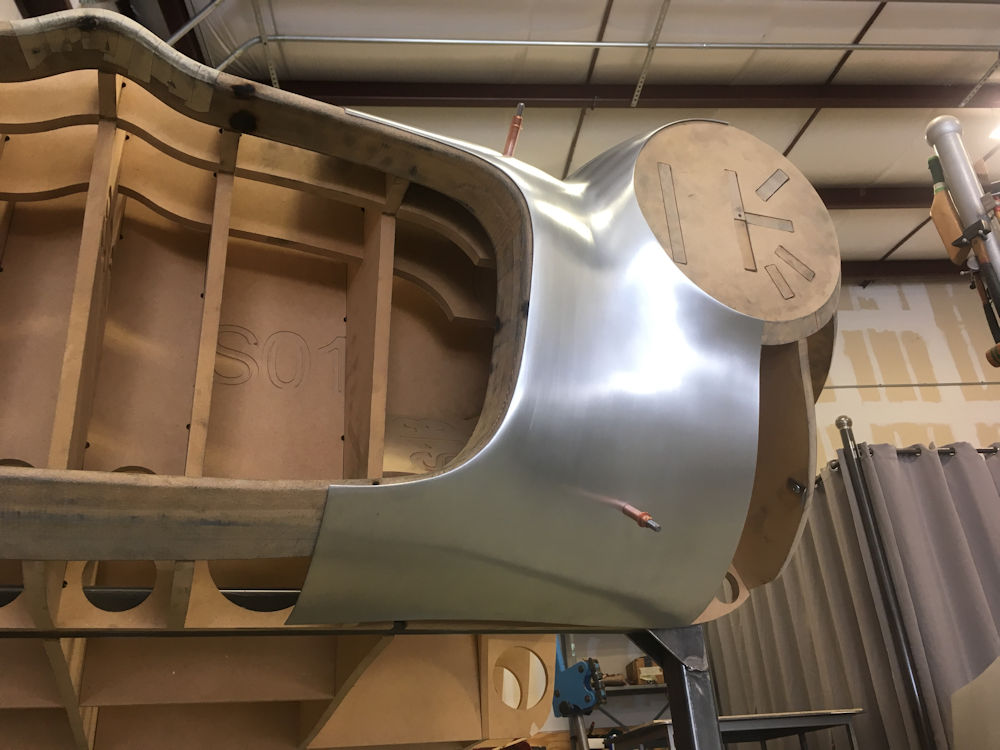
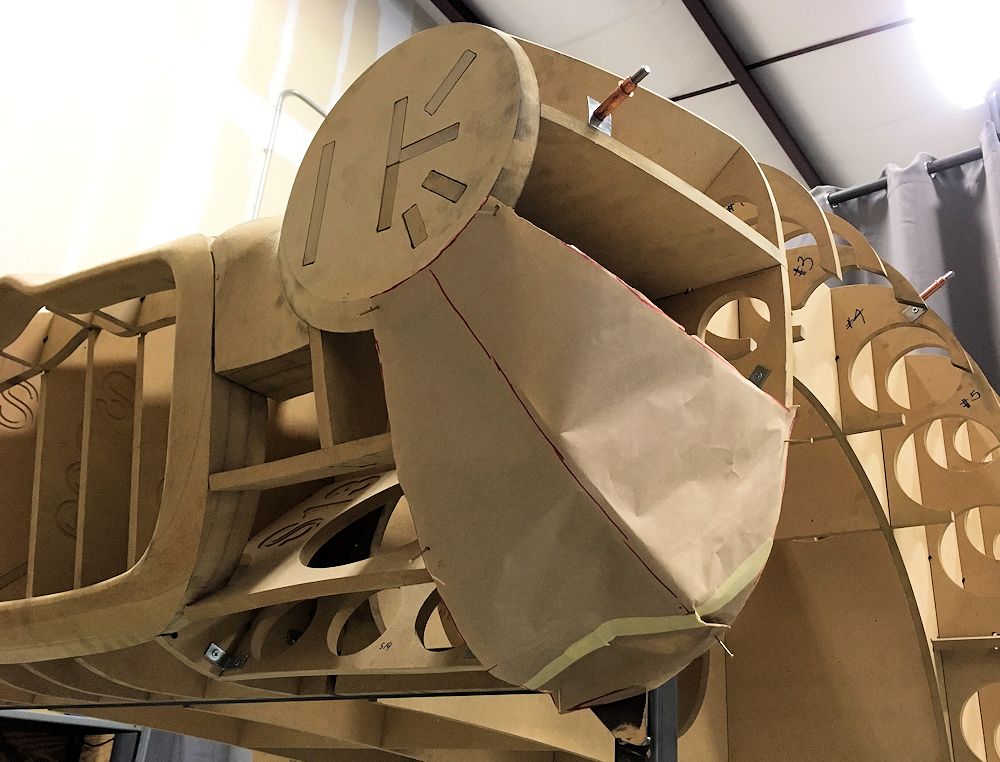
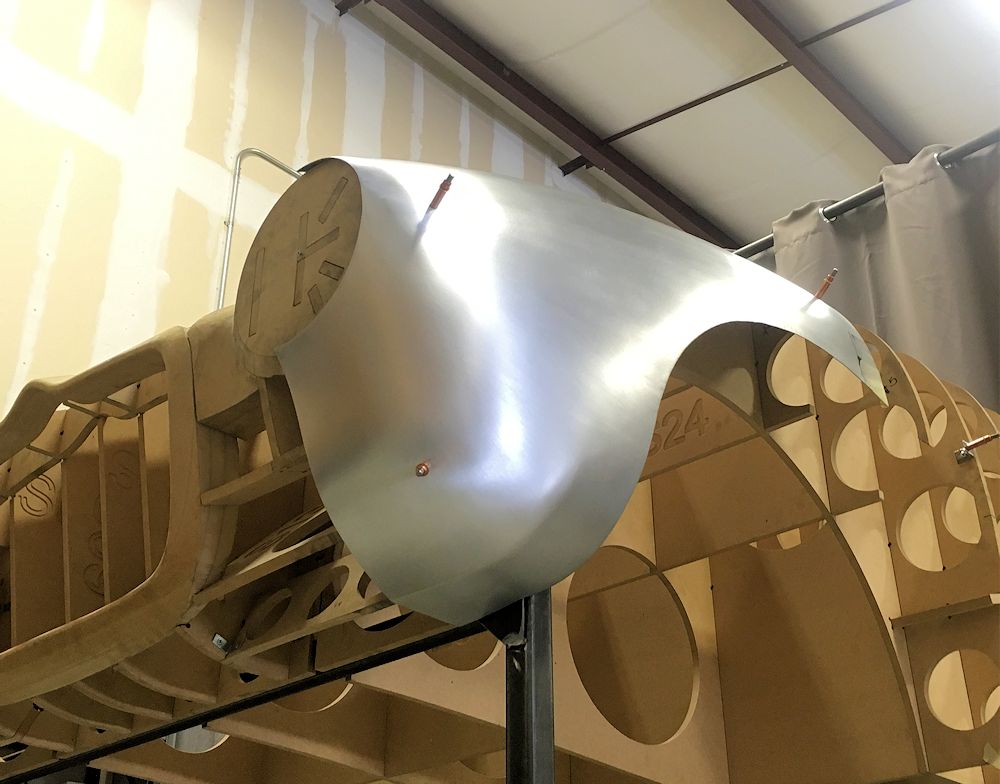
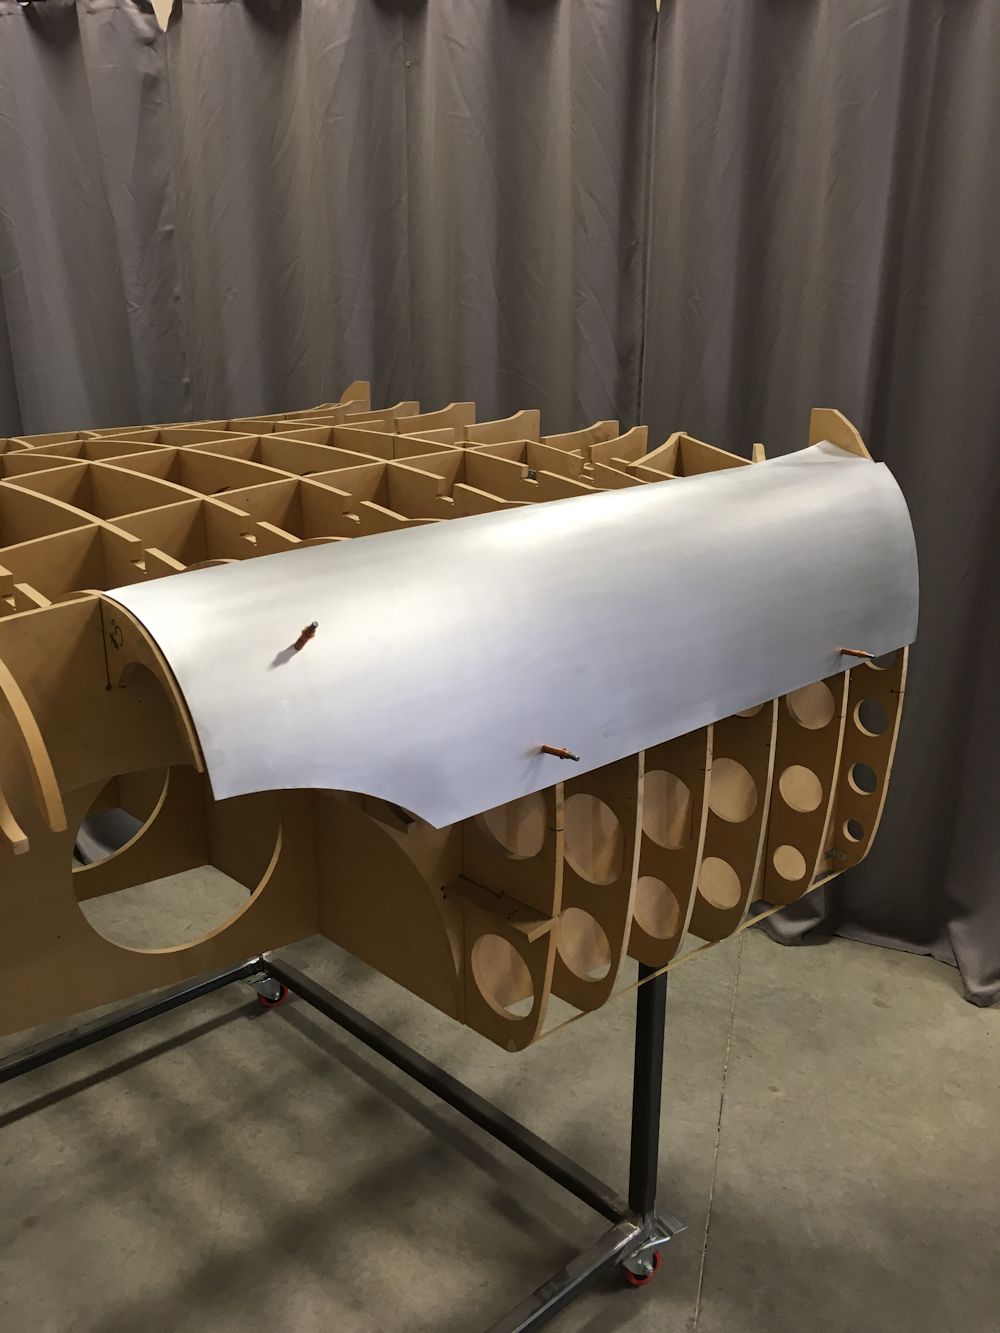
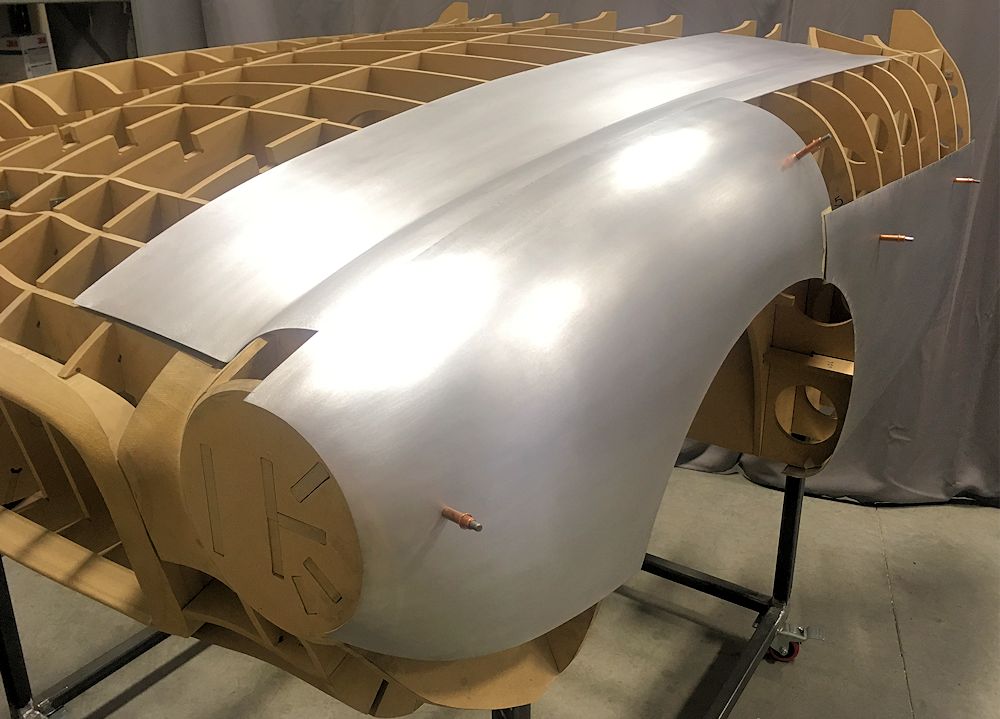
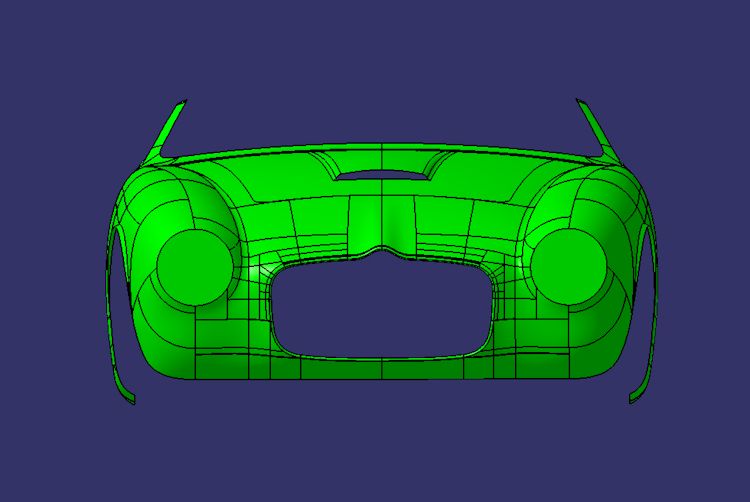
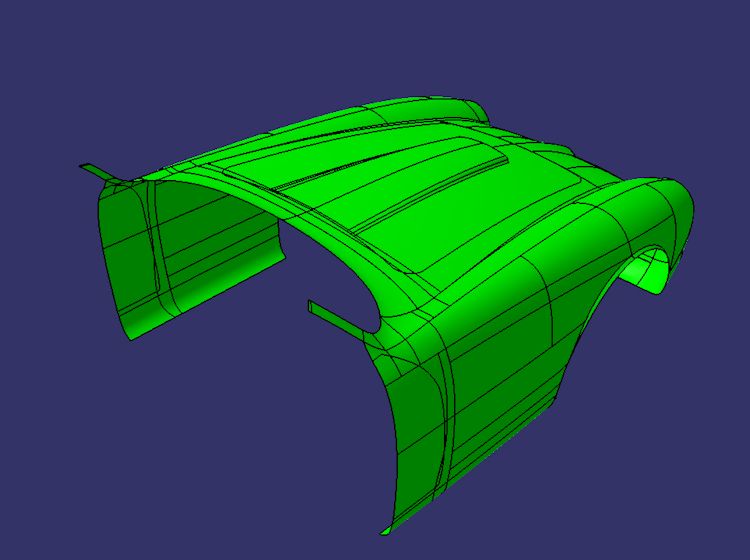
Front nose and bonnet opening
March 26, 2024
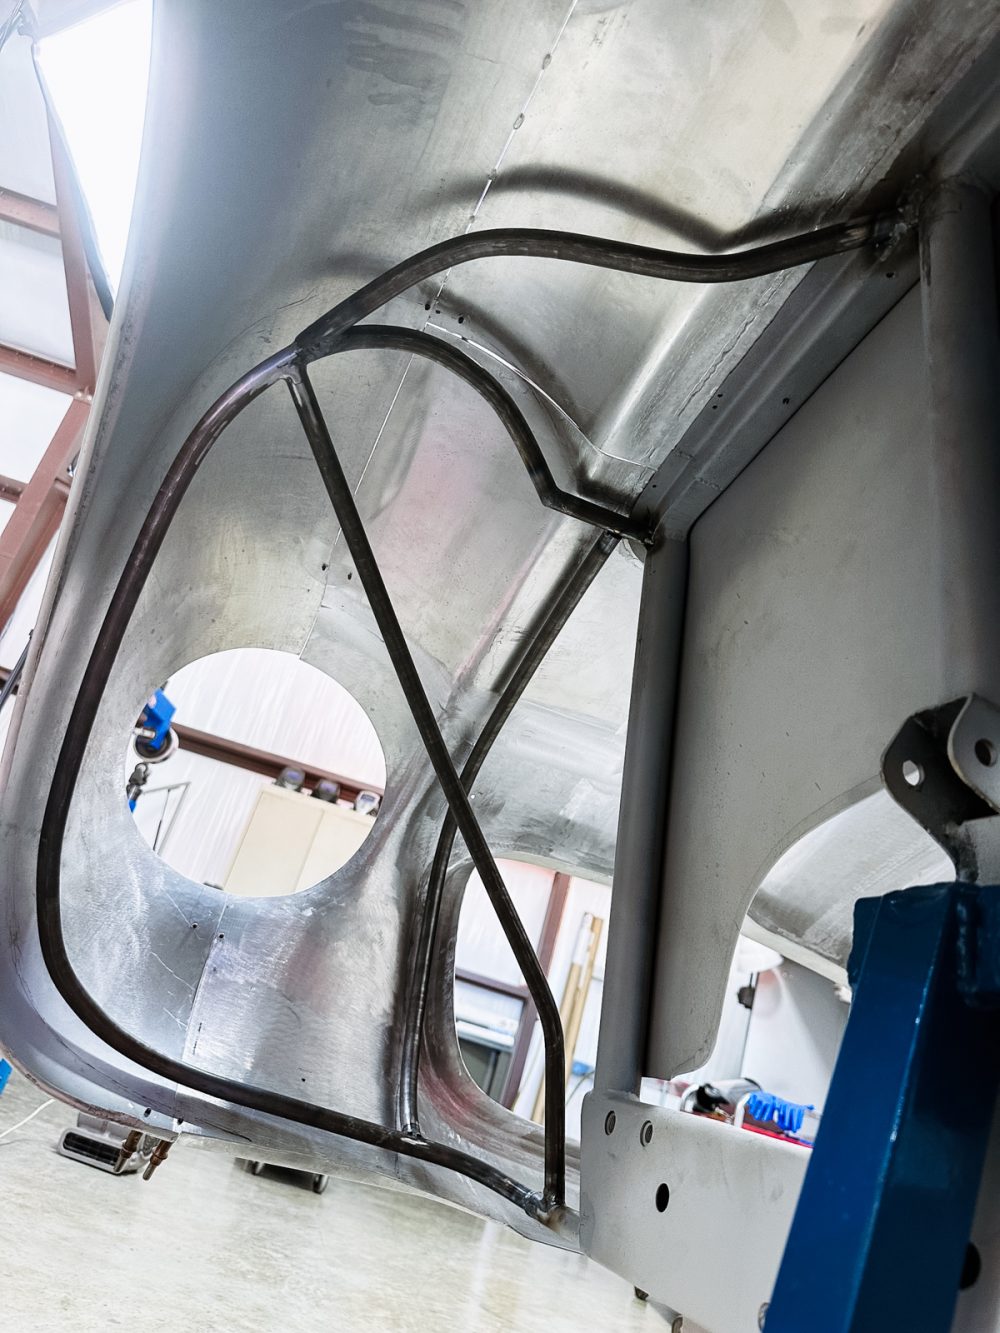
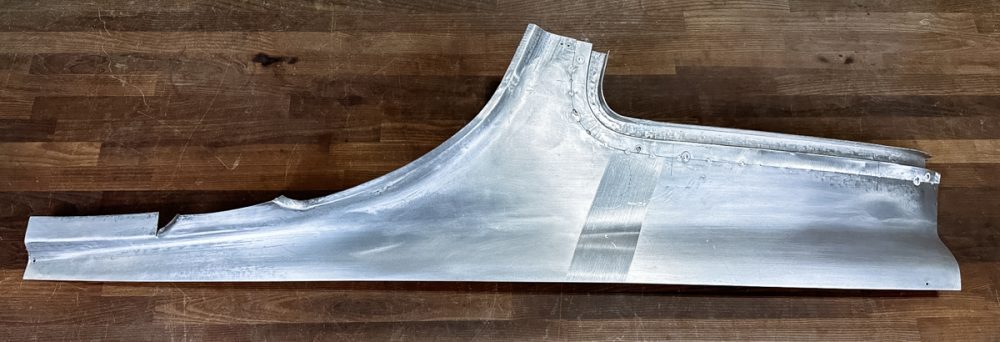
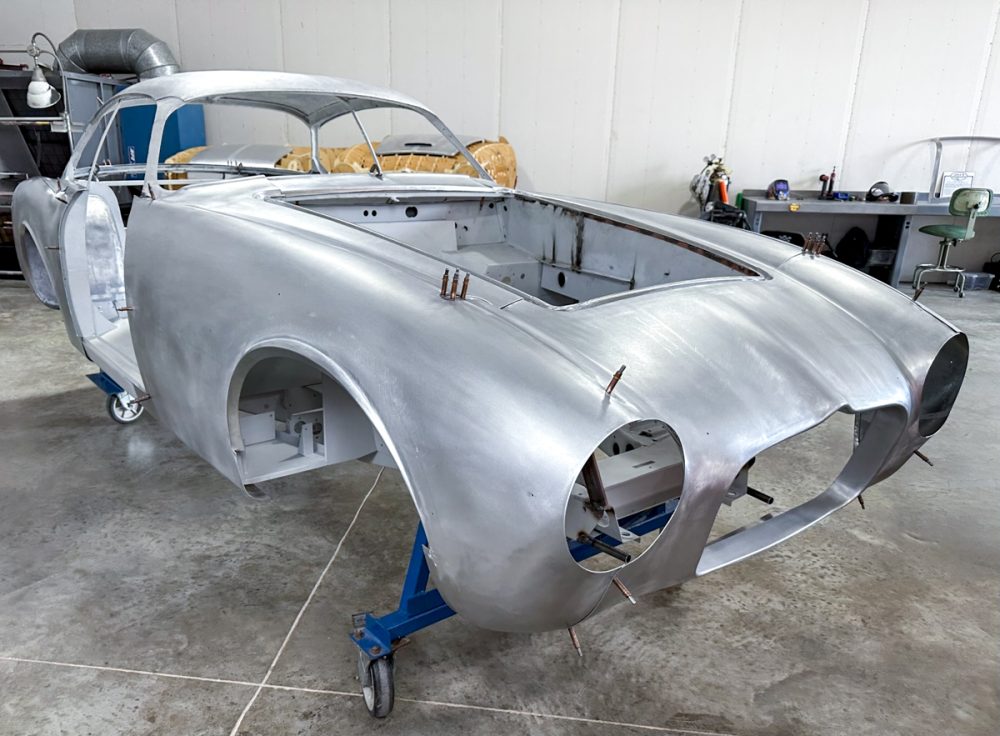
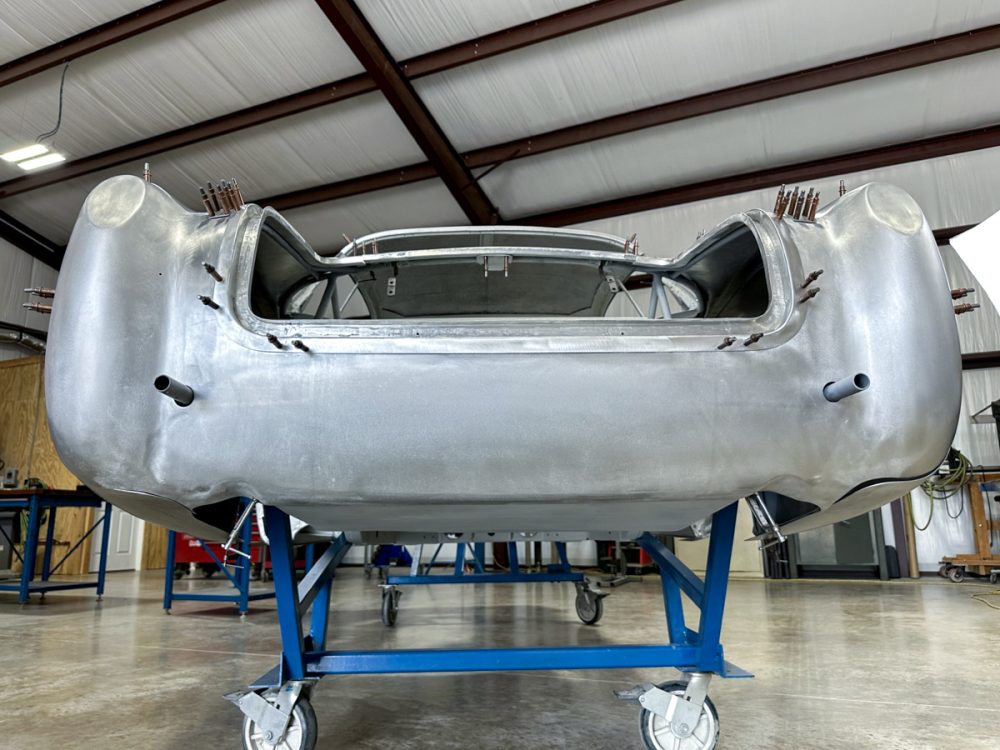
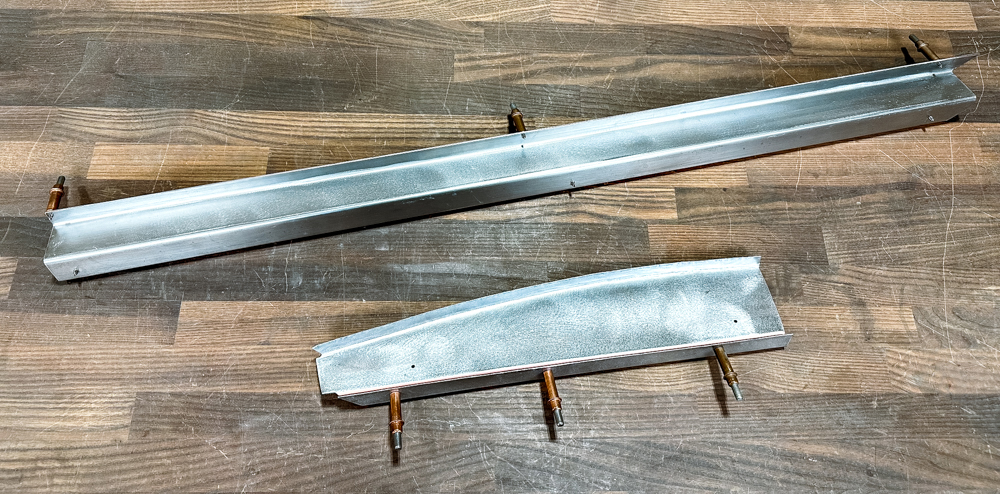
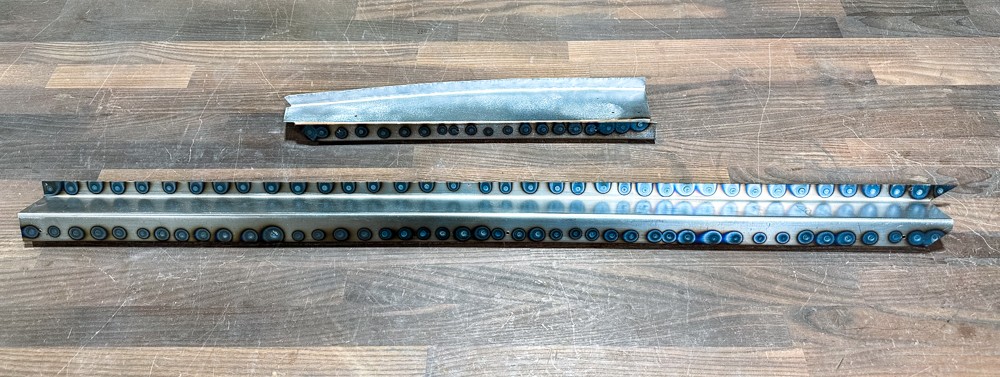
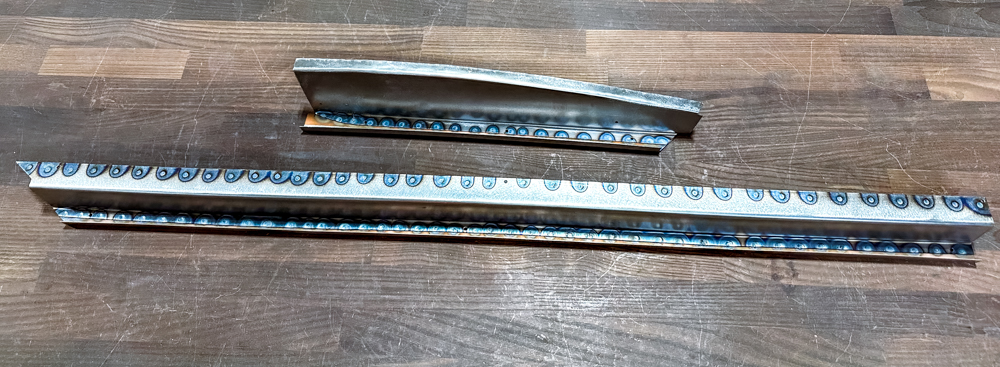
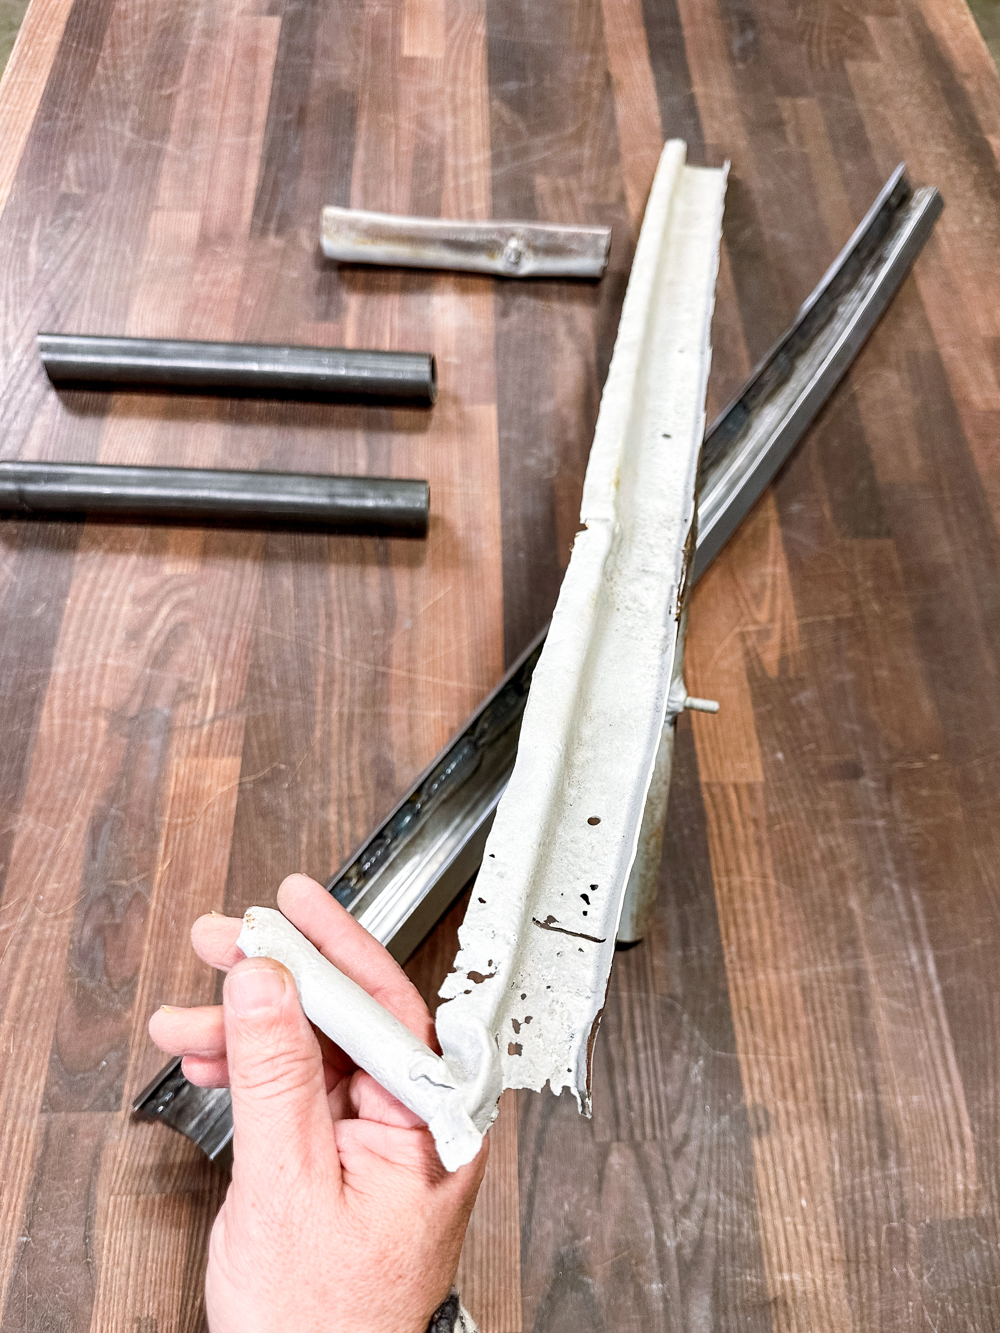
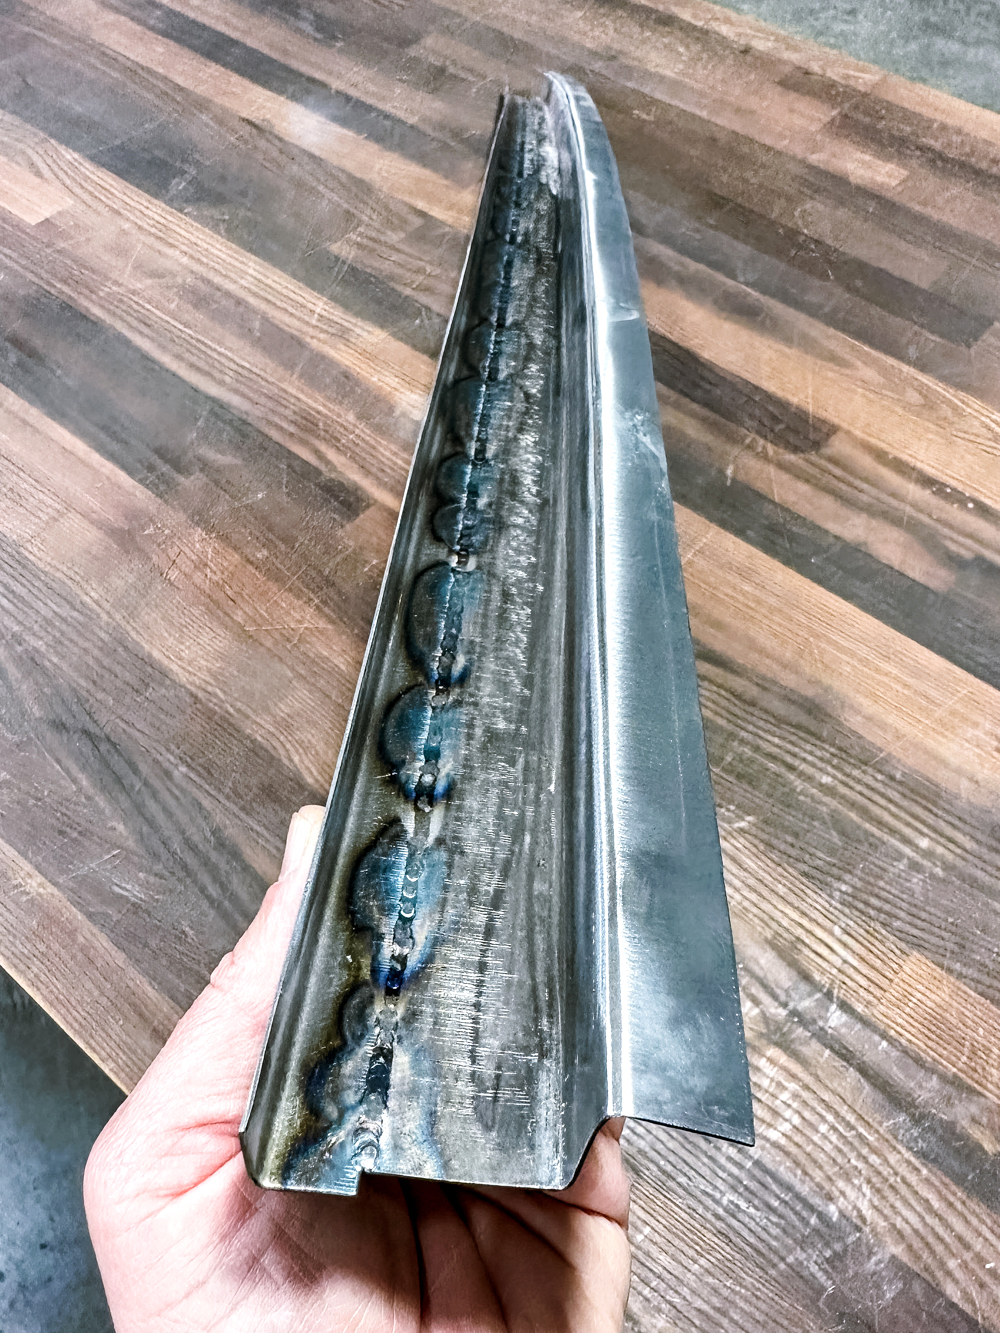
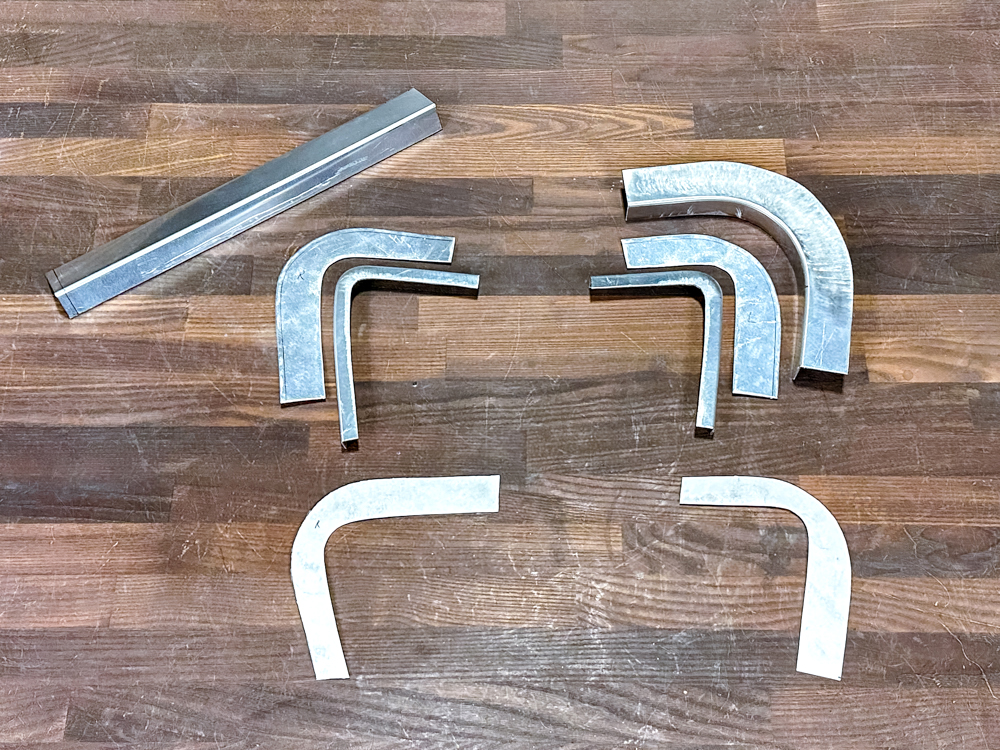
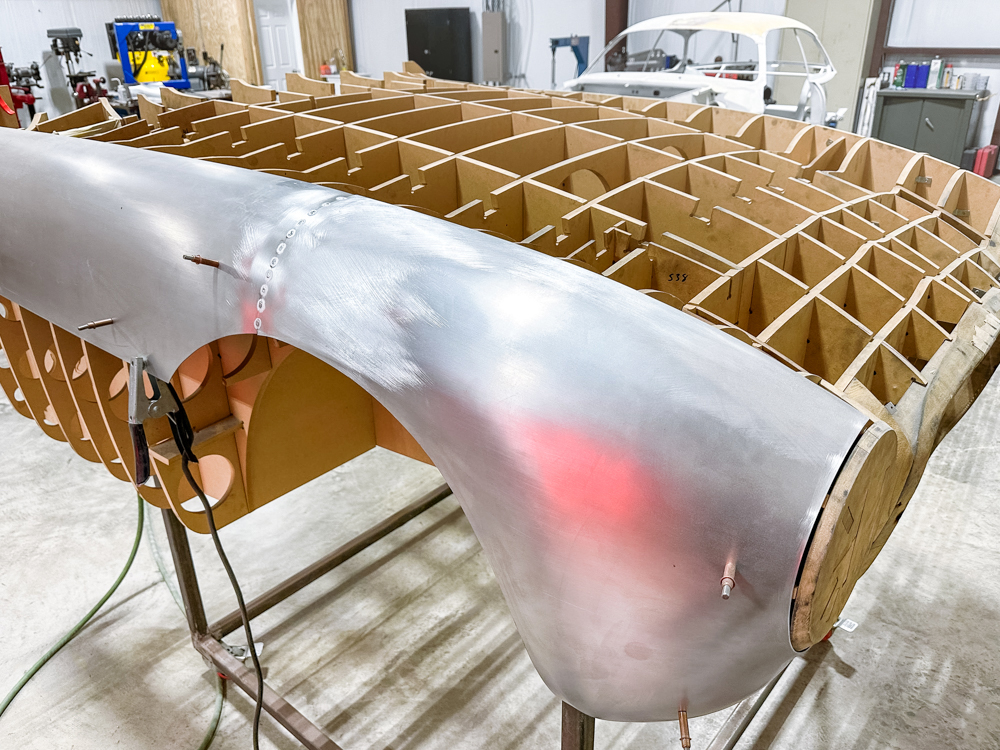
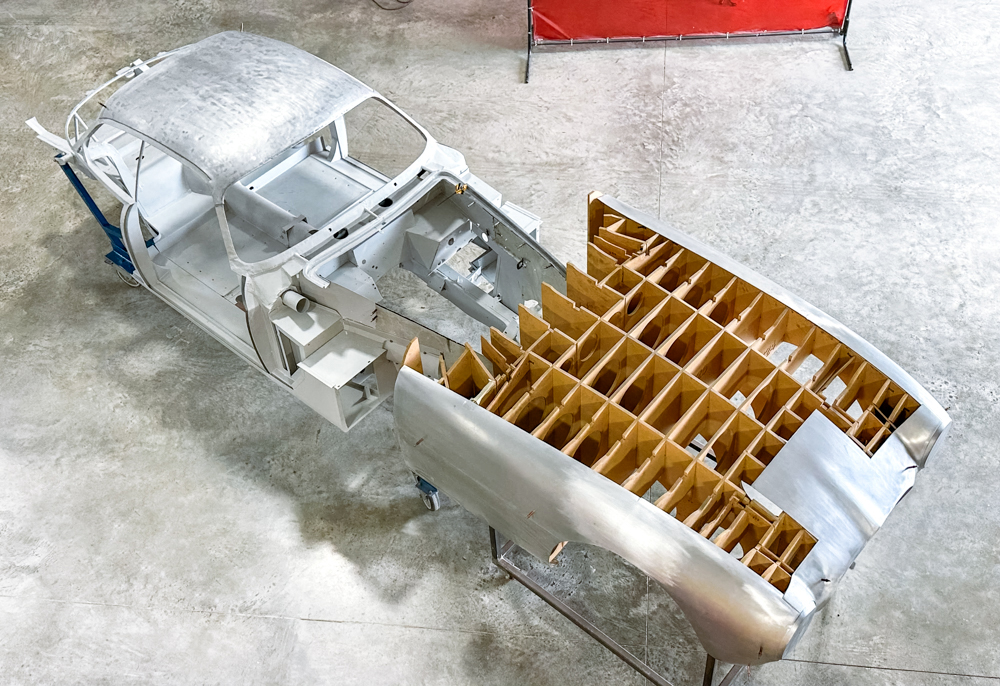
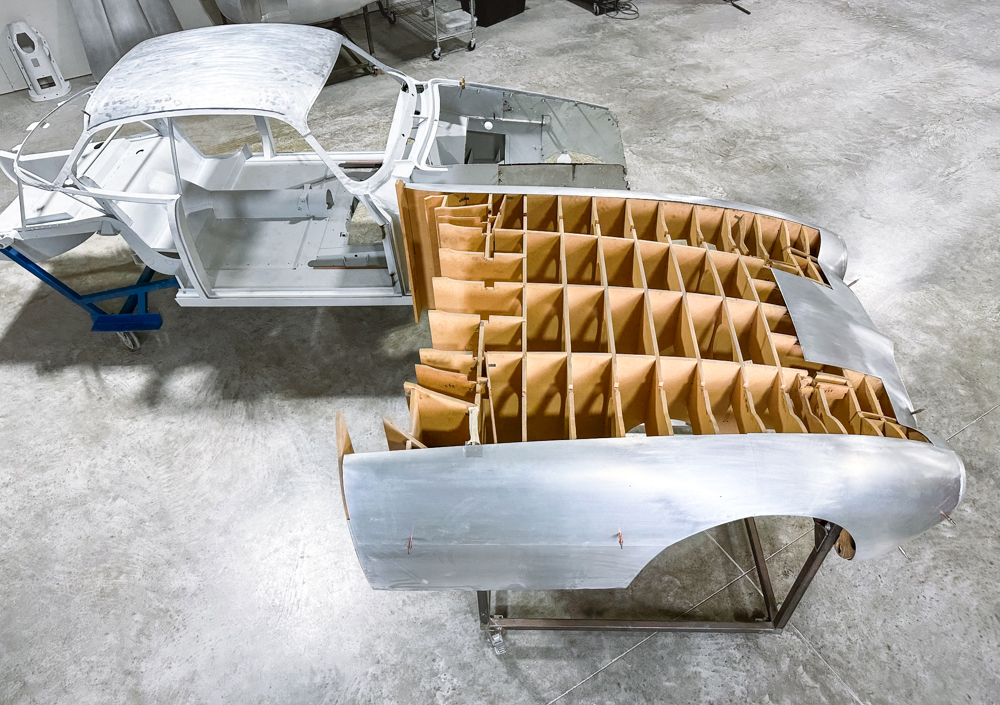
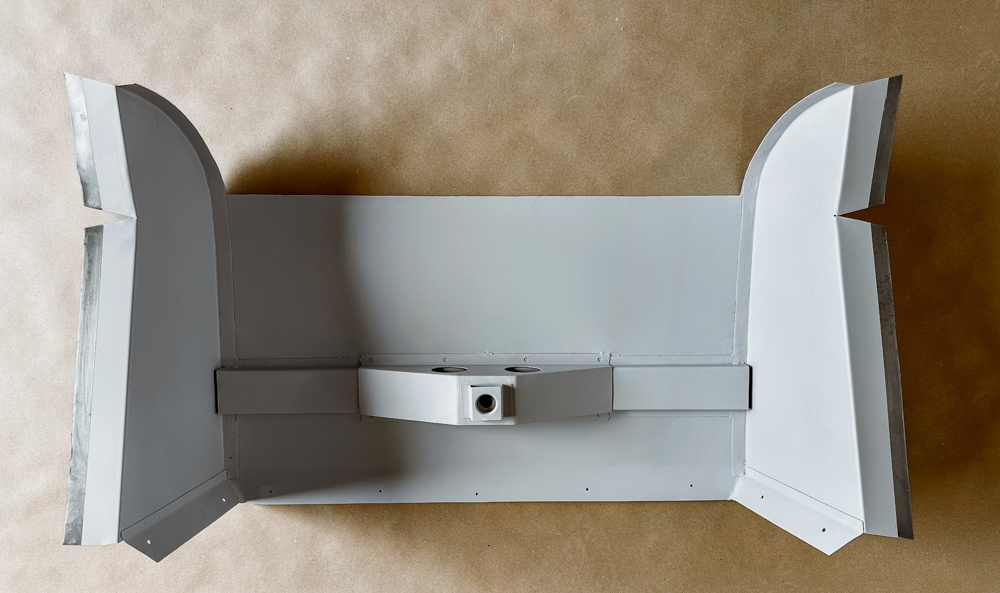
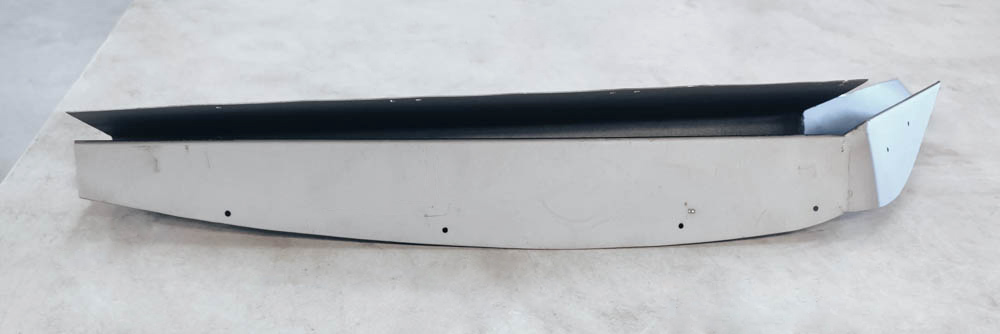
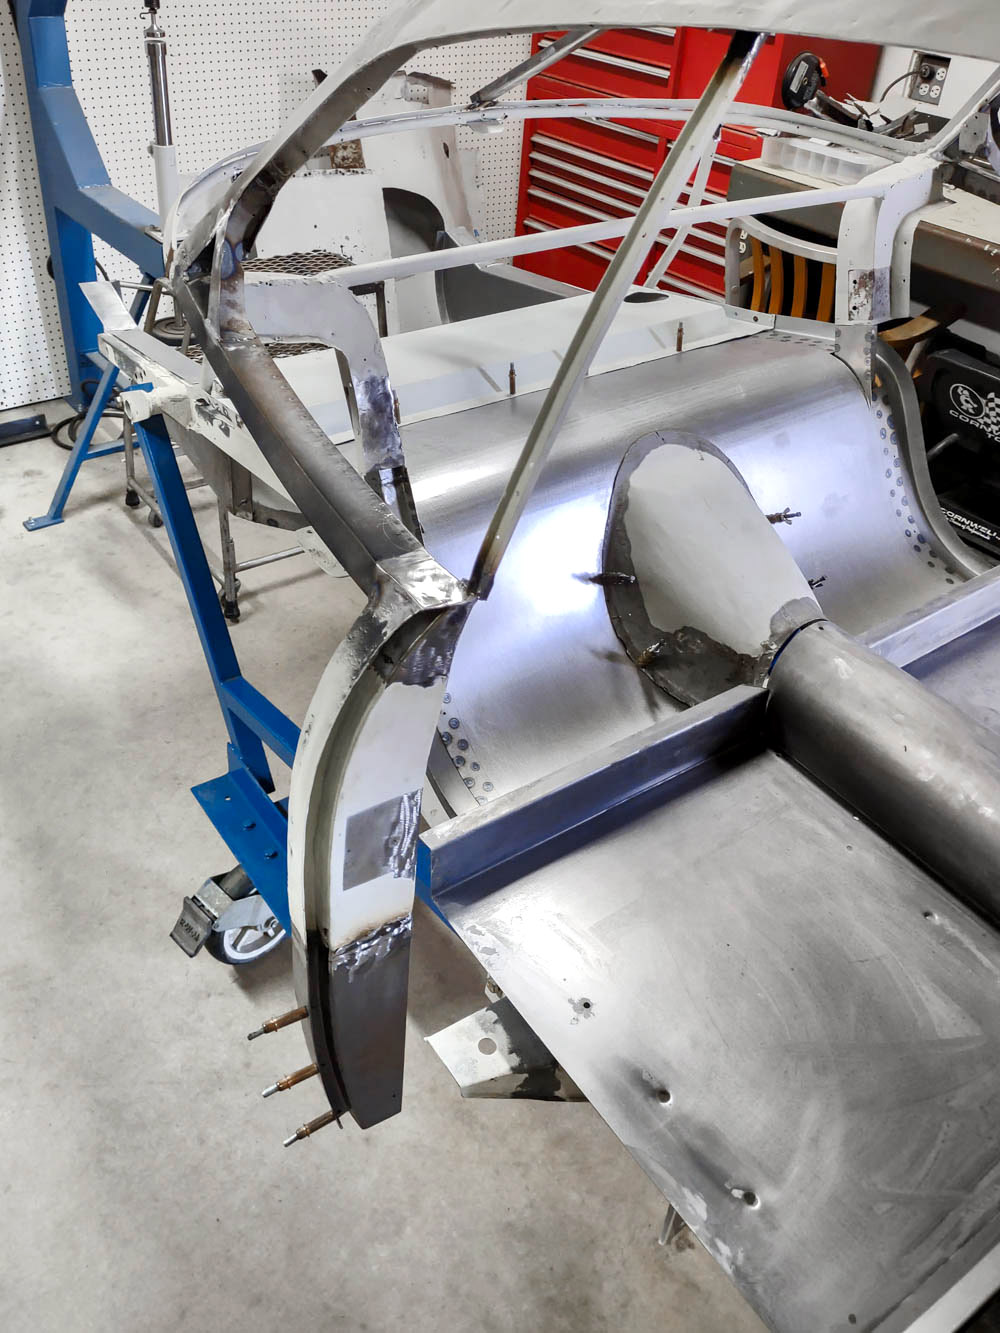
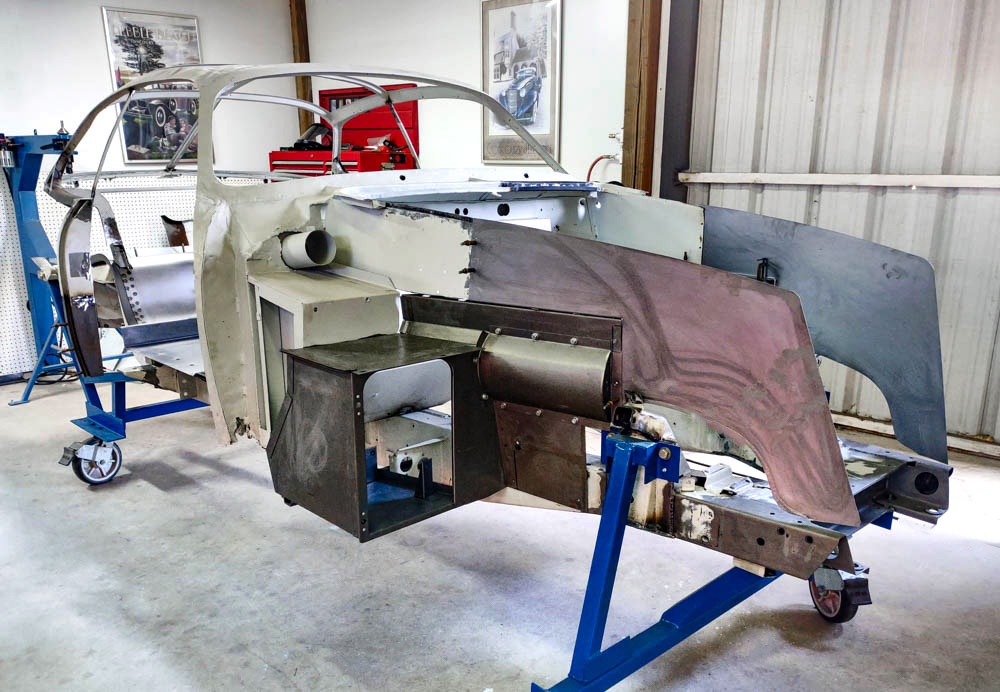
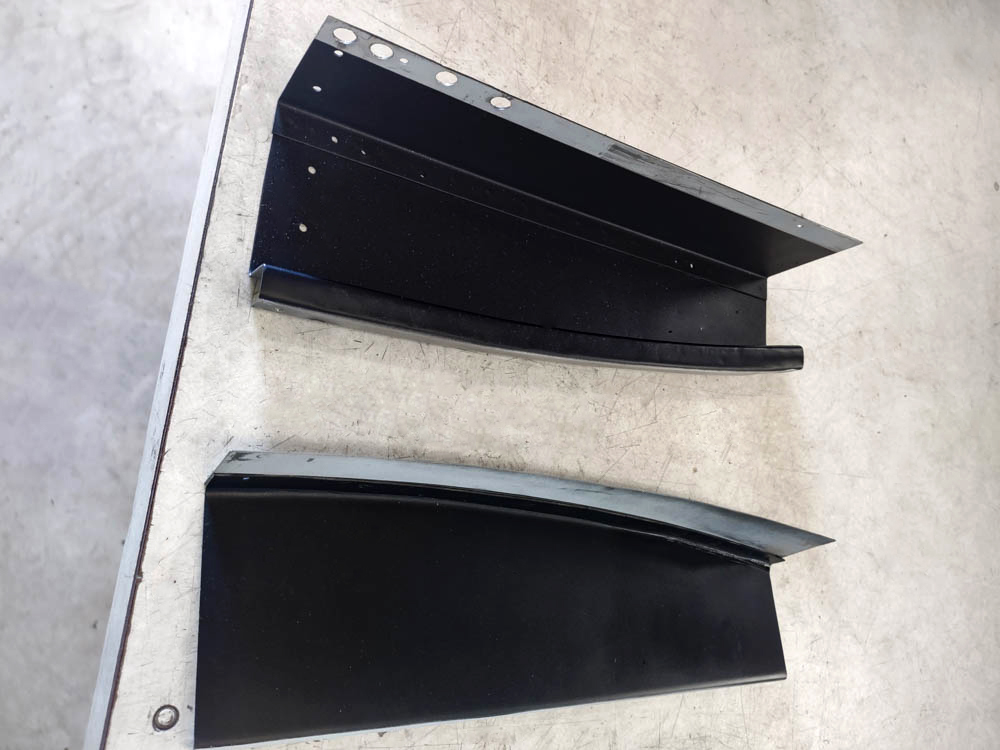
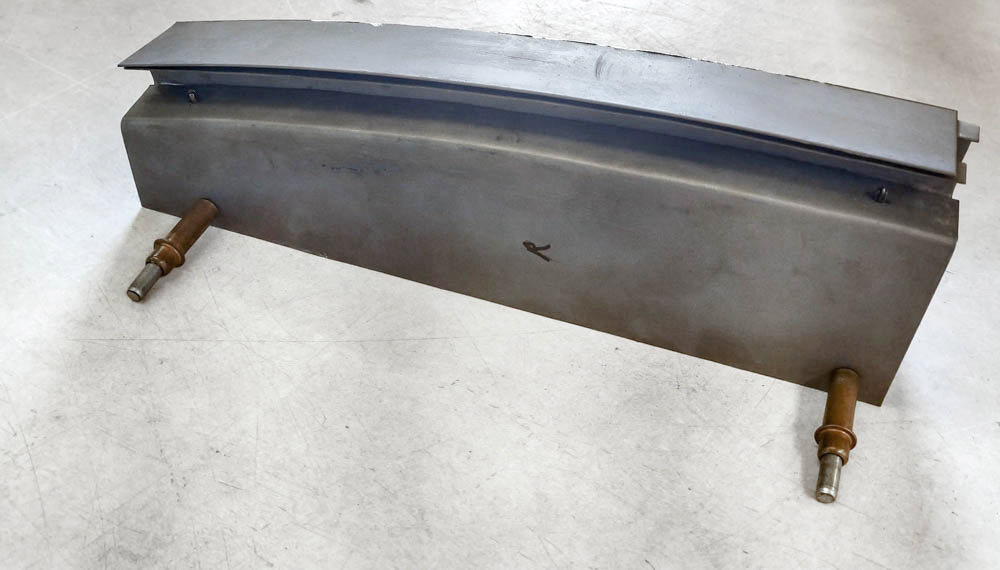
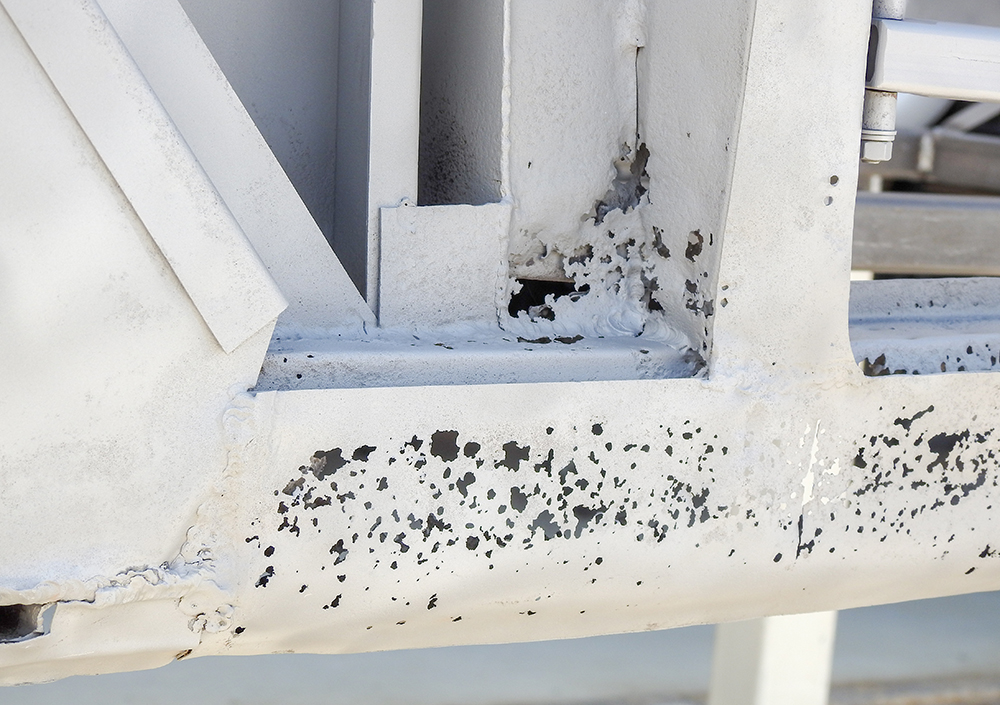
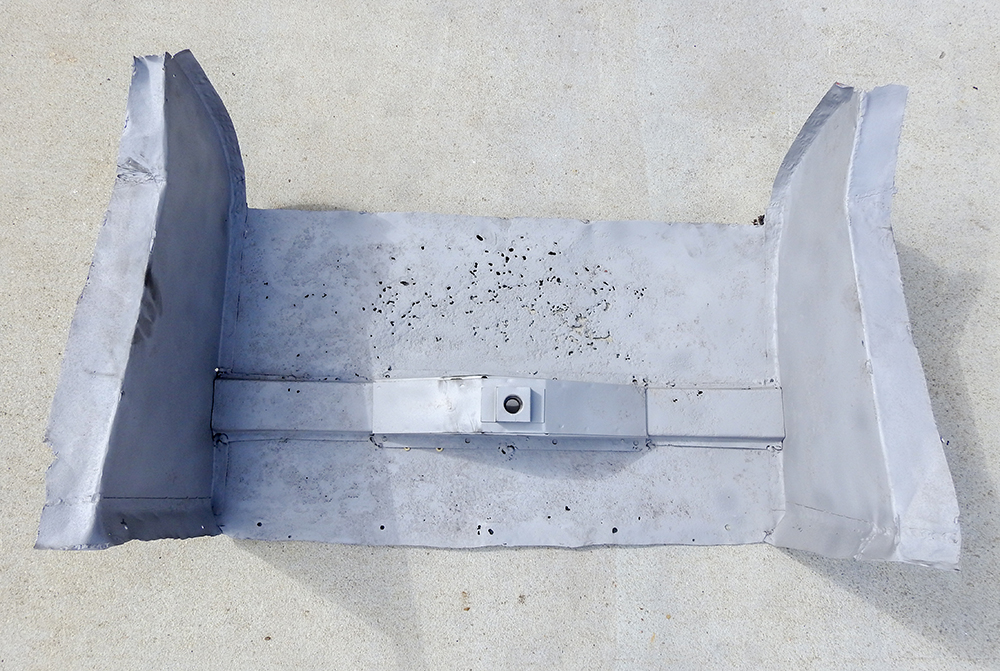
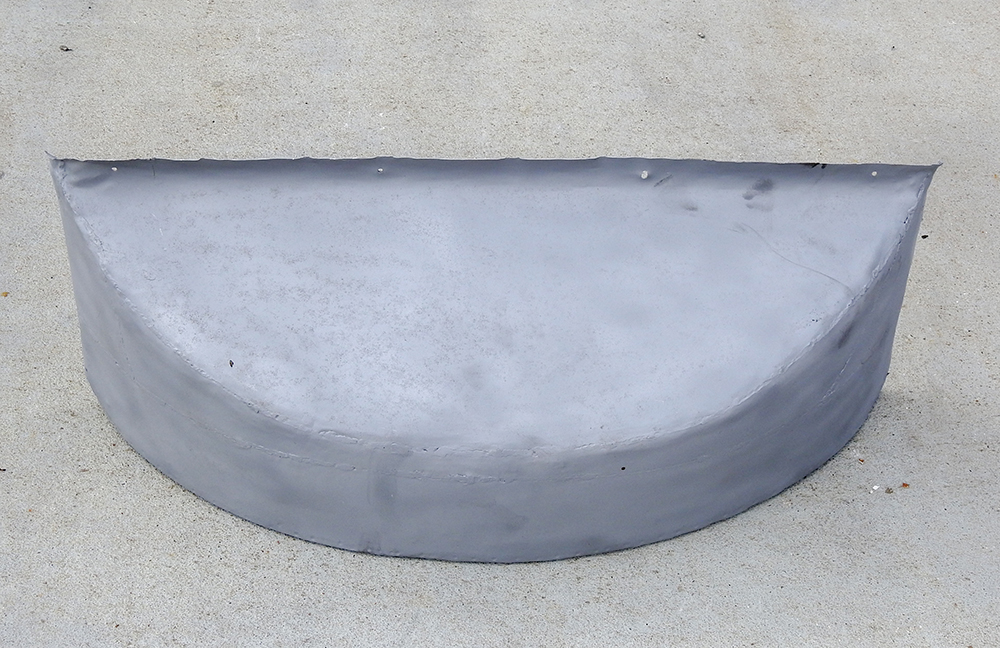
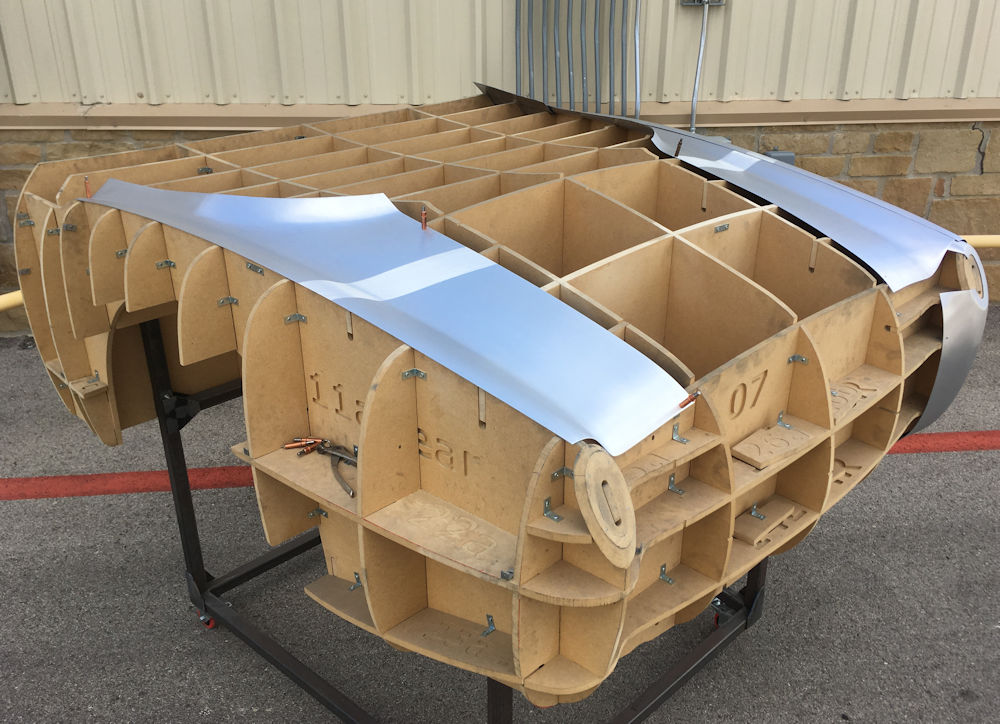
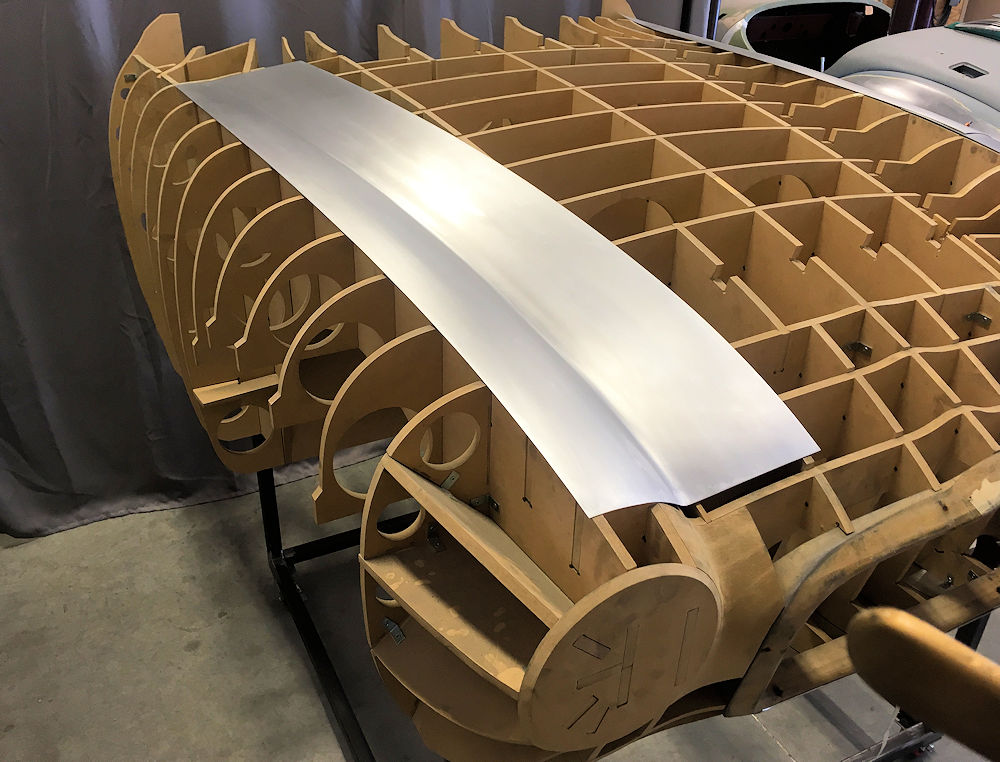
Rear fender construction
March 26, 2024
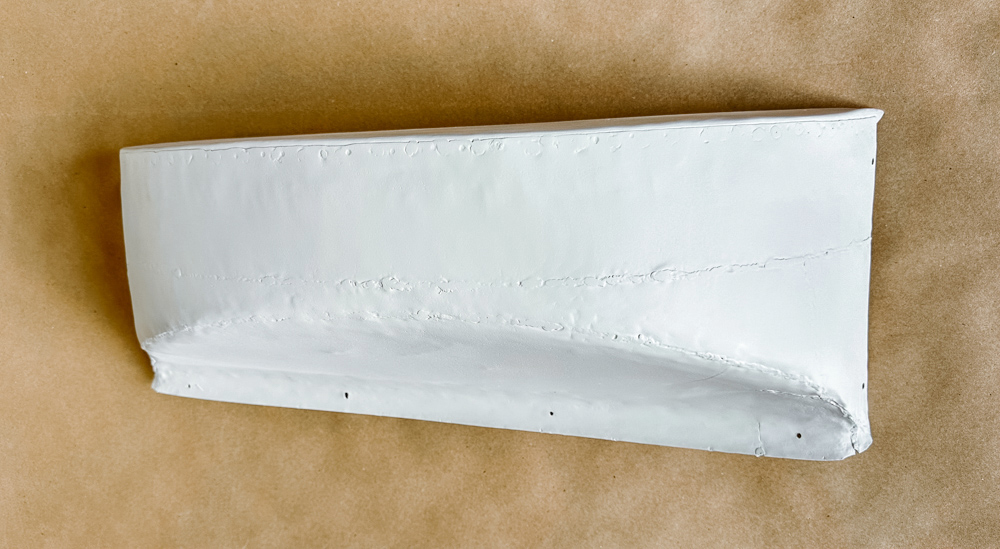
Tail panel construction
March 26, 2024
March 26, 2024
March 26, 2024
March 26, 2024
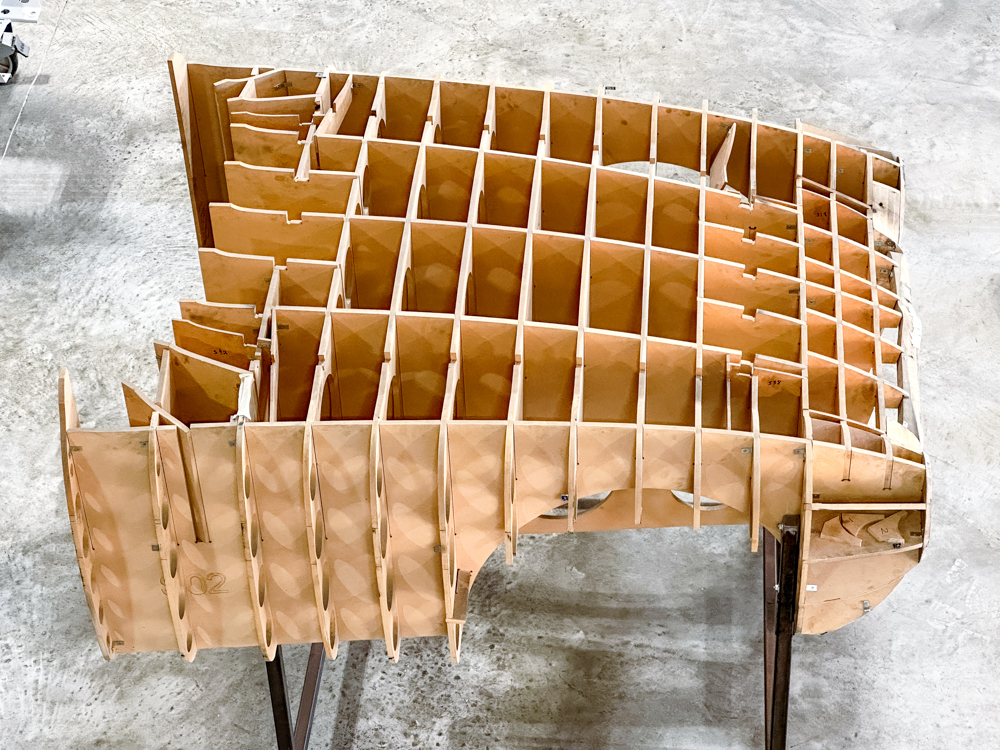
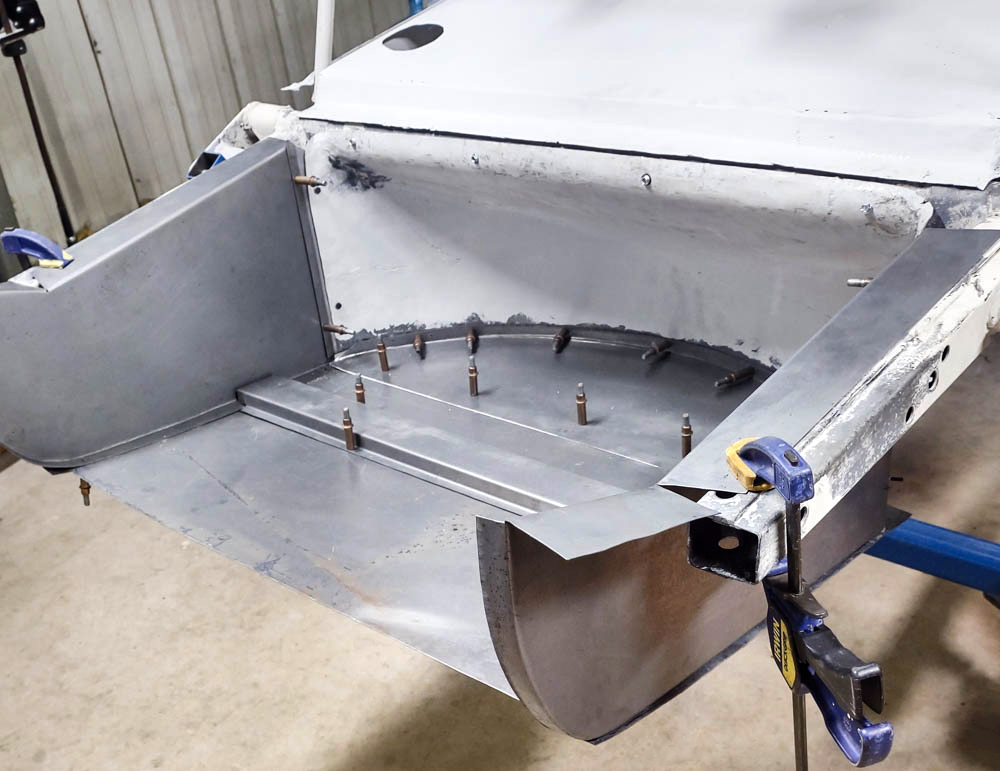
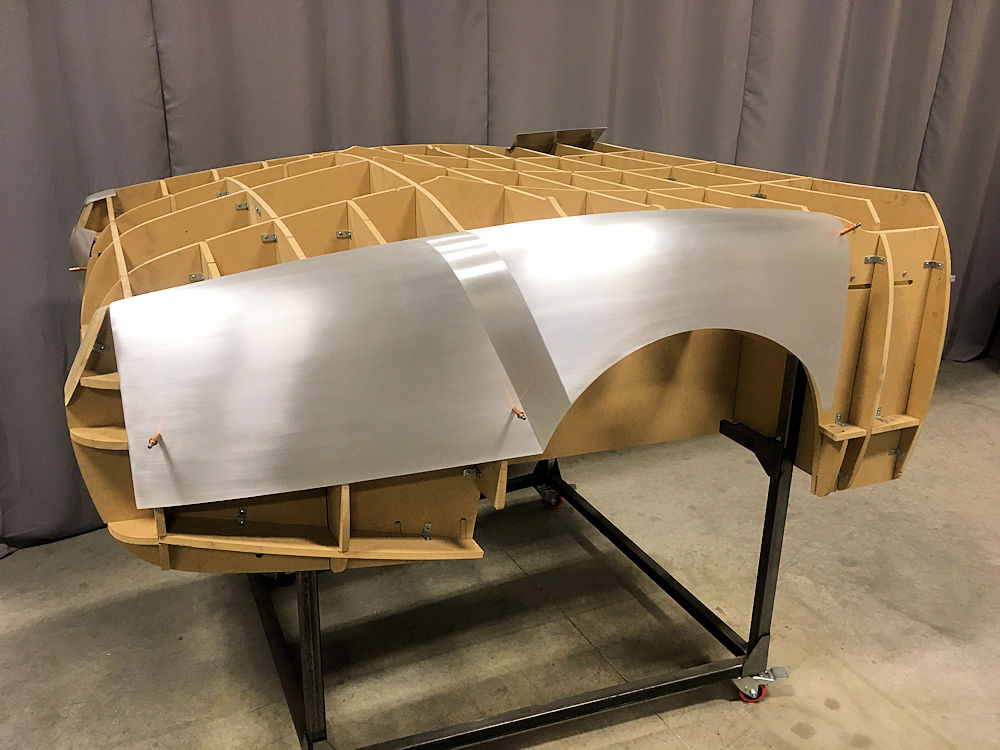
Fitting rear body panels to station buck
March 26, 2024
March 26, 2024
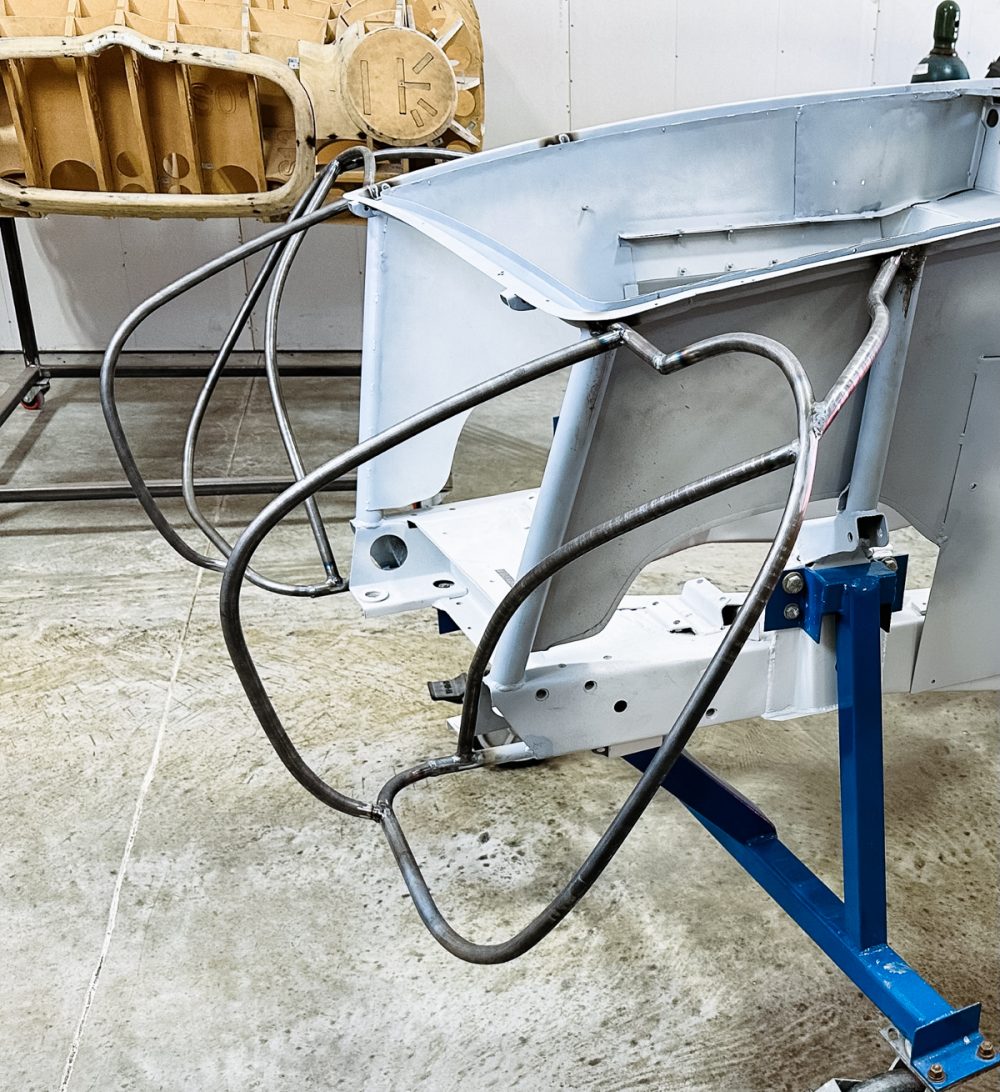
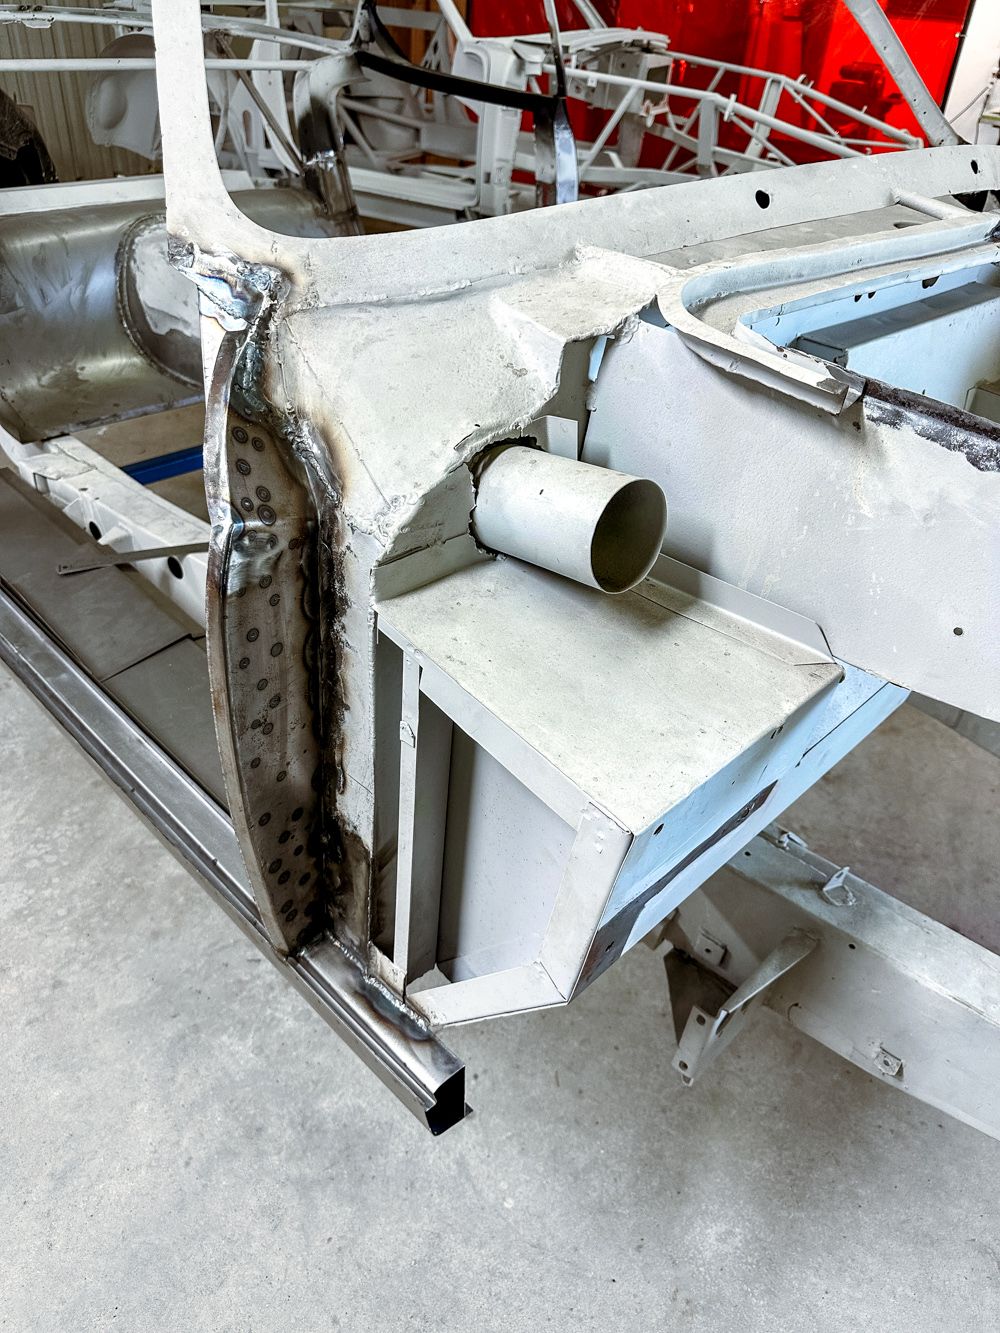
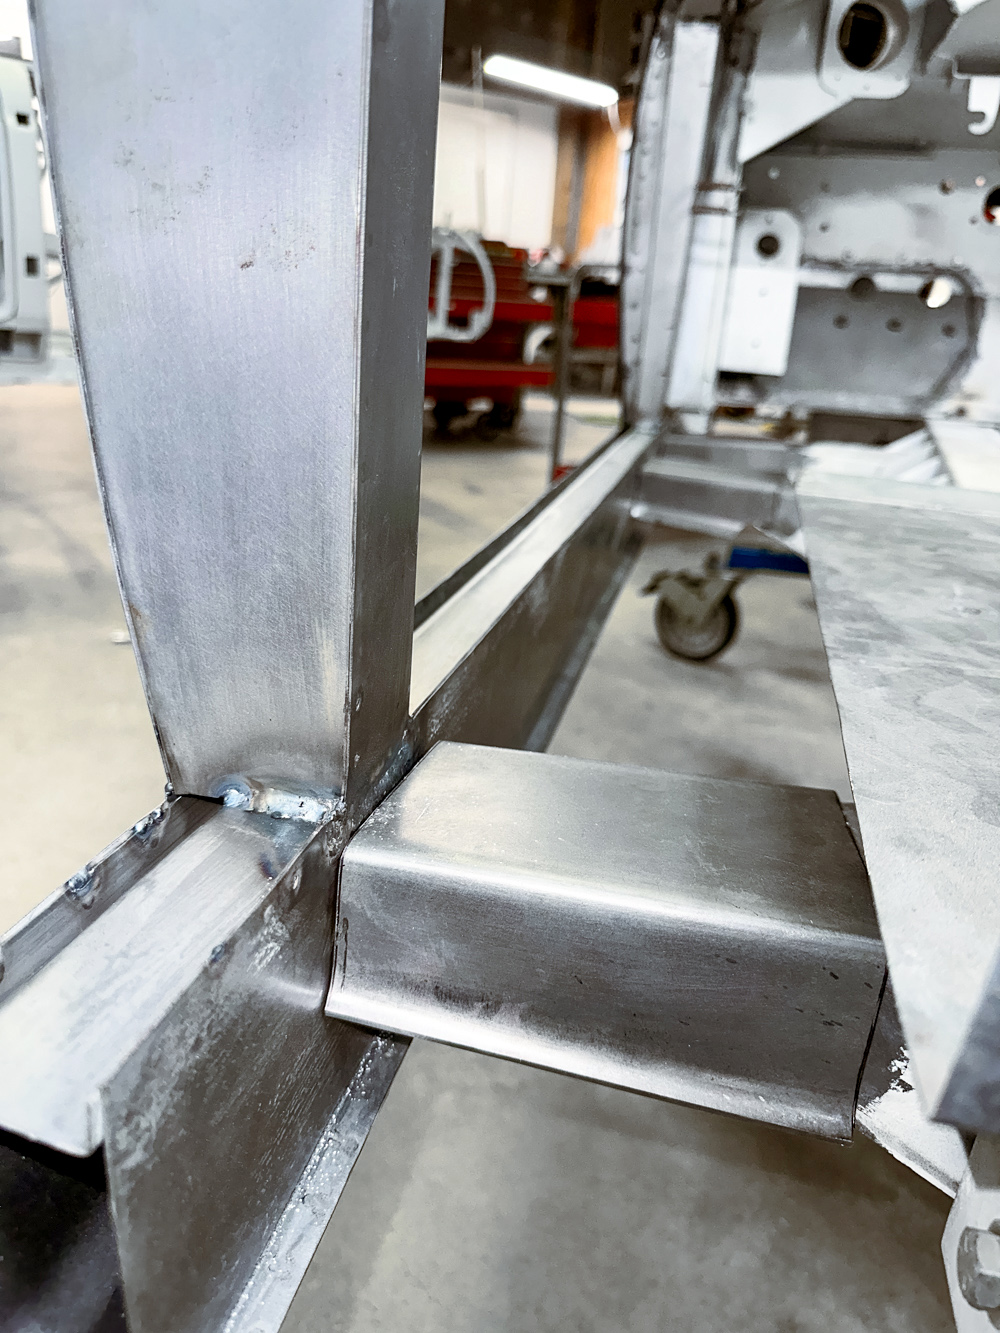
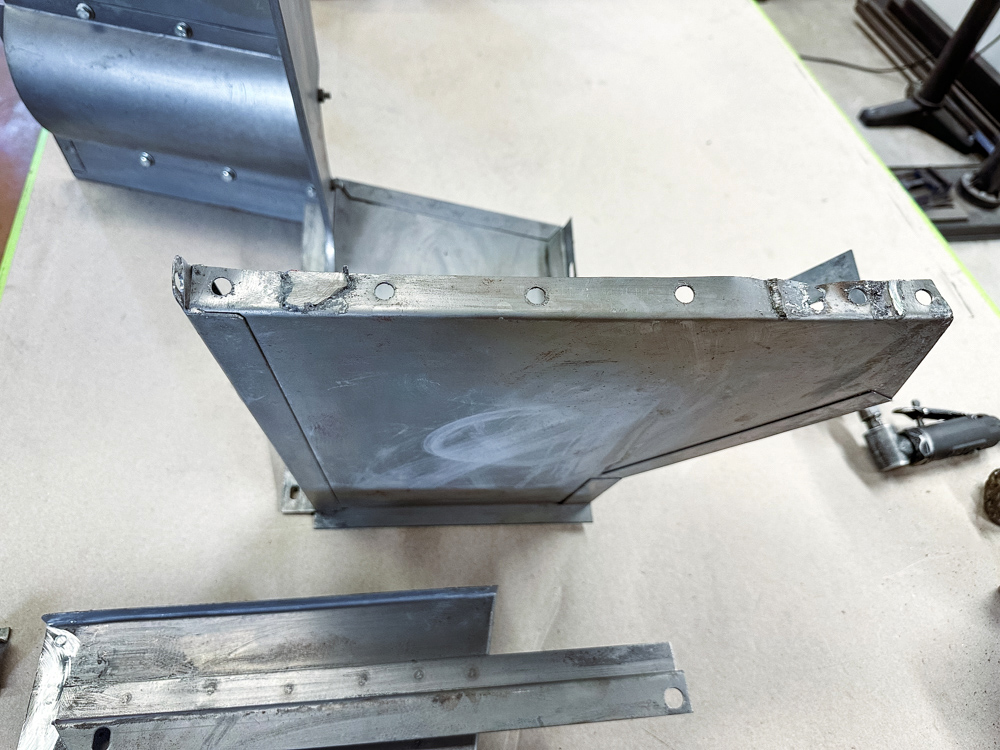
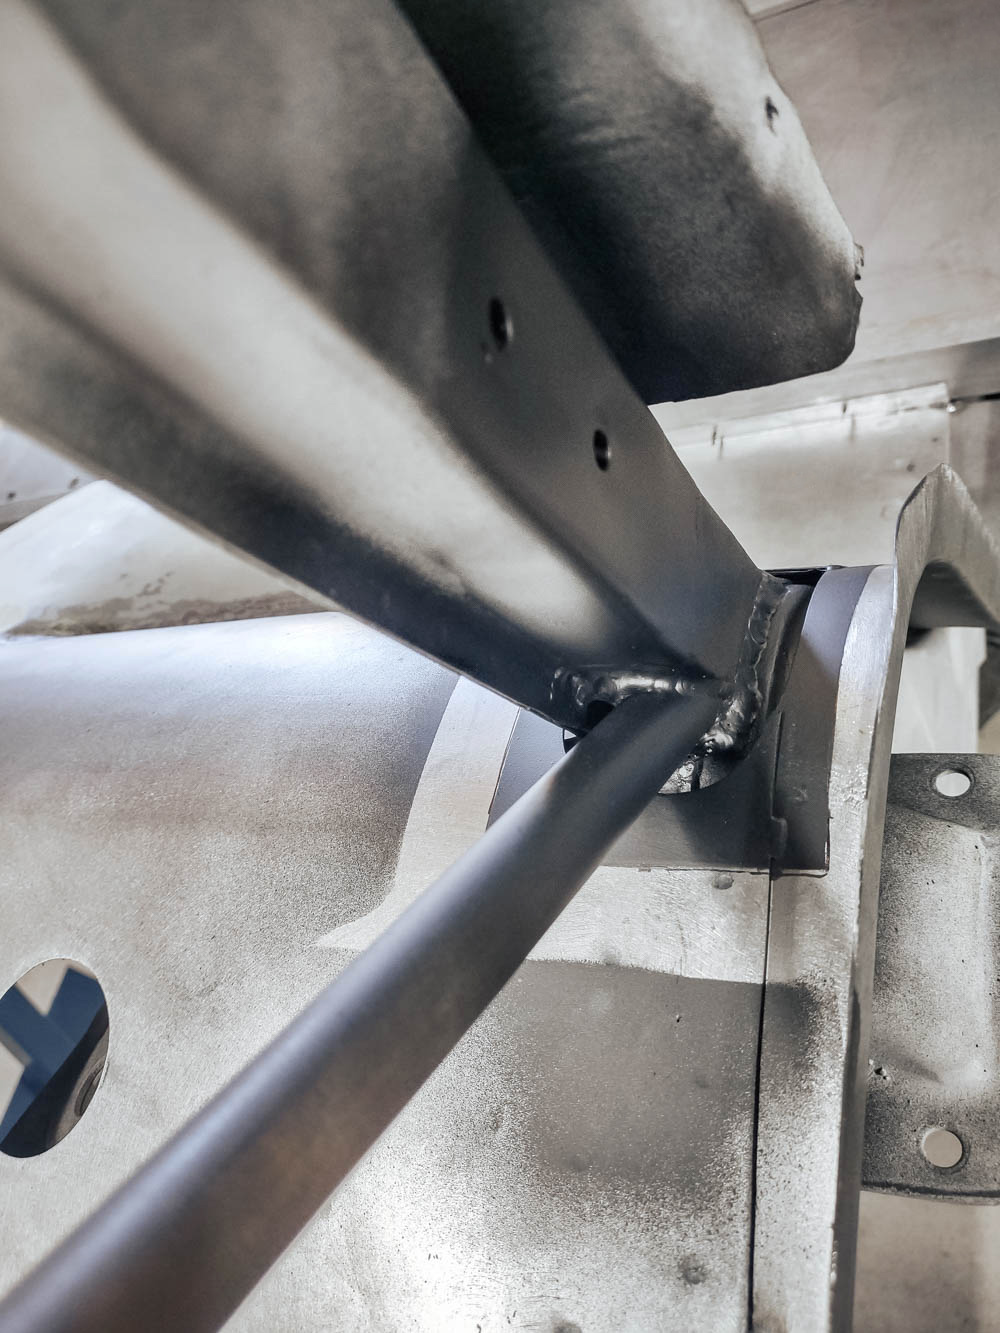
Rear superleggera framework and
rear bumper mount assemblies
March 26, 2024
March 26, 2024
March 26, 2024
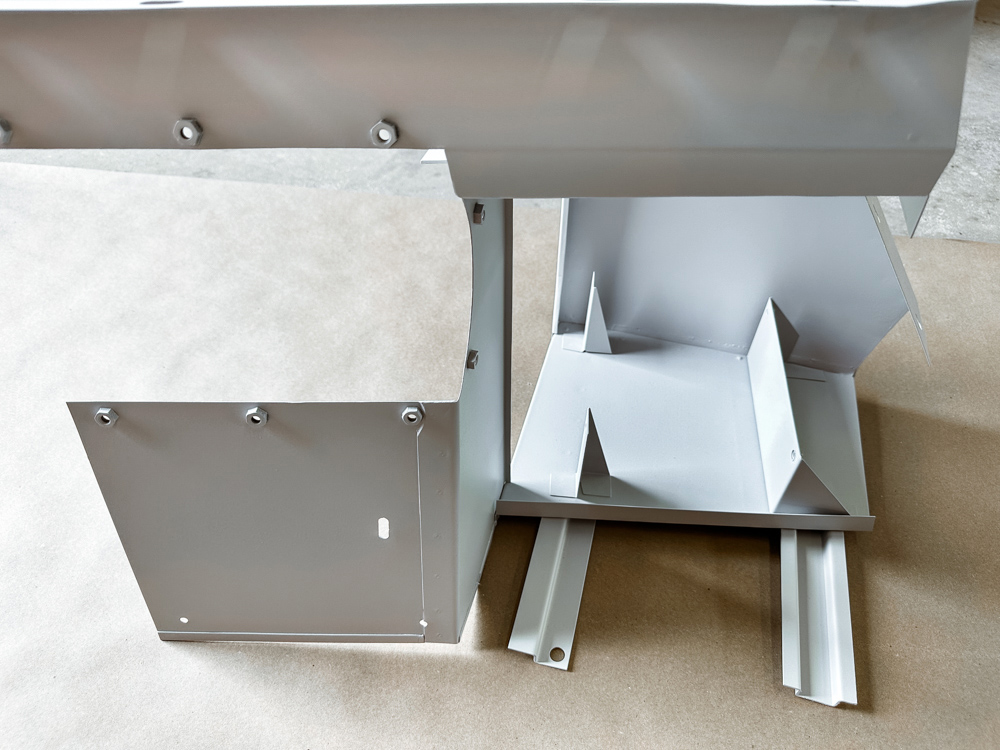
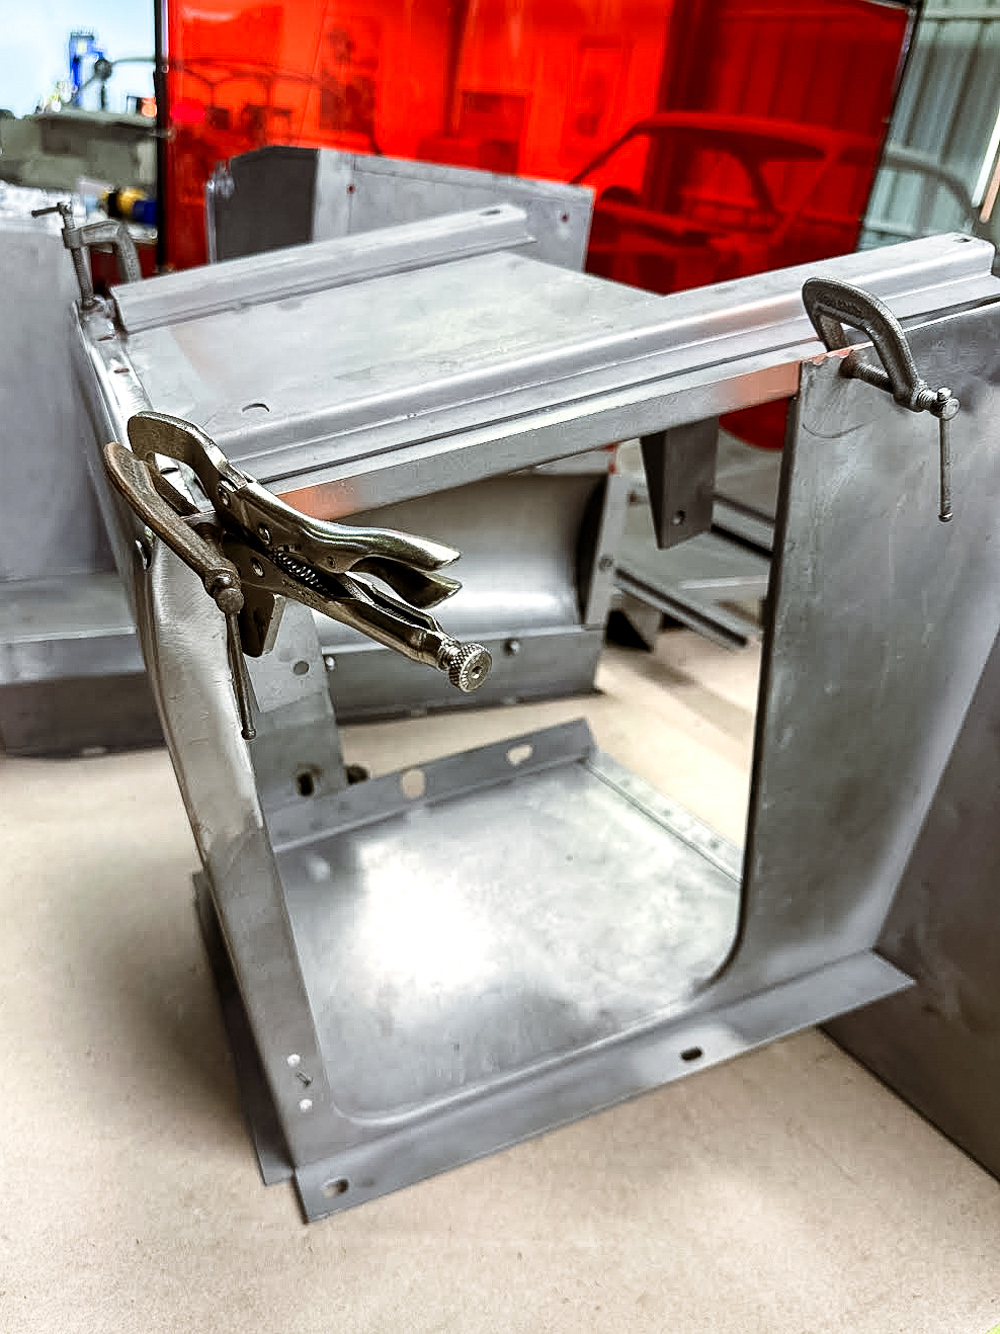
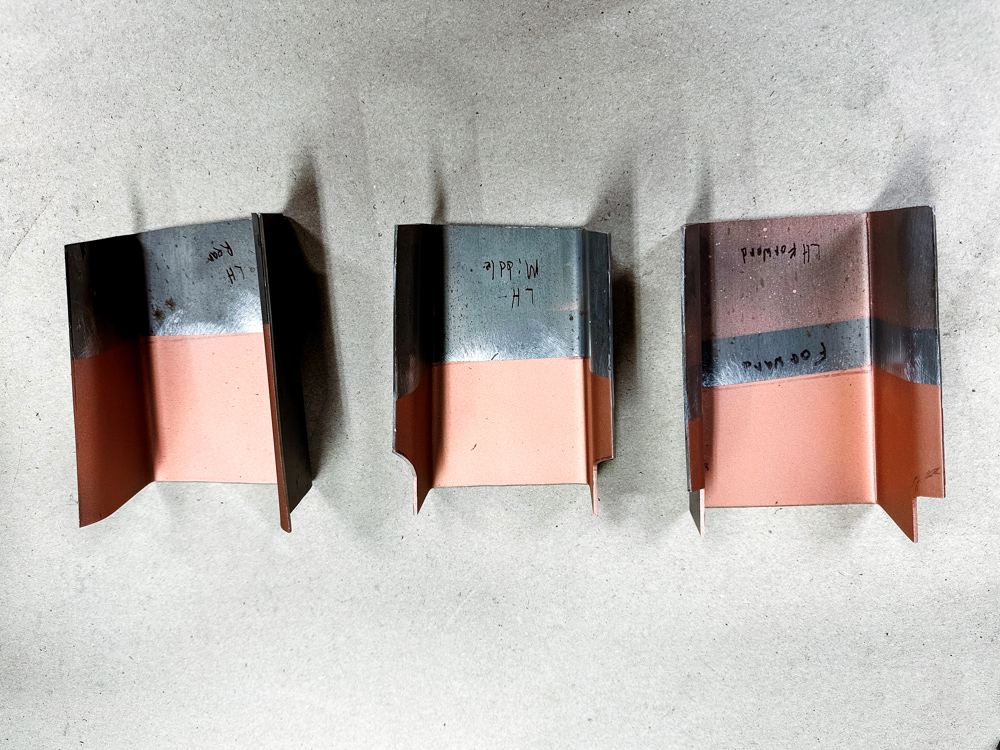
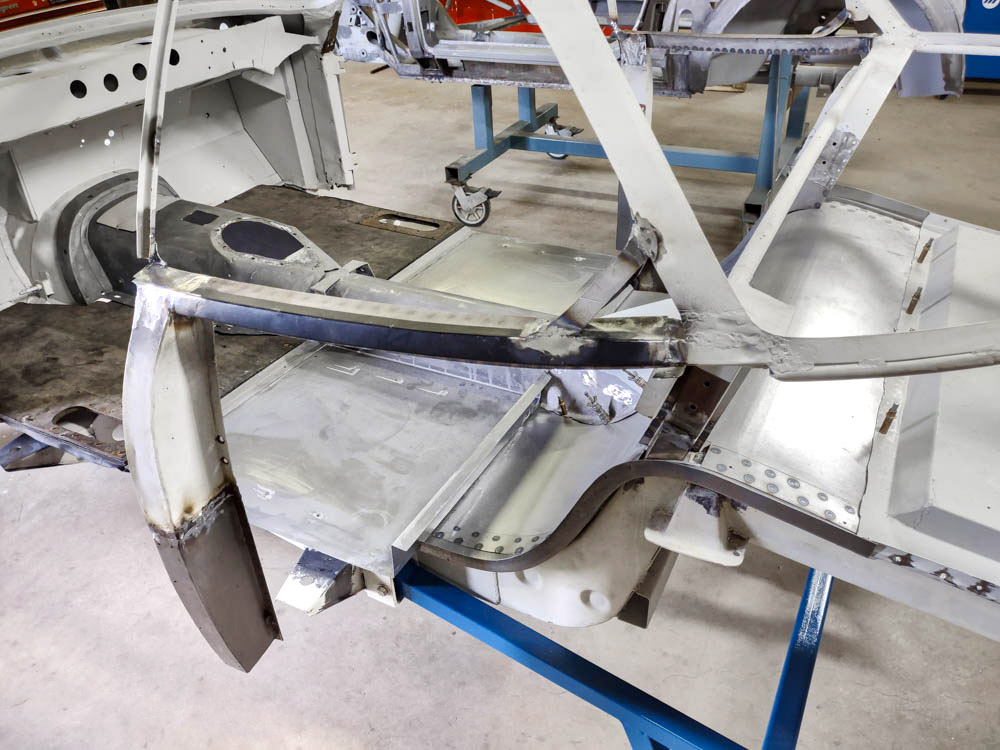
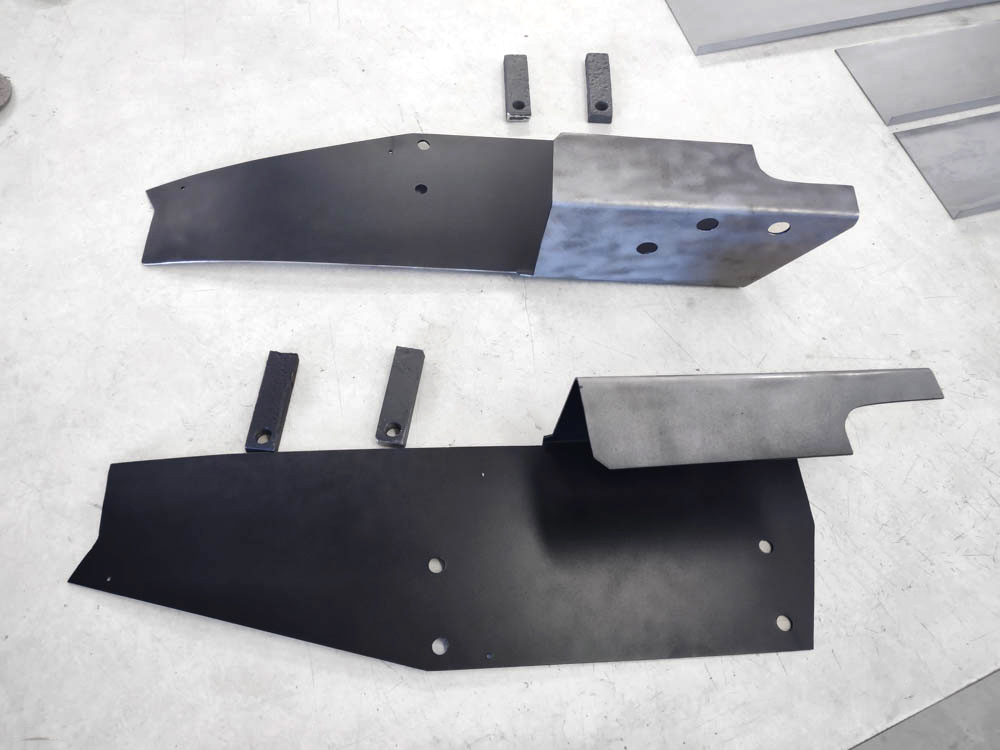
Rear wheel well repair and
fitting of close out panels
March 26, 2024
March 26, 2024
March 26, 2024
March 26, 2024
March 26, 2024
March 26, 2024
March 26, 2024
March 26, 2024
Wheel well panels prime
March 26, 2024
Close out panels prime
March 26, 2024
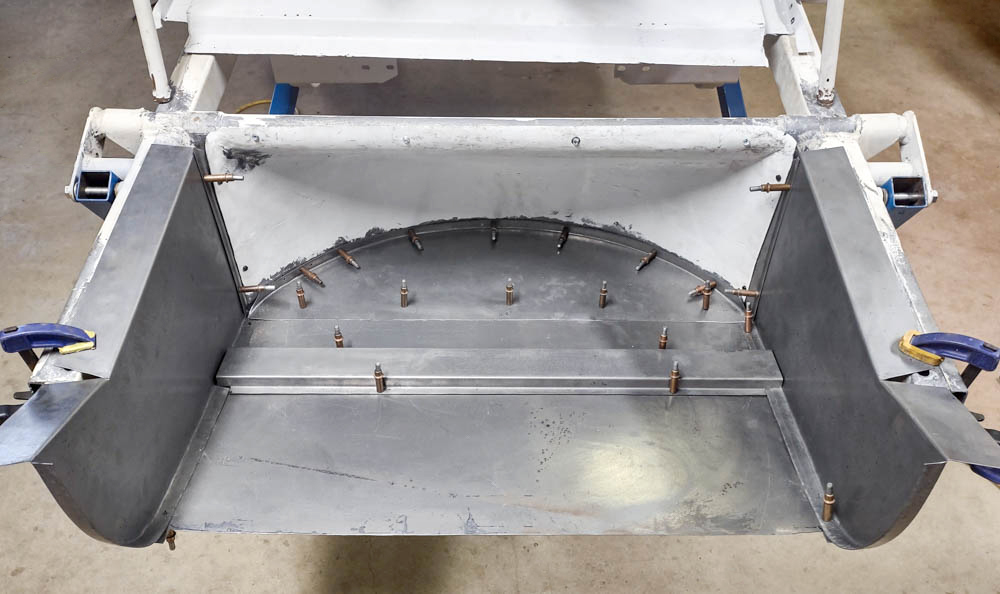
Rear wheel well panels and
close out panels installed
March 26, 2024
March 26, 2024
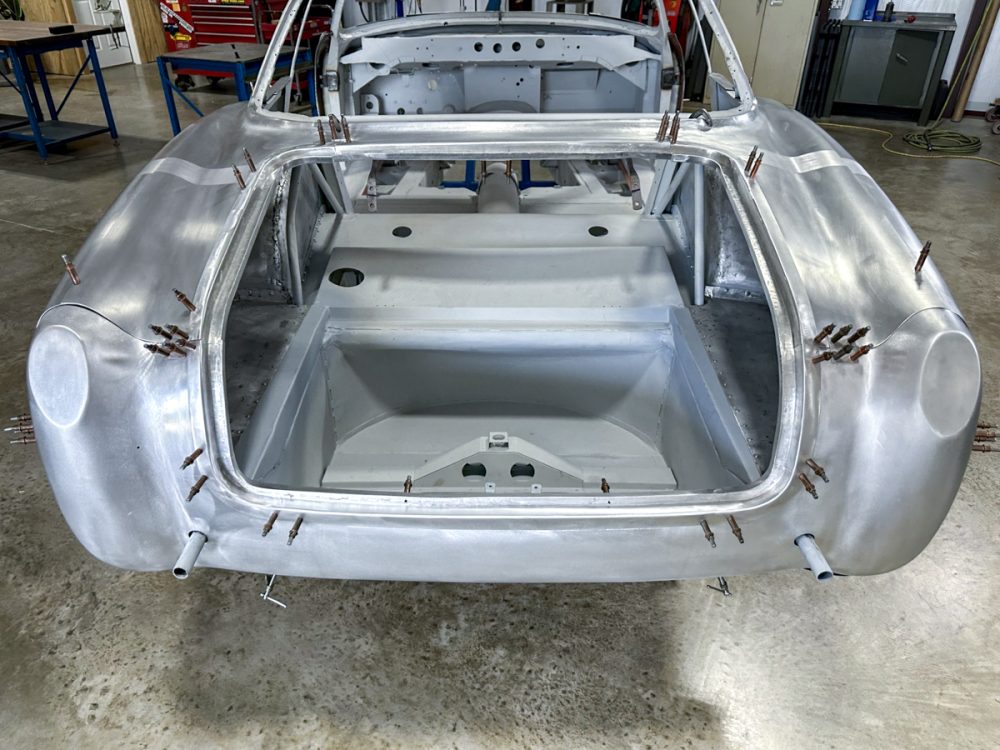
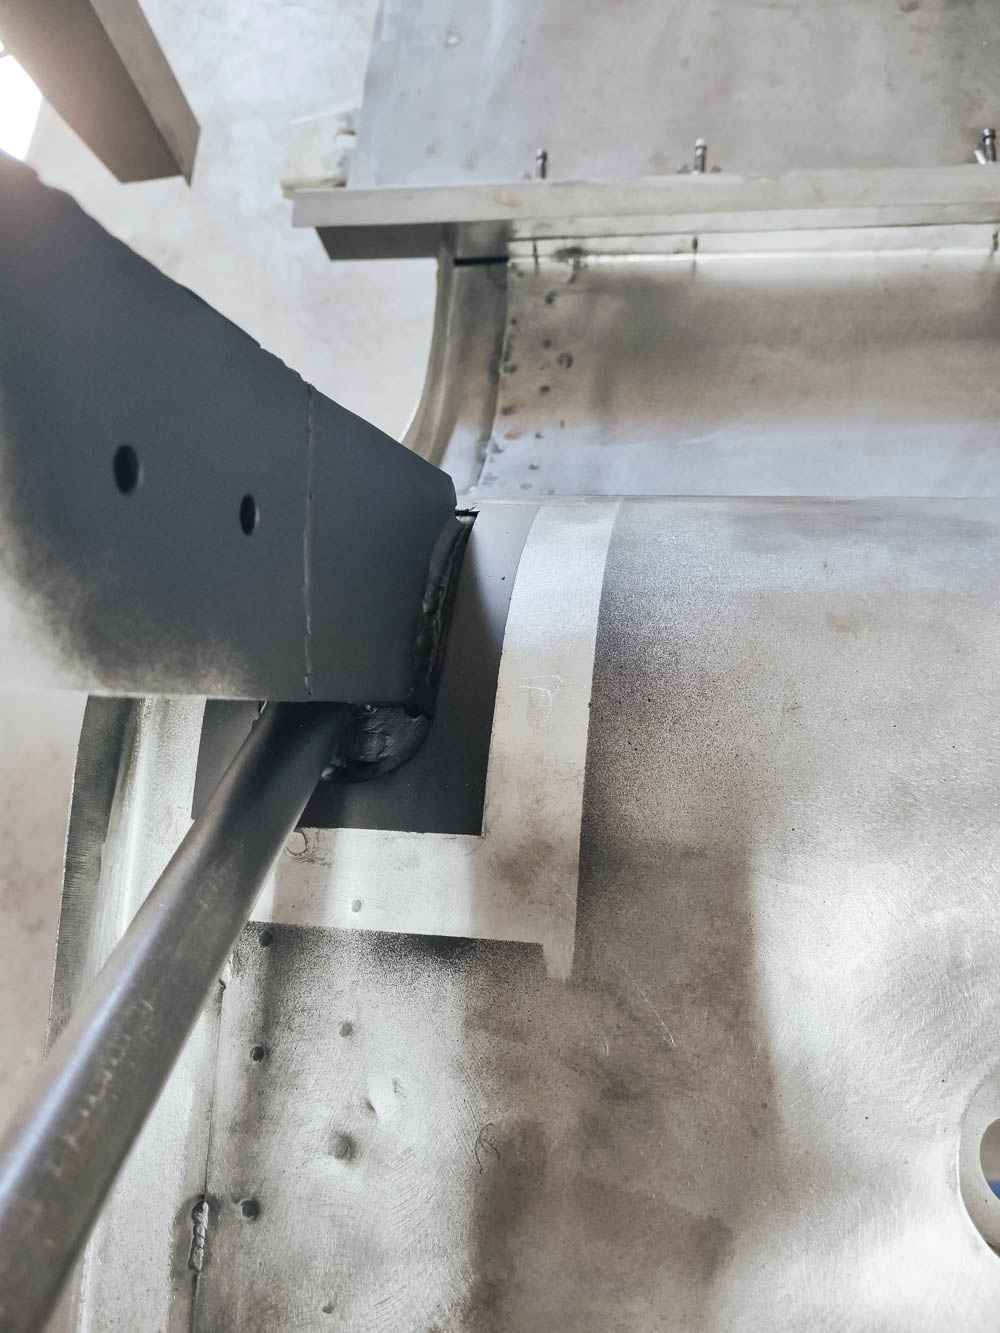
Fitting rear body panels to chassis
and rear superleggera framework
March 26, 2024
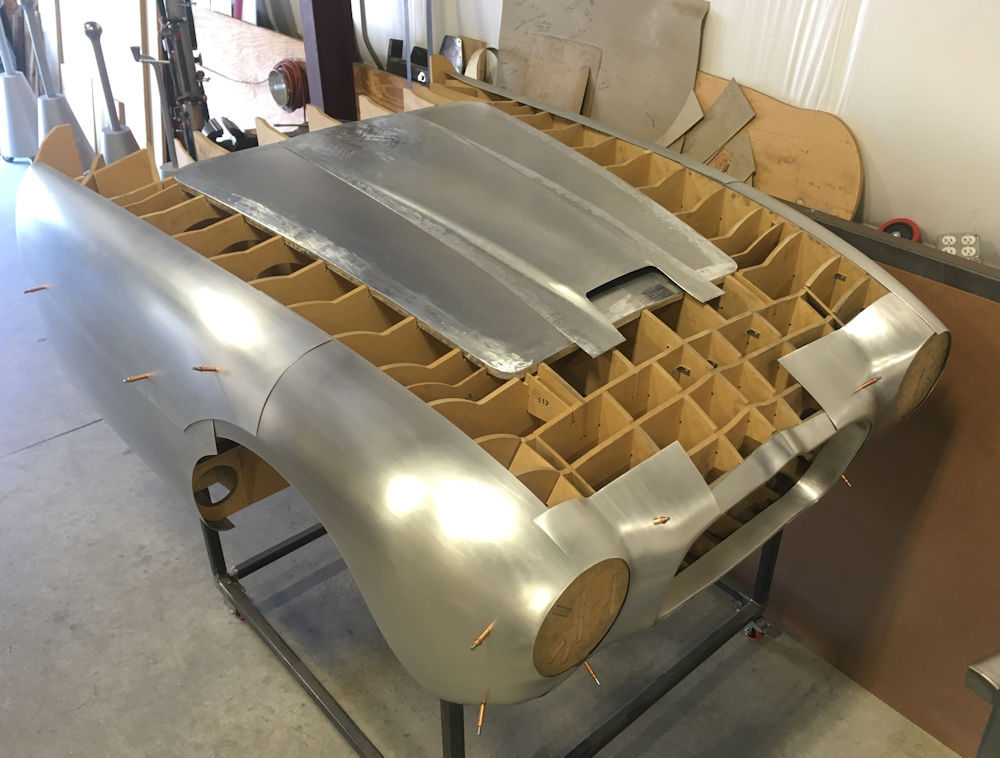
Bonnet drip rail
February 21, 2024
February 21, 2024
Bonnet opening support structure
and engine bay close out panels.
February 21, 2024
February 21, 2024
Bonnet opening aluminum drip rail.
February 21, 2024
February 21, 2024
February 21, 2024
February 21, 2024
February 21, 2024
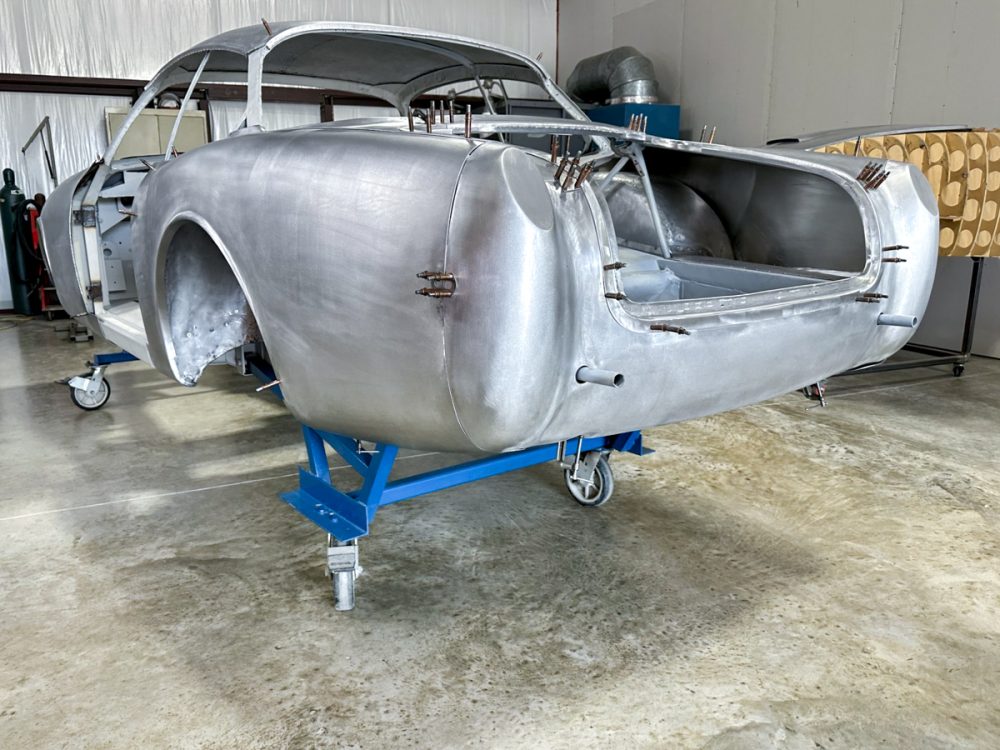
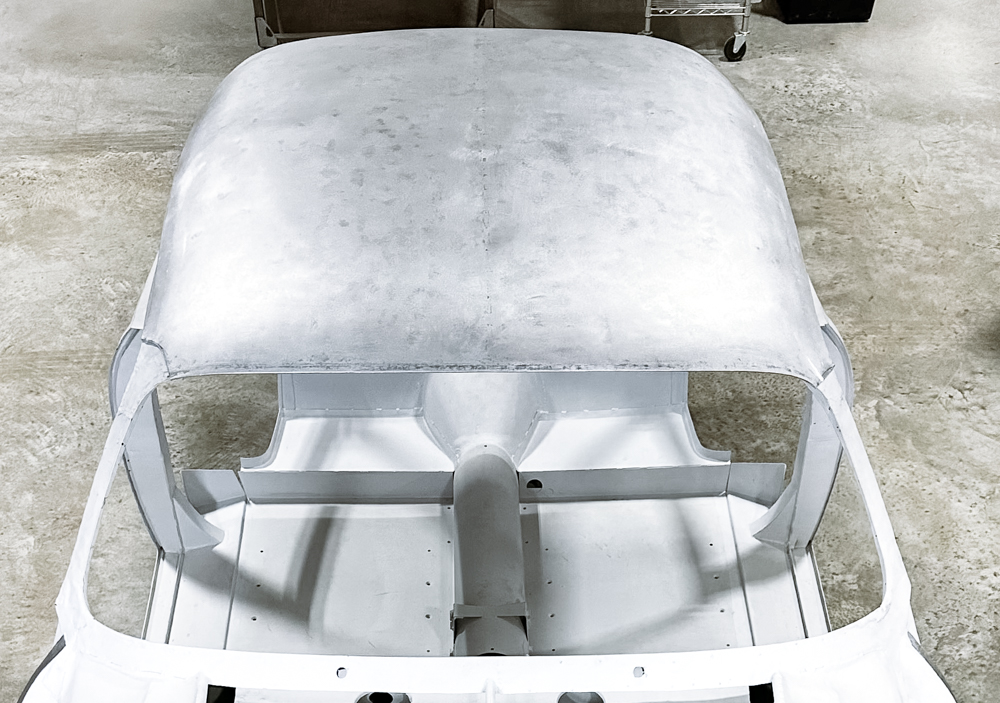
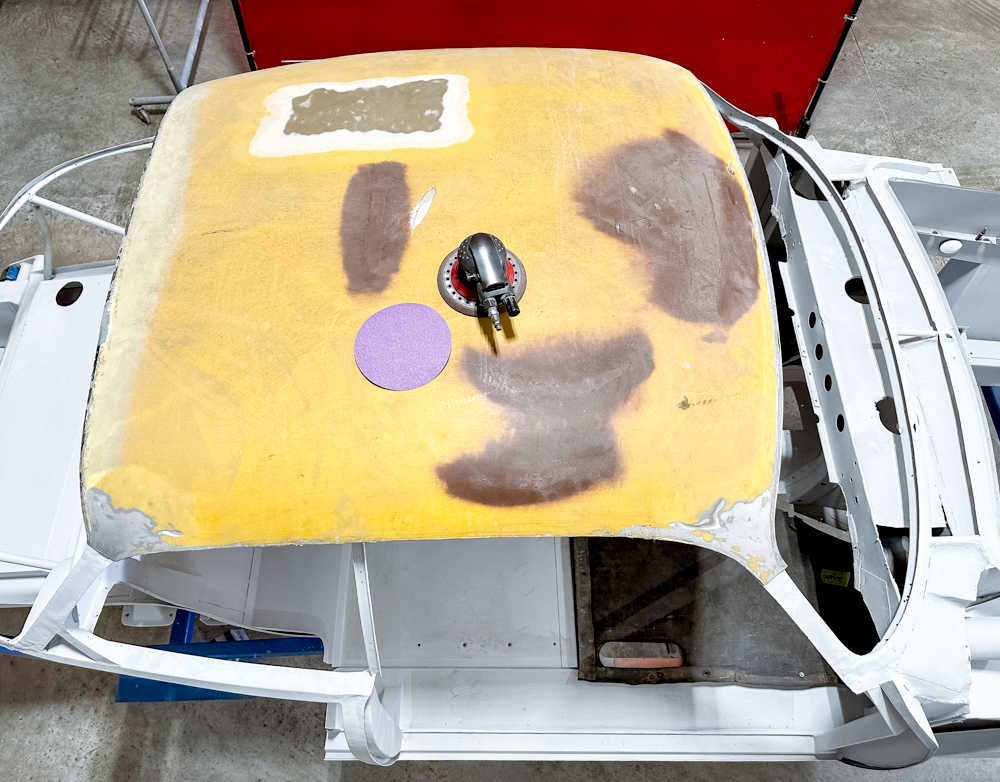
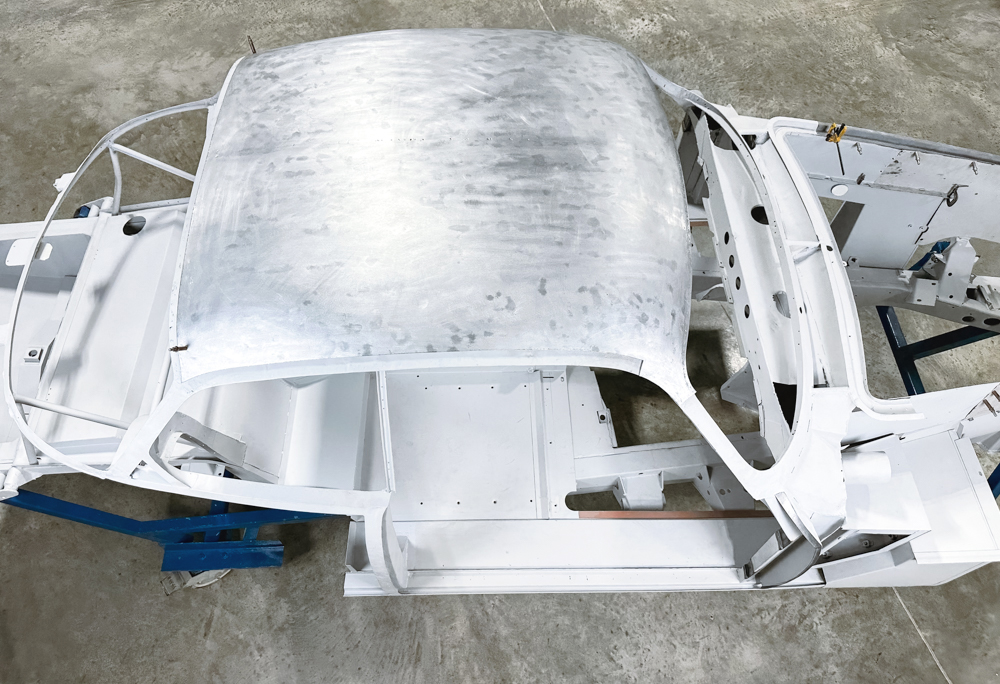
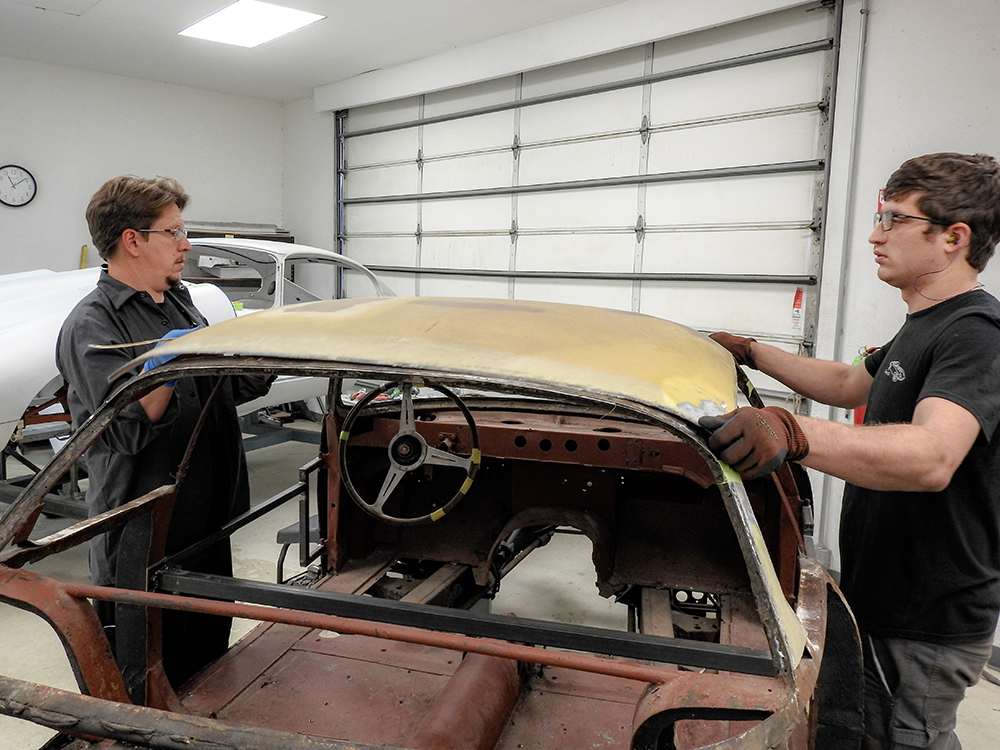
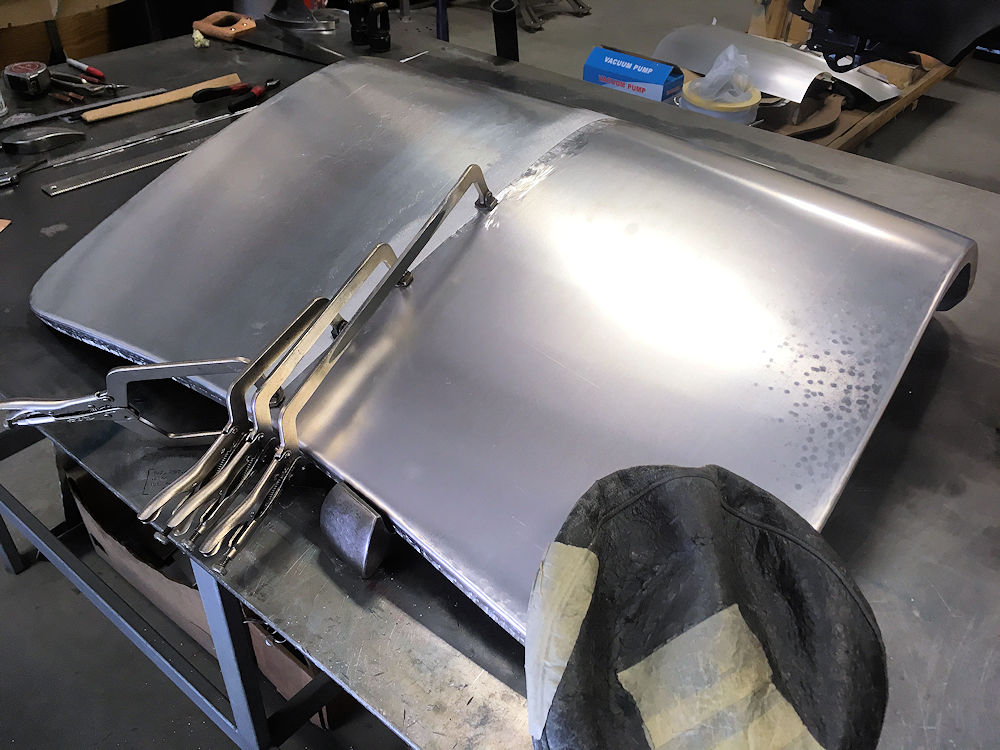
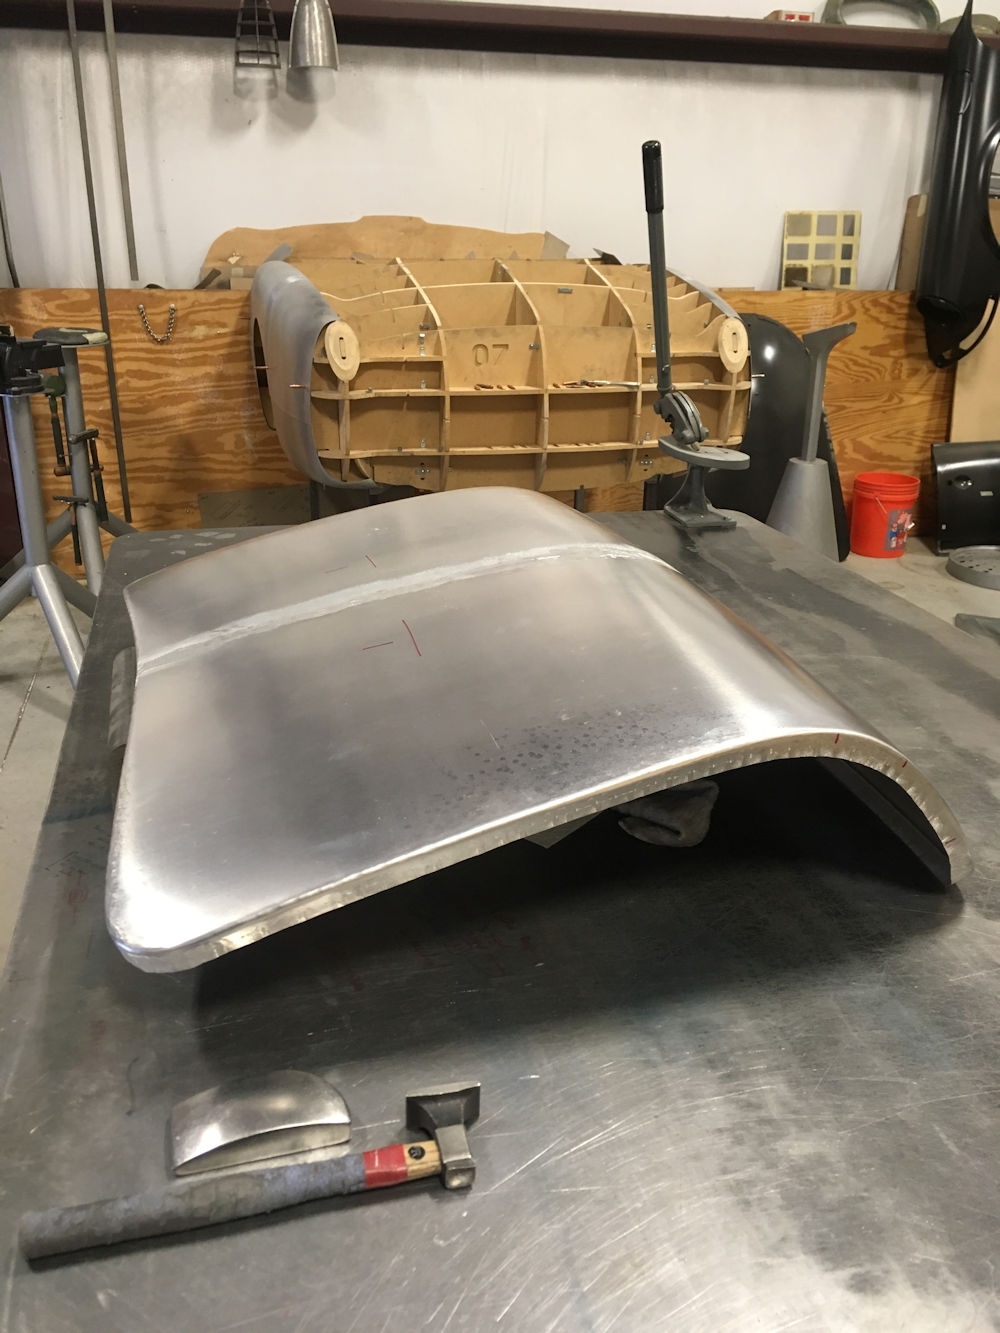
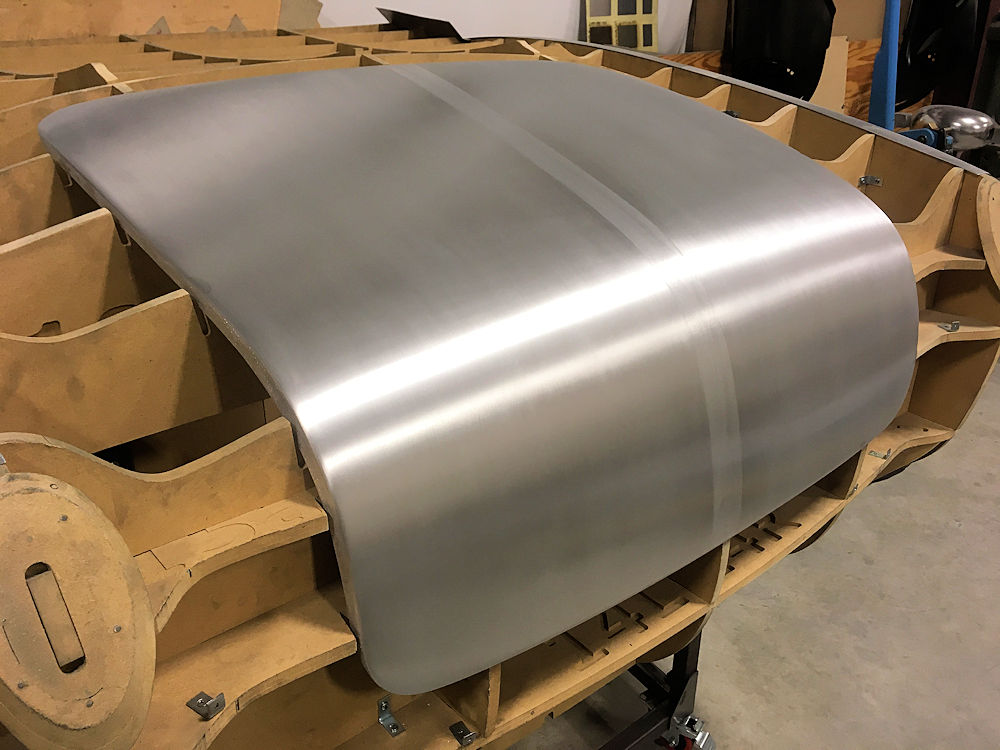
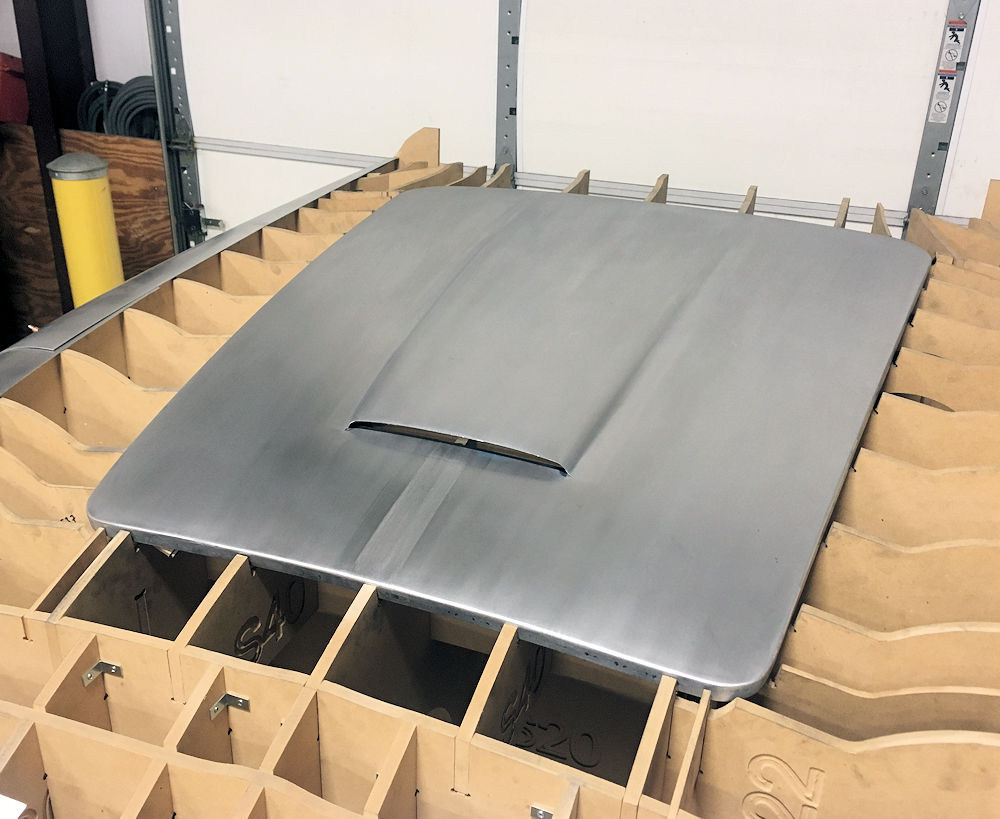
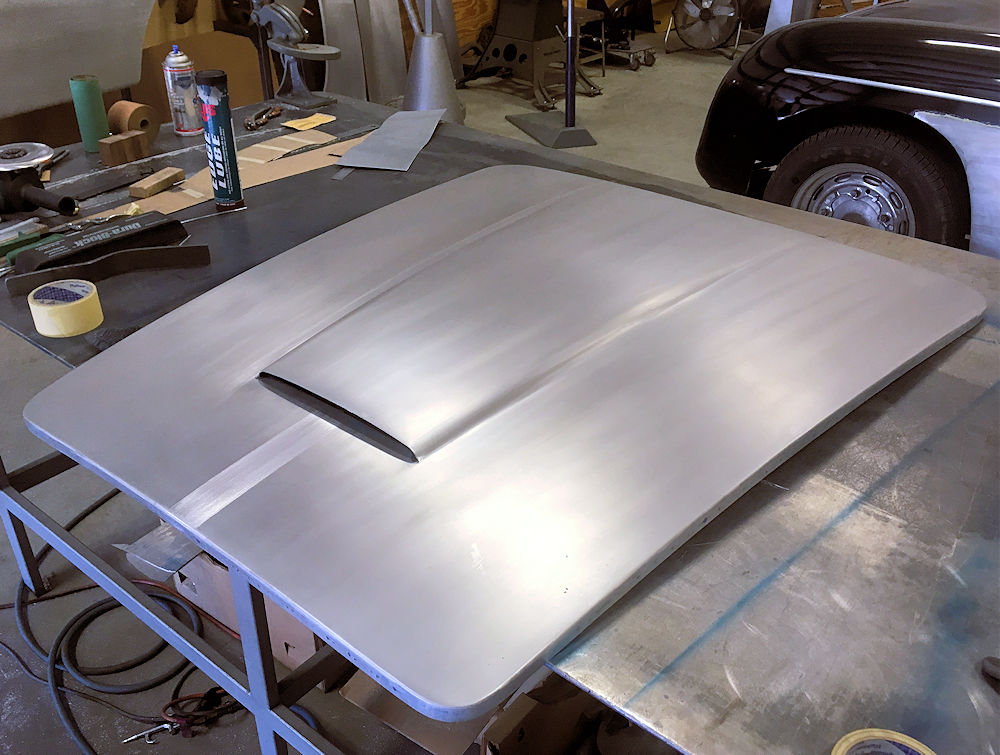
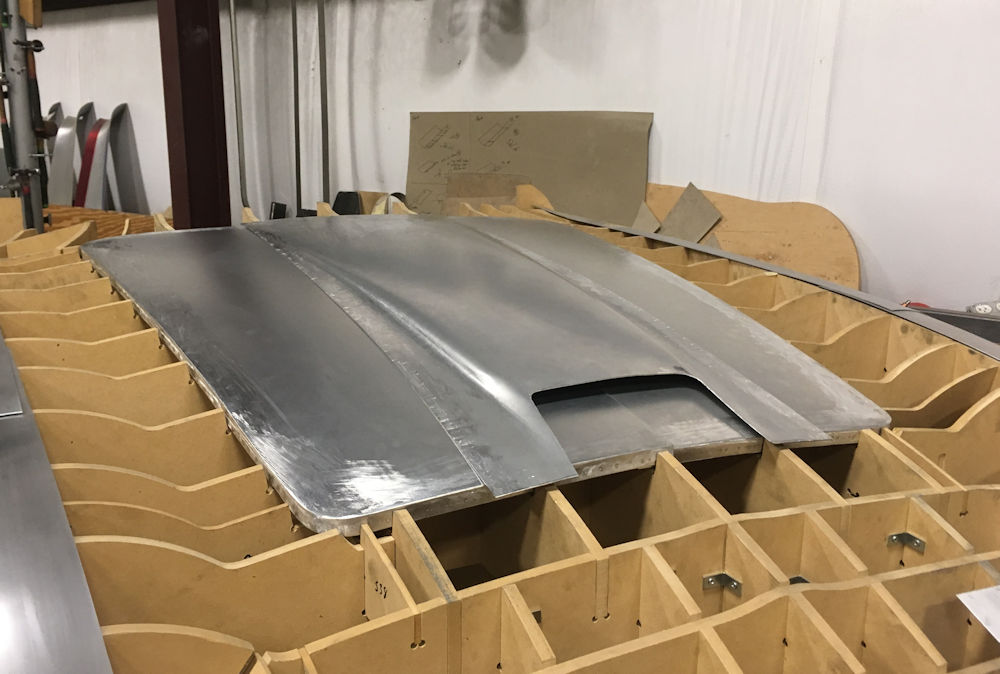
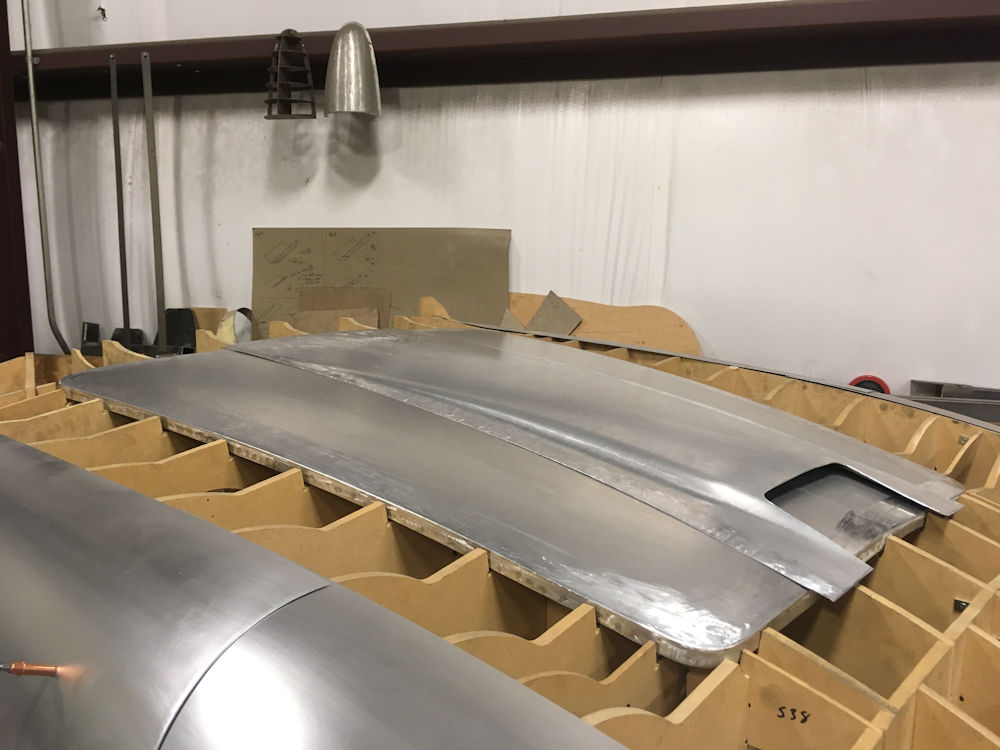
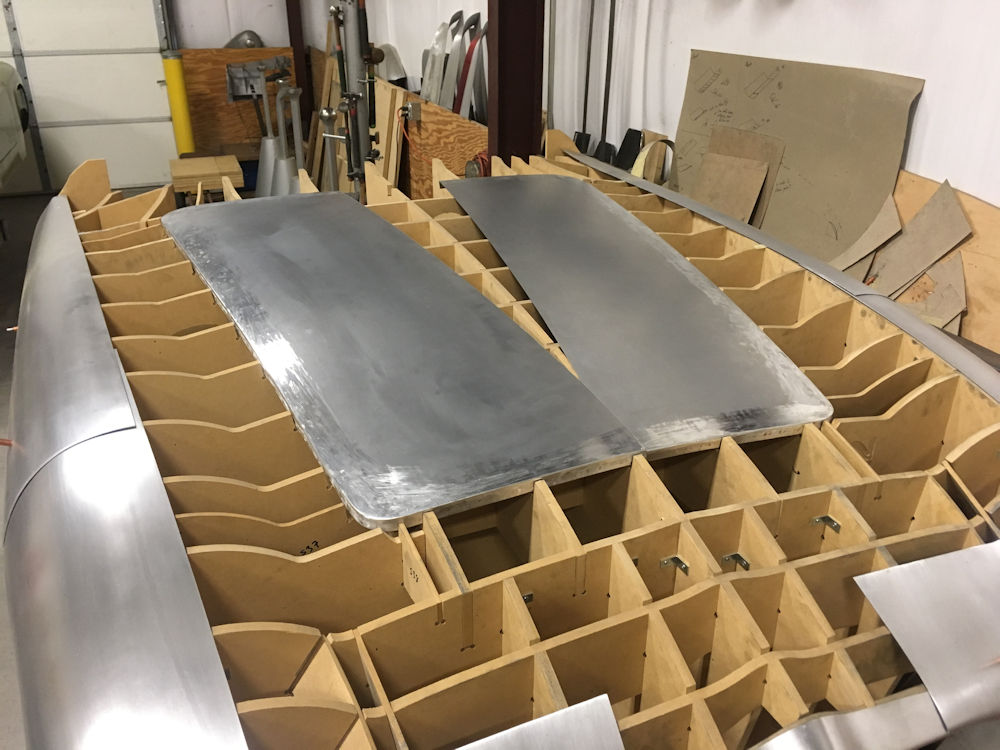
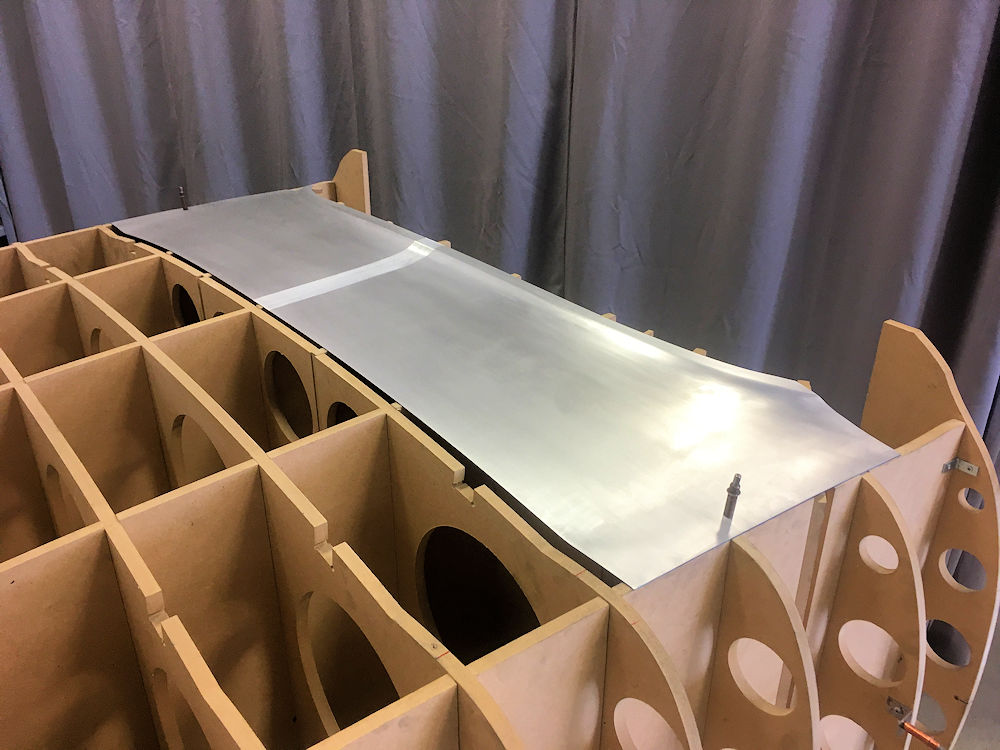
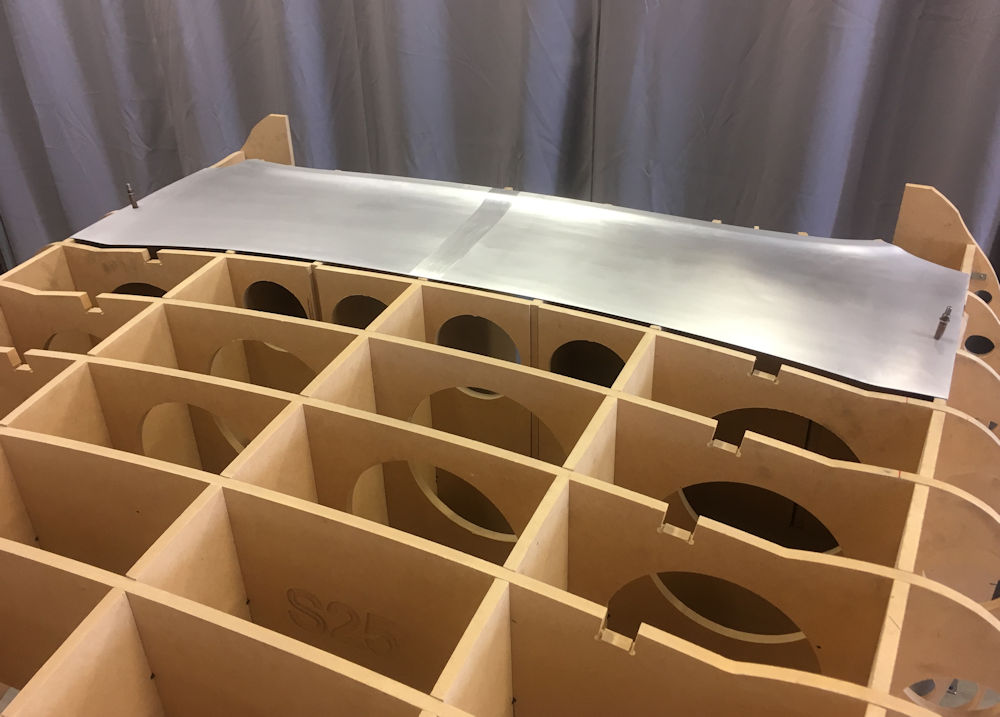
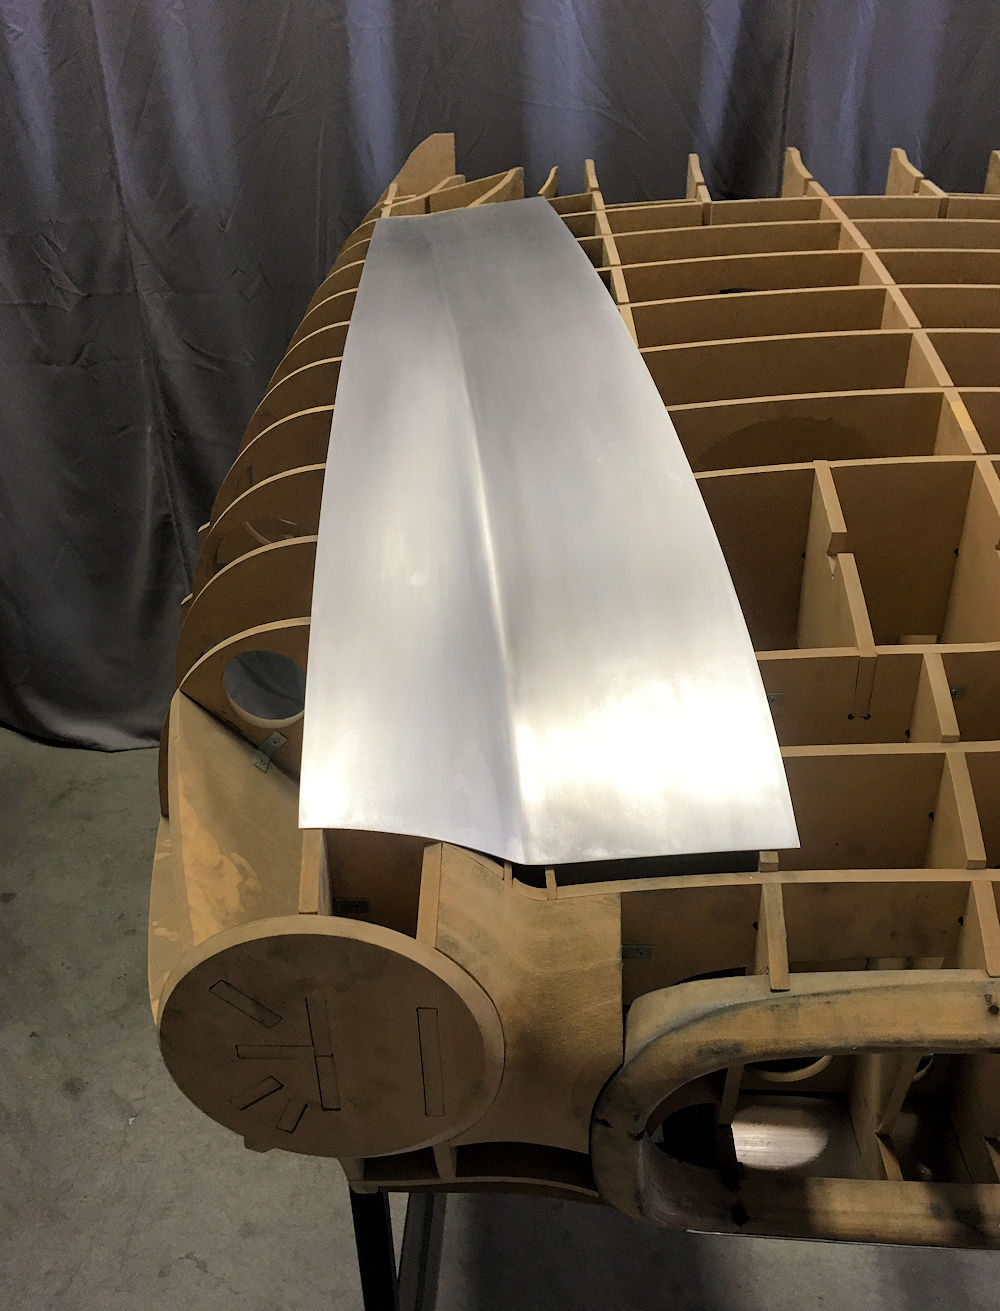
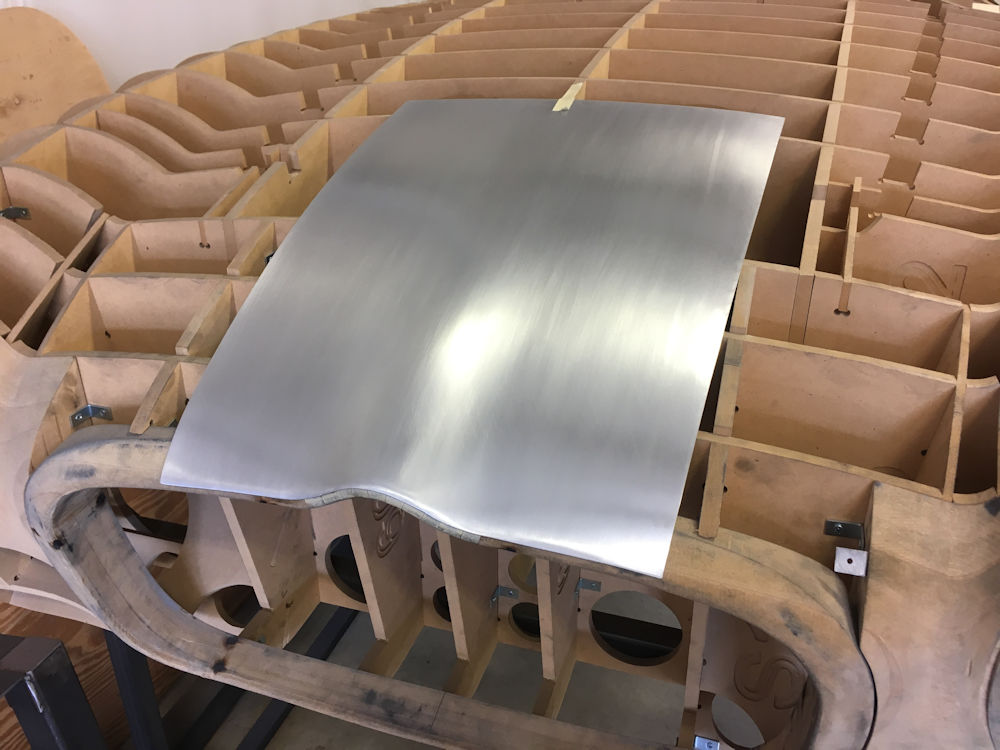
Roof panel with new flange panels.
Roof to cowl cover panels.
February 21, 2024
February 21, 2024
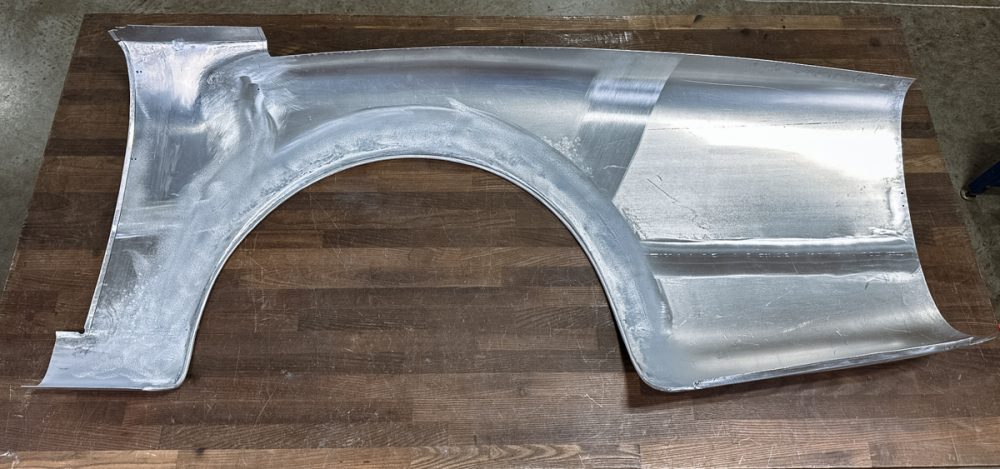
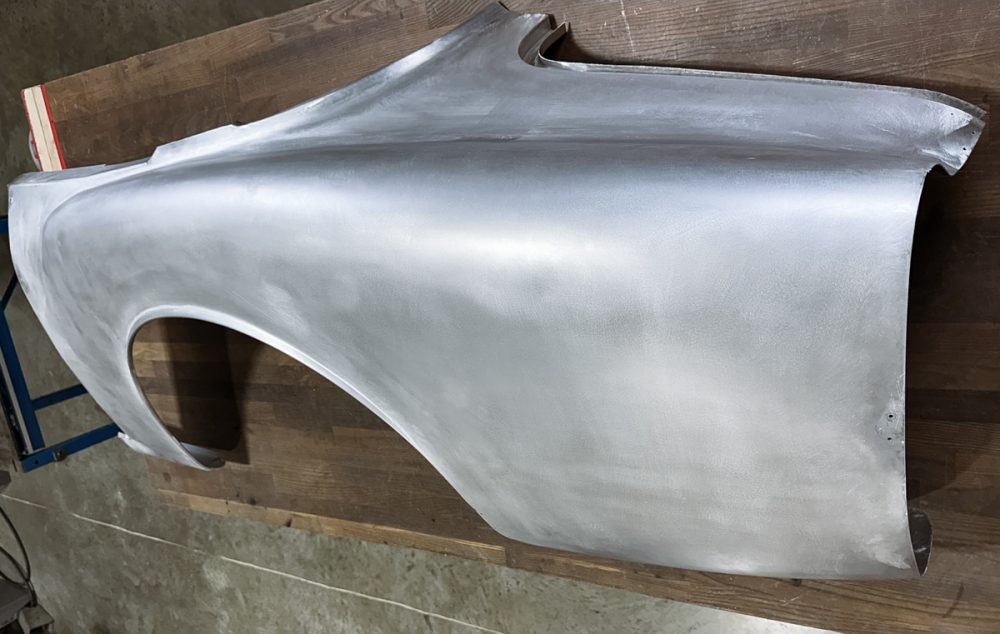
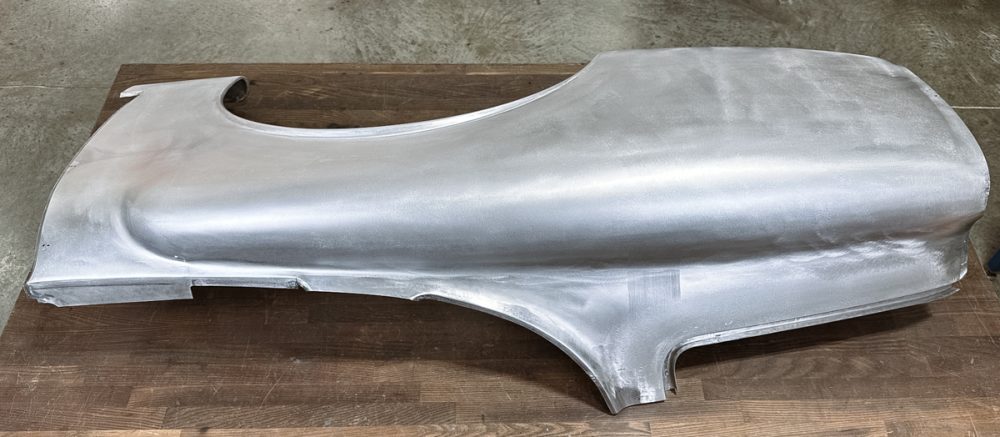
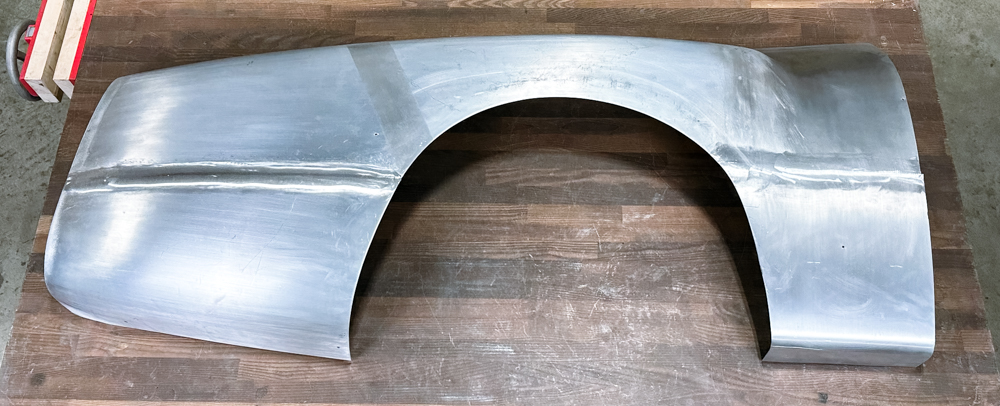
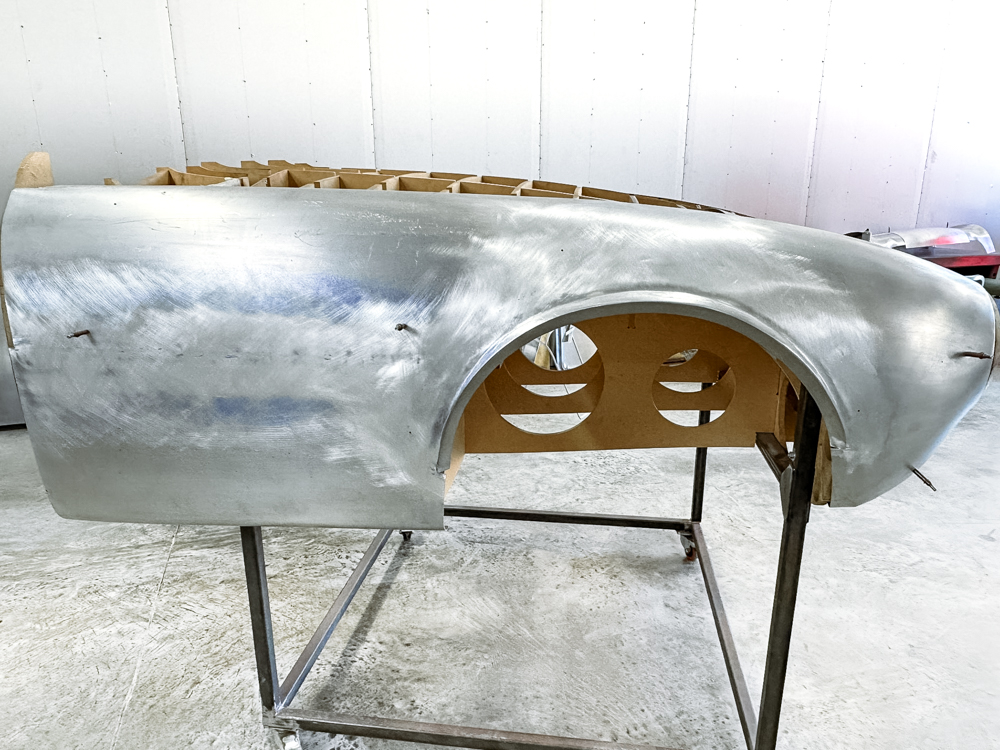
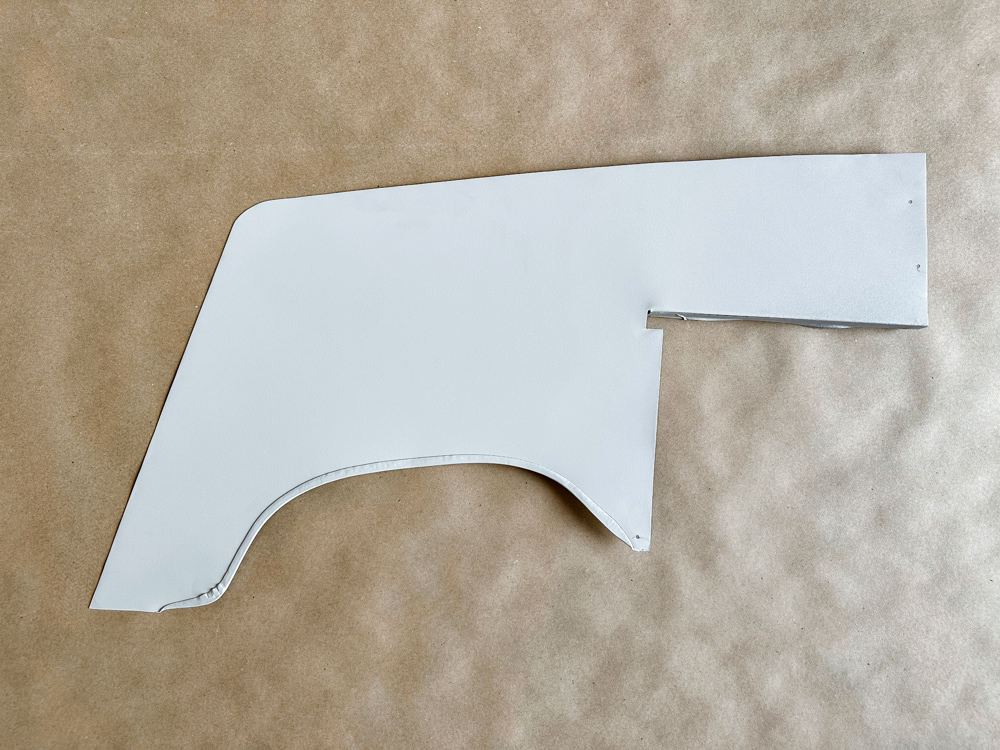
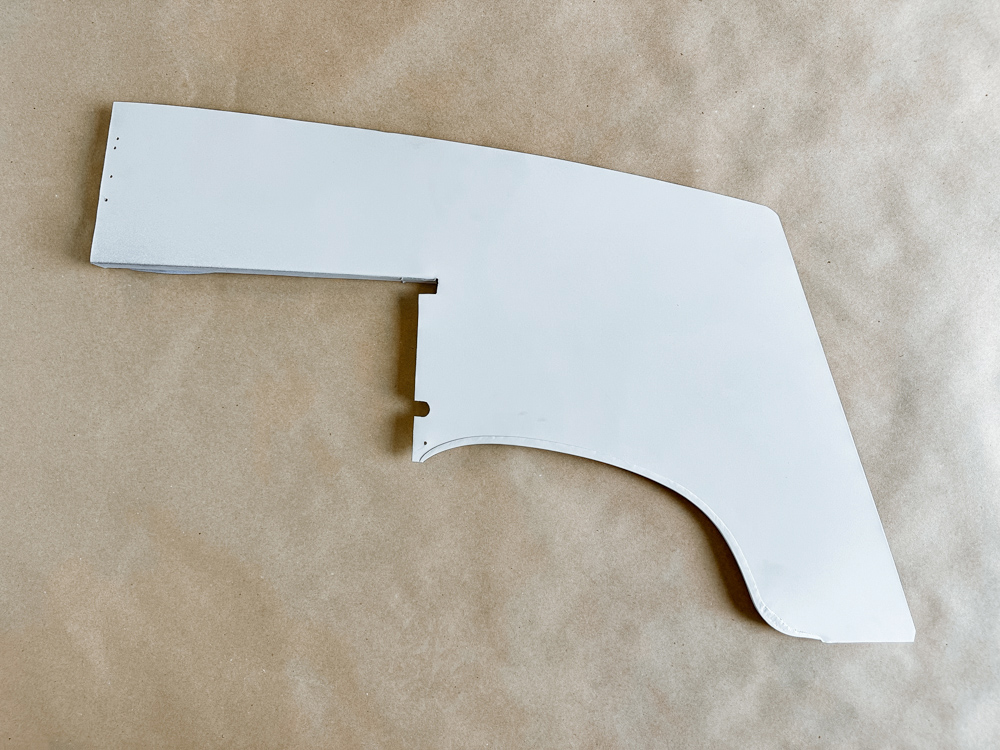
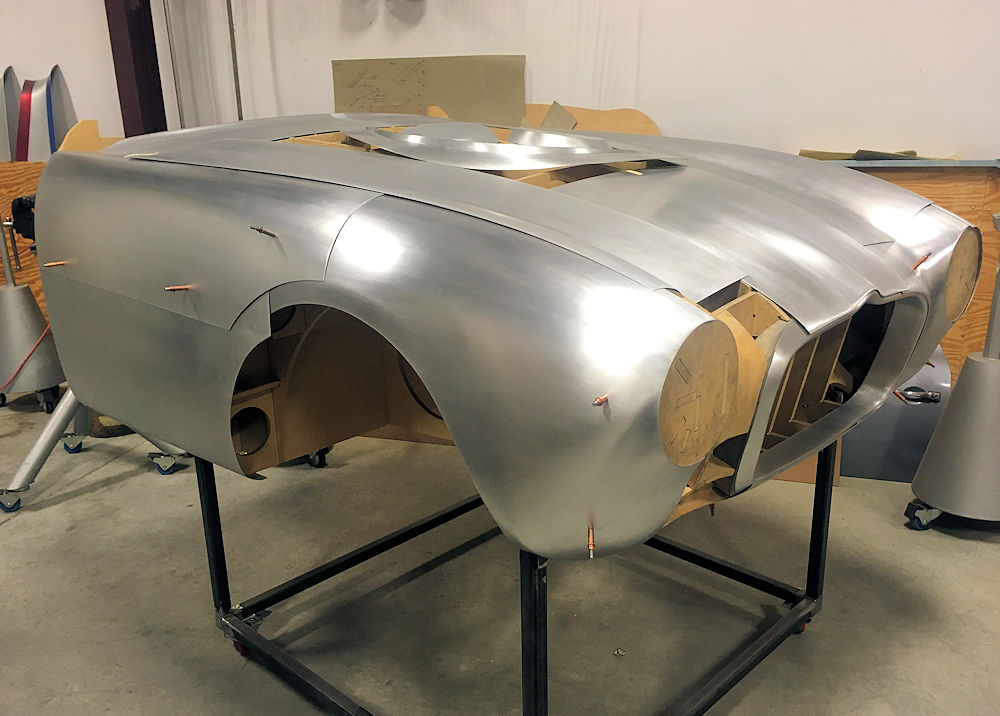
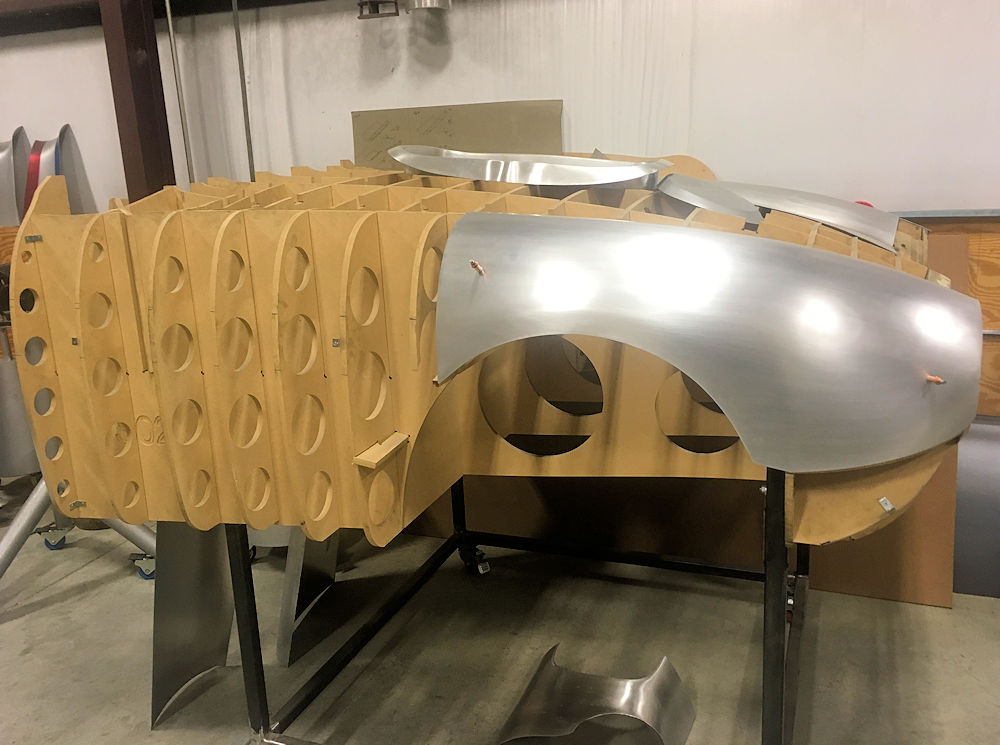
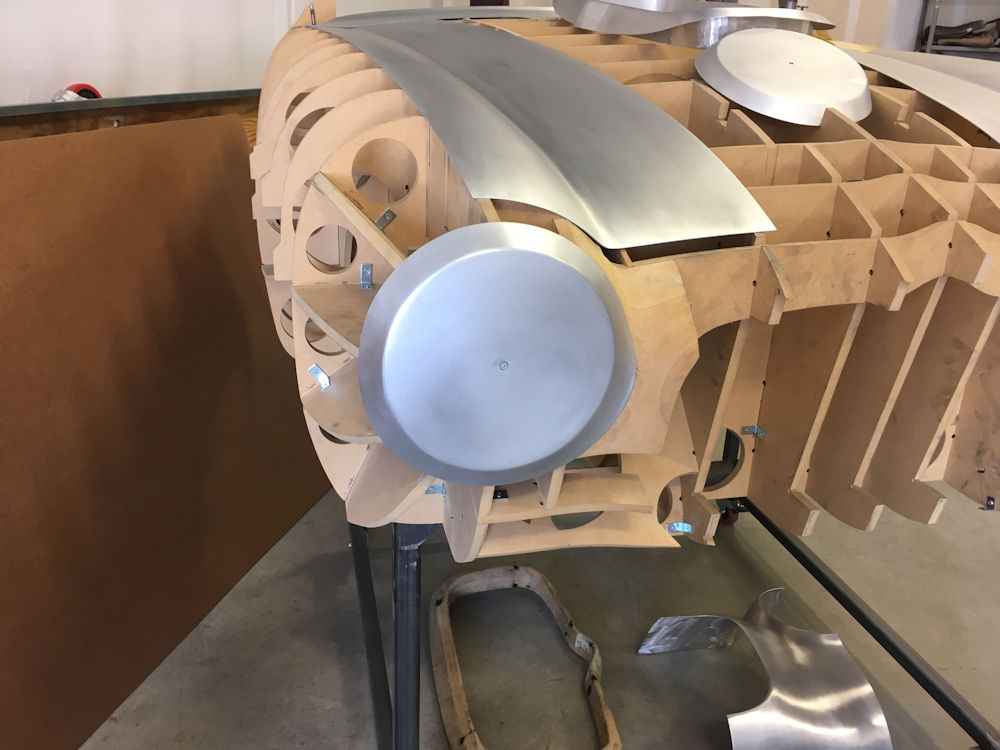
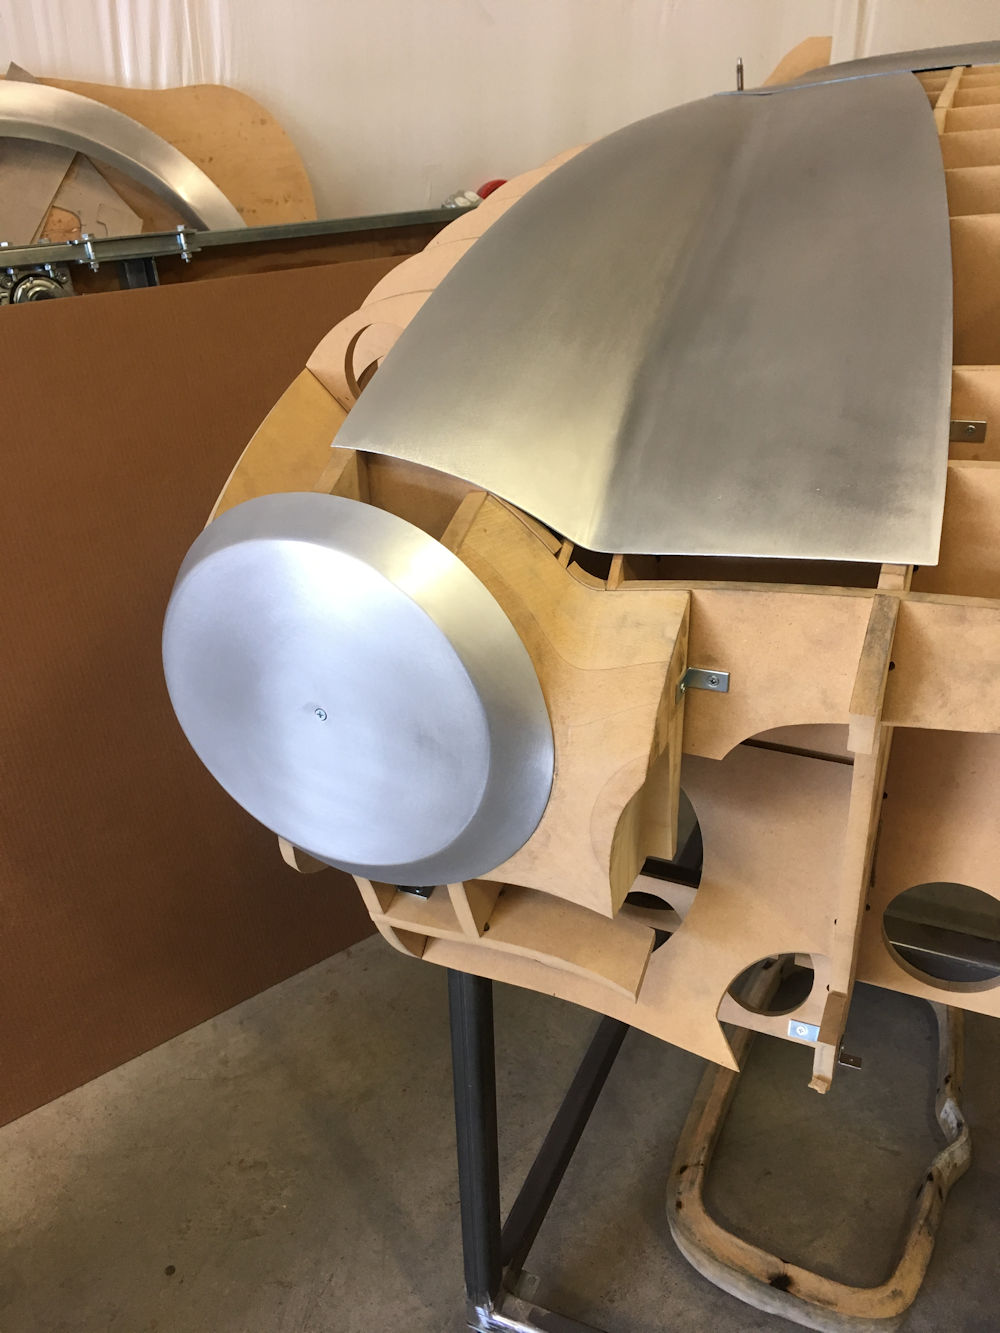
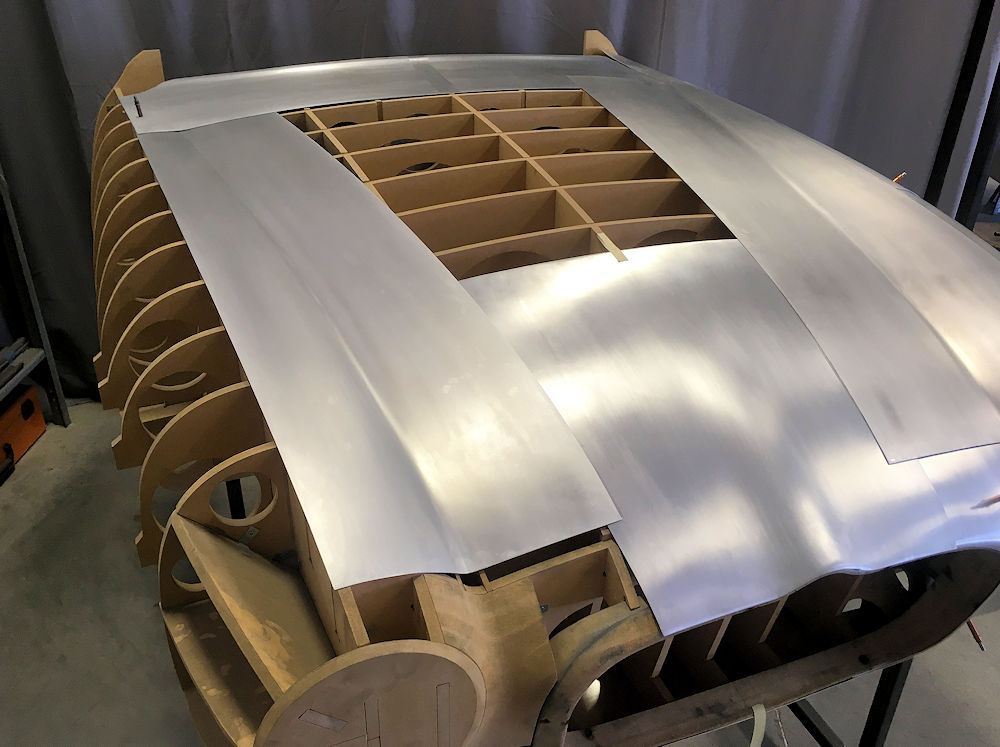
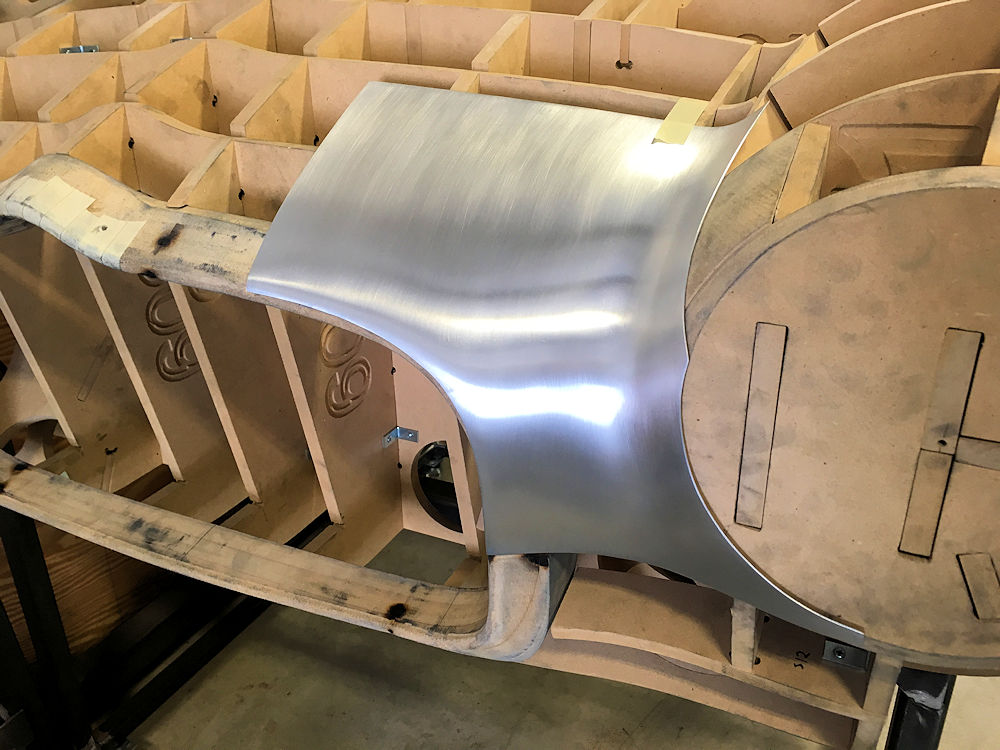
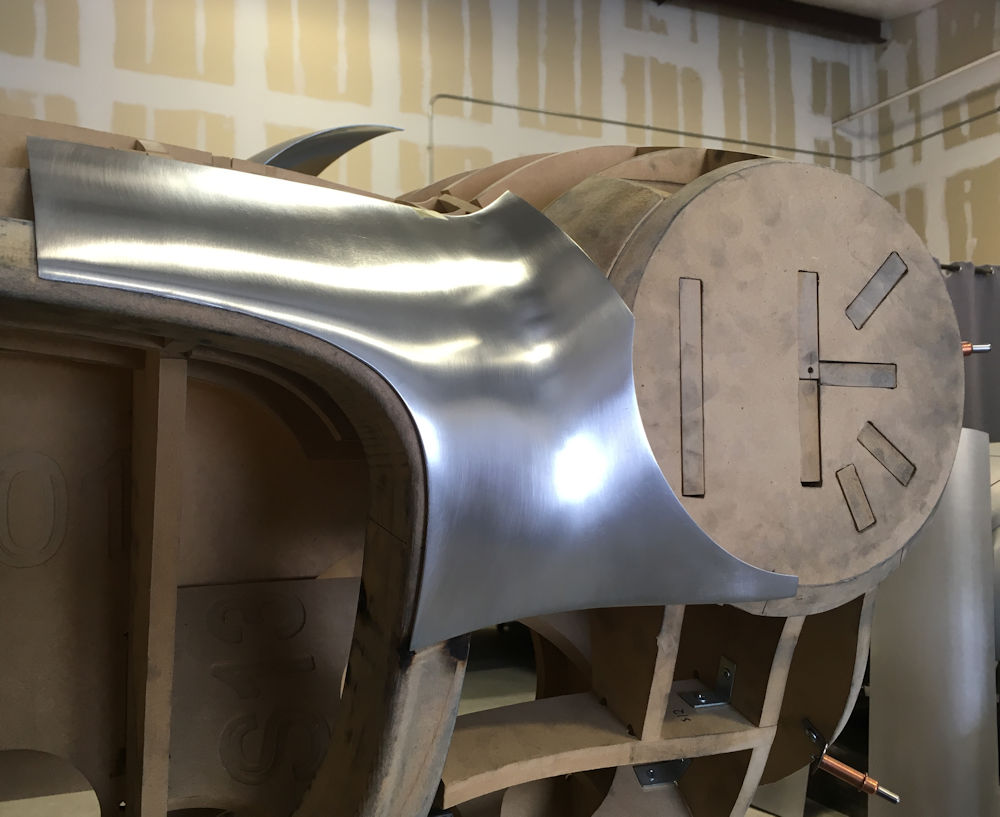
Front fender flares and lower fender panels.
February 21, 2024
February 21, 2024
February 21, 2024
February 21, 2024
February 21, 2024
February 21, 2024
February 21, 2024
February 21, 2024
February 21, 2024
February 21, 2024
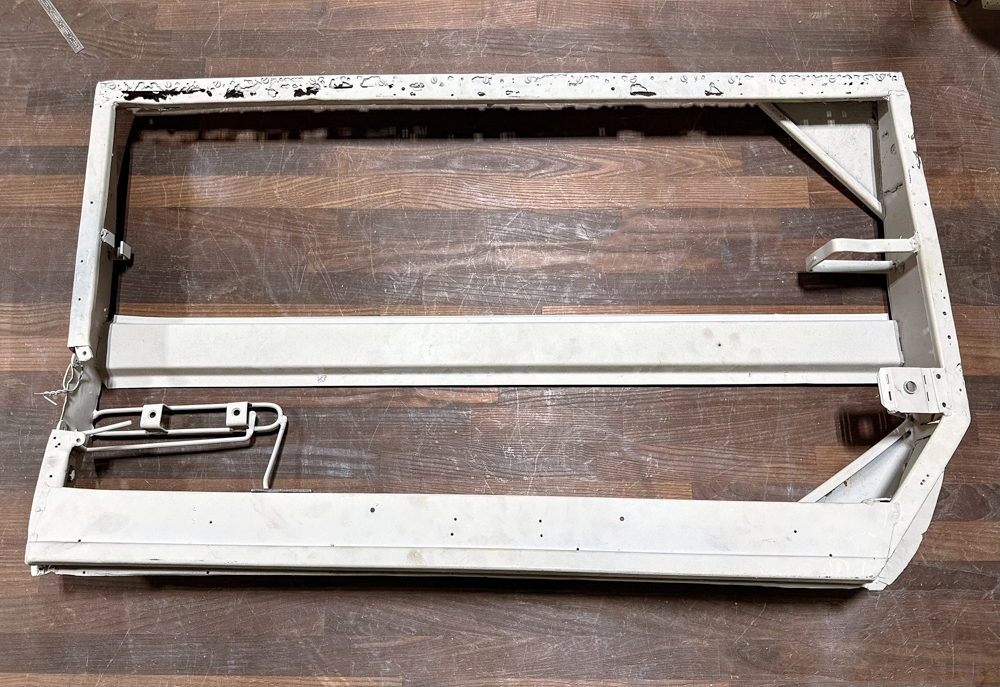
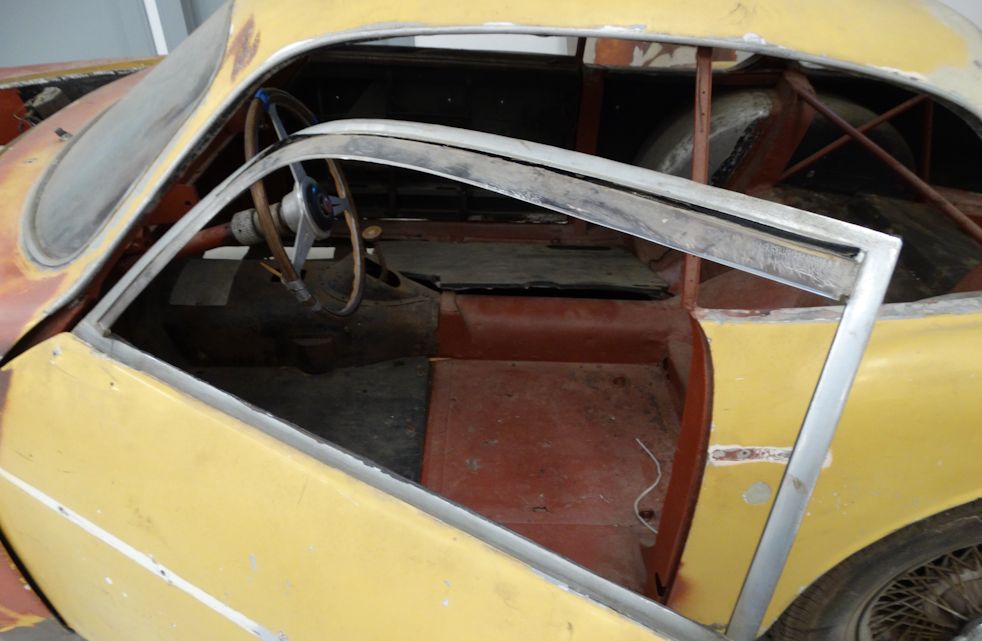
Door frame construction.
February 21, 2024
February 21, 2024
February 21, 2024
February 21, 2024
February 21, 2024
February 21, 2024
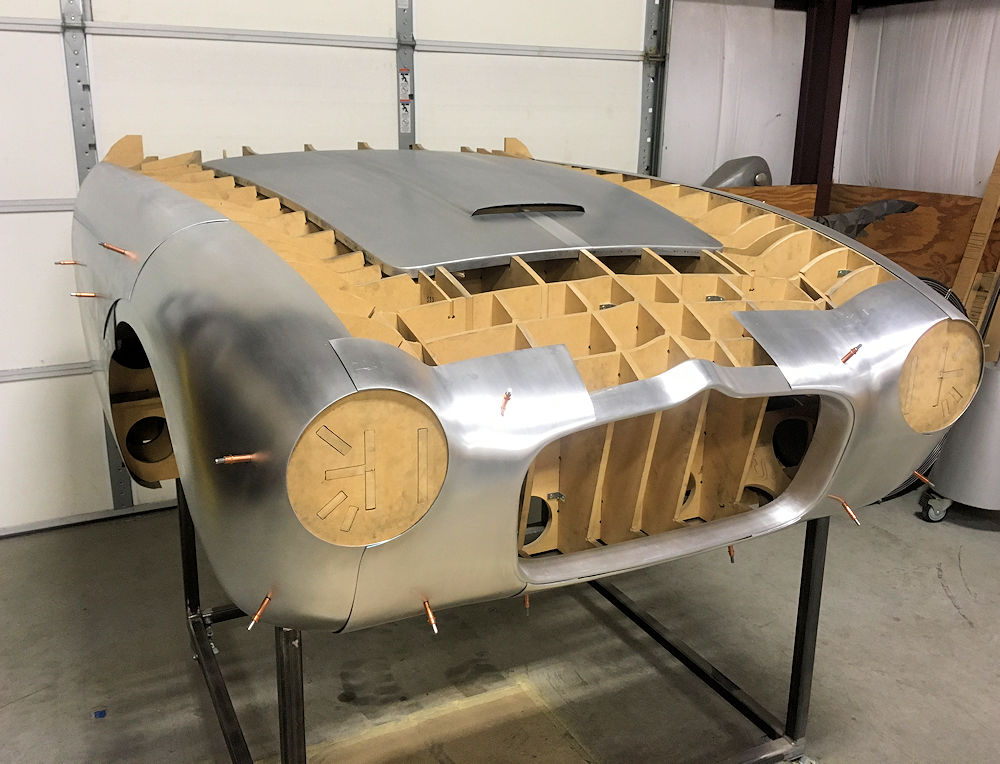
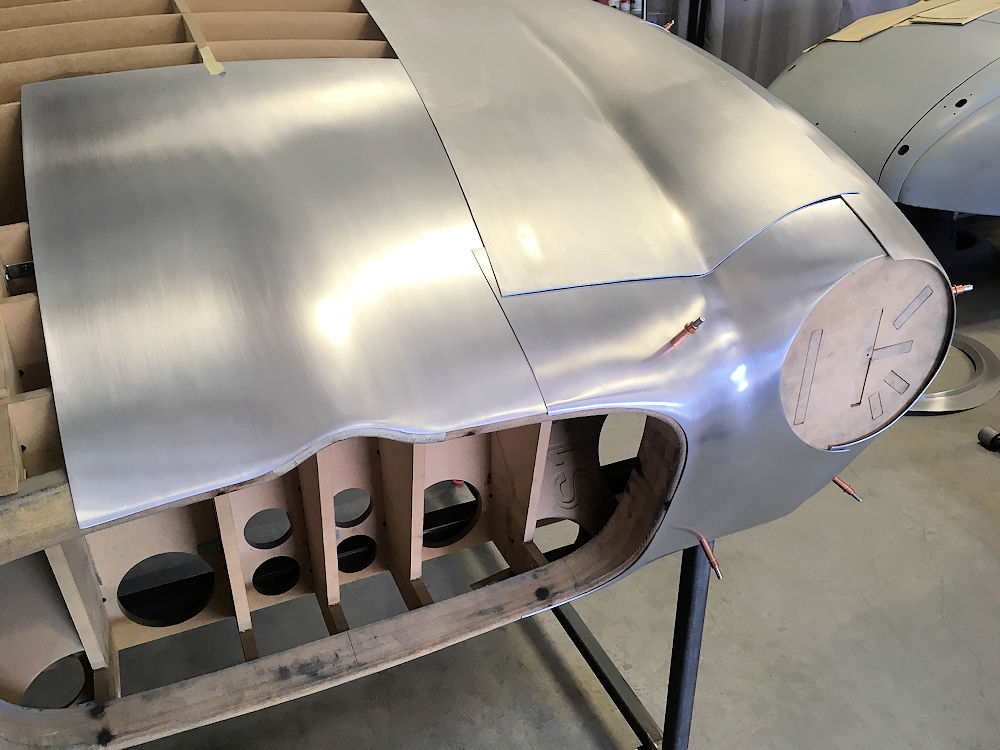
Fitting of nose panels to body.
February 21, 2024
February 21, 2024
February 21, 2024
February 21, 2024
February 21, 2024
February 21, 2024
February 21, 2024
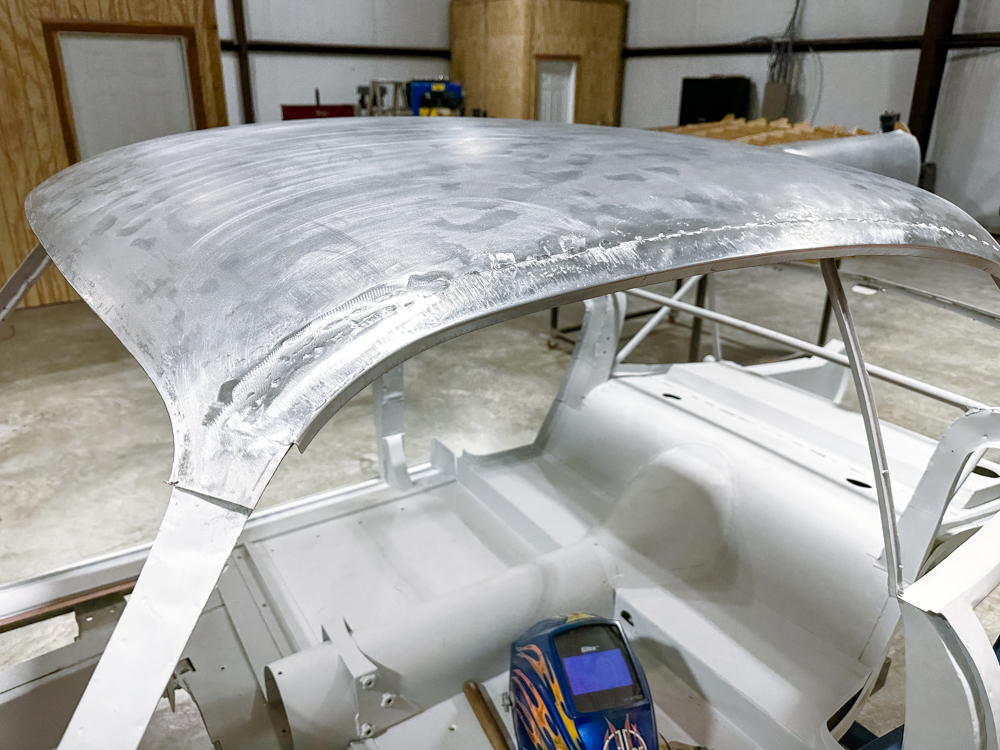
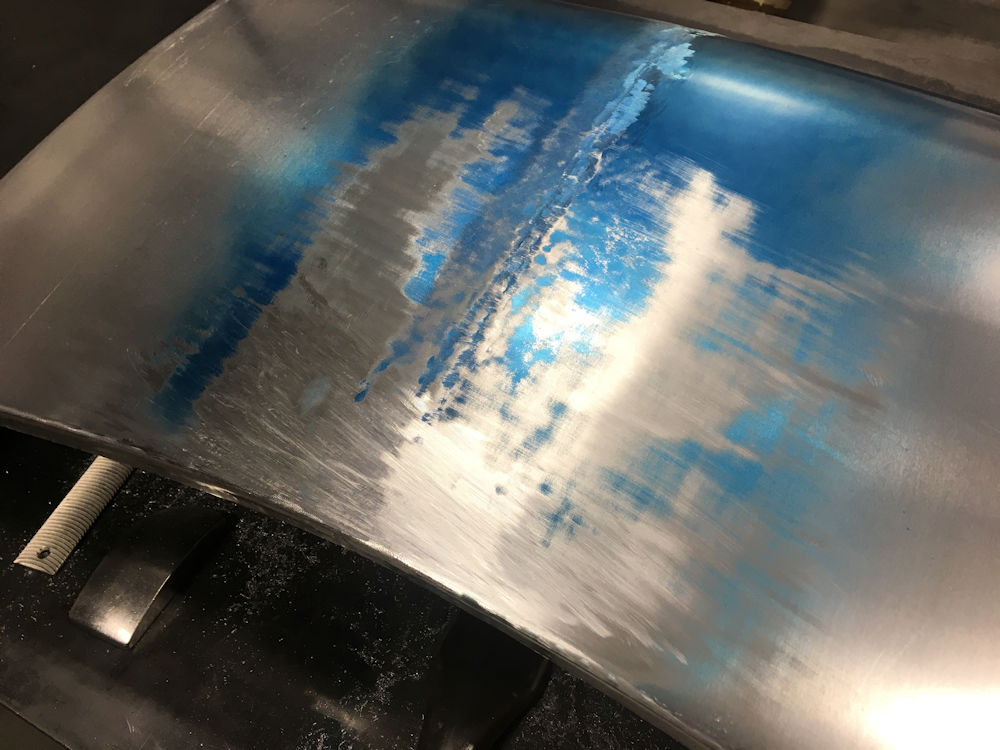
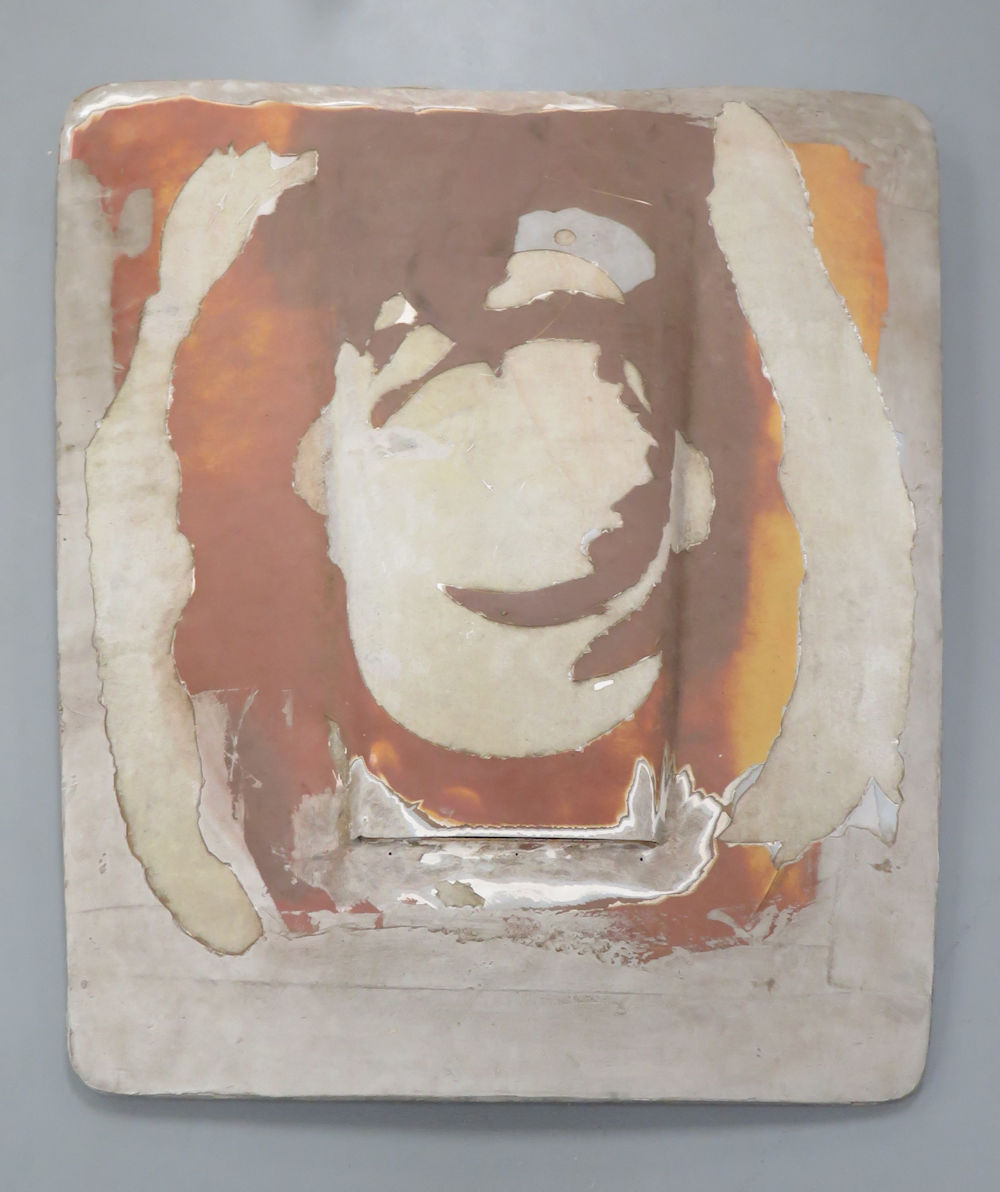
Original roof panel stripped to bare aluminum.
February 21, 2024
January 15, 2024
January 15, 2024
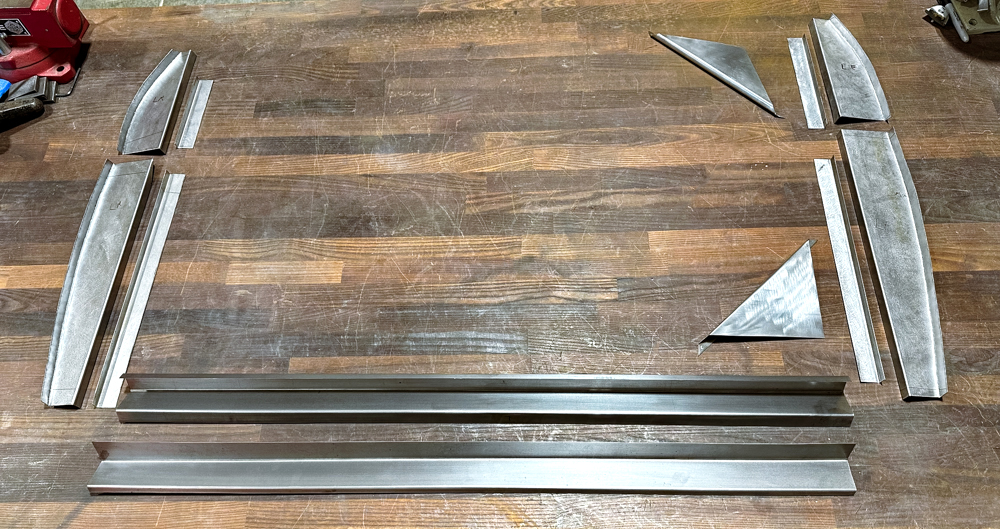
New flange panels for roof panel.
January 15, 2024
Door frame disassembly,
January 15, 2024
January 15, 2024
New panel construction for door frames.
January 15, 2024
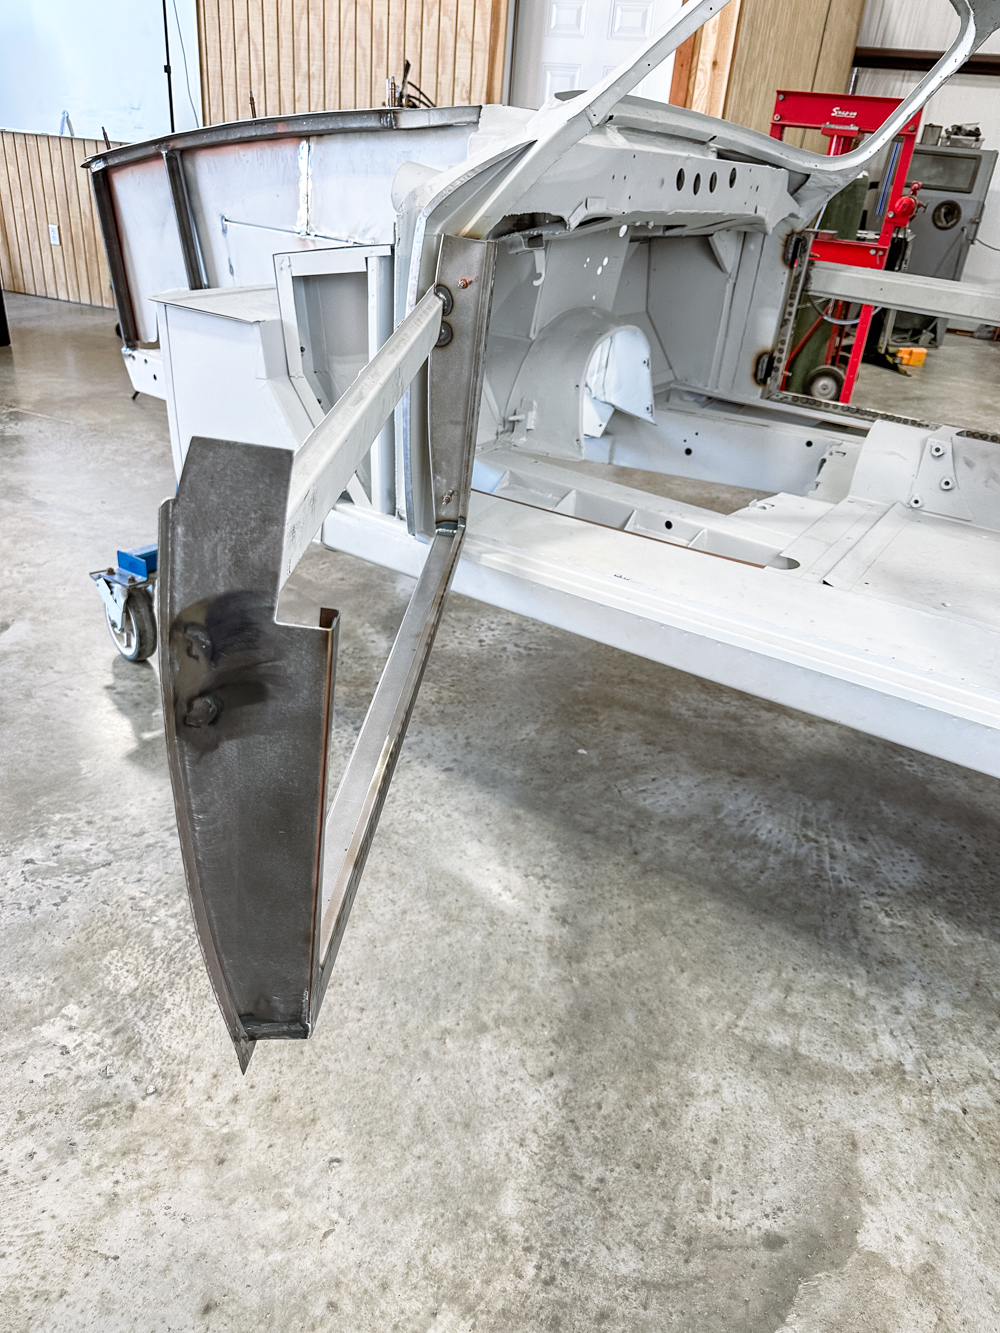
Door hinge pockets in A-pillars.
January 15, 2024
January 15, 2024
January 15, 2024
Bonnet drip rail reconstruction
and support tube replacement.
January 15, 2024
Bonnet body opening flanges.
January 15, 2024
Fitting, welding and metal finishing
of new panels to station buck.
January 15, 2024
New aluminum nose panels.
January 15, 2024
January 15, 2024
January 15, 2024
January 15, 2024
January 15, 2024
January 15, 2024
January 15, 2024
January 15, 2024
January 15, 2024
January 15, 2024
January 15, 2024
January 15, 2024
January 15, 2024
May 10, 2023
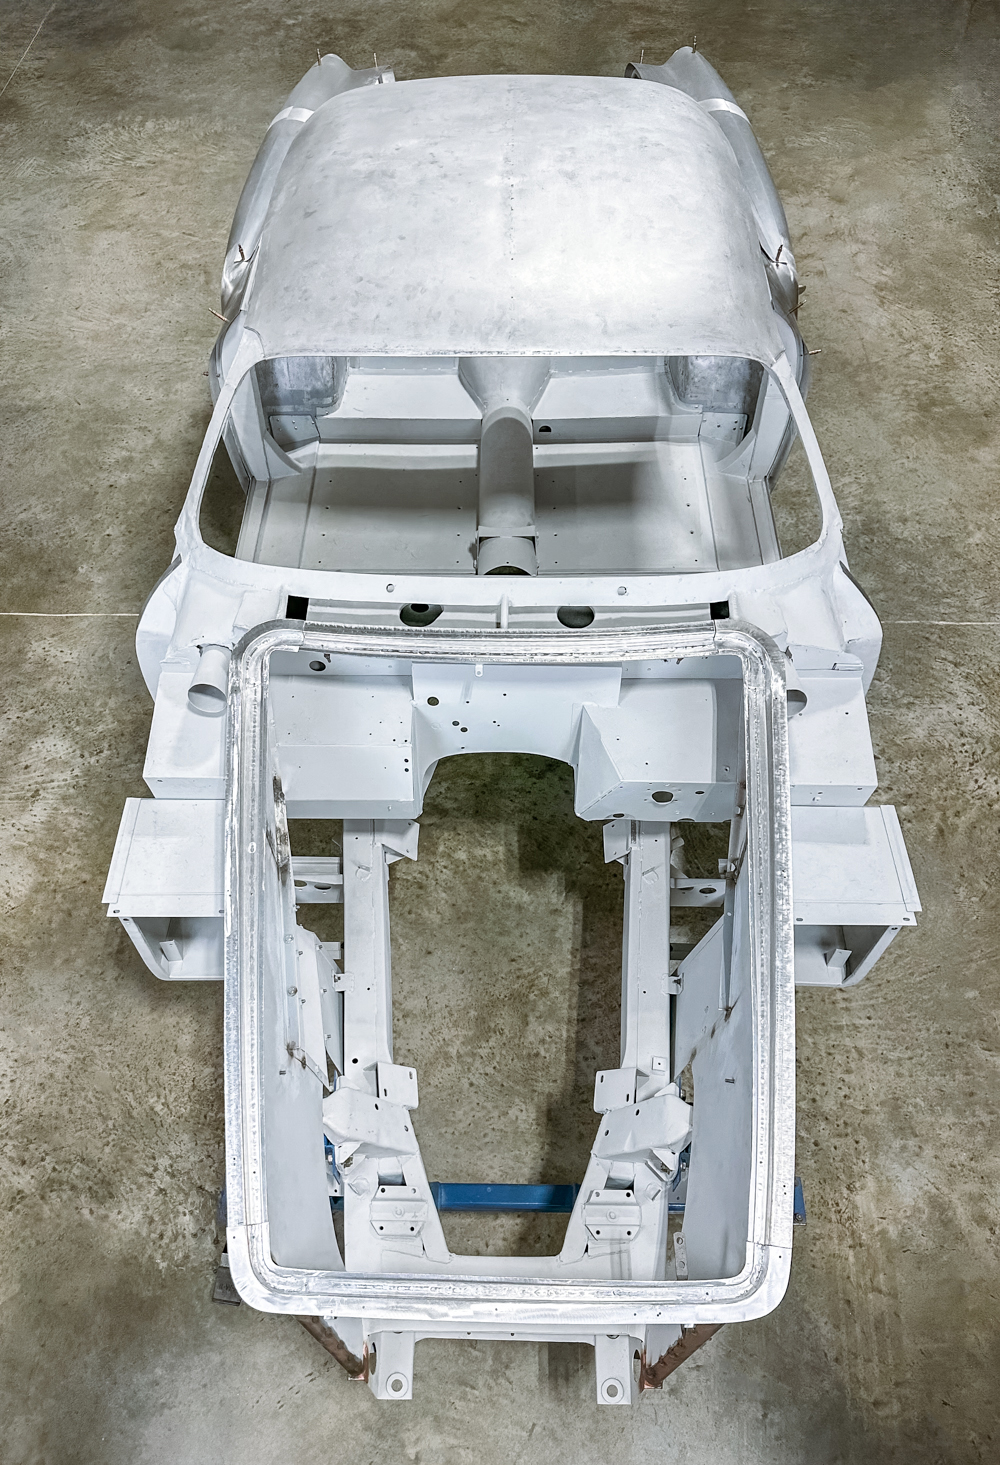
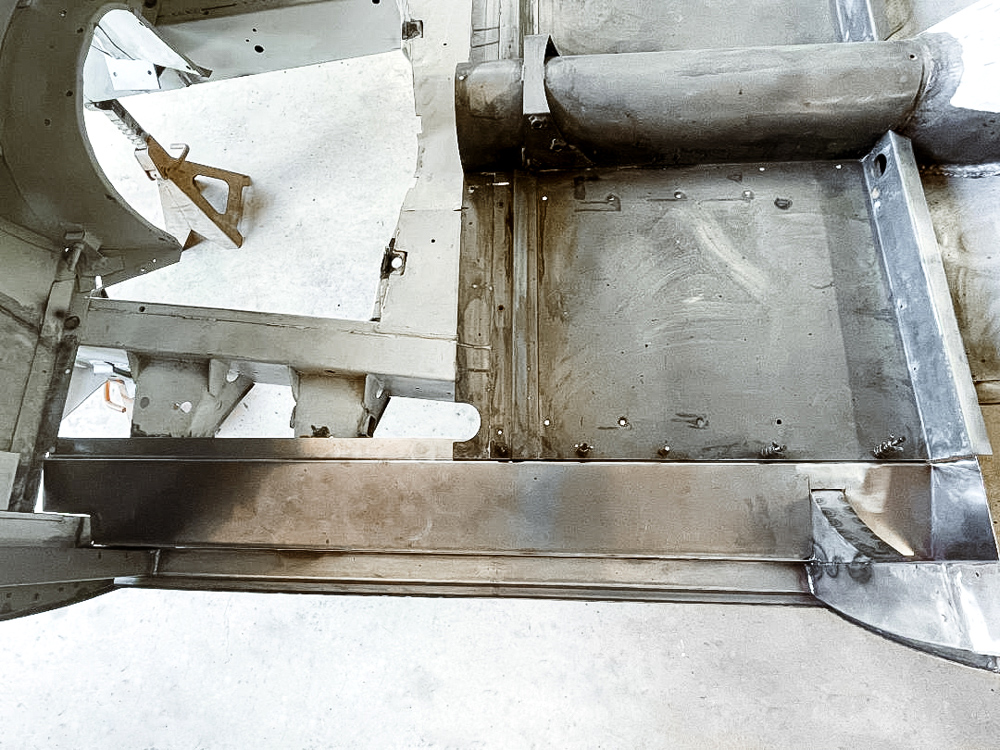
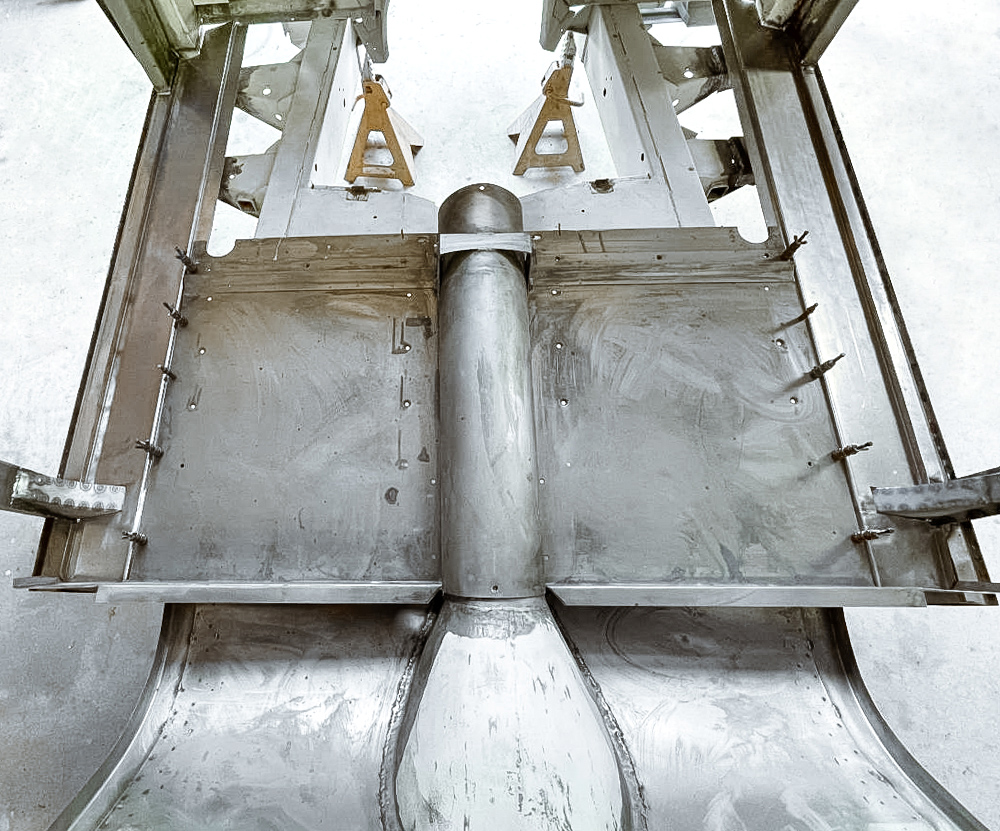
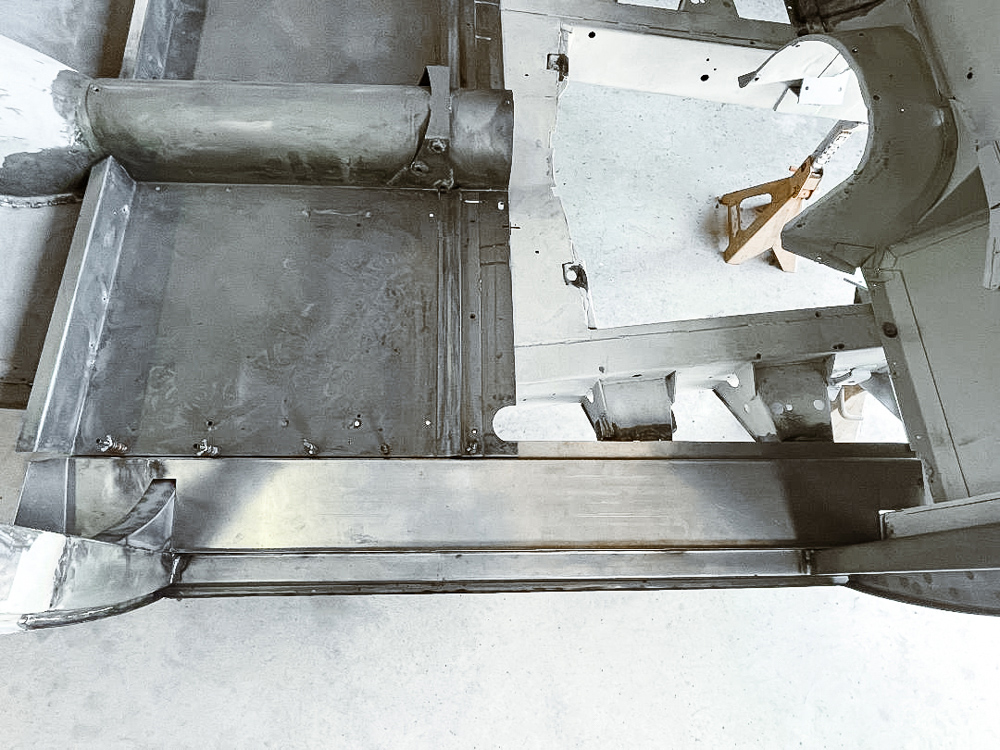
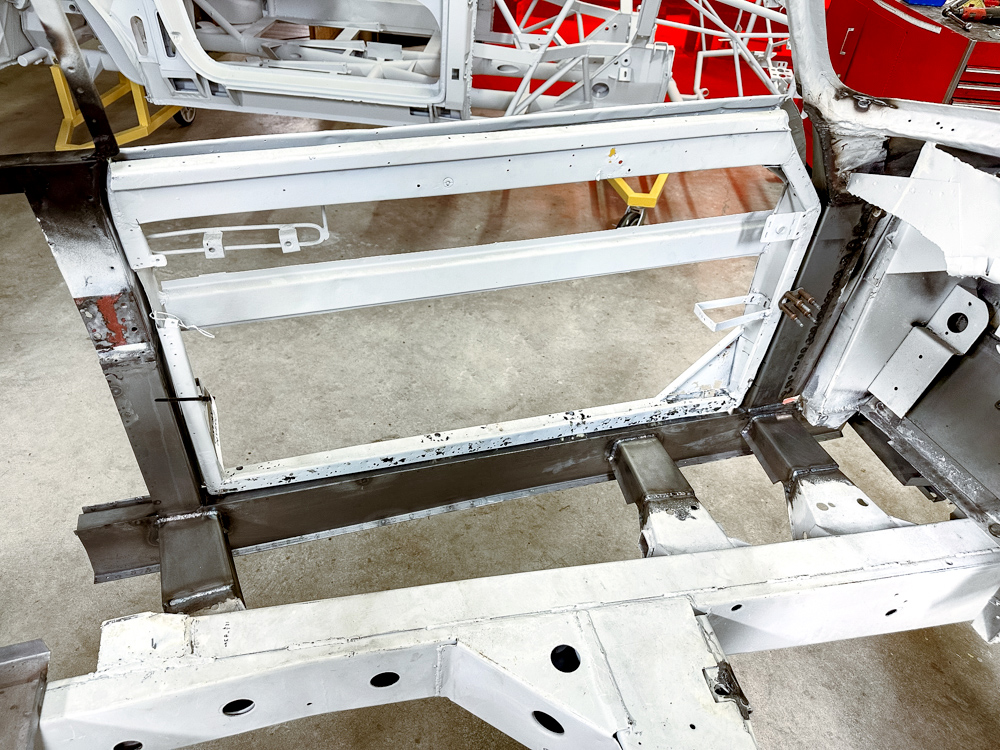
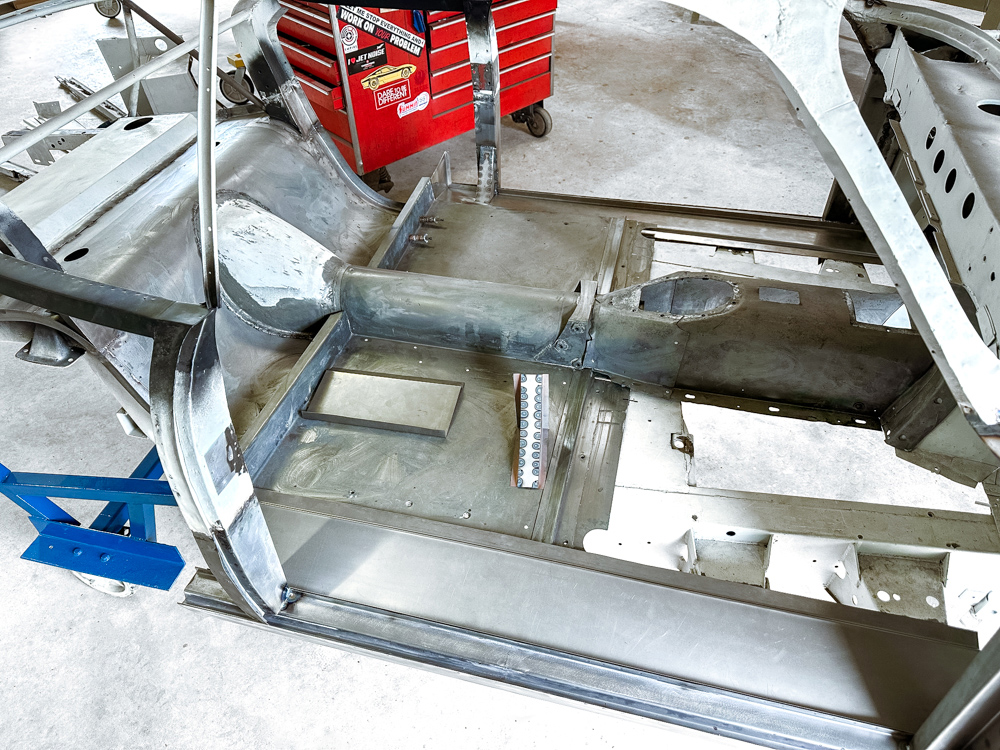
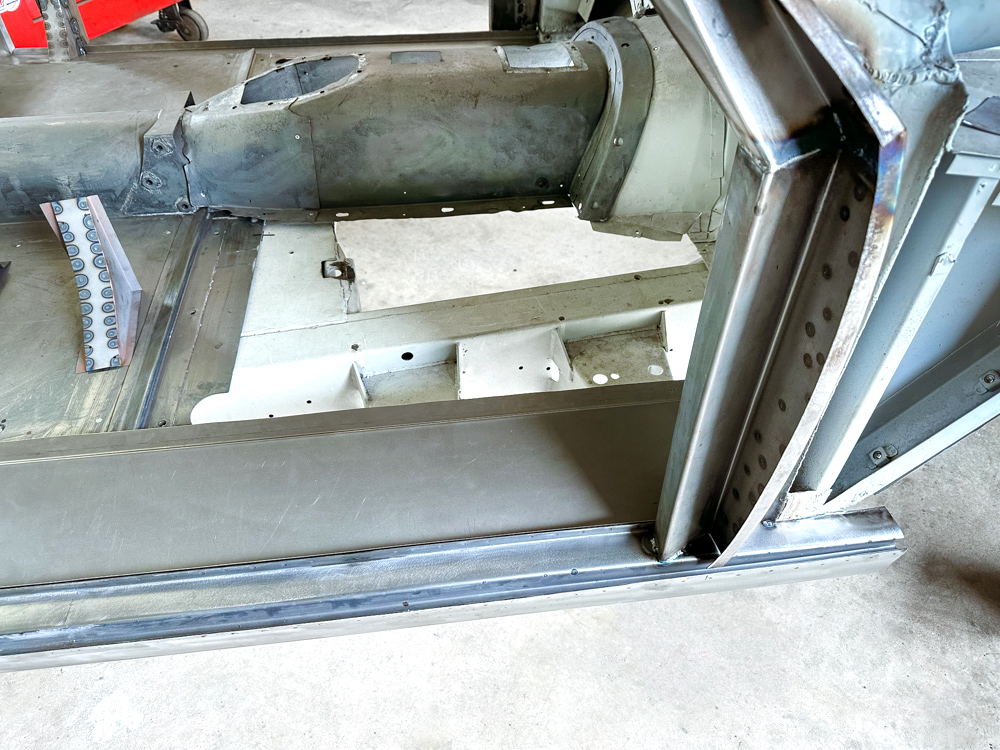
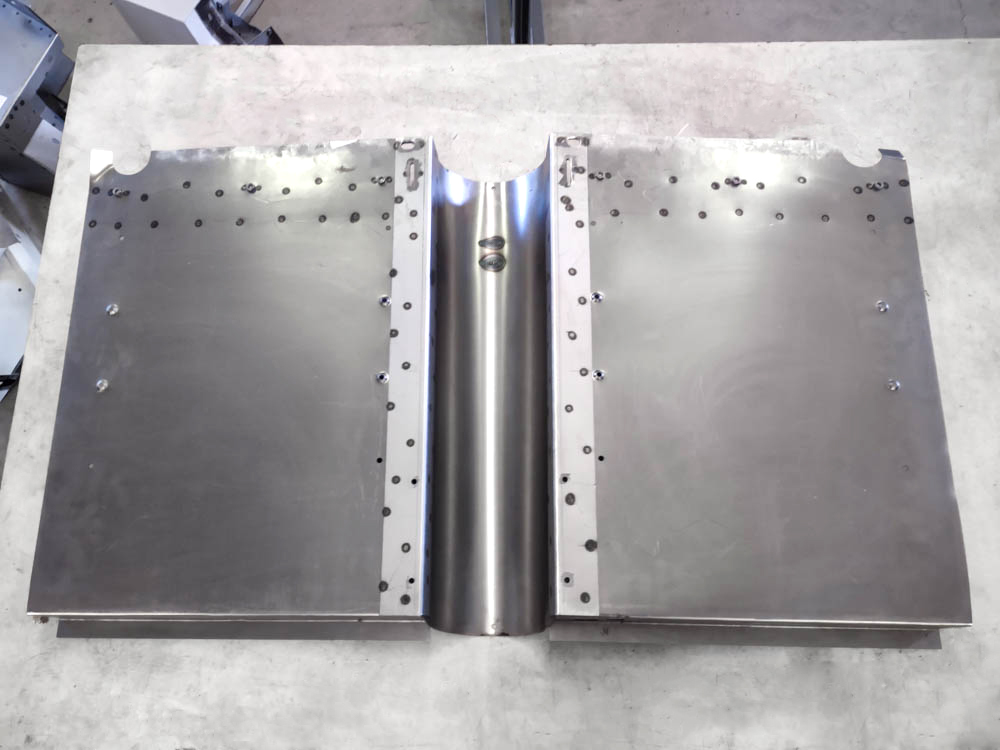
Floor and sill panel fitting
May 10, 2023
May 10, 2023
May 10, 2023
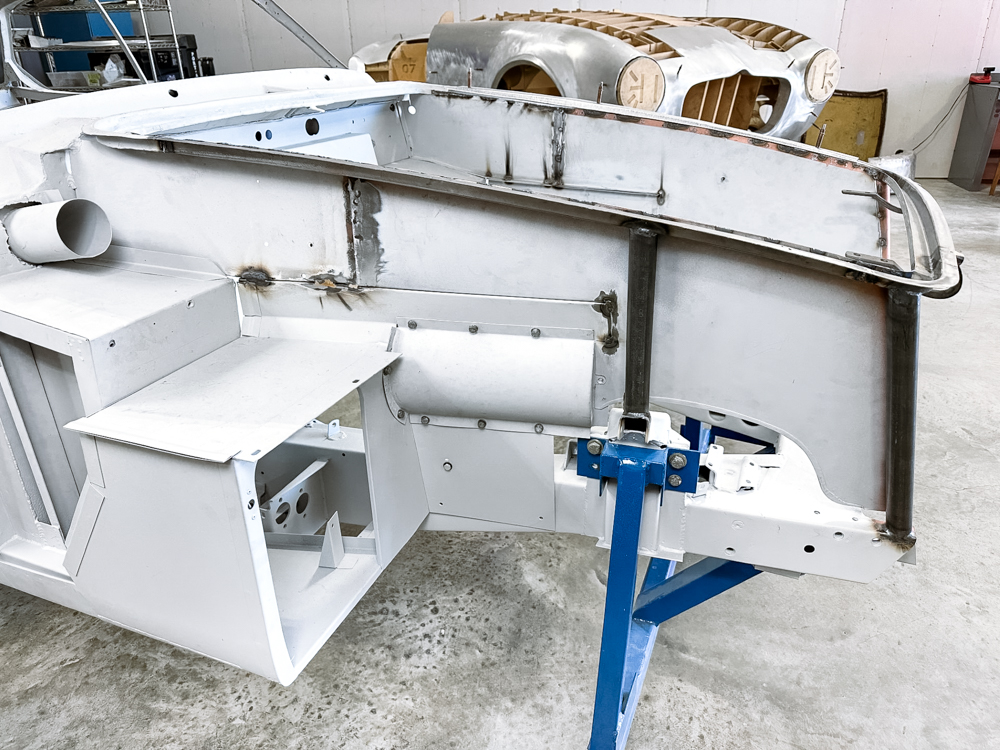
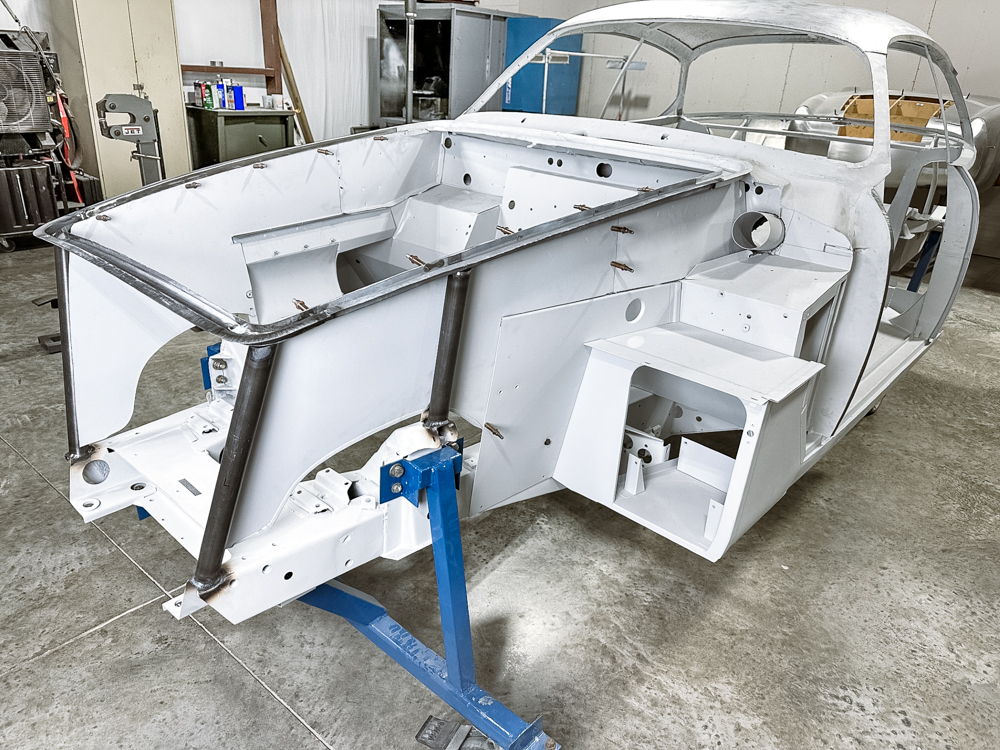
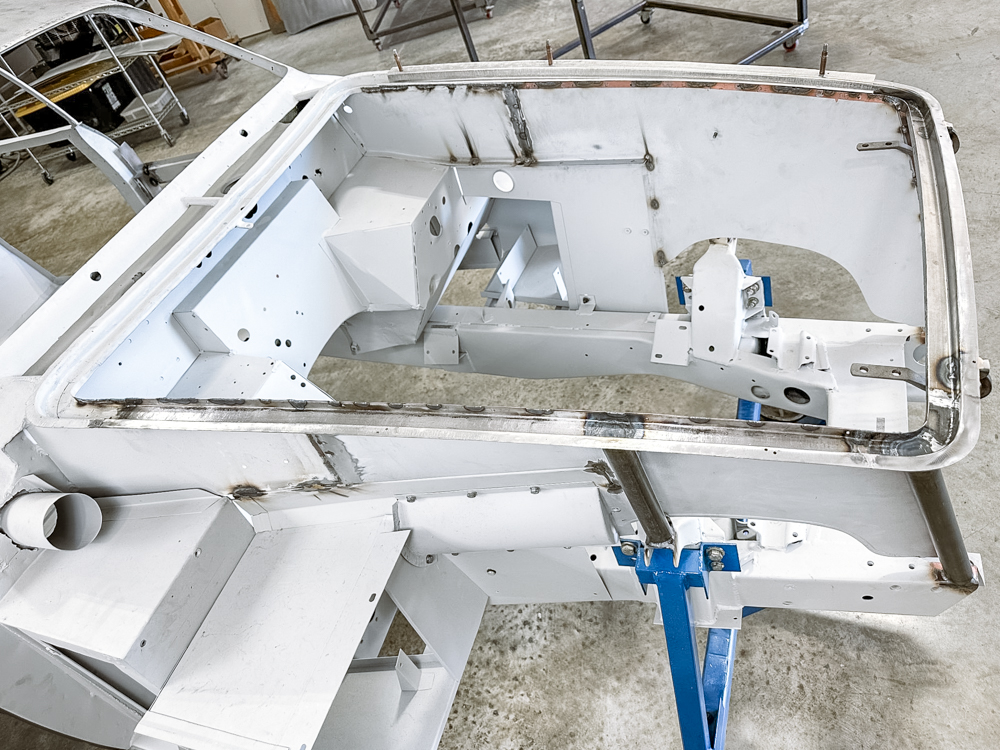
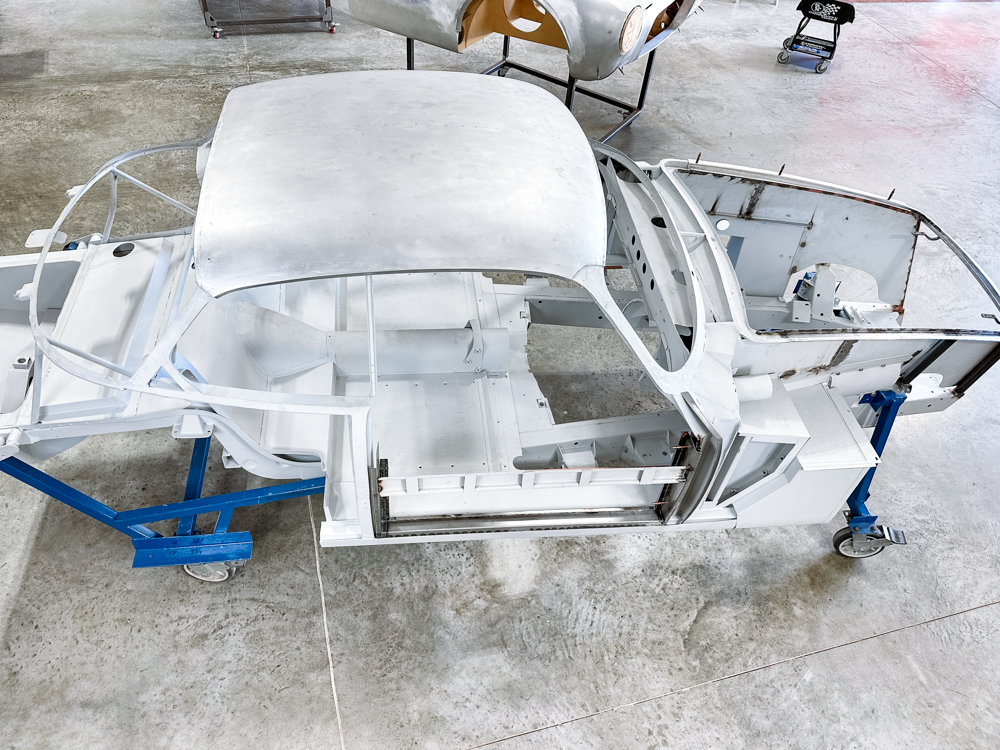
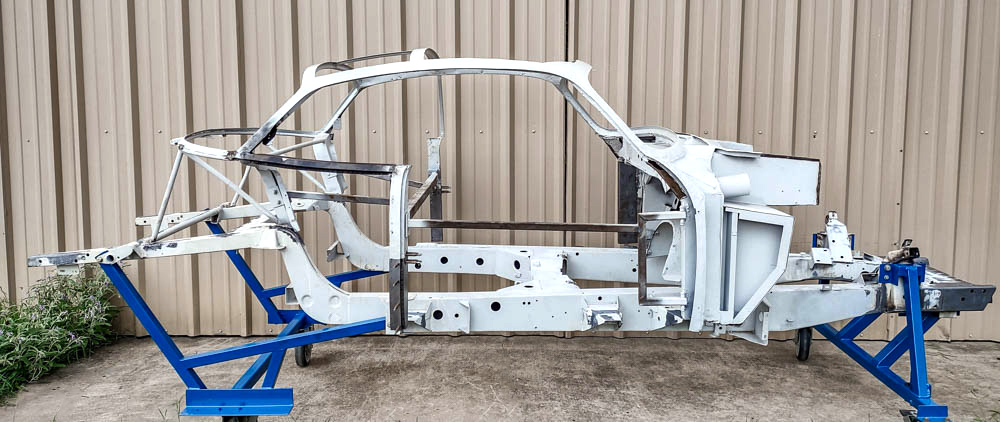
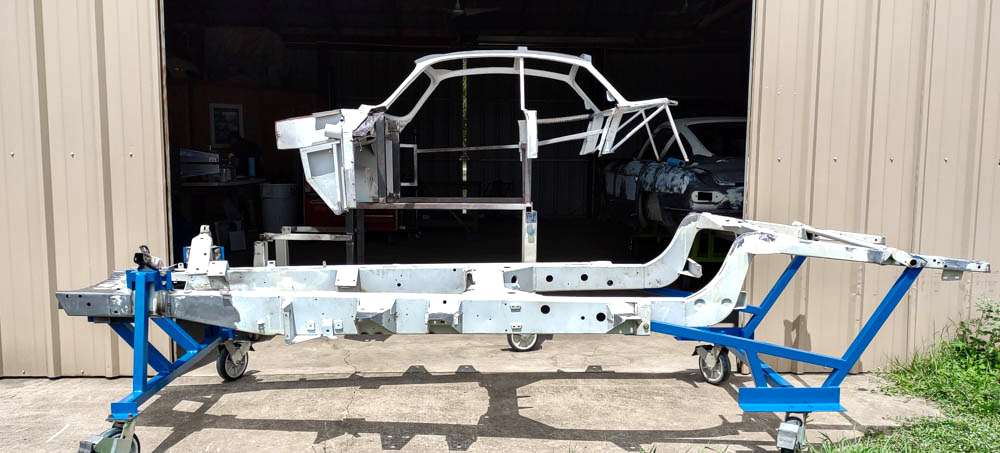
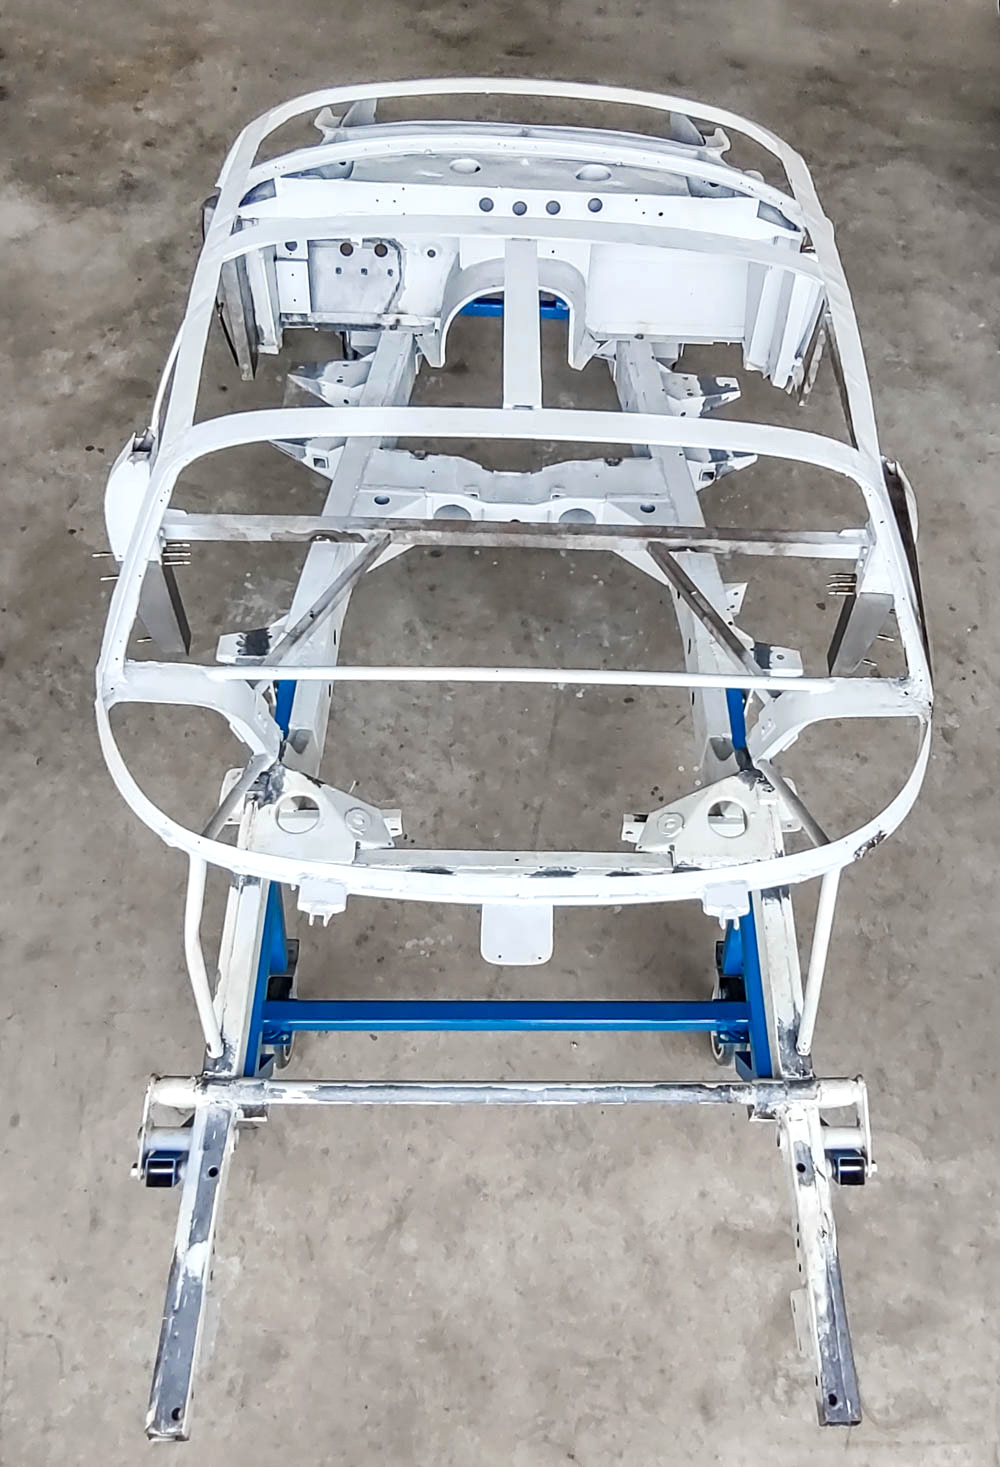
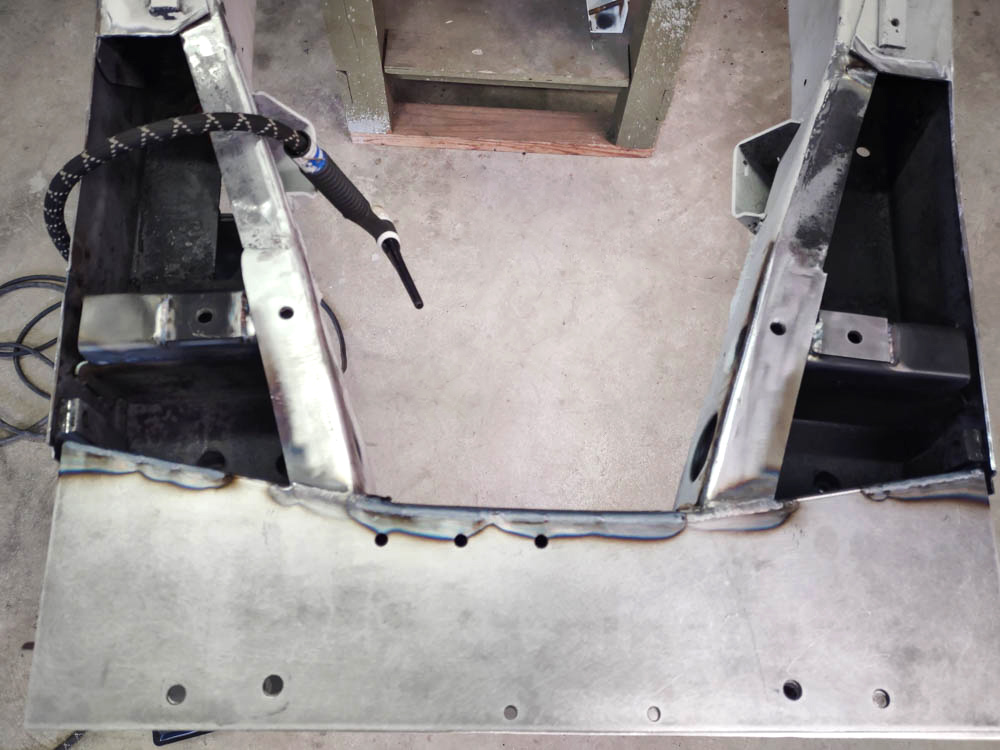
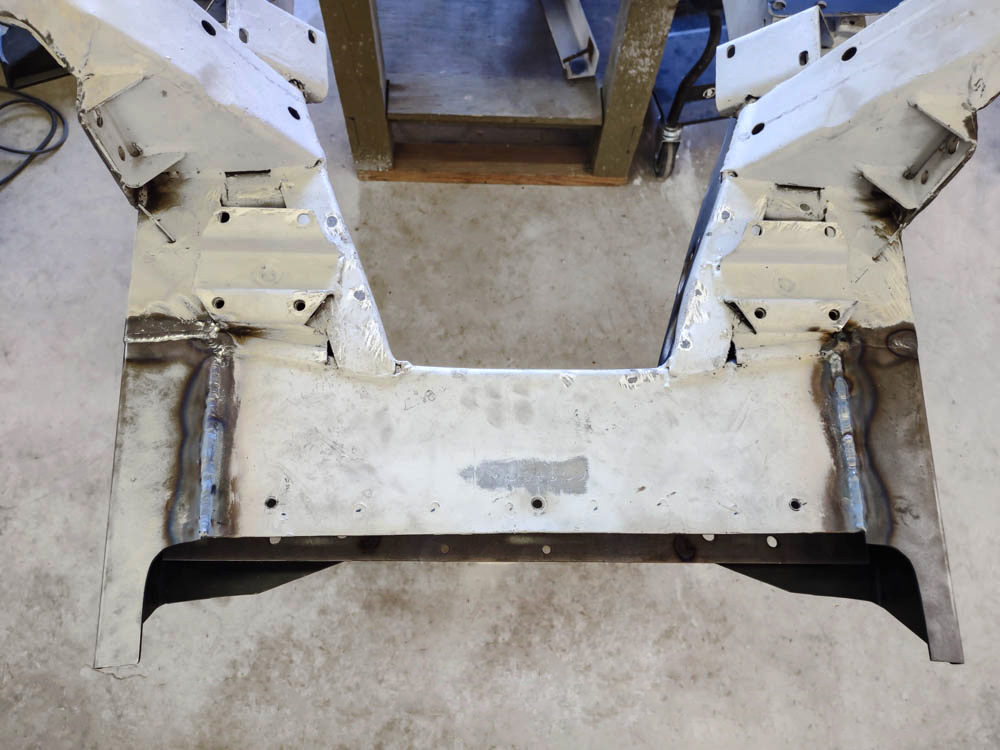
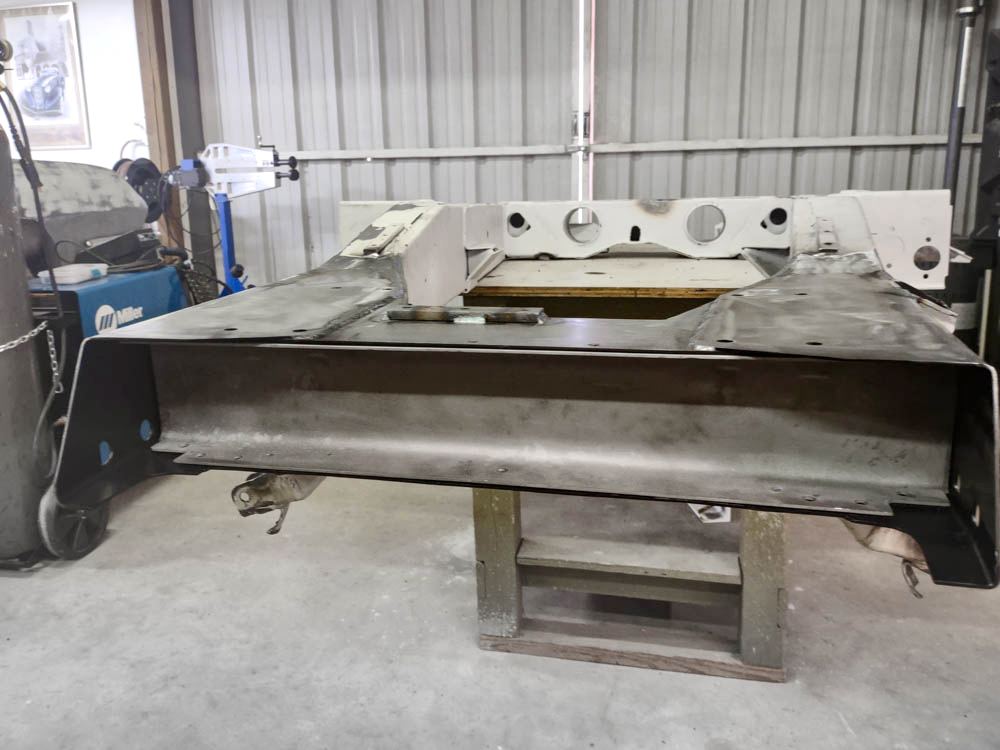
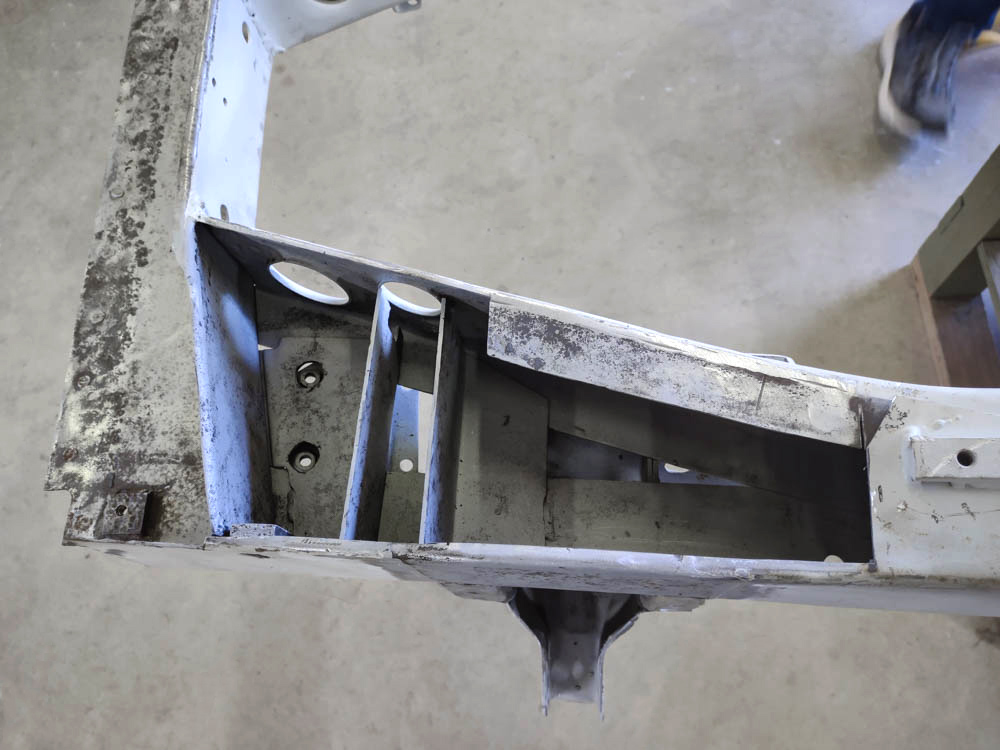
Chassis and body substructure primed
May 10, 2023
May 10, 2023
May 10, 2023
May 10, 2023
May 10, 2023
May 10, 2023
May 10, 2023
May 10, 2023
May 10, 2023
May 10, 2023
May 10, 2023
May 10, 2023
May 10, 2023
May 10, 2023
May 10, 2023
May 10, 2023
May 10, 2023
May 10, 2023
April 3, 2023
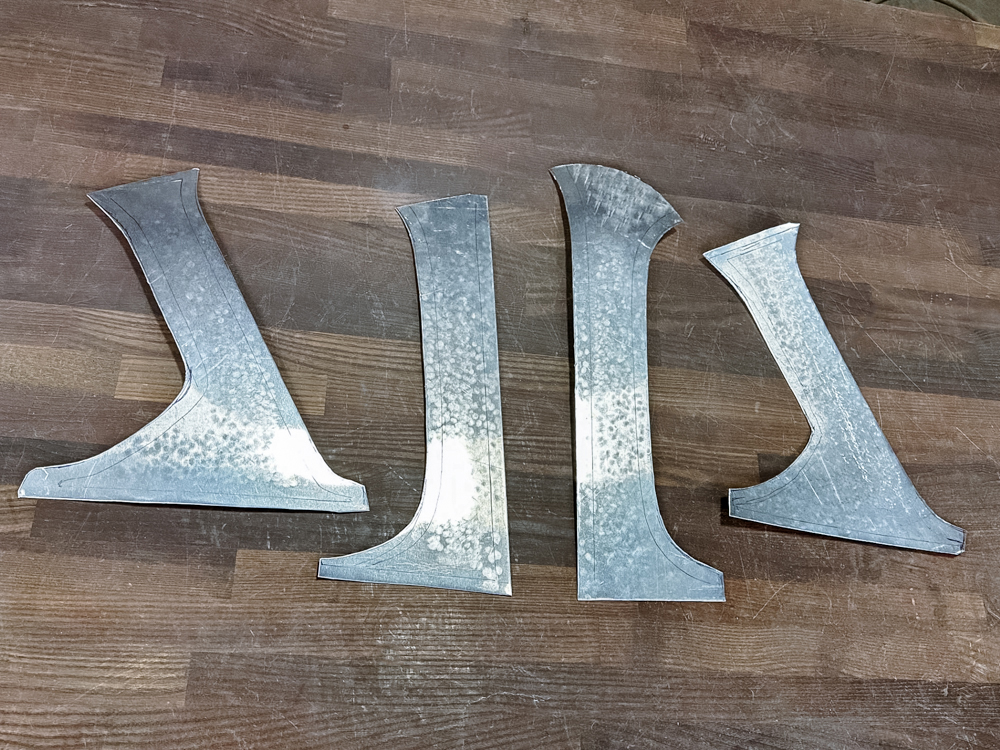
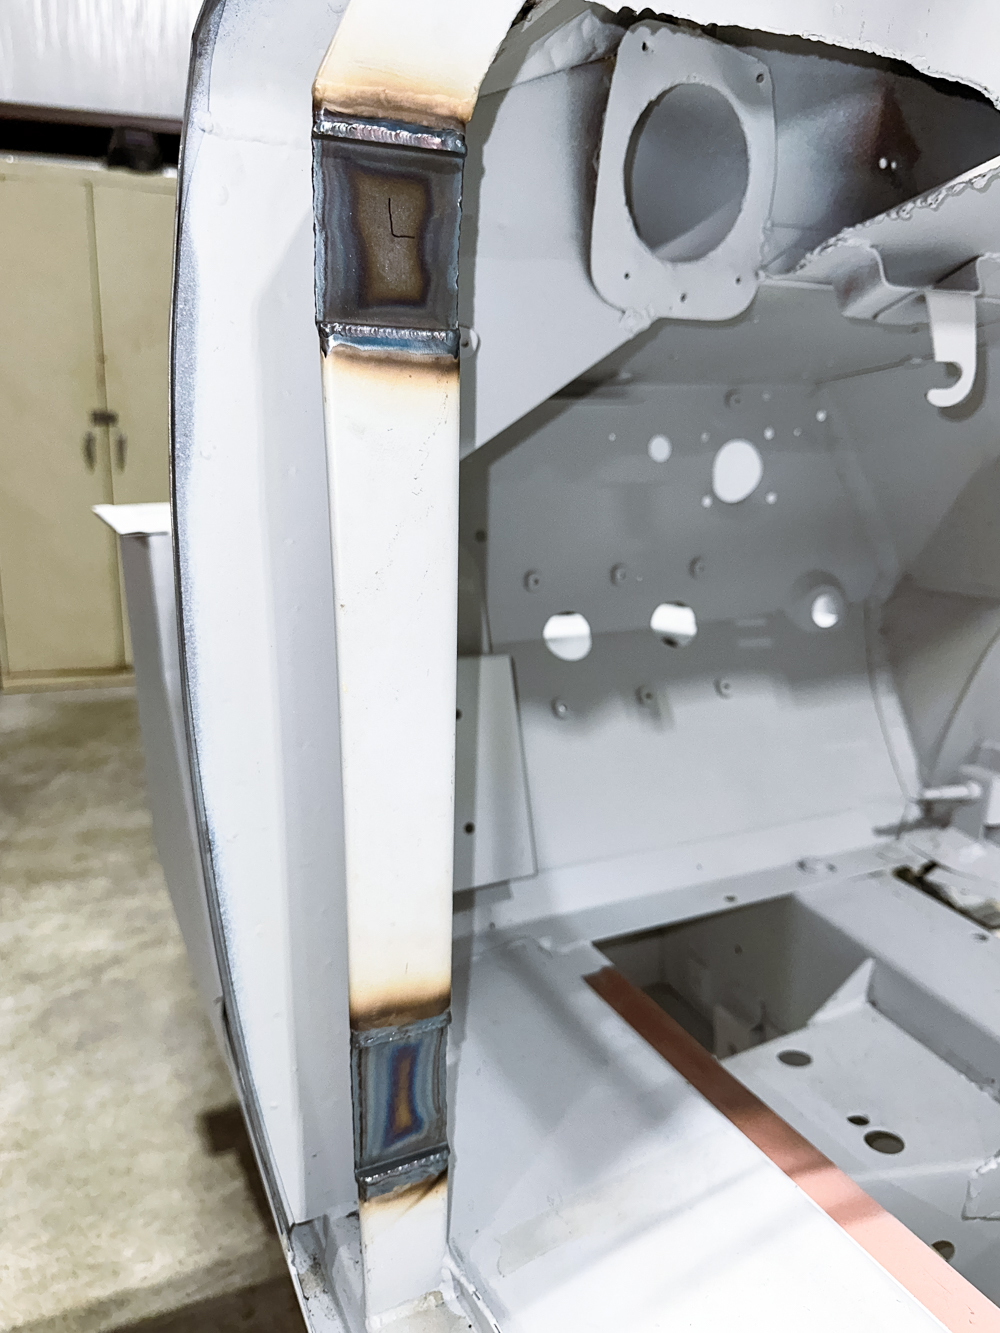
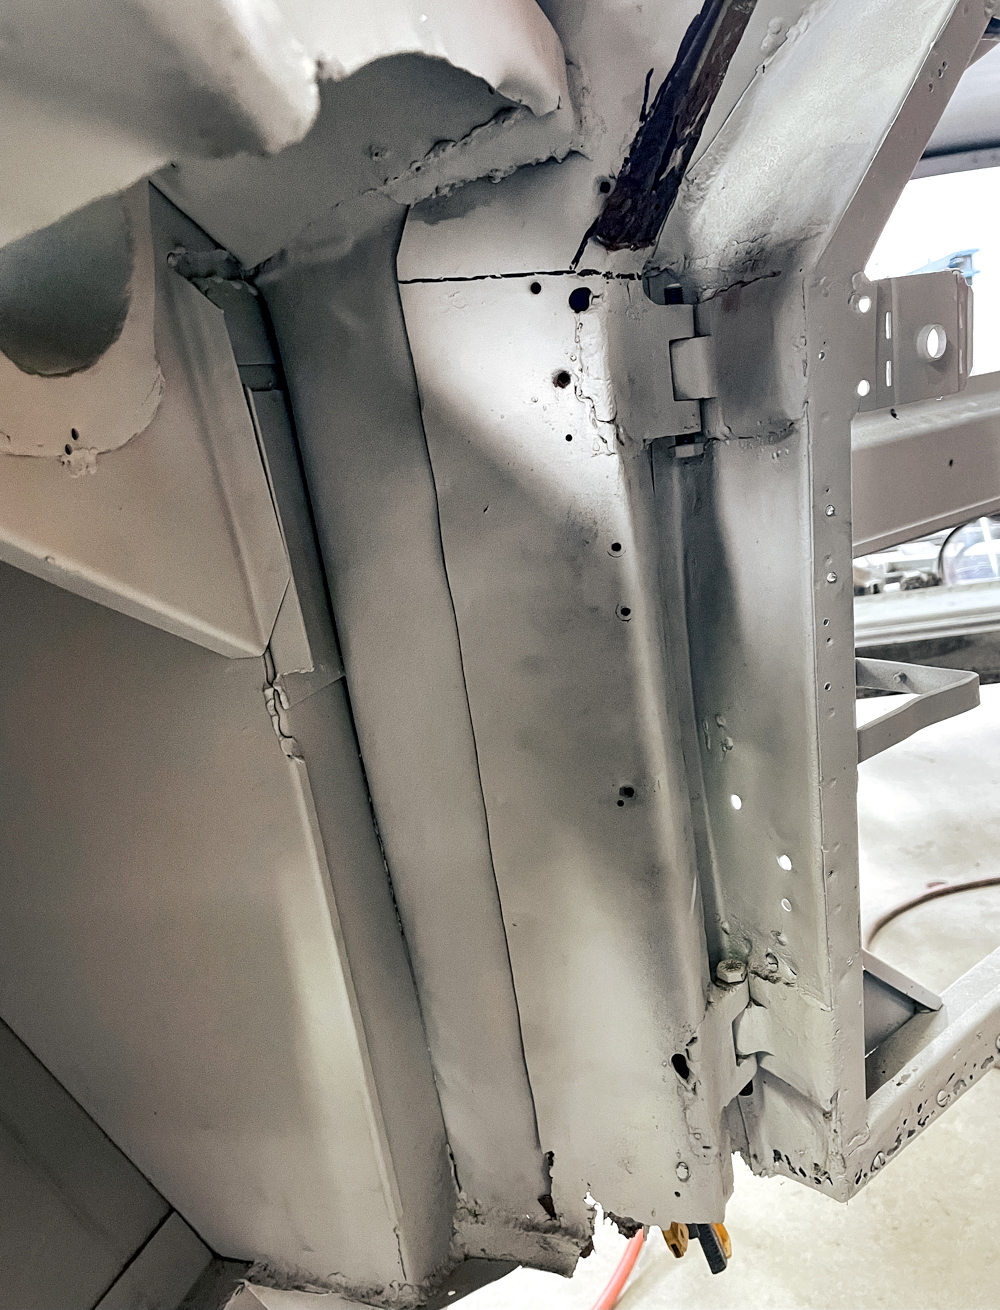
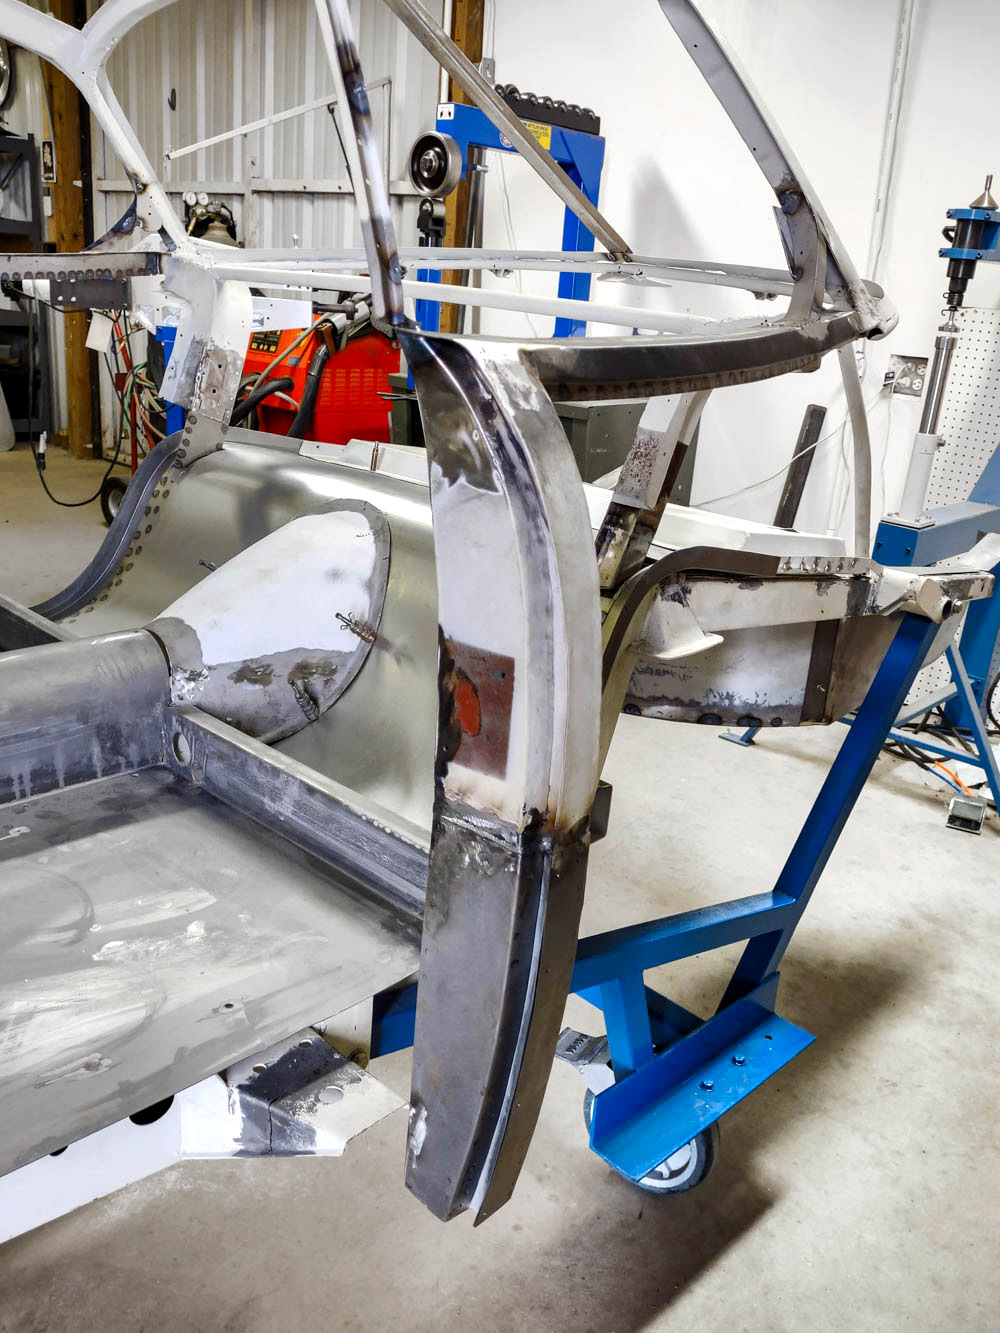
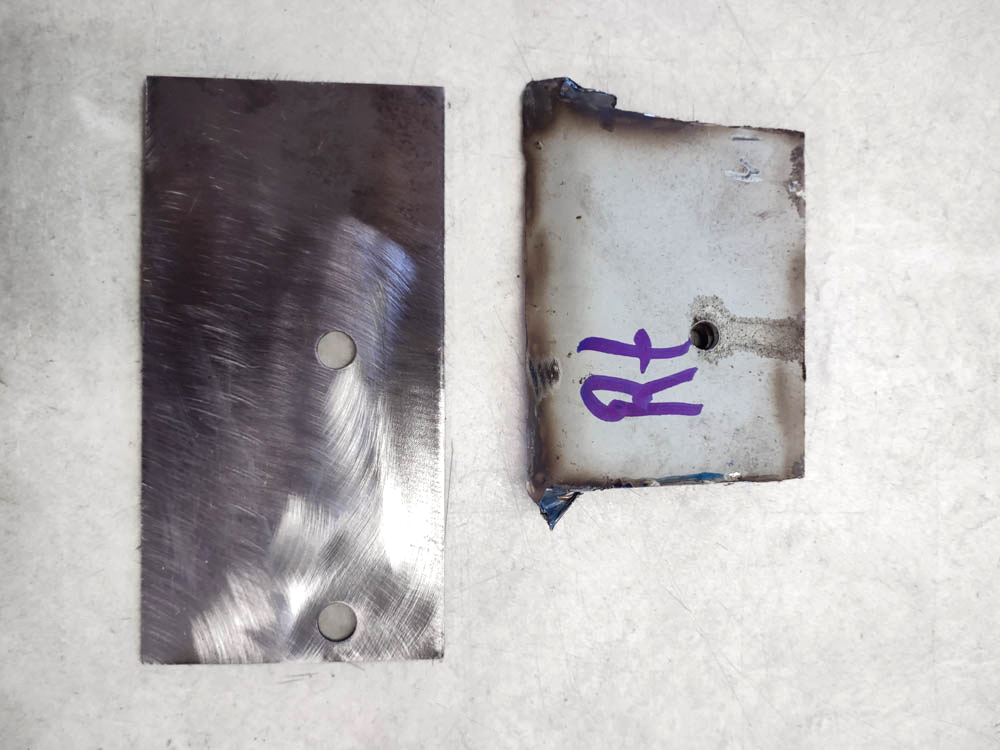
Right A-pillar post
April 3, 2023
April 3, 2023
April 3, 2023
April 3, 2023
April 3, 2023
April 3, 2023
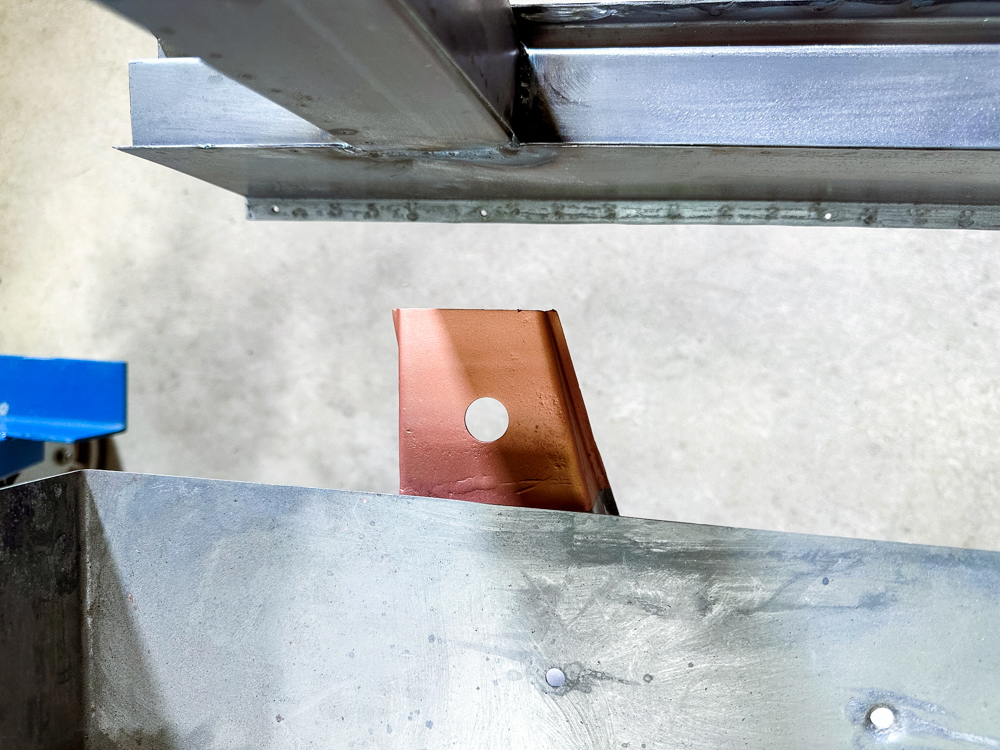
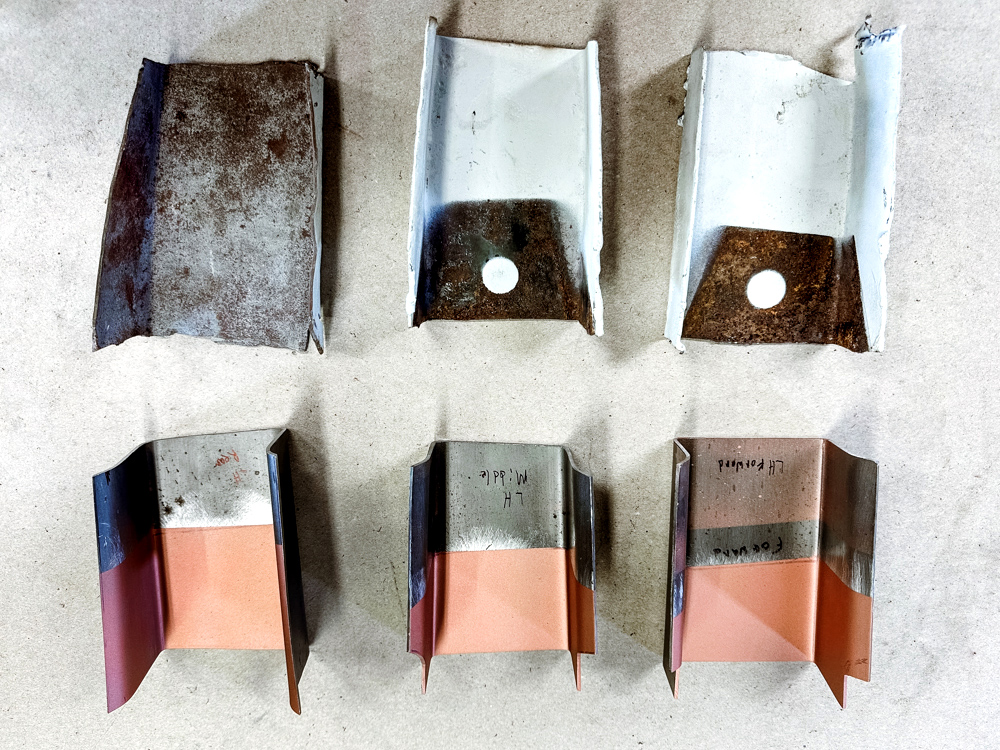
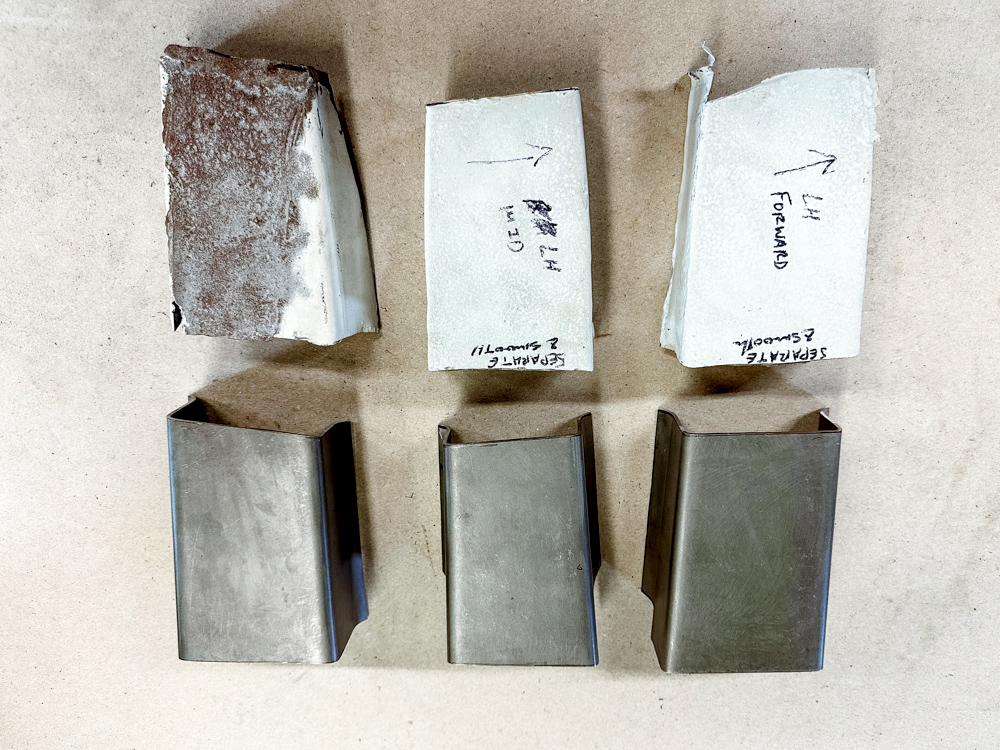
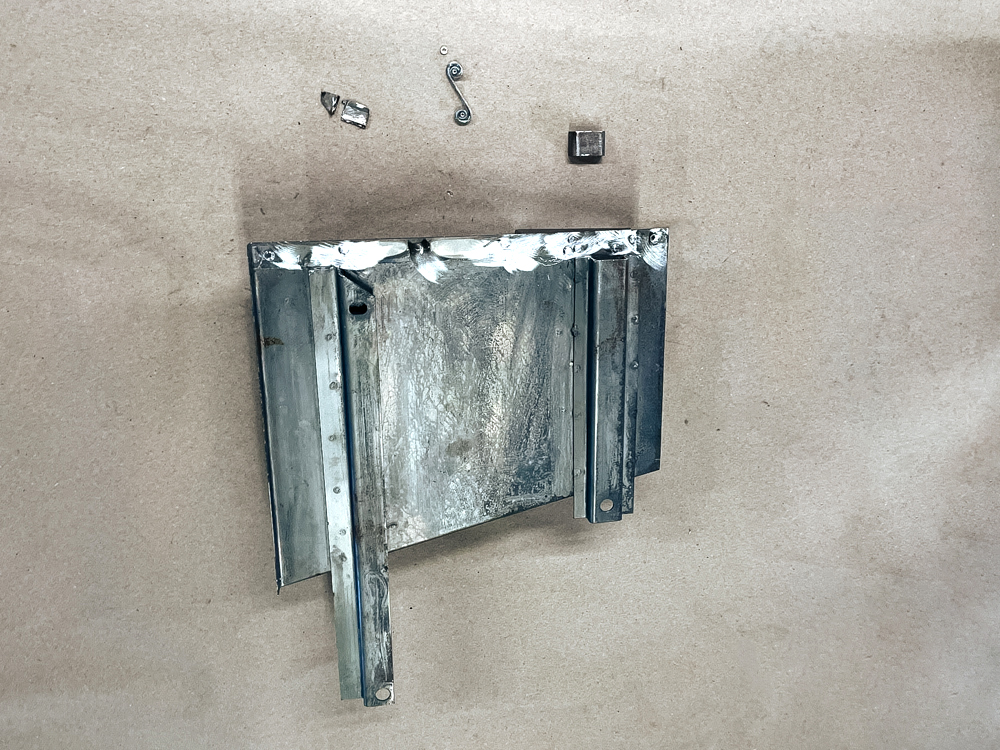
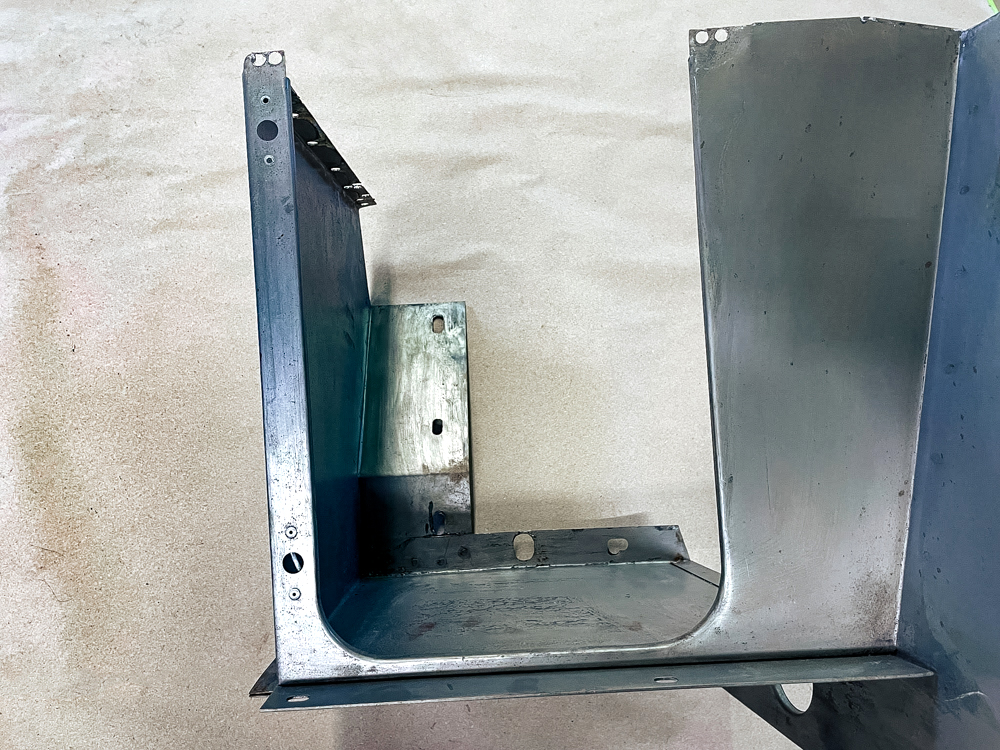
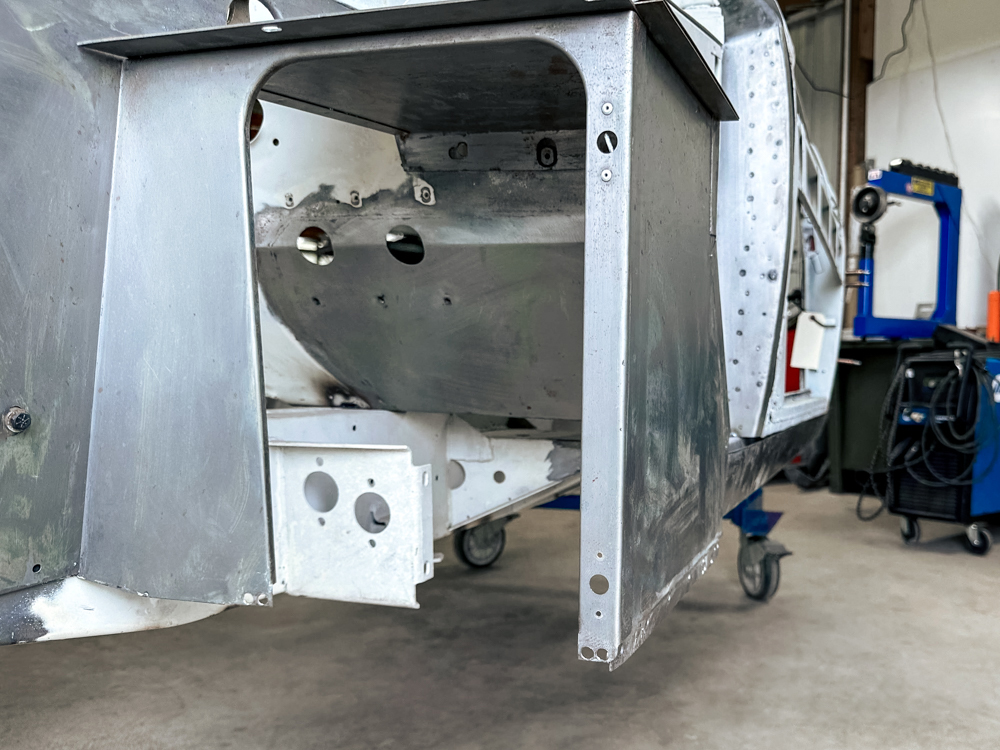
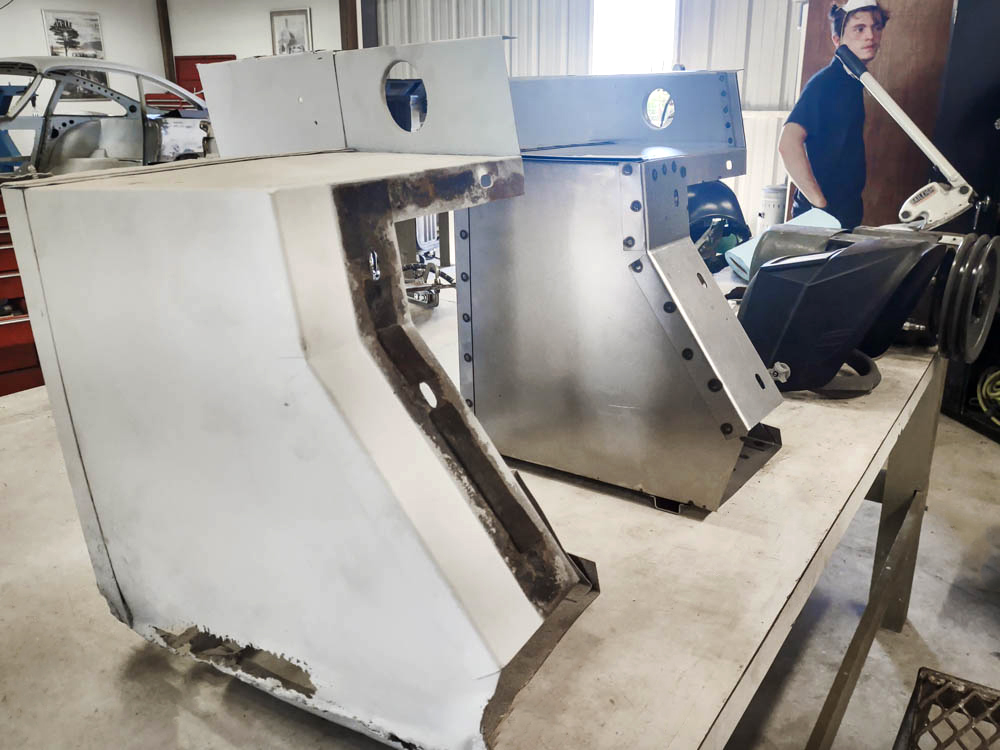
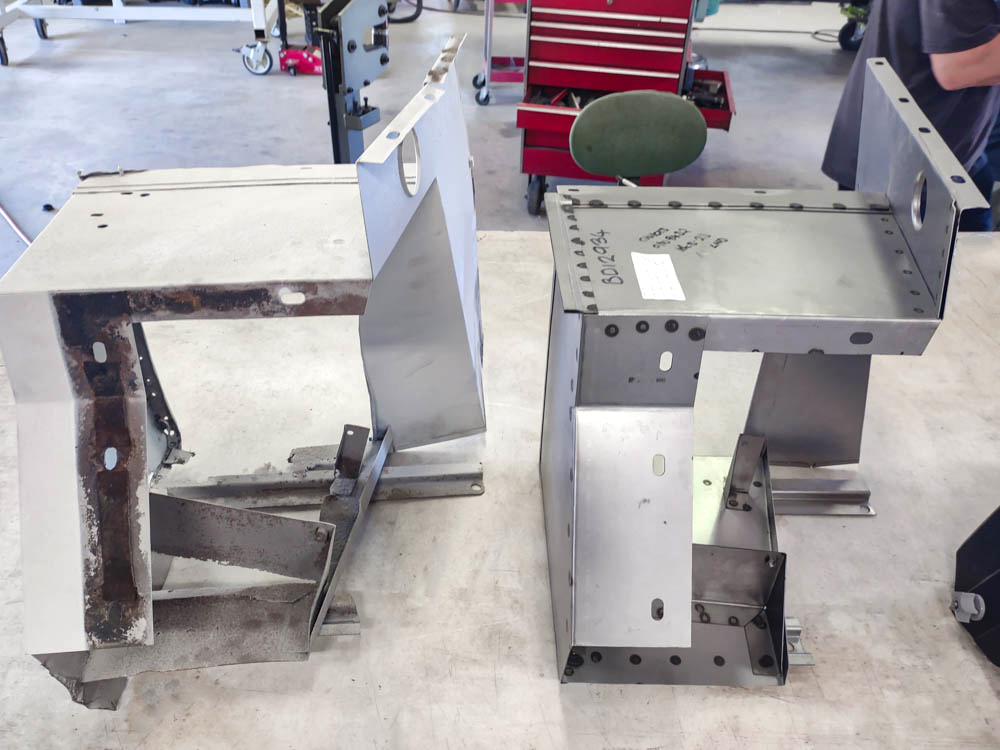
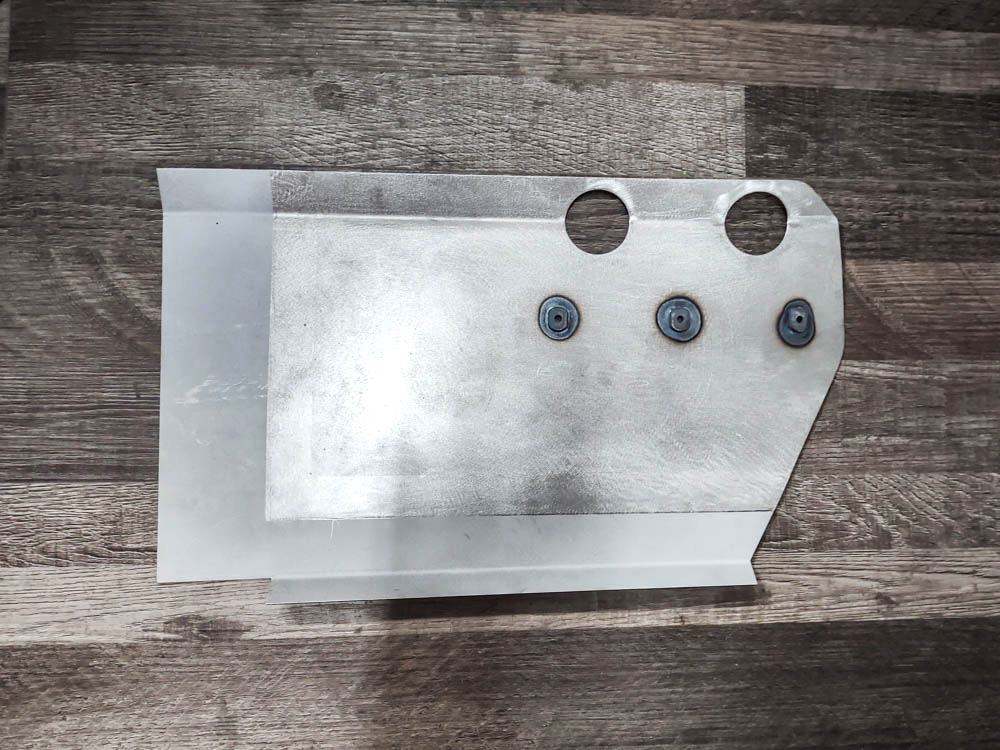
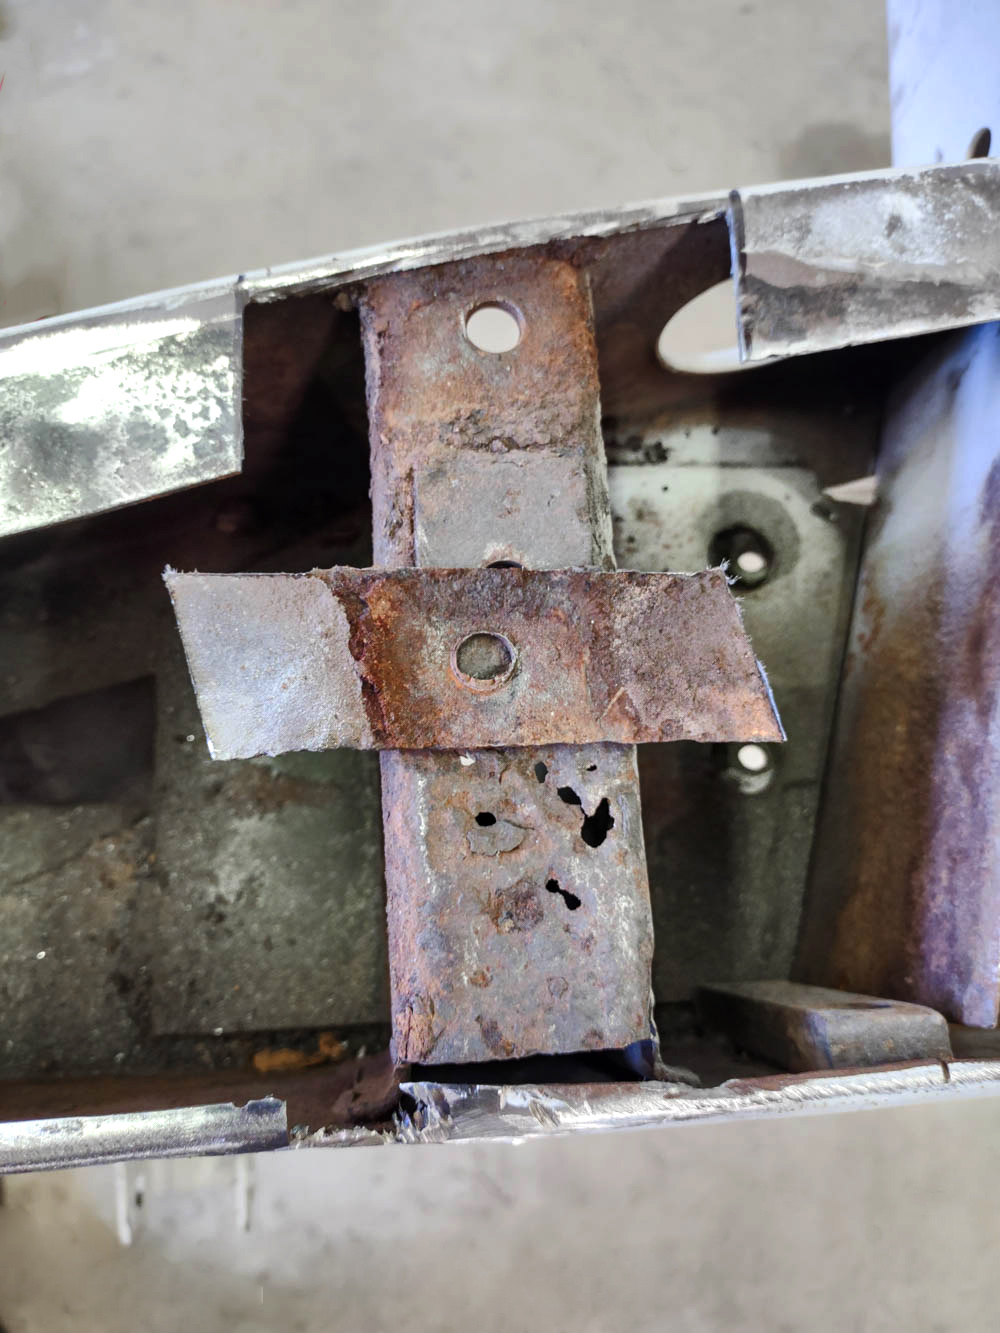
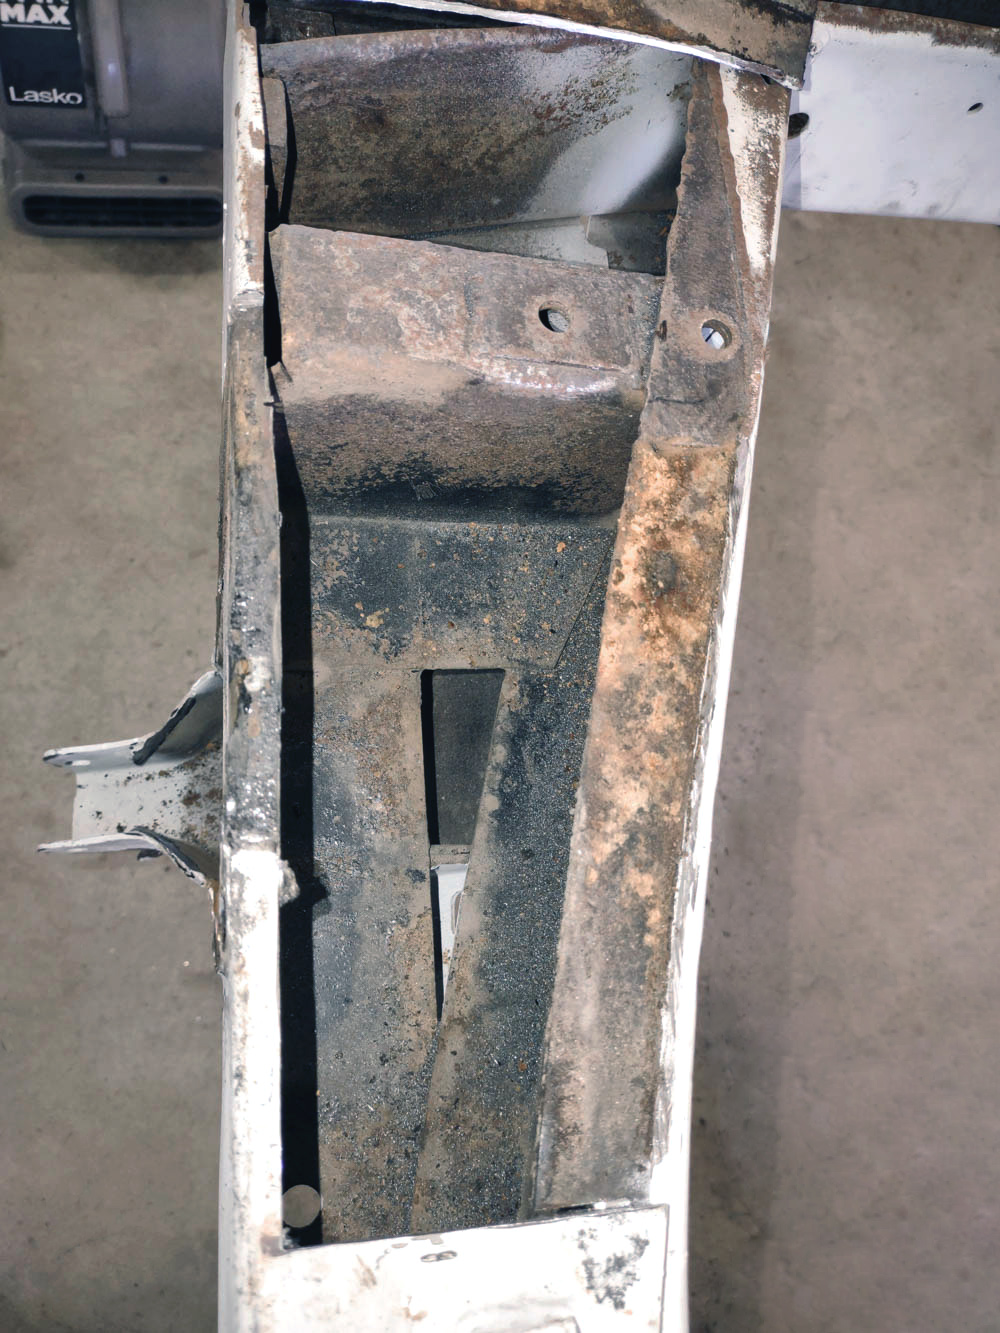
Left side battery box rebuild
April 3, 2023
April 3, 2023
April 3, 2023
April 3, 2023
April 3, 2023
April 3, 2023
April 3, 2023
April 3, 2023
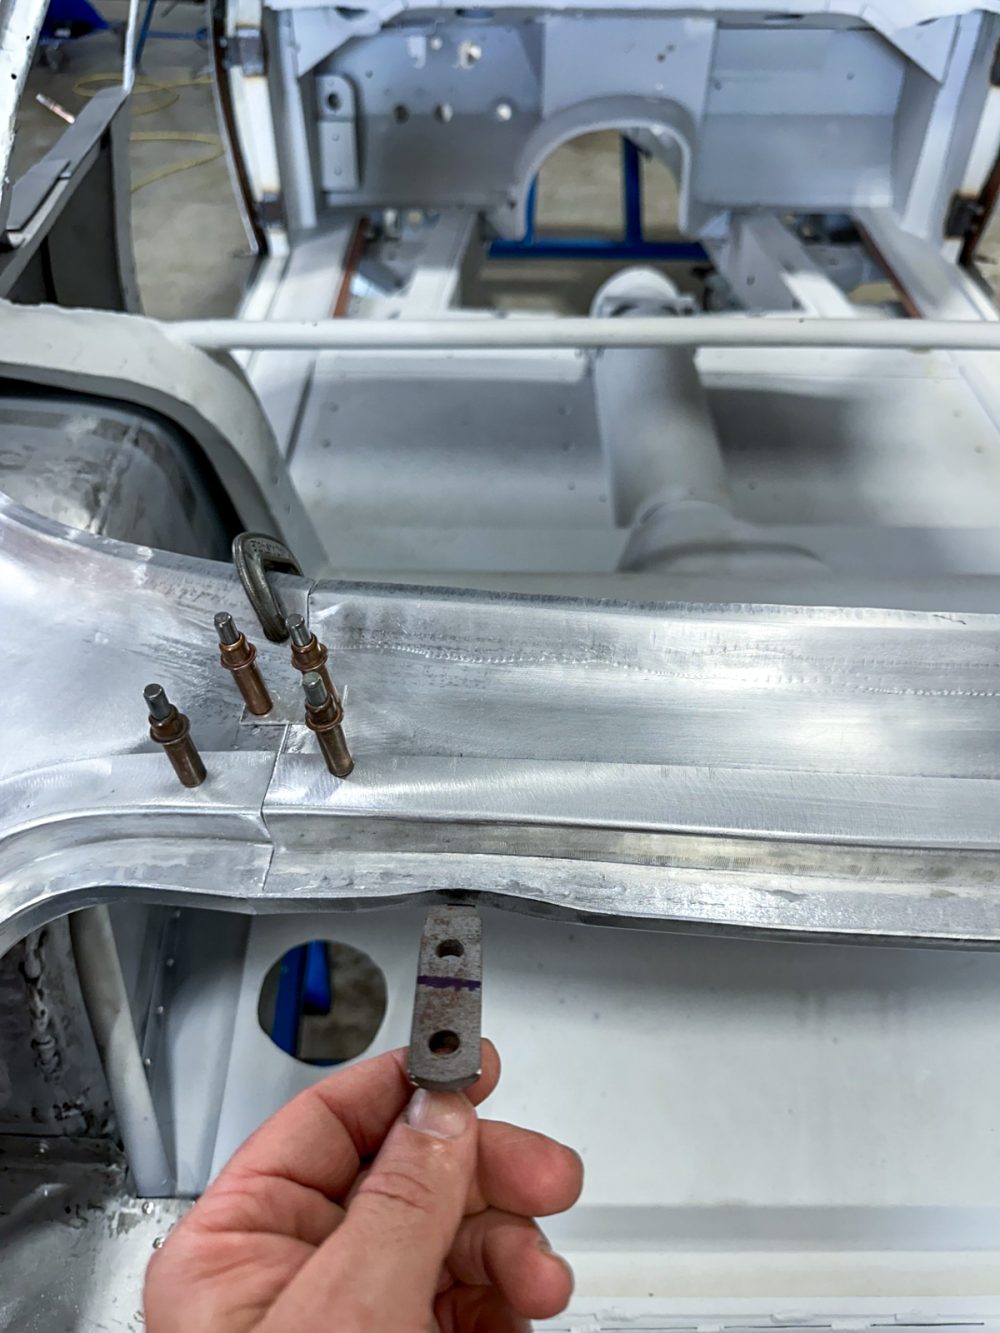
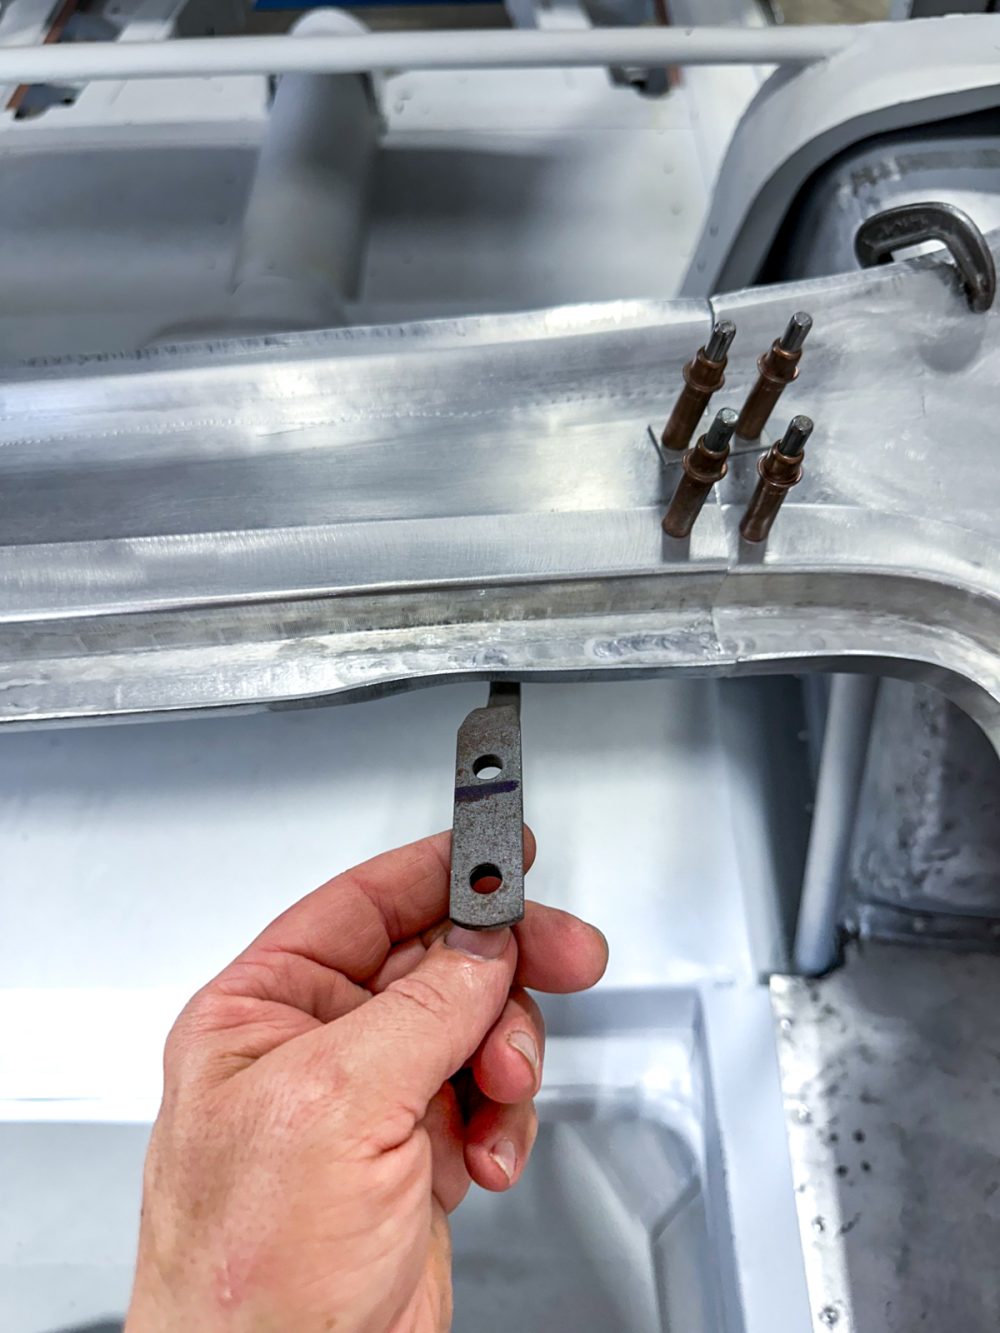
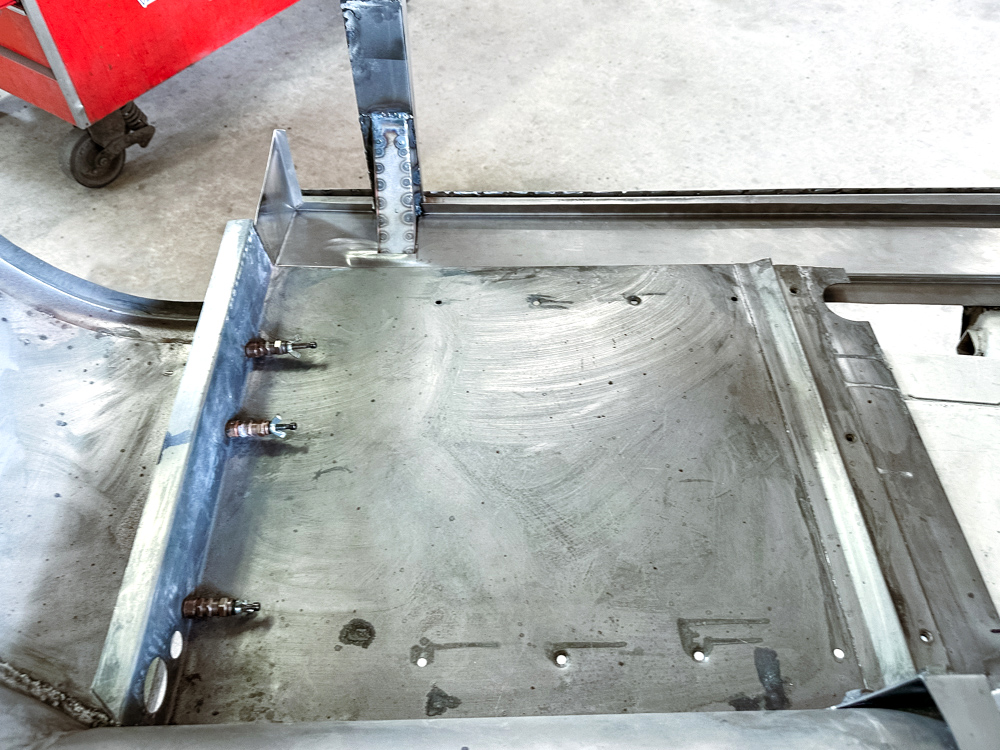
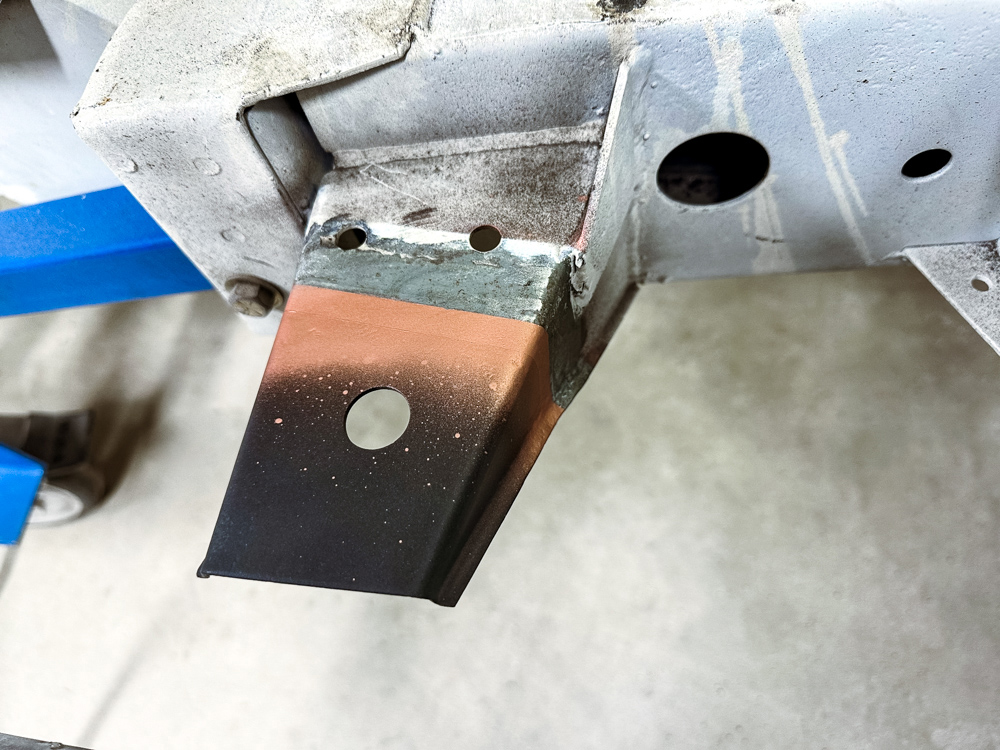
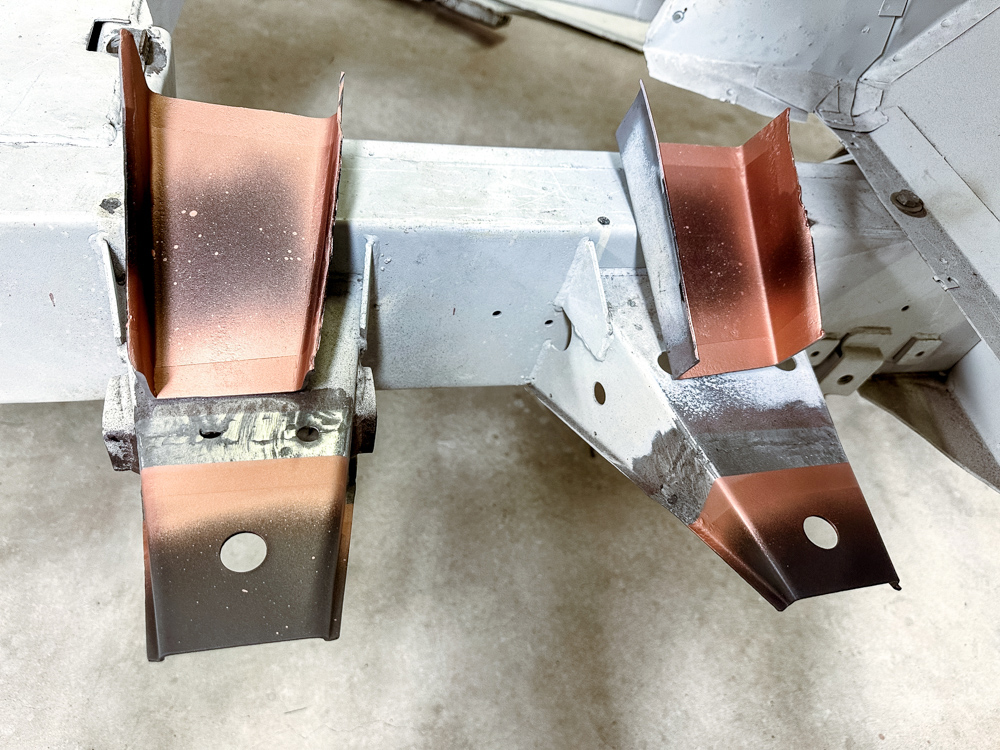
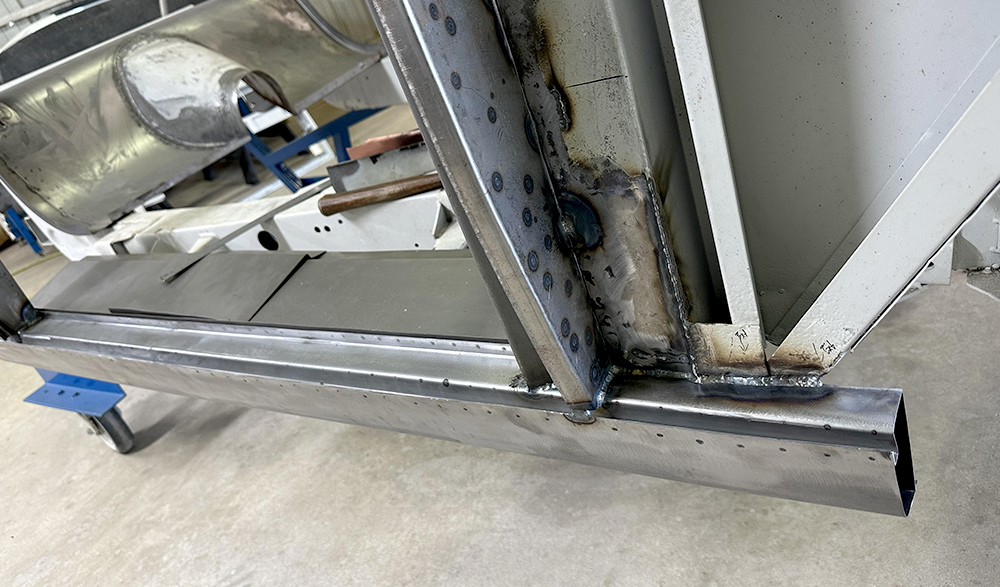
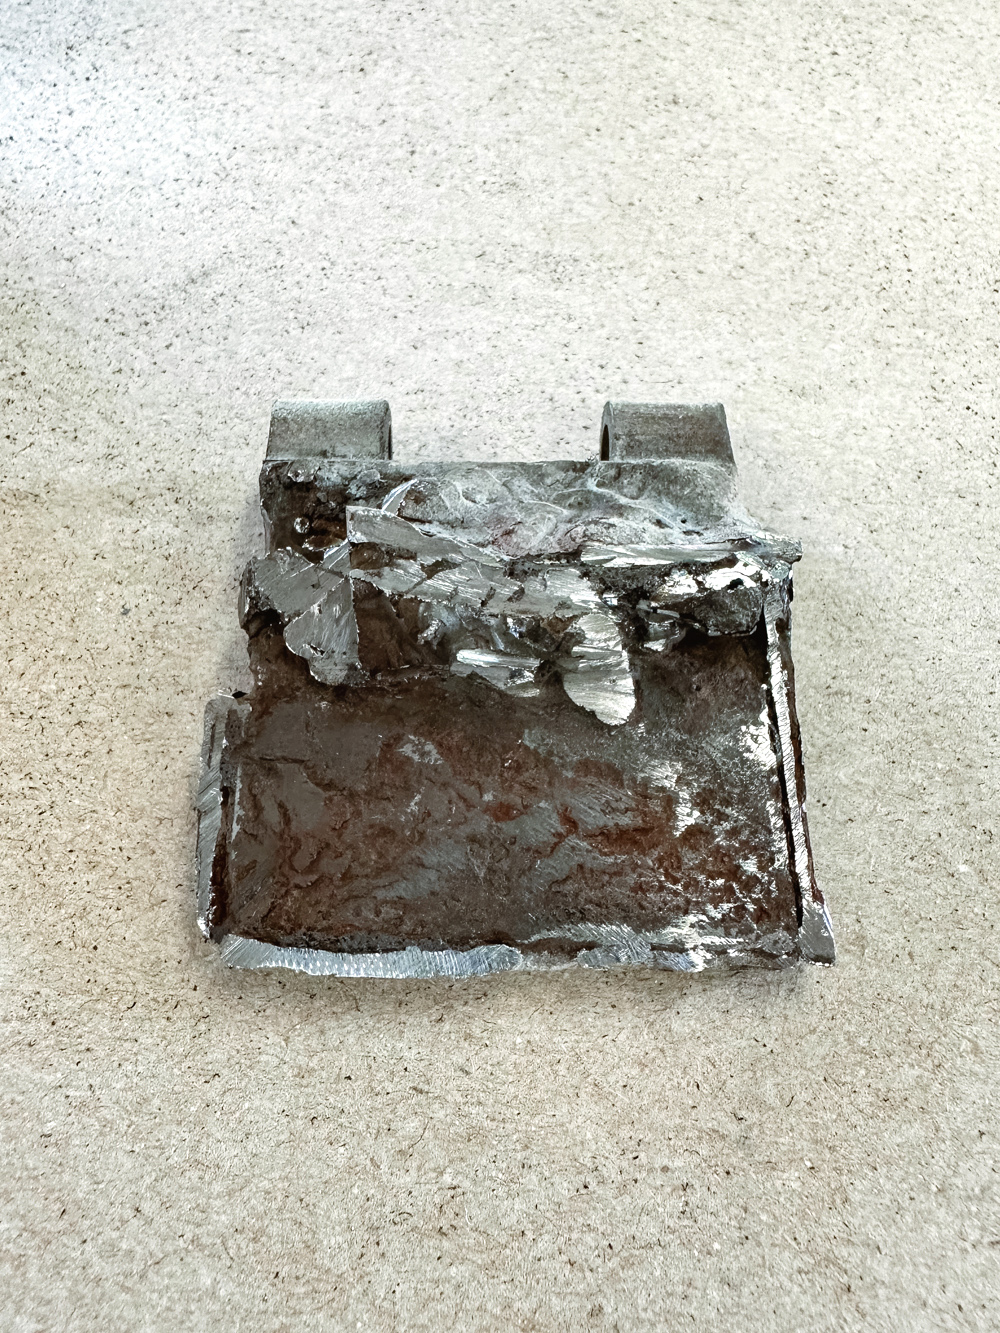
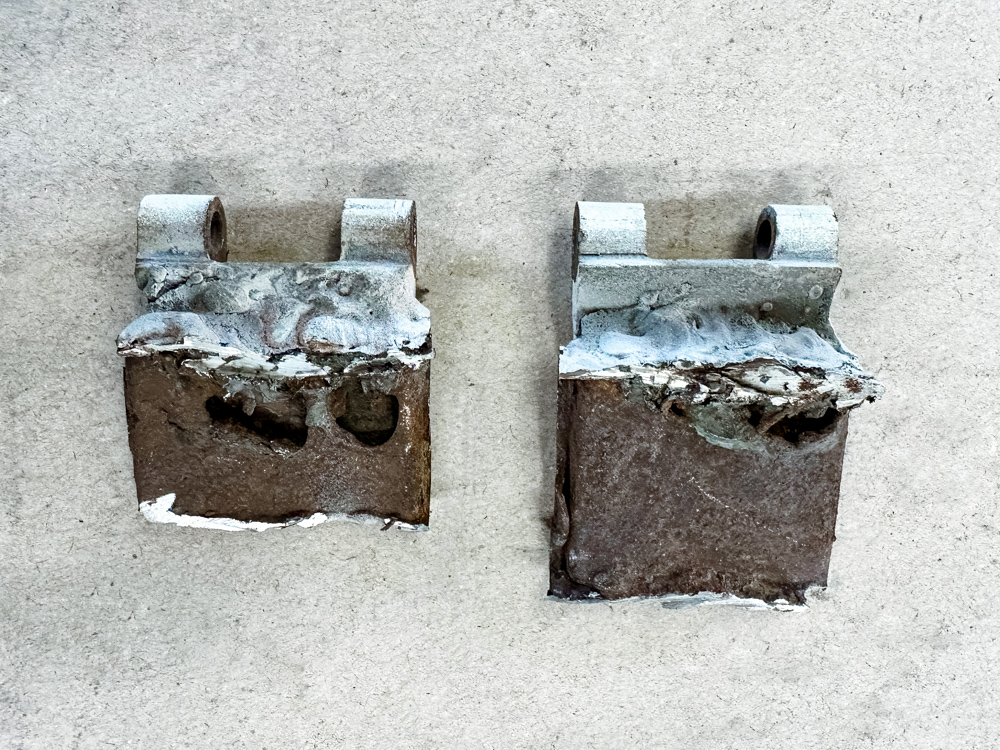
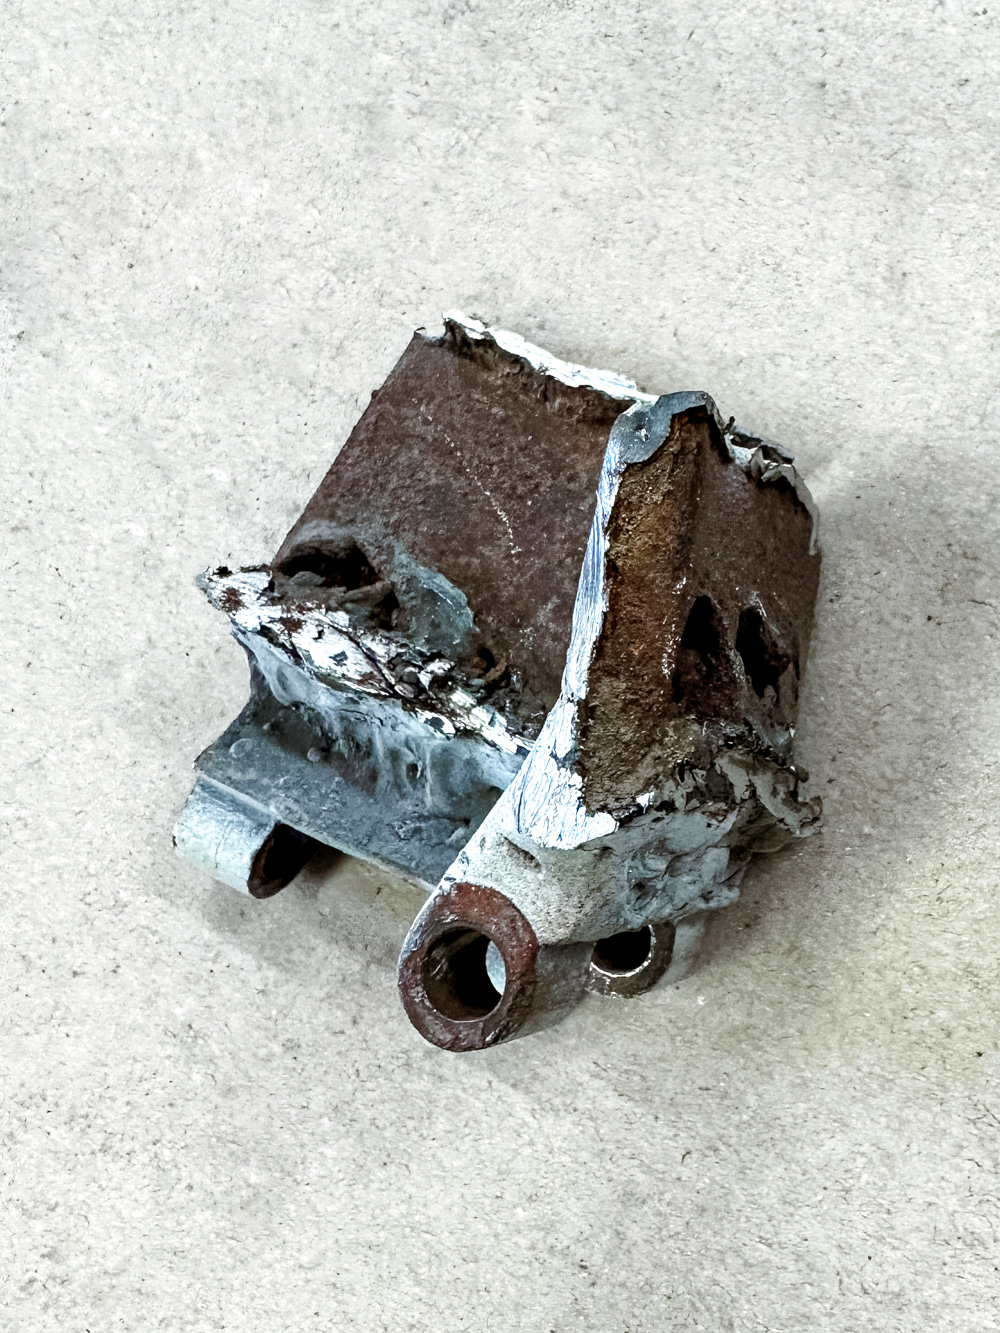
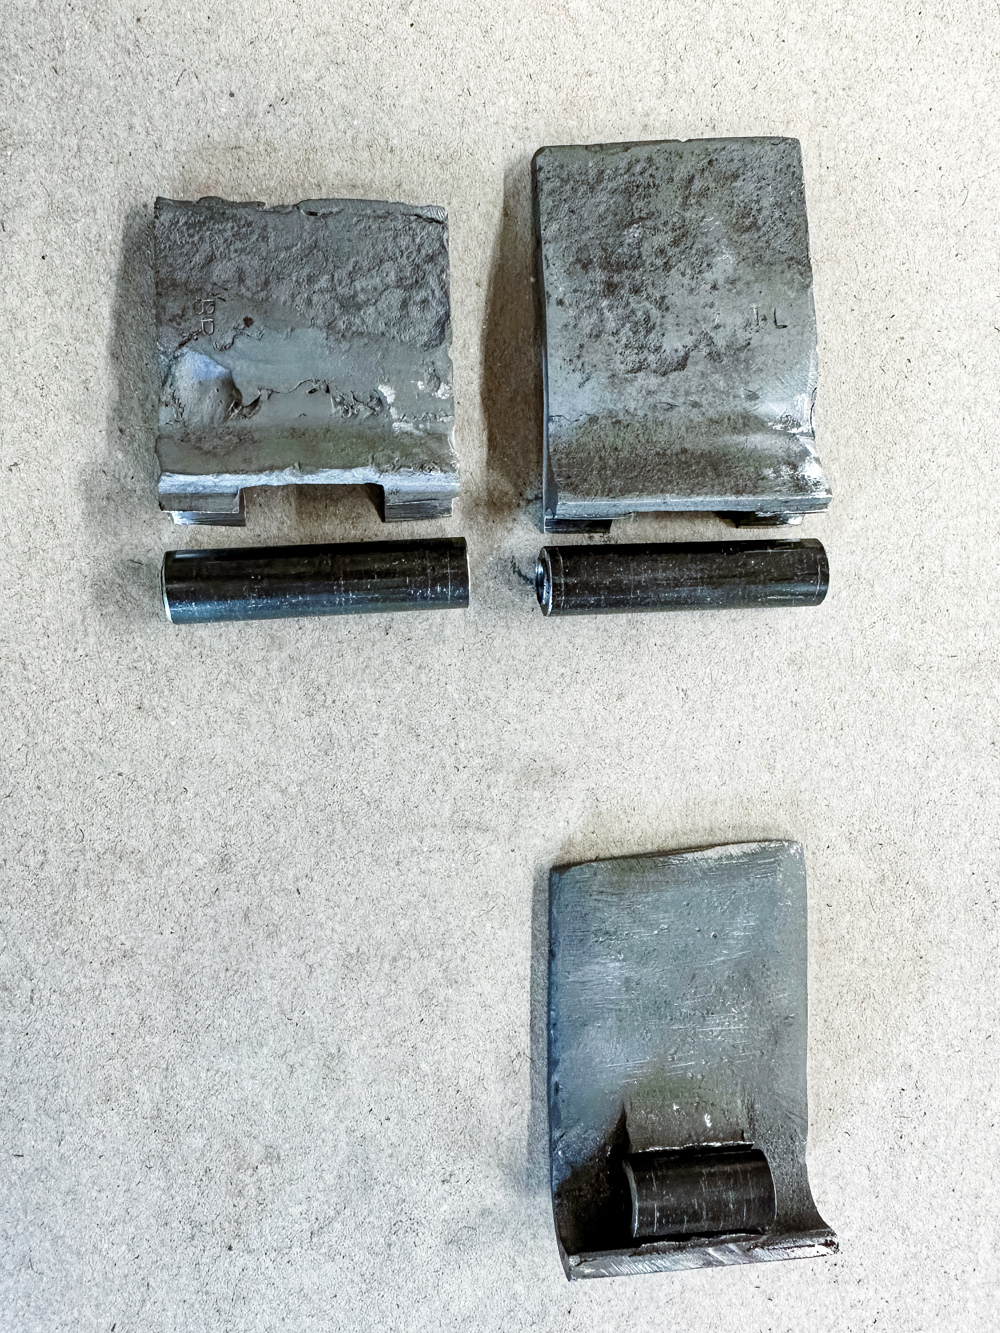
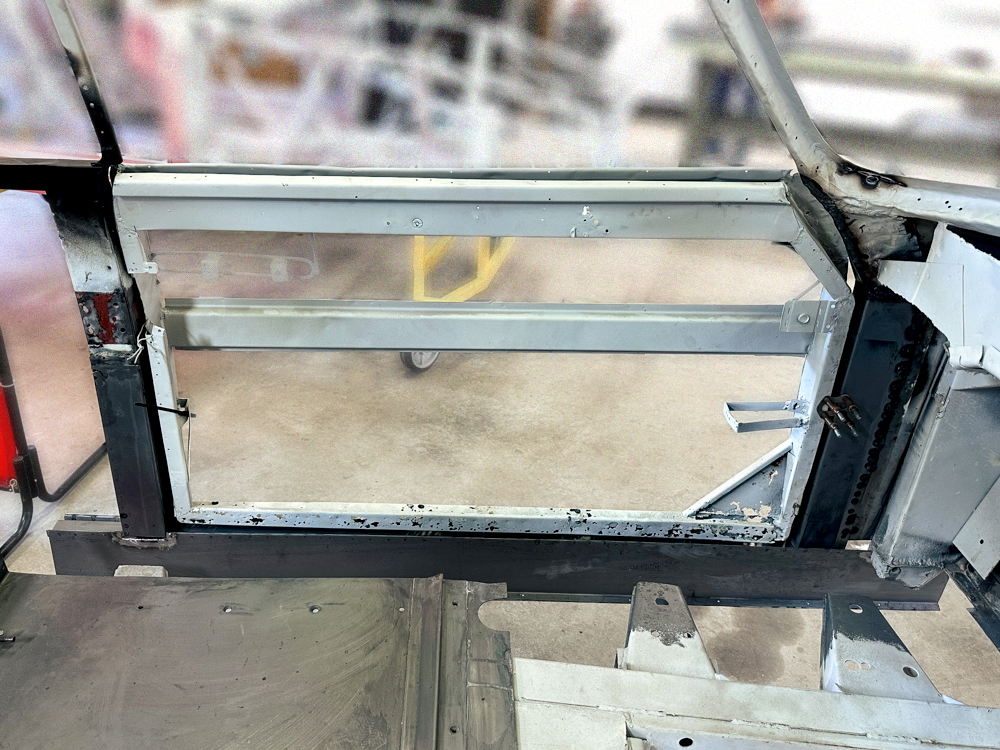
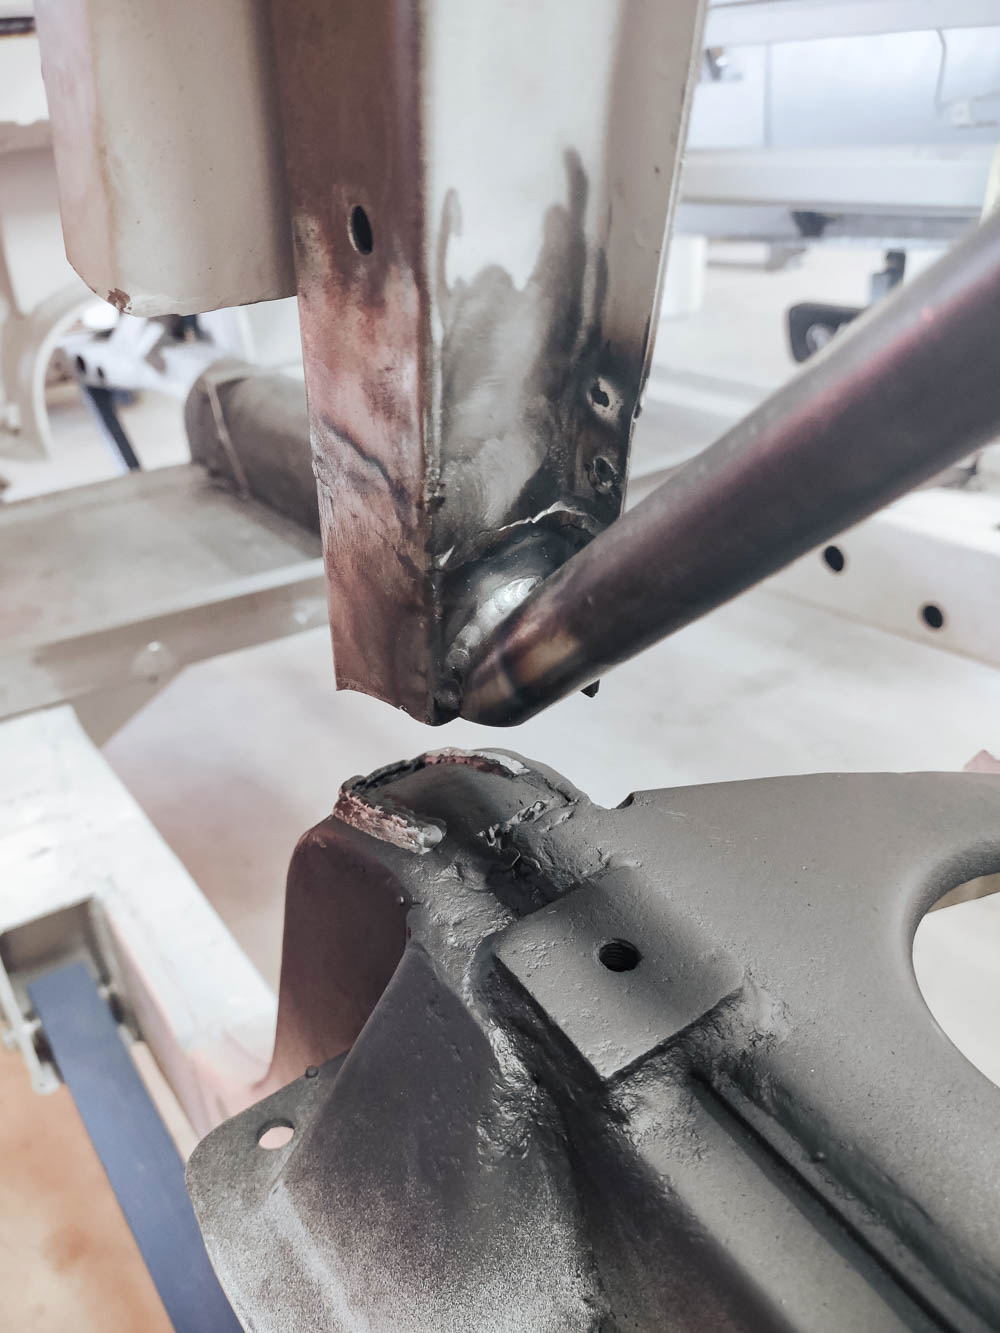
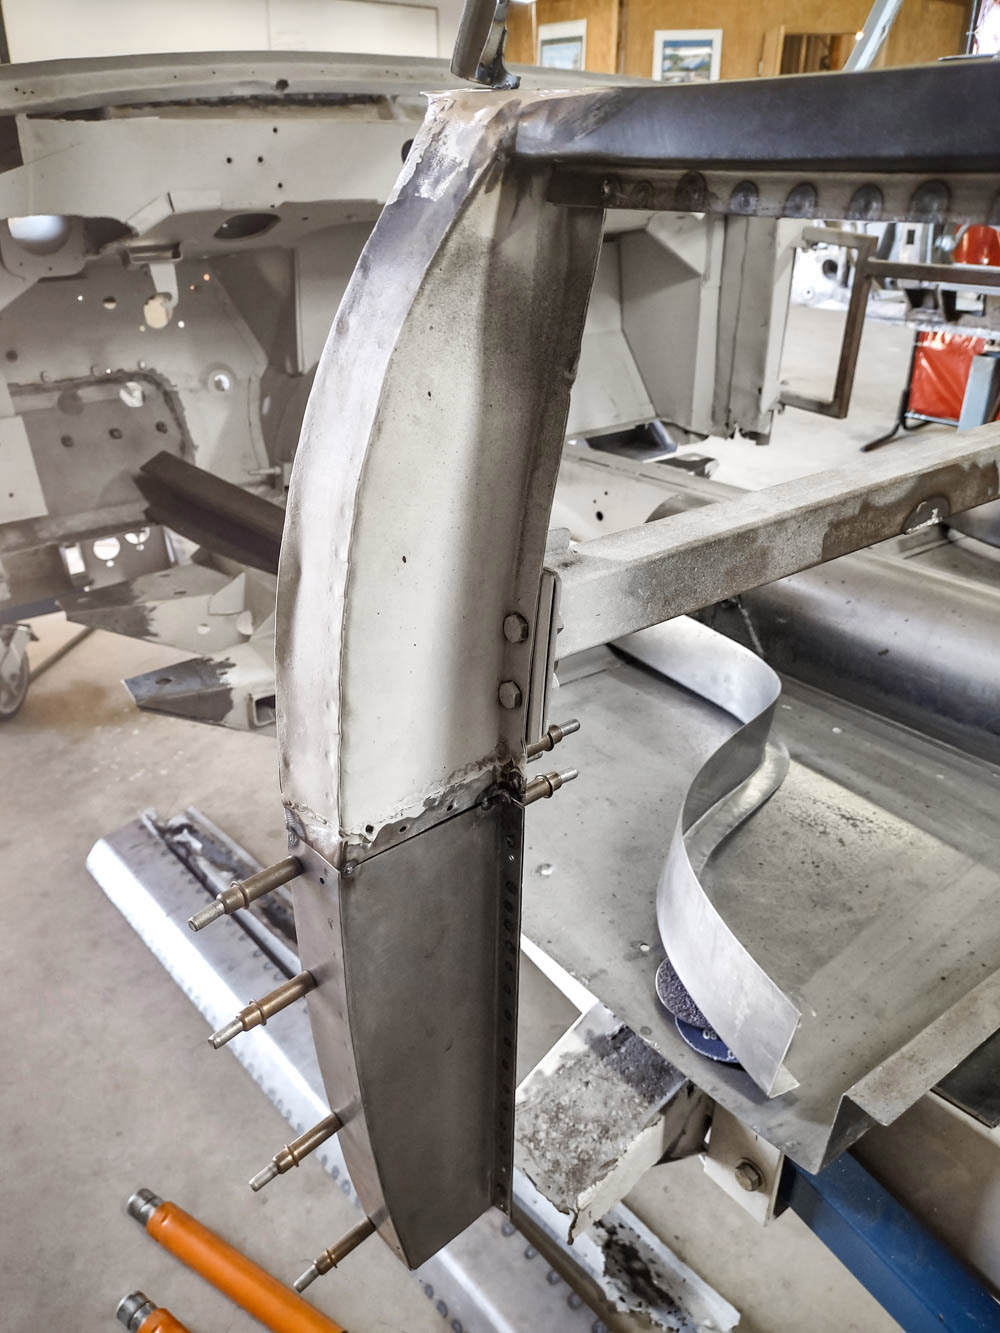
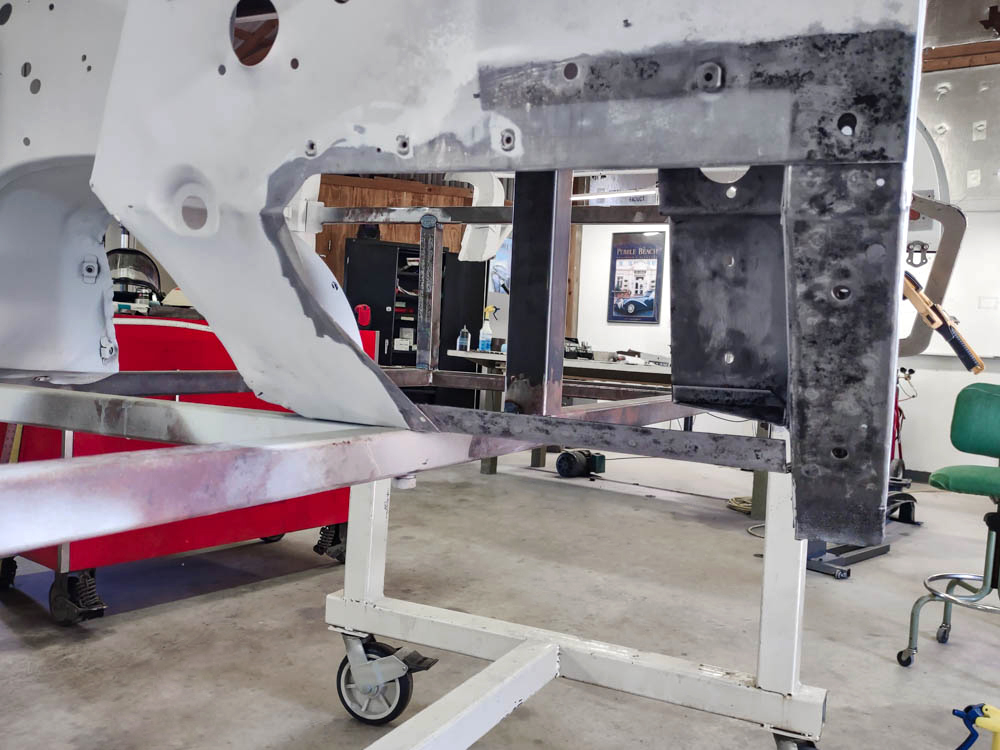
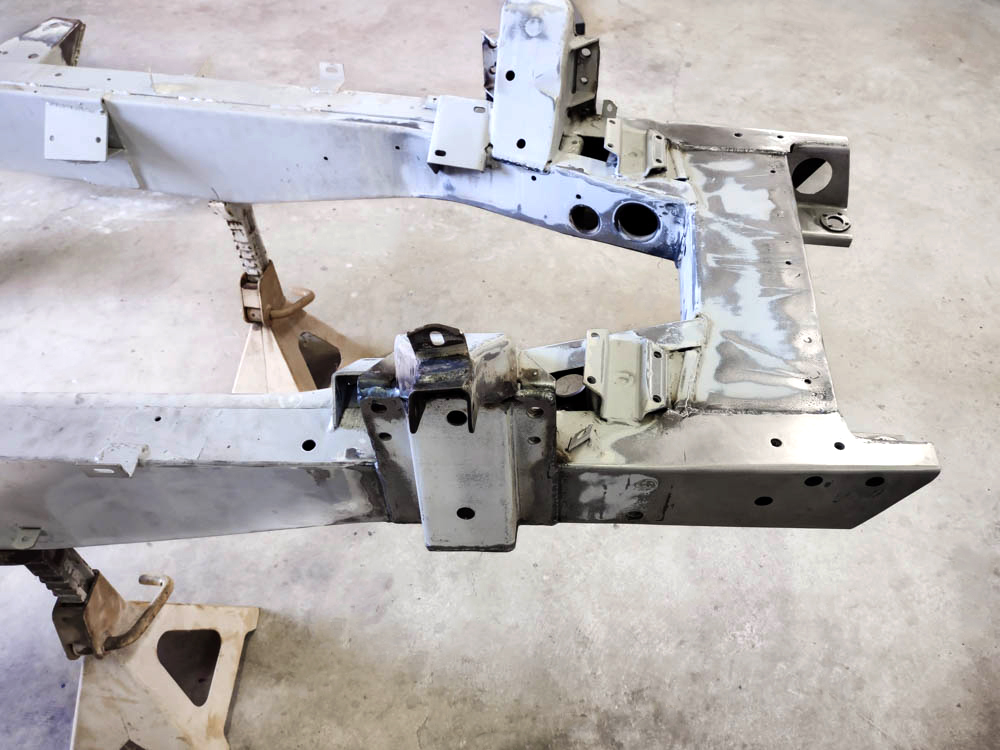
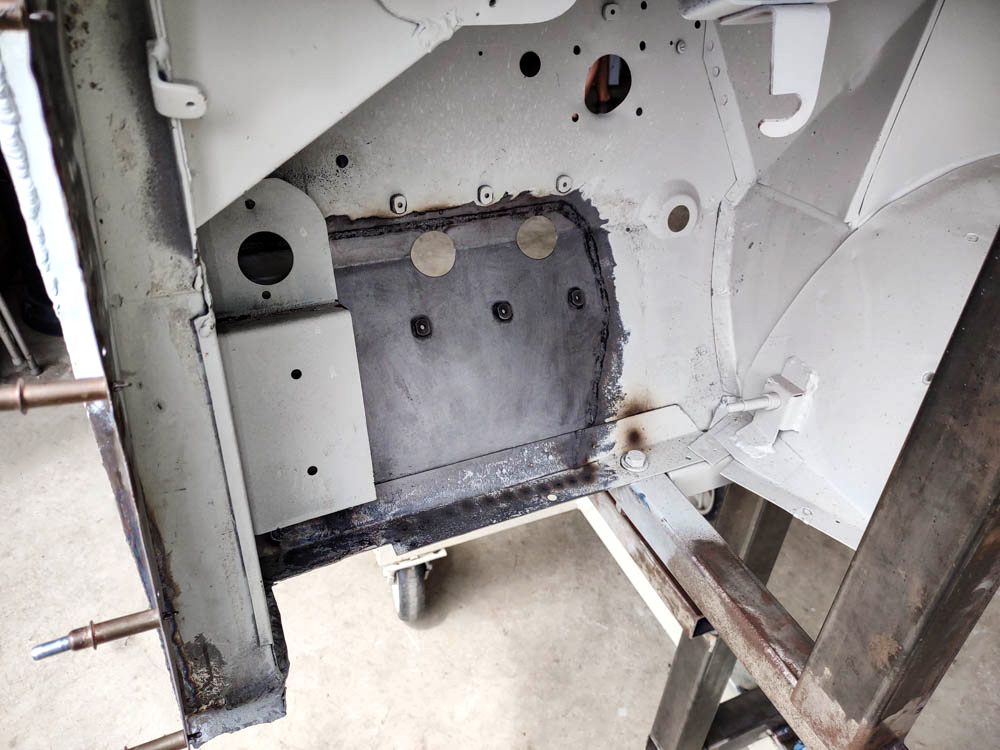
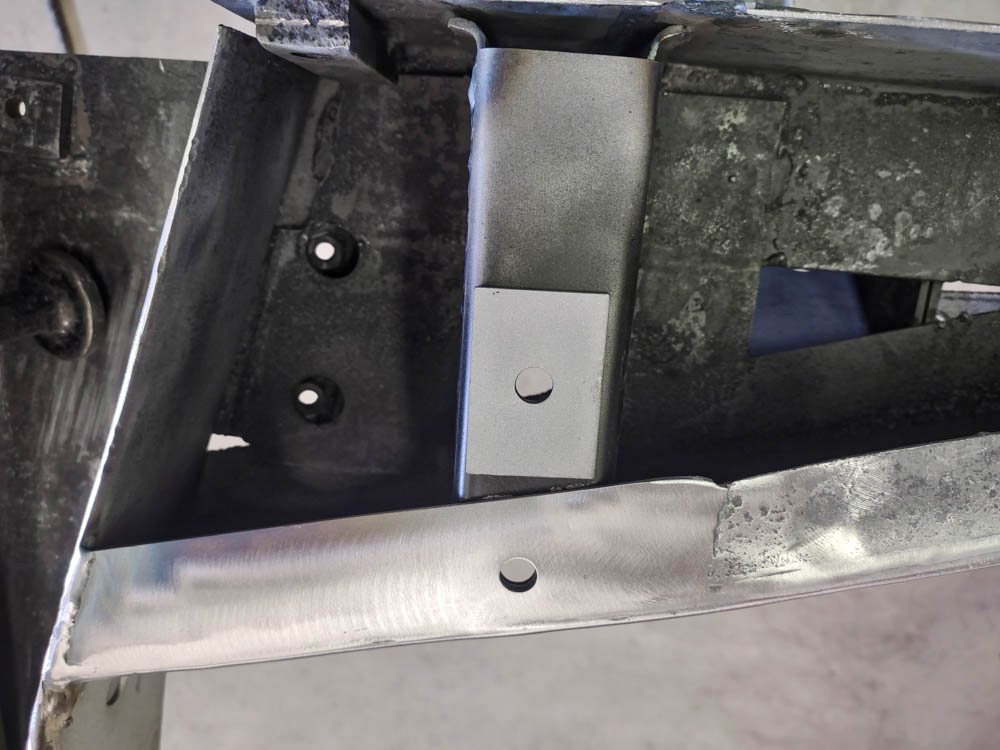
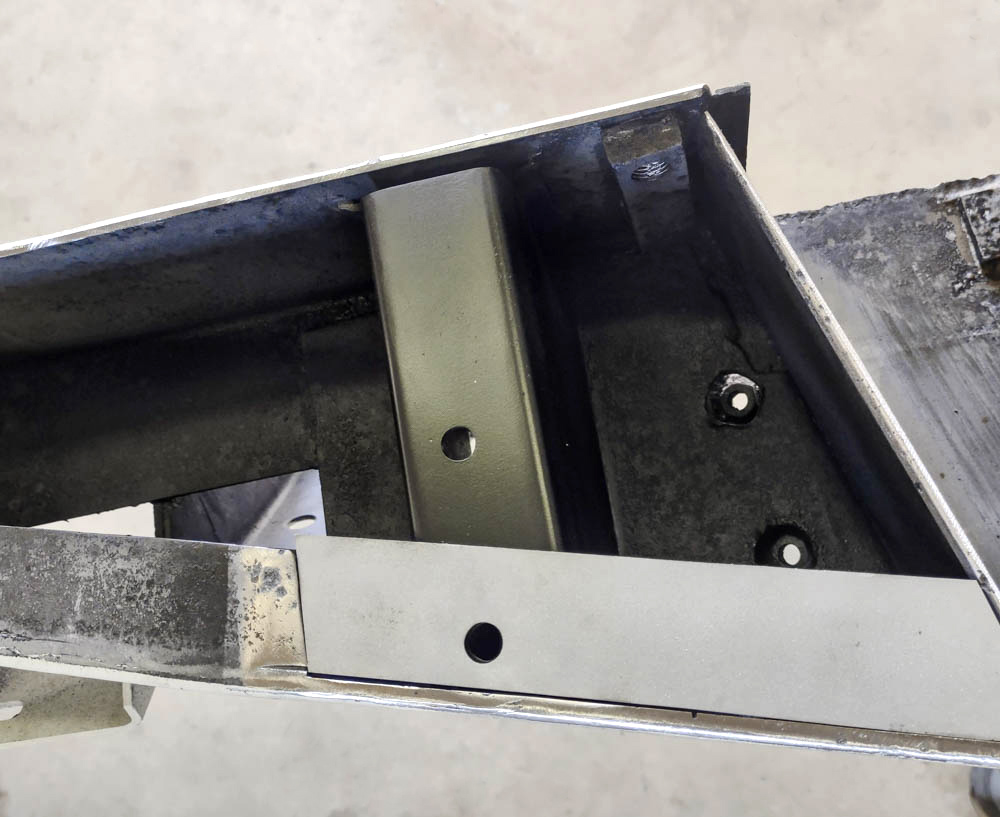
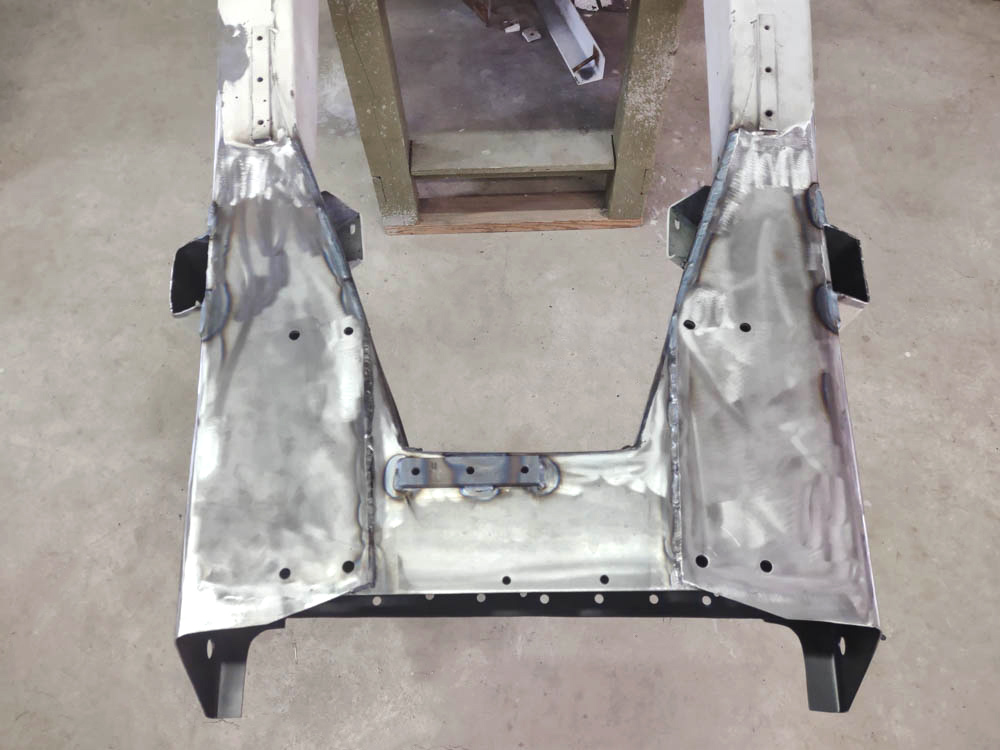
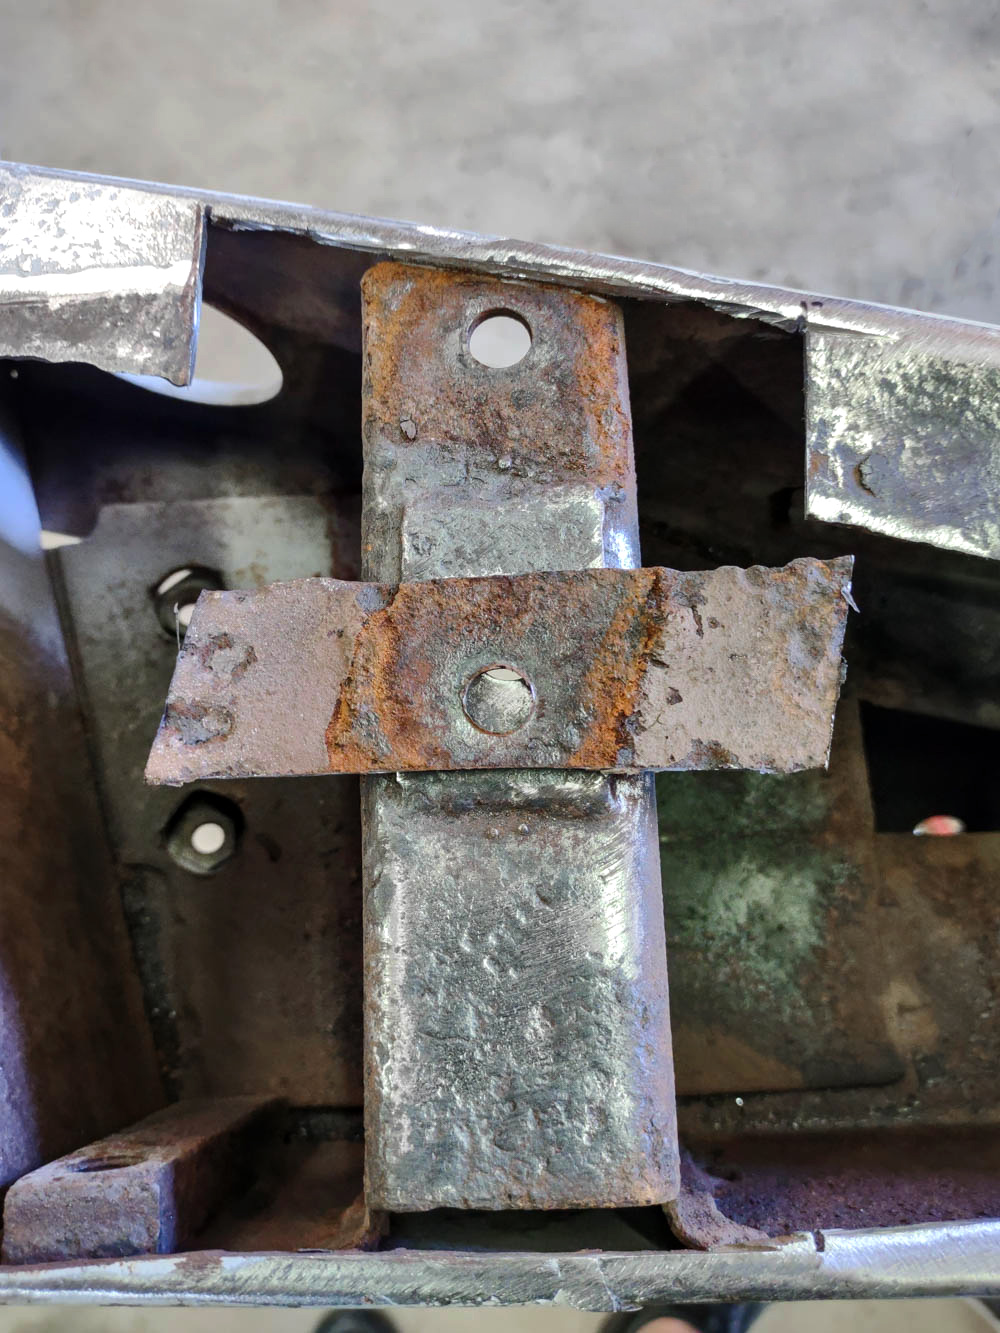
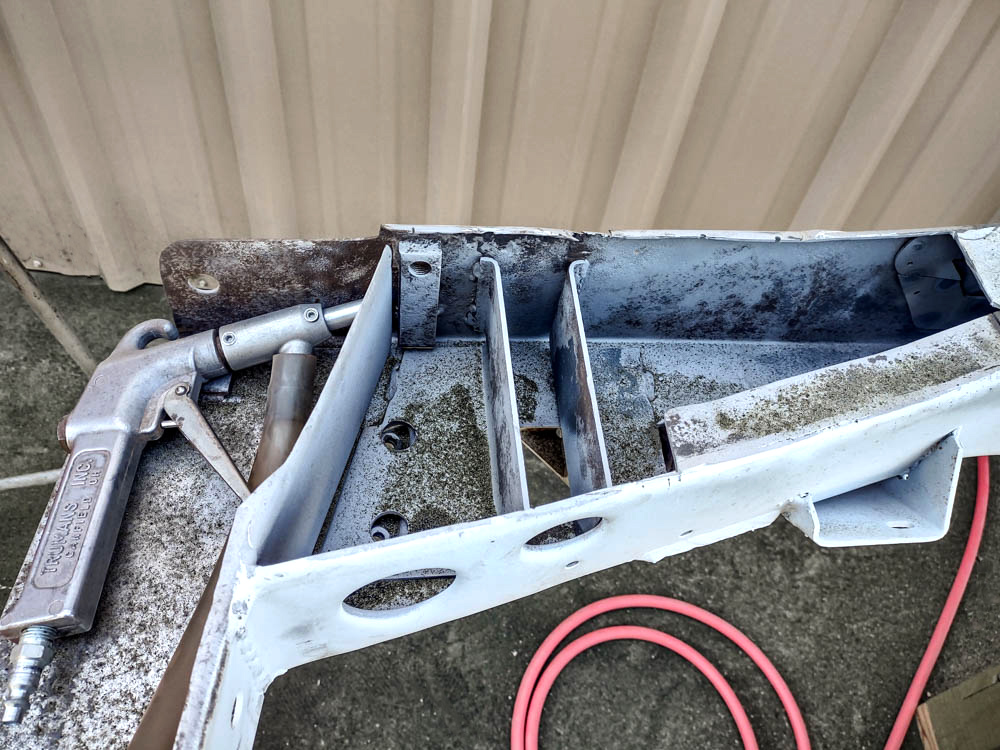
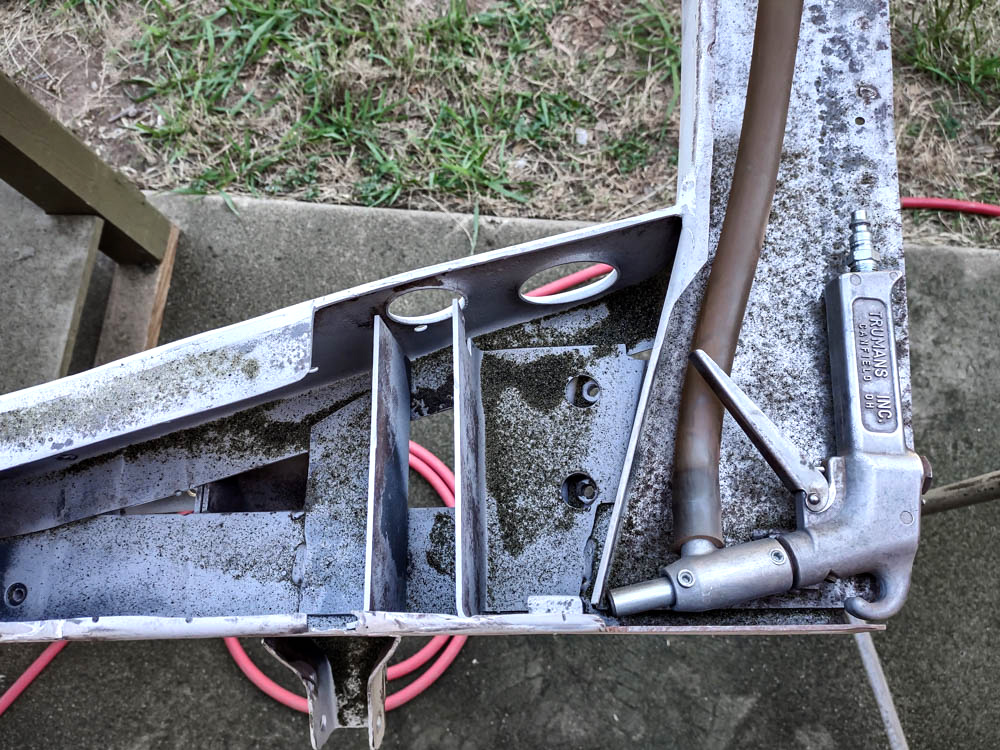
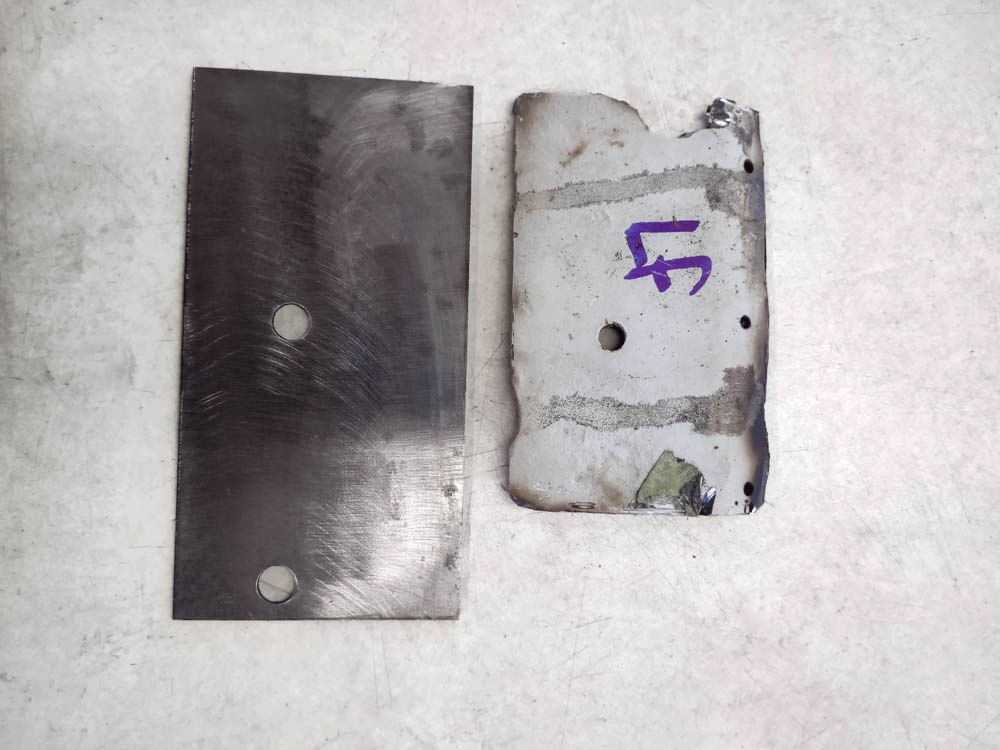
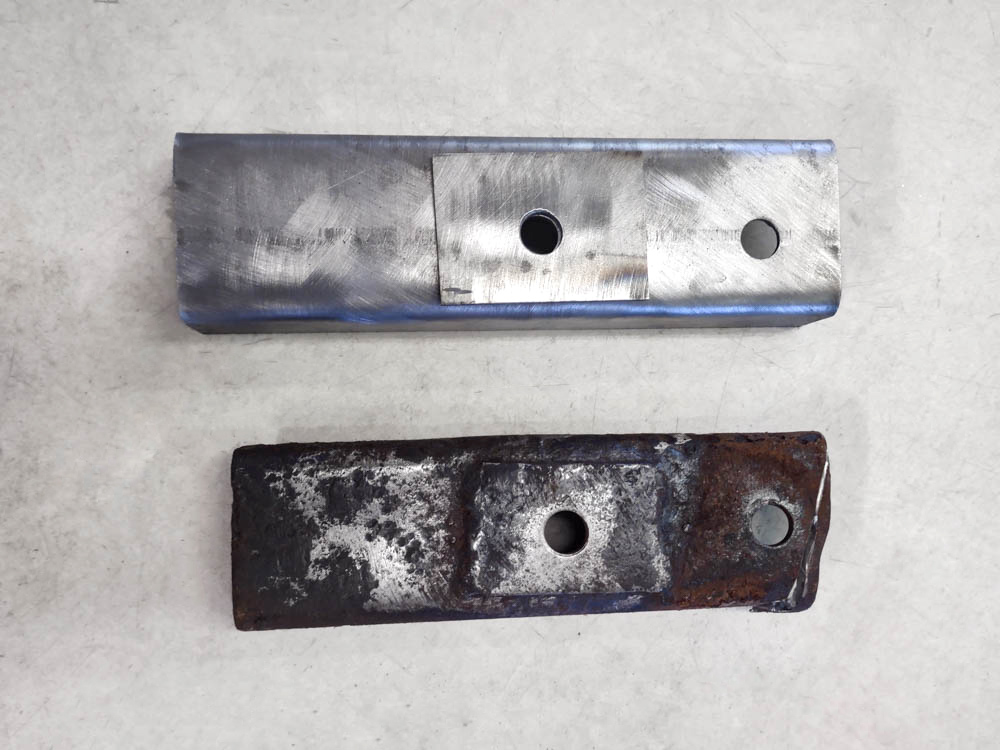
Left side chassis to body mount
April 3, 2023
April 3, 2023
April 3, 2023
April 3, 2023
April 3, 2023
April 3, 2023
Left B-pillar gusset panel
April 3, 2023
April 3, 2023
April 3, 2023
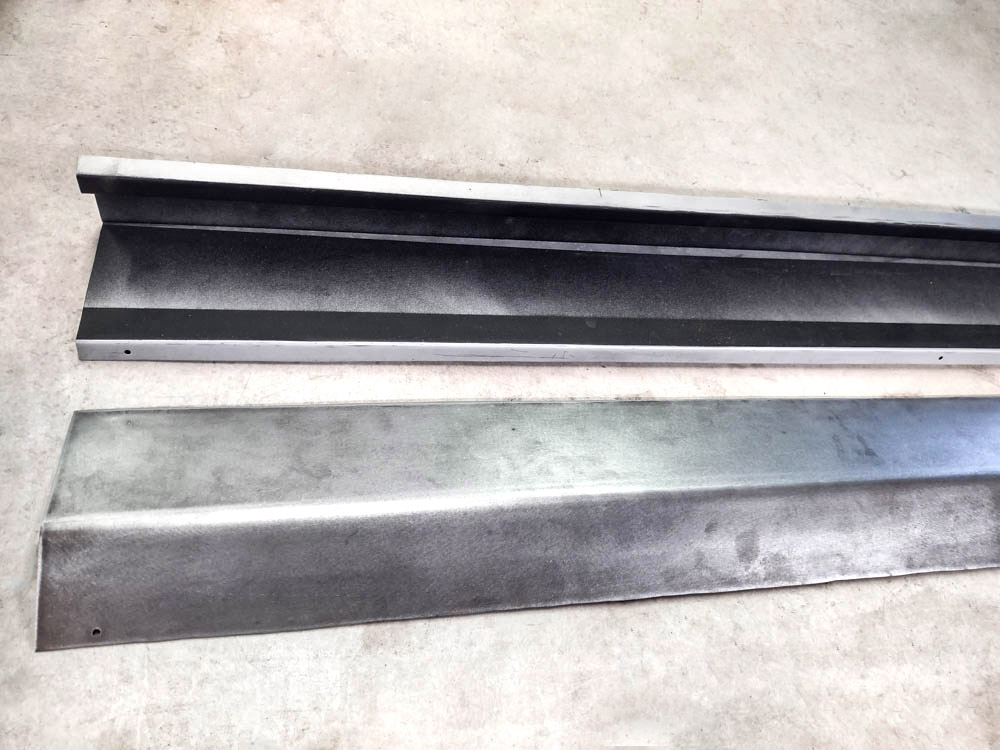
Left sill panel
April 3, 2023
April 3, 2023
April 3, 2023
April 3, 2023
April 3, 2023
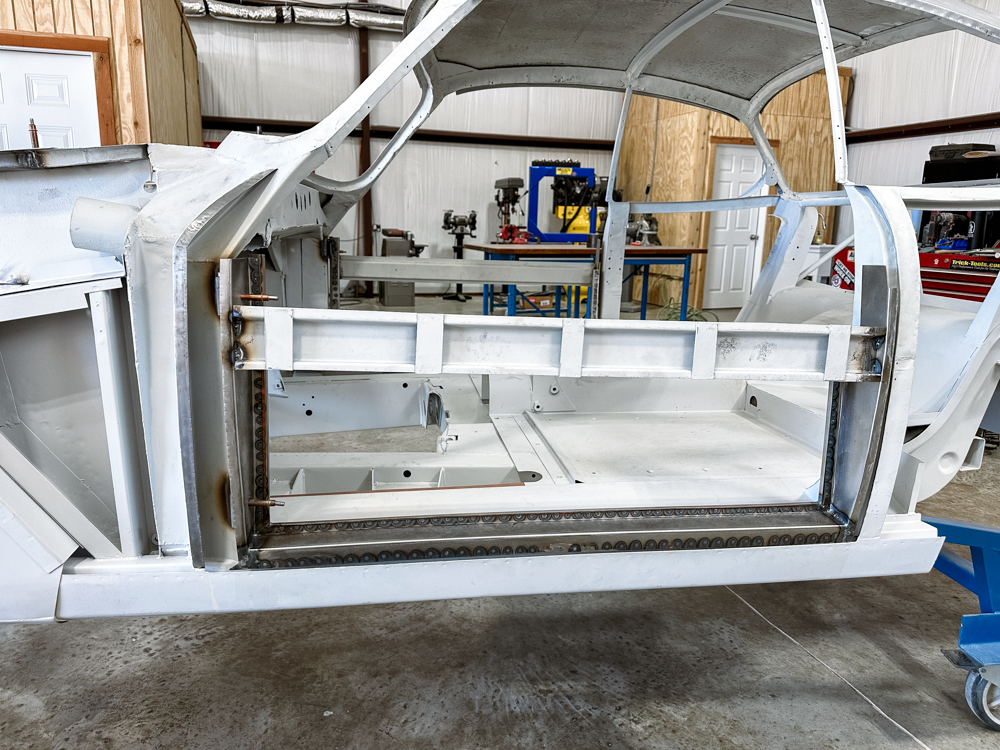
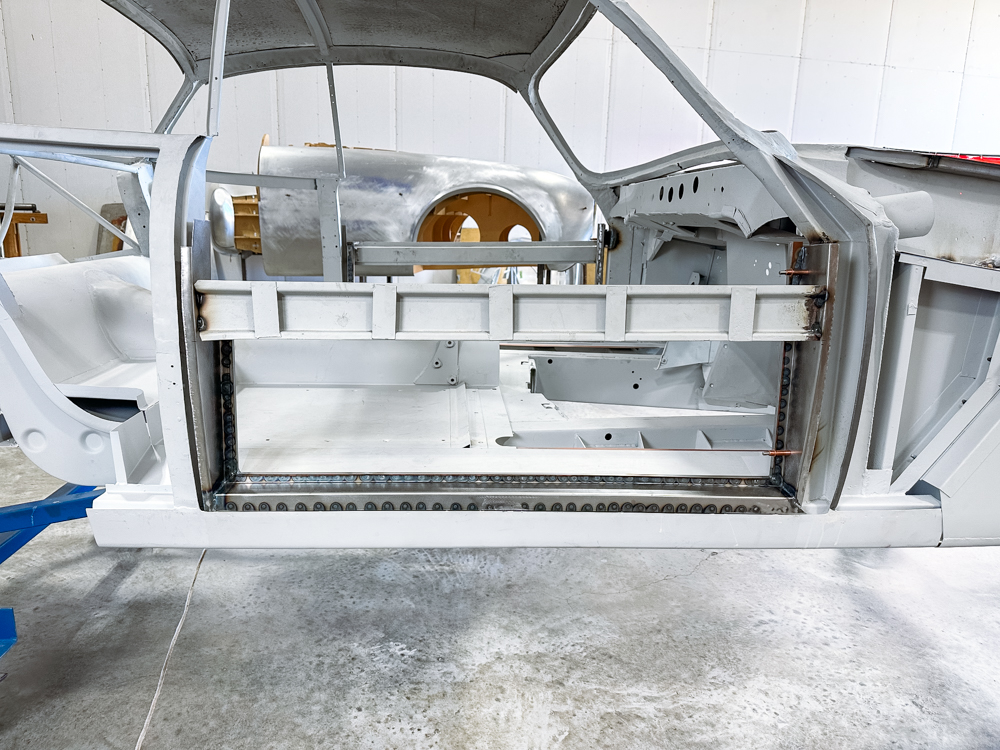
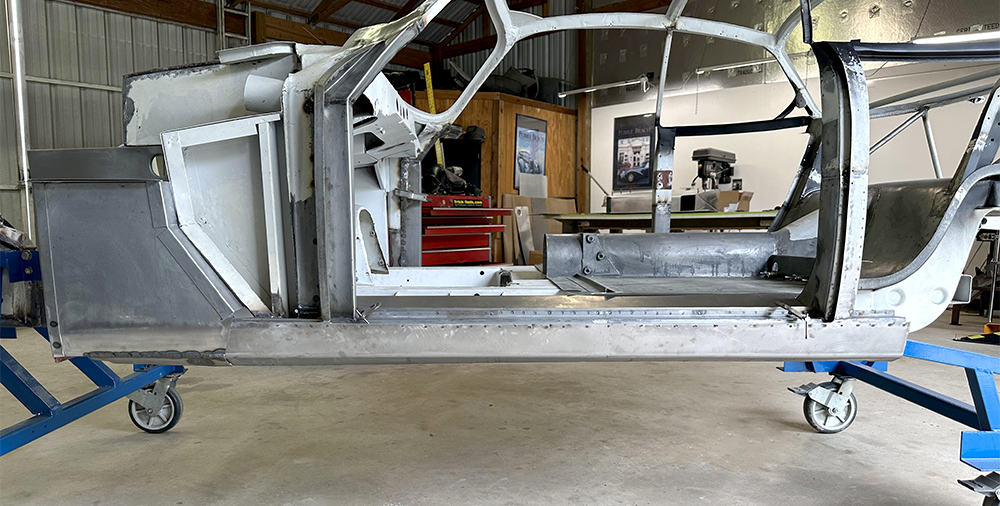
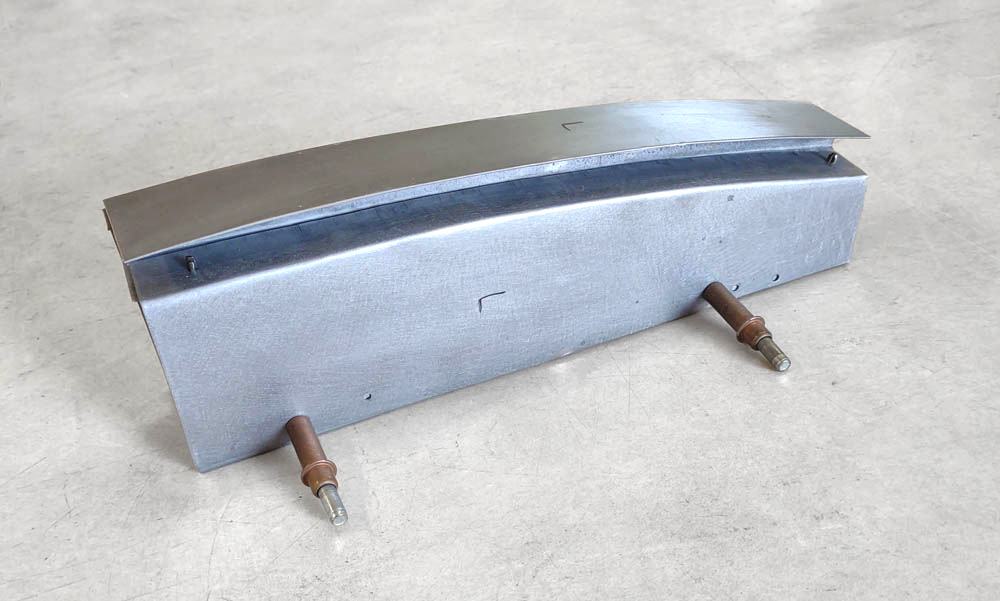
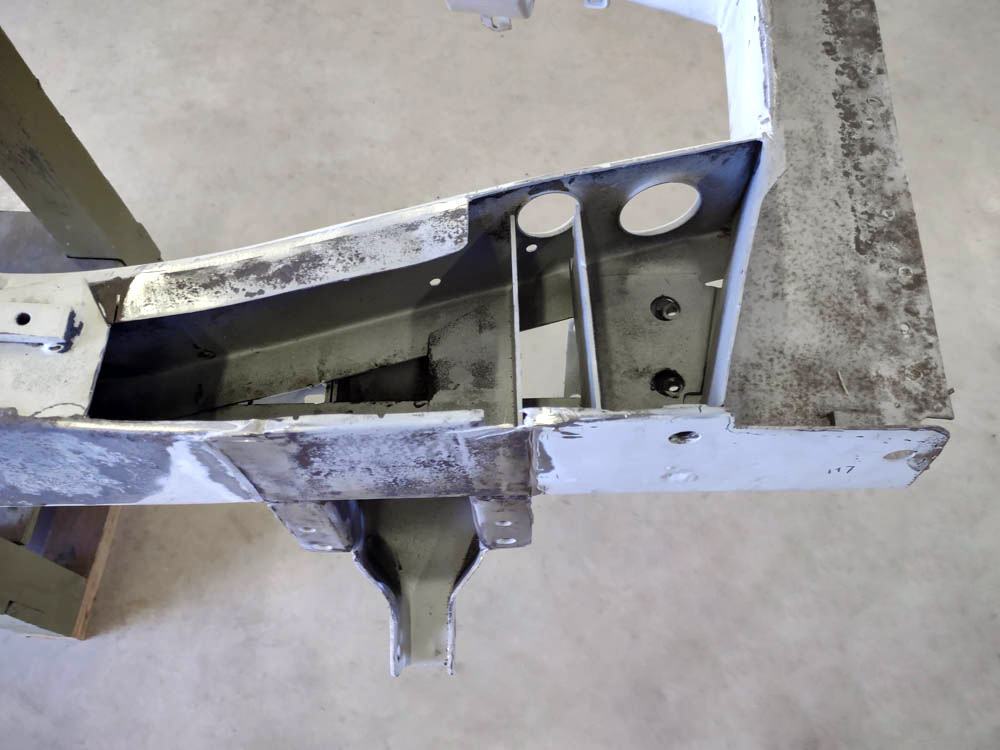
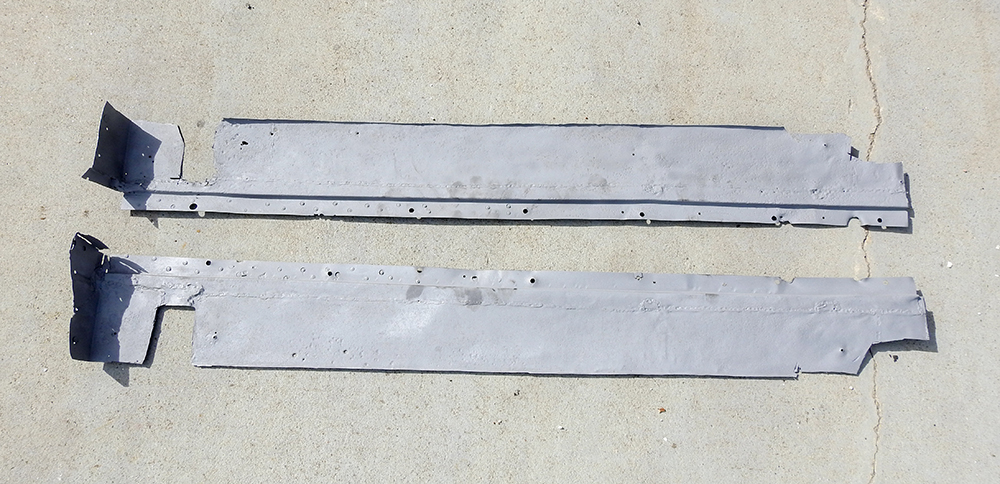
Right side rocker panel installation,
body to chassis mount installation
and construction of sill panel B-pillar gusset
April 3, 2023
April 3, 2023
April 3, 2023
April 3, 2023
April 3, 2023
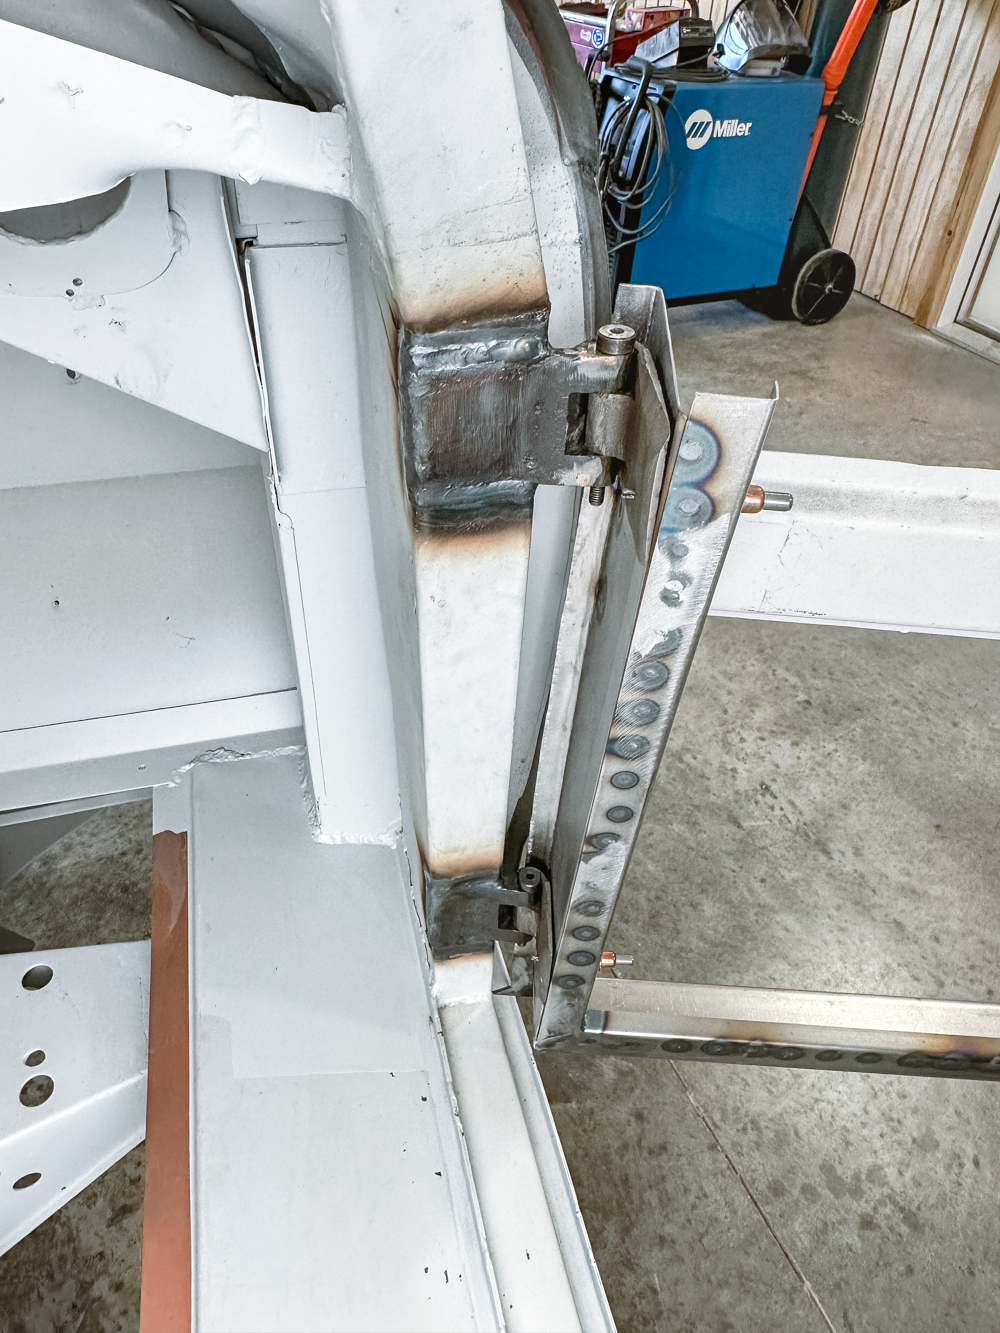
Continuation of door hinge
April 3, 2023
April 3, 2023
April 3, 2023
April 3, 2023
Right side battery box disassembly
April 3, 2023
April 3, 2023
March 3, 2023
Right A-pillar removal and reconstruction
March 3, 2023
March 3, 2023
March 3, 2023
March 3, 2023
March 3, 2023
March 3, 2023
March 3, 2023
March 3, 2023
March 3, 2023
March 3, 2023
March 3, 2023
March 3, 2023
March 3, 2023
March 3, 2023
March 3, 2023
March 3, 2023
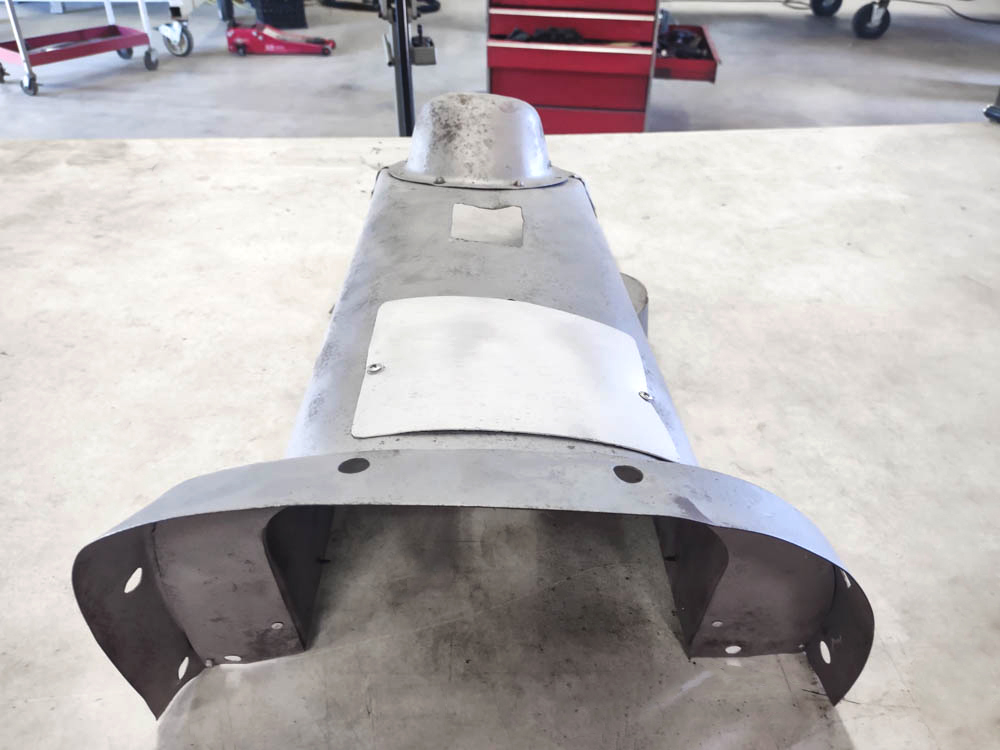
Fuel tank cover panel installation
March 3, 2023
Left door hinge rebuild
November 30, 2022
November 30, 2022
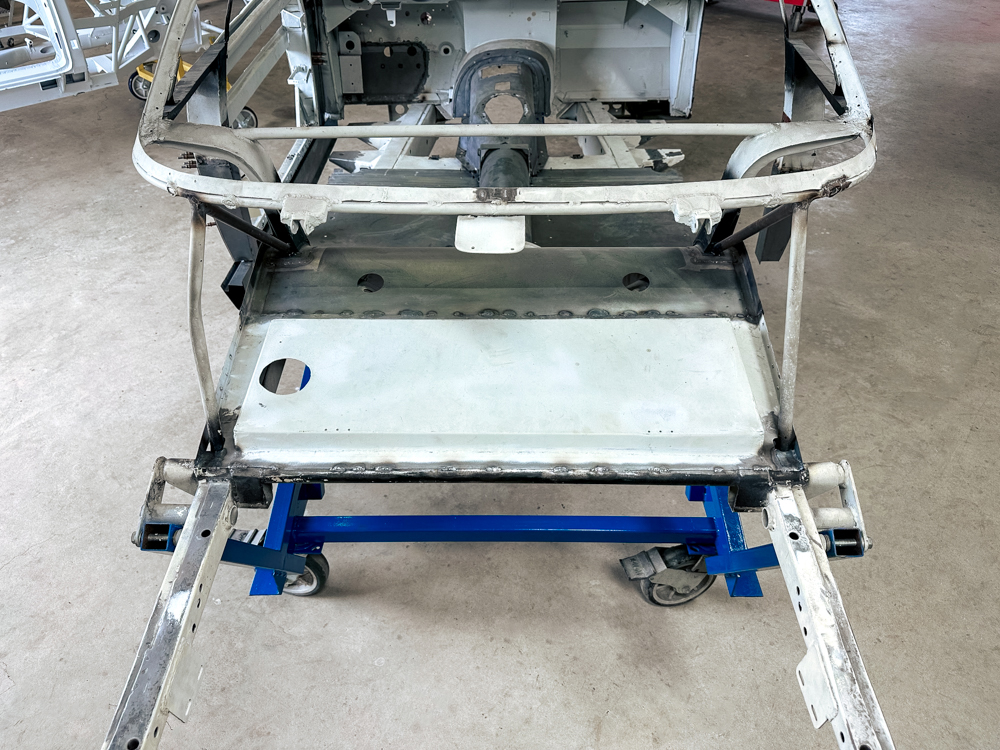
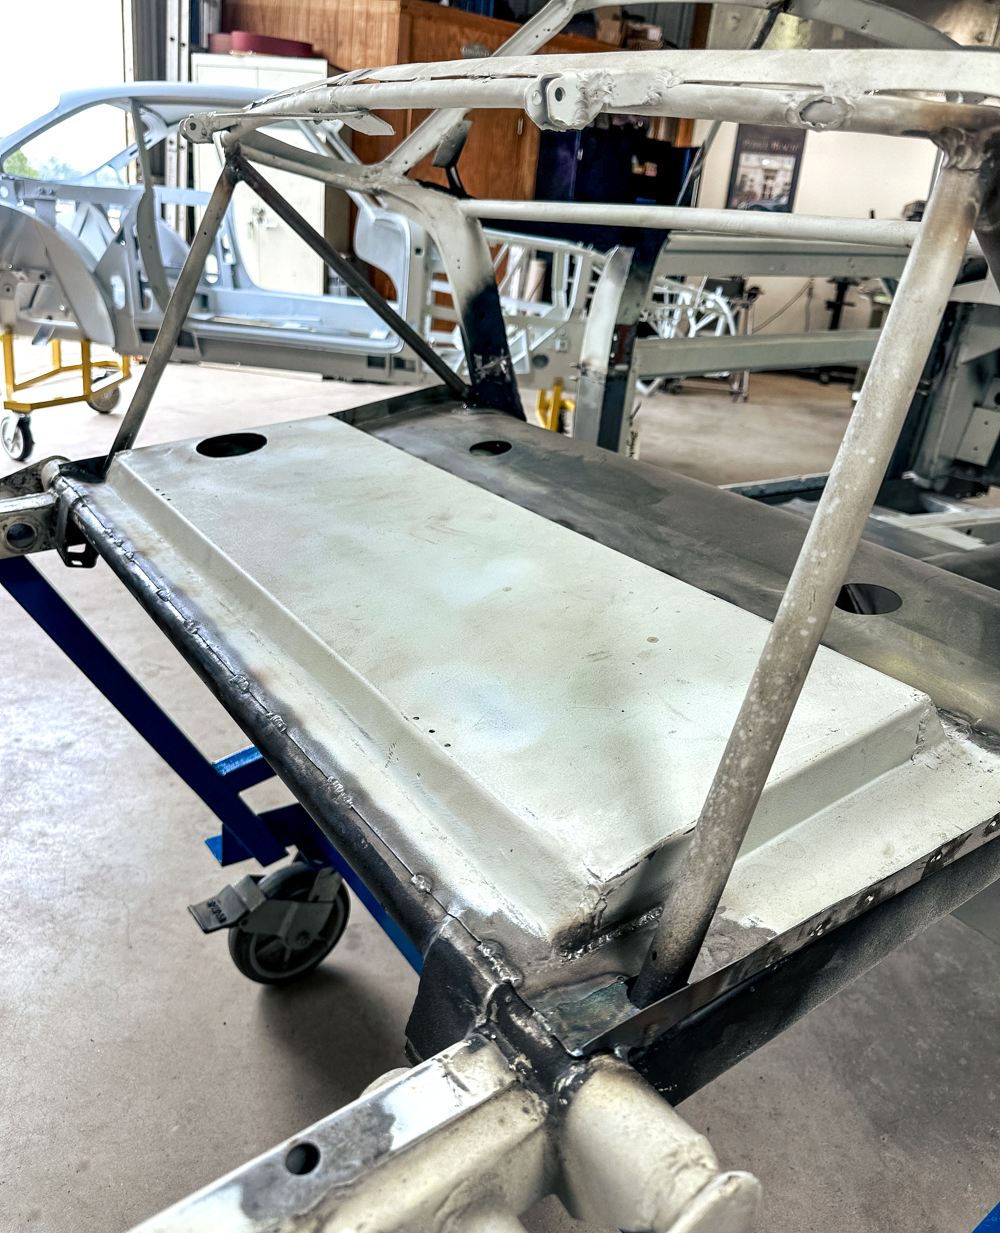
Completion and installation
of rear floorboard
November 30, 2022
November 30, 2022
November 30, 2022
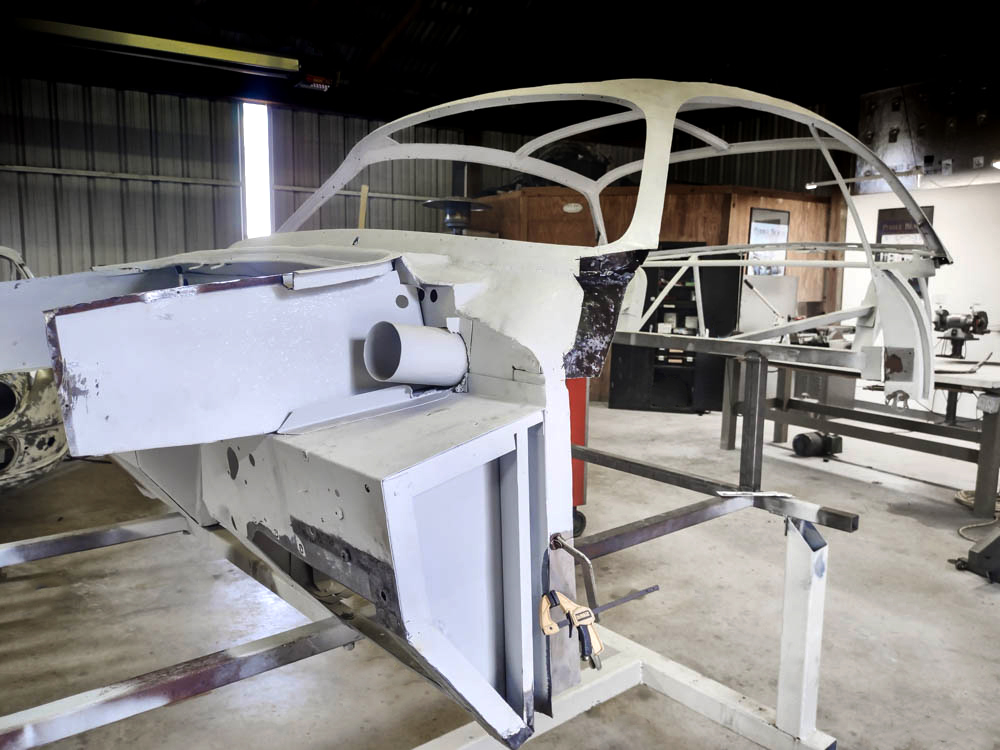
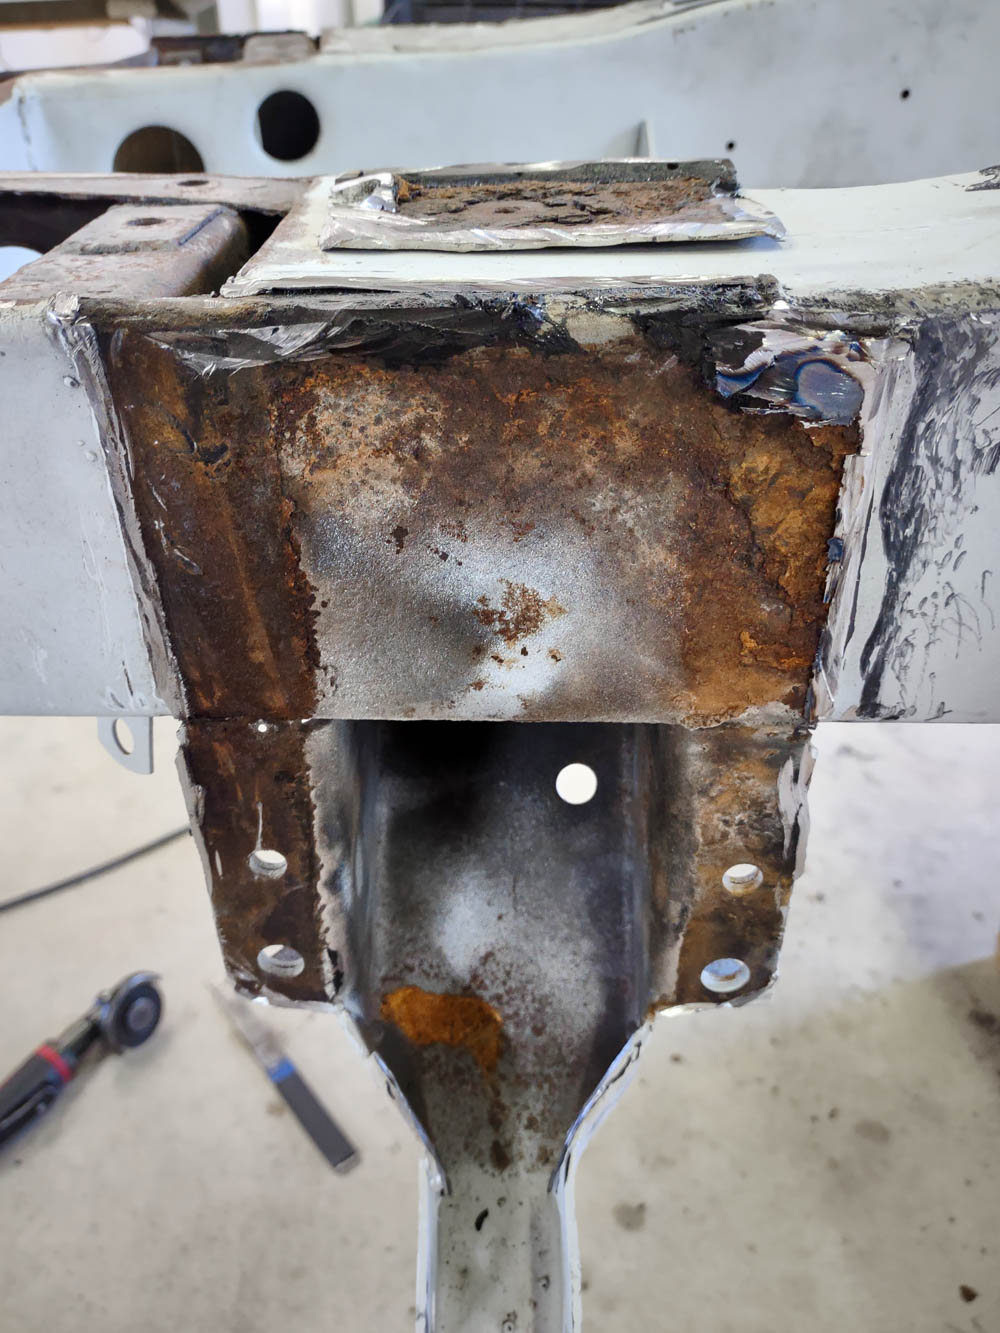
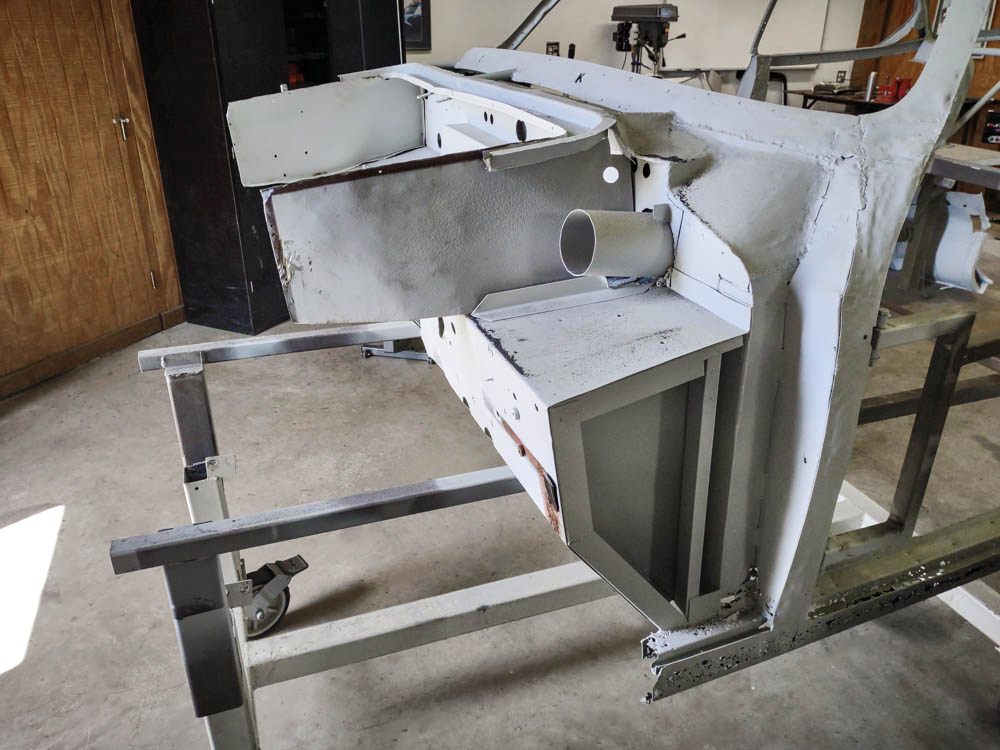
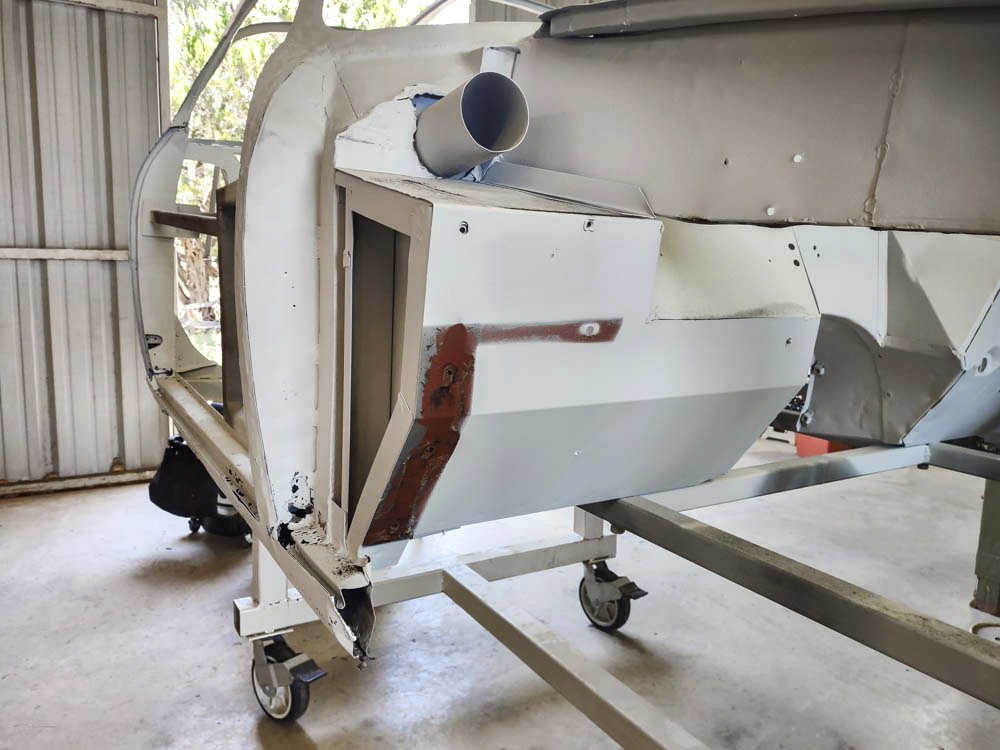
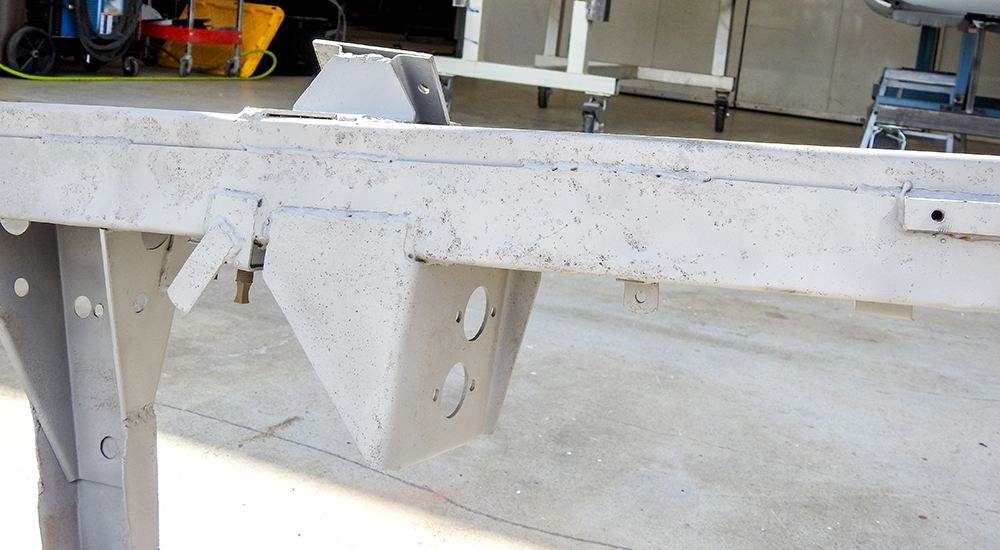
Repair and reconstruction of
rear body mounts and superleggera tubing
November 30, 2022
November 30, 2022
November 30, 2022
November 30, 2022
November 30, 2022
November 30, 2022
November 30, 2022
November 30, 2022
November 30, 2022
Installation of new left A-pillar
November 30, 2022
November 30, 2022
November 30, 2022
November 30, 2022
November 30, 2022
November 30, 2022
November 30, 2022
October 6, 2022
Rebuilding of spare wheel well and floor panels
November 30, 2022
October 6, 2022
October 6, 2022
October 6, 2022
October 6, 2022
New cowl drip rail panel fabrication
and installation
New rocker panel assemblies
October 6, 2022
October 6, 2022
October 6, 2022
October 6, 2022
October 6, 2022
Rebuilding of A & B posts
and rocker panels
October 6, 2022
October 6, 2022
October 6, 2022
October 6, 2022
October 6, 2022
Rebuilding rear wheel inner arch body
to frame mounts
October 6, 2022
New floorboard construction from
seat floor board to fuel tank cover panel
October 6, 2022
October 6, 2022
October 6, 2022
October 6, 2022
October 6, 2022
October 6, 2022
October 6, 2022
October 6, 2022
October 6, 2022
September 7, 2022
October 6, 2022
September 7, 2022
September 7, 2022
September 7, 2022
September 7, 2022
September 7, 2022
September 7, 2022
September 7, 2022
September 7, 2022
September 7, 2022
September 7, 2022
September 7, 2022
September 7, 2022
September 7, 2022
September 7, 2022
September 7, 2022
September 7, 2022
September 7, 2022
September 7, 2022
September 7, 2022
September 7, 2022
September 7, 2022
September 7, 2022
September 7, 2022
September 7, 2022
September 7, 2022
September 7, 2022
September 7, 2022
September 7, 2022
September 7, 2022
September 7, 2022
September 7, 2022
August 16, 2022
August 16, 2022
August 16, 2022
August 16, 2022
August 16, 2022
August 16, 2022
August 16, 2022
August 16, 2022
August 16, 2022
August 16, 2022
August 16, 2022
August 16, 2022
August 16, 2022
August 16, 2022
August 16, 2022
August 16, 2022
August 16, 2022
August 16, 2022
August 16, 2022
August 16, 2022
August 16, 2022
August 16, 2022
August 16, 2022
August 16, 2022
August 16, 2022
August 16, 2022
July 18, 2022
July 18, 2022
July 18, 2022
July 18, 2022
July 18, 2022
July 18, 2022
July 18, 2022
July 18, 2022
July 18, 2022
July 18, 2022
July 18, 2022
July 18, 2022
July 18, 2022
July 18, 2022
July 18, 2022
July 18, 2022
July 18, 2022
July 18, 2022
July 18, 2022
July 18, 2022
July 18, 2022
July 18, 2022
July 18, 2022
July 18, 2022
July 18, 2022
May 14, 2020
The Zagato has returned from being media blasted!
July 18, 2022
May 14, 2020
May 14, 2020
May 14, 2020
May 14, 2020
May 14, 2020
May 14, 2020
May 14, 2020
May 14, 2020
May 14, 2020
May 14, 2020
May 14, 2020
May 14, 2020
May 14, 2020
May 14, 2020
May 14, 2020
May 14, 2020
May 14, 2020
May 14, 2020
May 14, 2020
May 14, 2020
May 14, 2020
May 14, 2020
May 14, 2020
May 14, 2020
May 14, 2020
May 14, 2020
May 14, 2020
May 14, 2020
May 14, 2020
May 14, 2020
May 14, 2020
May 14, 2020
May 14, 2020
May 14, 2020
May 14, 2020
May 14, 2020
May 14, 2020
May 14, 2020
May 14, 2020
May 14, 2020
May 14, 2020
May 14, 2020
May 14, 2020
May 14, 2020
May 14, 2020
De-skinning the Zagato doors.
May 14, 2020
April 28, 2020
April 28, 2020
April 28, 2020
April 28, 2020
April 28, 2020
April 28, 2020
April 28, 2020
April 28, 2020
April 28, 2020
April 28, 2020
April 28, 2020
April 28, 2020
April 28, 2020
April 28, 2020
April 20, 2020
April 28, 2020
April 20, 2020
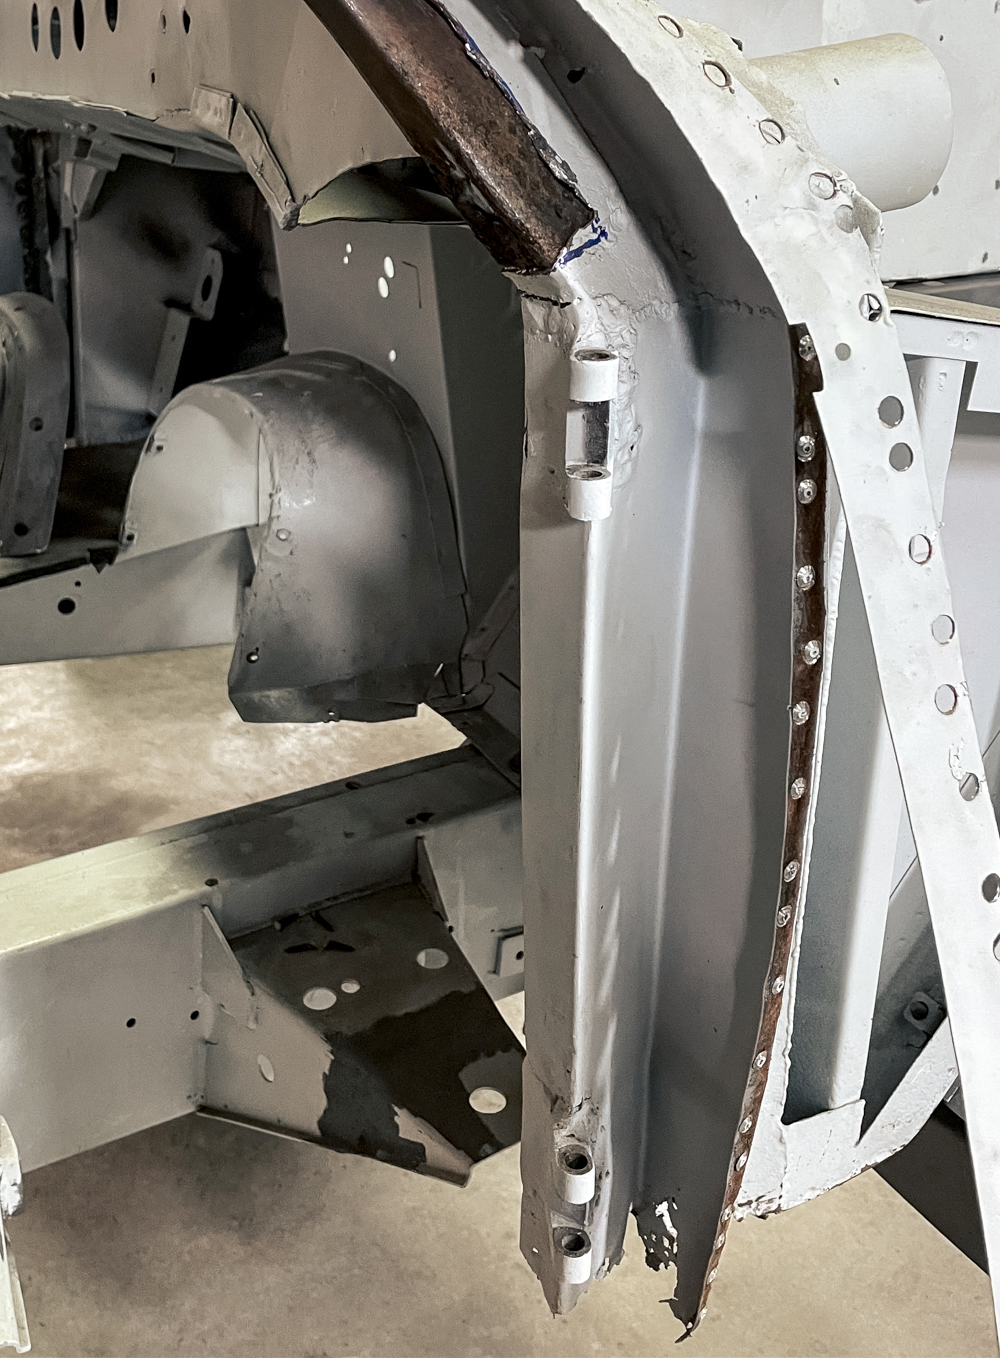
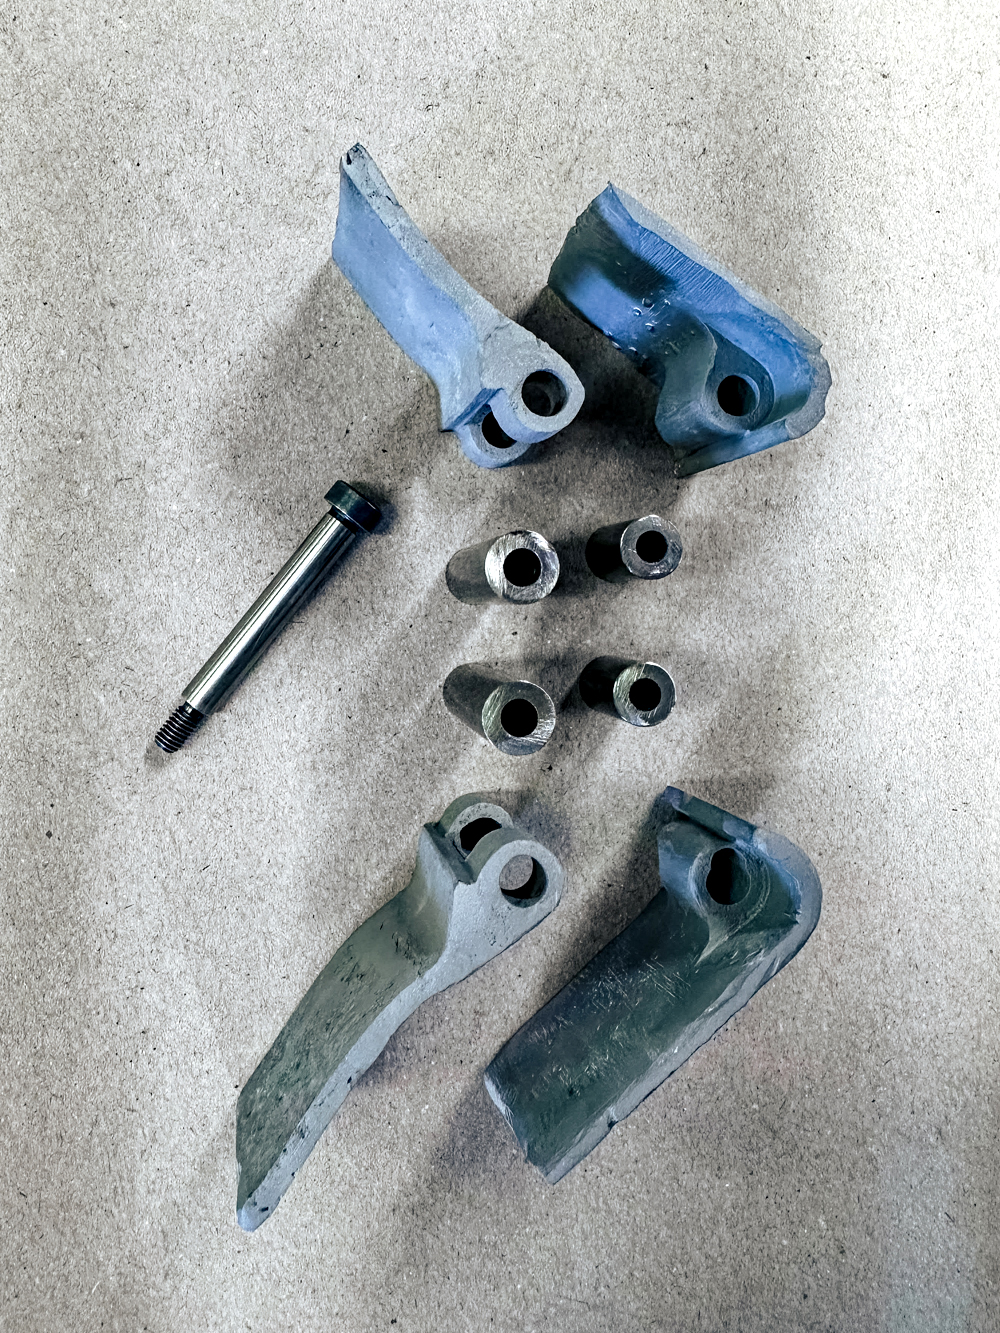
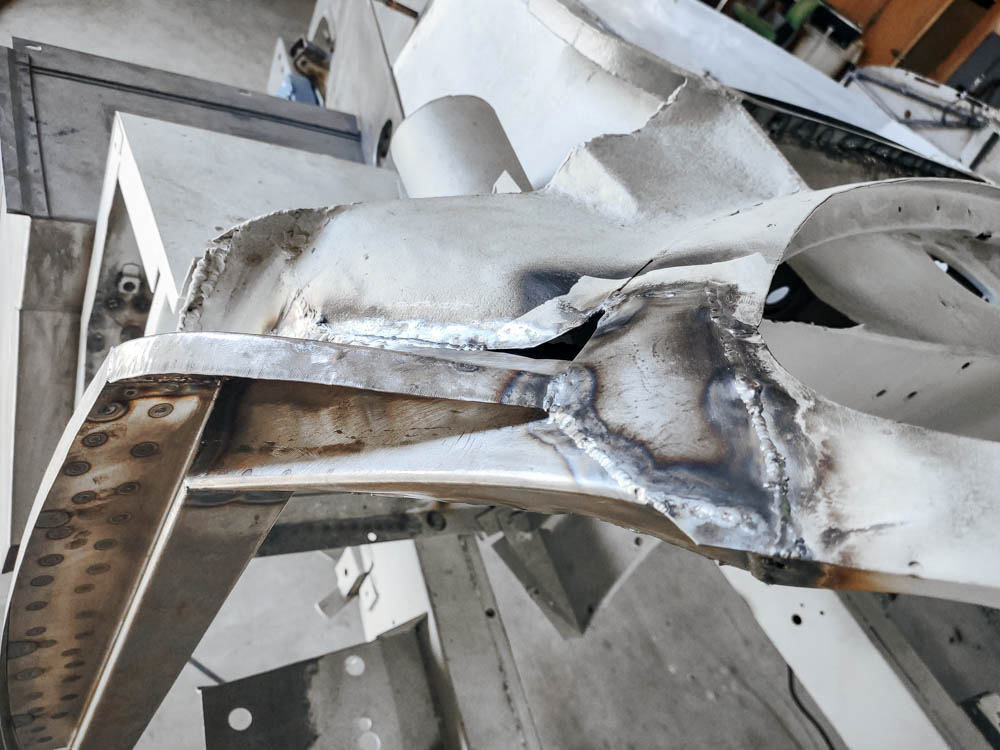
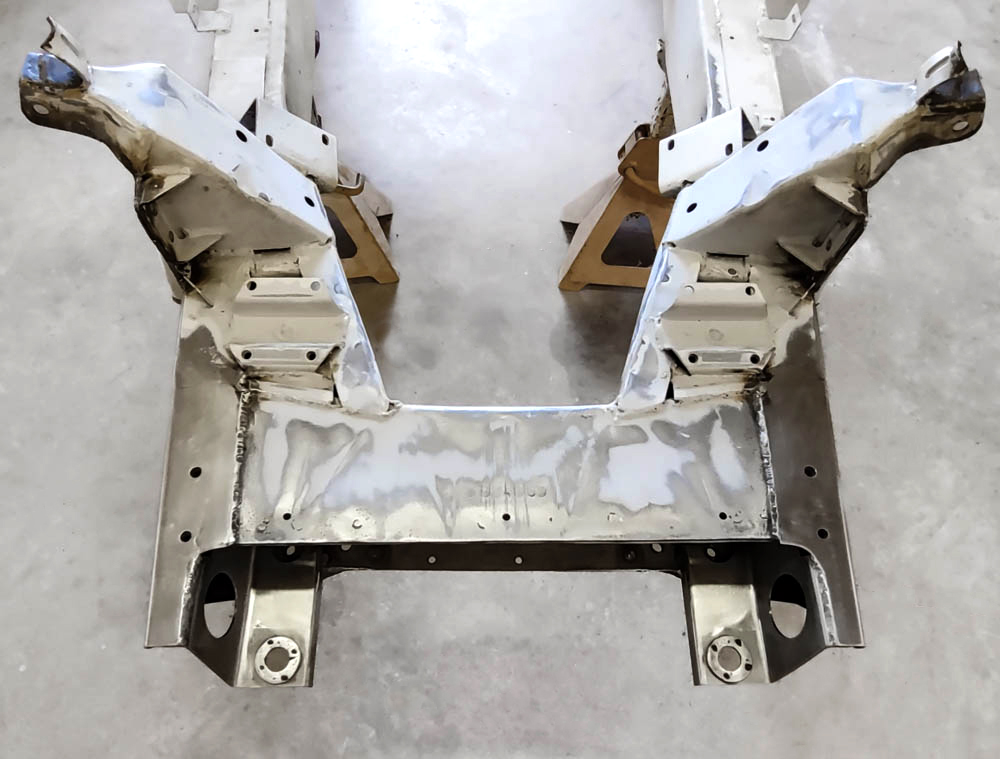
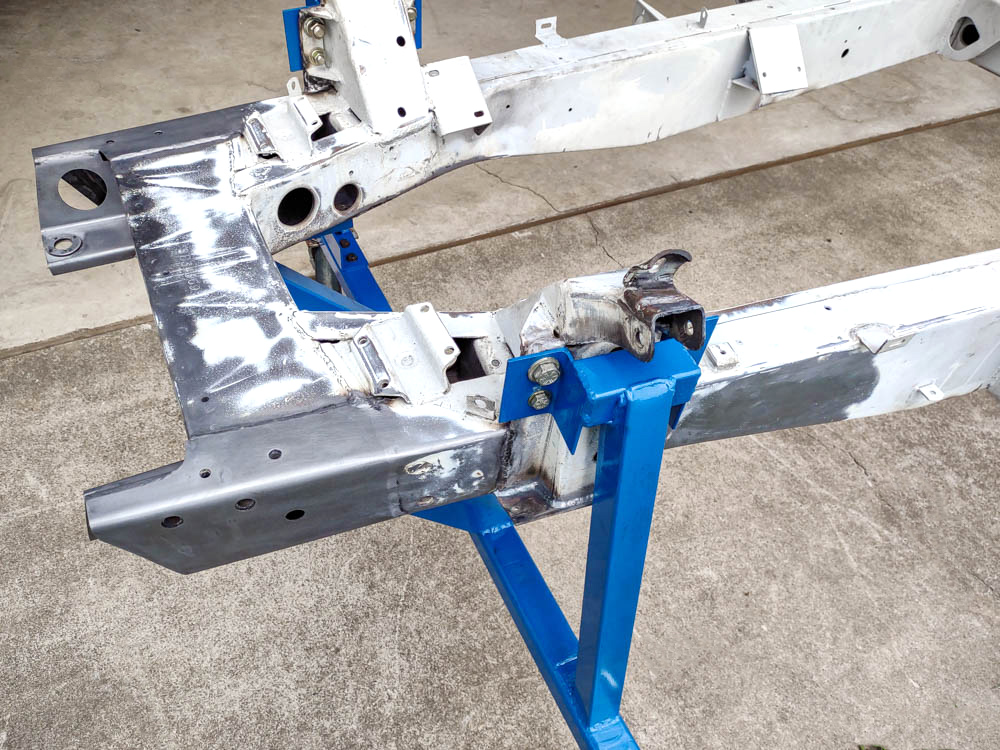
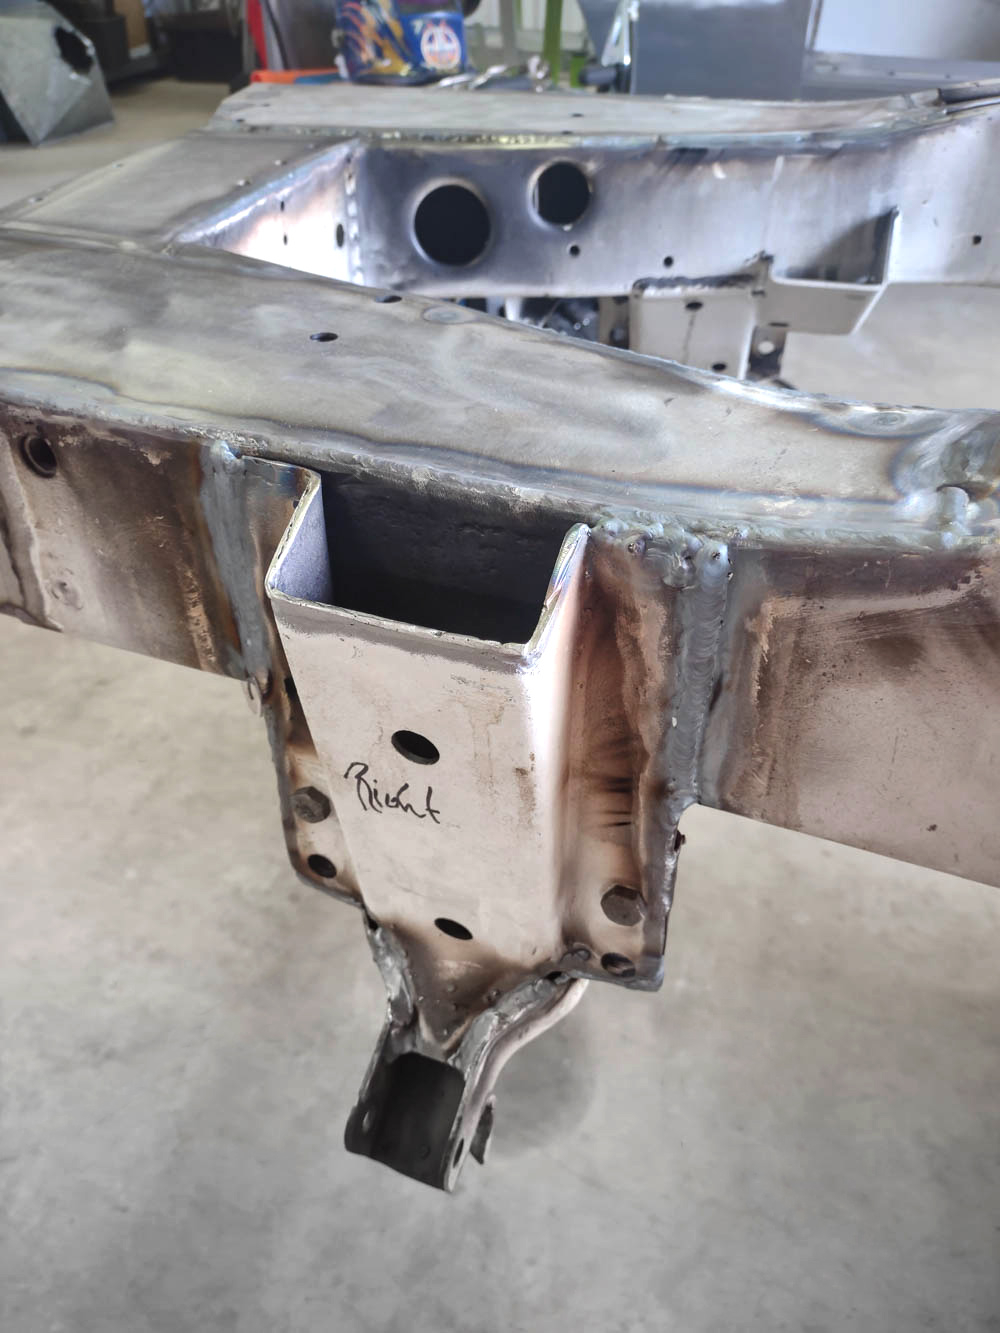
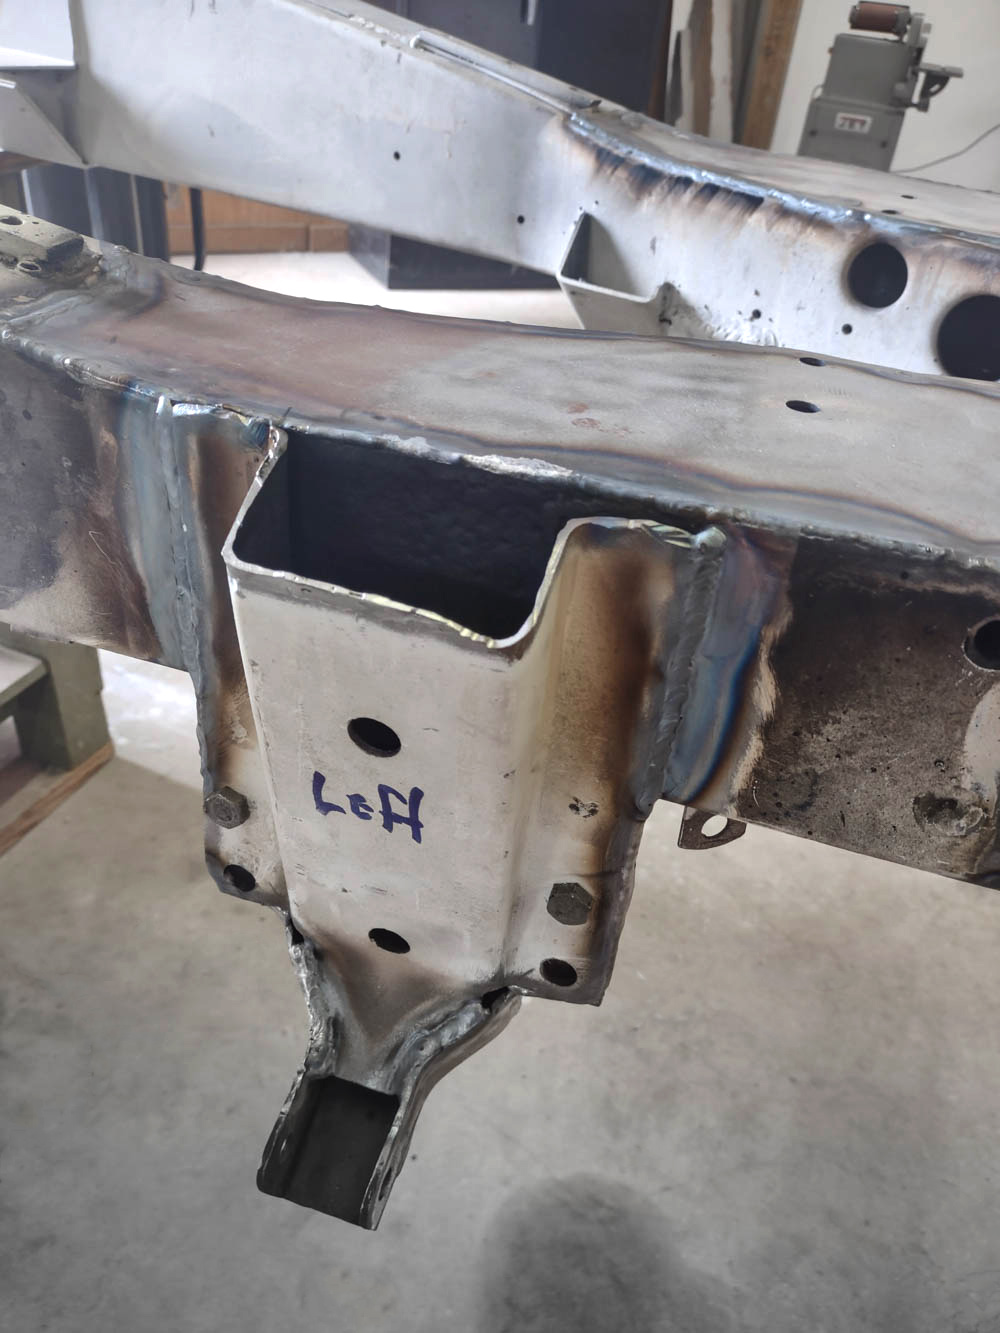
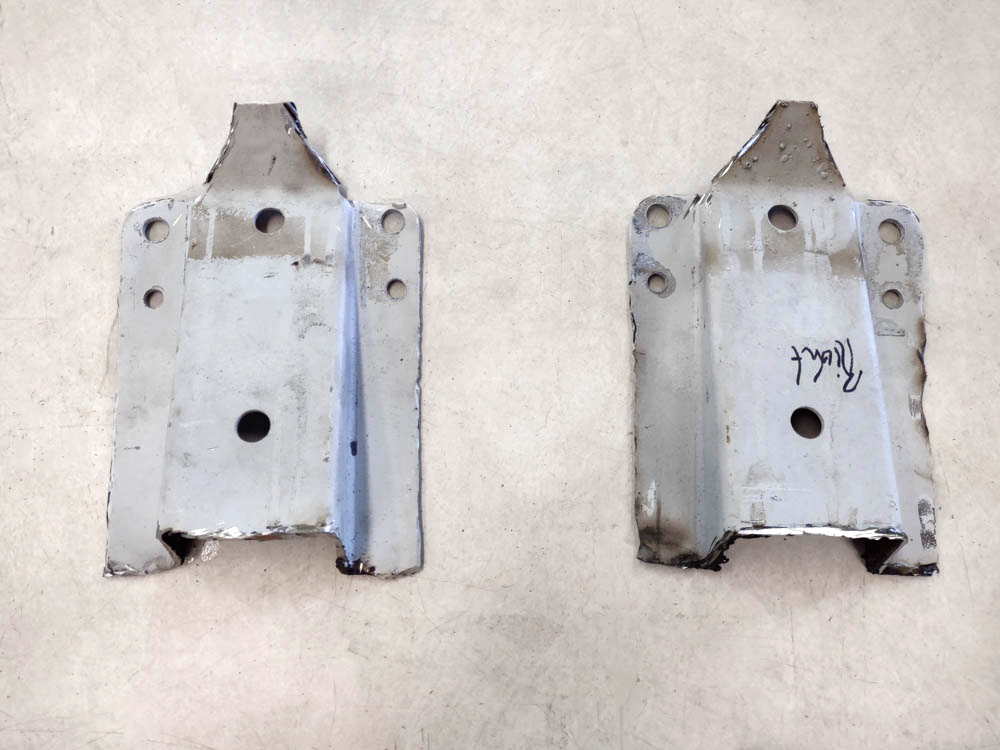
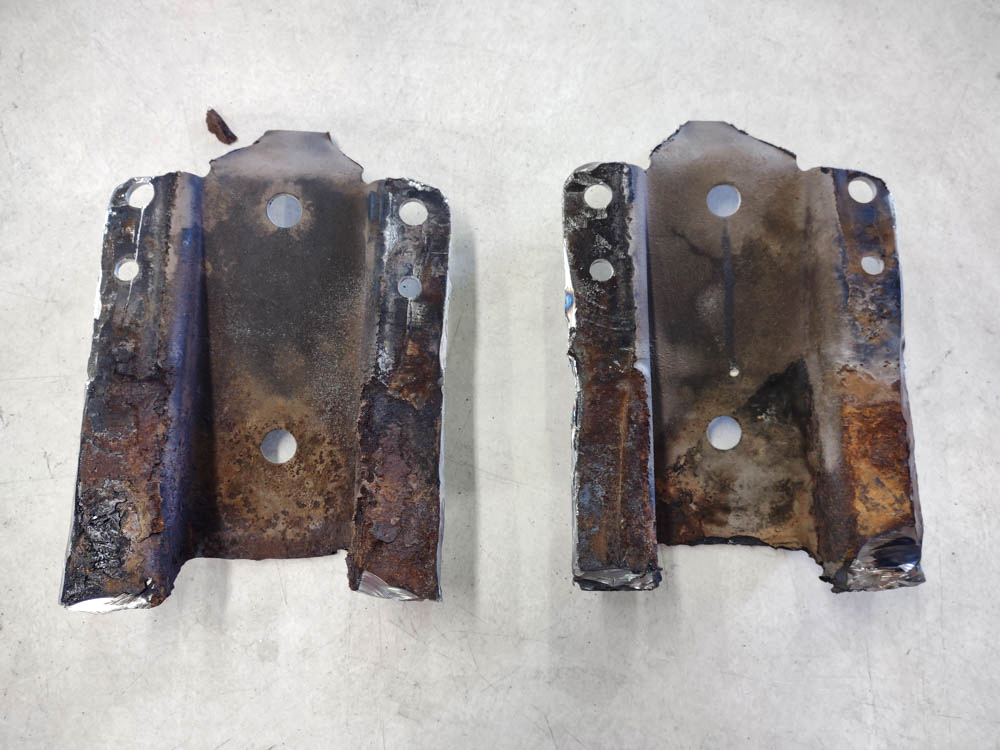
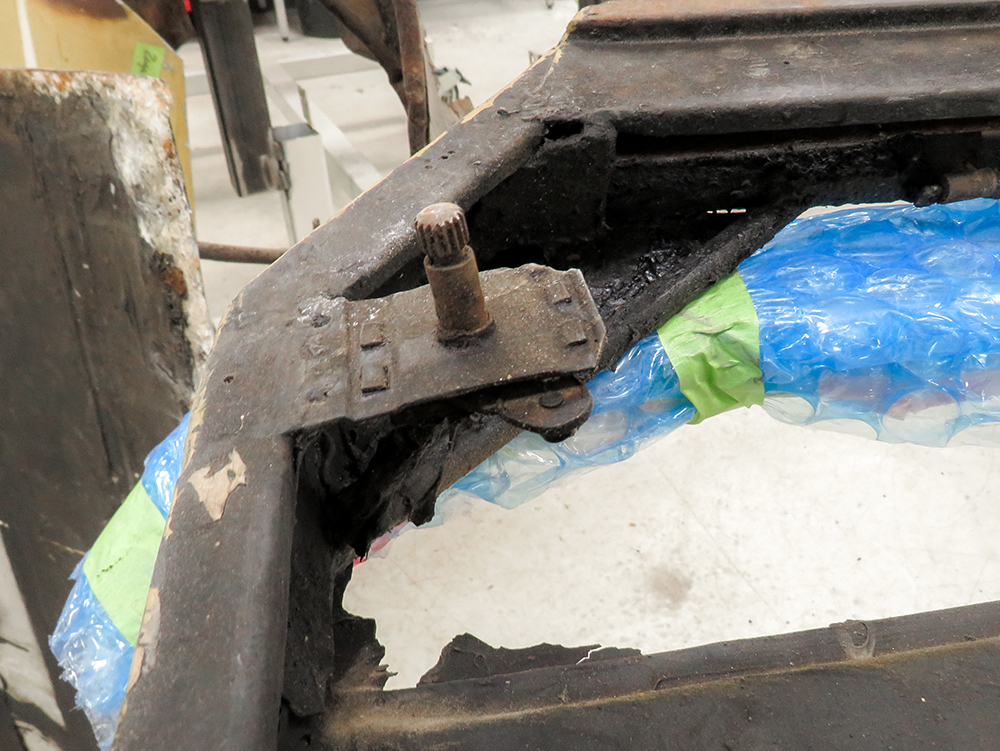
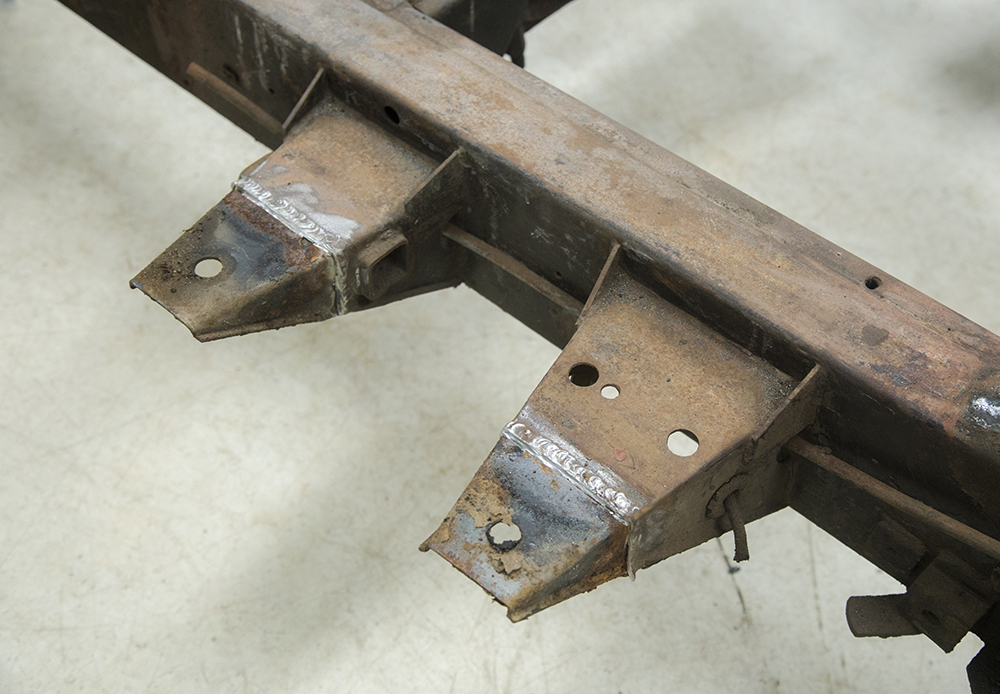
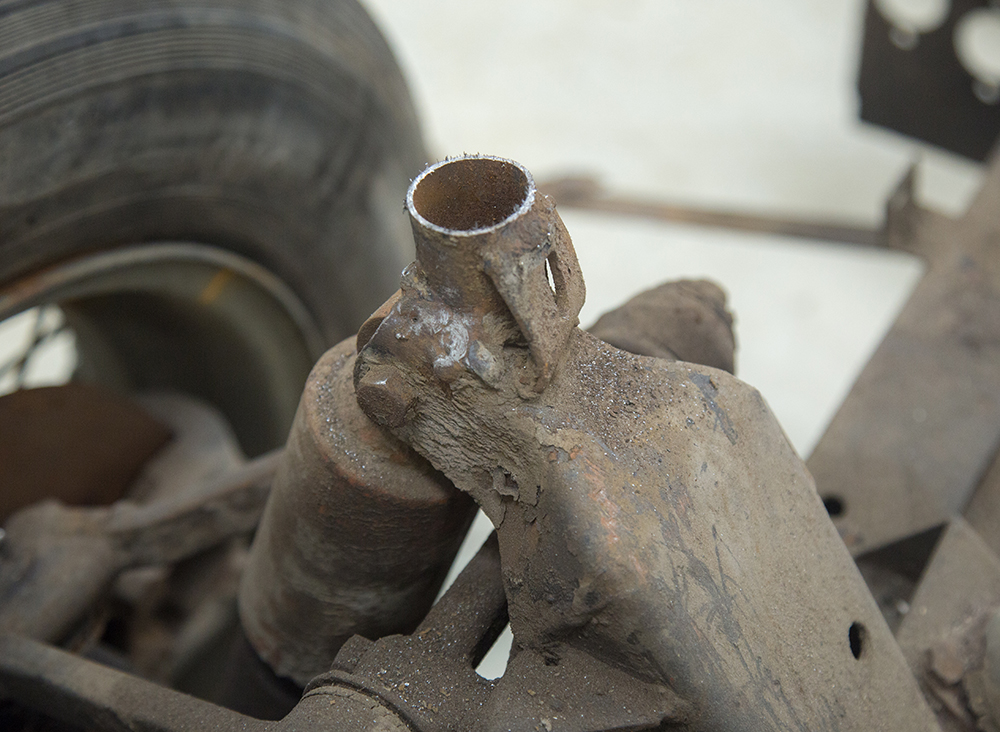
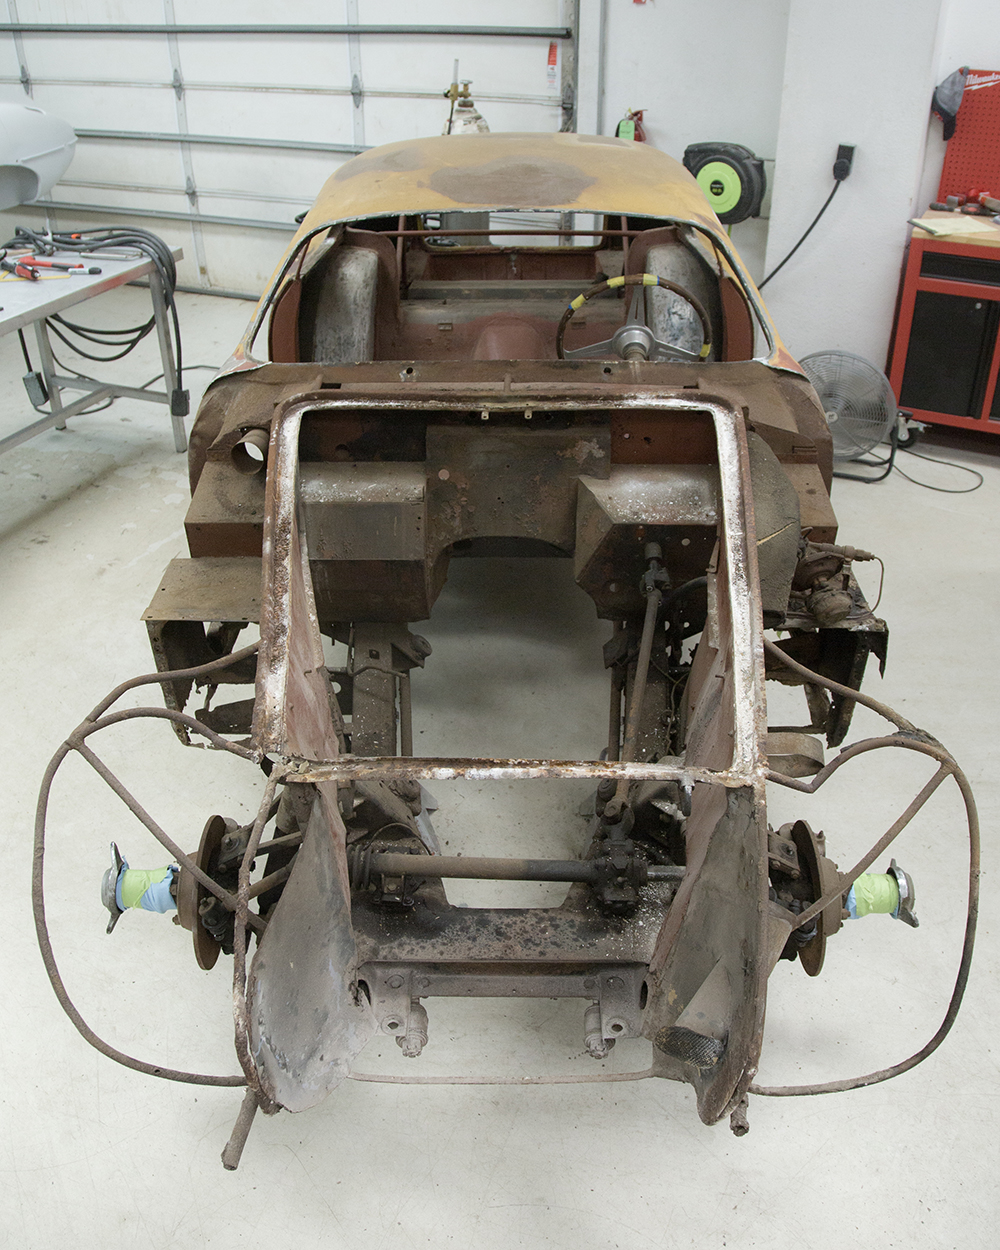
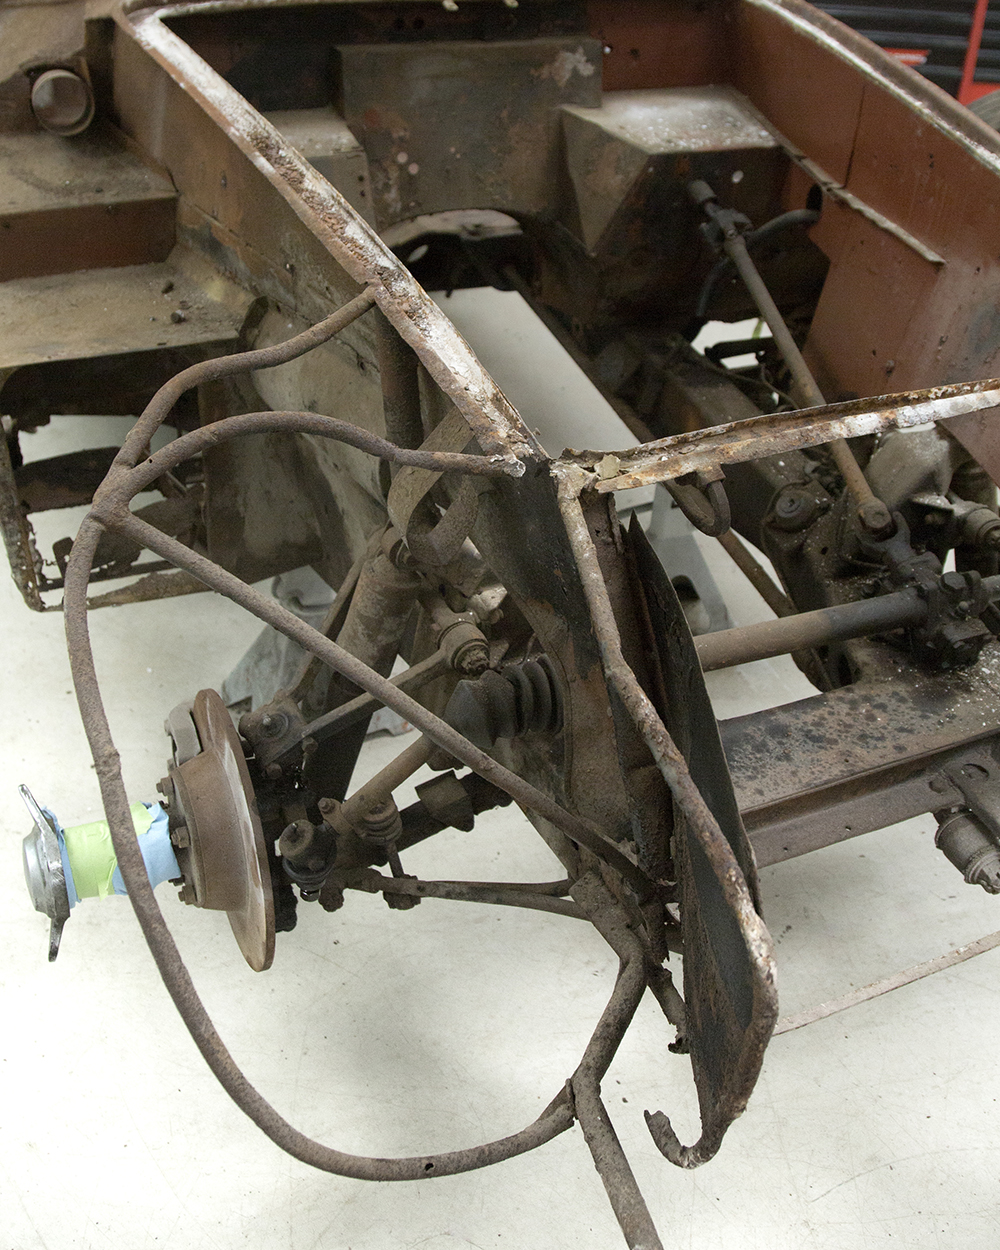
Jaguar XK150 chassis has been slightly modified by Zagato
Extensions have been welded at the top of front
shock towers
April 20, 2020
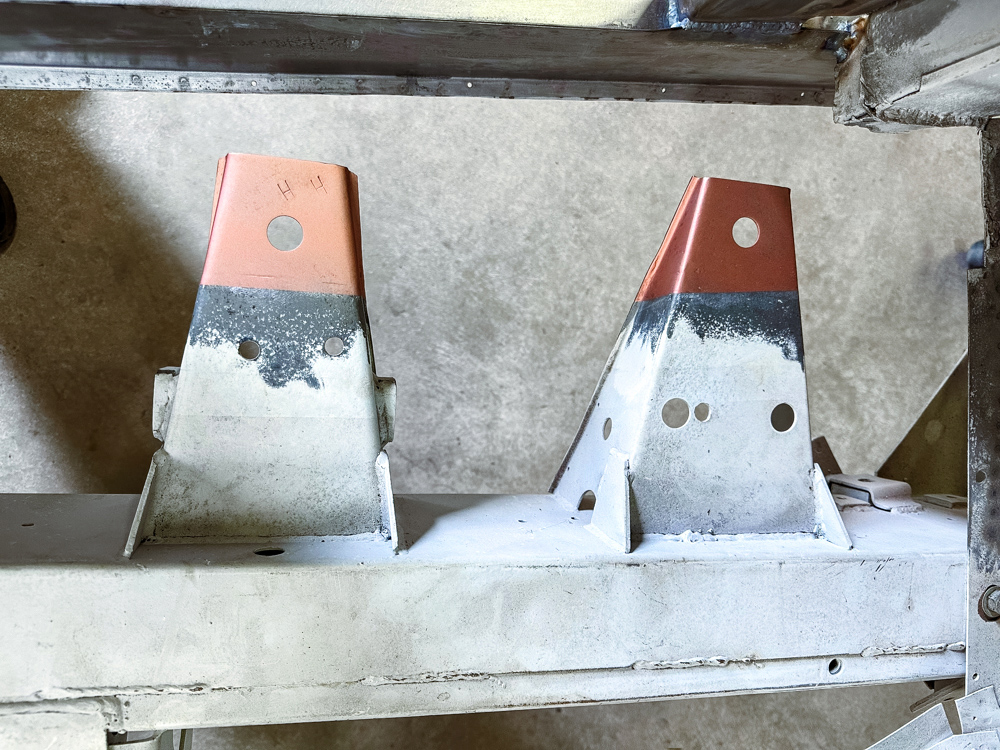
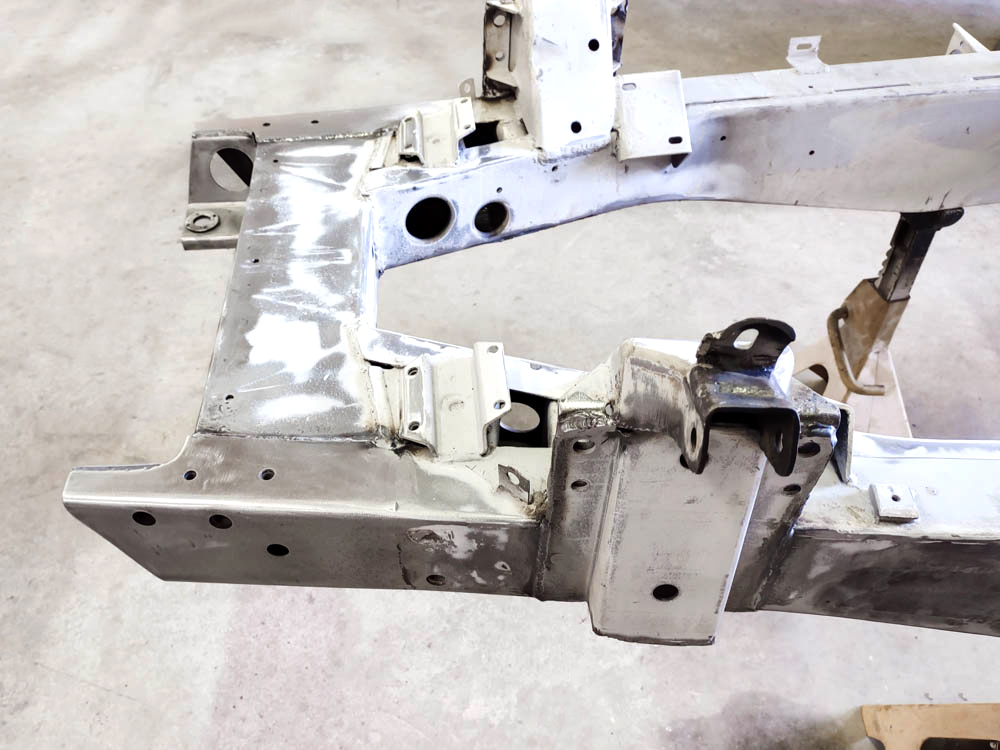
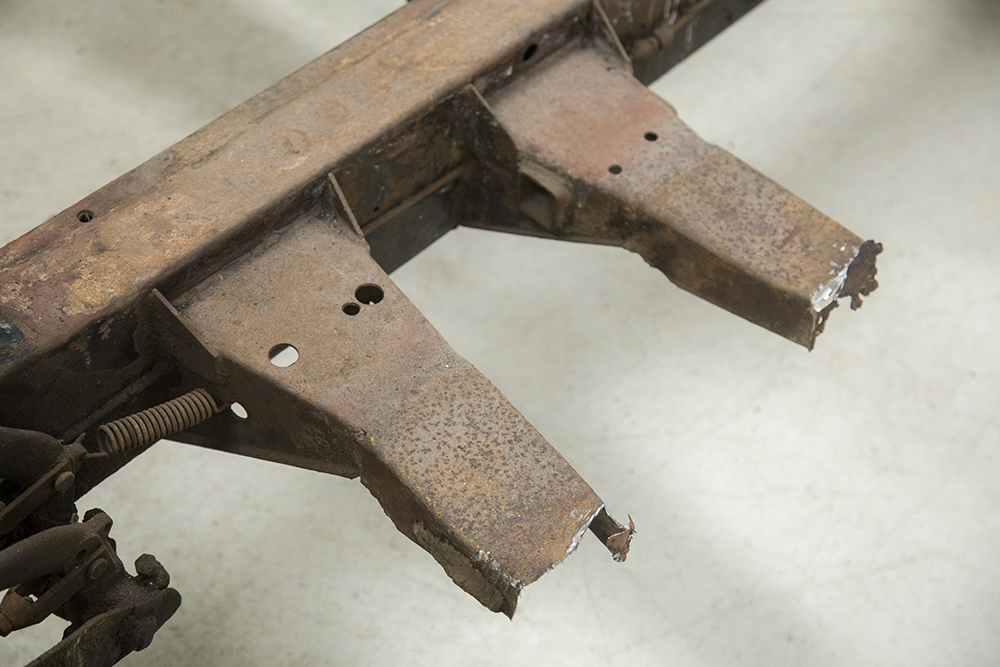
Zagato also welded extensions to the body
support brackets
April 20, 2020
April 20, 2020
April 20, 2020
April 20, 2020
April 20, 2020
April 20, 2020
April 13, 2020
De-skinning the Zagato roof and rocker panels.
April 13, 2020
April 13, 2020
April 13, 2020
April 13, 2020
April 13, 2020
April 13, 2020
April 13, 2020
April 13, 2020
April 13, 2020
April 13, 2020
April 13, 2020
De-skinning the rear clip.
April 13, 2020
April 7, 2020
April 7, 2020
April 7, 2020
April 7, 2020
April 7, 2020
April 7, 2020
April 7, 2020
April 7, 2020
April 7, 2020
April 7, 2020
April 7, 2020
April 7, 2020
April 7, 2020
April 7, 2020
April 7, 2020
April 7, 2020
April 7, 2020
April 7, 2020
April 7, 2020
April 7, 2020
April 7, 2020
April 7, 2020
April 7, 2020
April 7, 2020
April 7, 2020
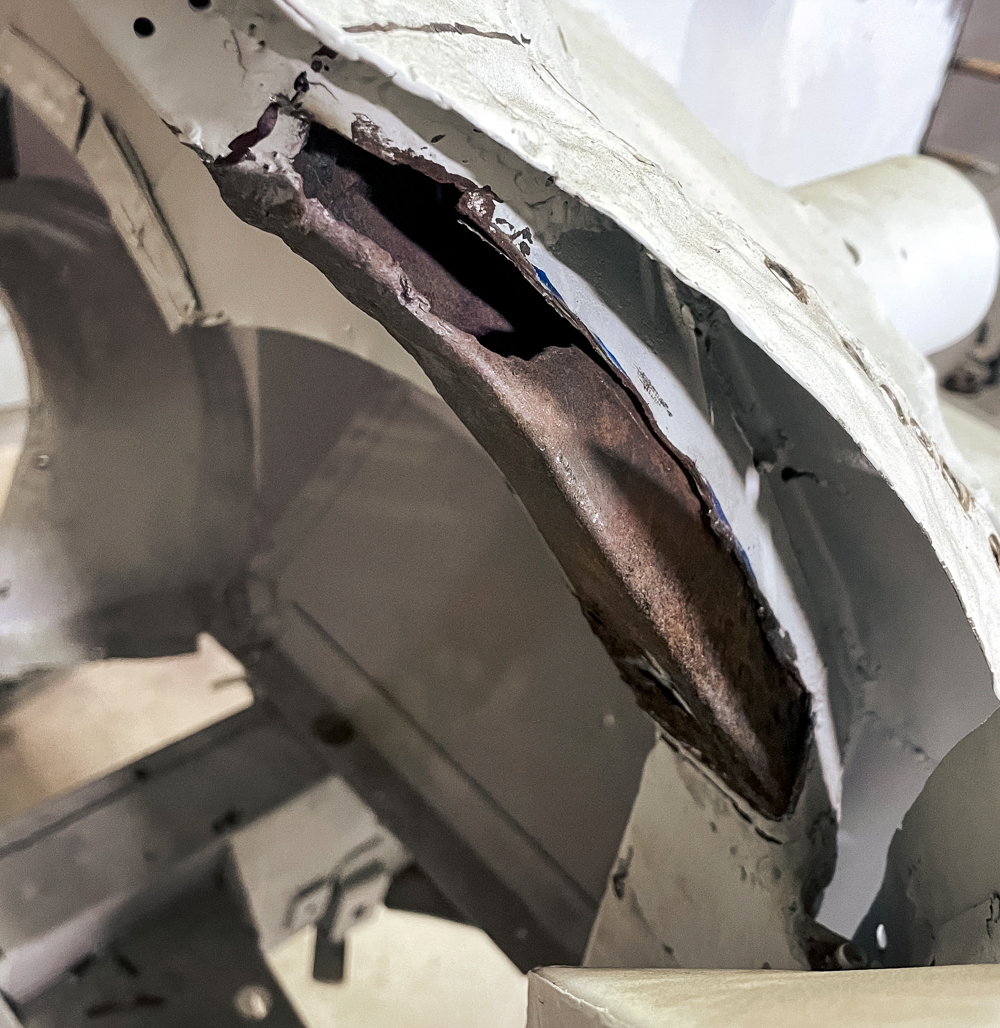
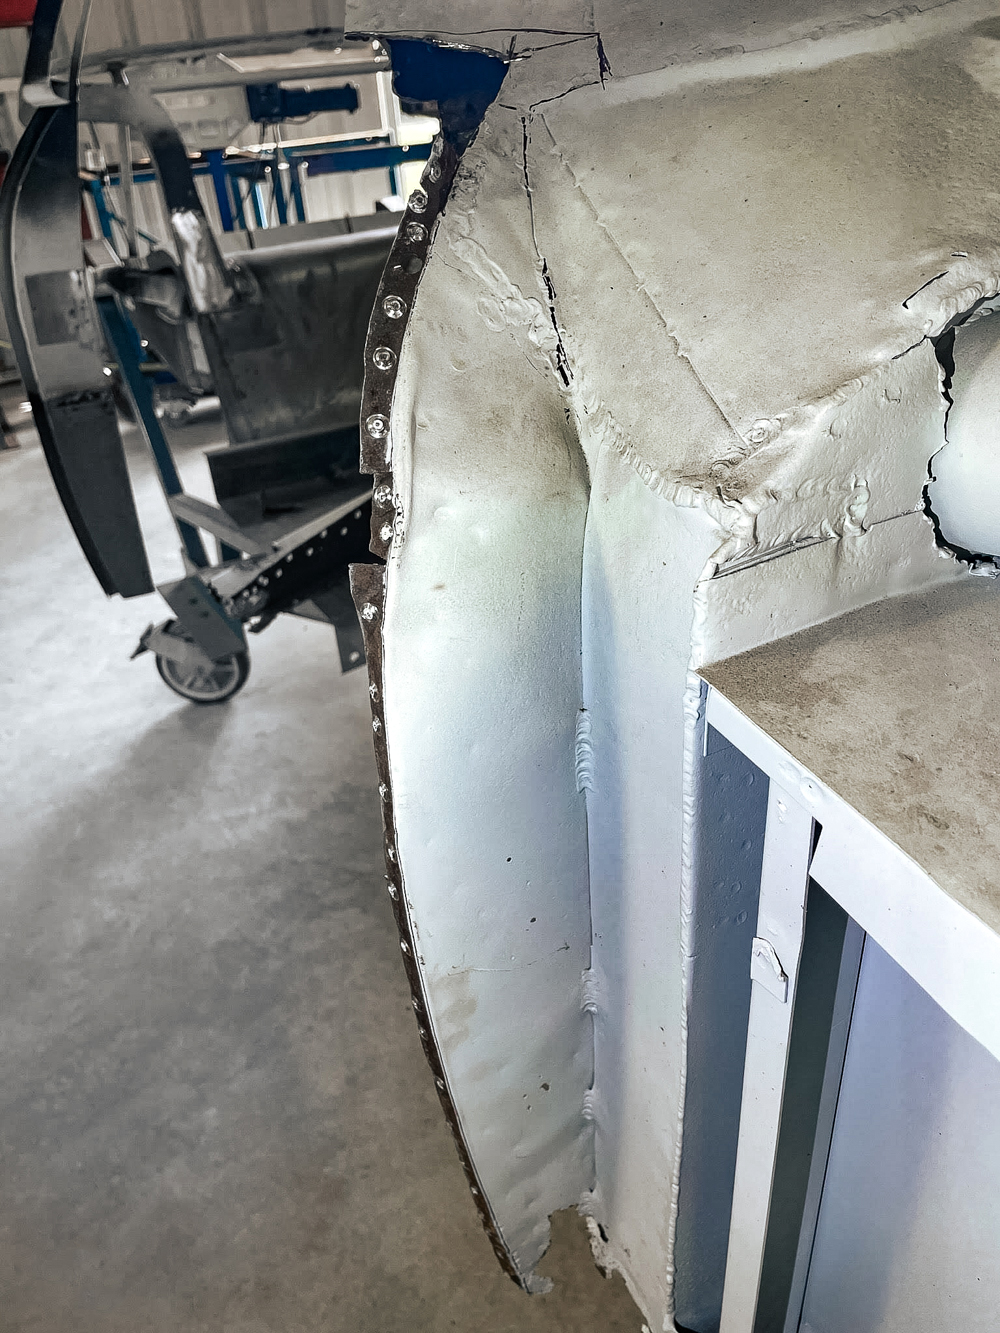
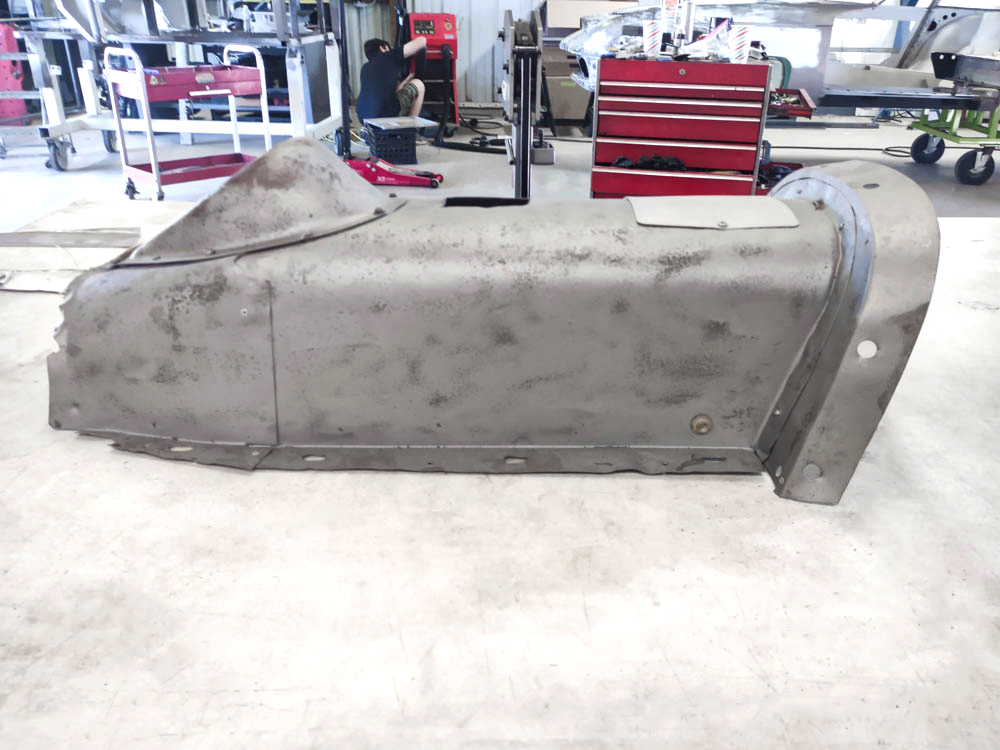
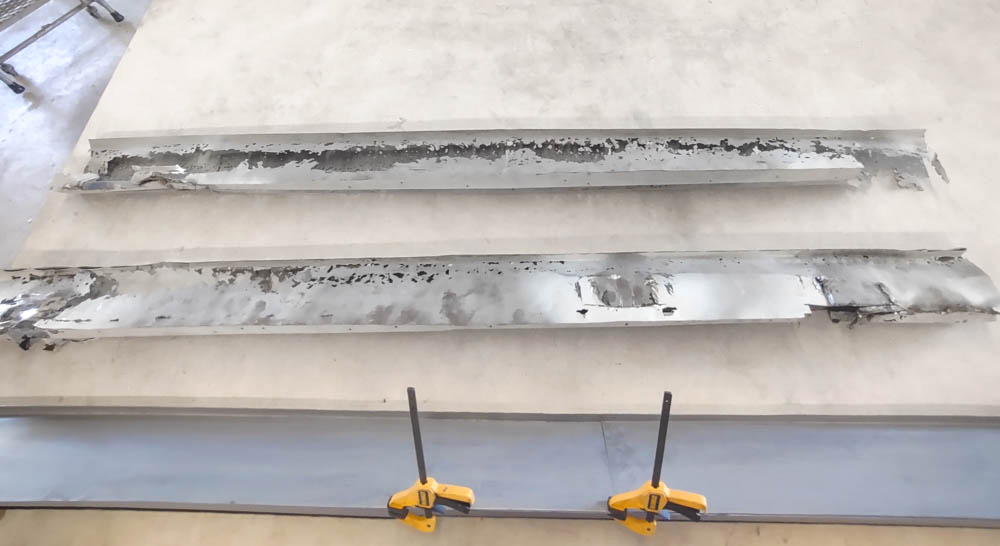
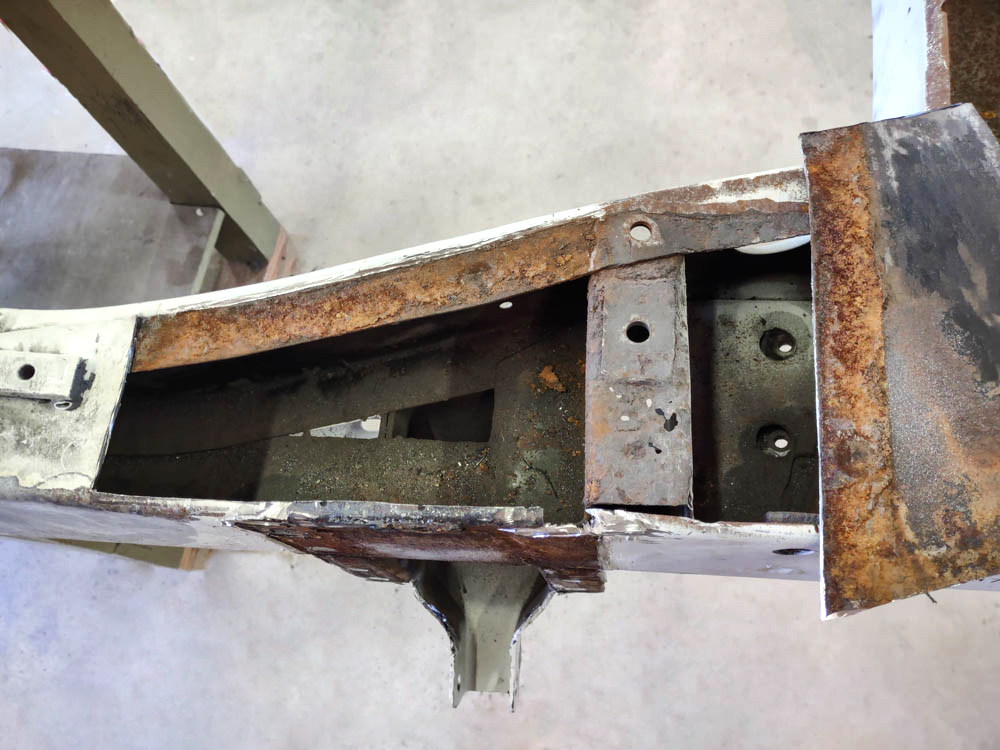
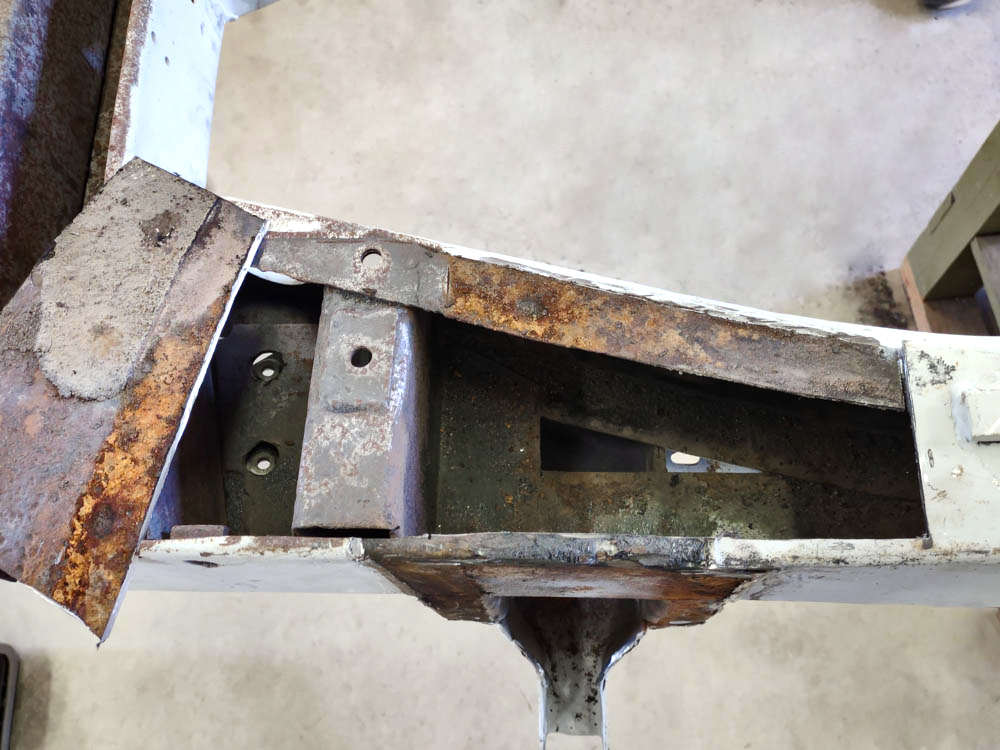
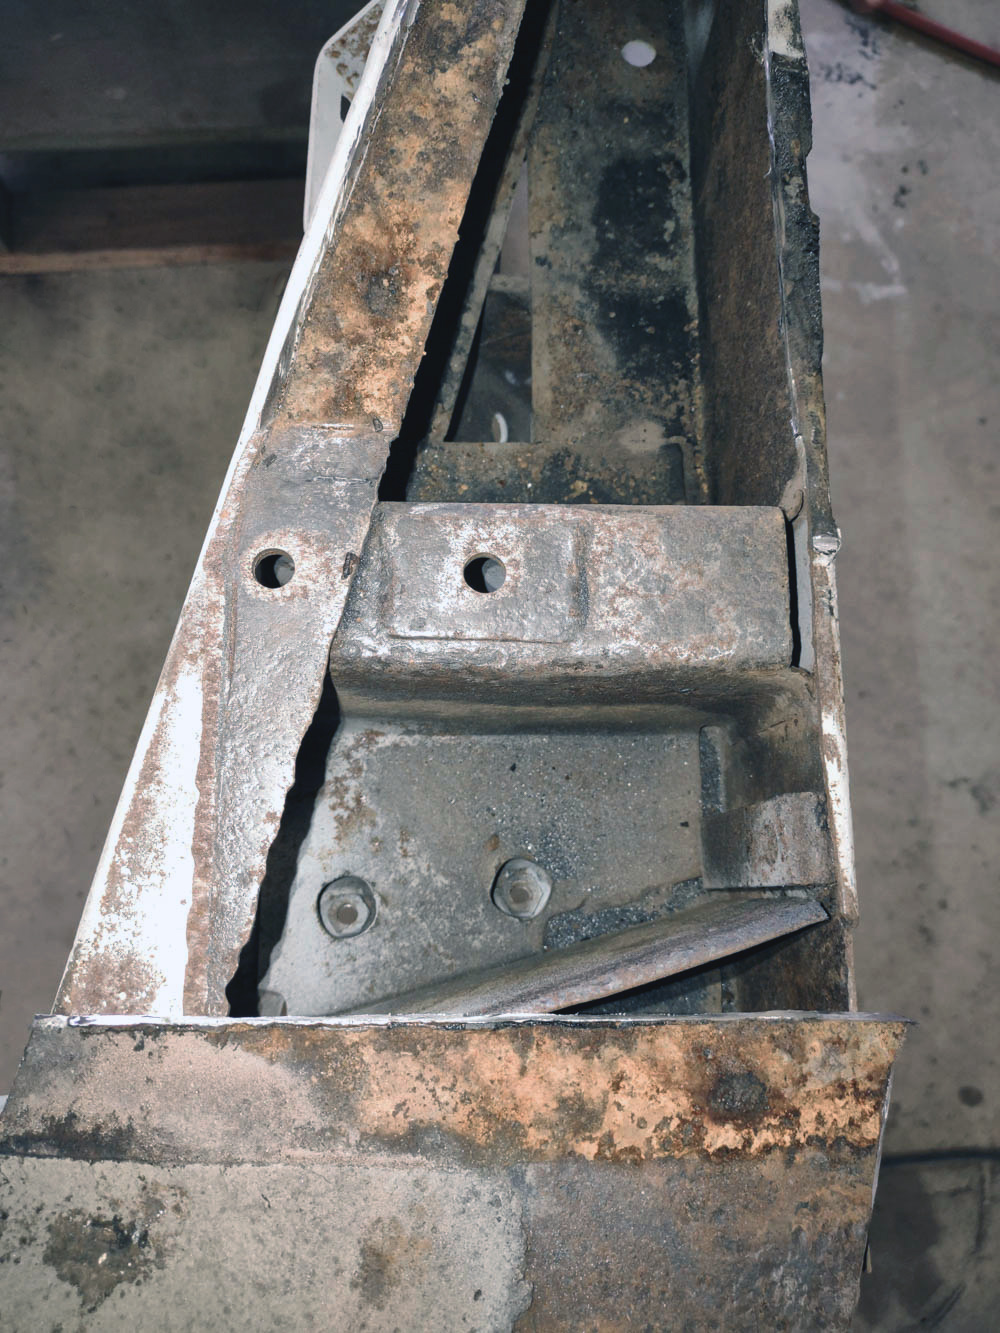
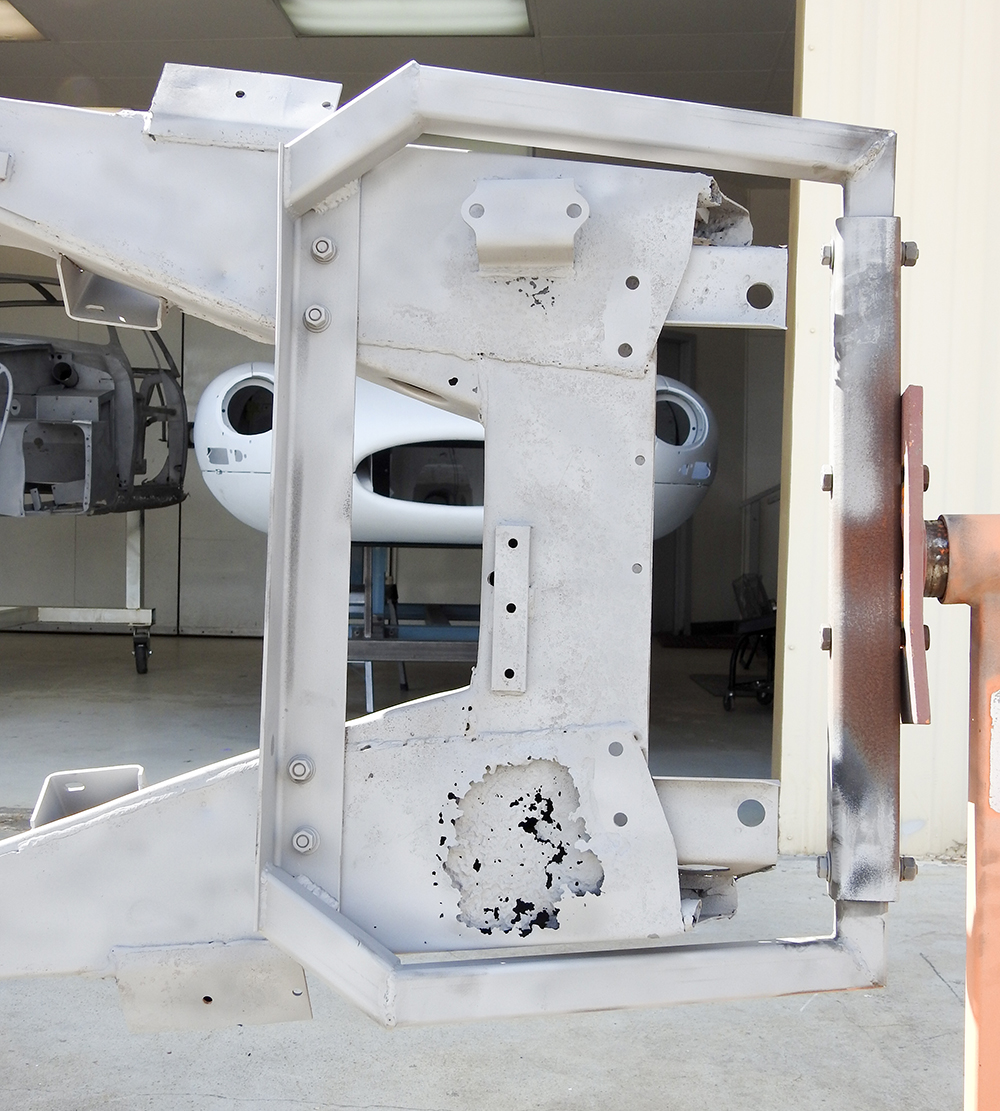
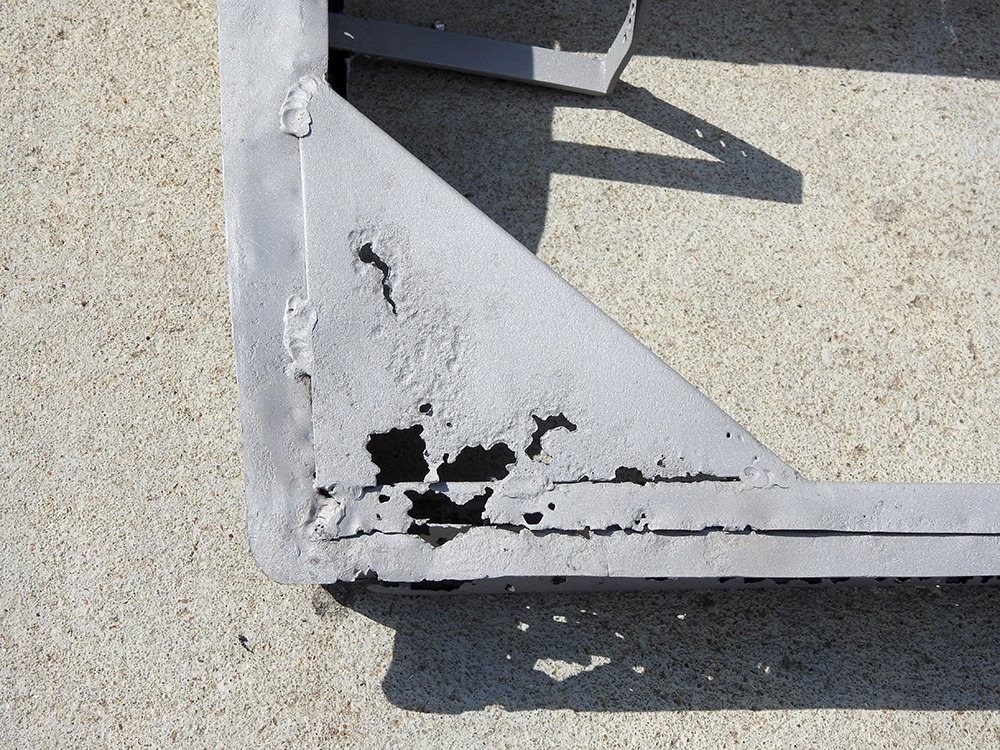
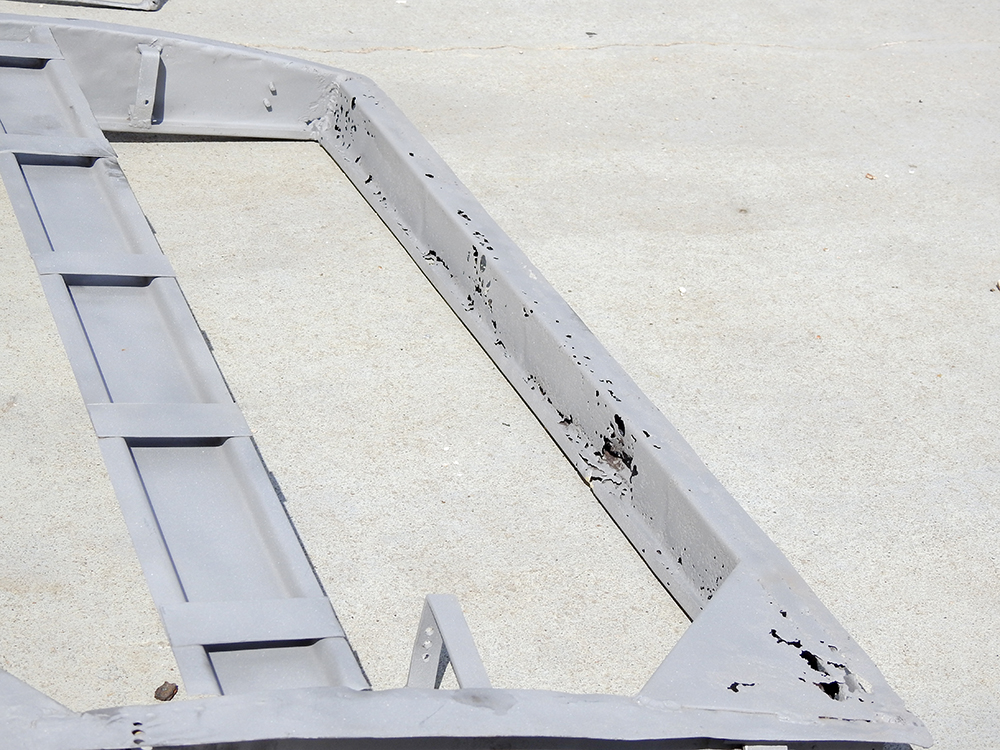
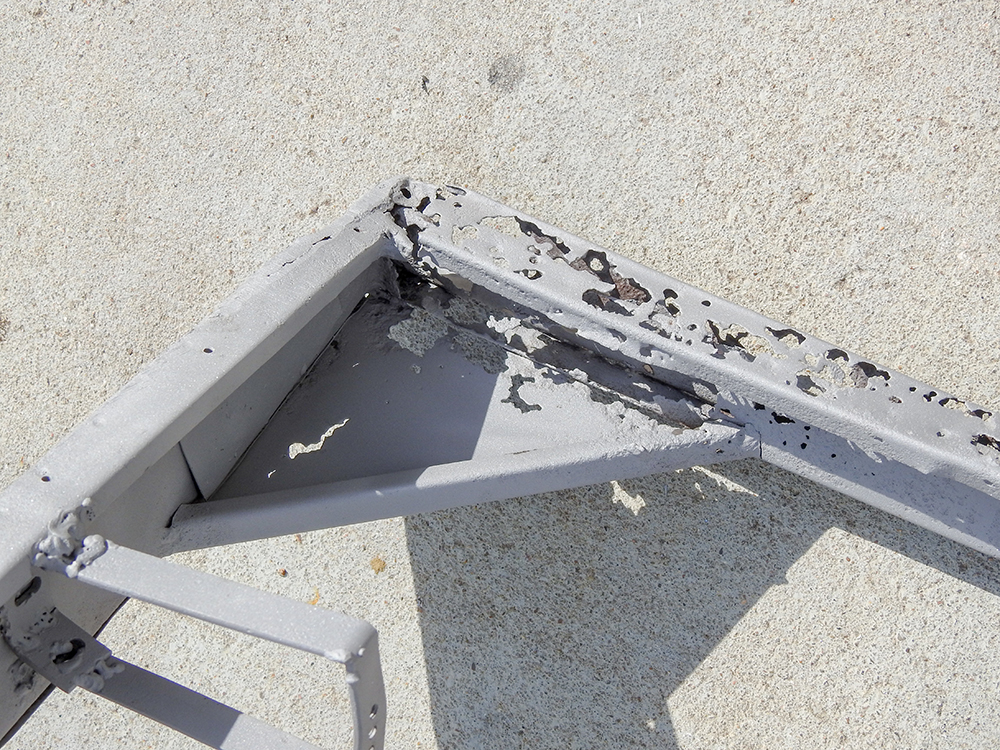
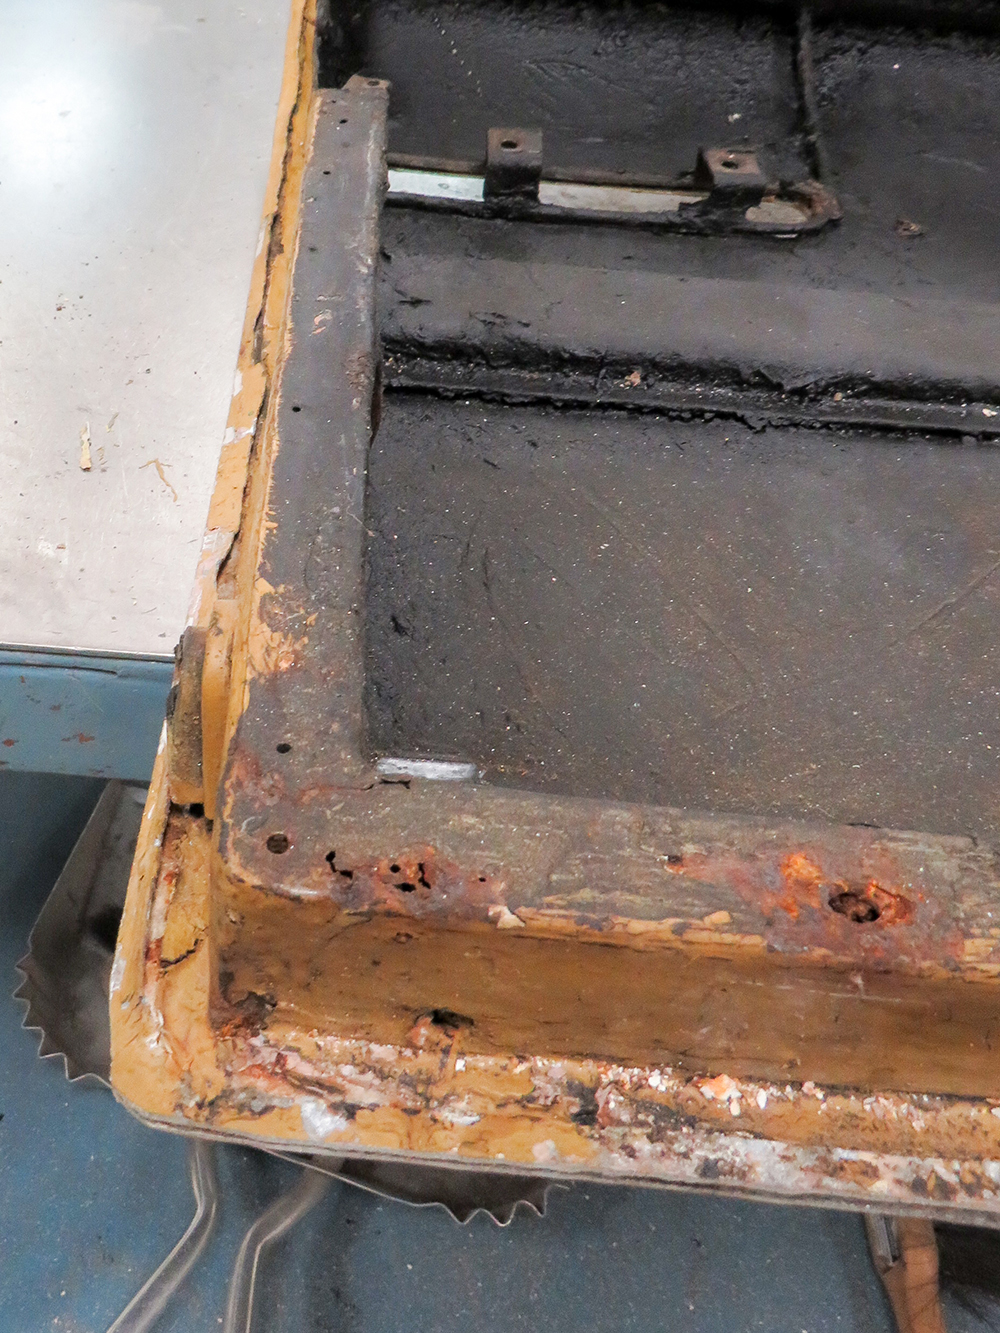
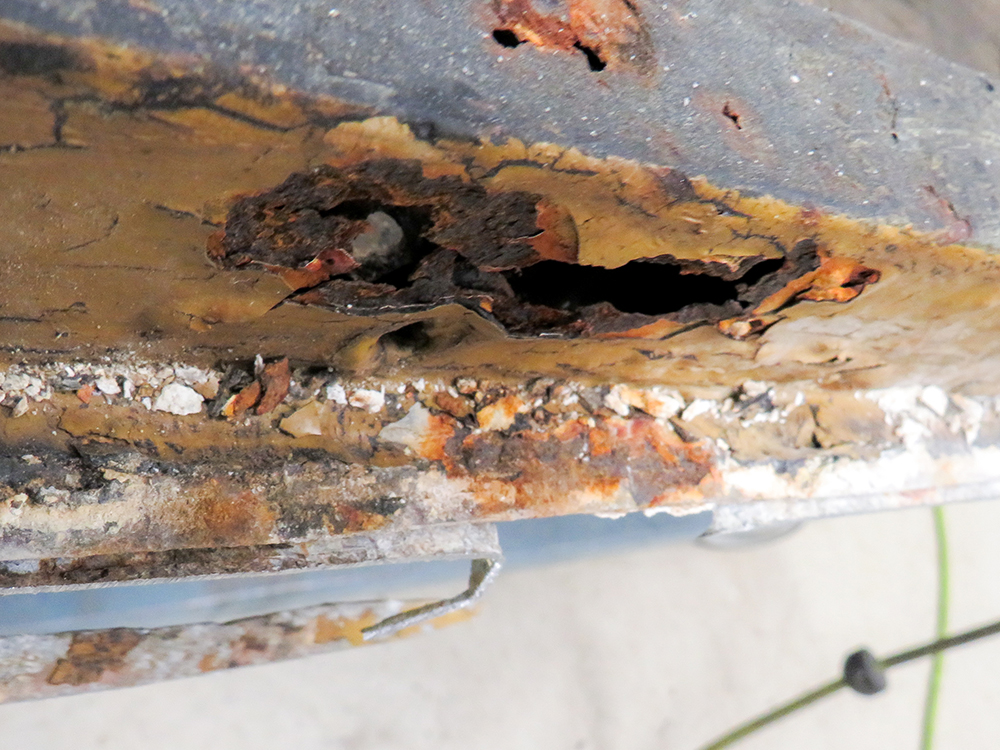
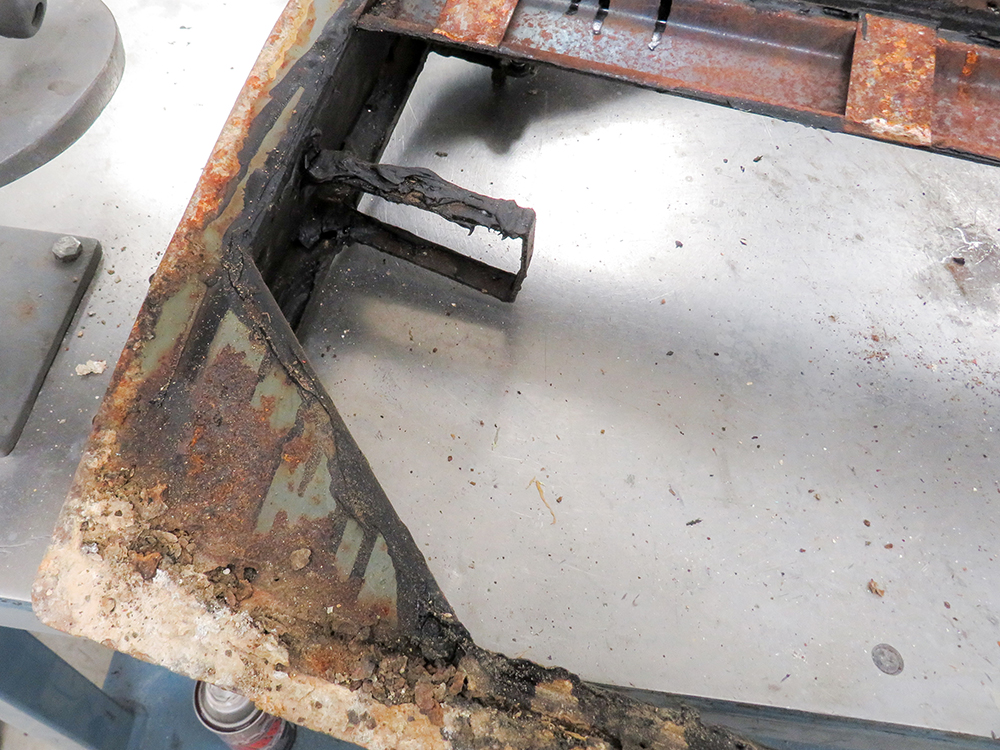
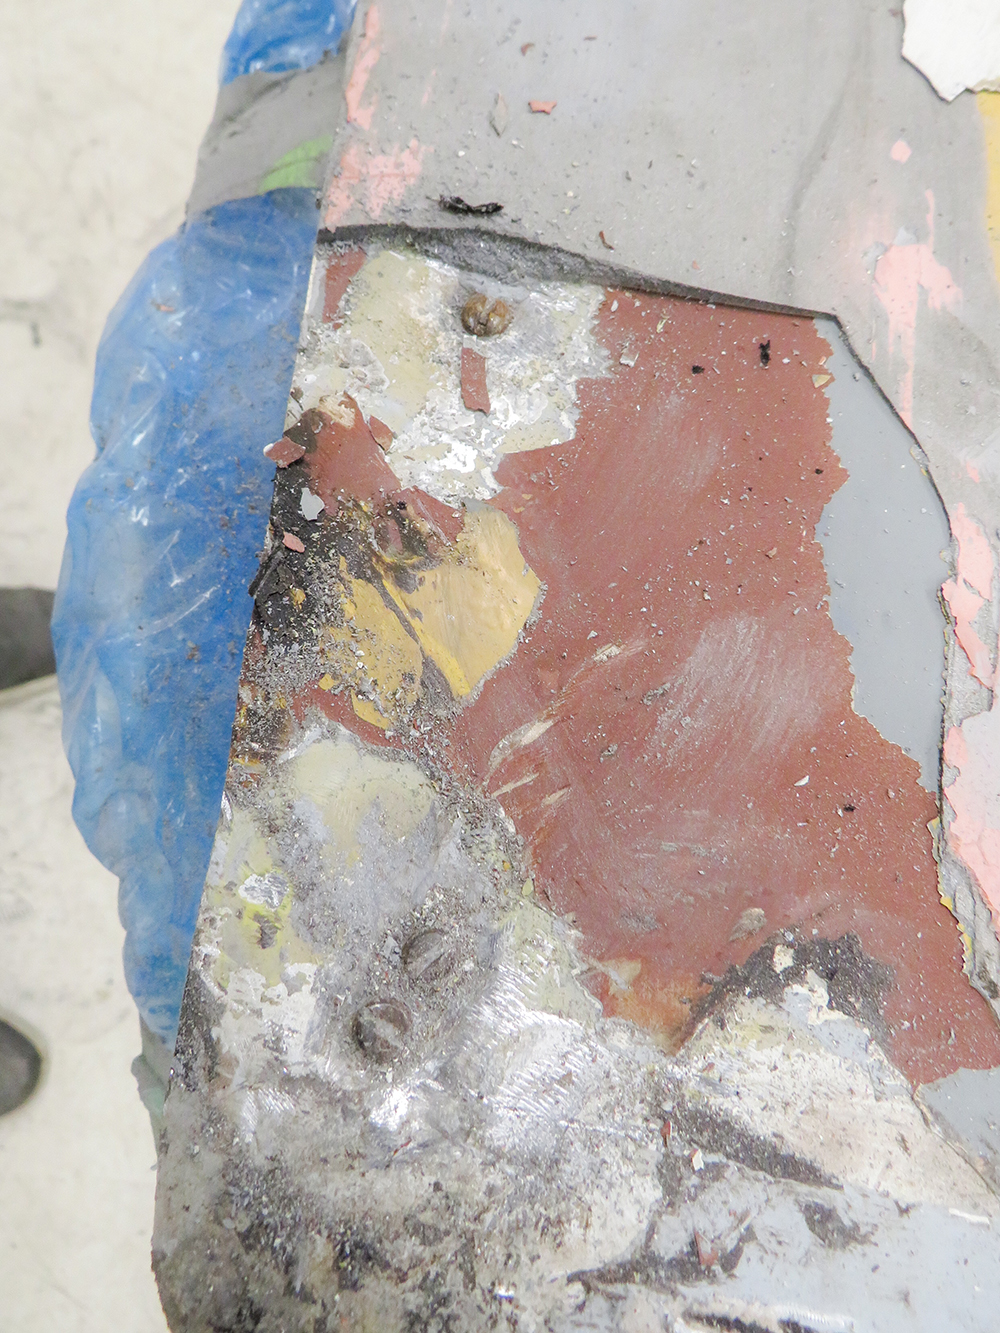
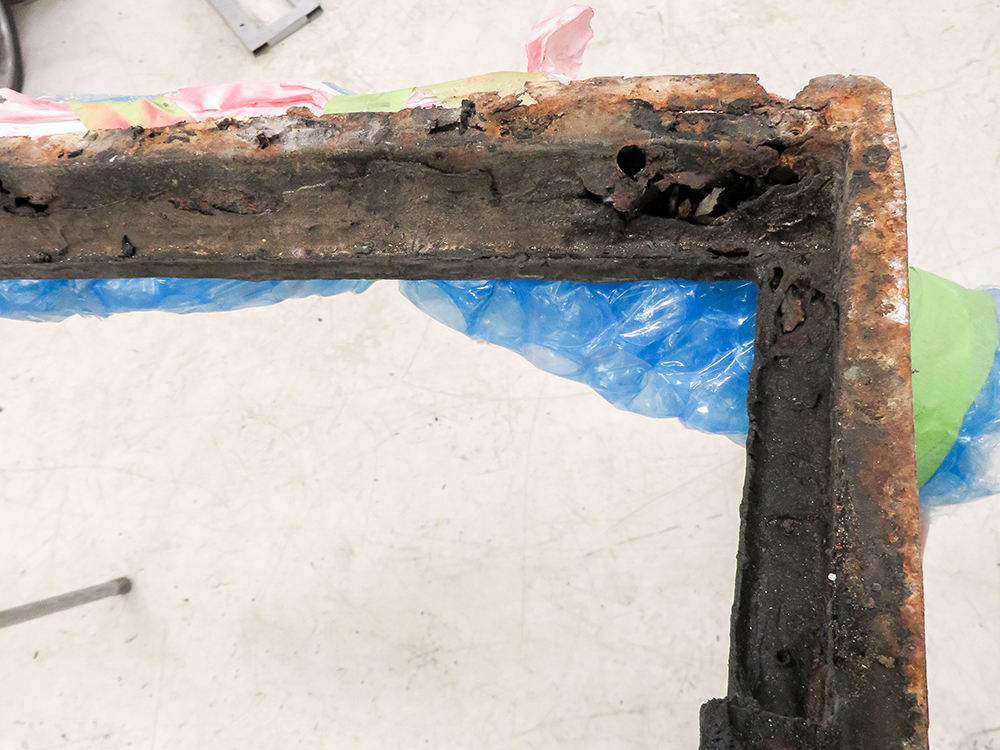
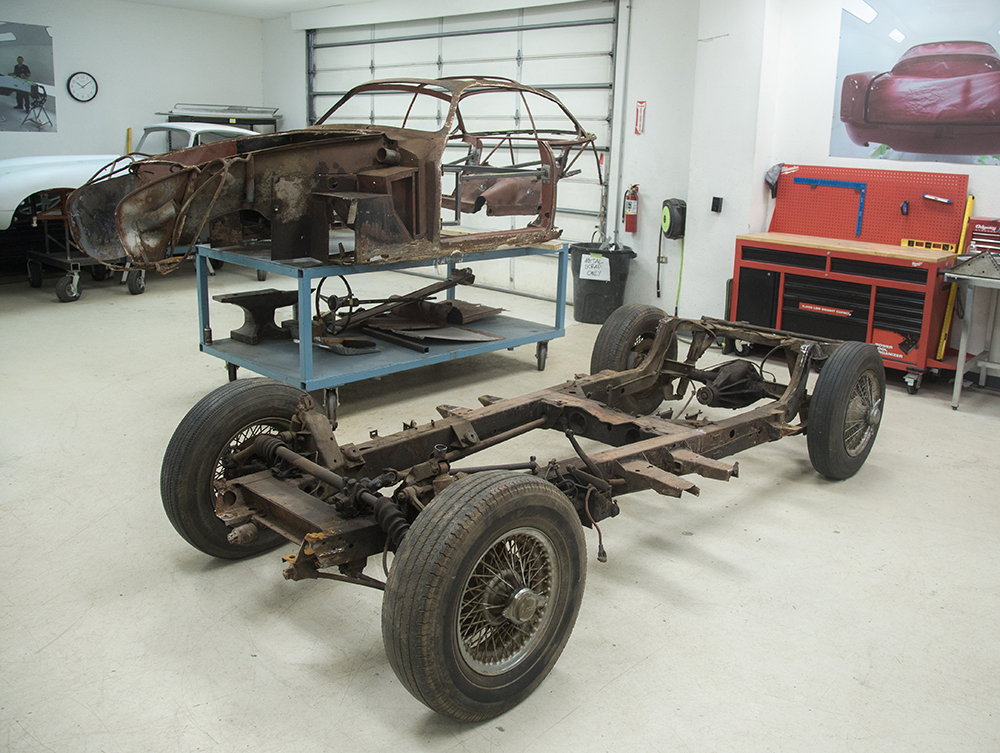
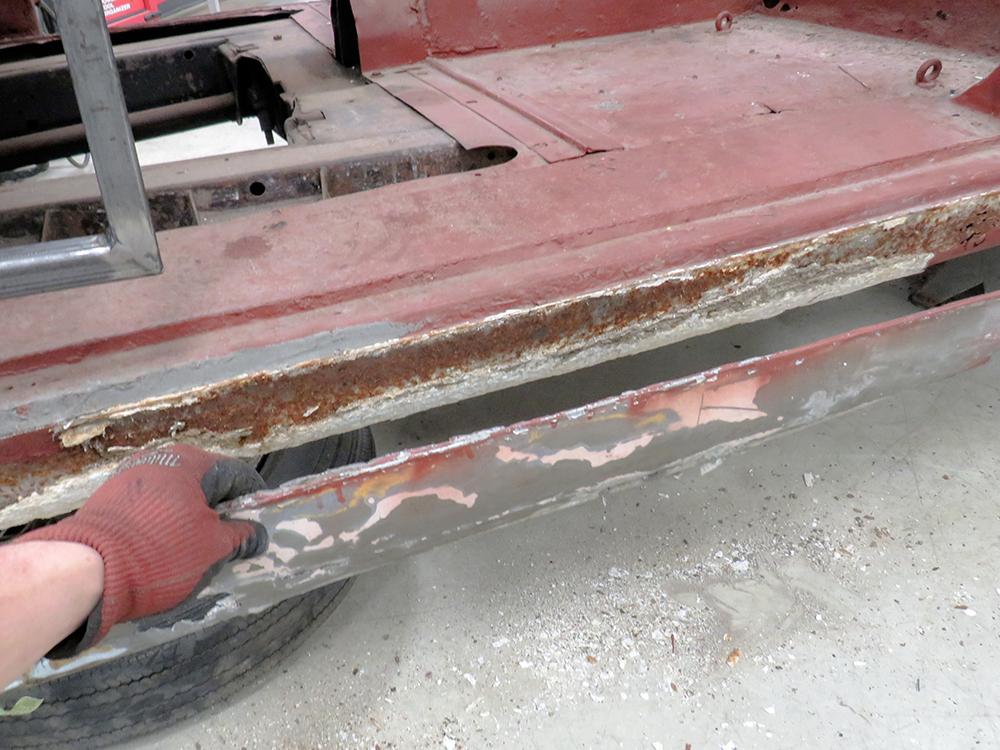
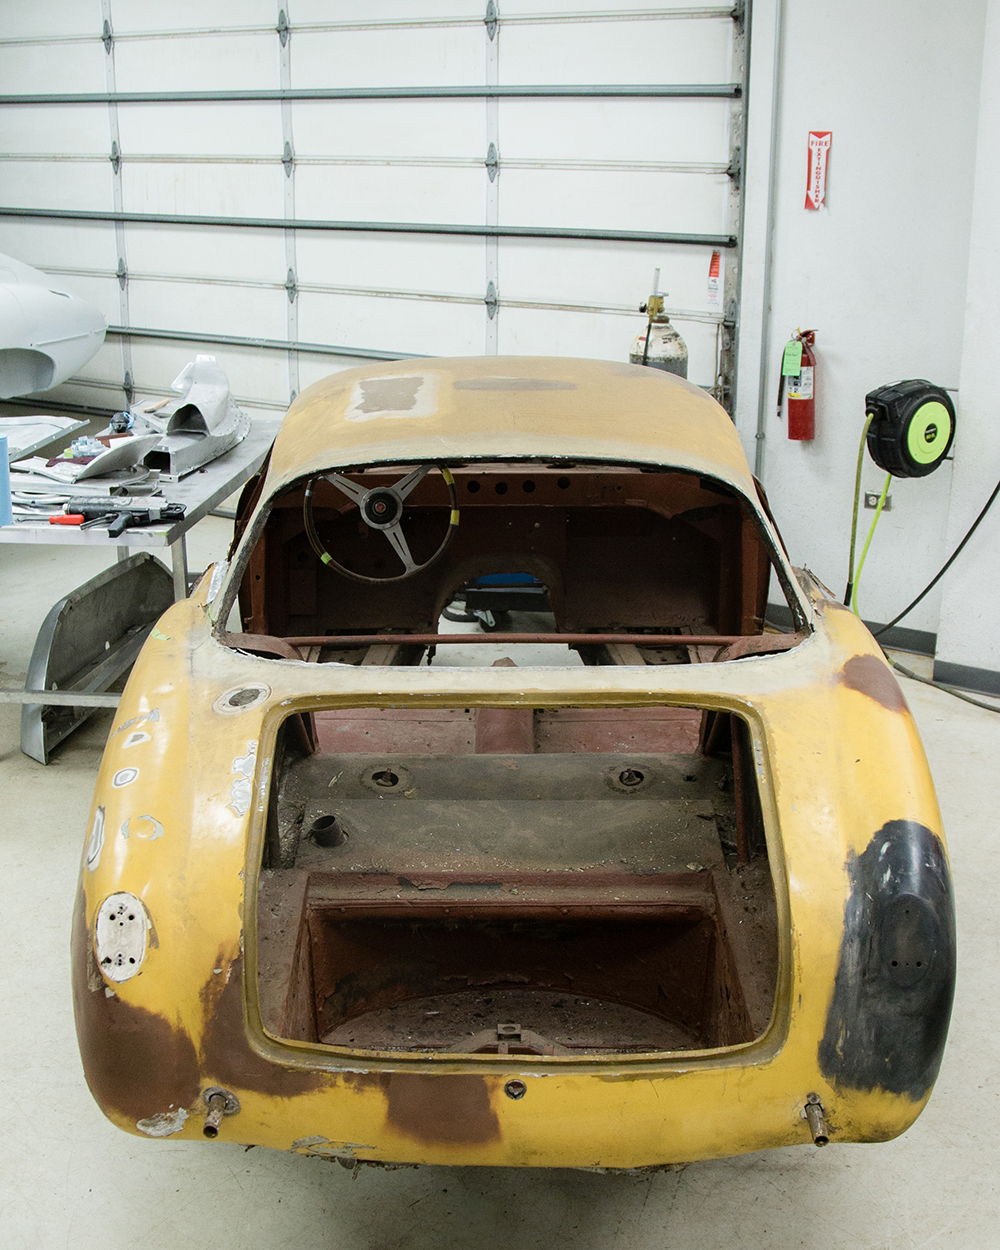
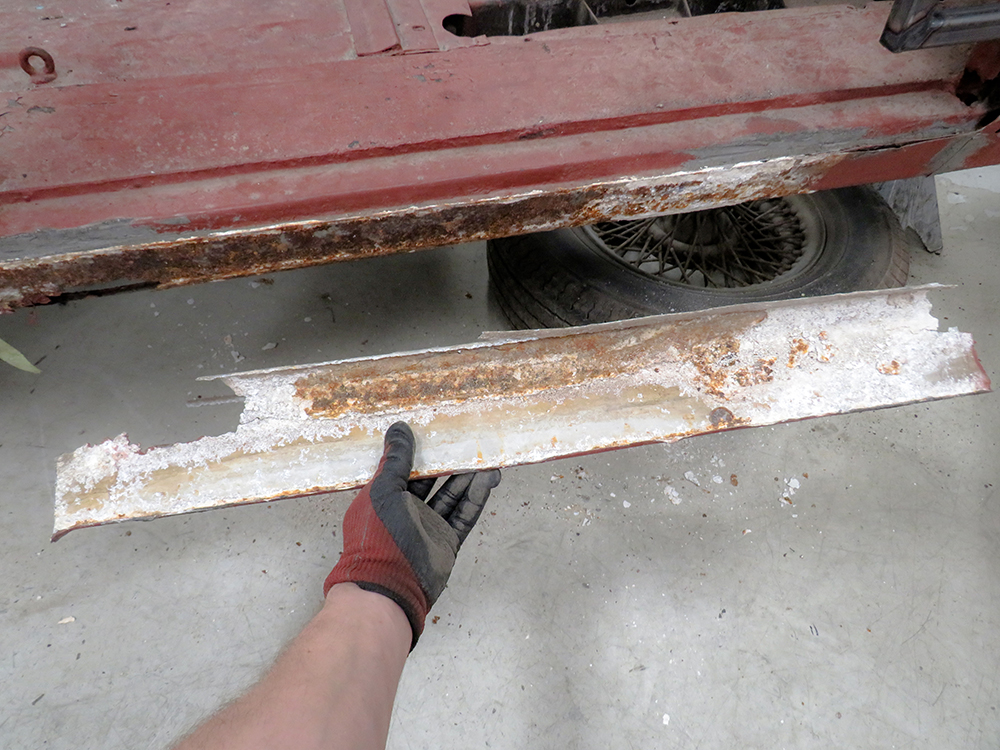
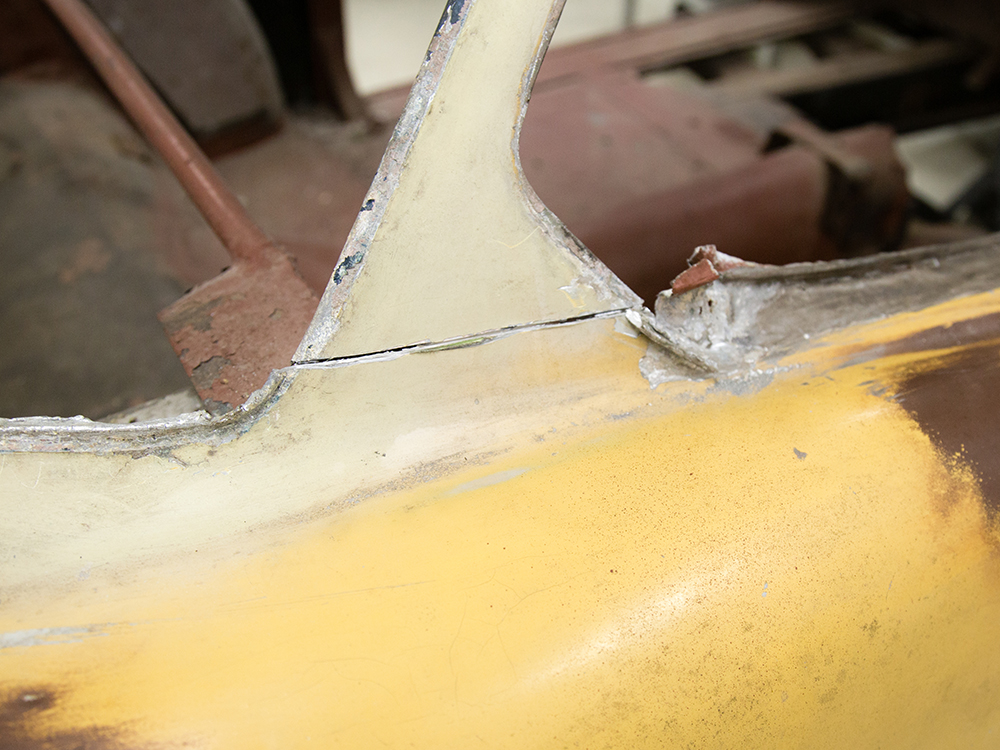
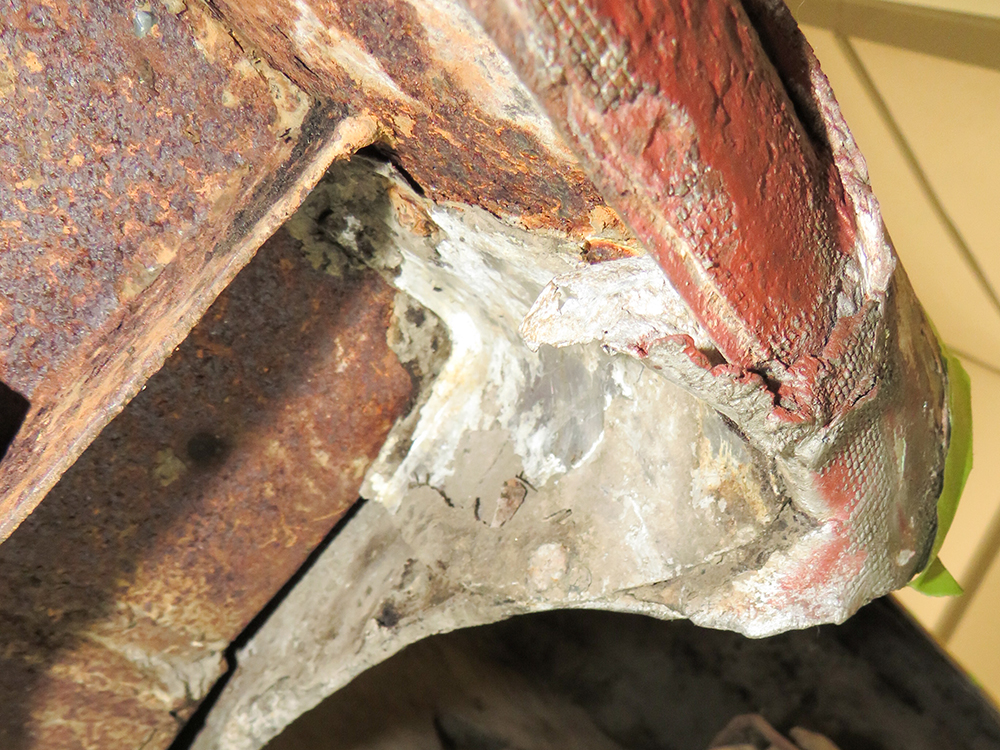
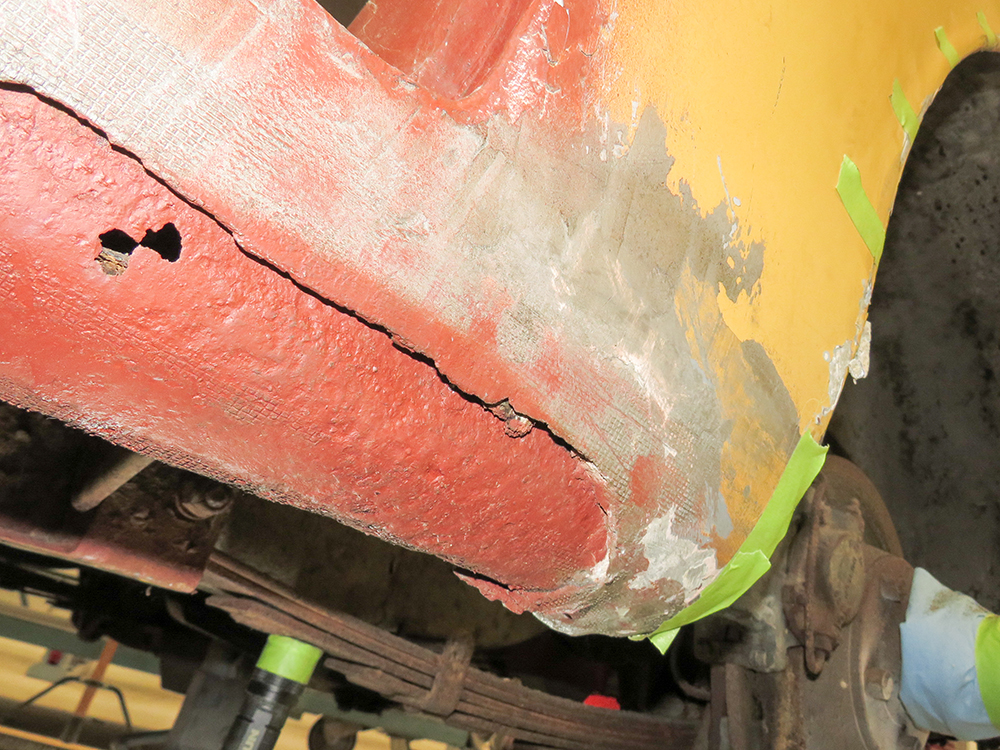
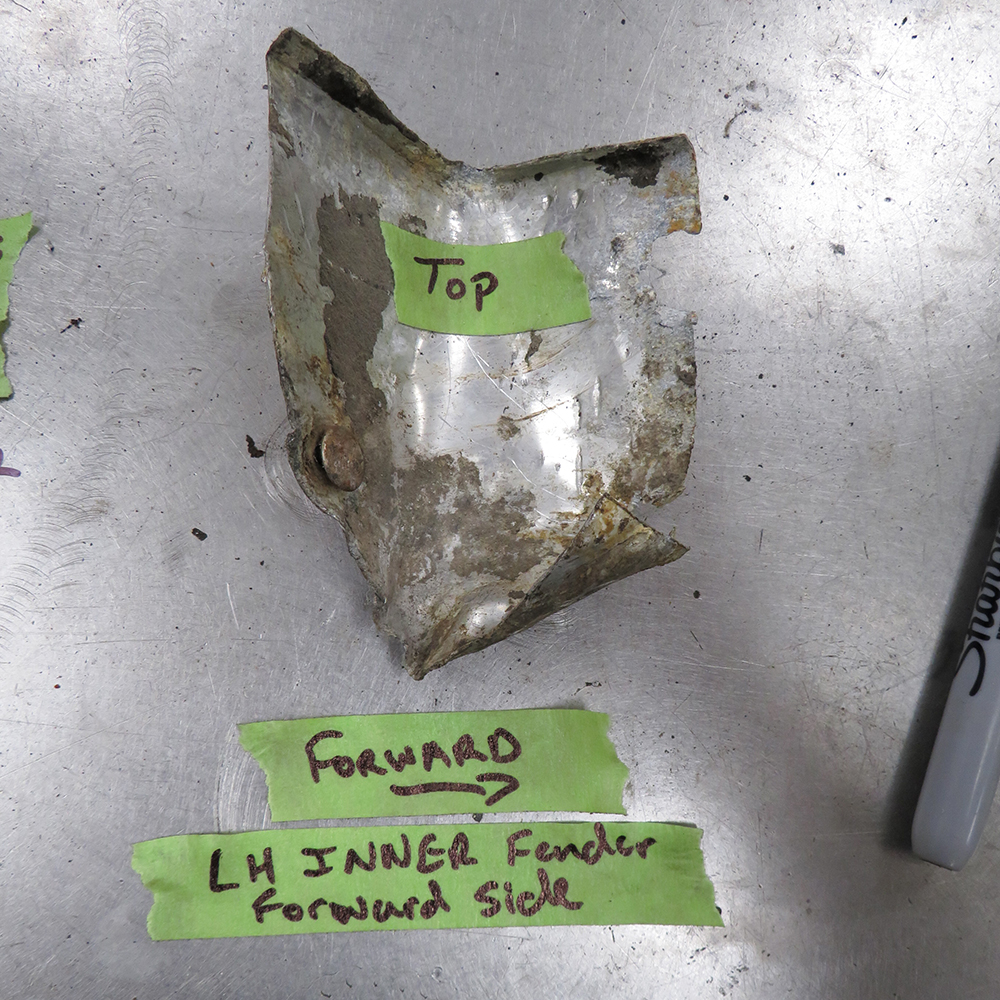
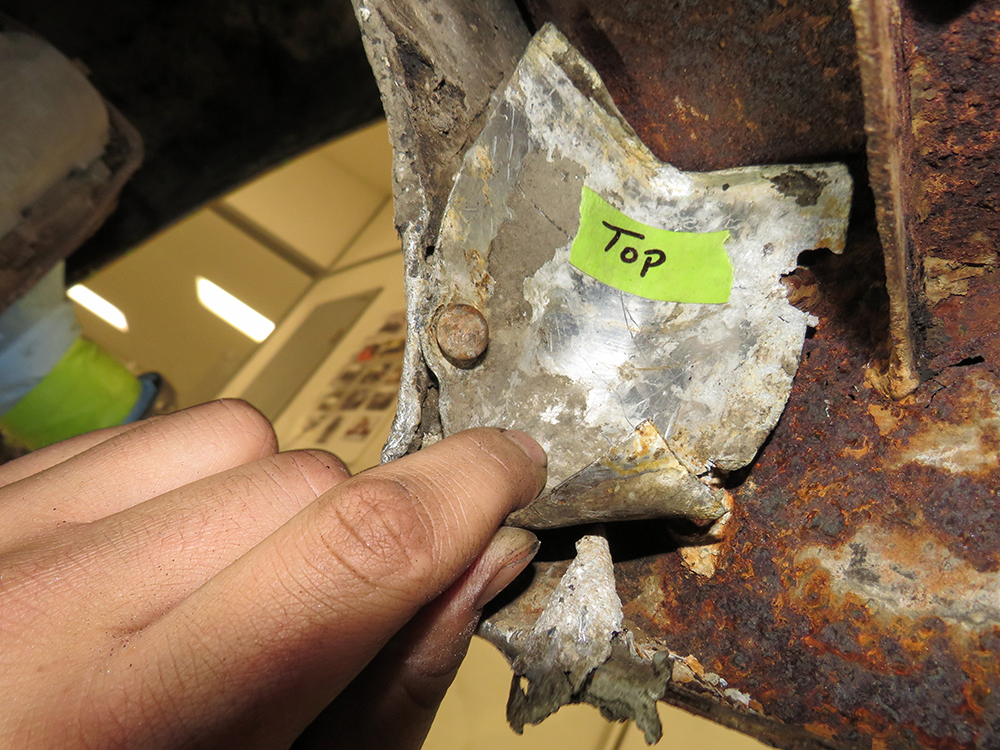
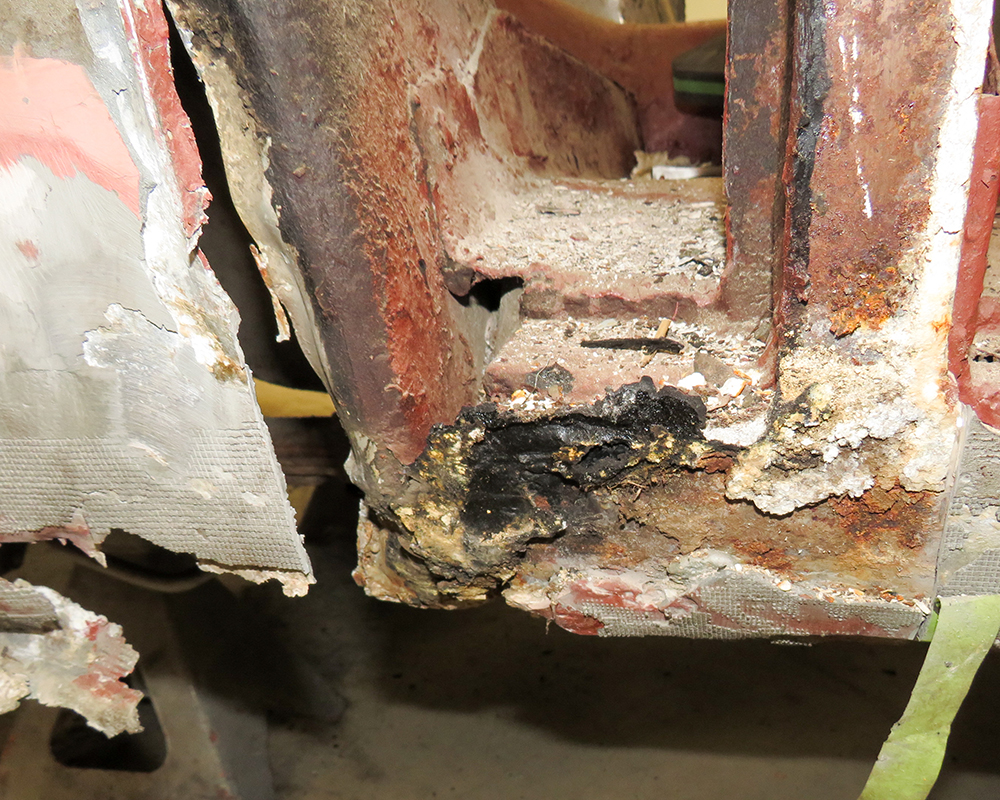
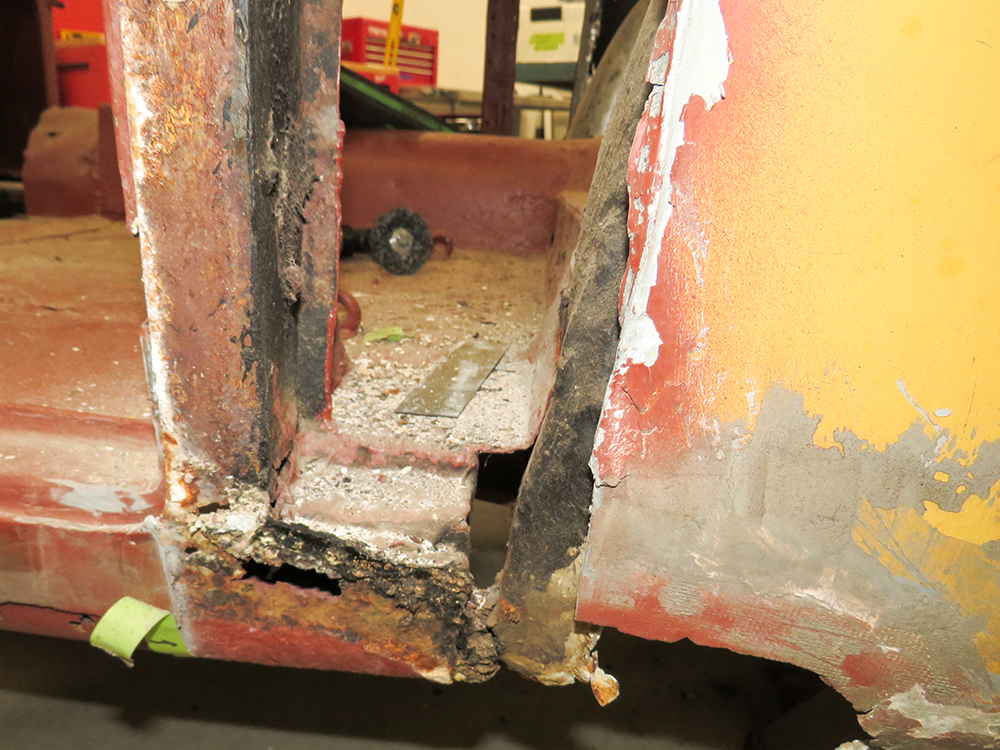
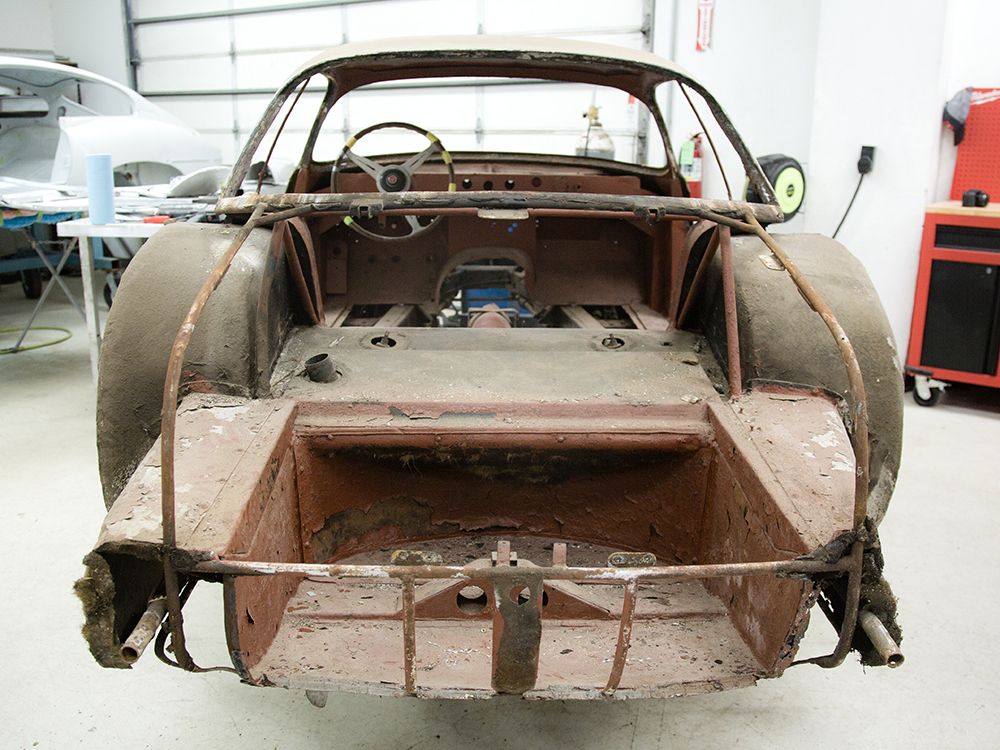
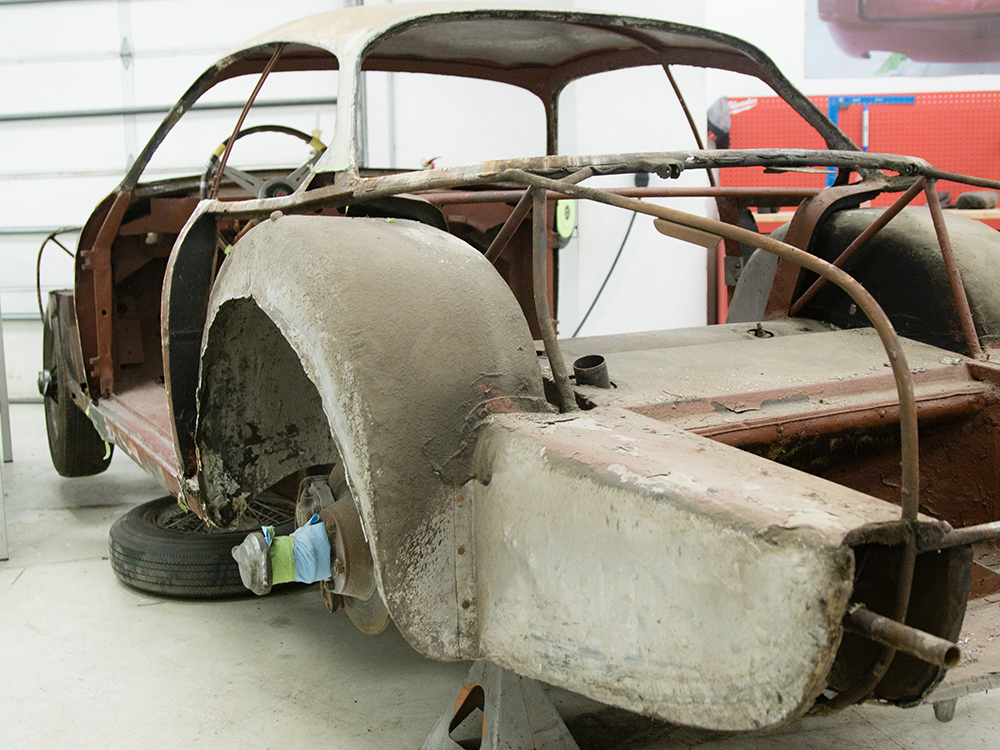
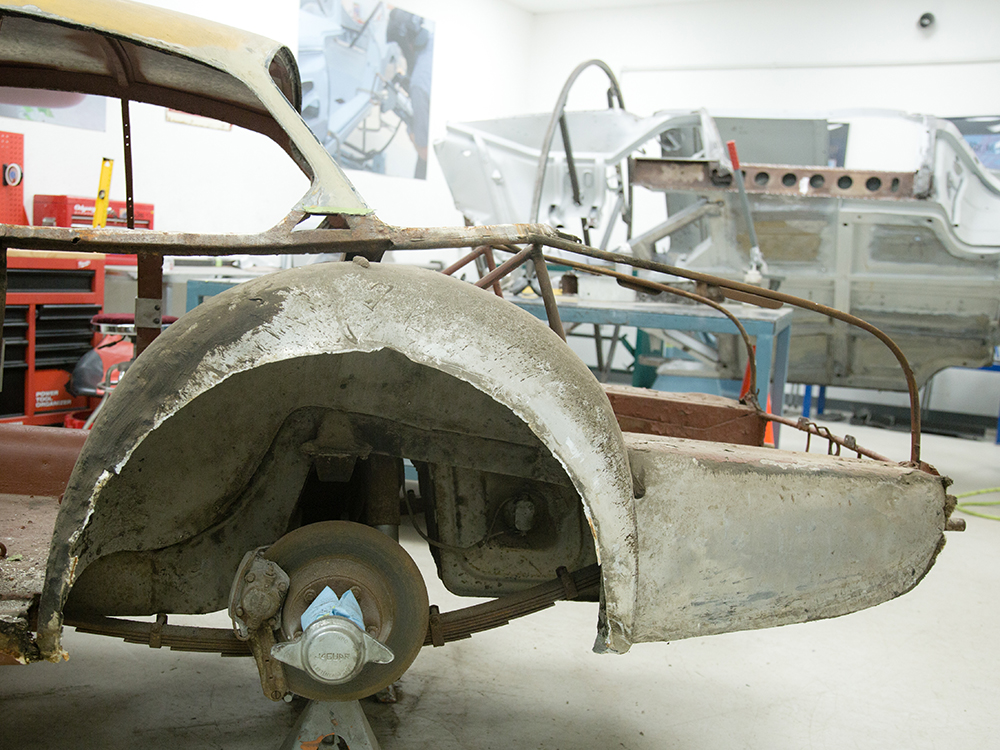
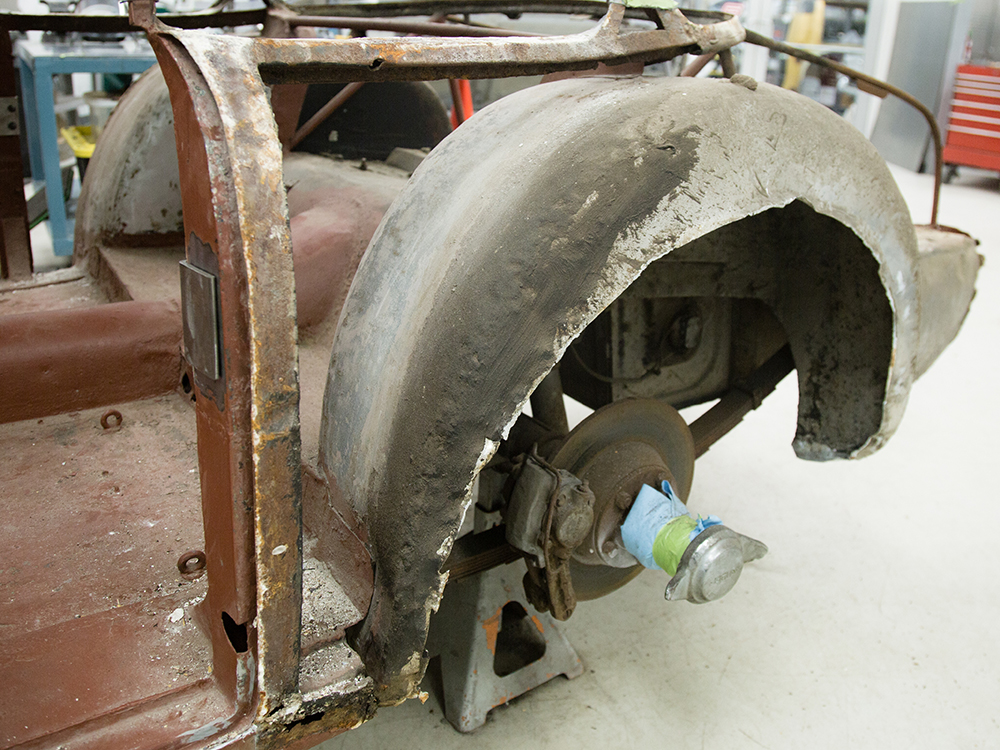
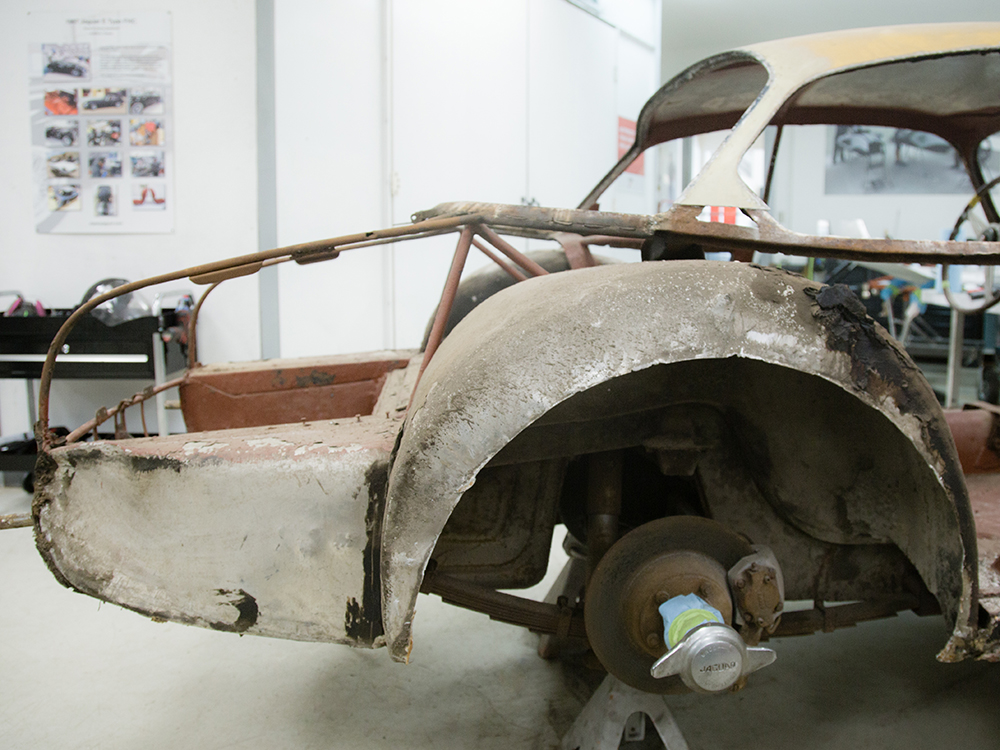
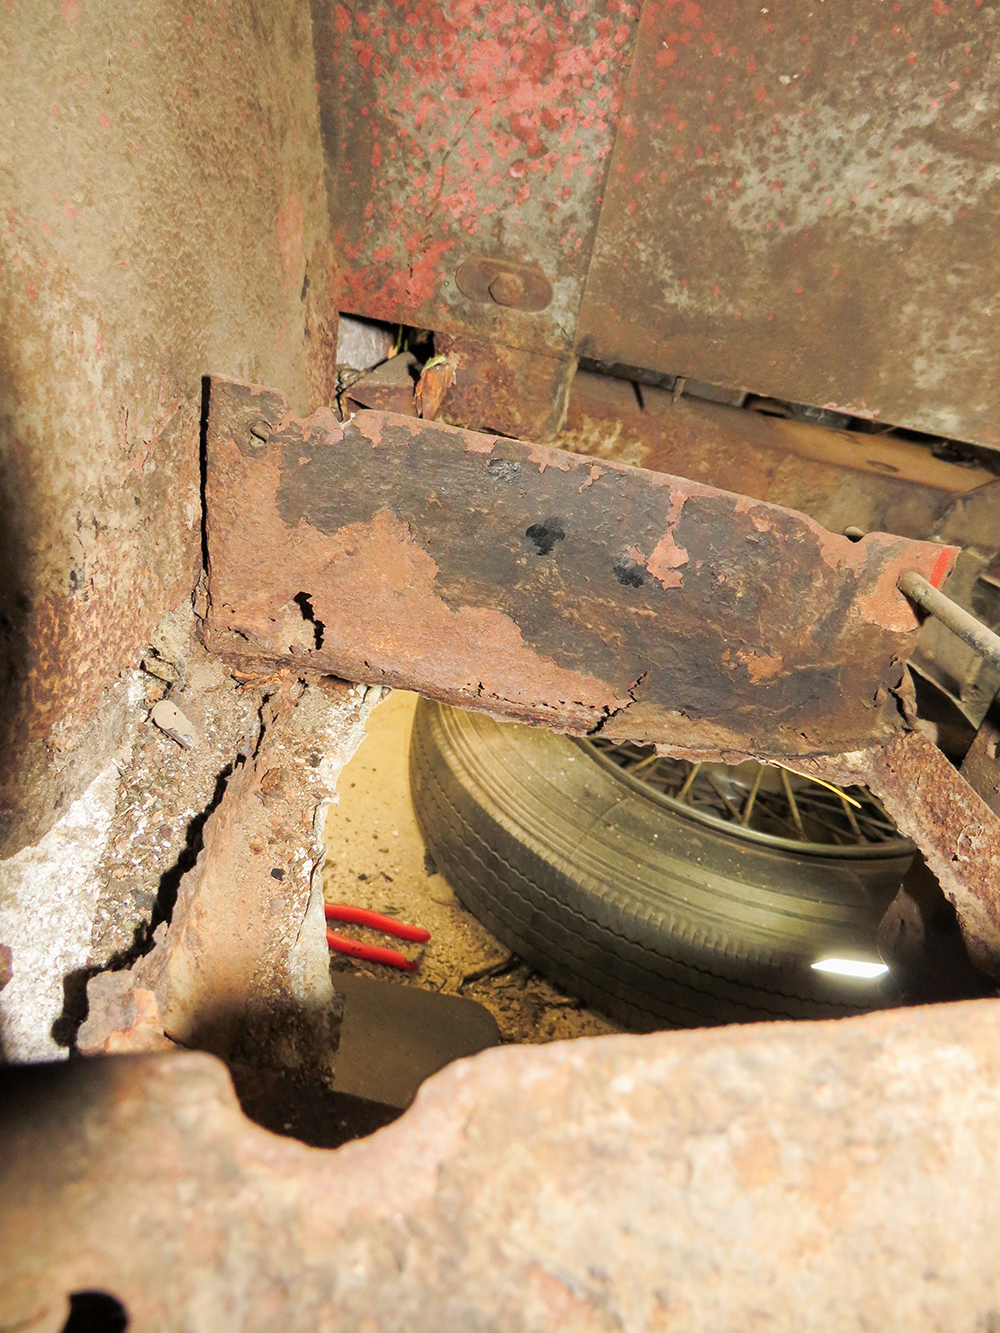
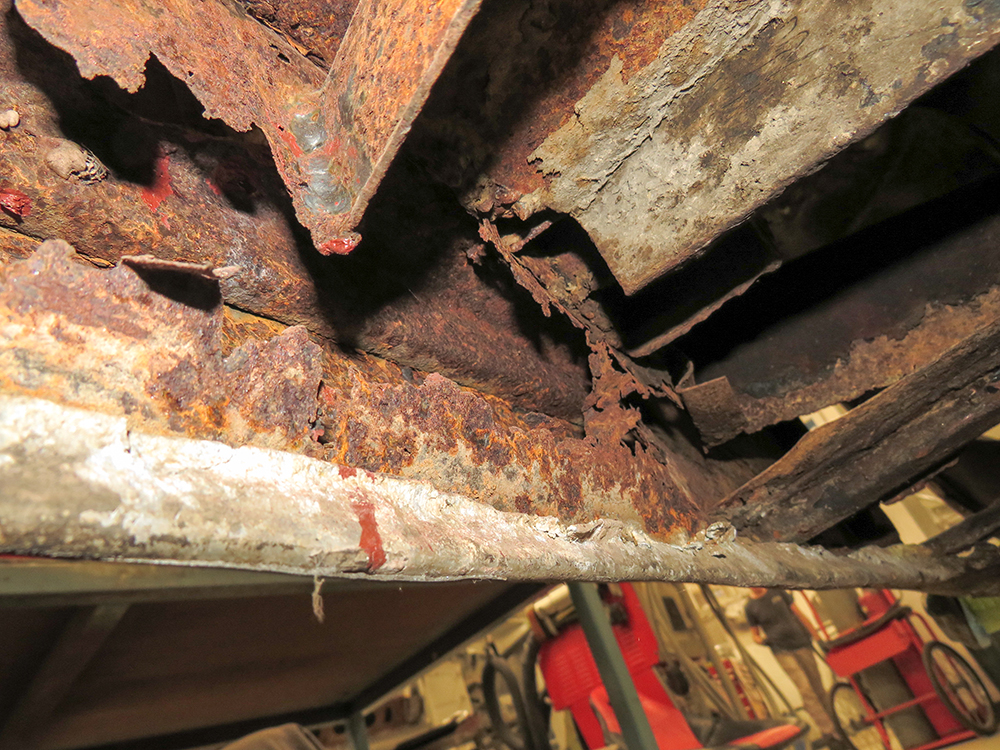
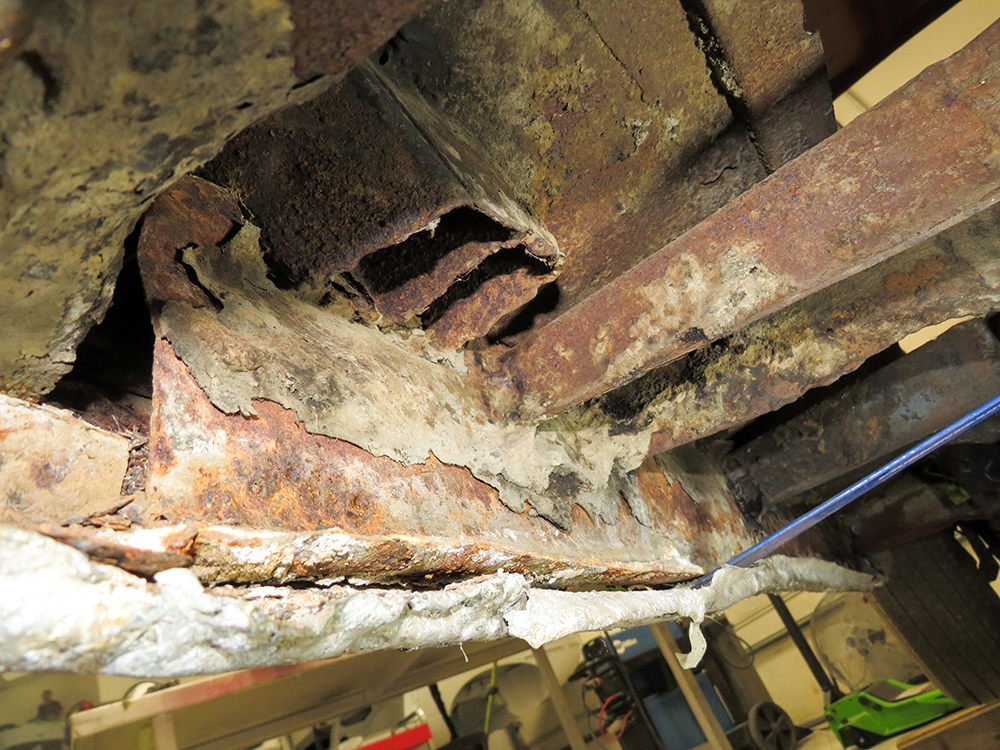
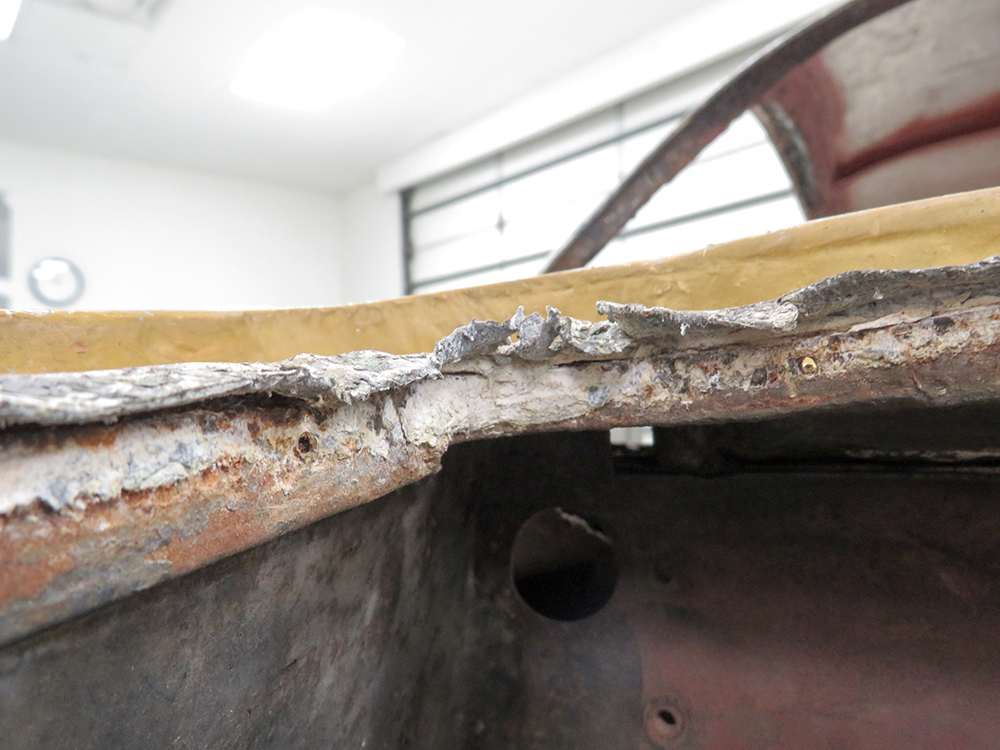
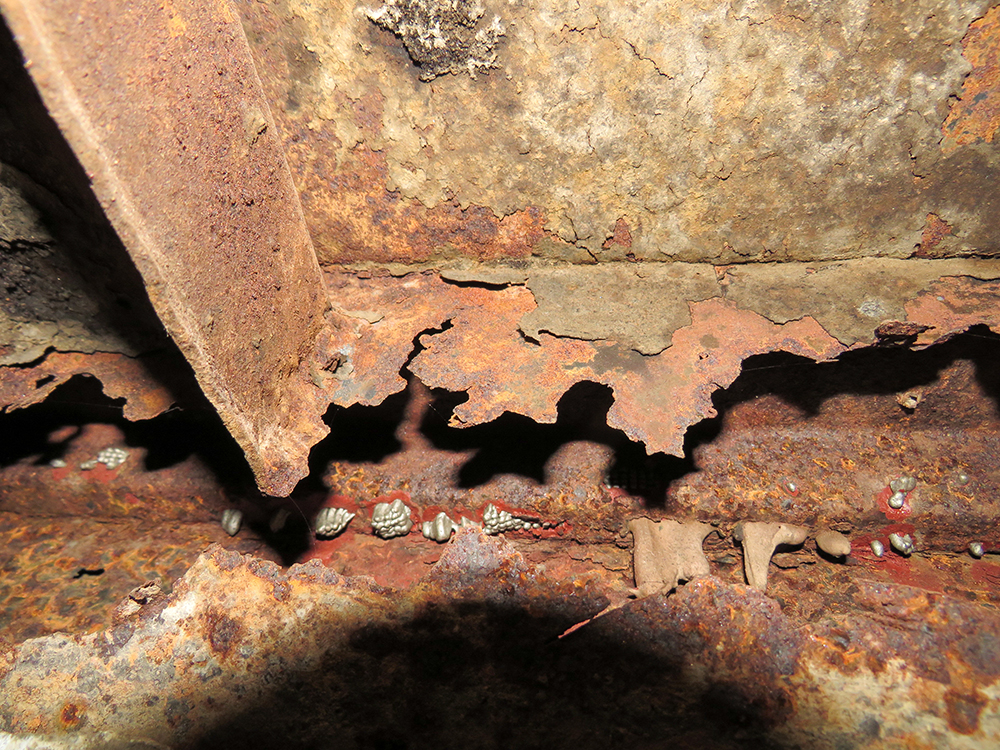
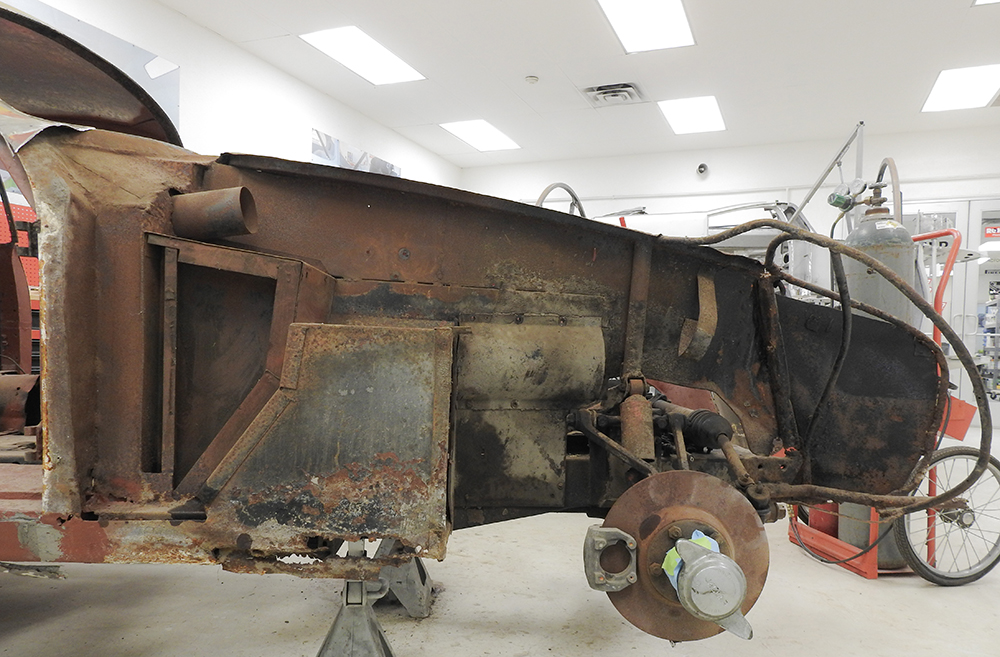
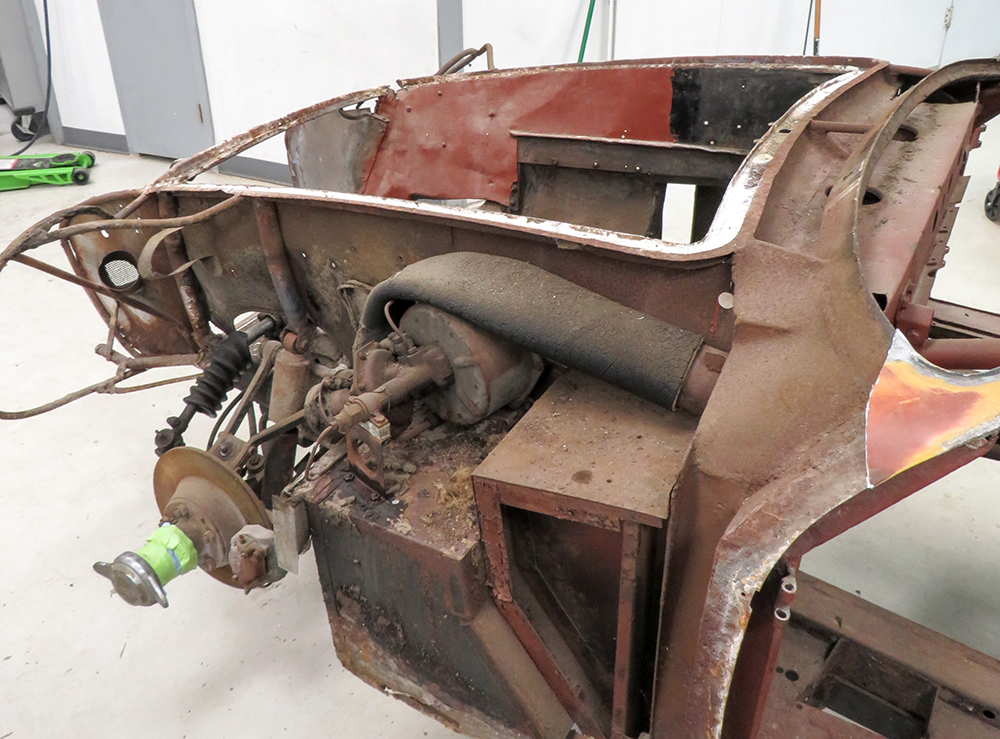
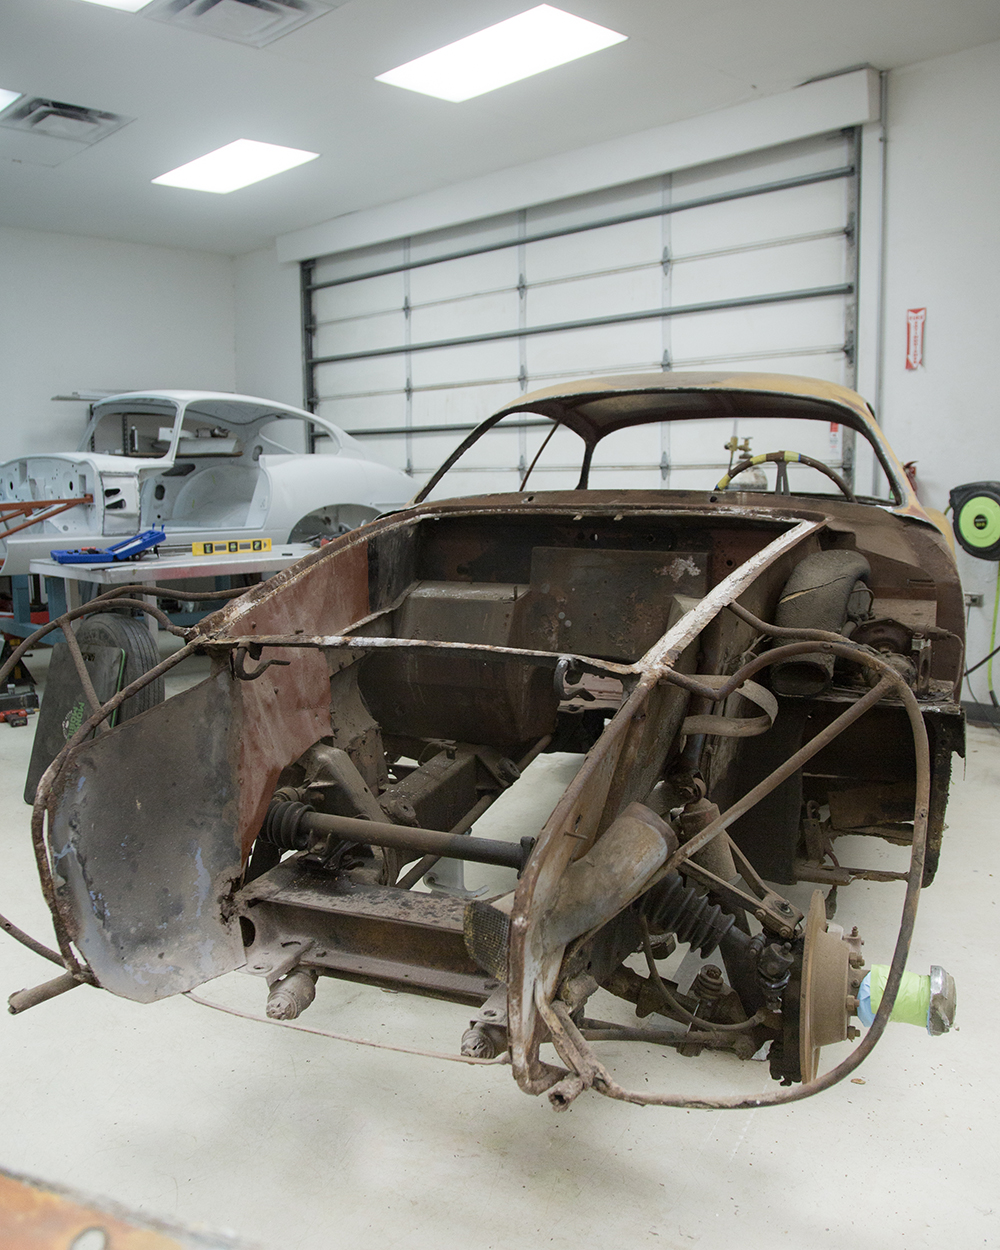
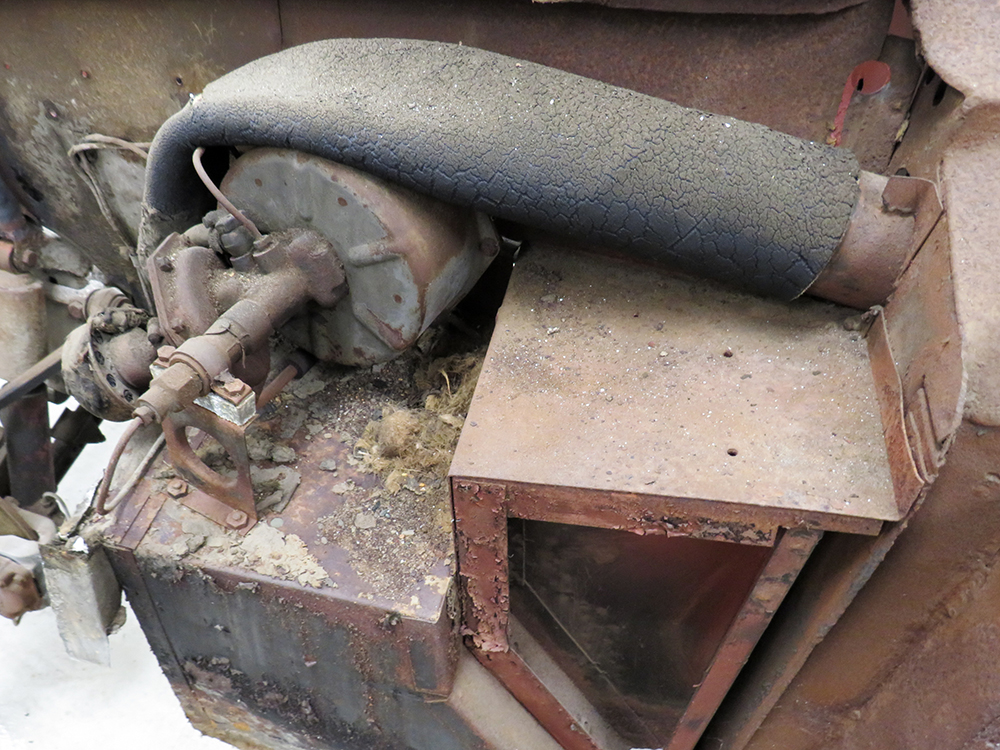
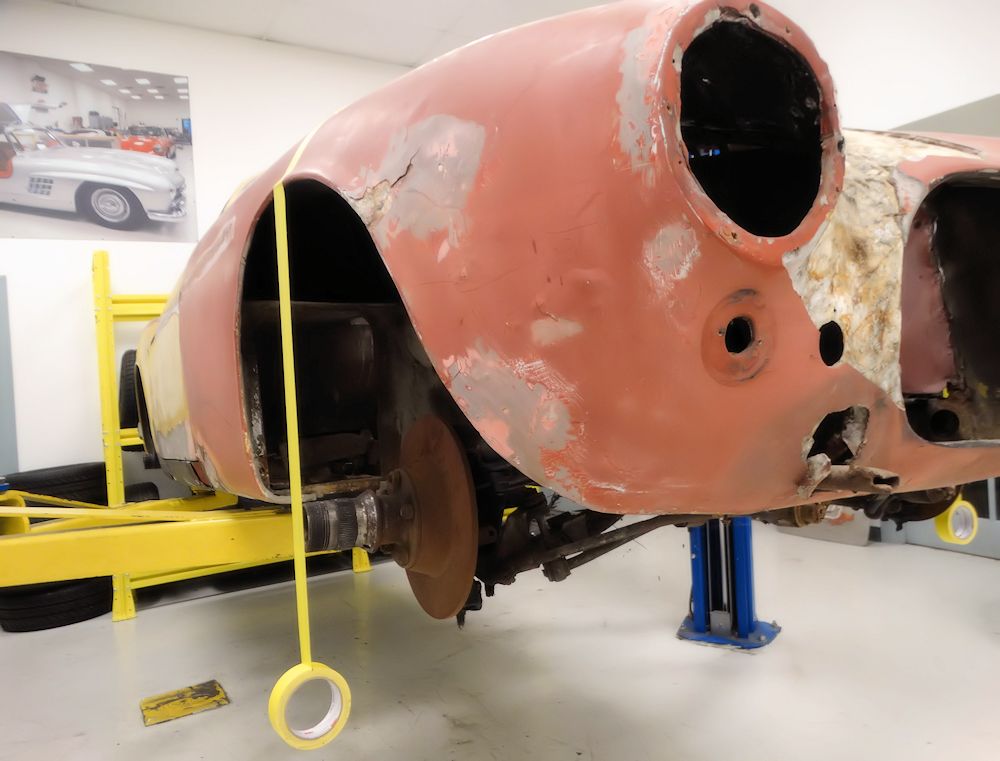
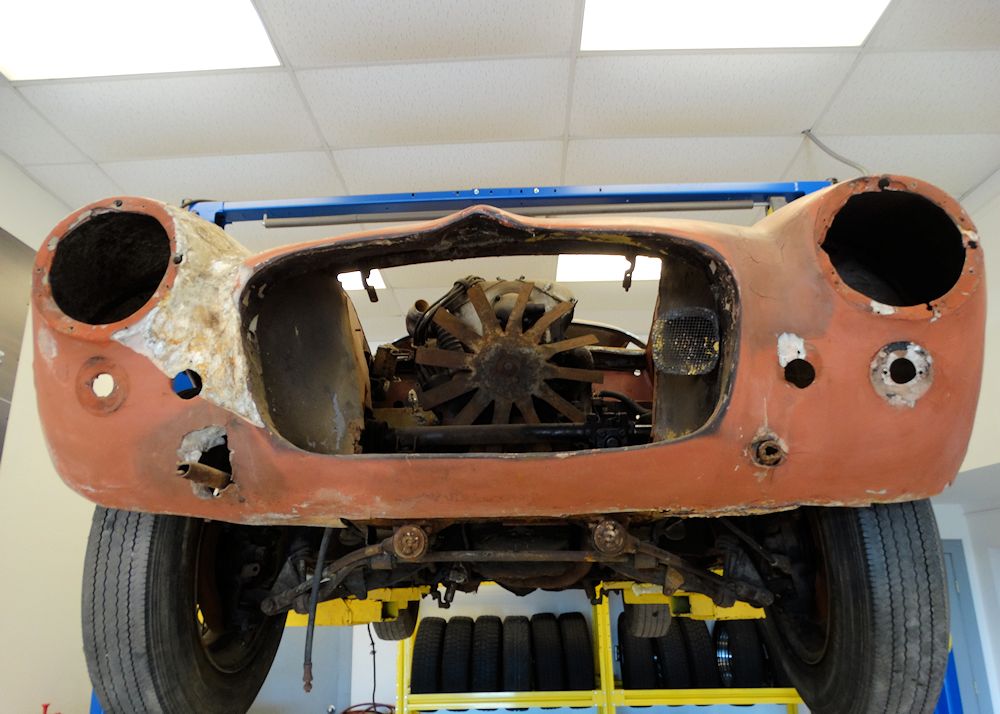
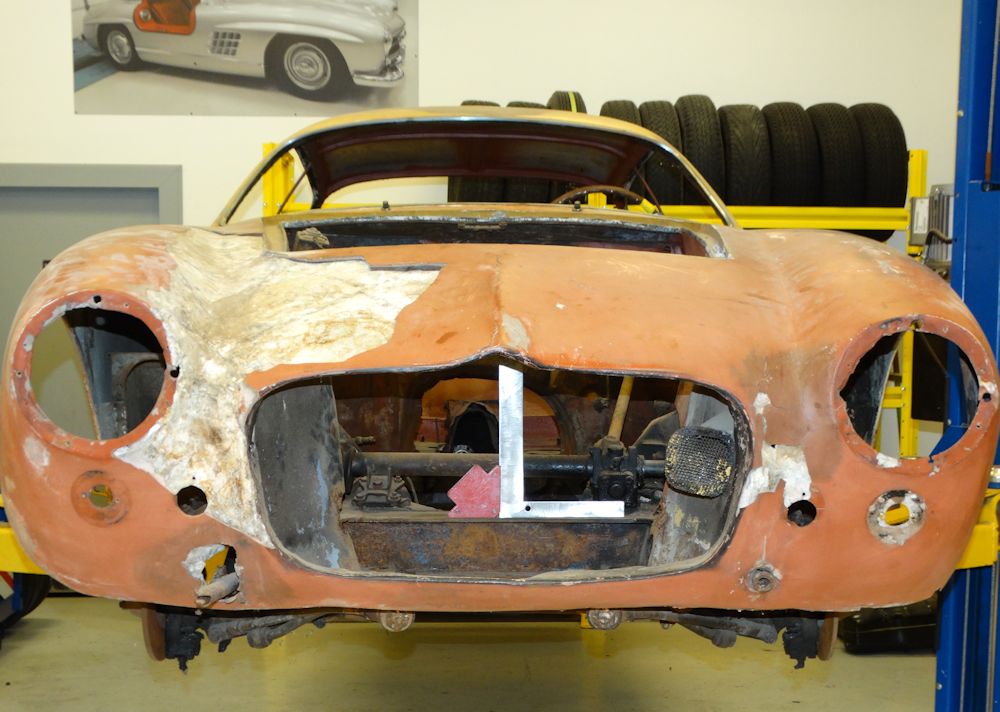
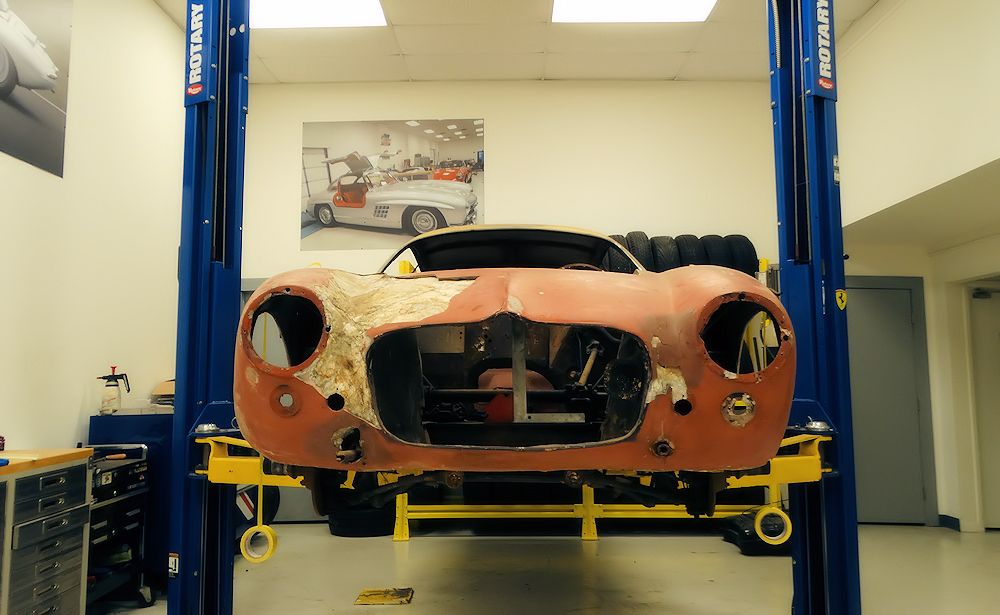
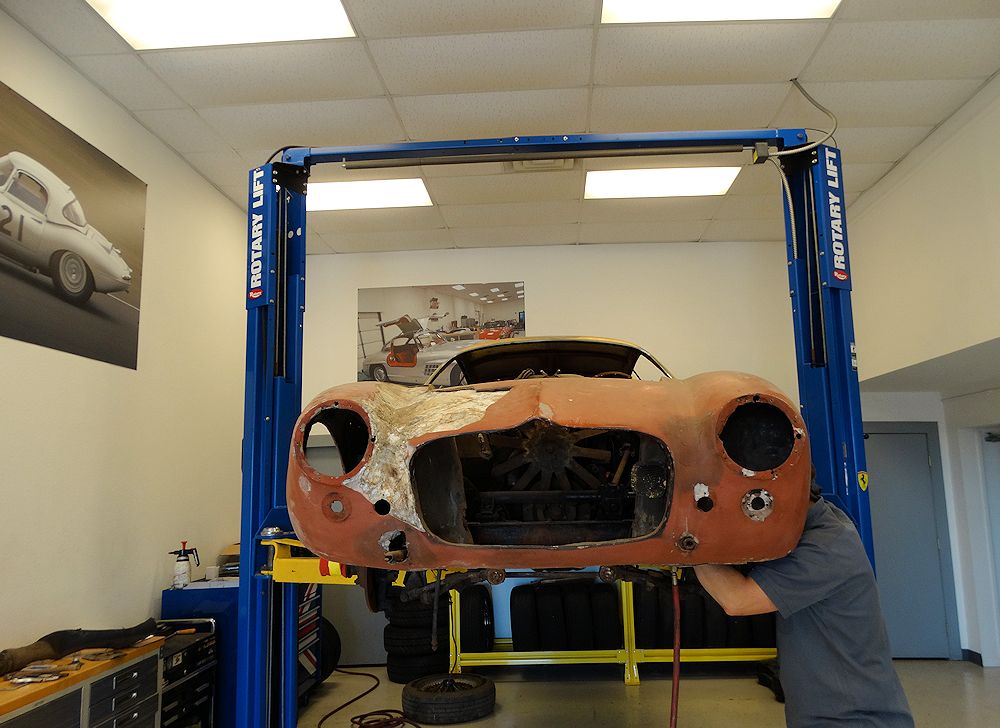
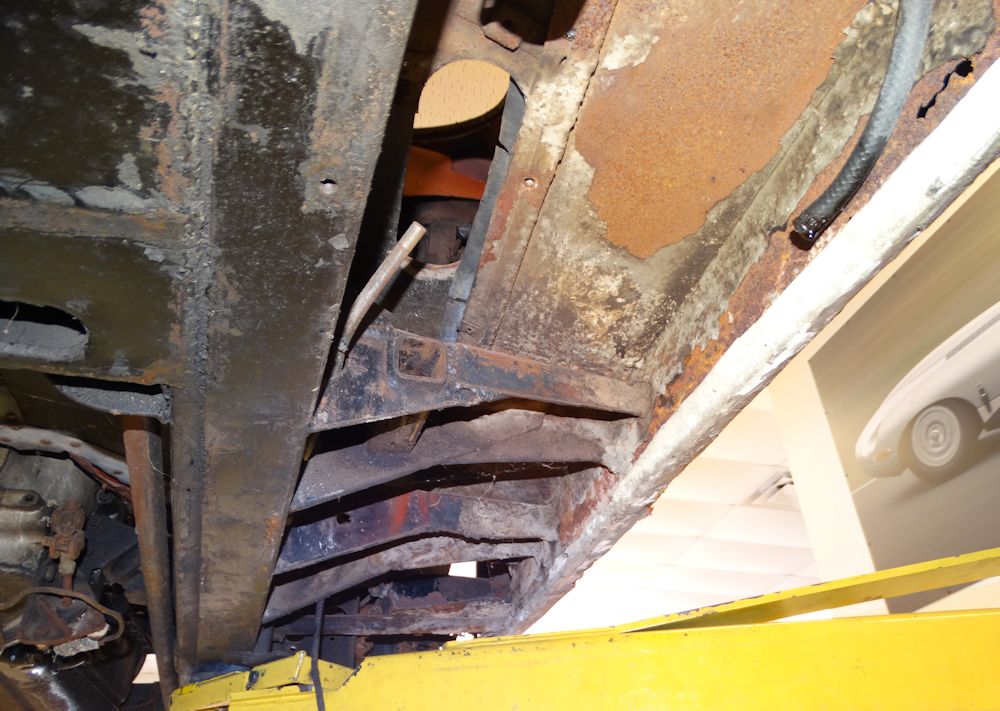
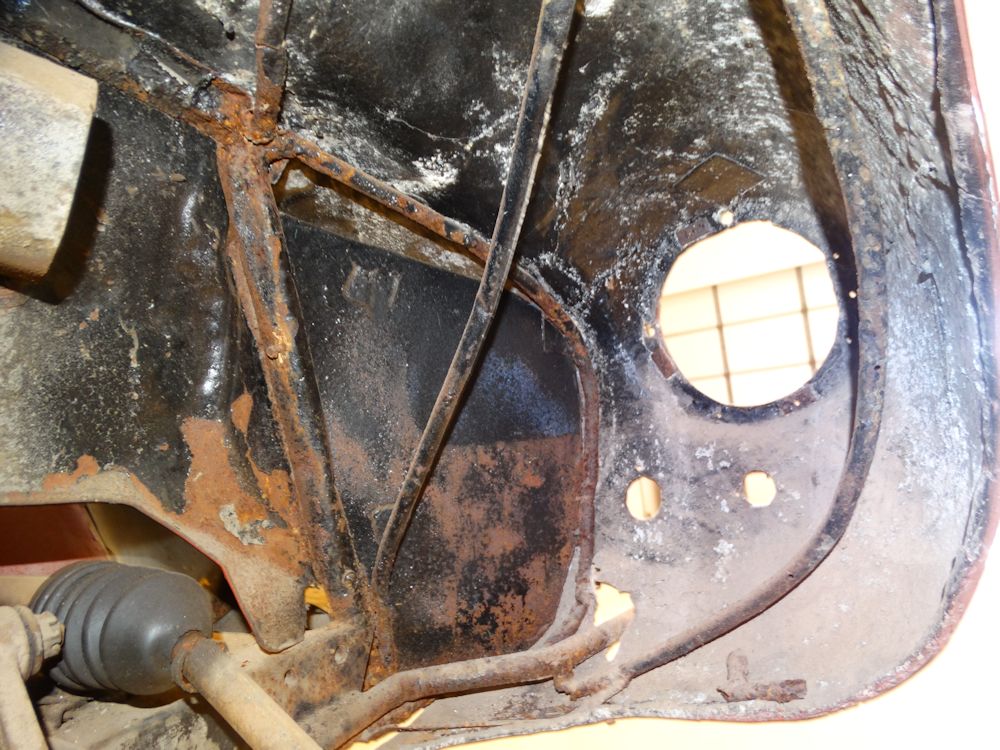
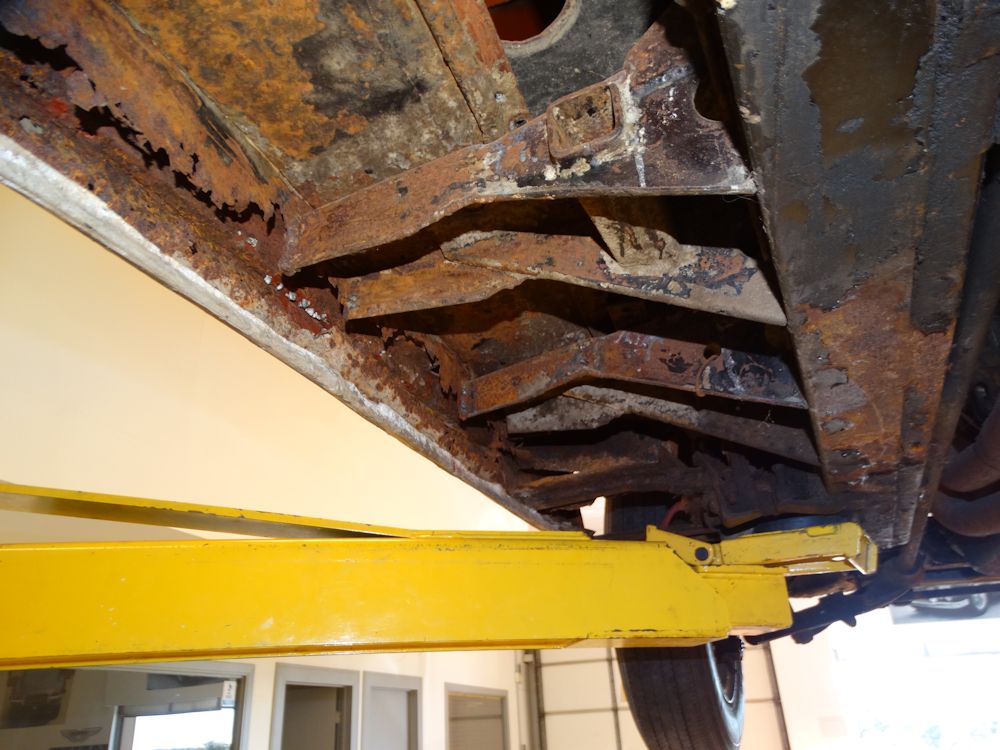
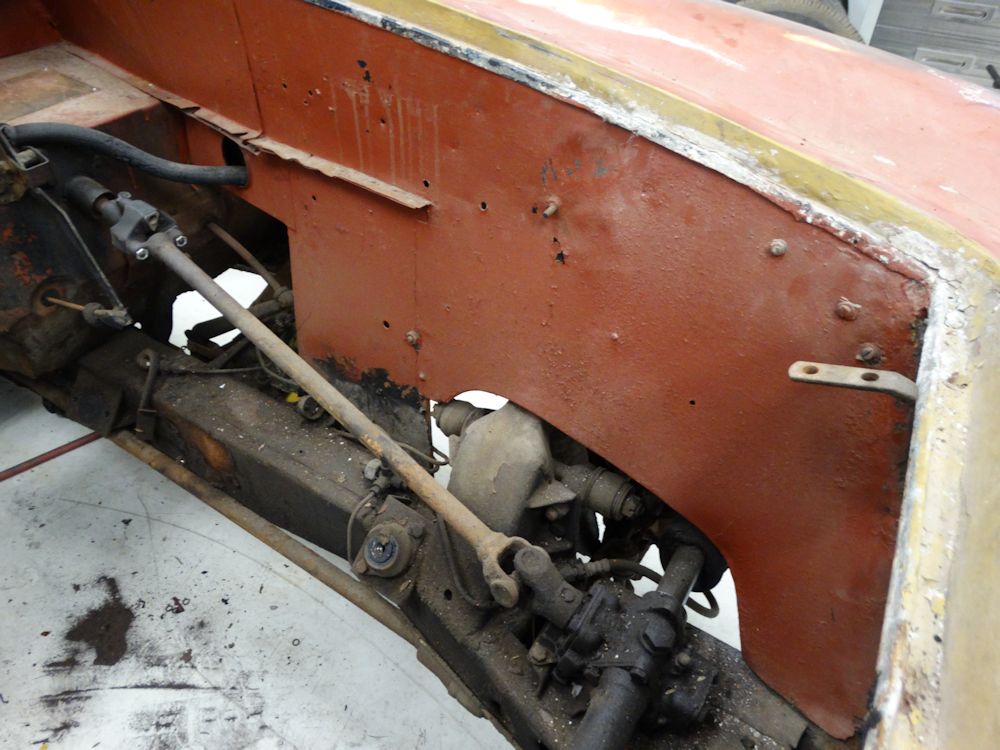
The following sequence of photographs show the terrible corrosion damage the car has suffered over the years.
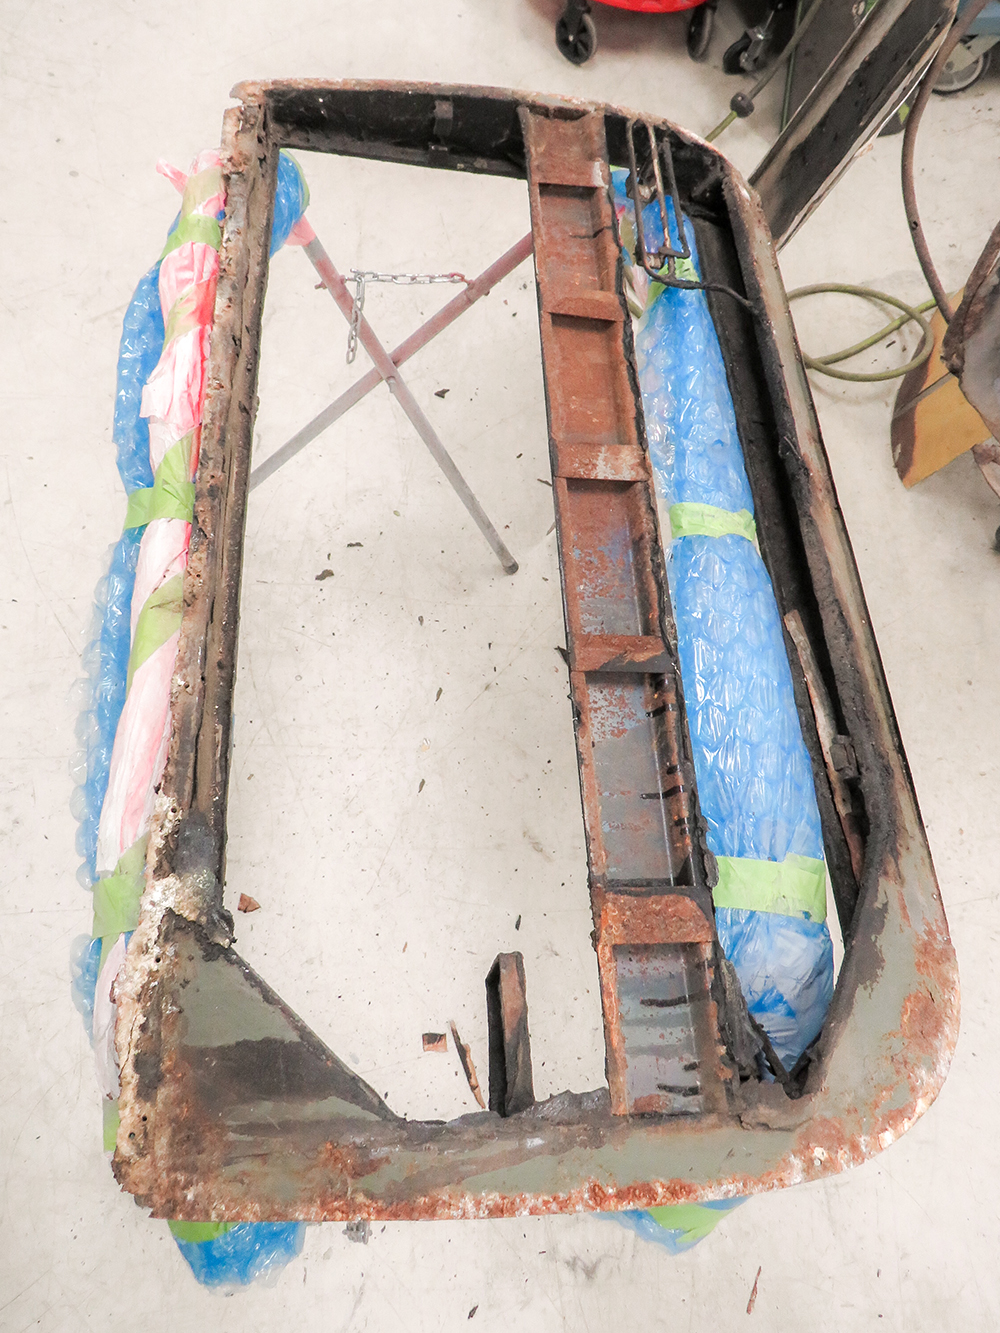
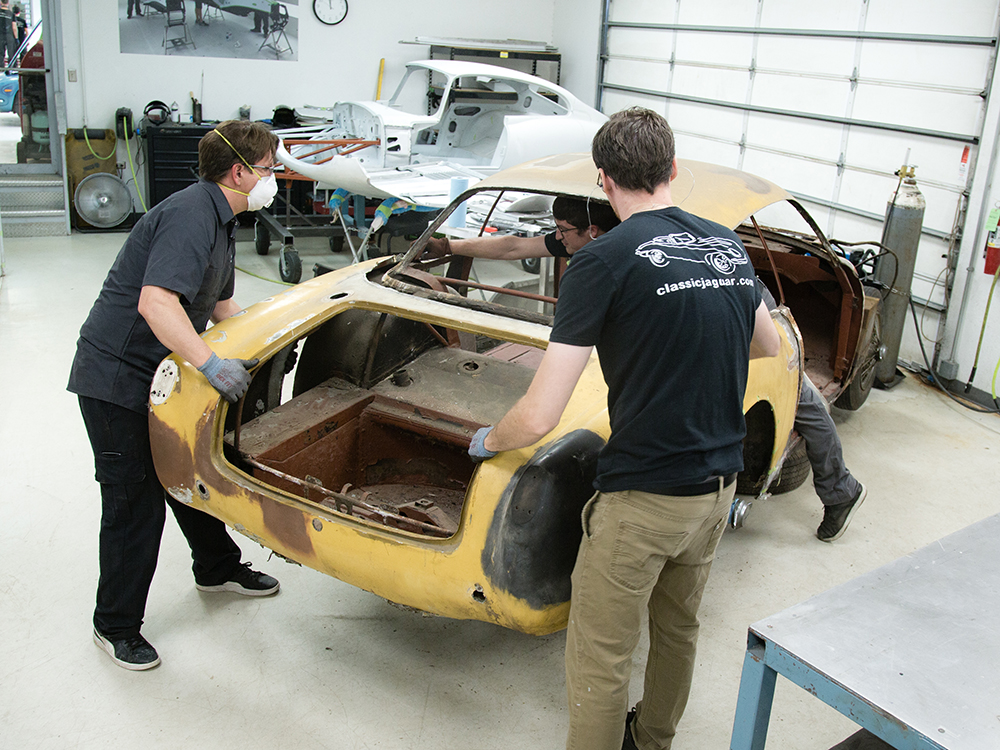
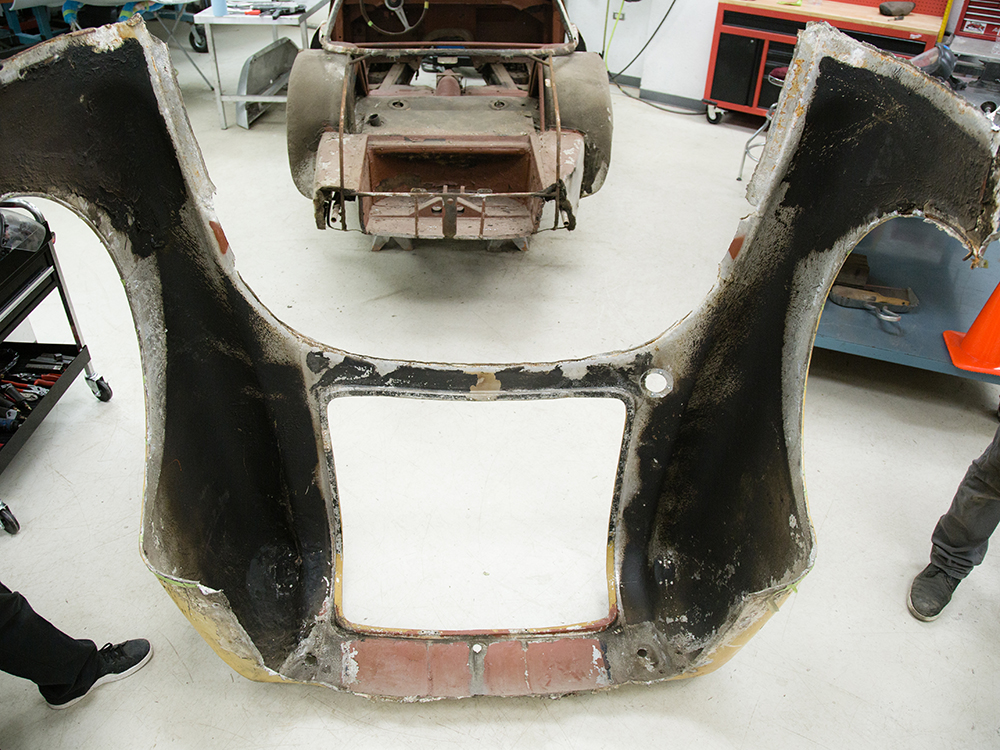
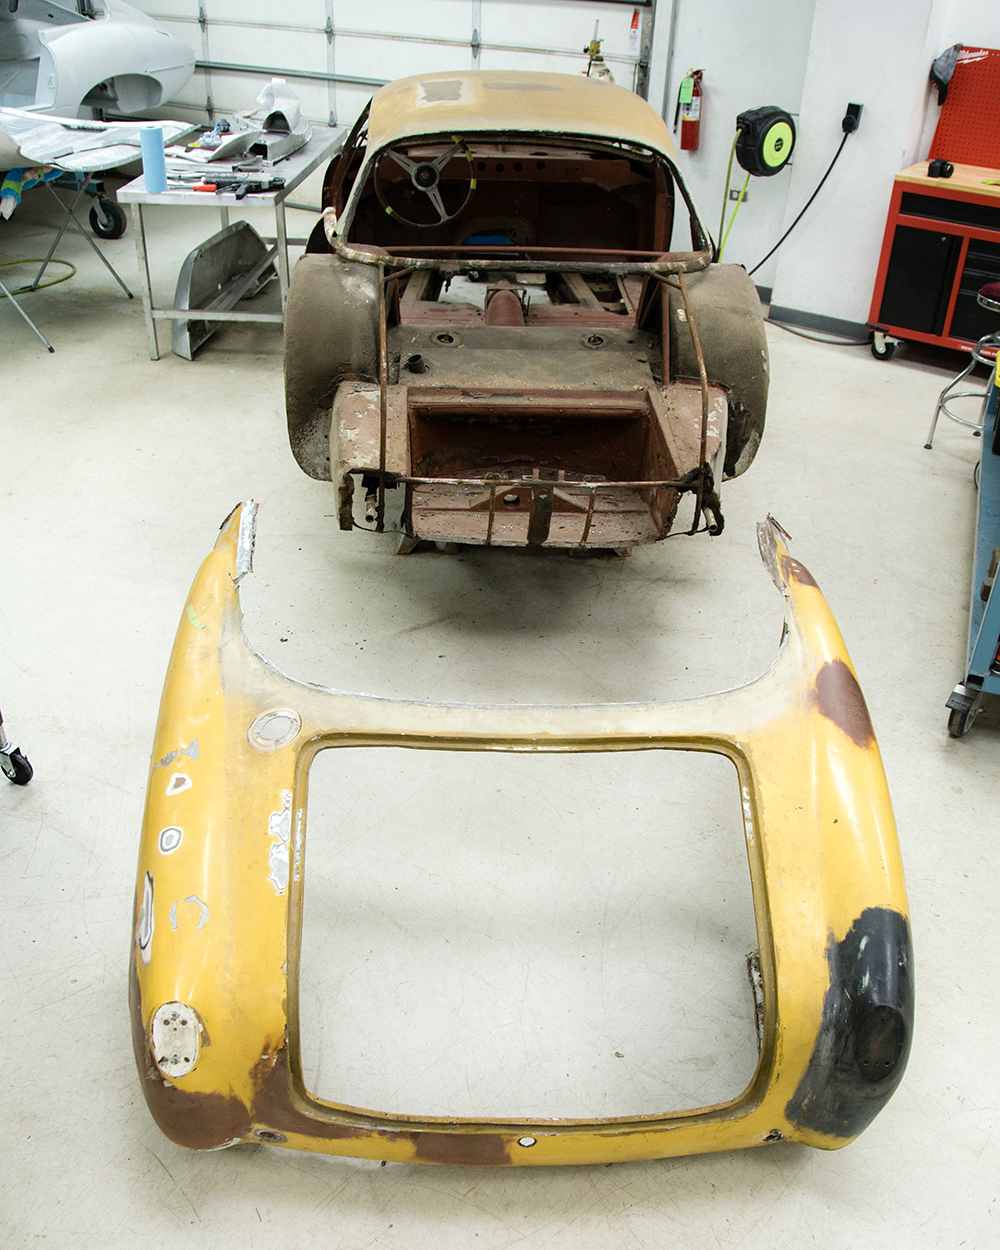
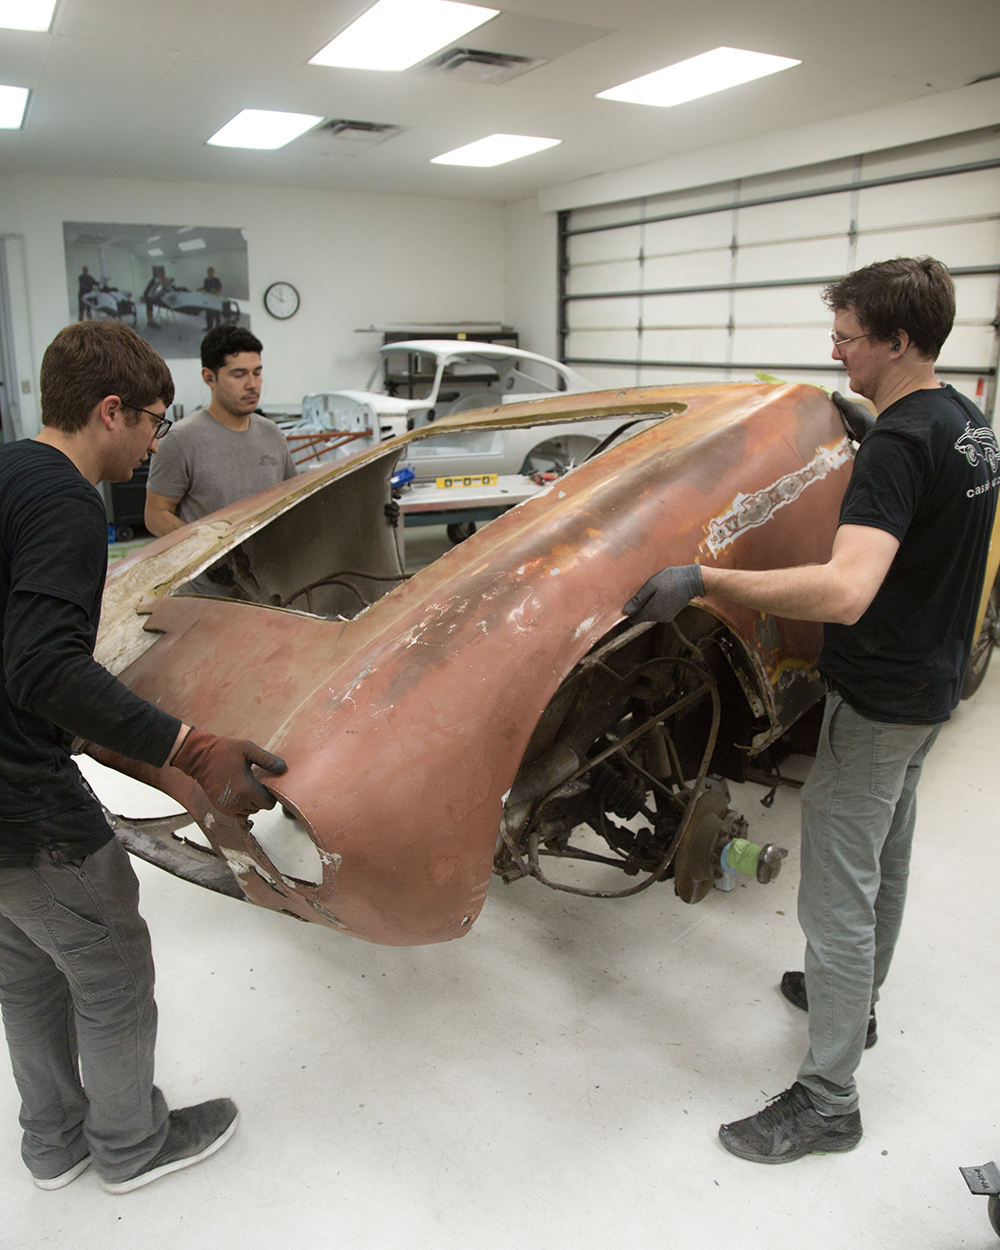
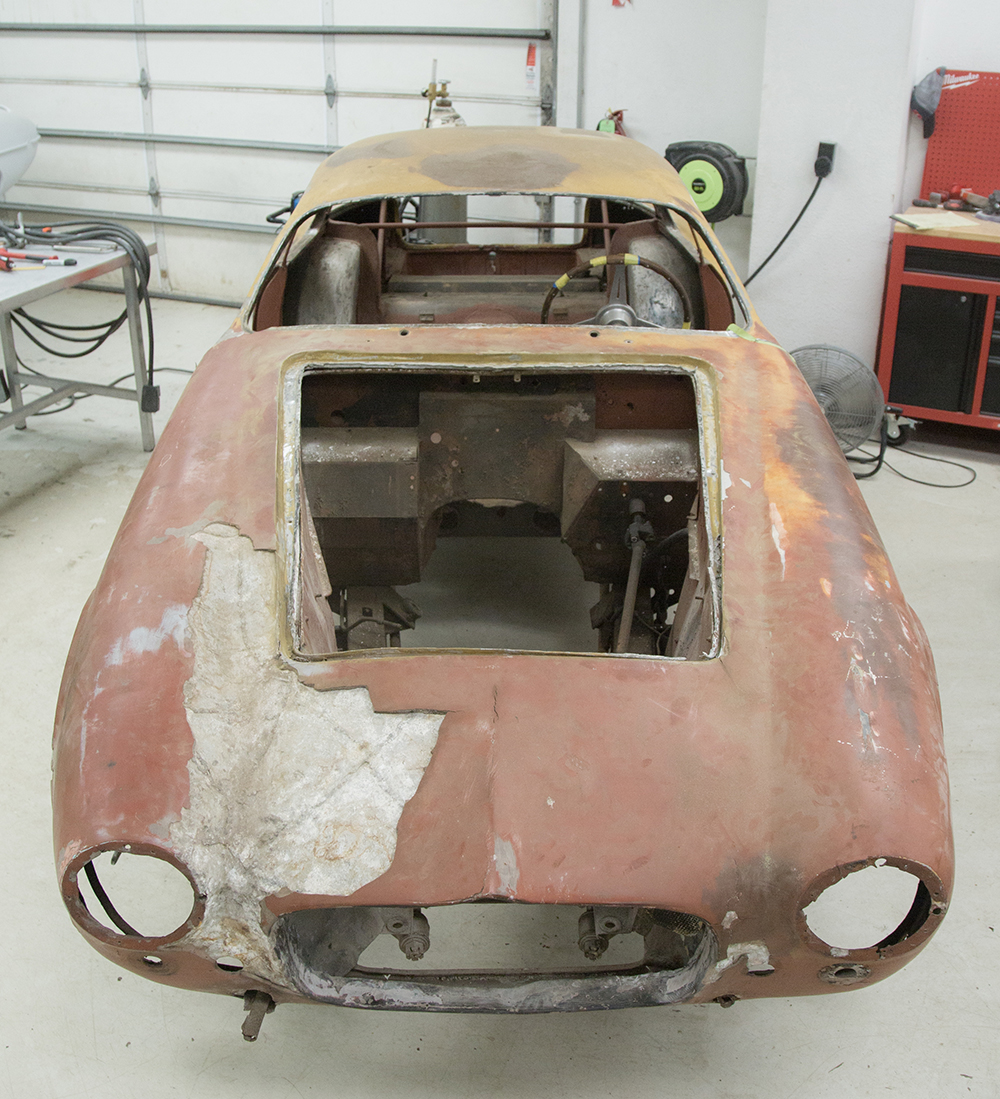
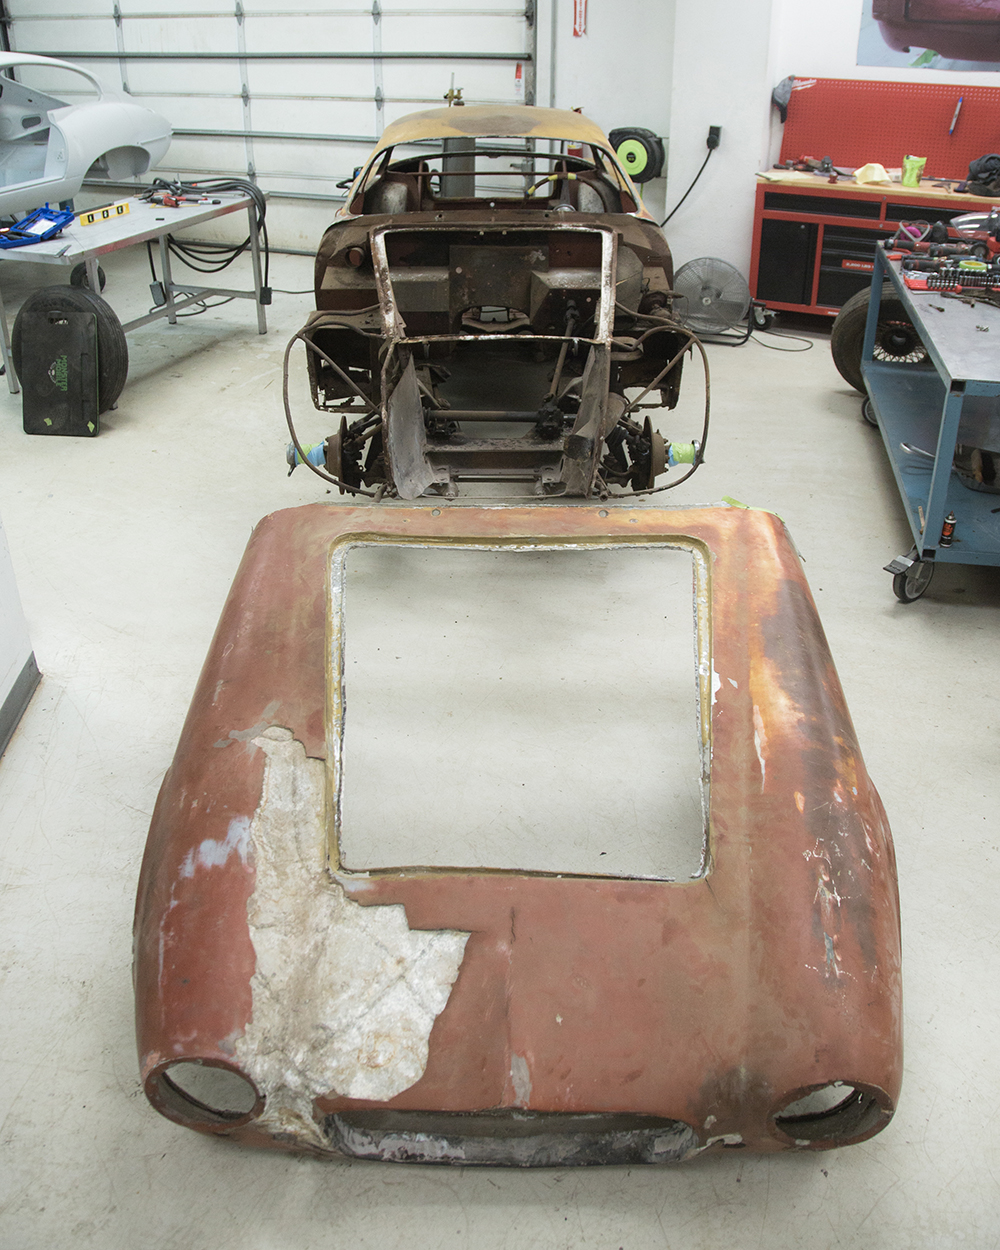
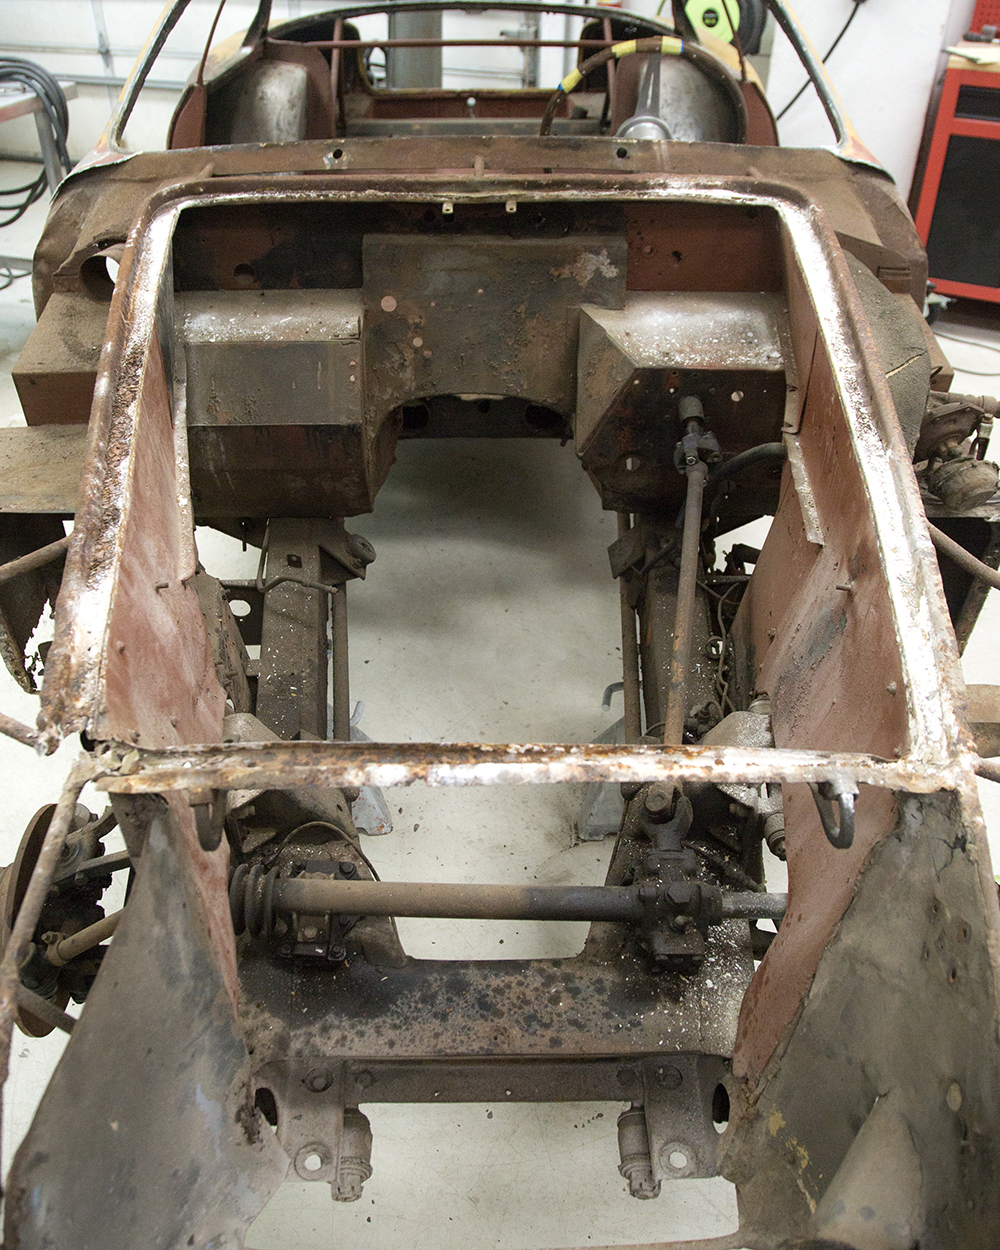
It is now time to de-skin the front and rear clips
April 6, 2020
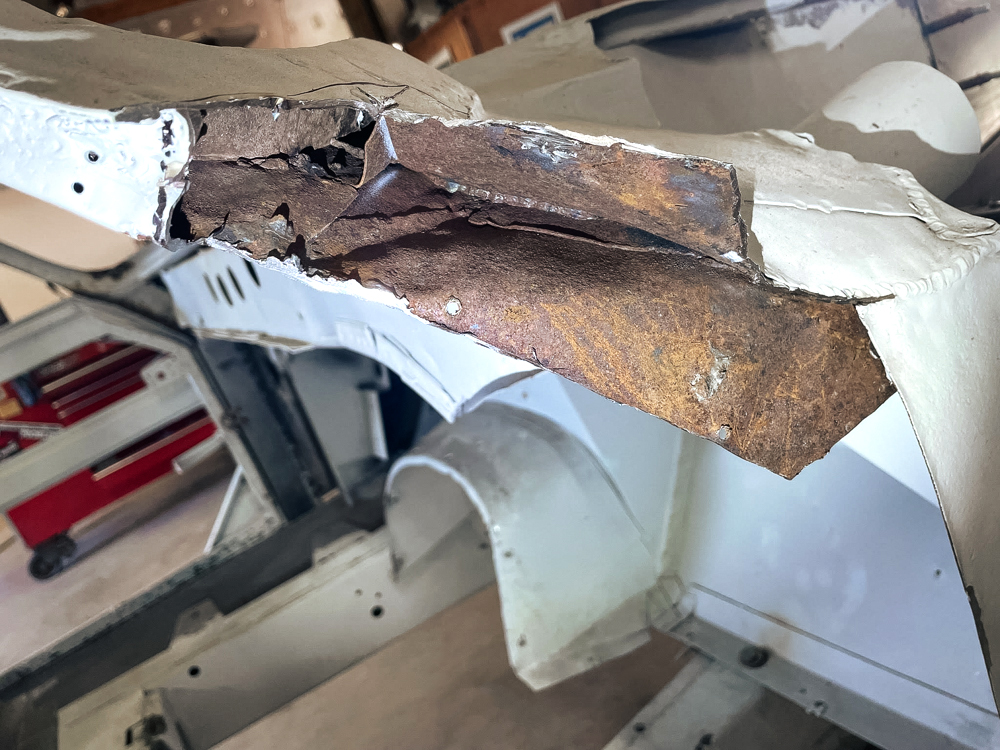
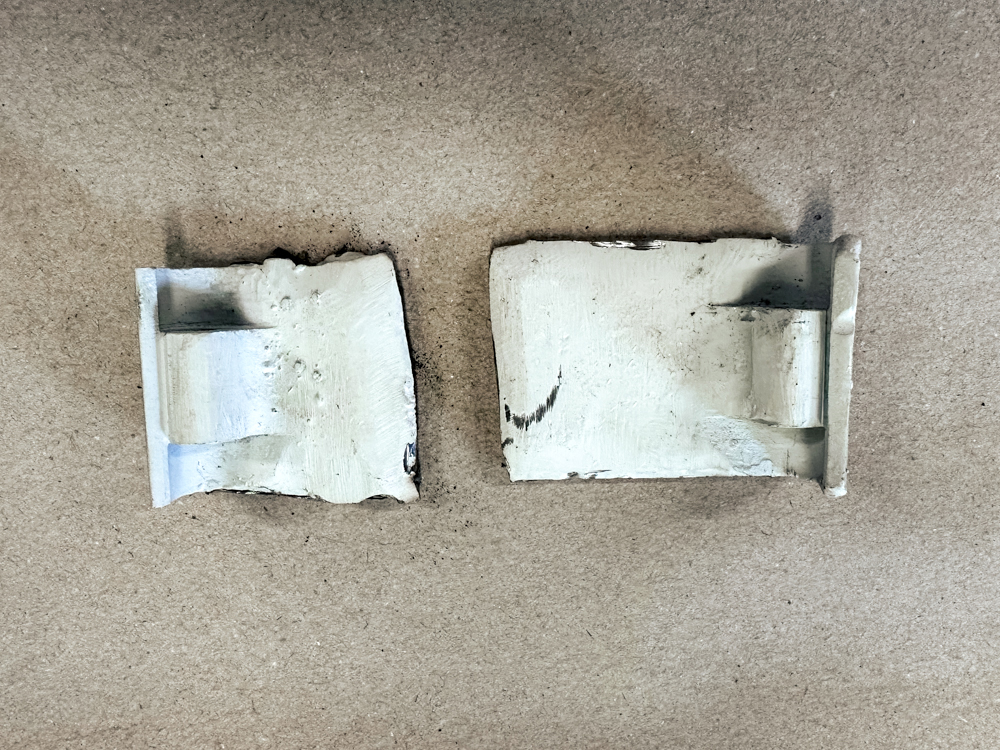
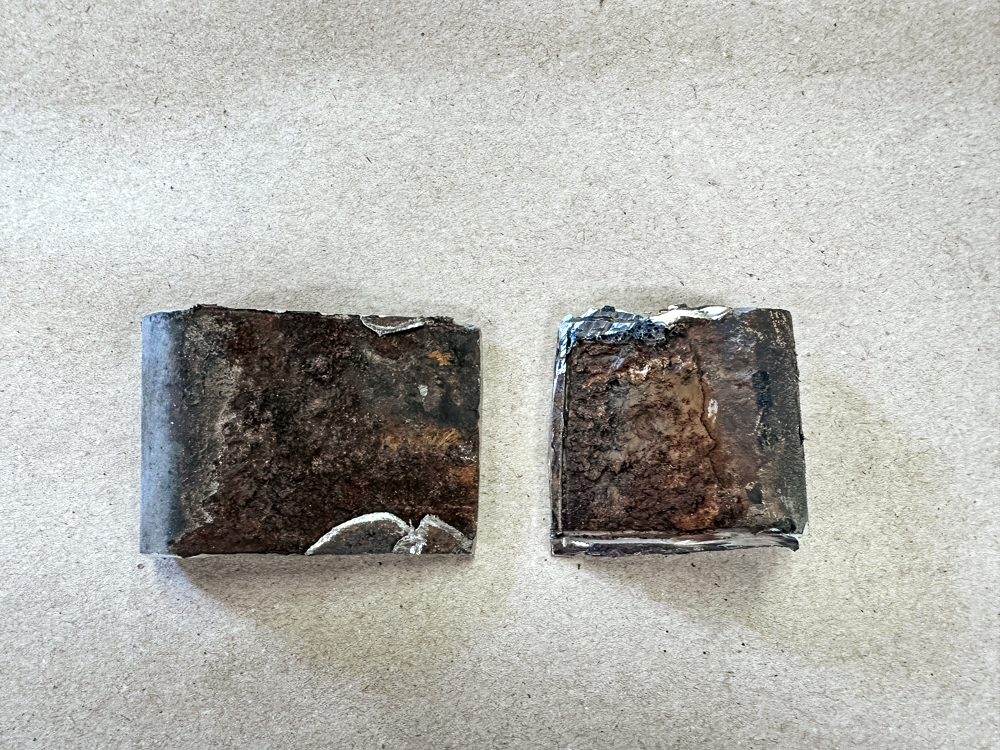
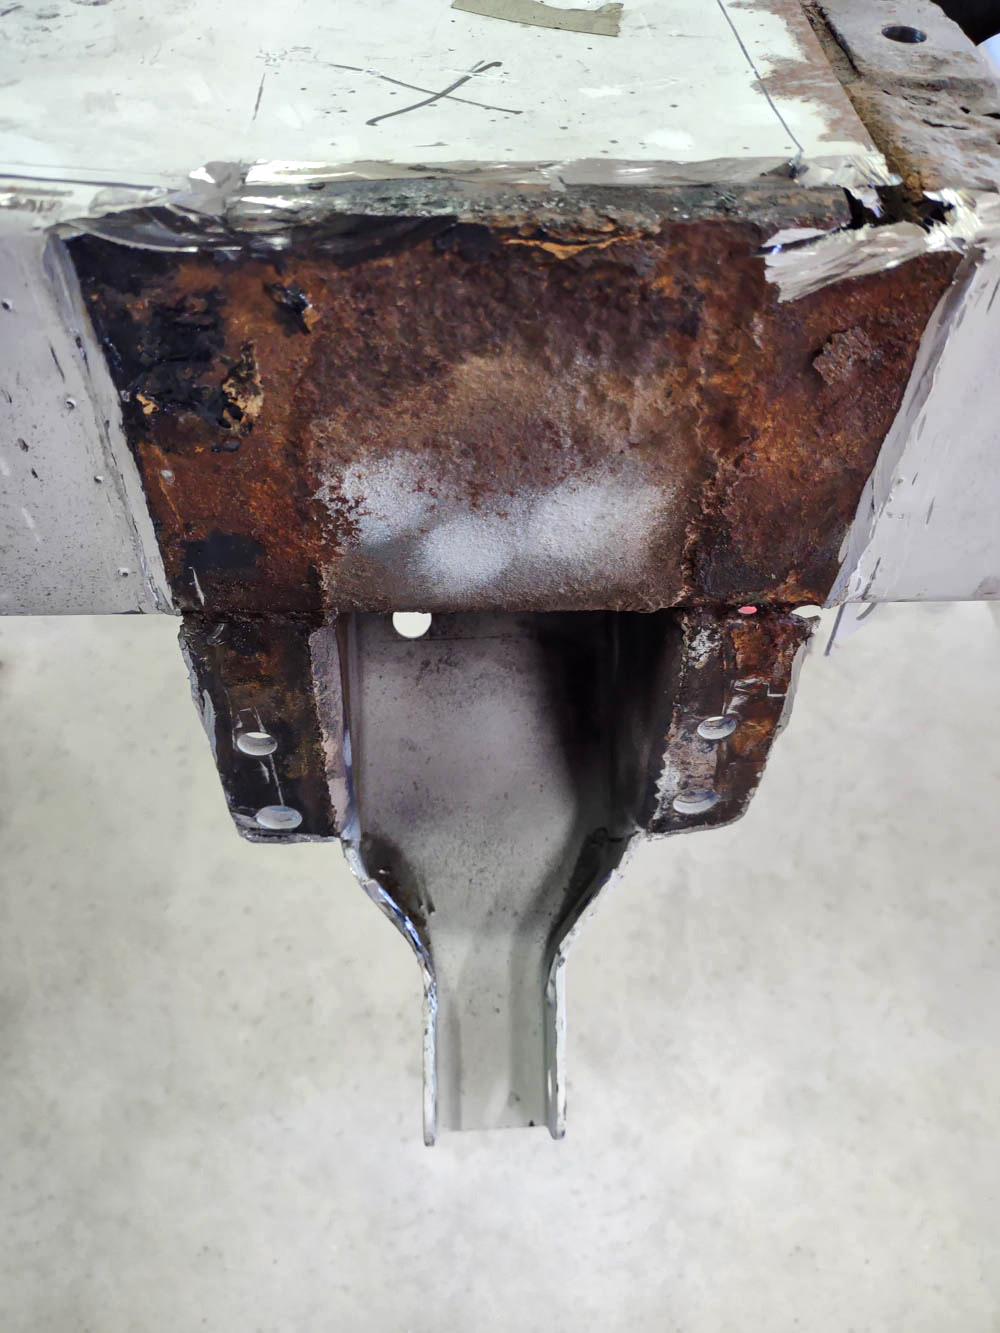
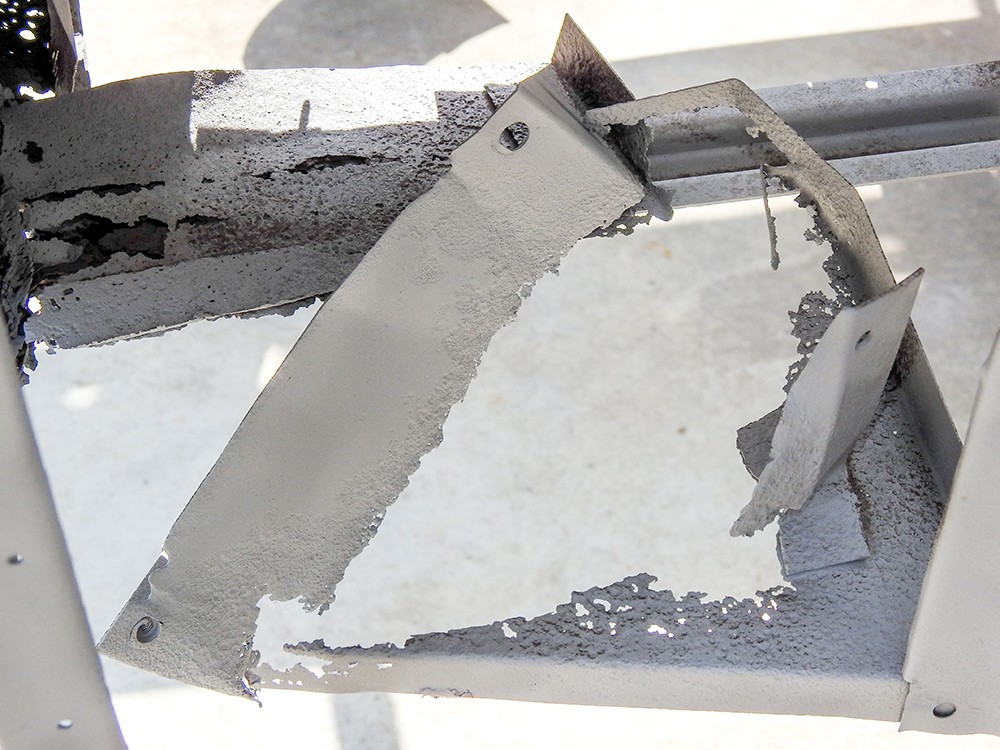
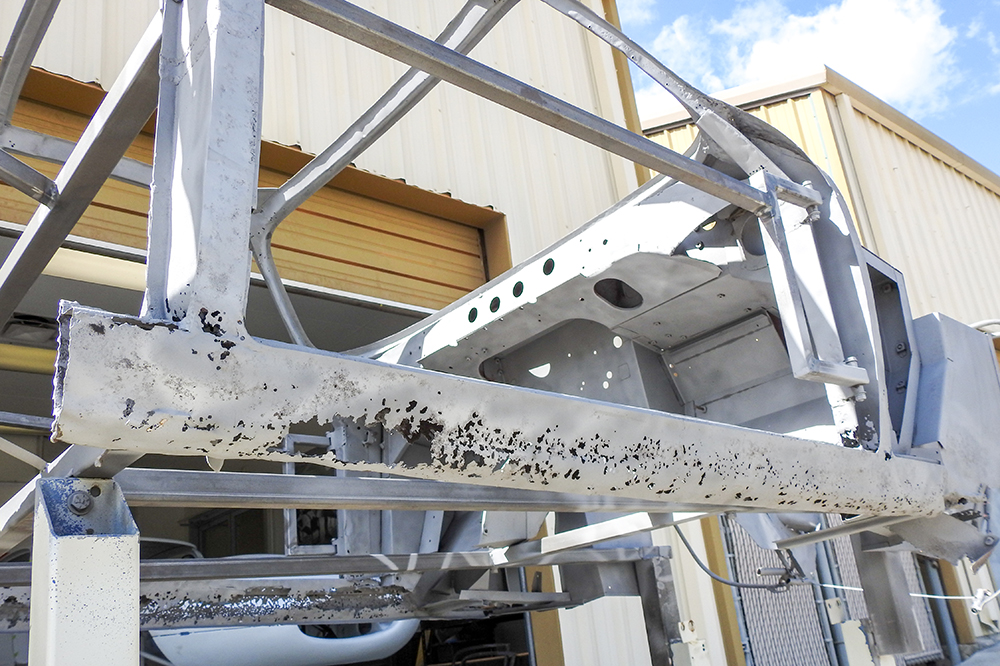
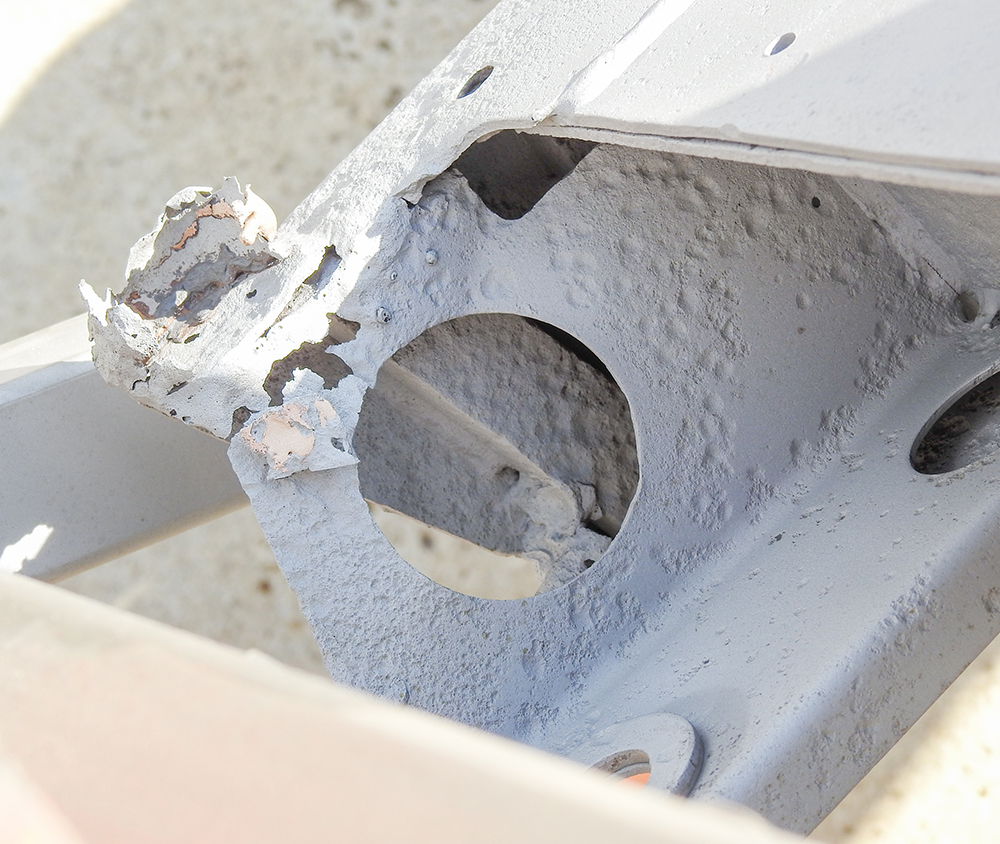
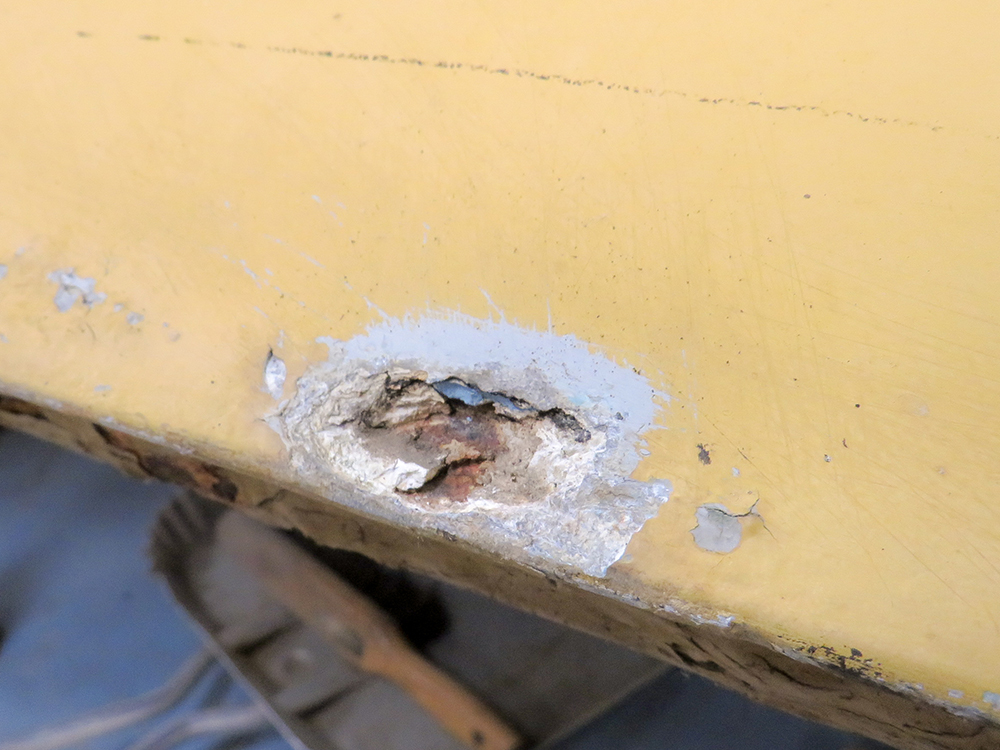
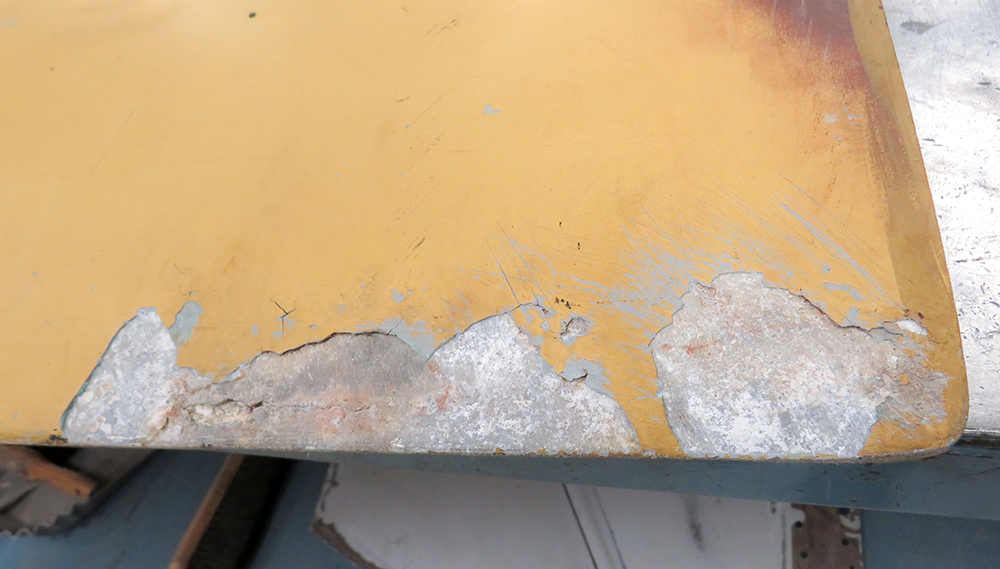
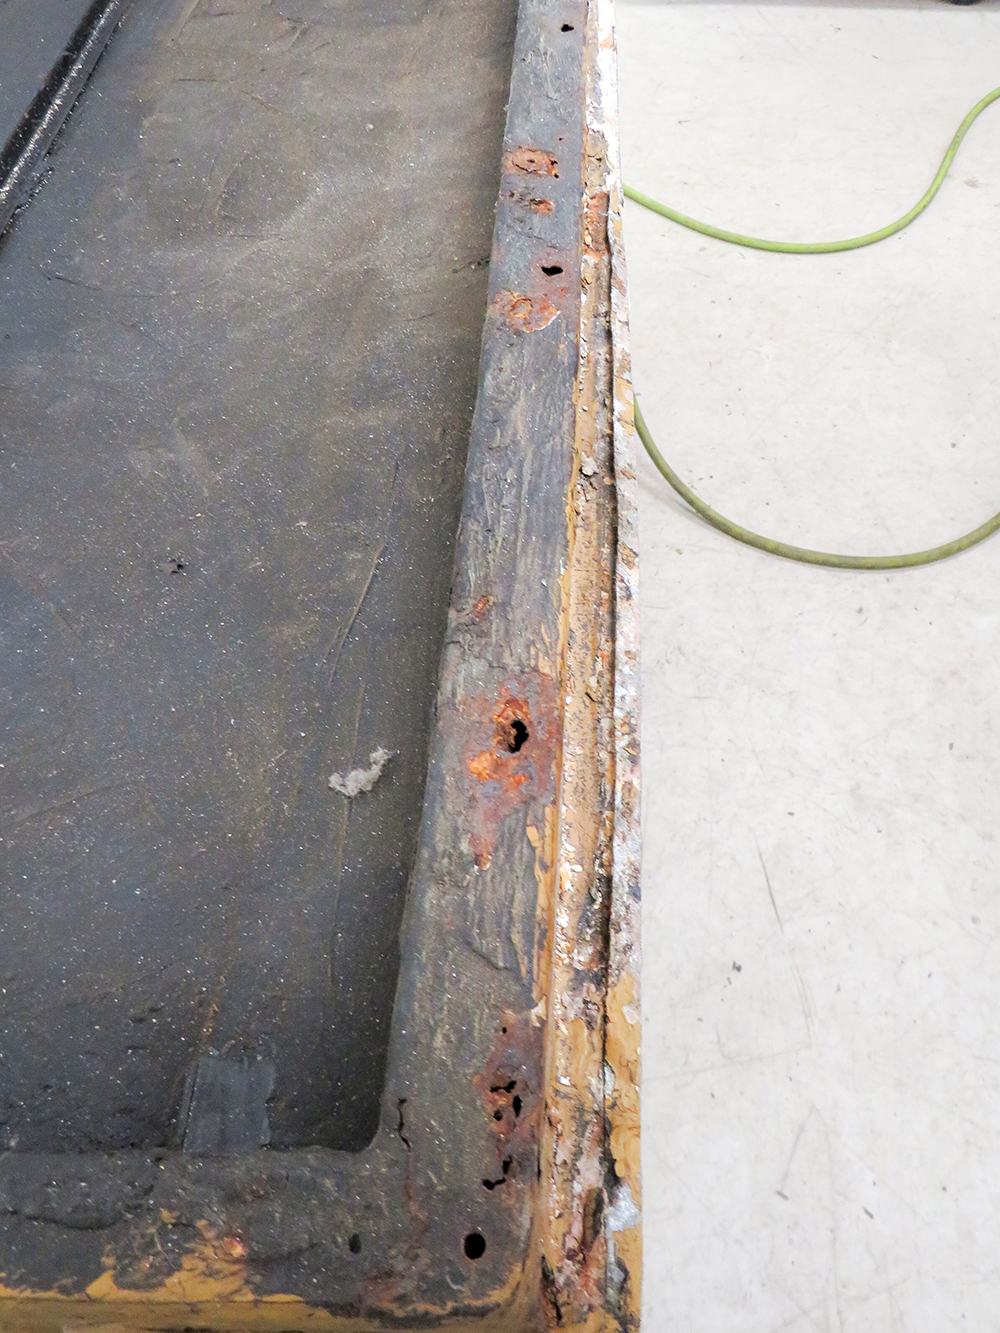
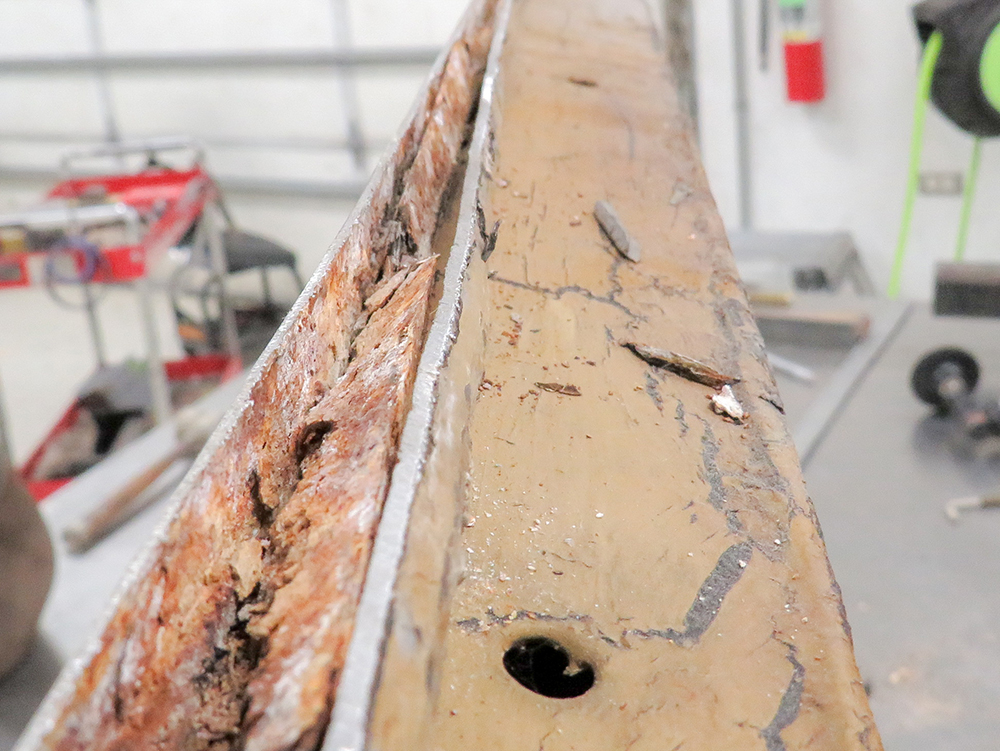
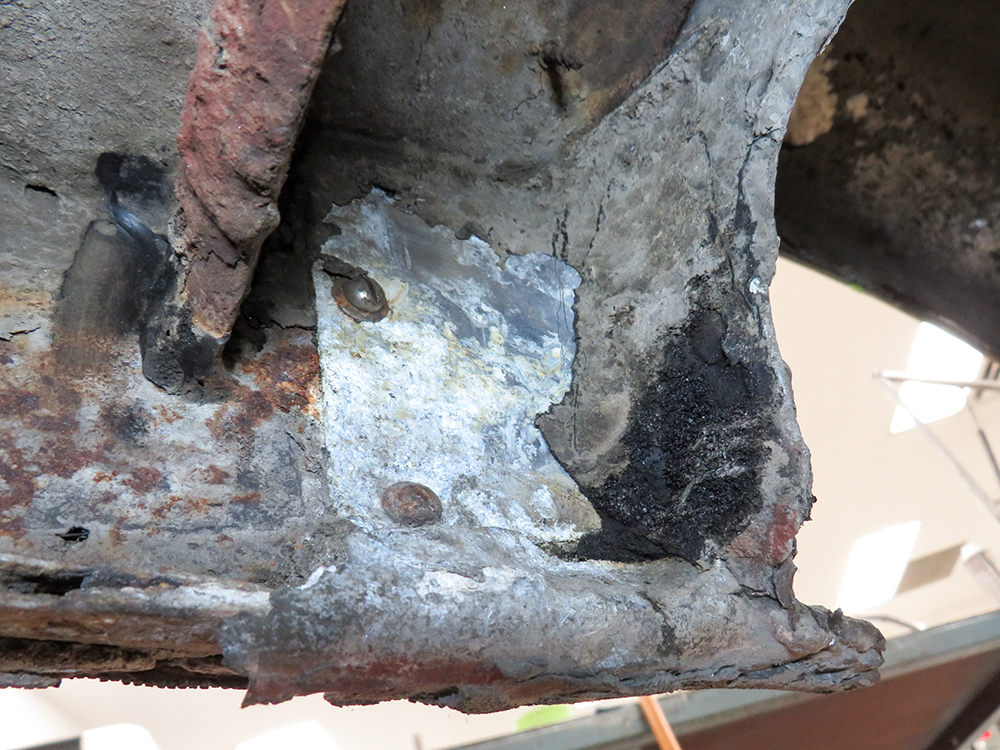
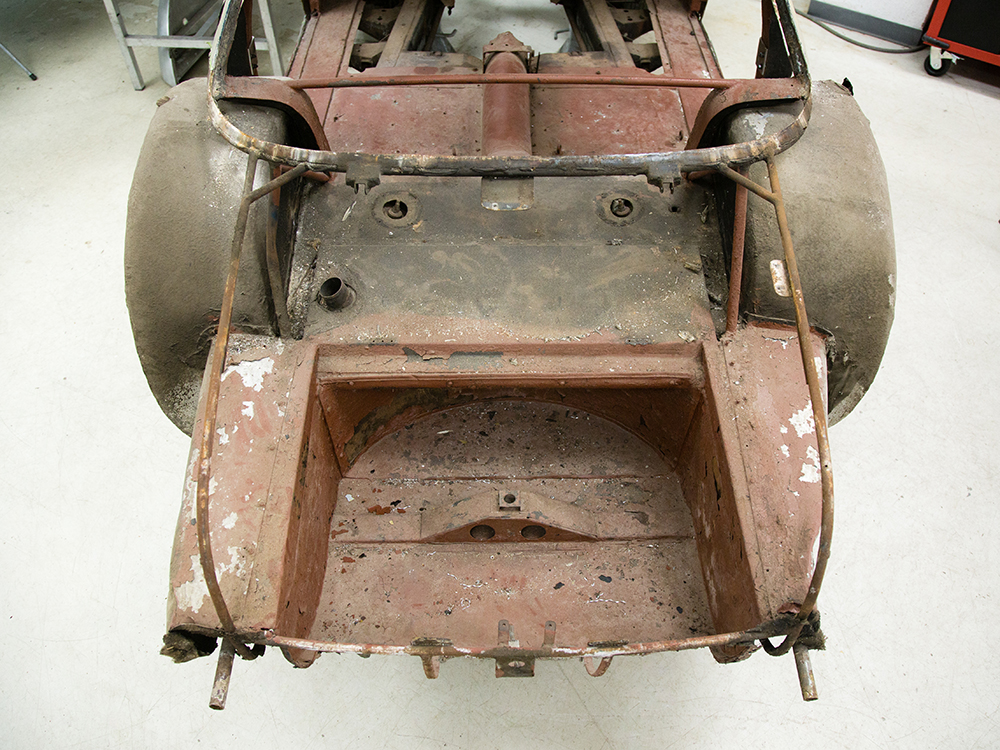
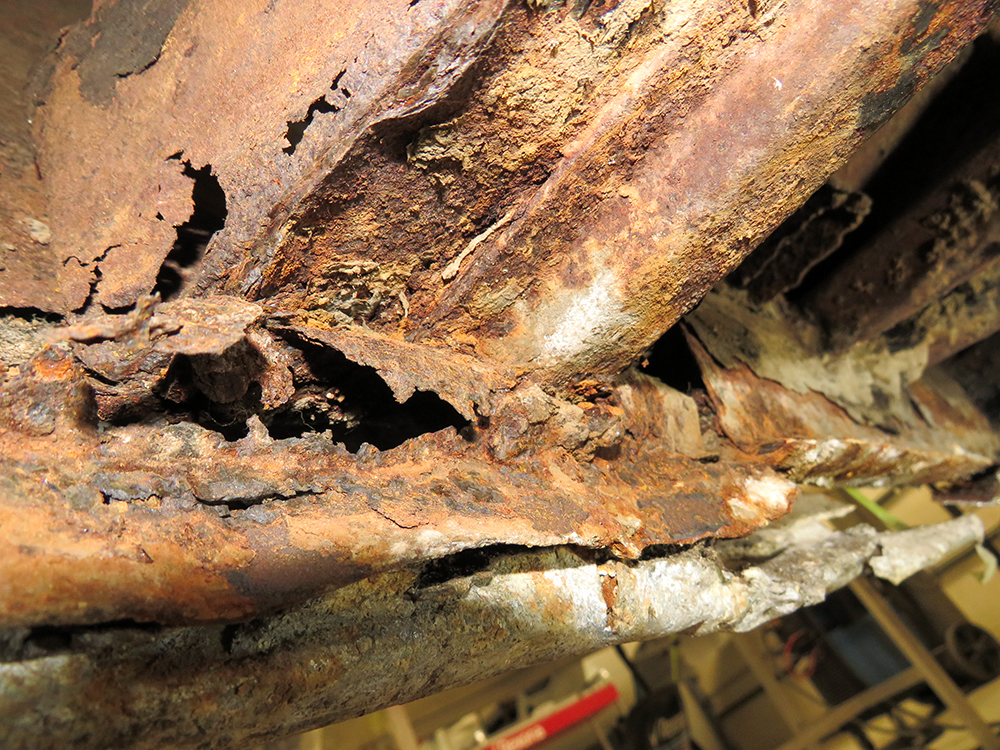
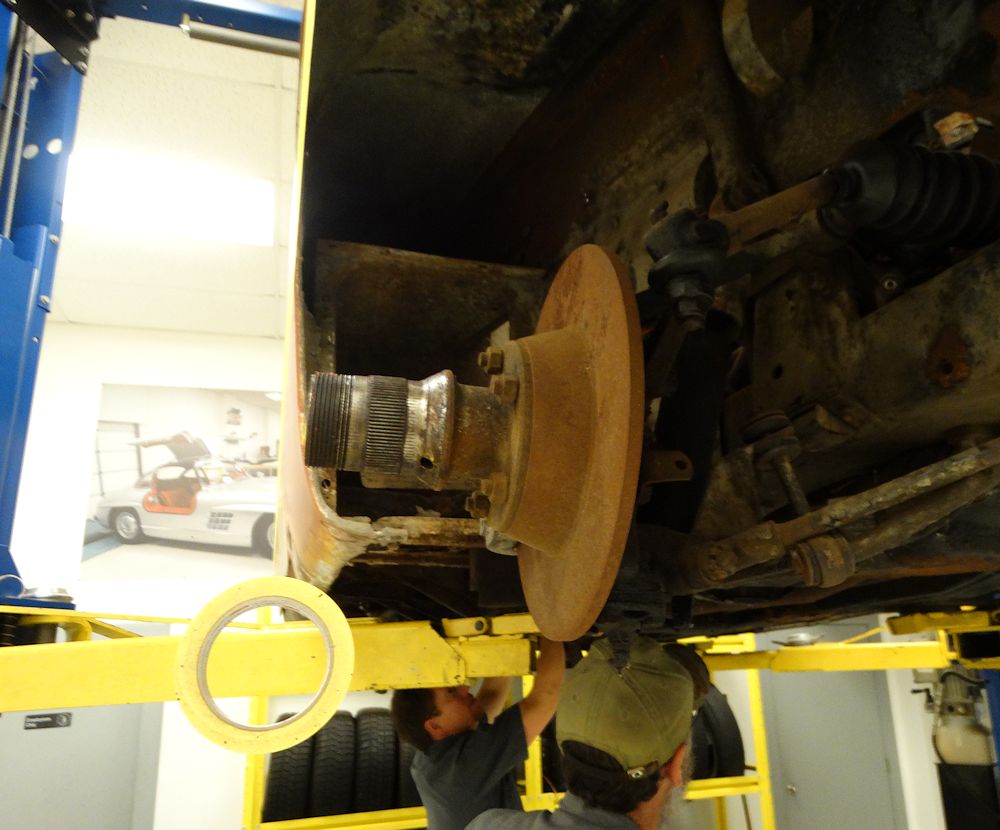
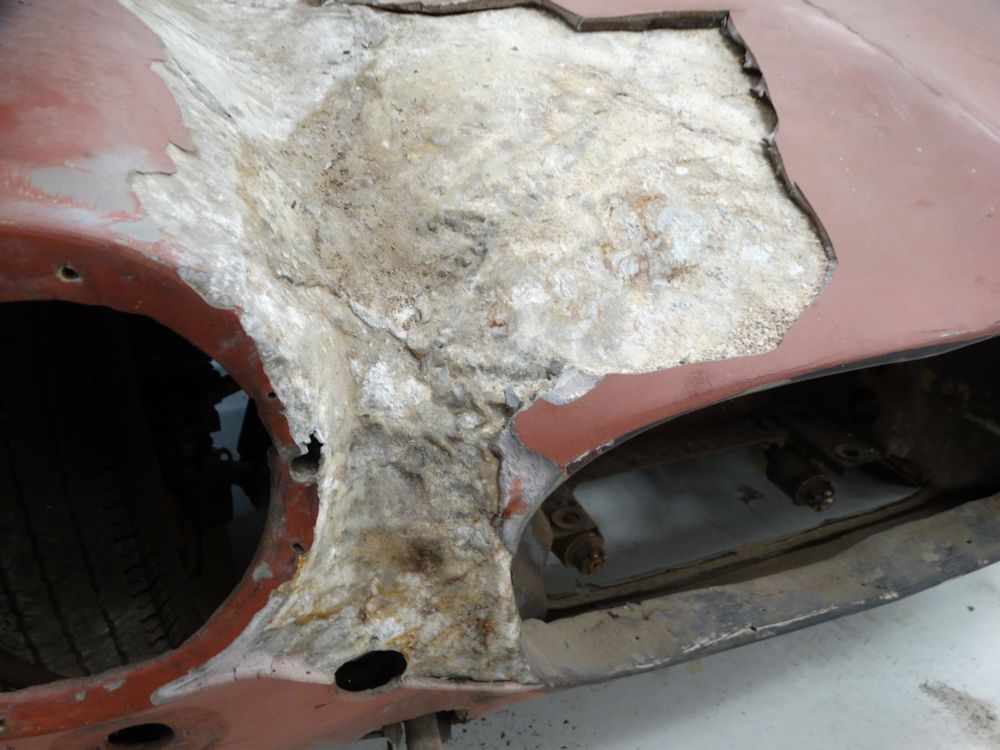
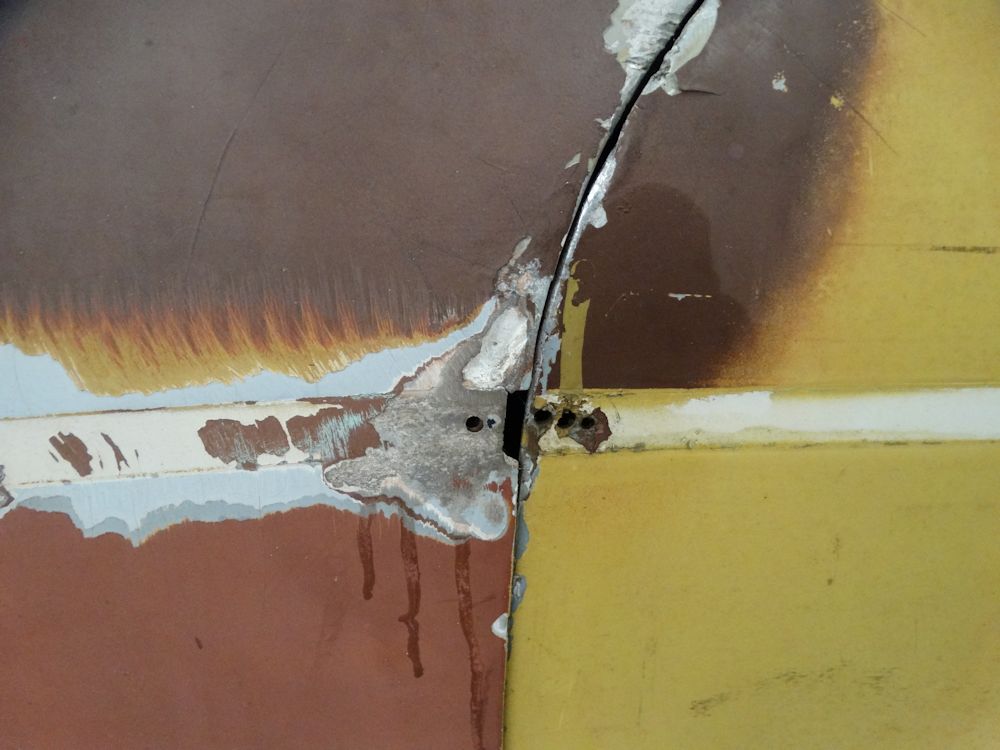
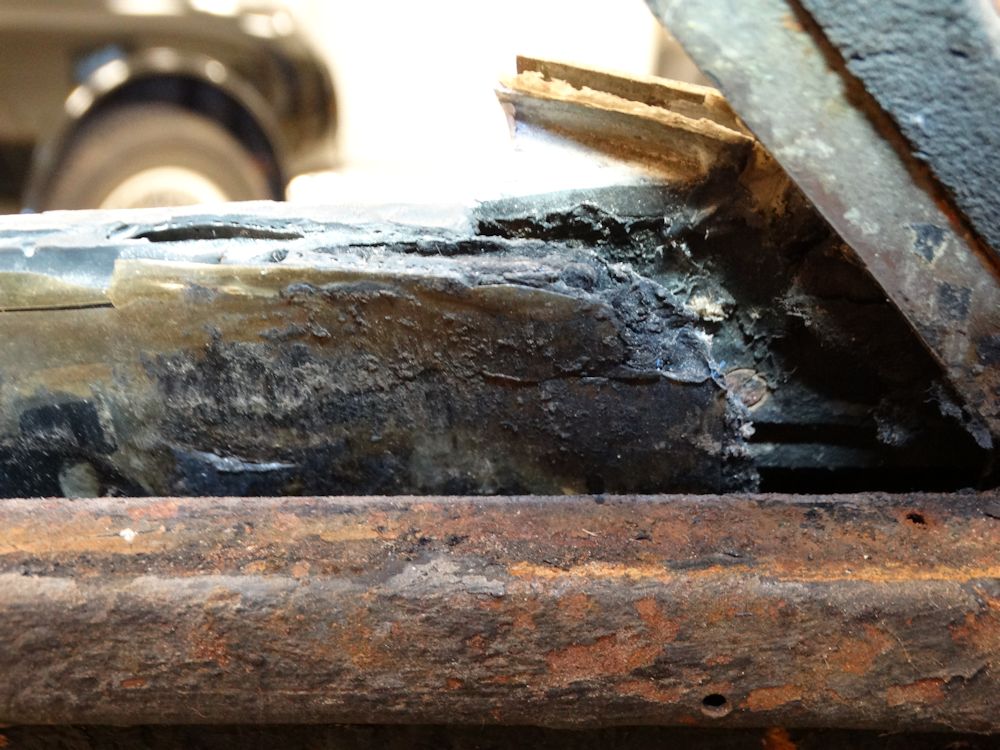
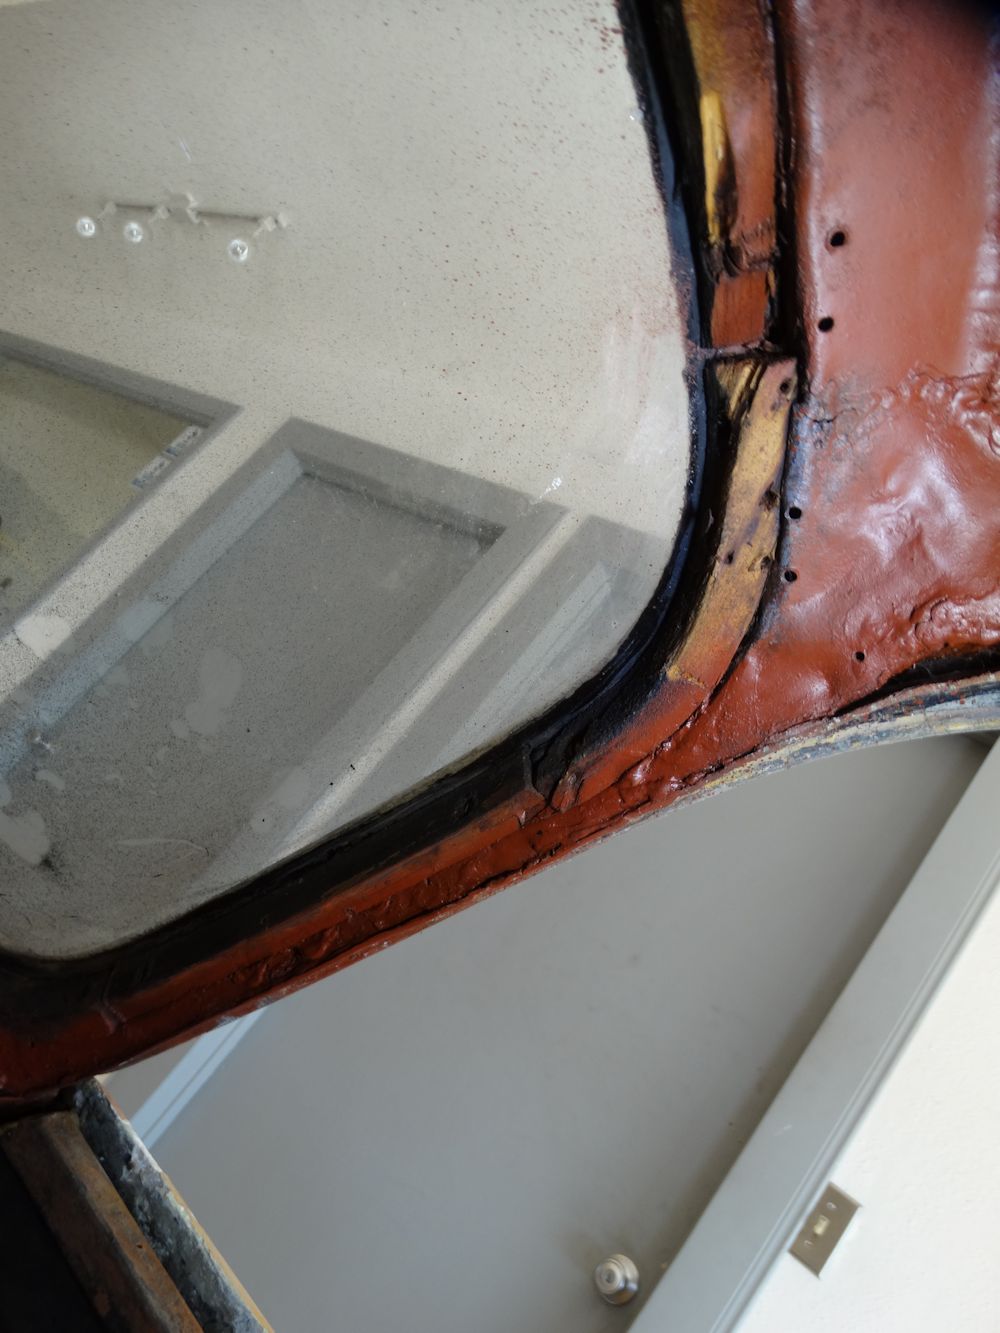
Severe galvanic corrosion where the aluminum has
been in contact with the steel
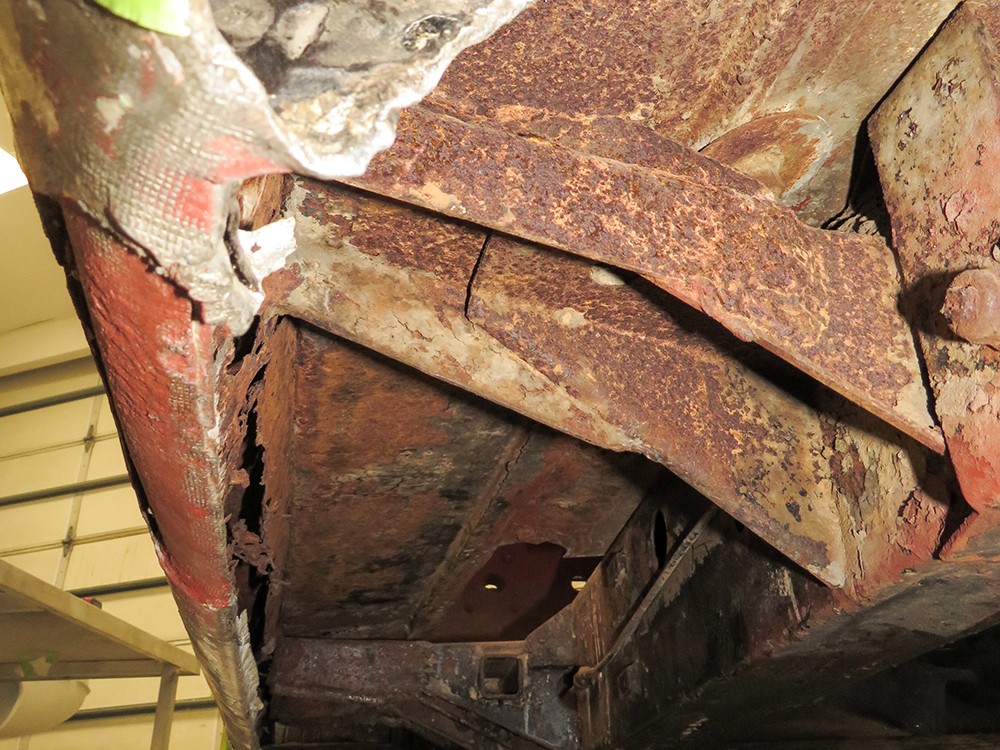
This image shows the bottom edges of the aluminum
front wings wrapped around the steel frame
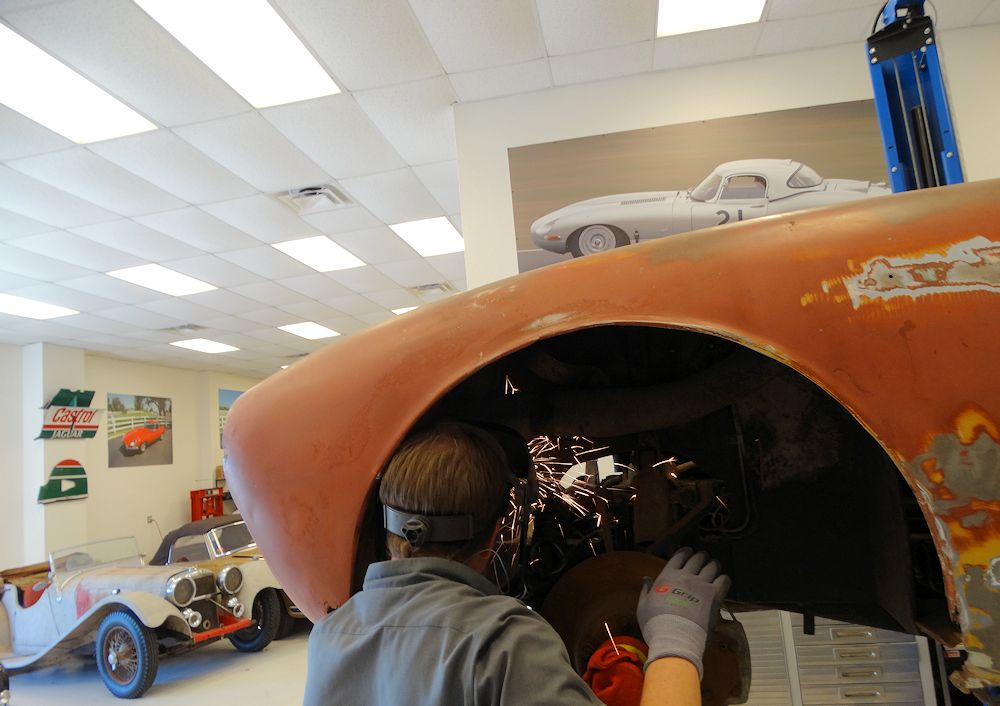
Cutting away the flange around the engine
bay opening
April 6, 2020
April 6, 2020
Lifting the alloy front skin away
April 6, 2020
April 6, 2020
April 6, 2020
April 6, 2020
April 6, 2020
April 6, 2020
April 6, 2020
April 6, 2020
April 6, 2020
April 6, 2020
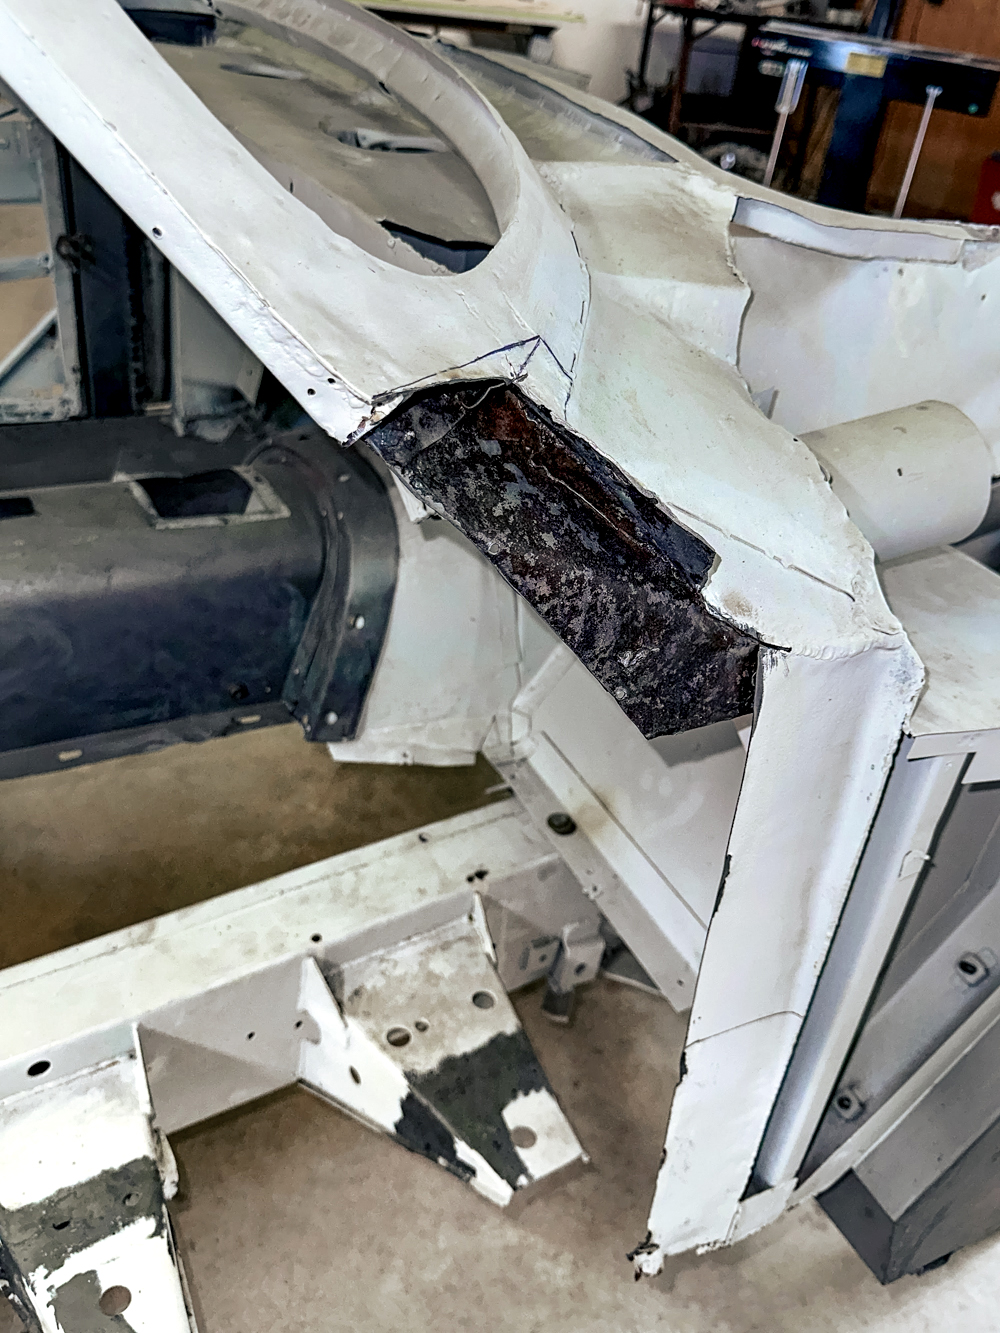
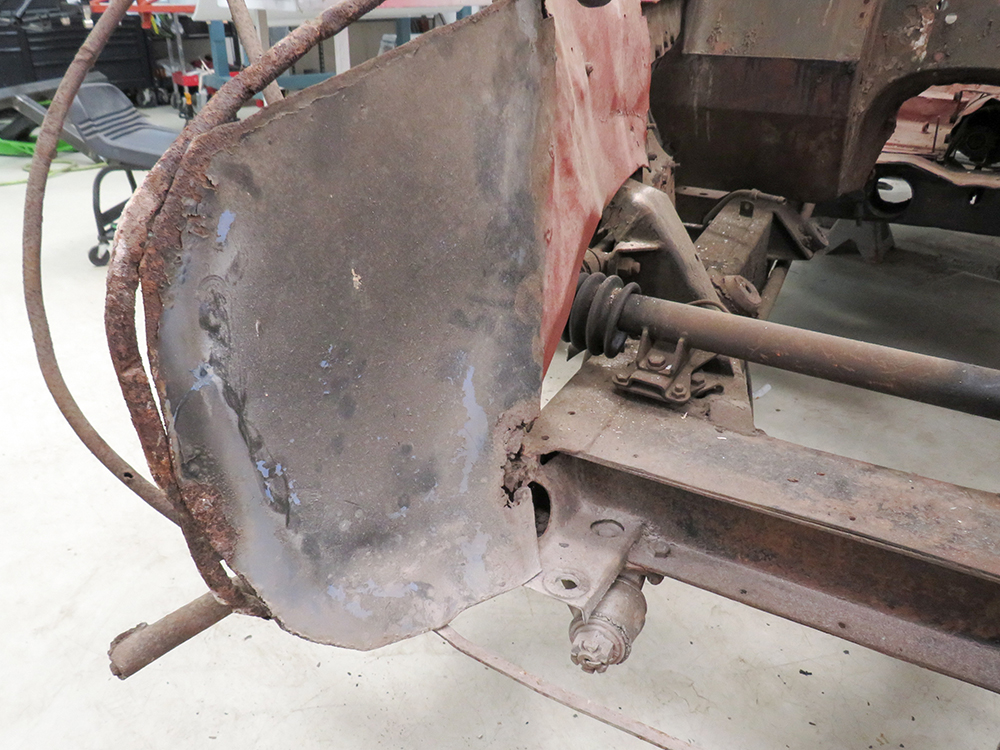
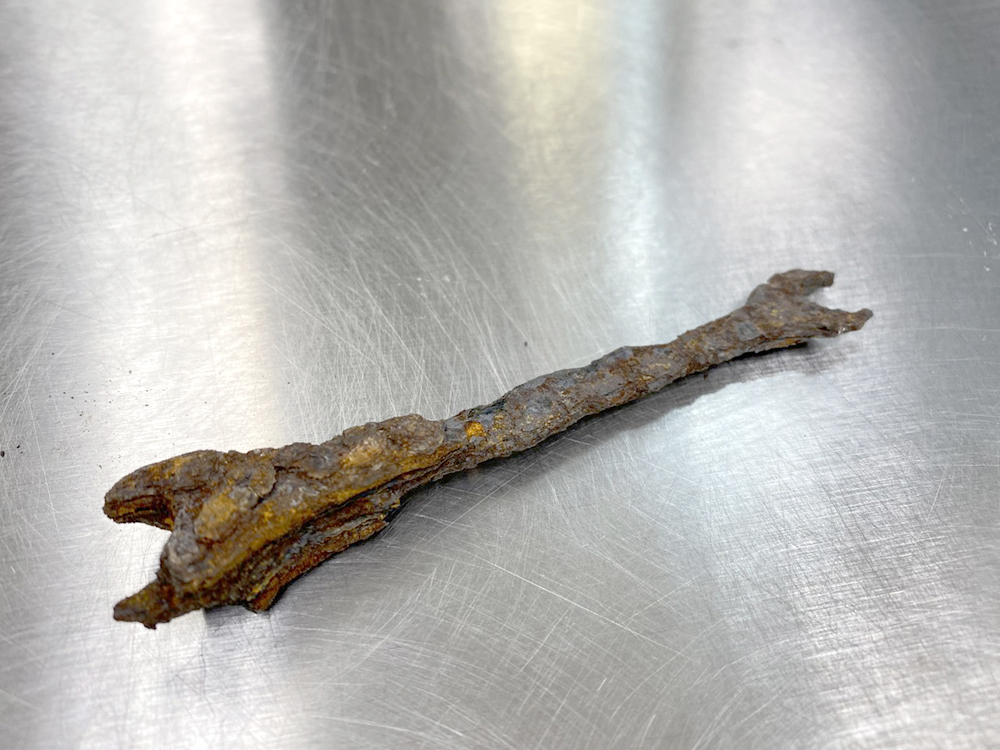
This wrench has been lurking inside the left front
quarter panel since 1957
April 6, 2020
The following sequence of photographs show the inner structure for the new boot lid. This was a complex and difficult panel to fabricate, and Edward really did a superb job!
The wrench must have belonged to a Zagato
technician who built the car in 1957
February 9, 2020
February 9, 2020
February 9, 2020
February 9, 2020
February 9, 2020
February 9, 2020
February 9, 2020
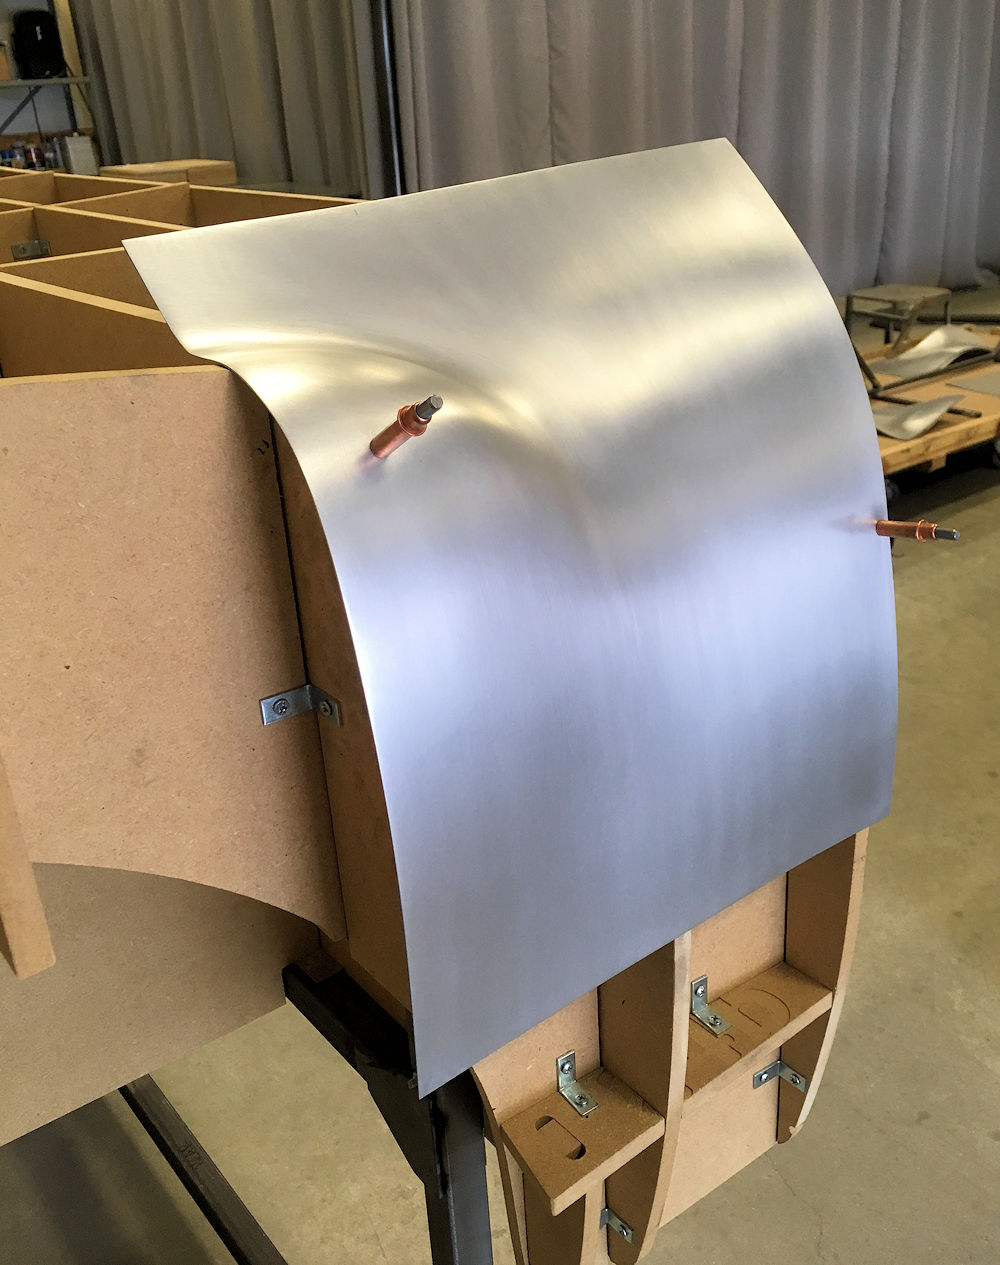
The following sequence of photos show Edward fabricating the new boot lid outer skin. This was a particularly challenging panel because of the complex shape and curvature. The only panel left to make at this point is the frame for the boot lid.
February 9, 2020
February 9, 2020
February 9, 2020
February 9, 2020
February 9, 2020
February 9, 2020
February 9, 2020
February 9, 2020
February 9, 2020
Edward has been busy fabricating the new panel between the left rear wing and the boot lid.
Shaping the left hand rear wing on the buck, then both left and right forward sections of the rear quarter panels.
Shaping the right rear wing on the station buck.
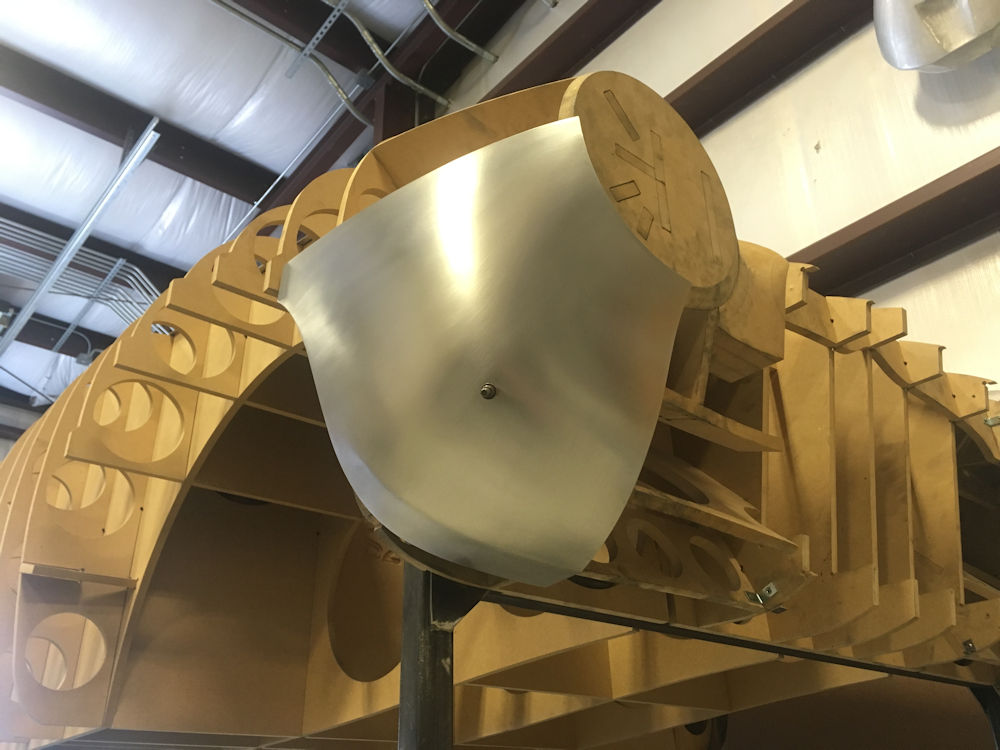
Shaping the rear lamp panels.
Interesting to see the new nose alongside the original body yesterday.
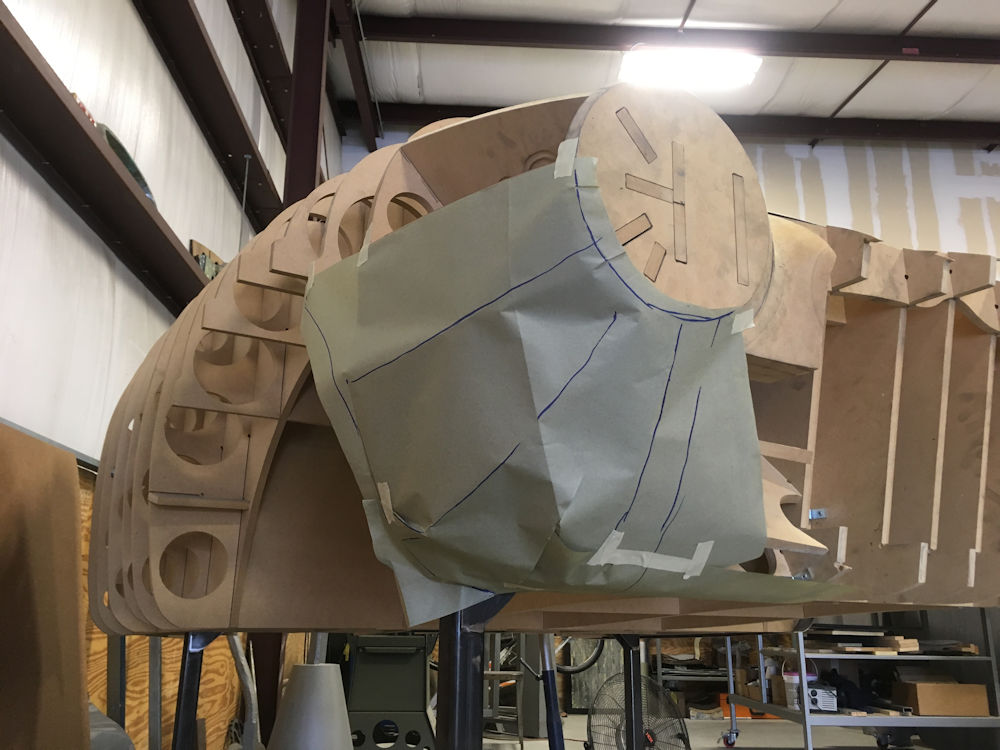
Edward has now cut and assembled the rear station buck and has made the first two panels for the rear end.
Edward has now completed the design of the station buck for the rear bodywork.
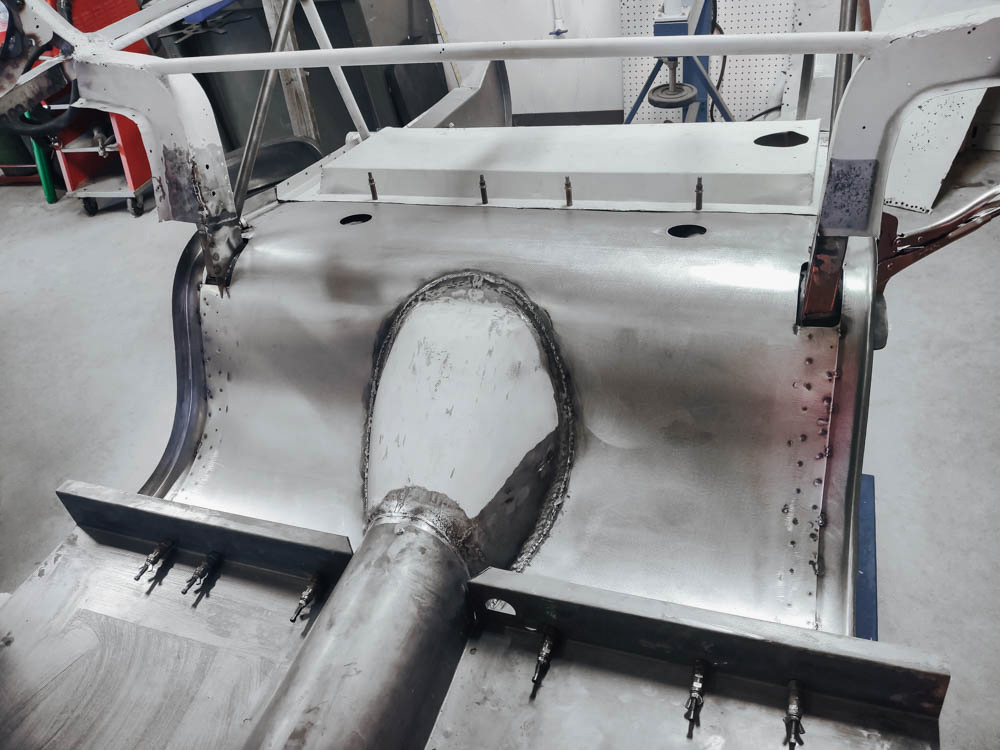
Edward has now welded together all the various newly fabricated panels which form the outer skin of the bonnet. Next task is to recreate the steel tubing that acts as the lower frame of the bonnet.
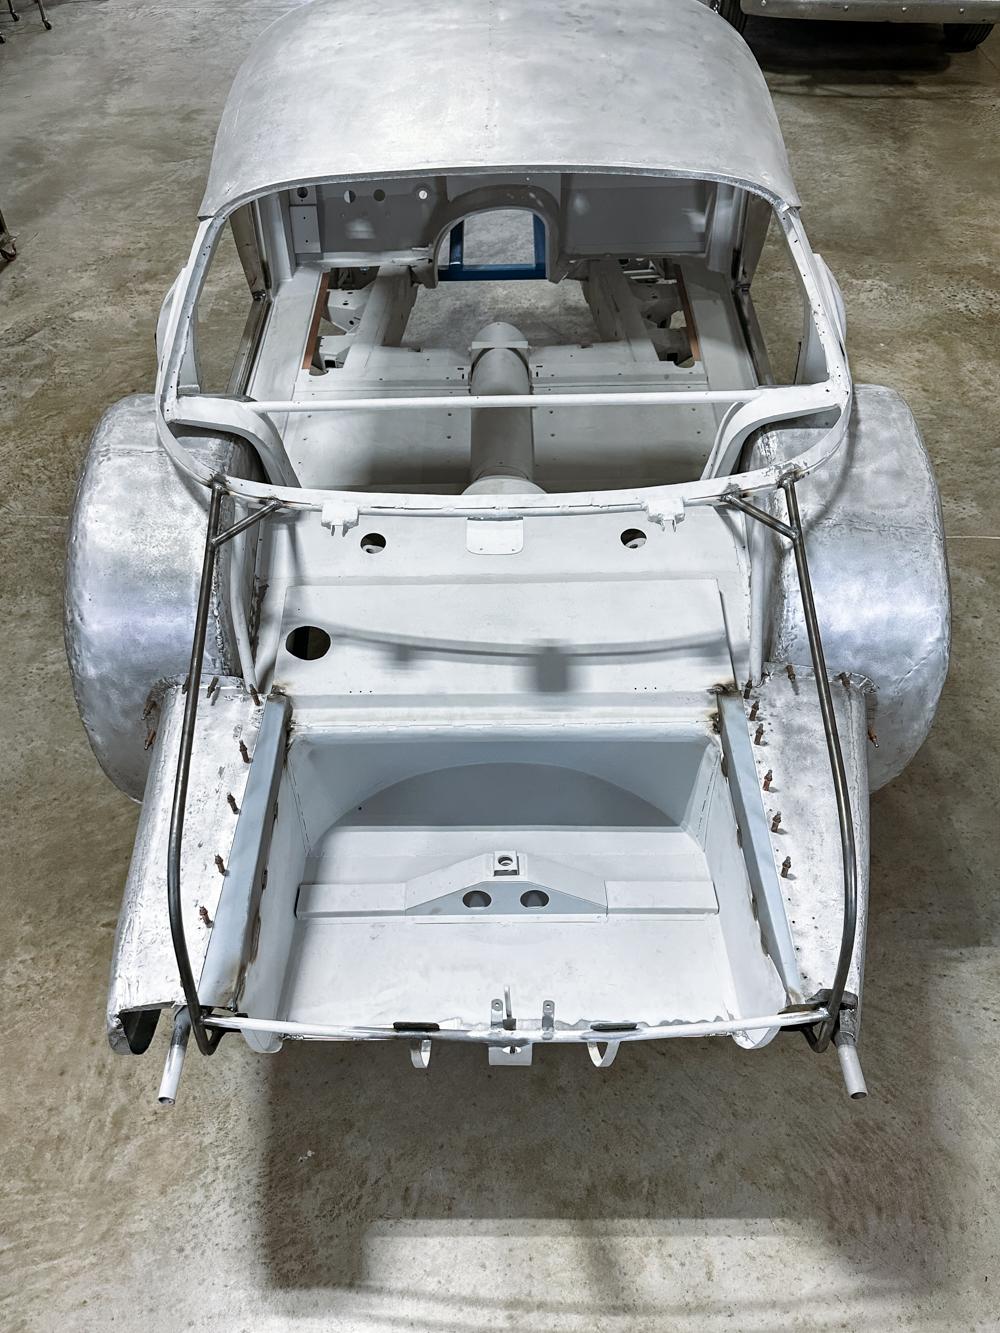
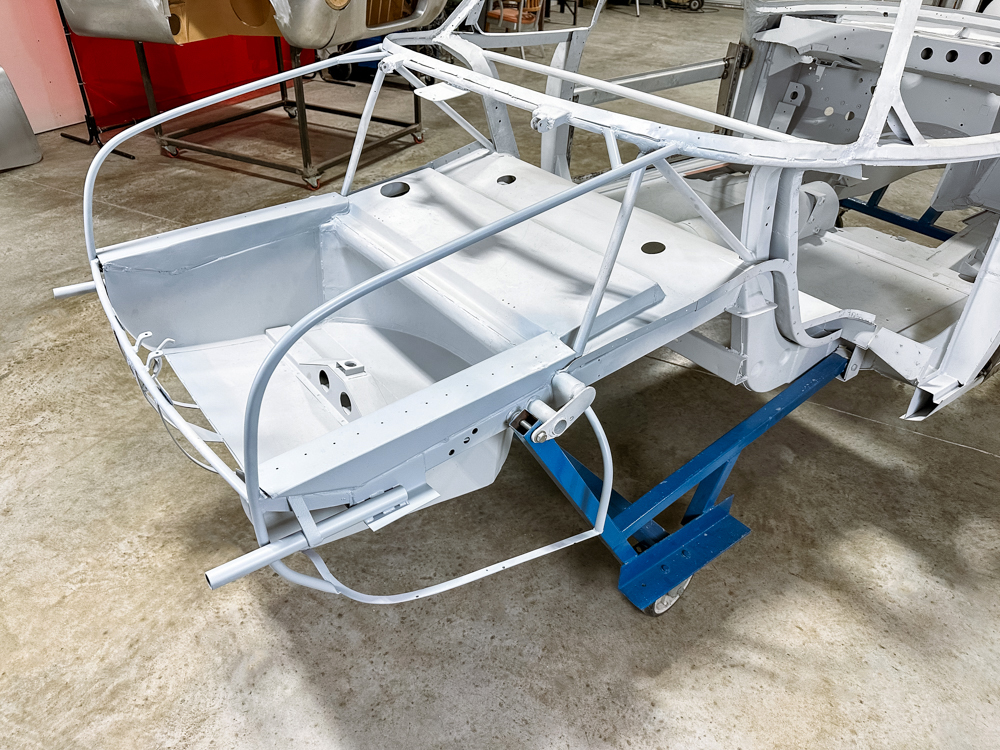
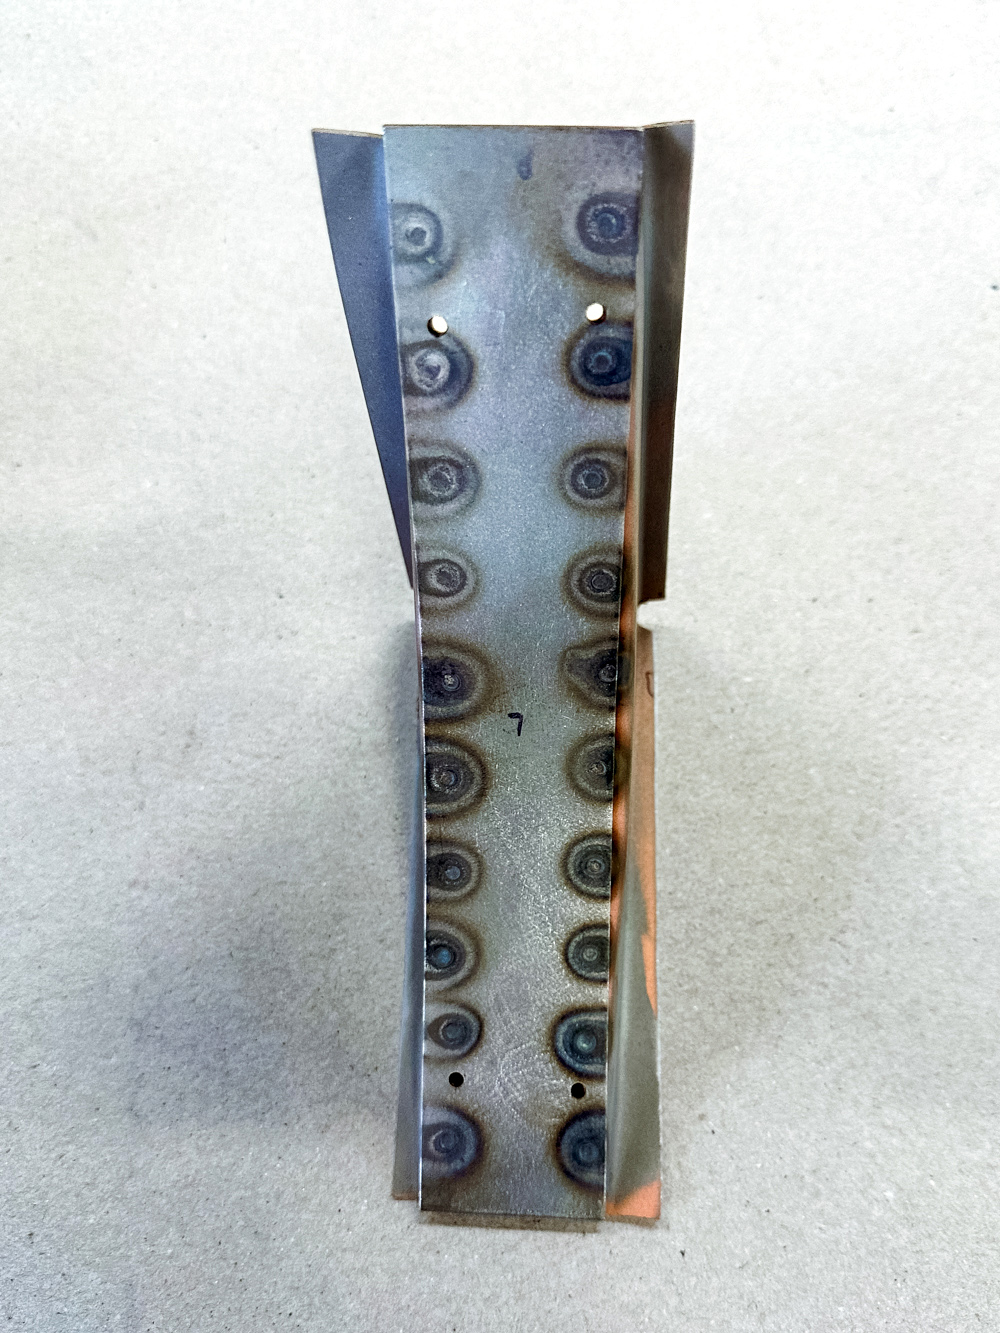
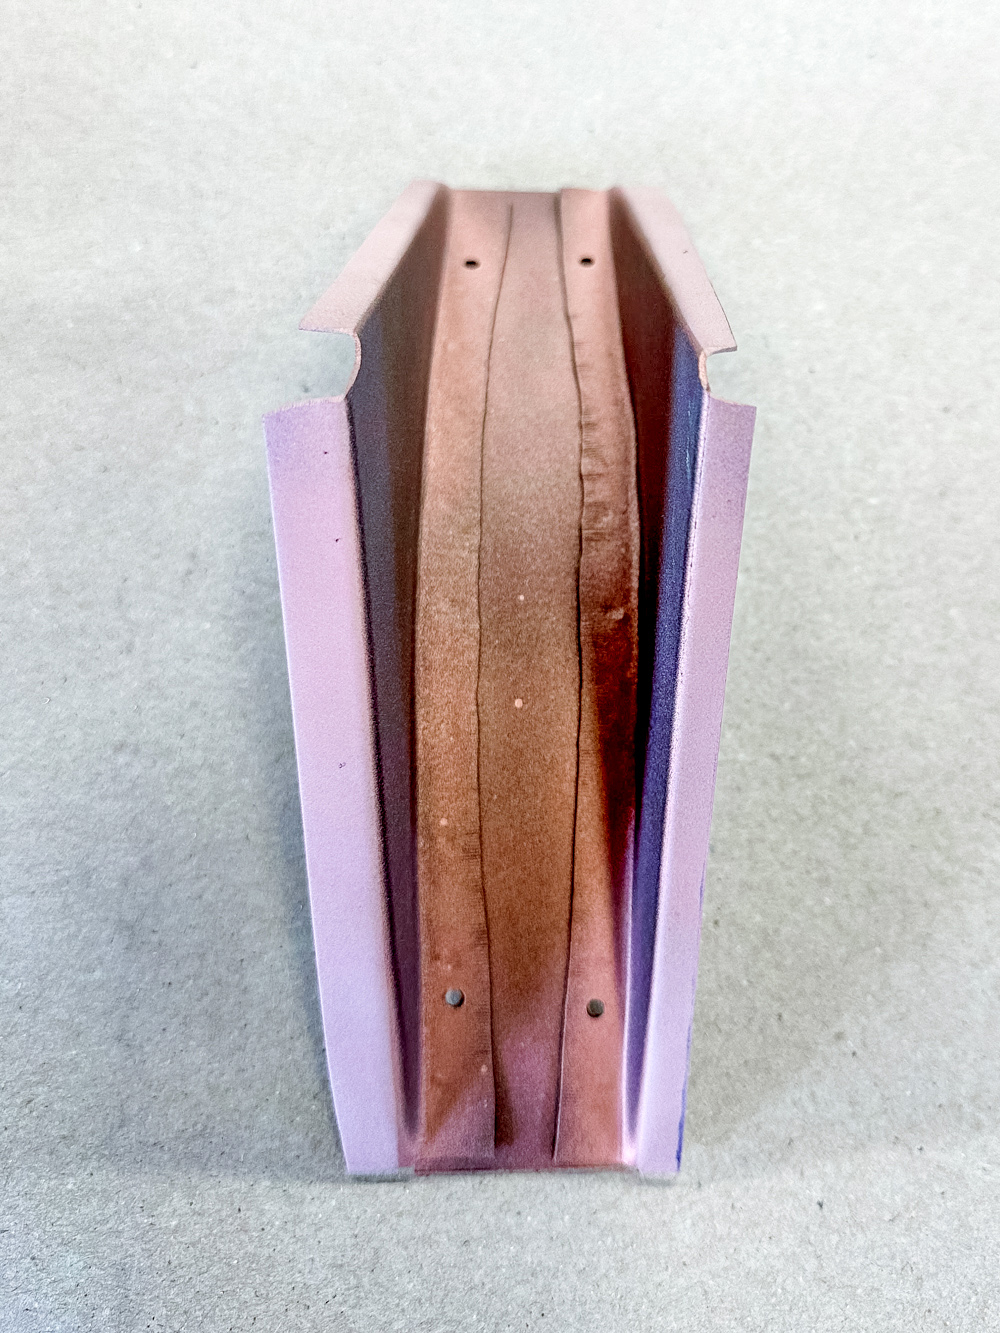
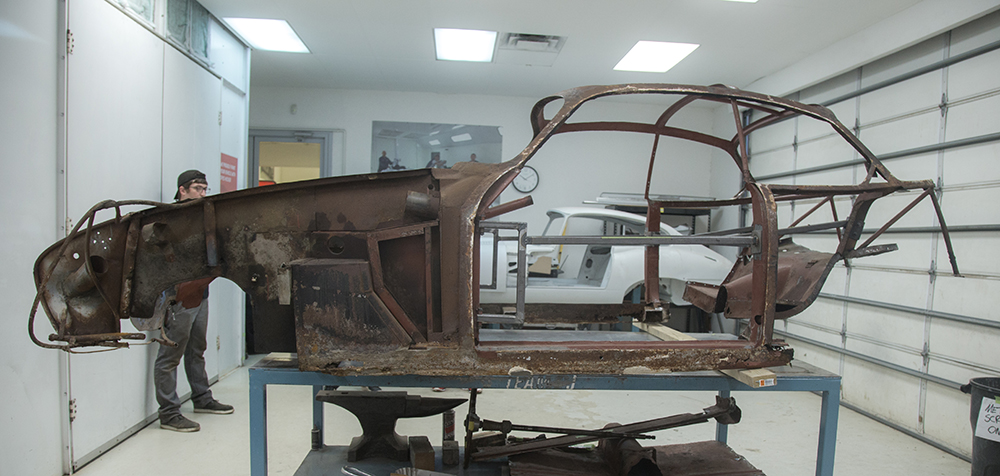
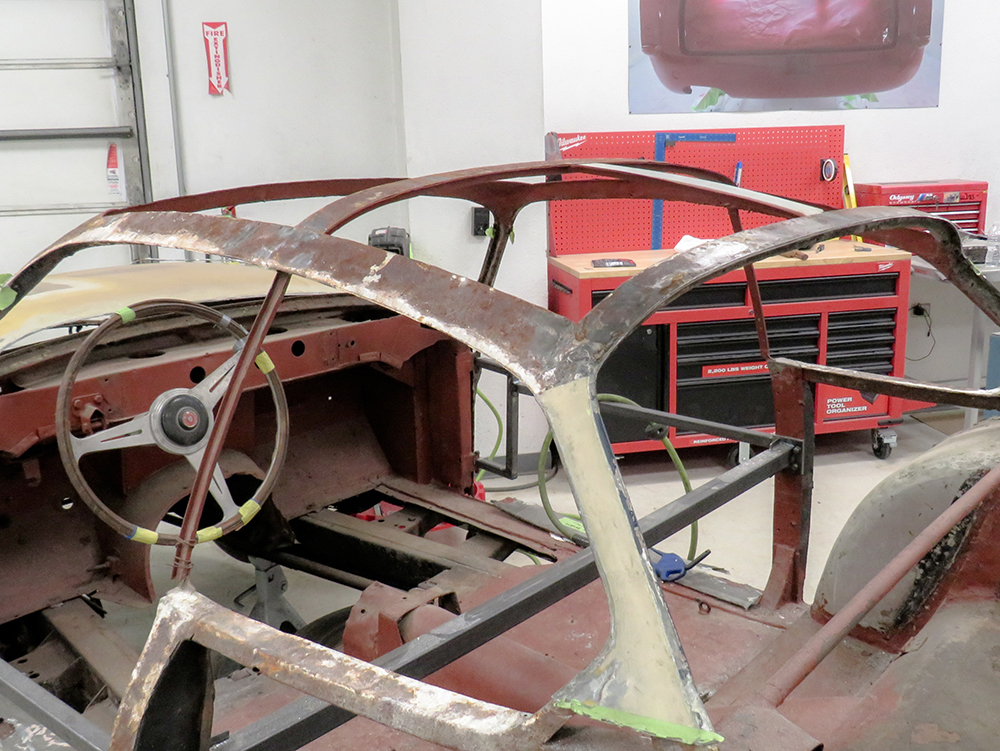
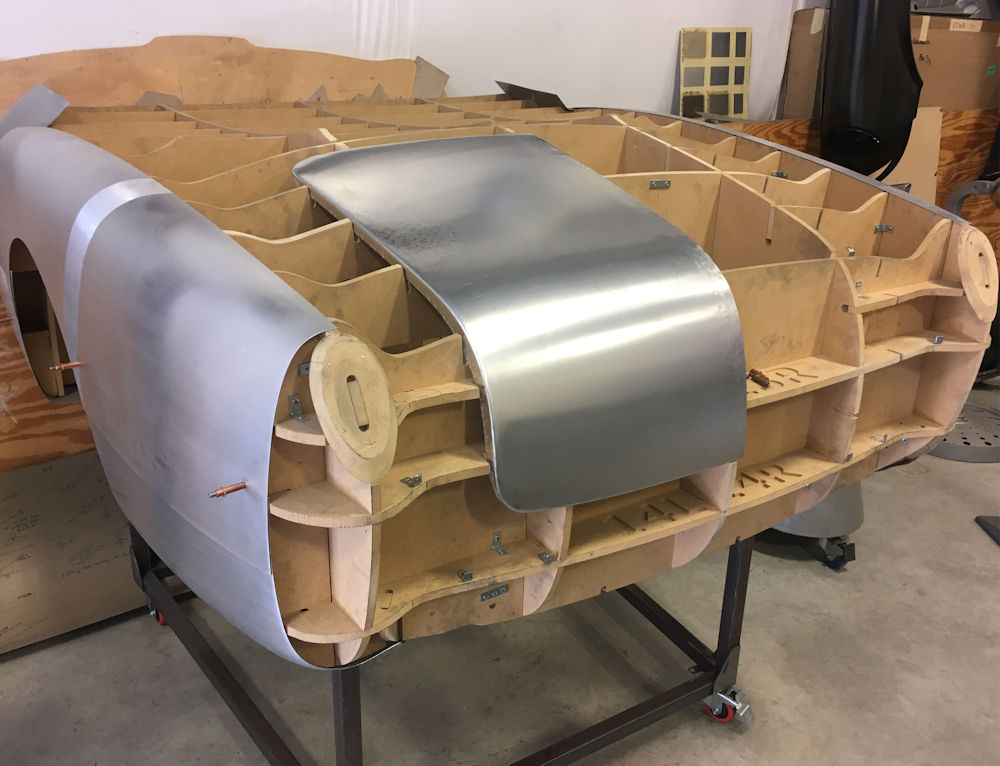
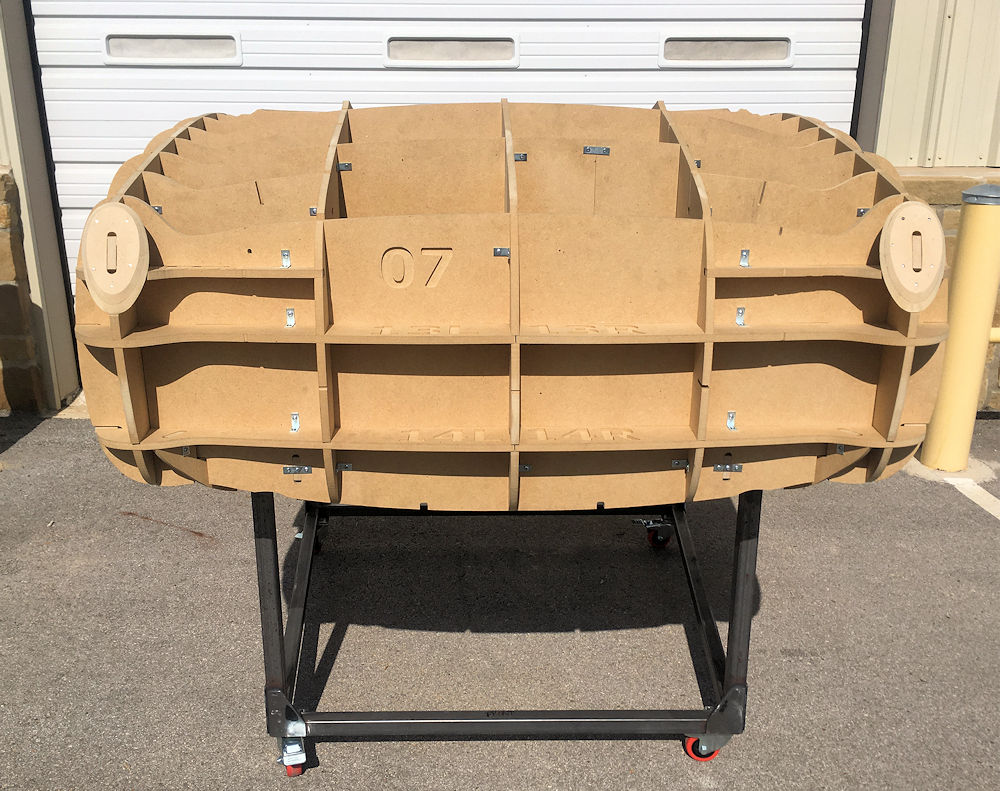
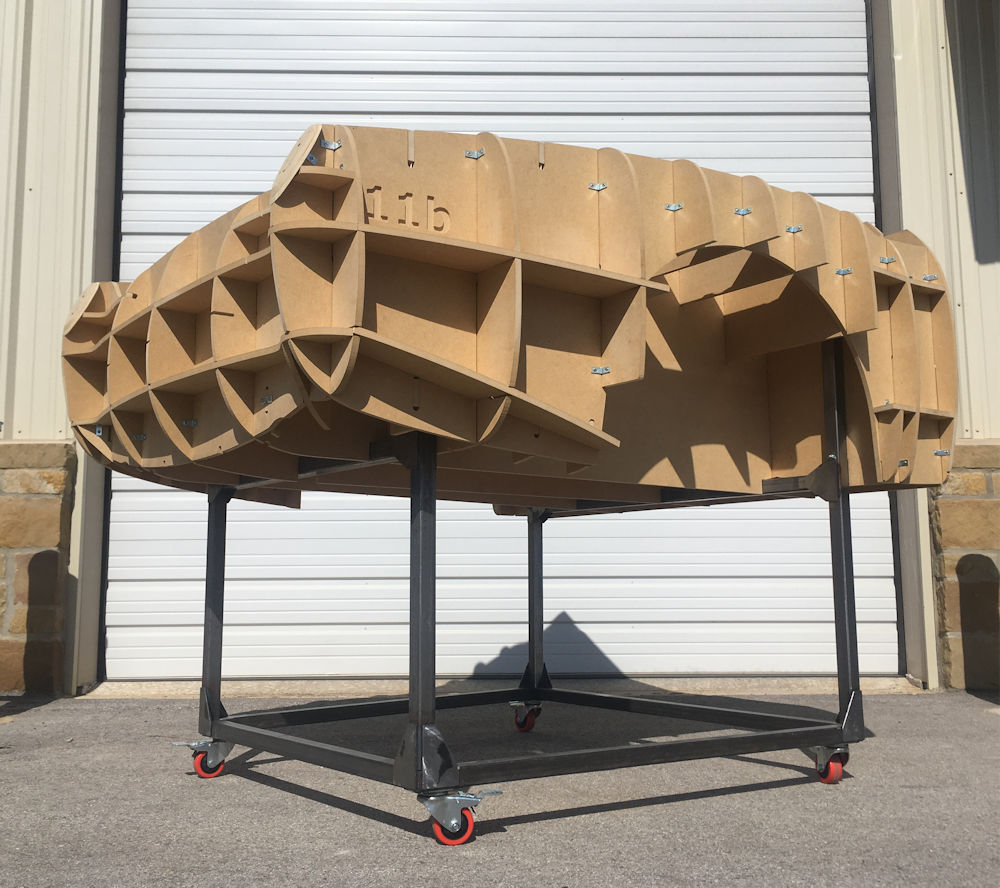
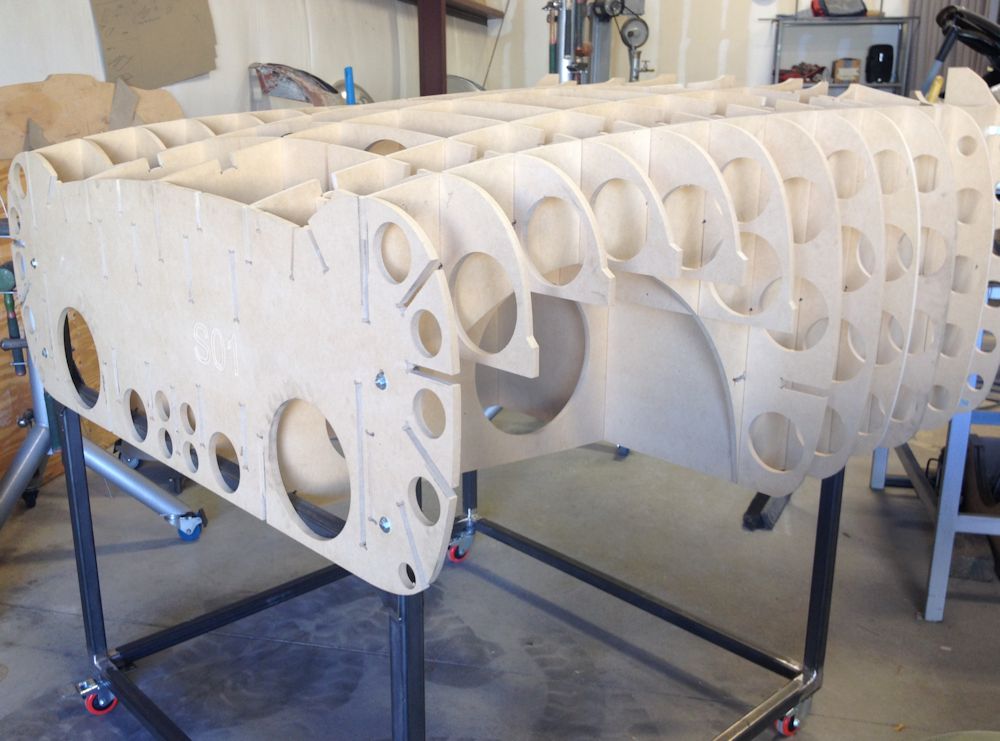
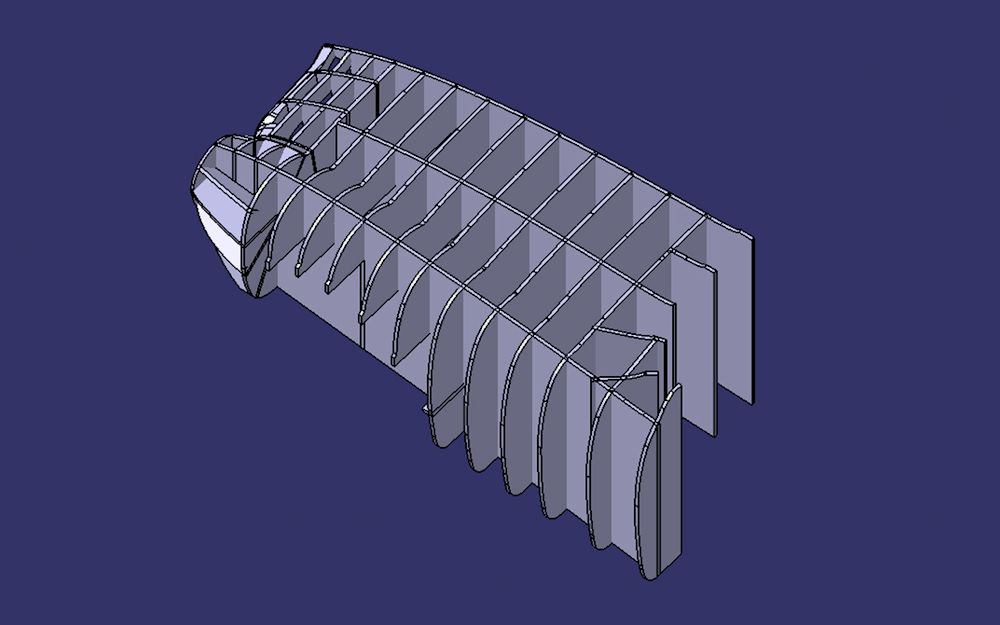
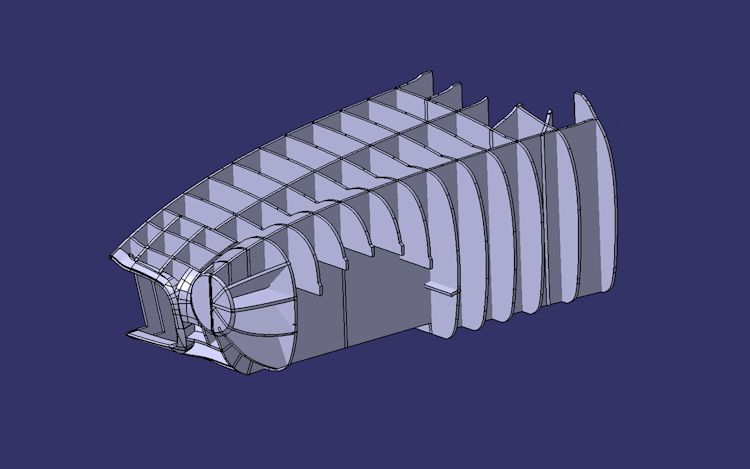
Typical Superleggera construction
Edward has been busy fabricating a new bonnet for the Zagato. The original bonnet had suffered serious galvanic corrosion where the aluminum skin was wrapped around the steel Superleggera frame.
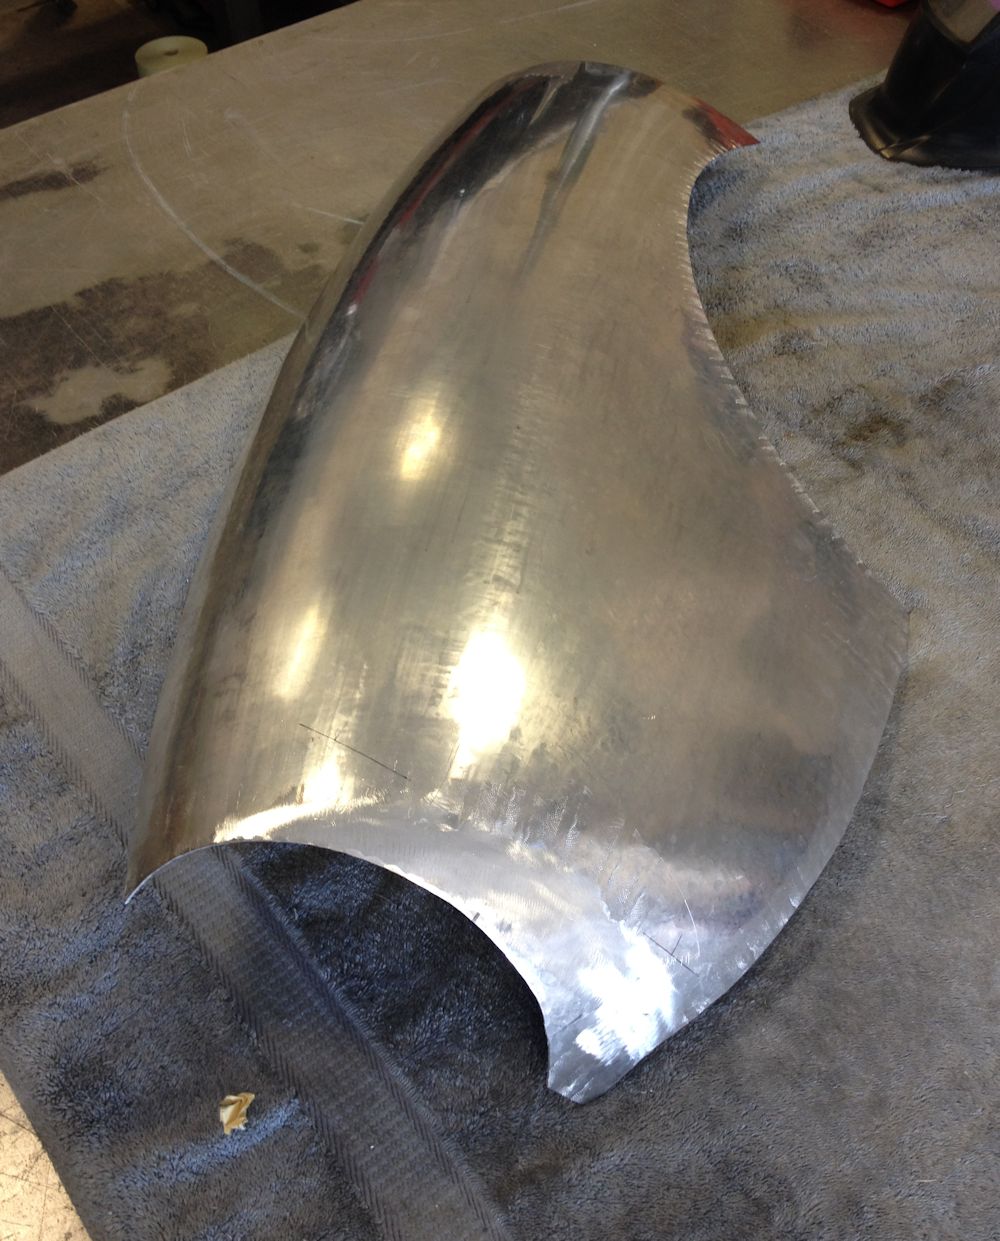
New bonnet starting to take shape
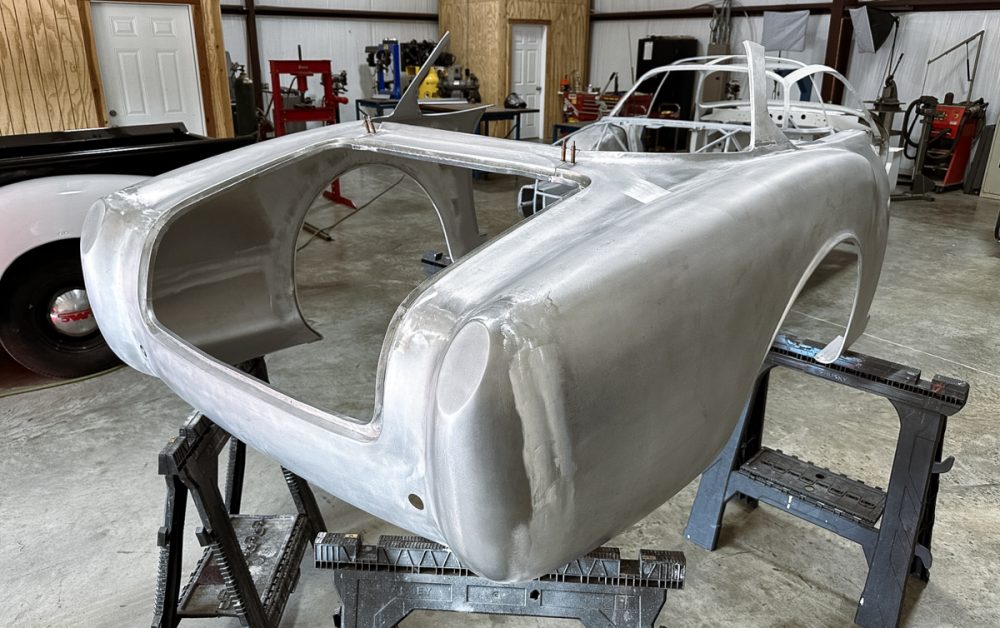
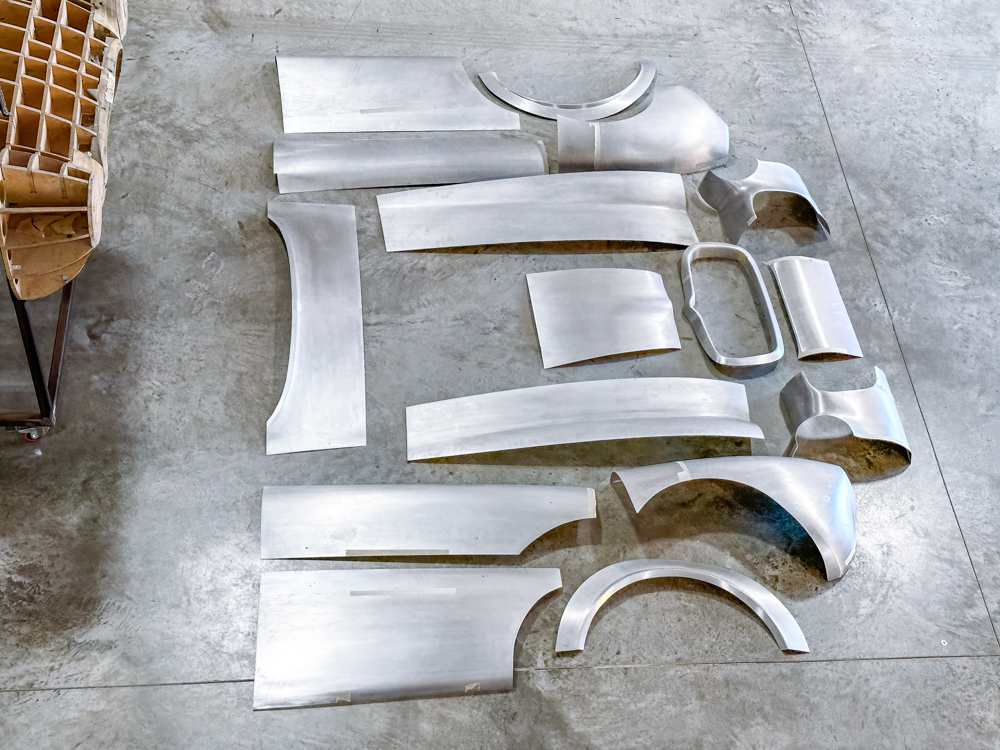
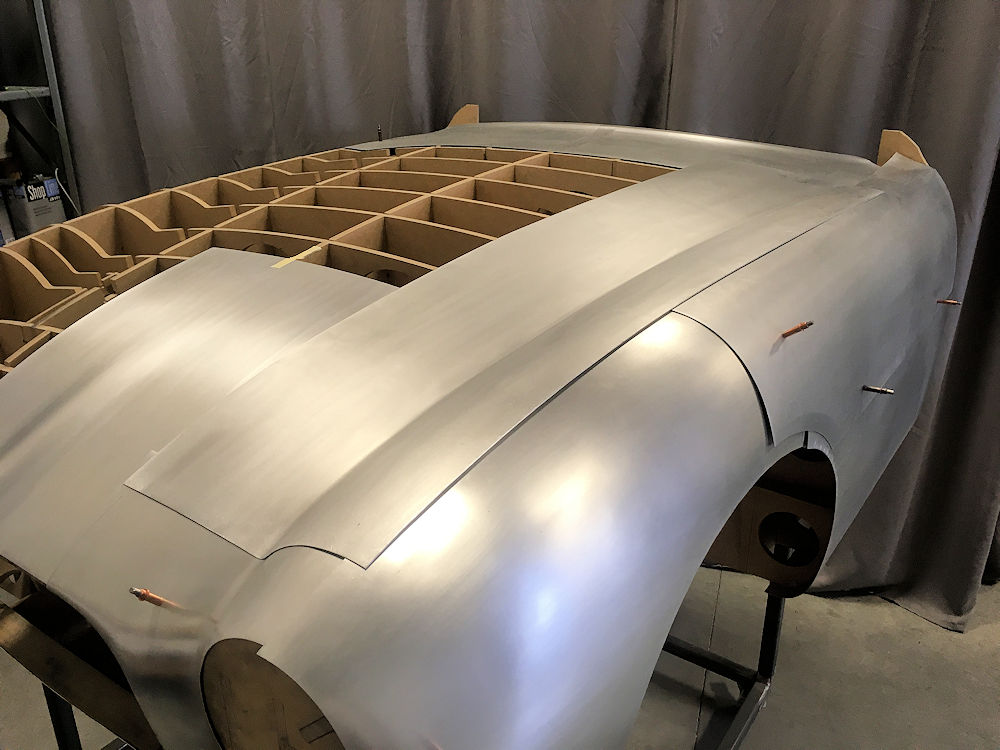
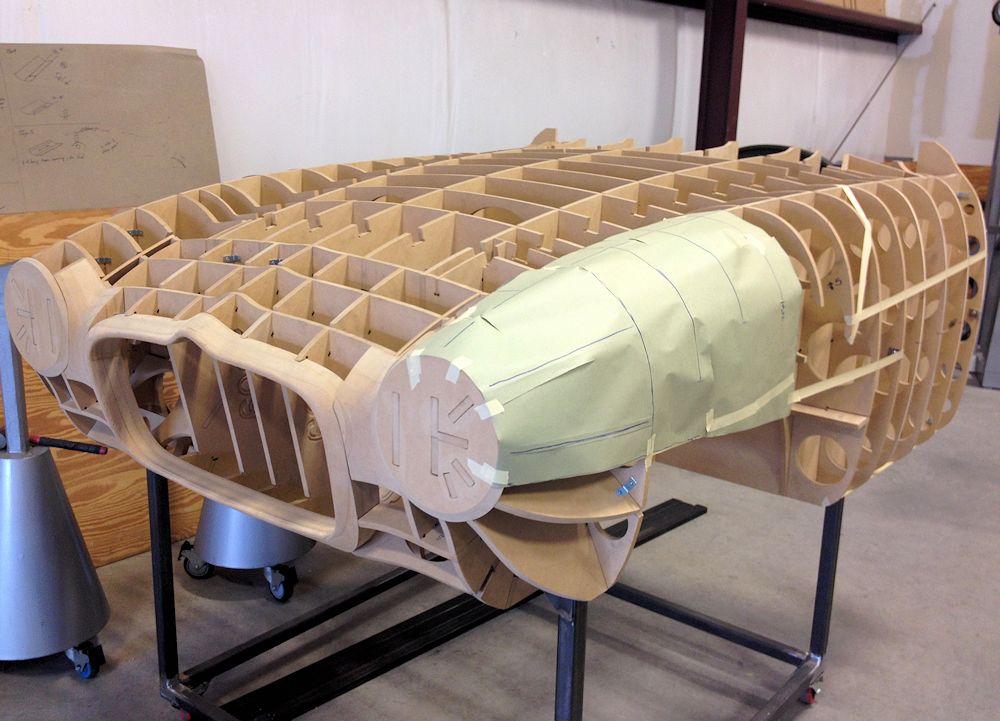
With 18 panels for the front end now completed, I thought it might be interesting to assemble what we have so far. It is really starting to take shape now.
Edward continuing to work on the Zagato front end.
Fabrication of the new aluminum panels for the front end, continued.
More progress with the Zagato front end.
More panels taking shape at the front end of the Zagato.
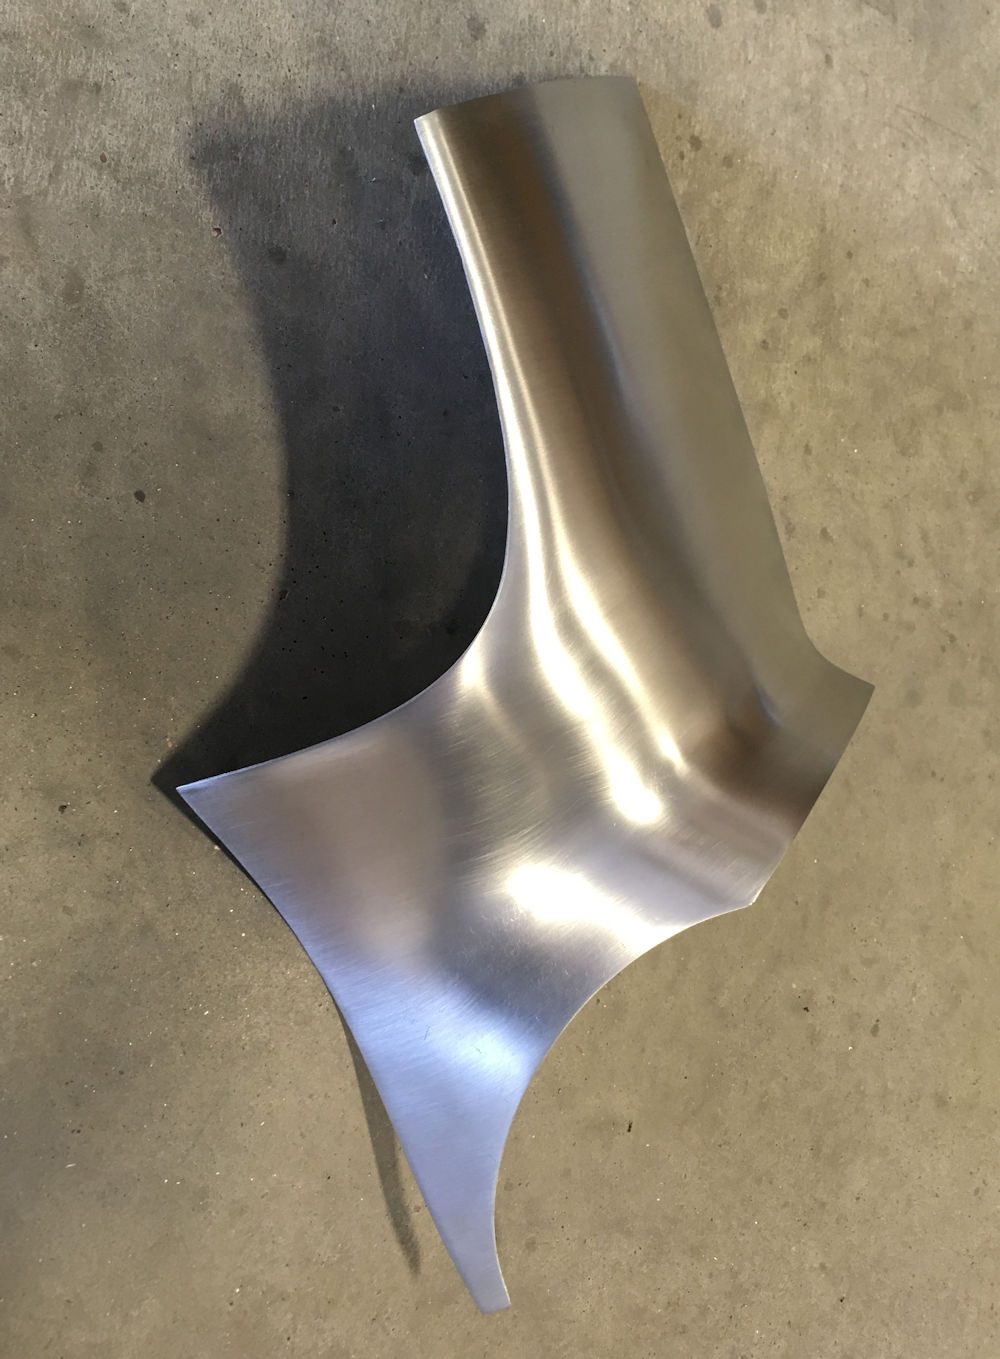
Quite a complex little panel to shape
Edward has been busy shaping the grill opening to the station buck.
New grille surround fits the station buck perfectly
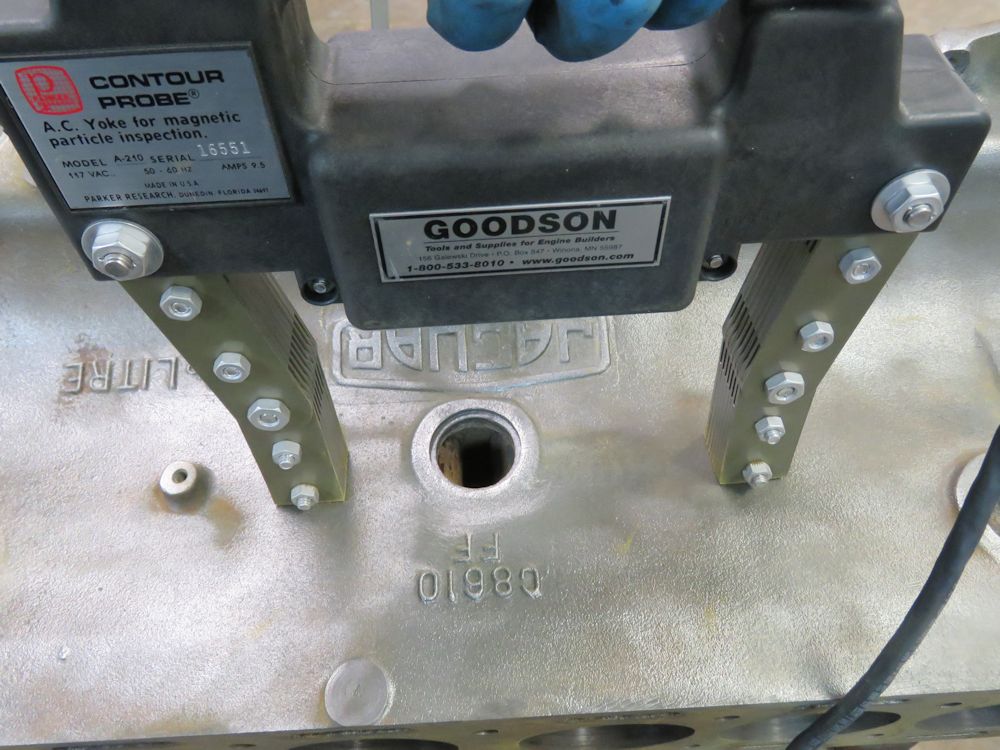
Magnaflux crack checking the block after it spent
some time in an alkaline bath
Left hand front wheel arch fitted to the station buck
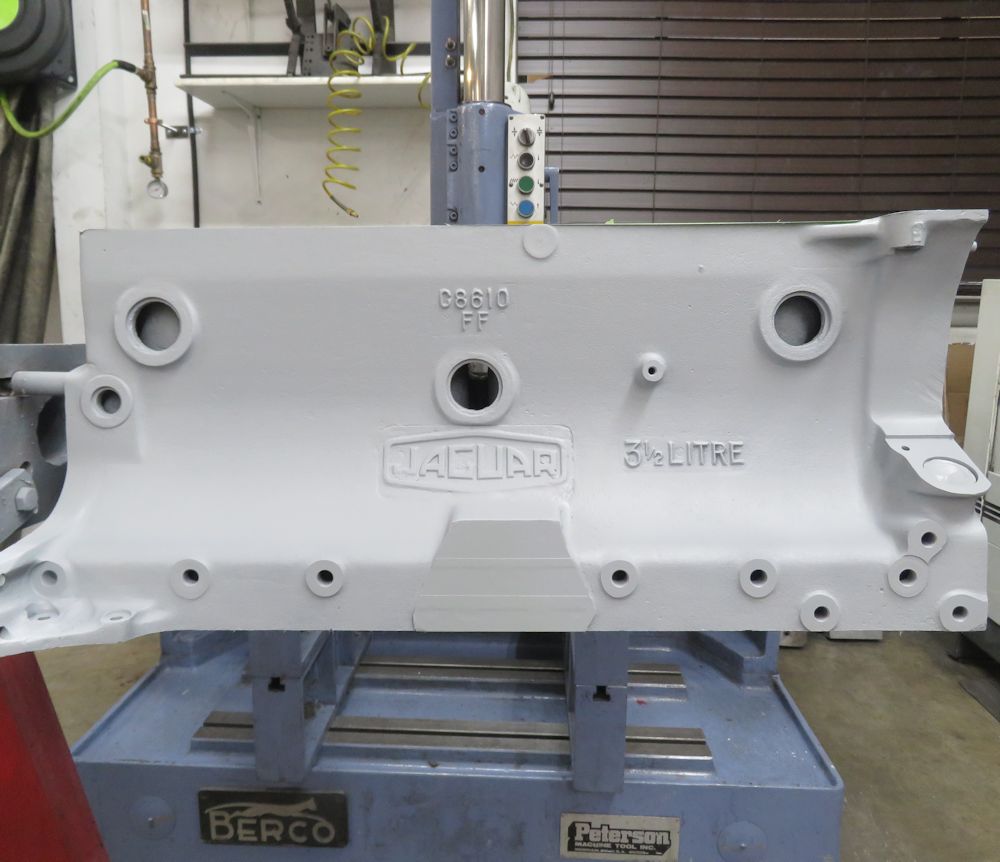
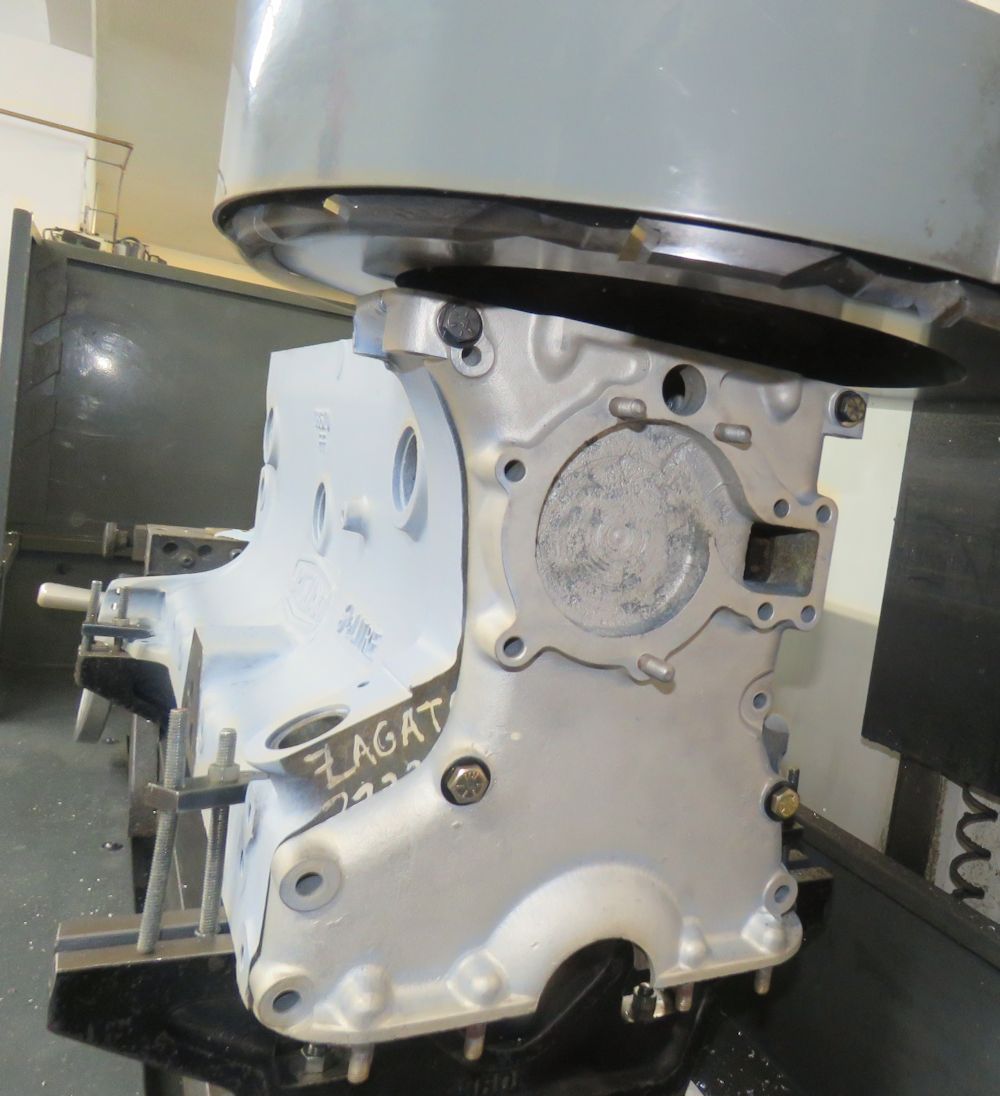
Etch priming the block
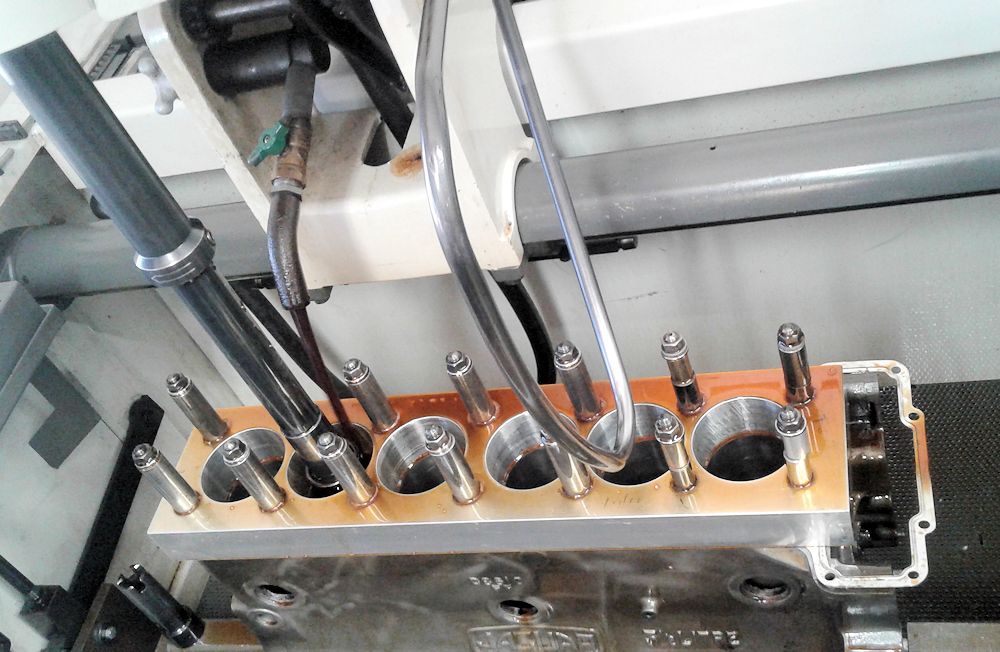
Torque plate honing the block
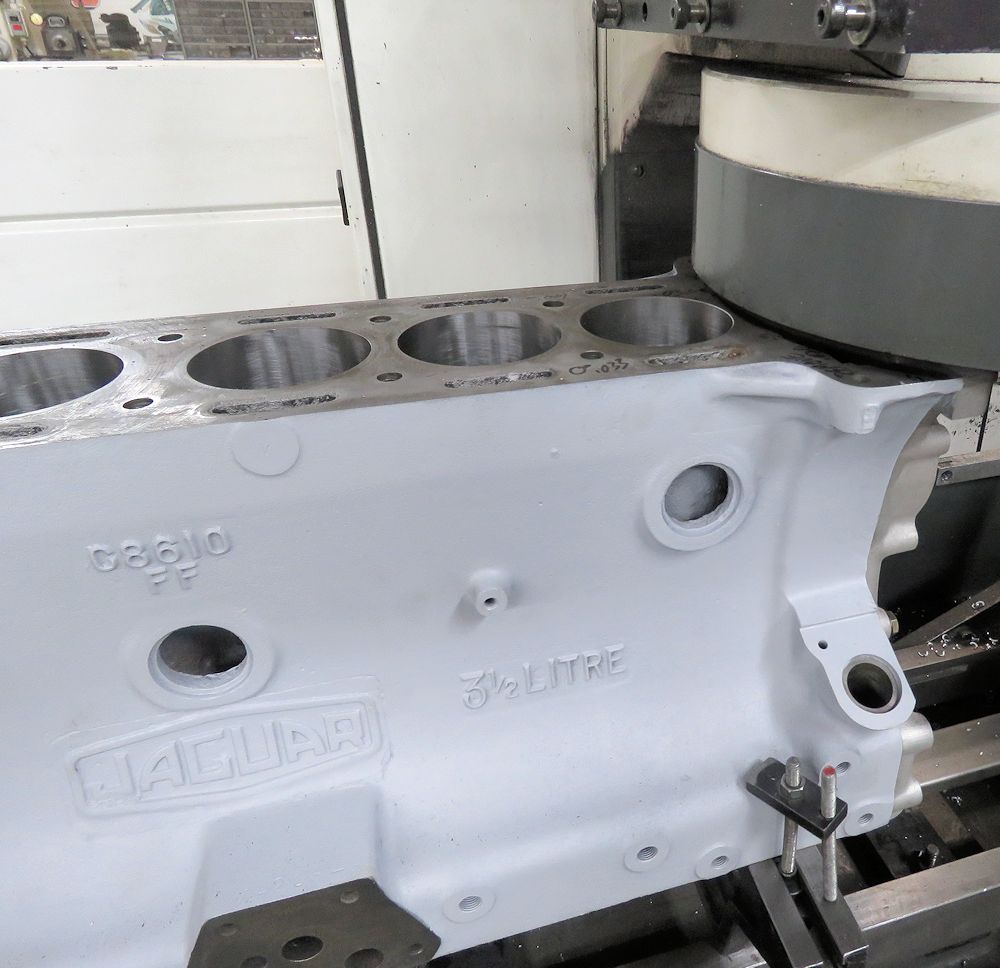
We removed .020" from the deck surface in order
to zero deck our pistons
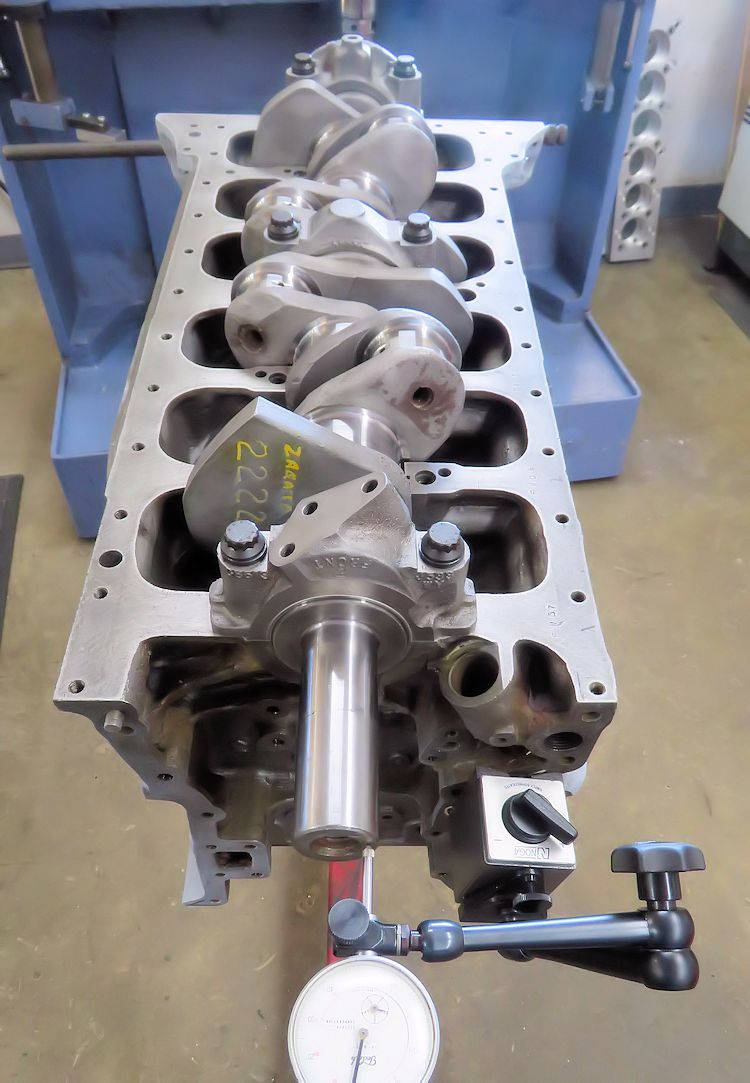
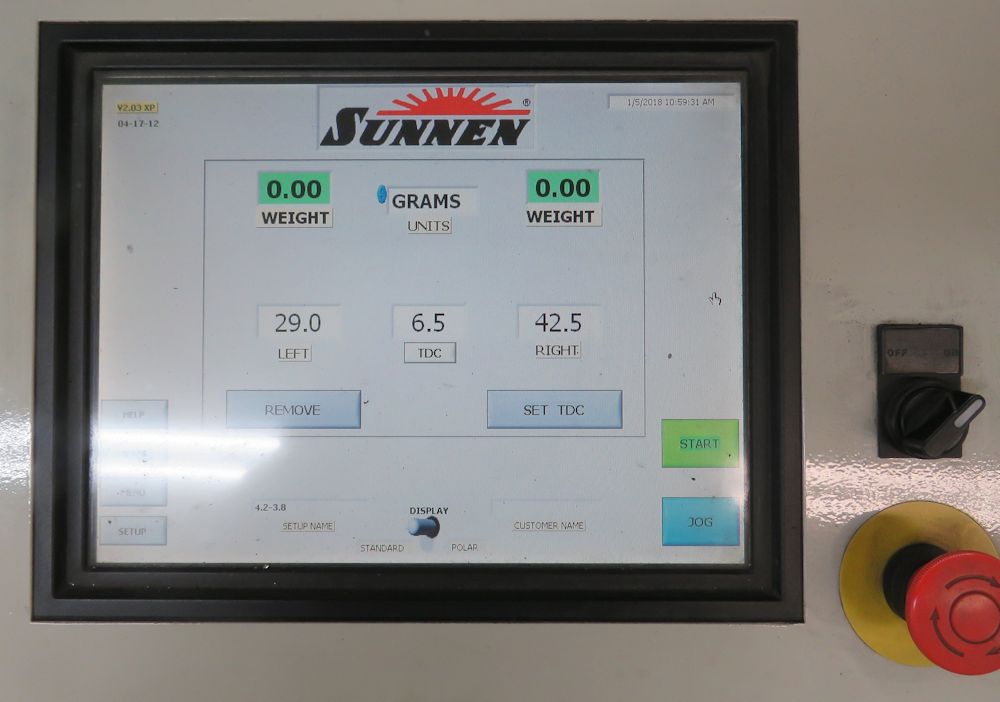
Establishing desired crank end play
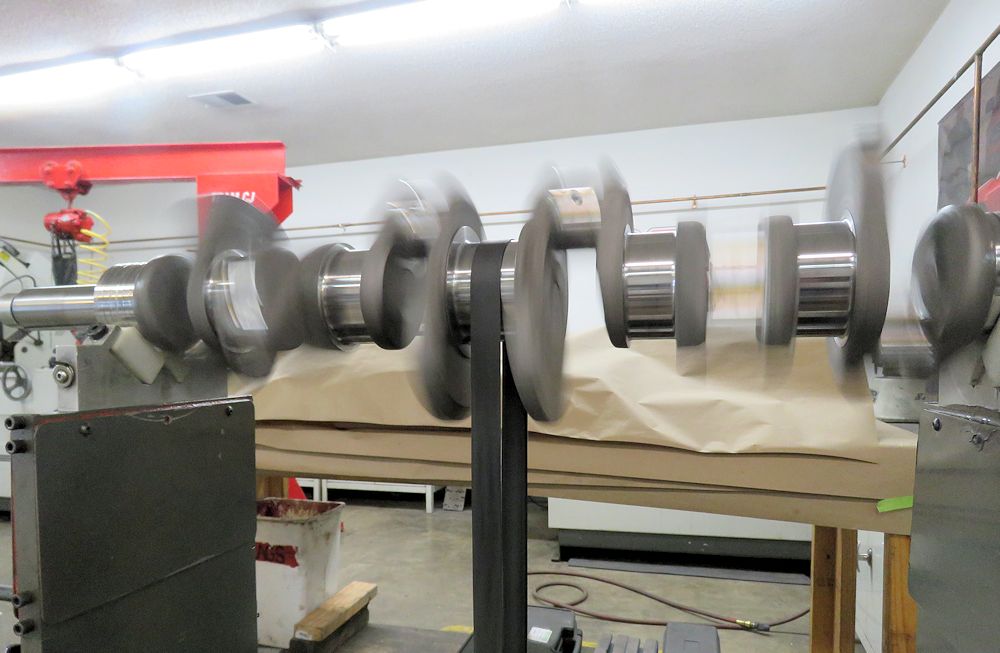
Balancing the crankshaft
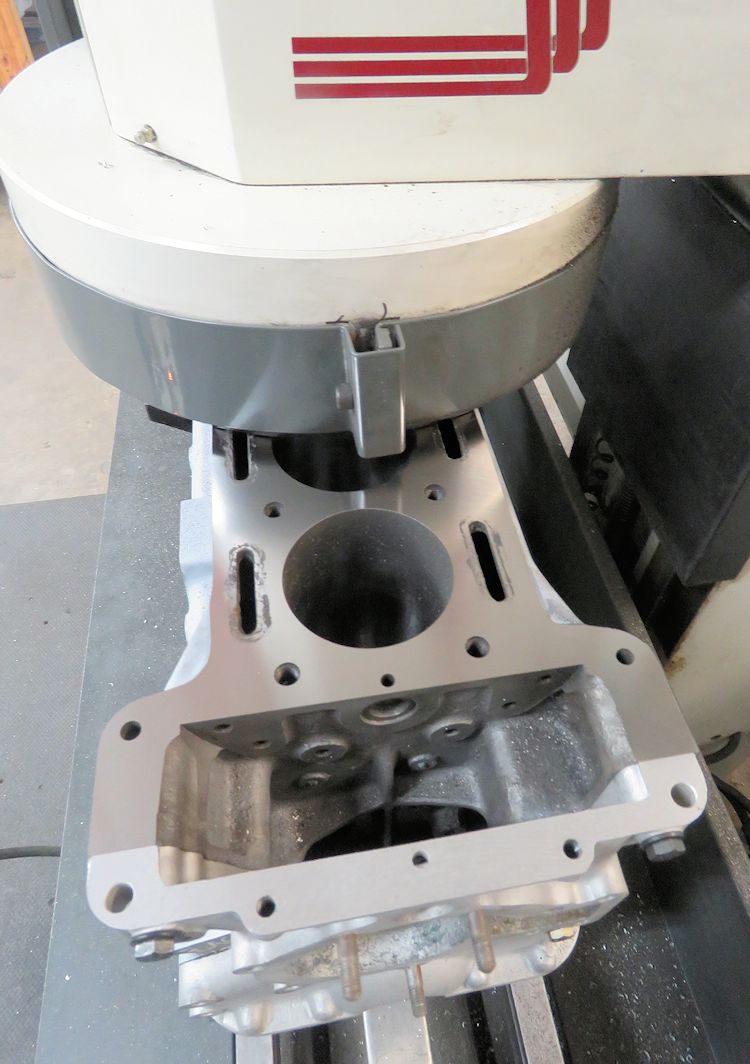
Note timing chain cover in place when surfacing
the block
All zeros is a good thing in this case
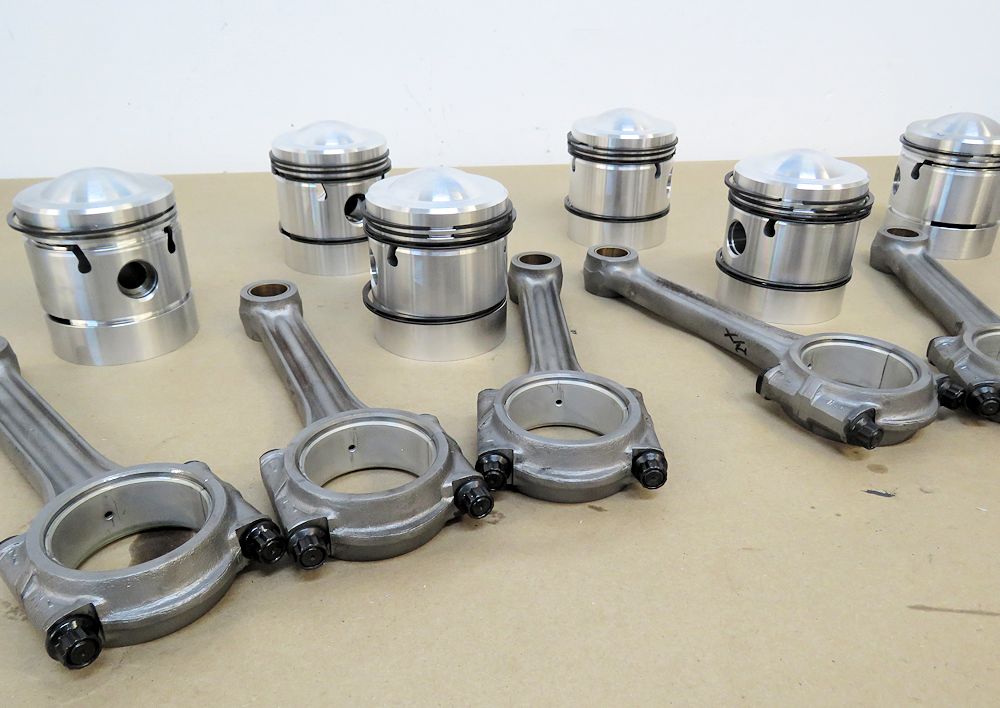
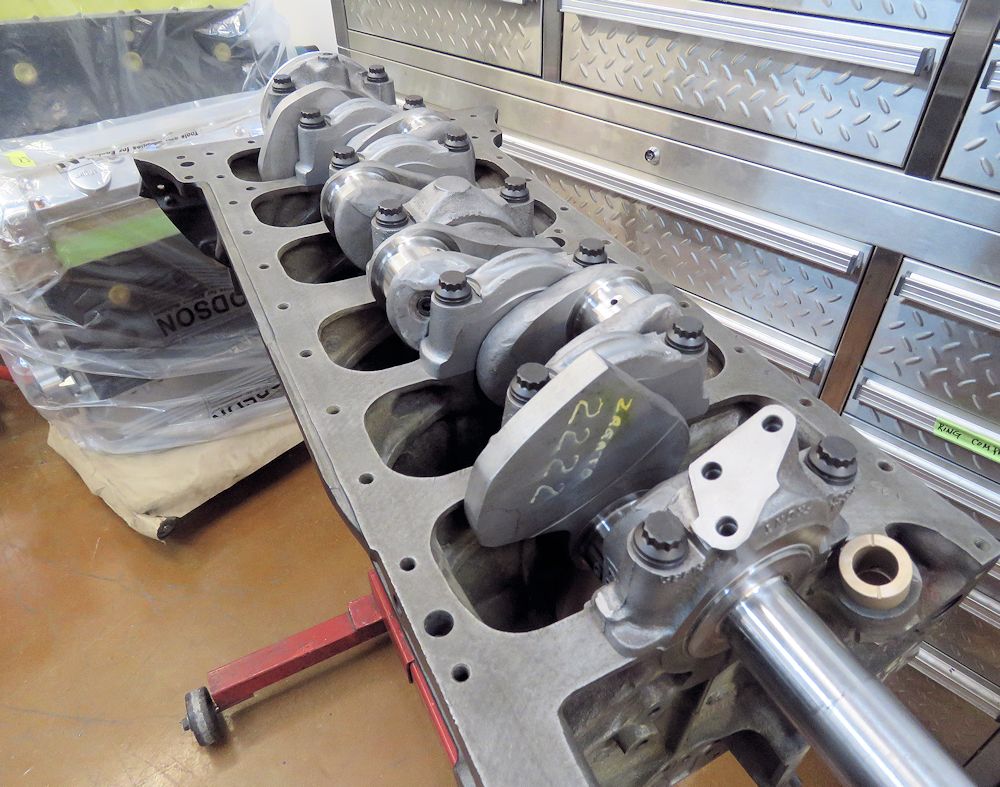
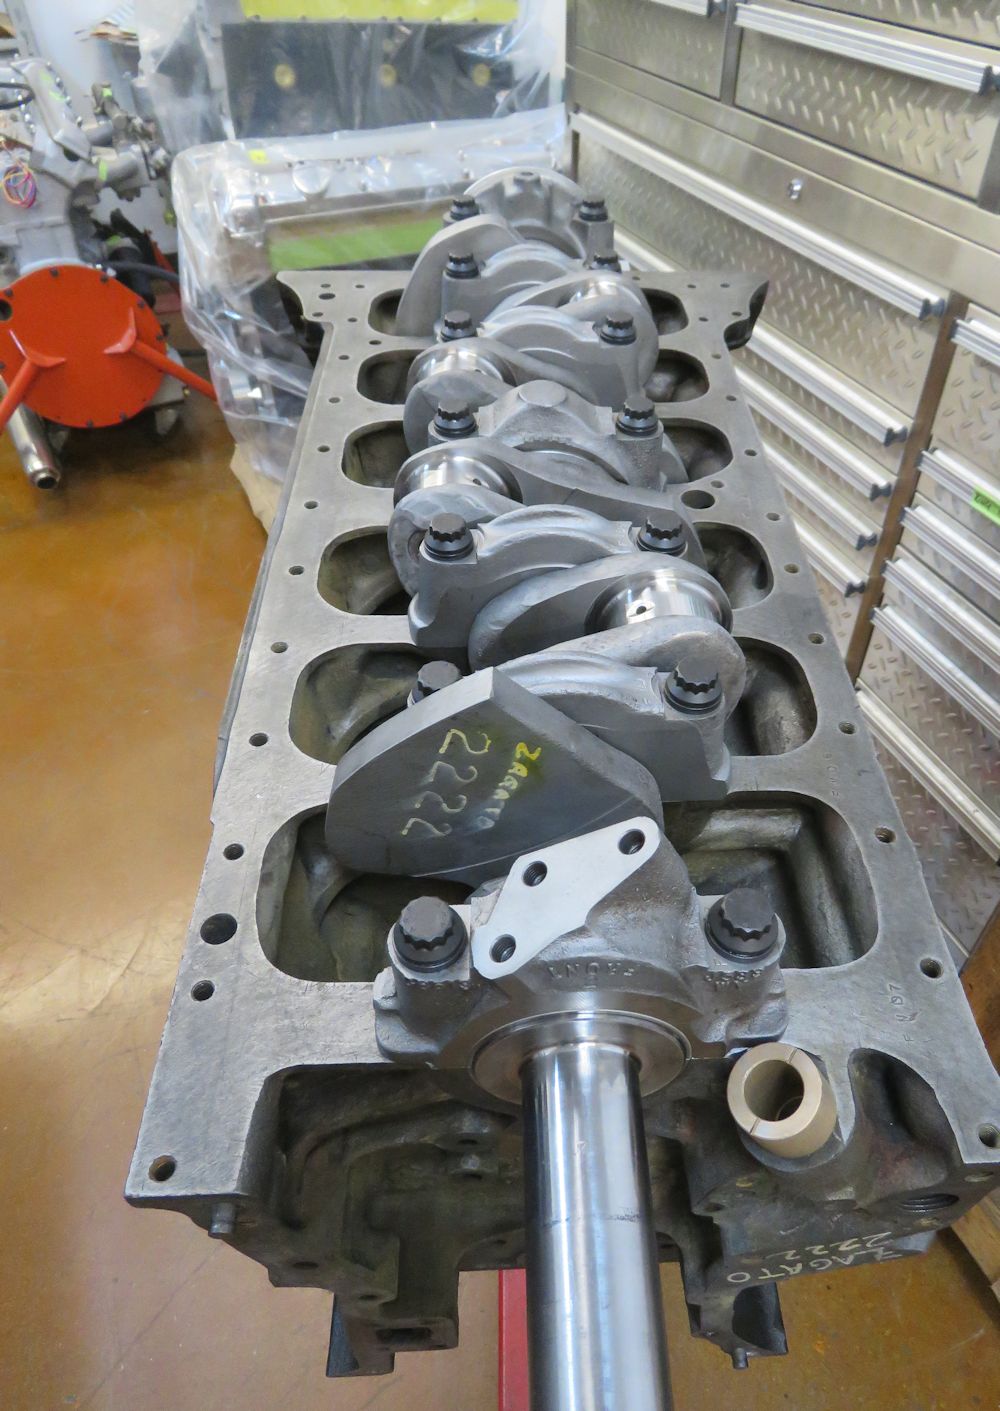
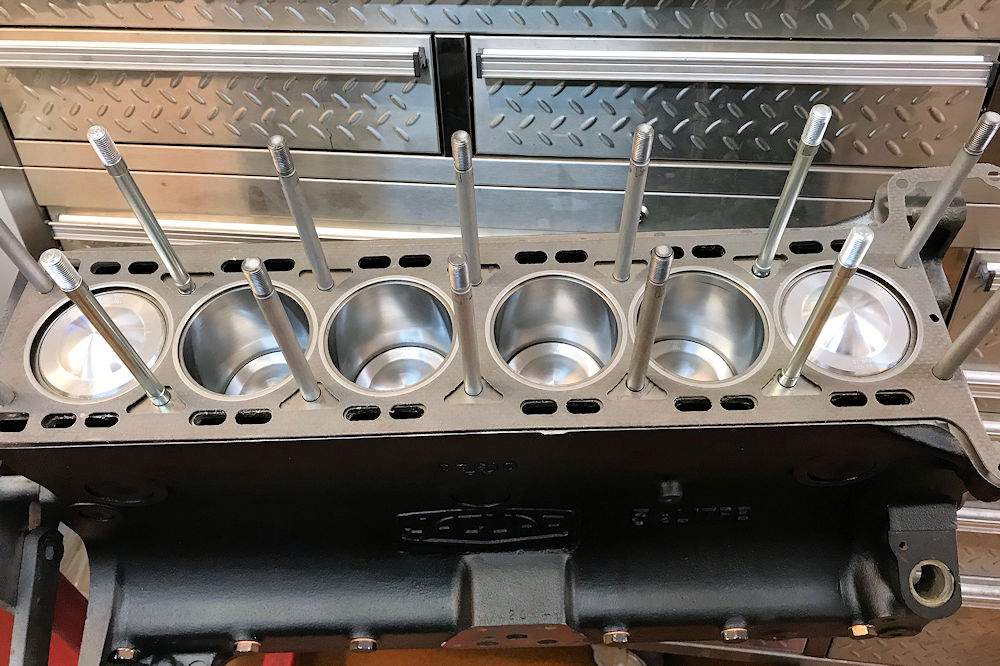
Hanging rods on pistons
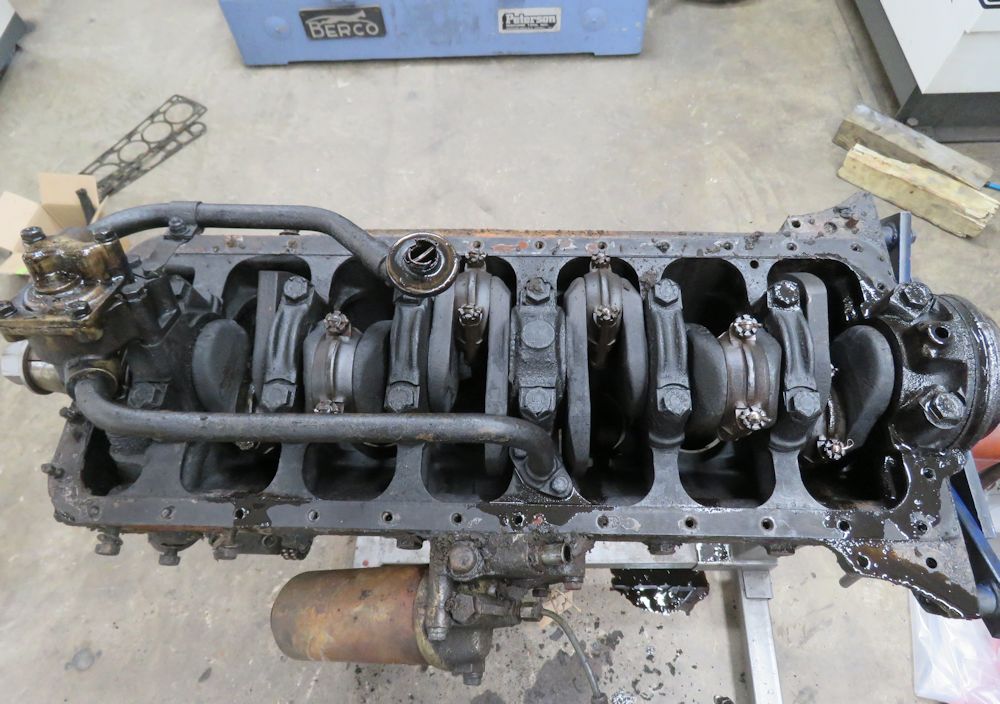
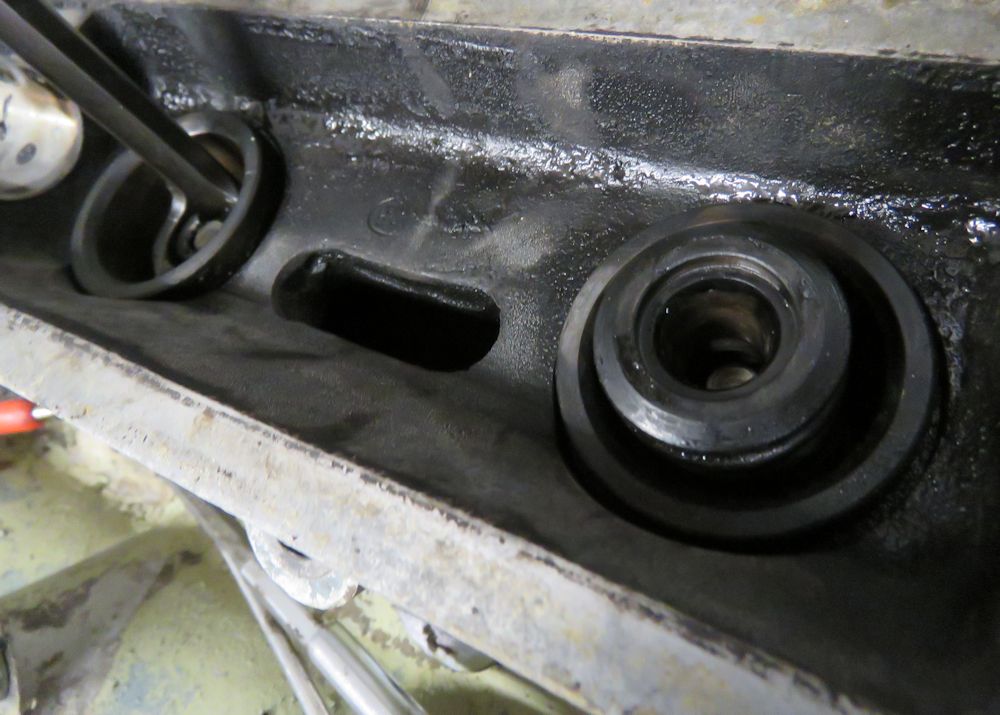
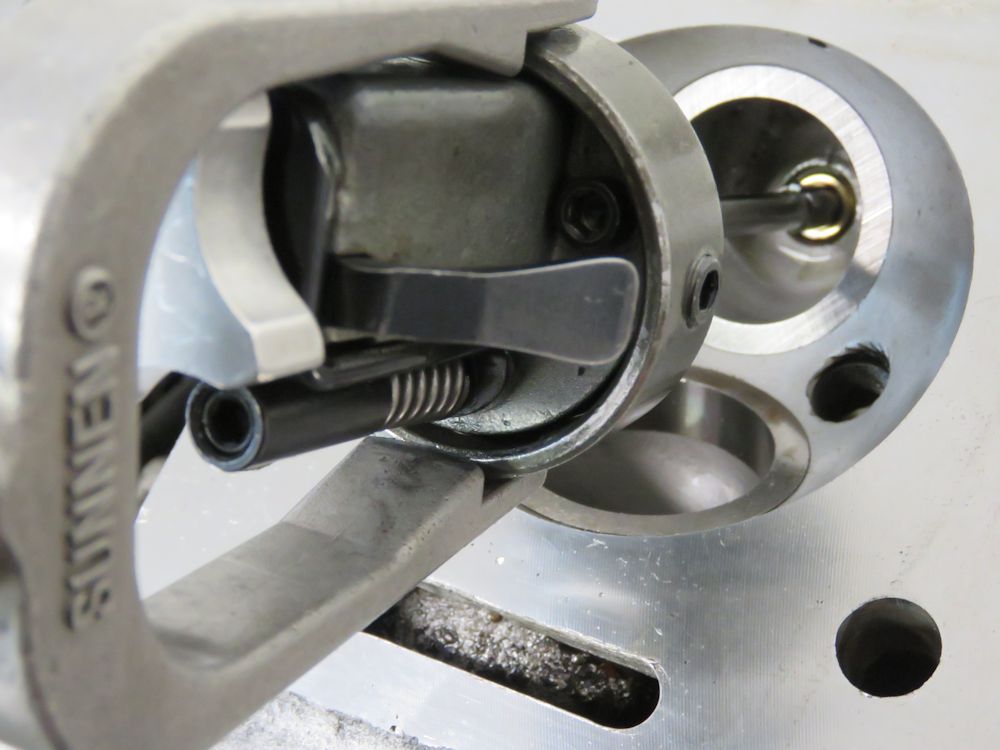
Assembling the short block
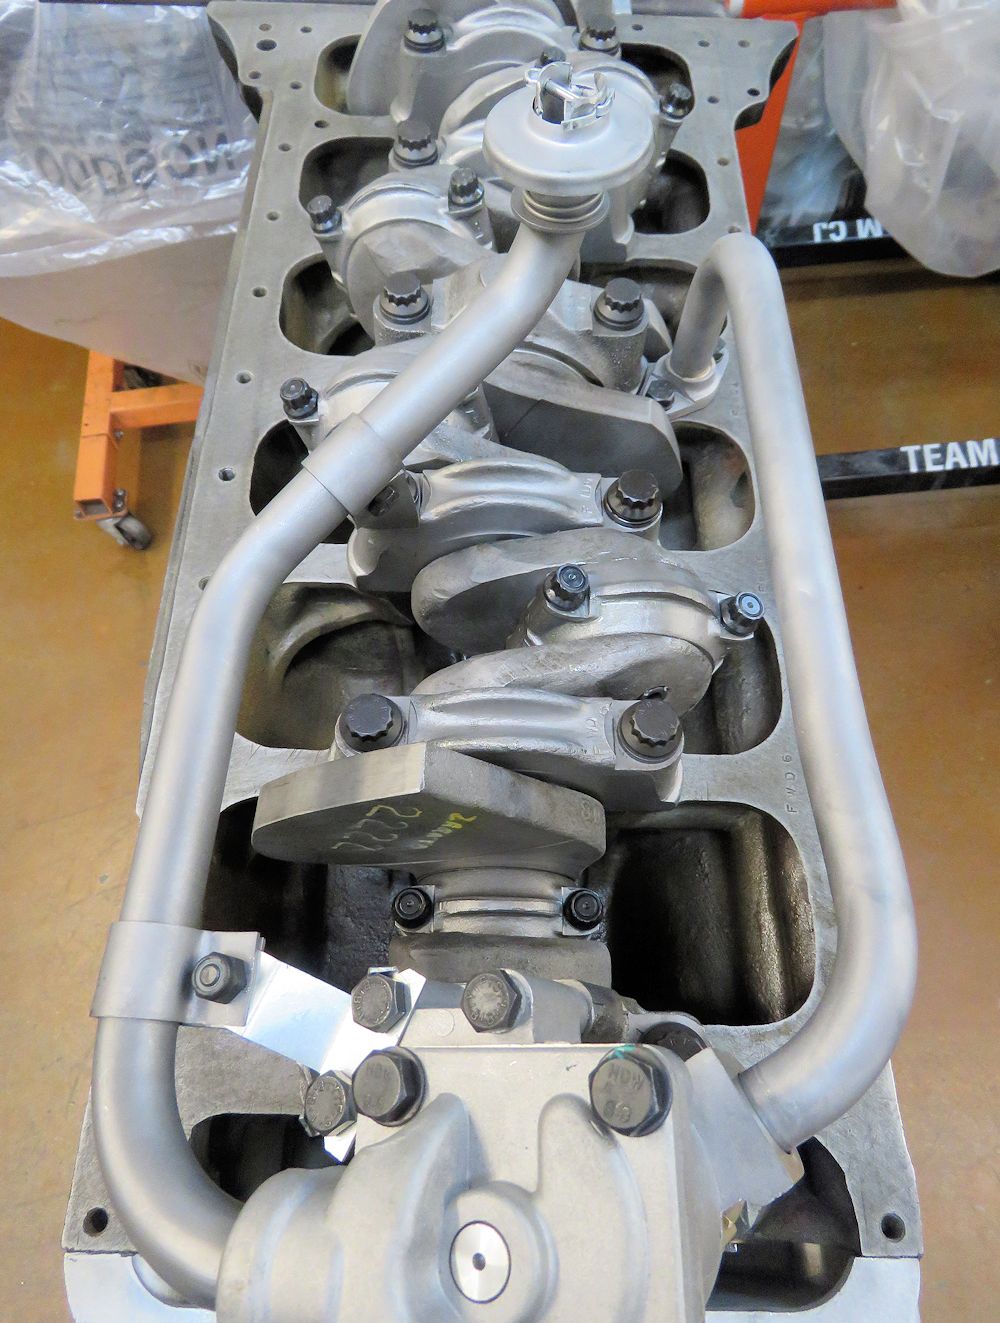
Installing oil plumbing
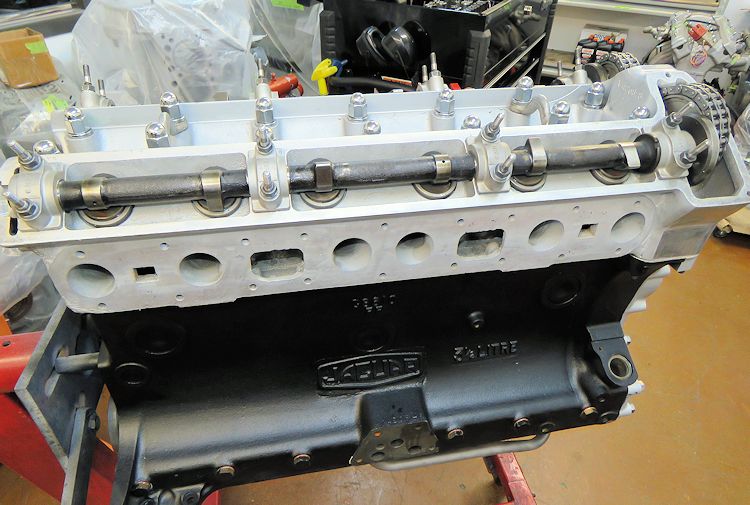
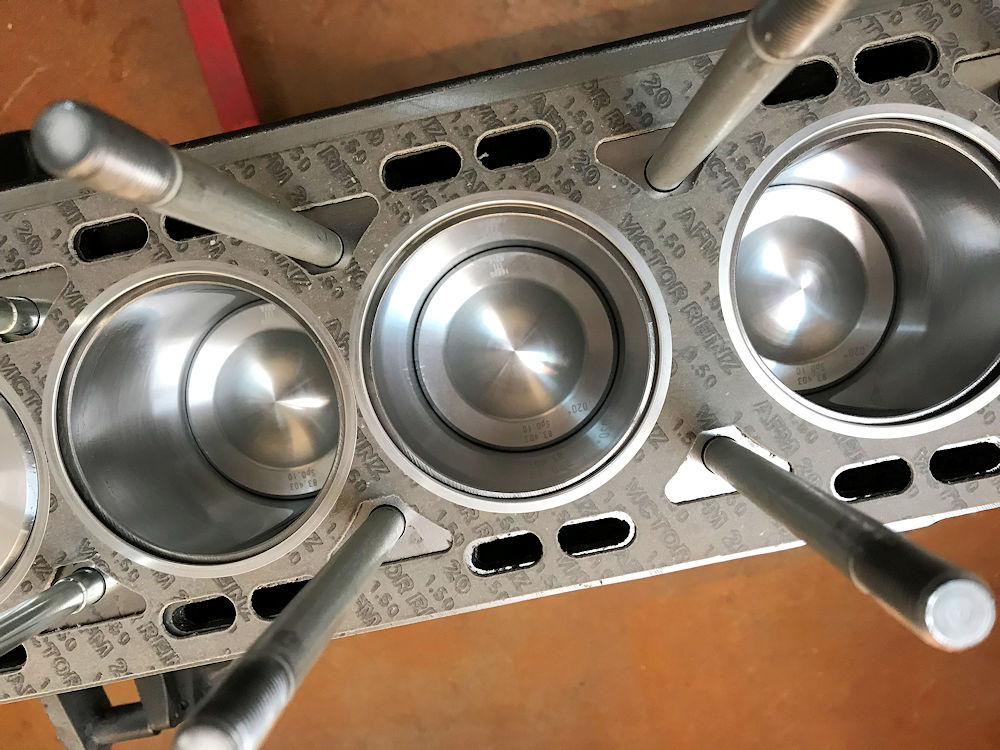
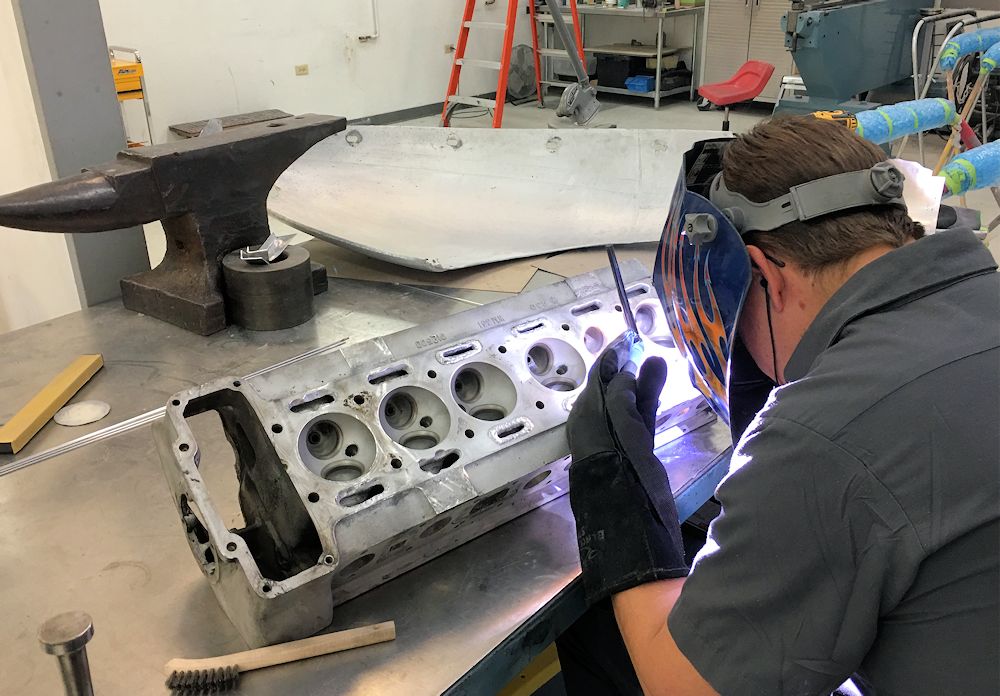
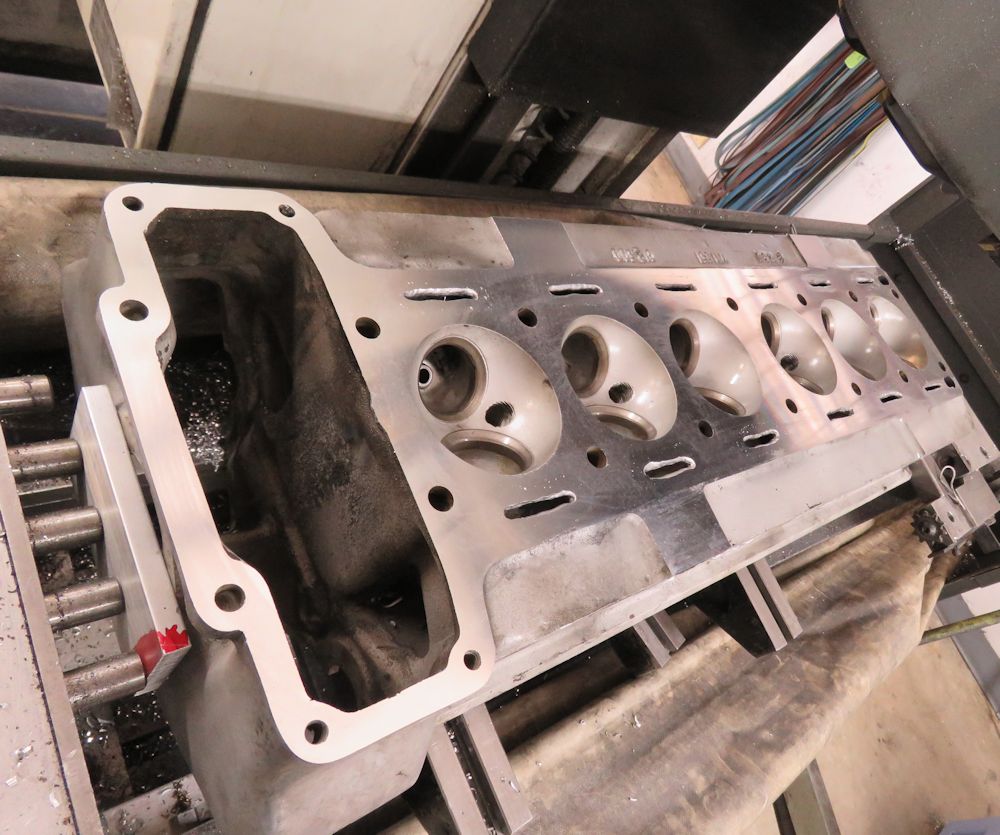
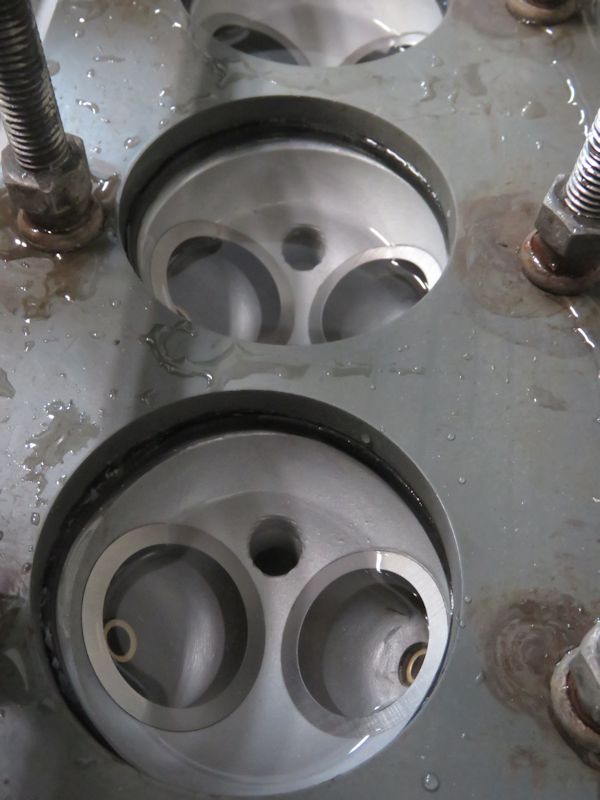
Head installed
Installing head studs and head gasket
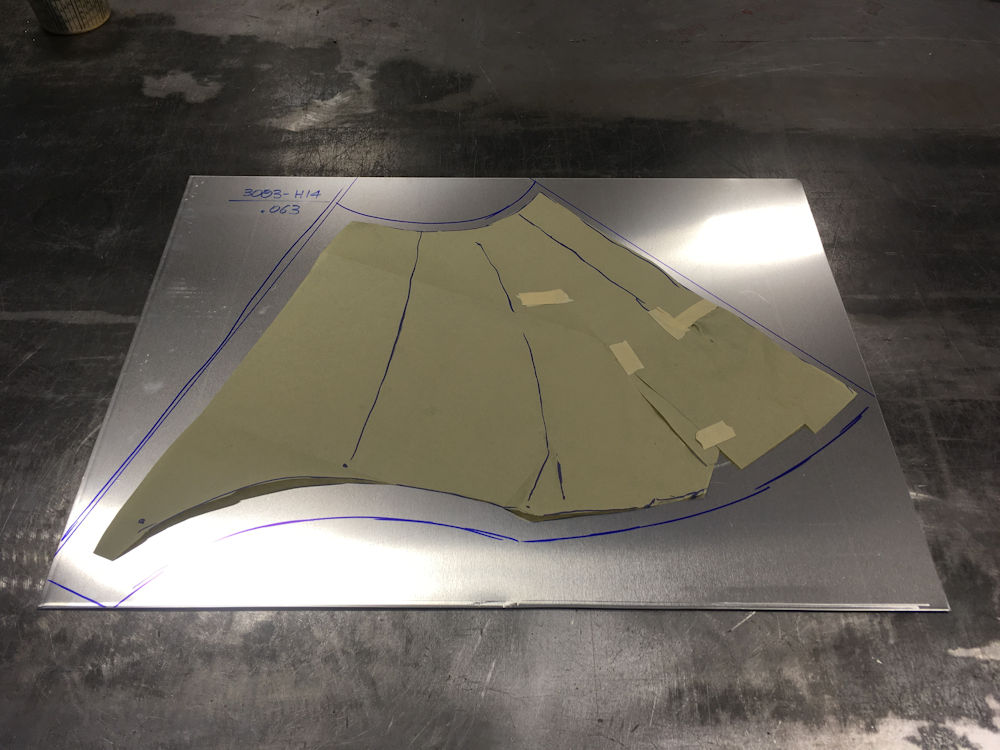
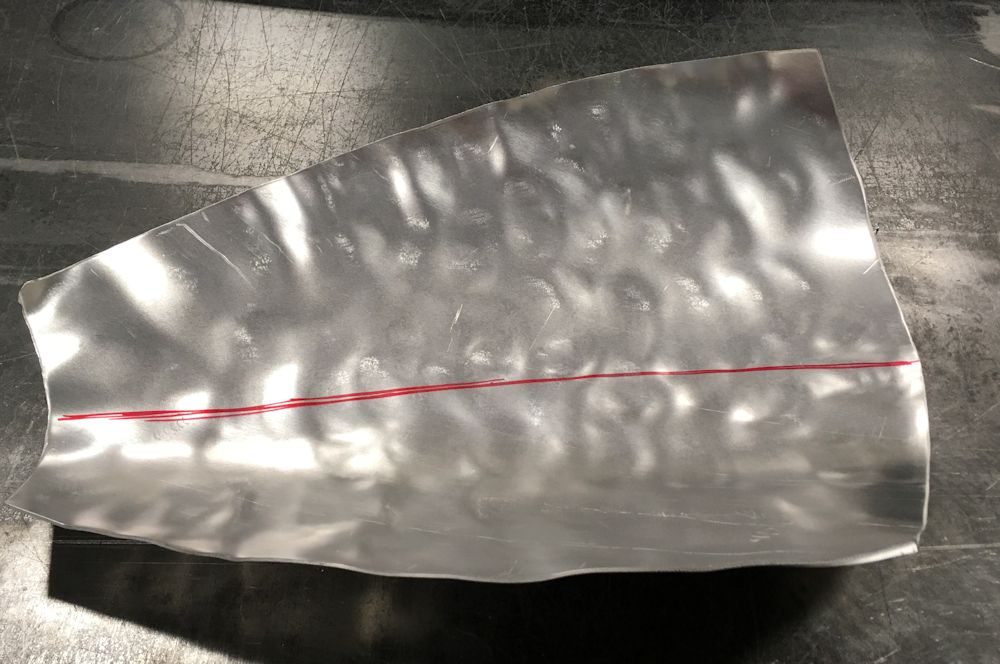
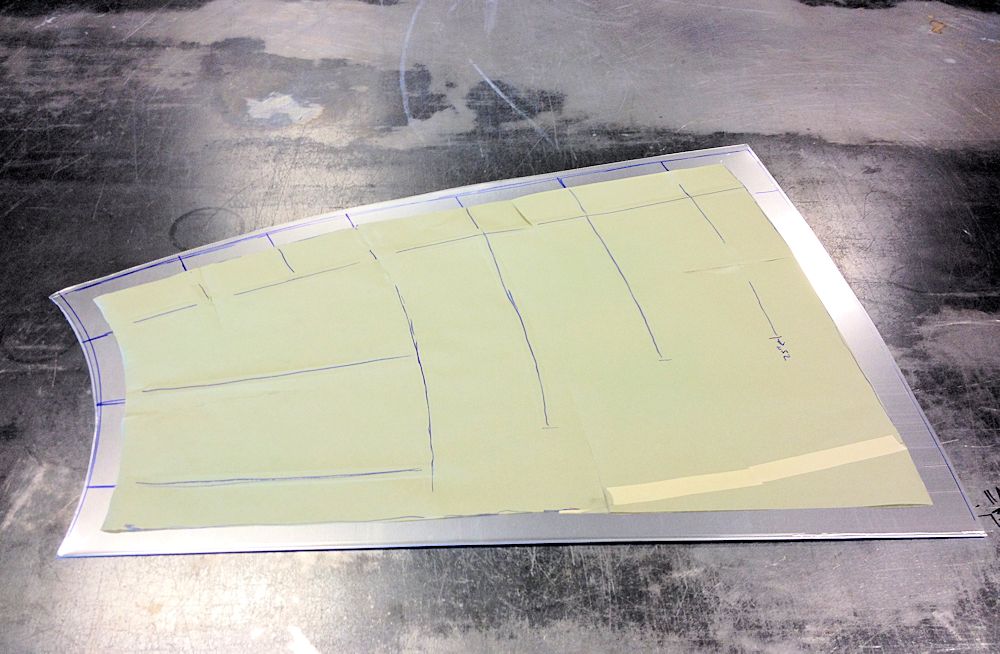
Paper template for panel #6
Edward has now shaped the fifth and sixth panels and welded them to panel #1.
Panels 1 thru 6 now shaped and welded together
Edward has now completed the fourth panel for the left front wing. Next he will fabricate the panel beneath the left hand headlamp.
Edward has now finished shaping the third panel.
Edward has now finished shaping and metal finishing the second panel and has begun working on the transition panel at the top of the left front wing to the bonnet opening.
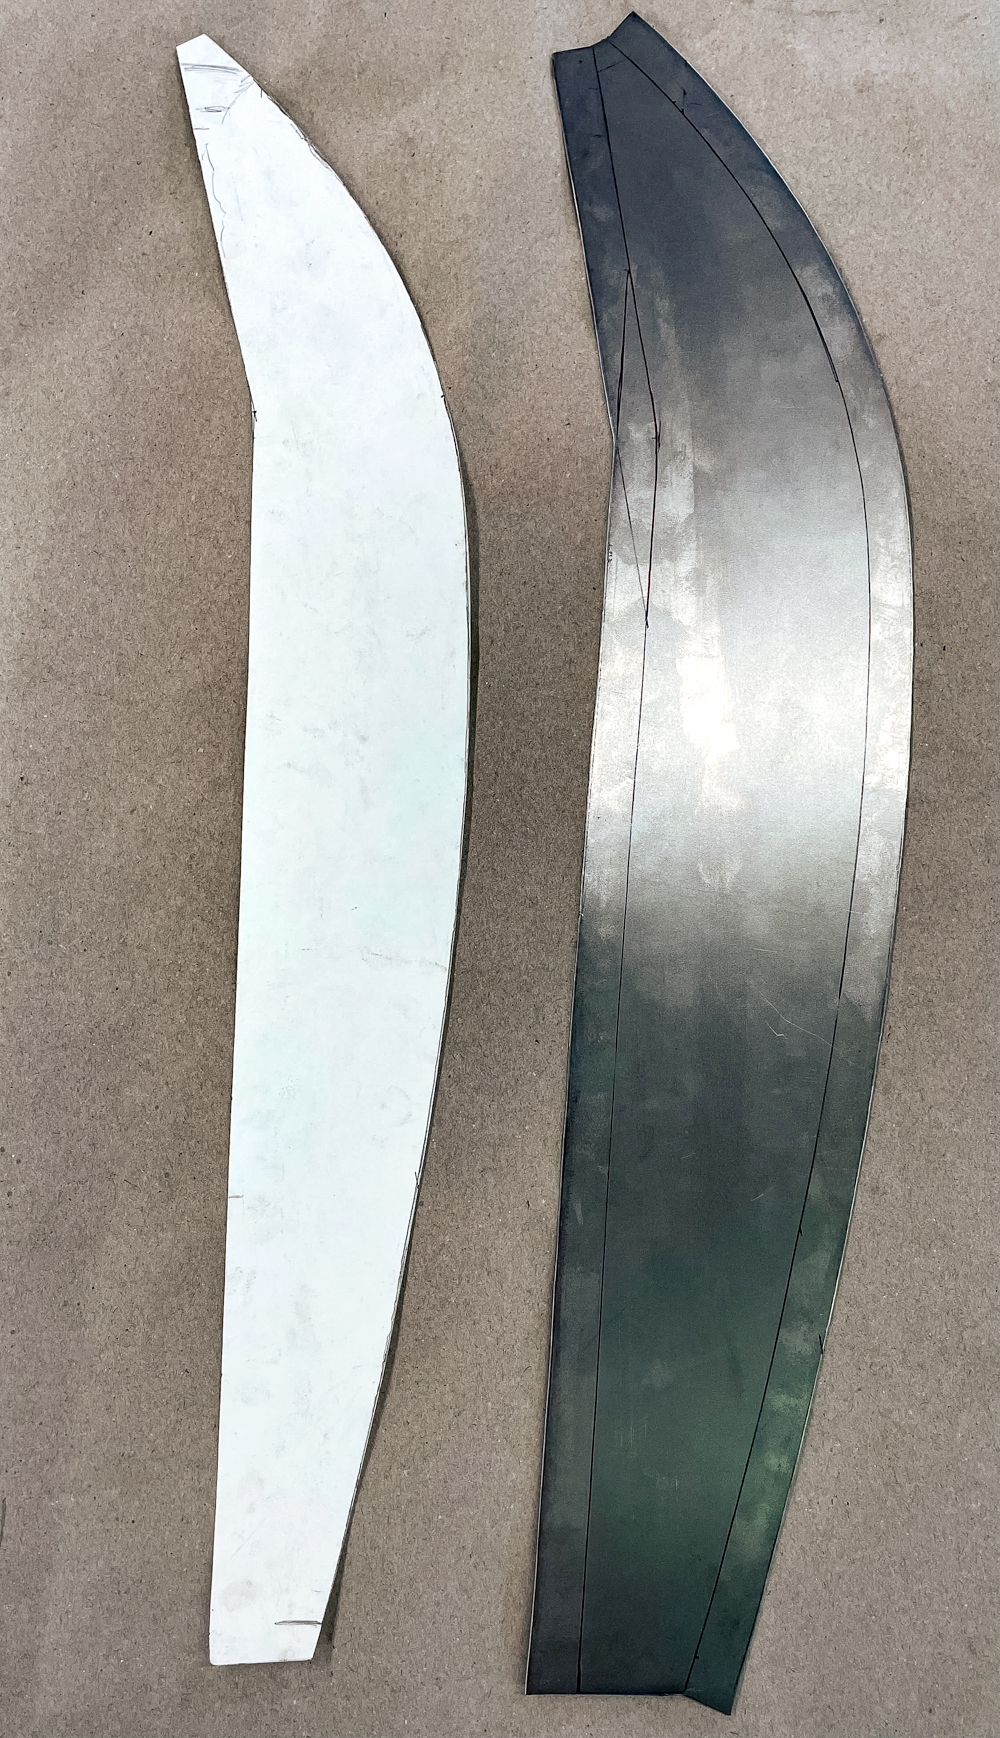
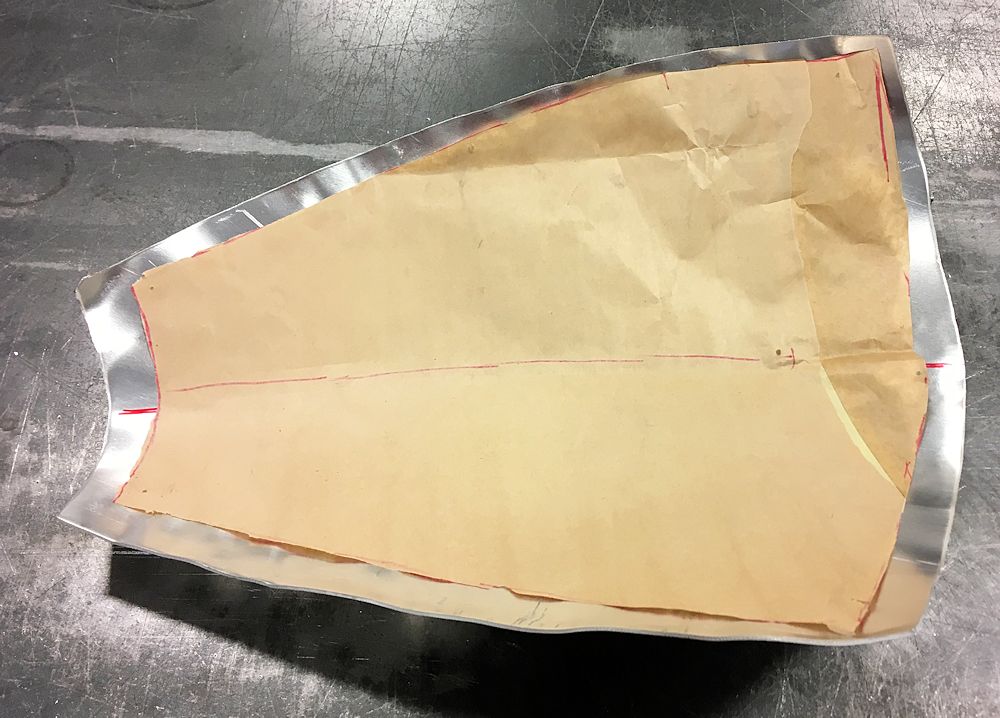
Transferring the template to aluminum sheet
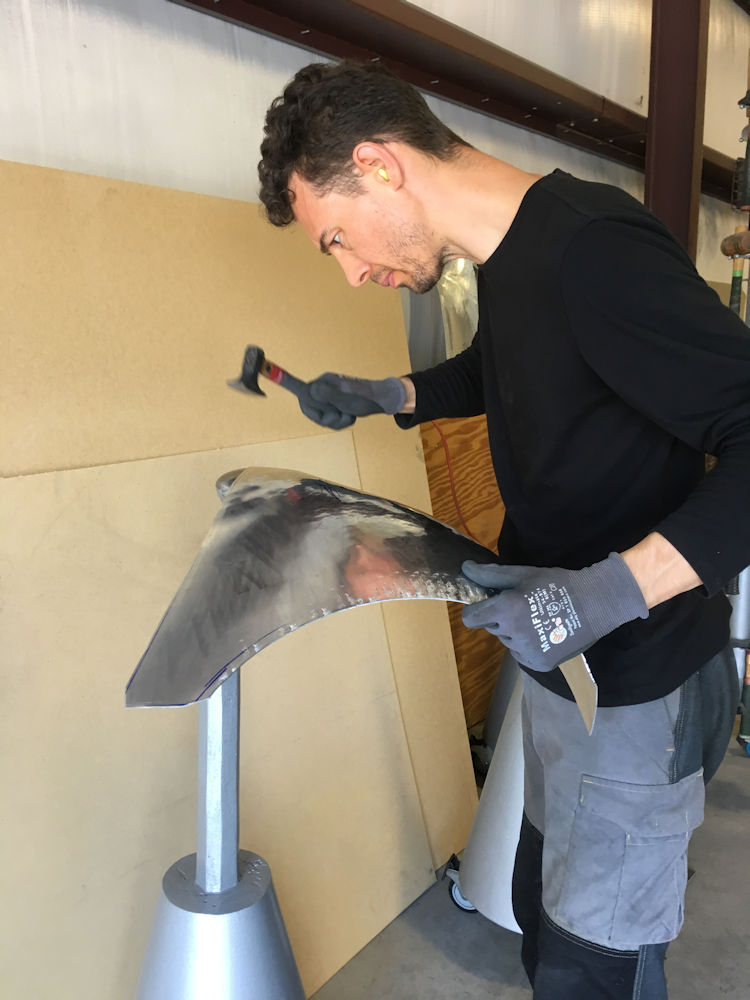
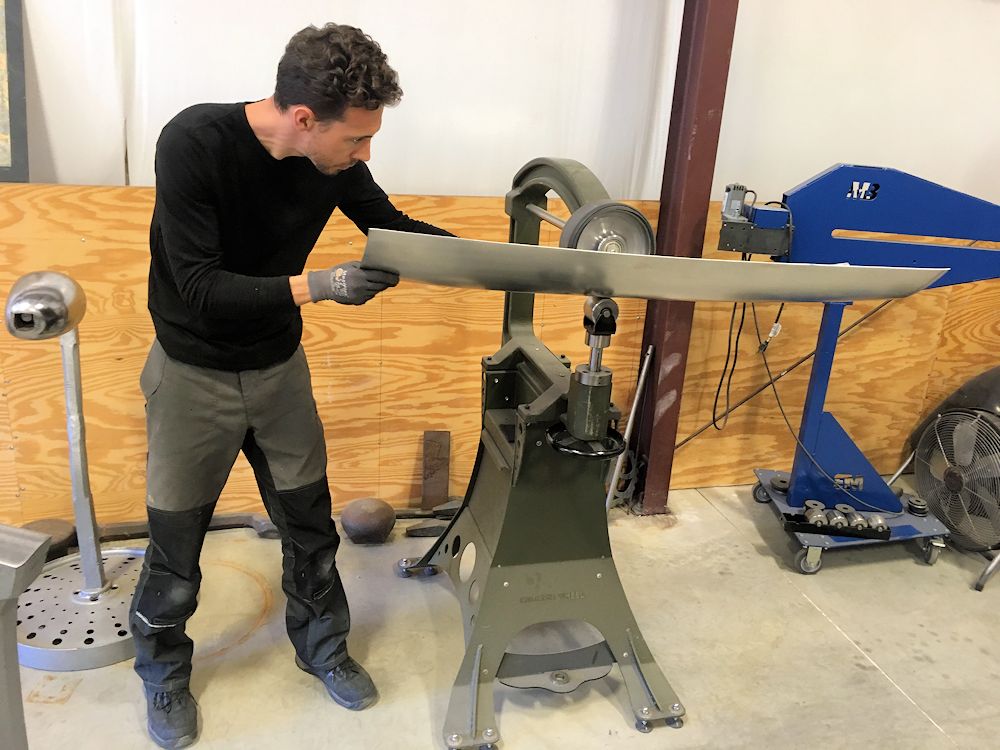
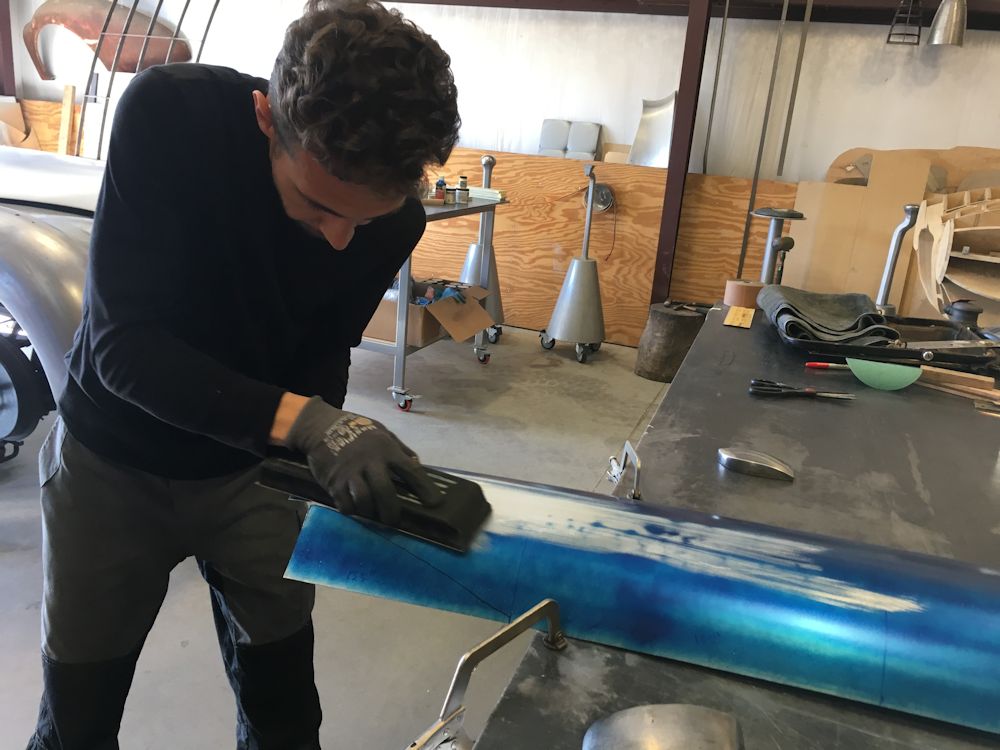
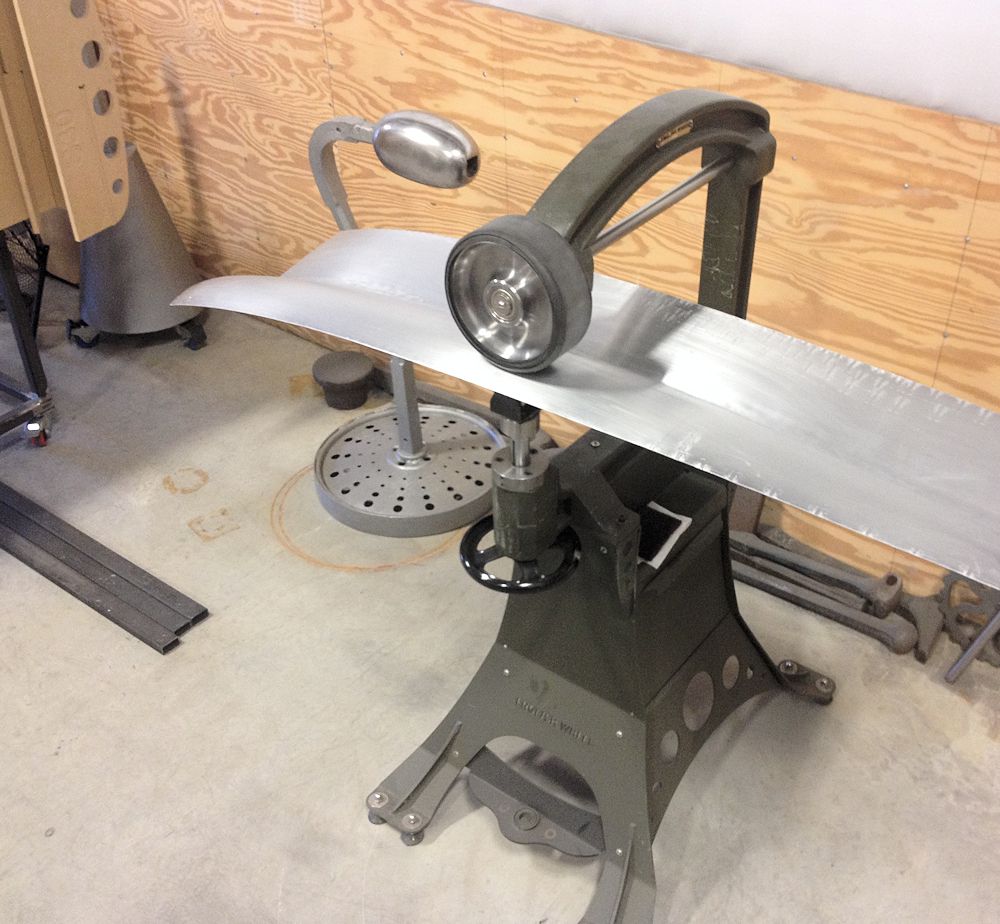
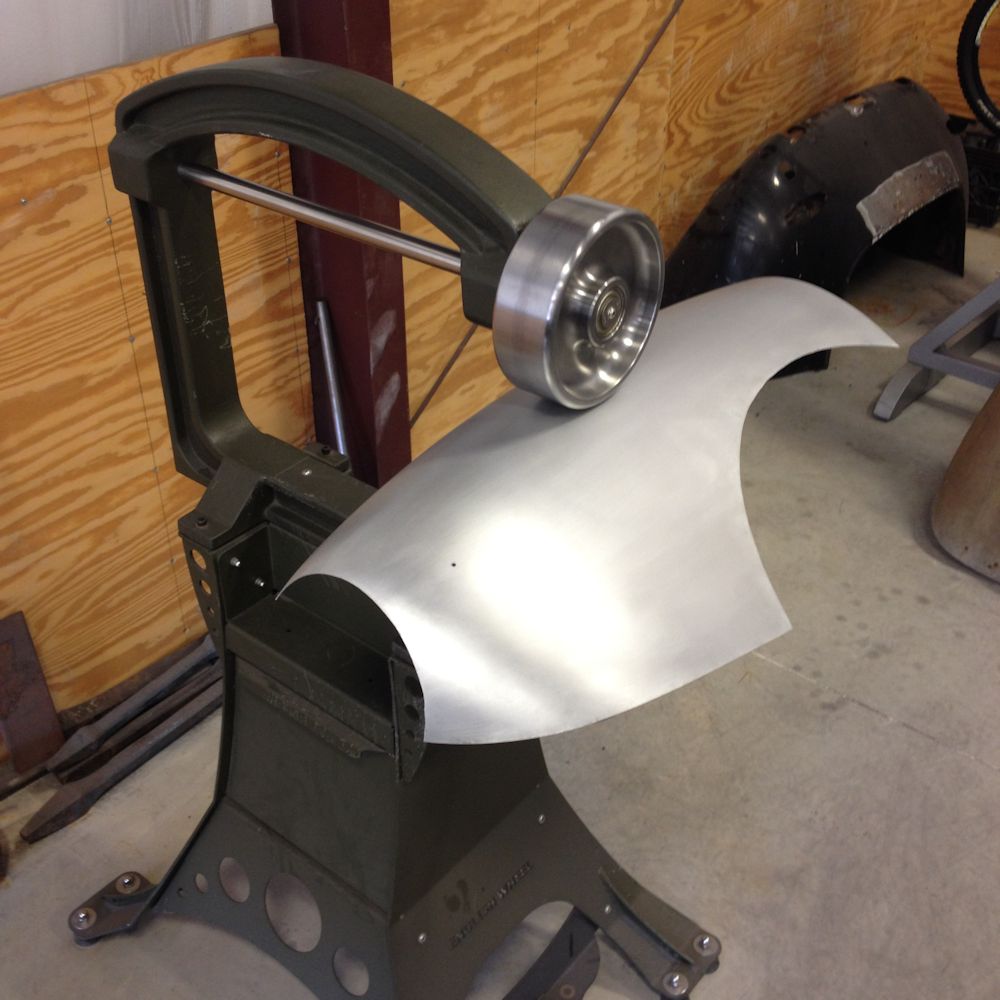
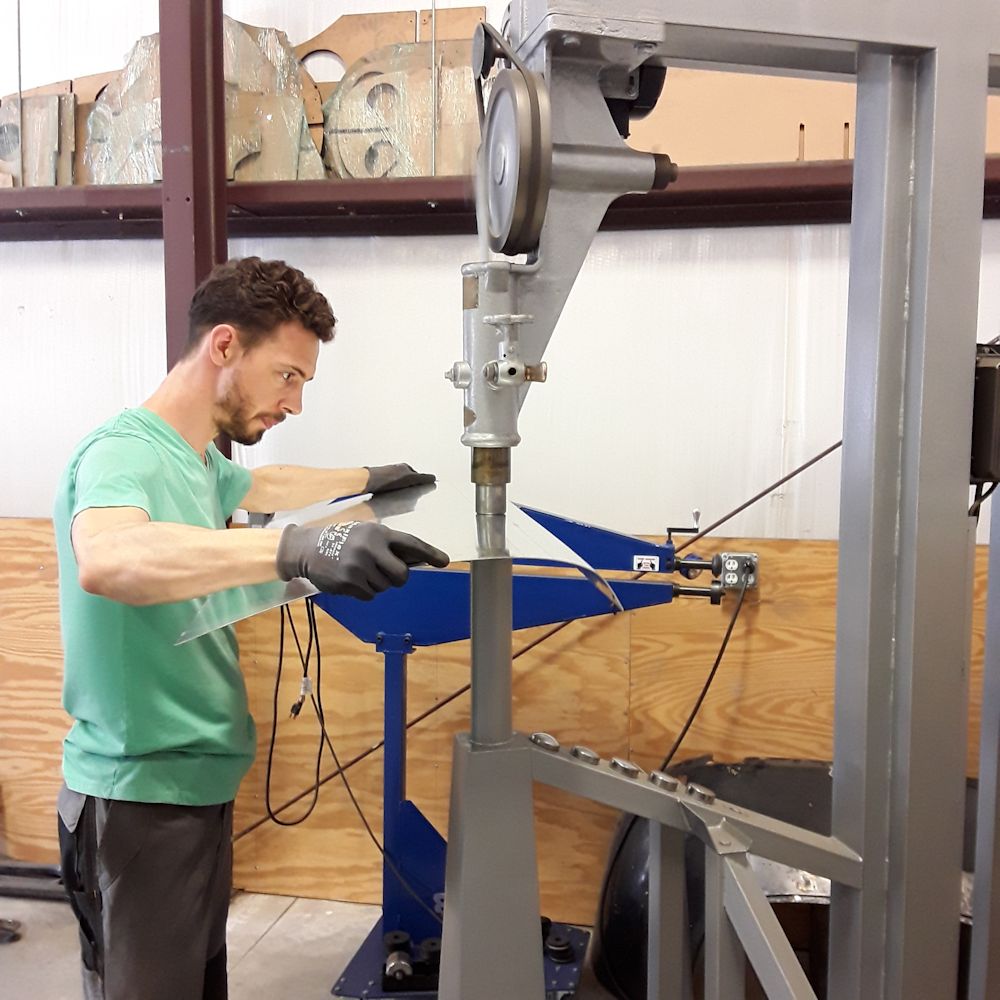
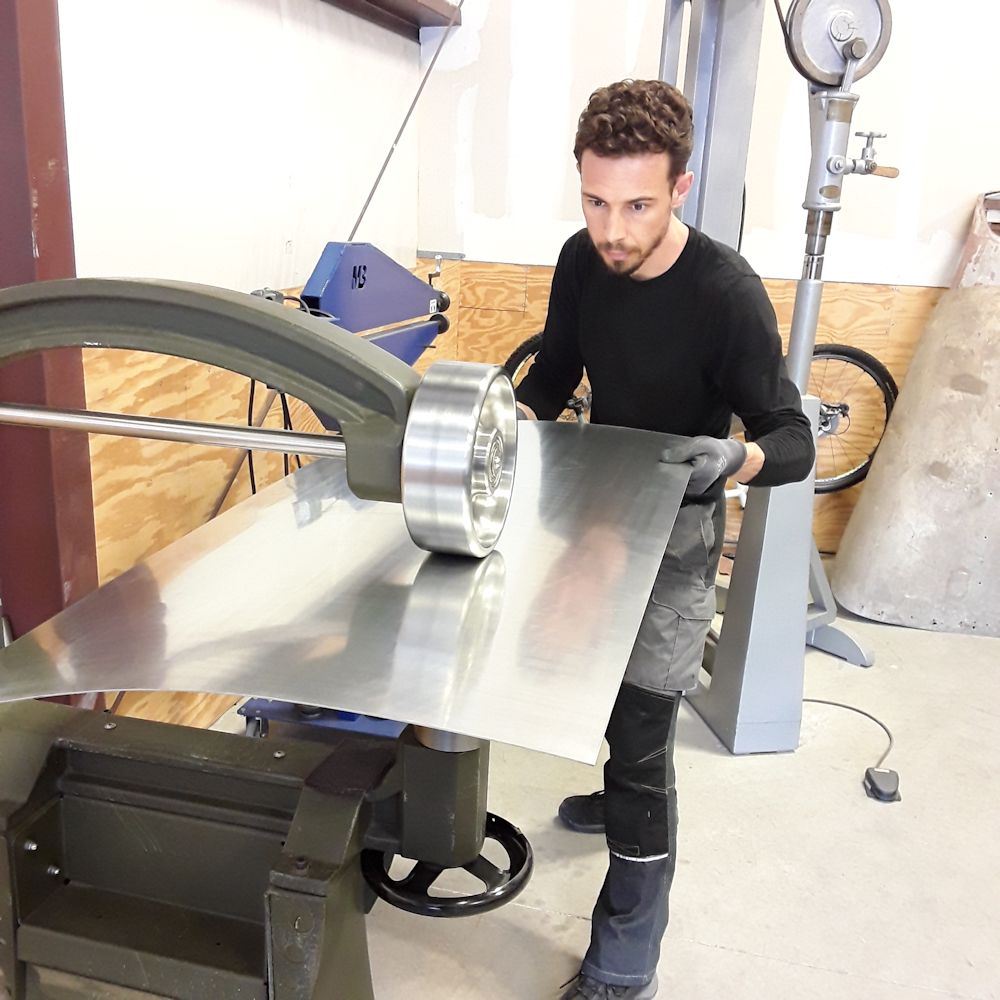
Edward has now made a start fabricating the new left front wing. In the photos below you can see how he first creates a paper template which is then transferred to the alloy sheet, which is then worked with the English wheel and planishing hammer until it follows the contour and form of the station buck.
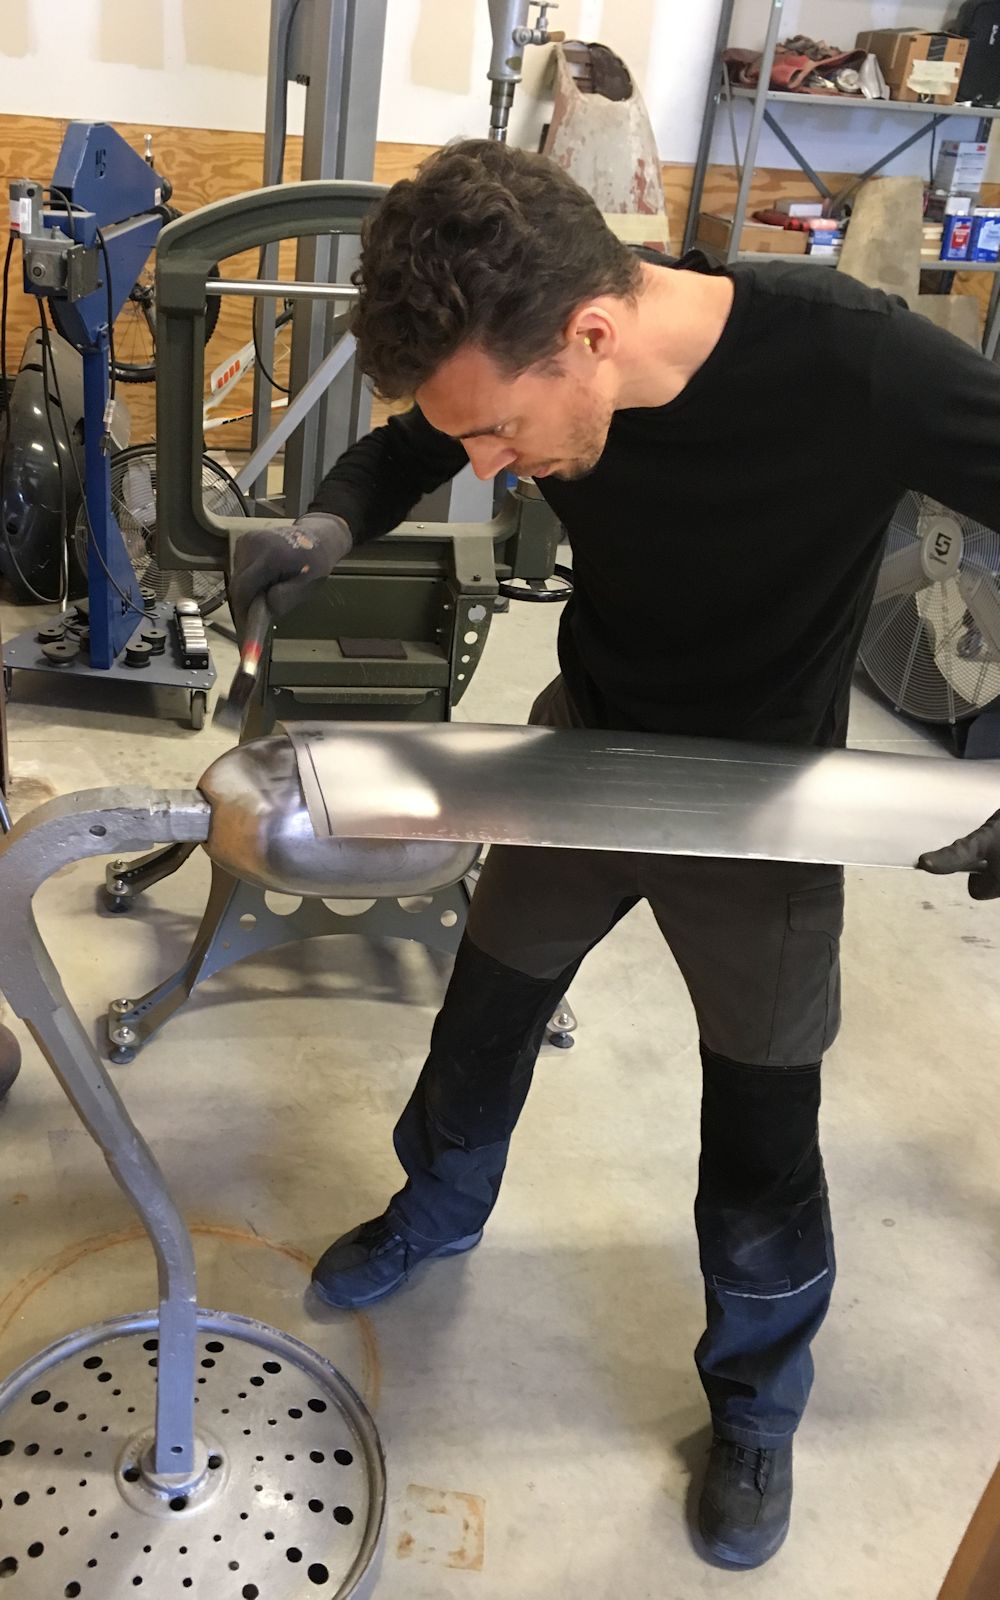
Panel is shaped on the planishing hammer
and the English wheel
Edward now turns his attention to the rear section
of the left hand front wing
Shaping the rear panel
Deck surface now looking much better!
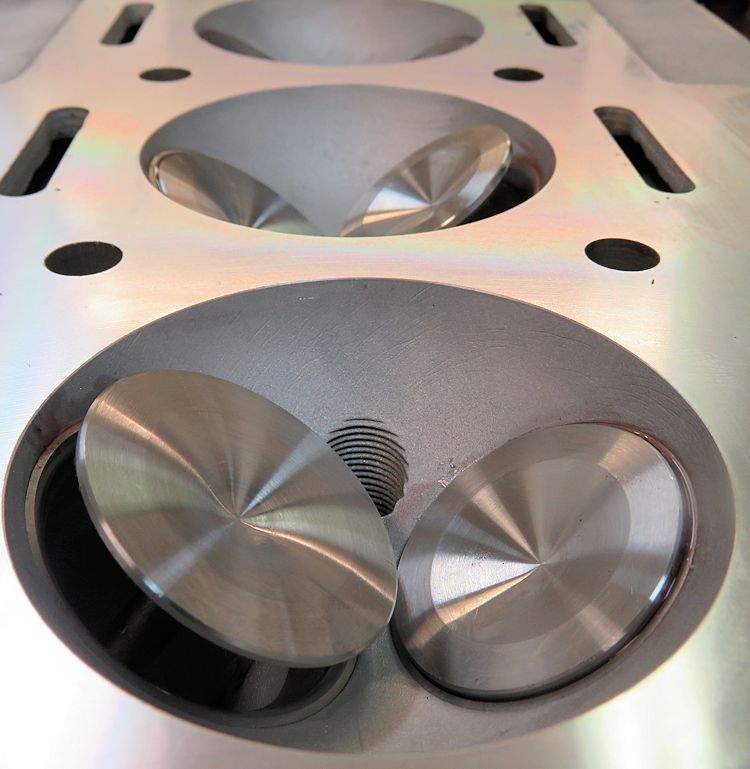
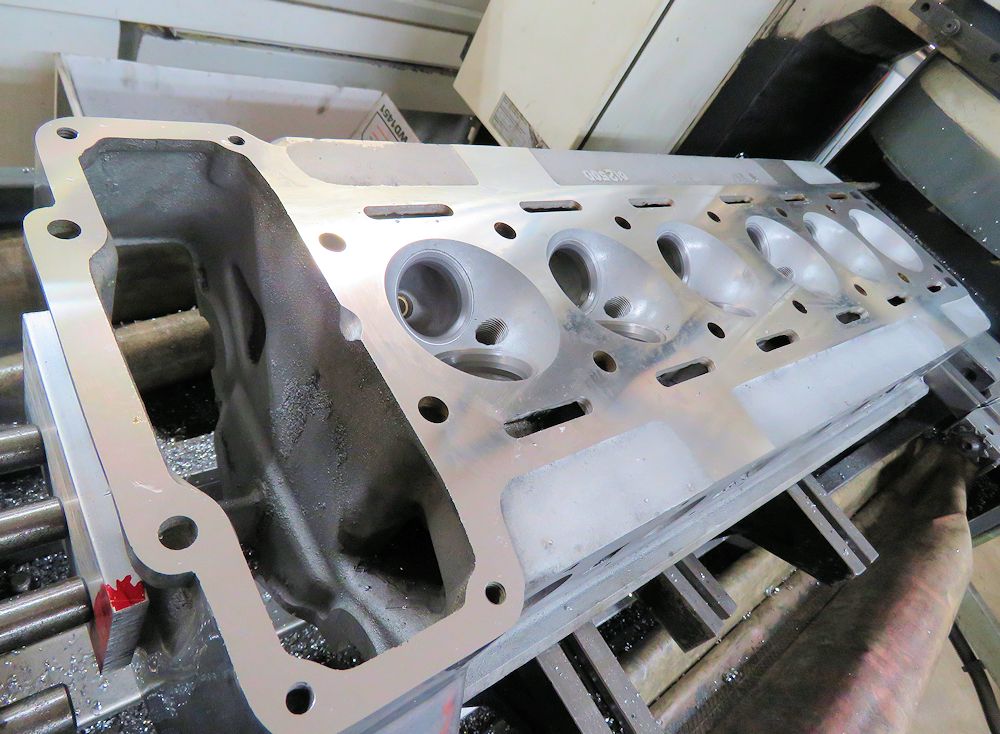
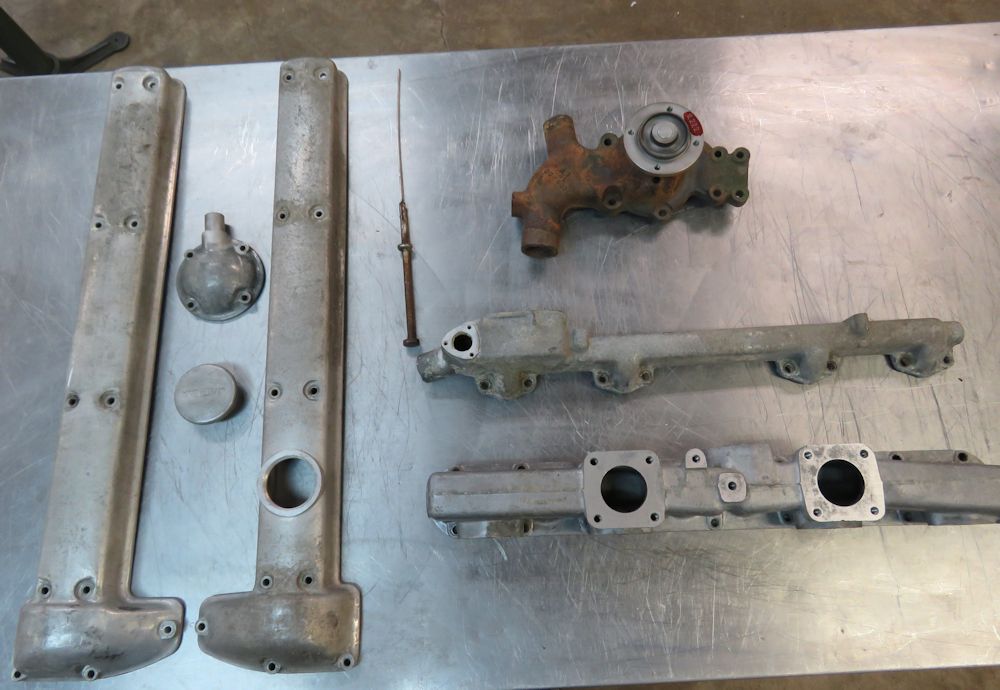
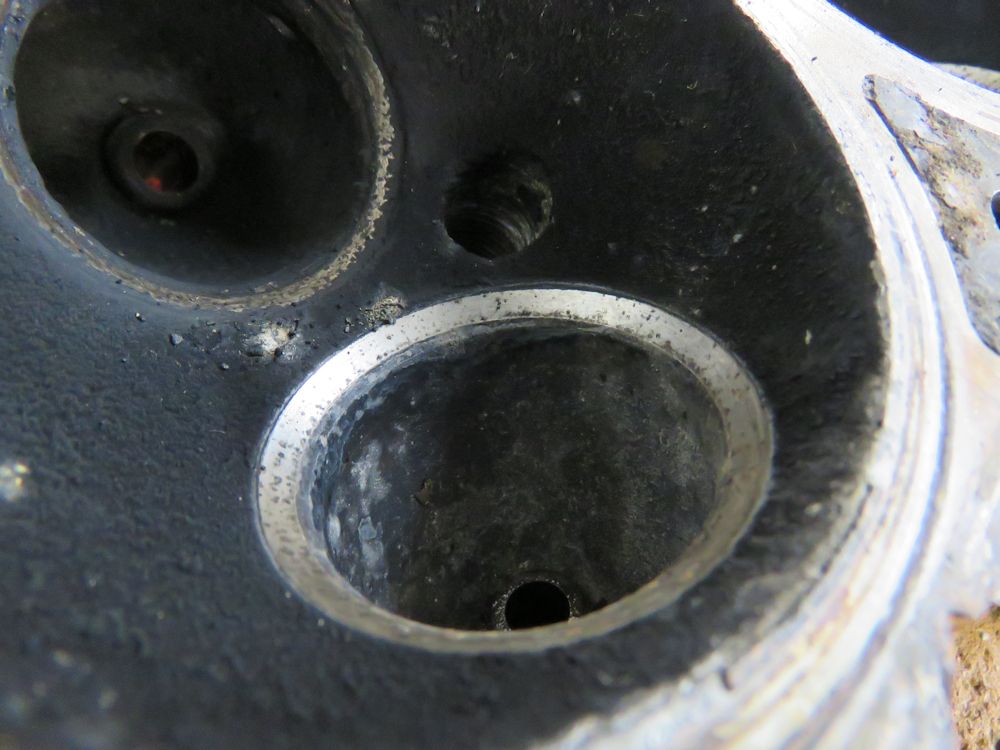
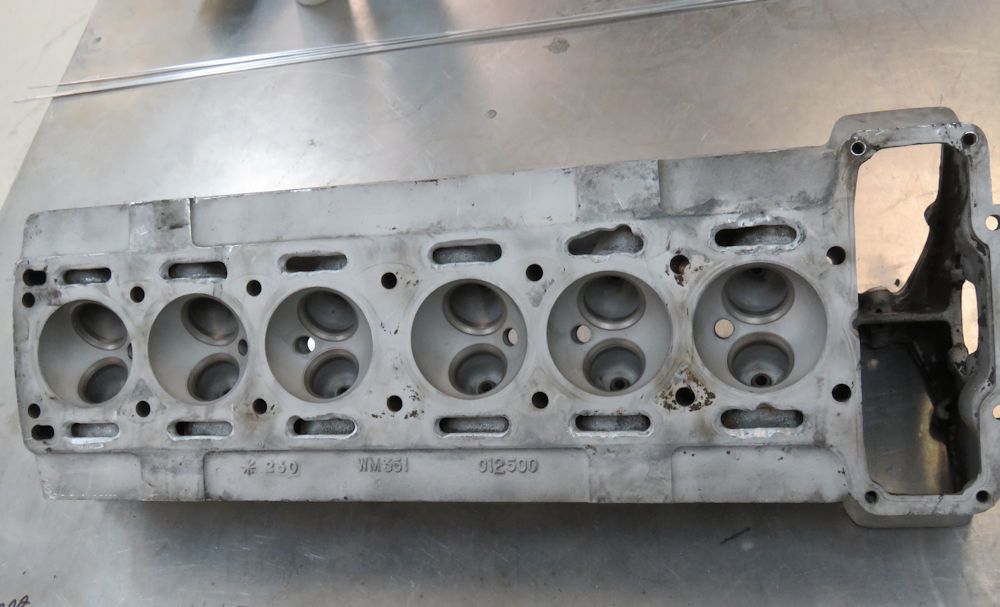
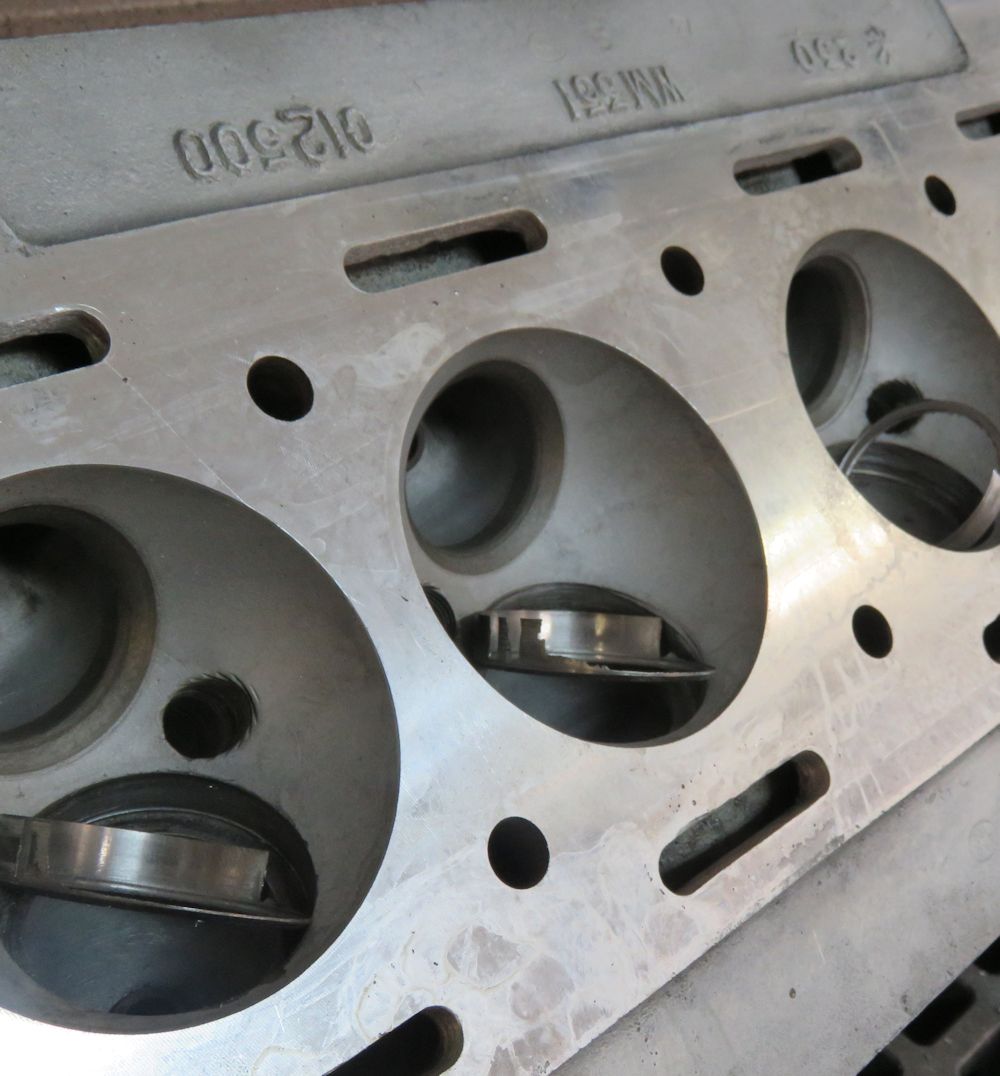
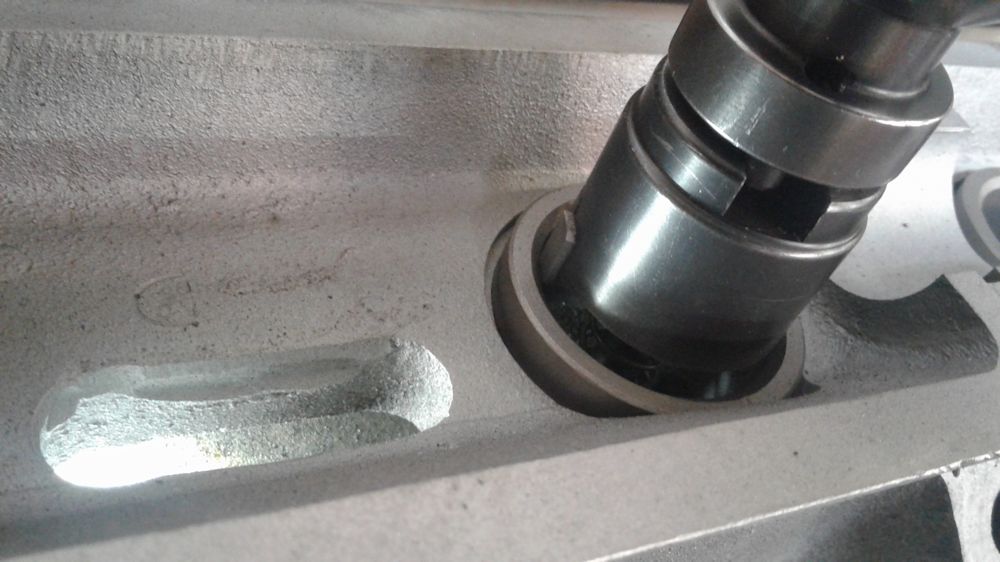
Cylinder head now fully rebuilt
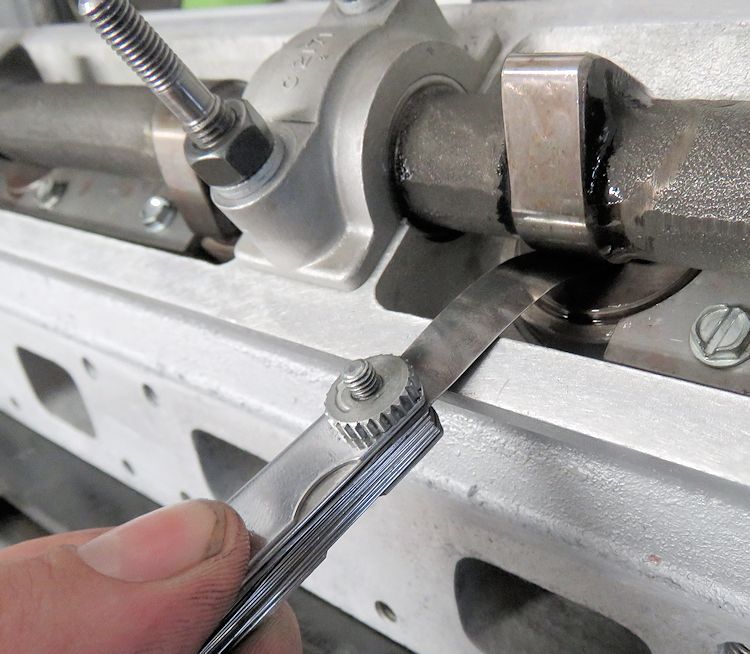
Setting valve lash during reassembly
I am pleased to report that we have now completed our rebuild of the Zagato cylinder head. The block is going to be cleaned and degreased using an industrial acid dipping process in the next few days.
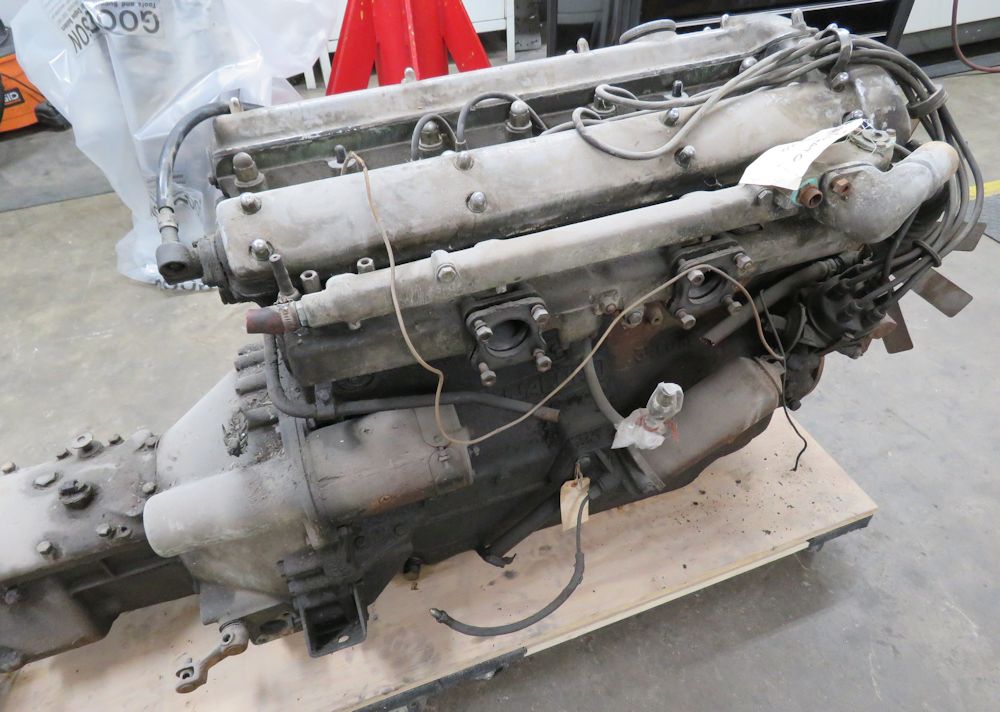
The starting point of this challenging engine rebuild
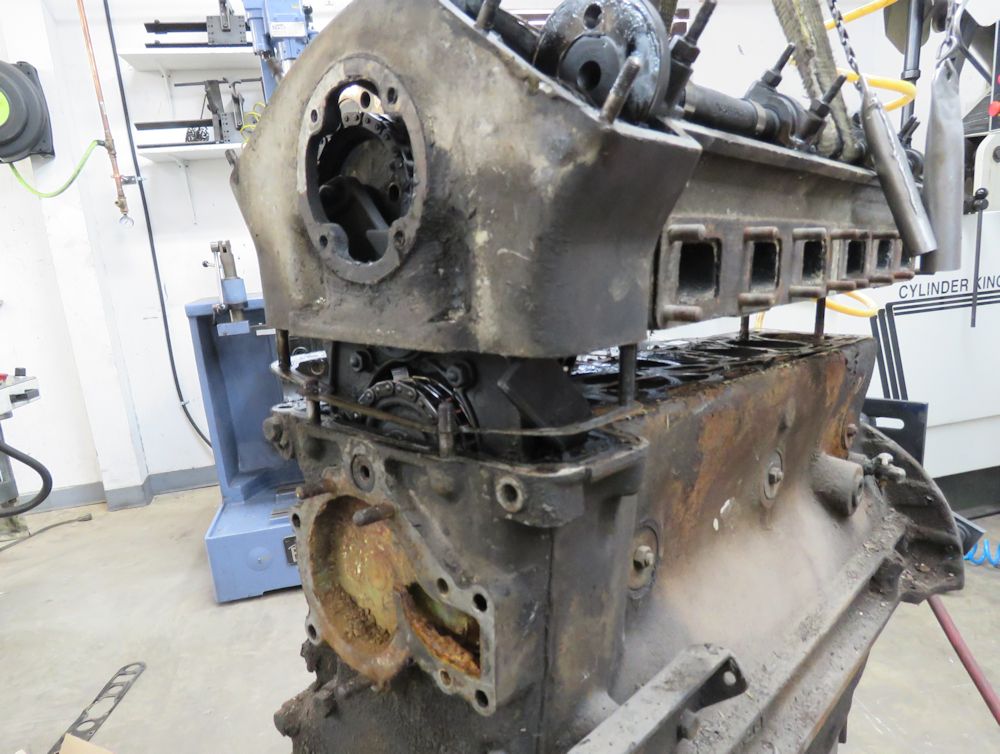
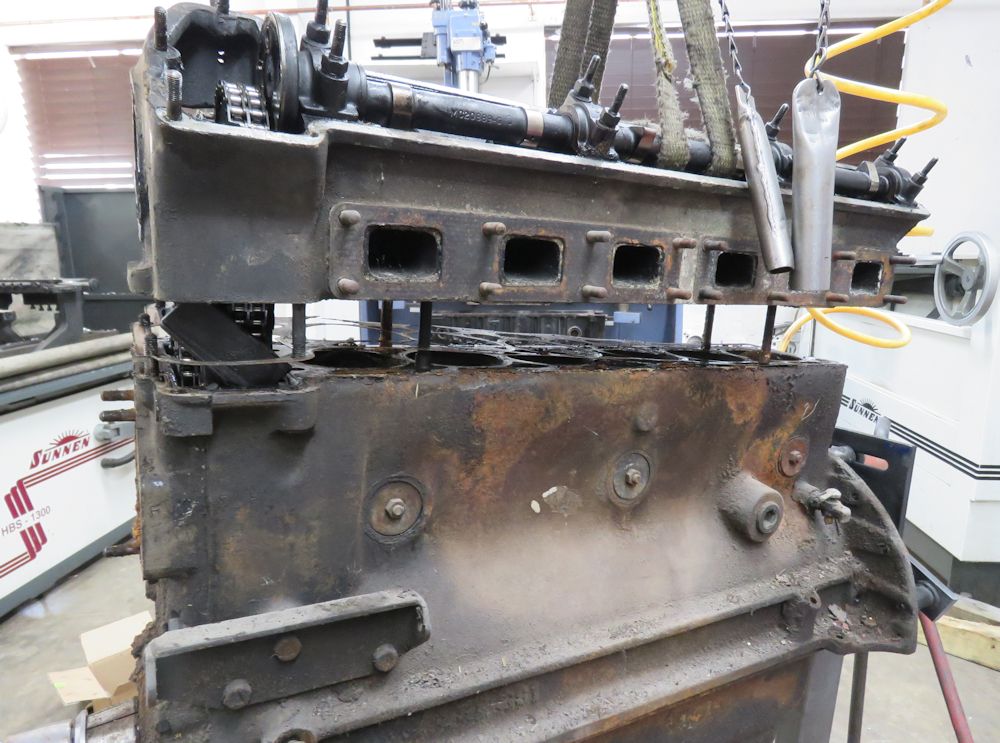
Lifting the head off using the shop crane
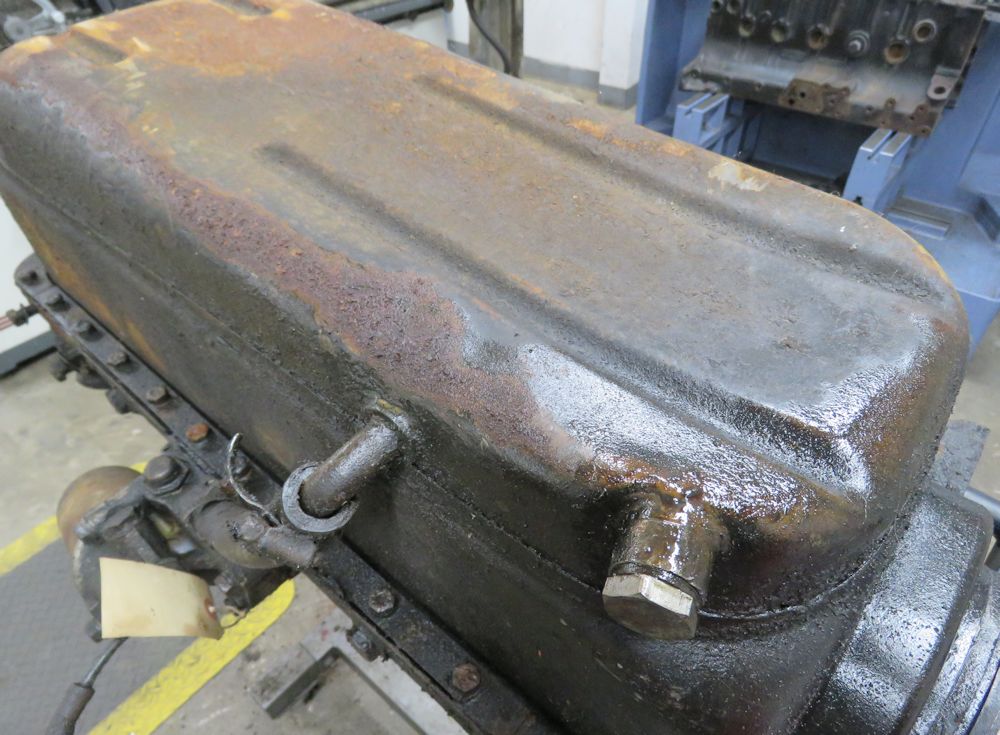
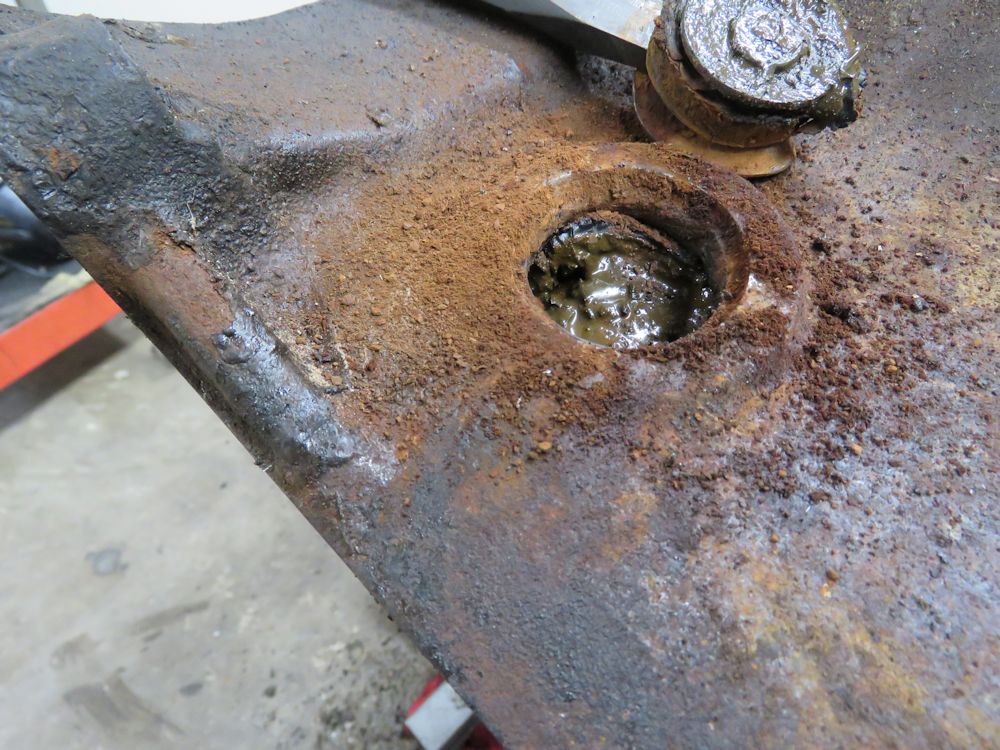
Preparing to remove the oil pan
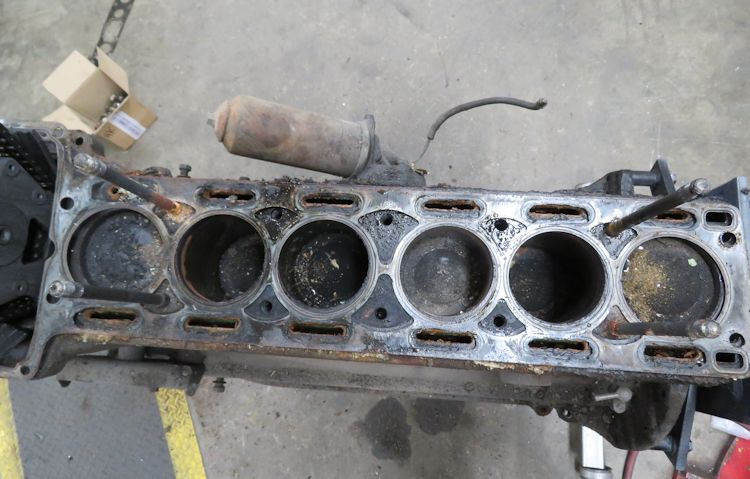
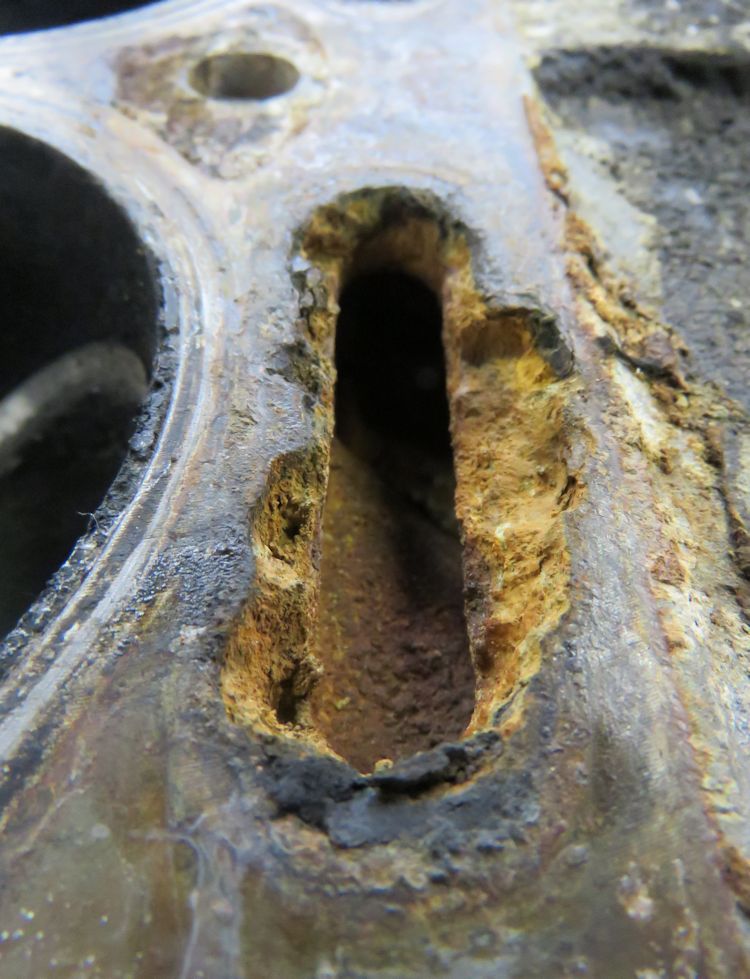
First signs of some pretty bad internal damage
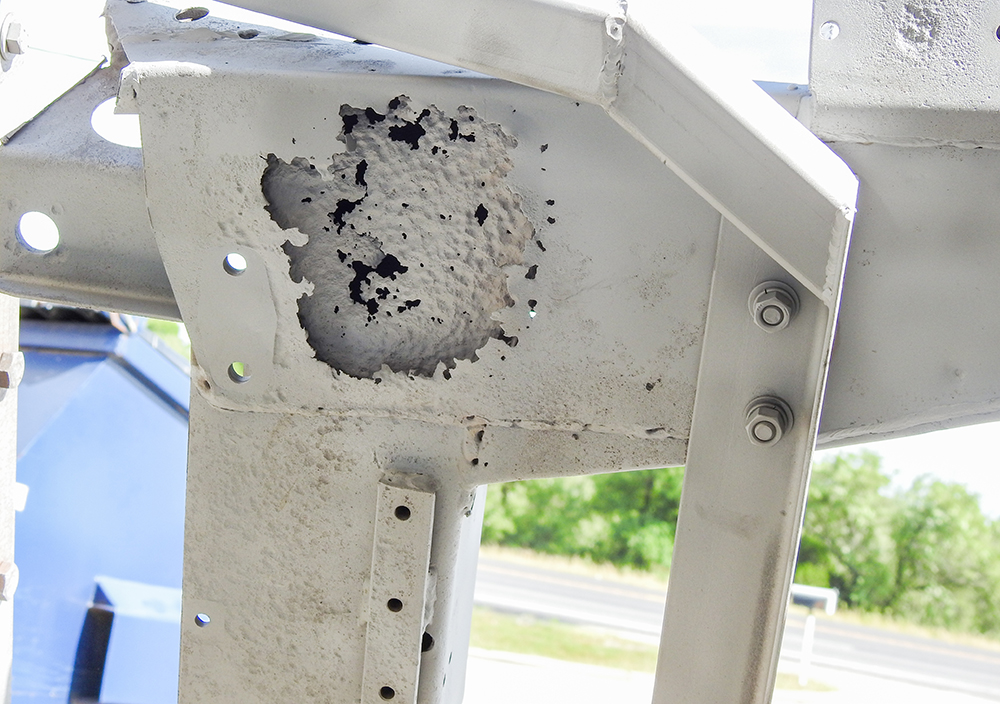
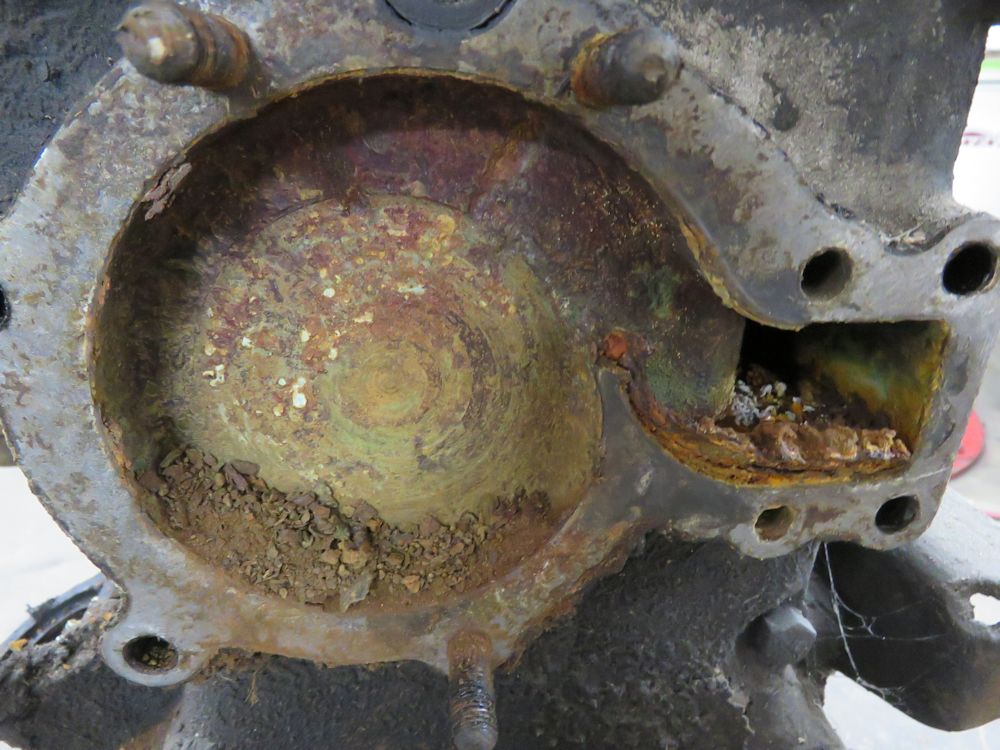
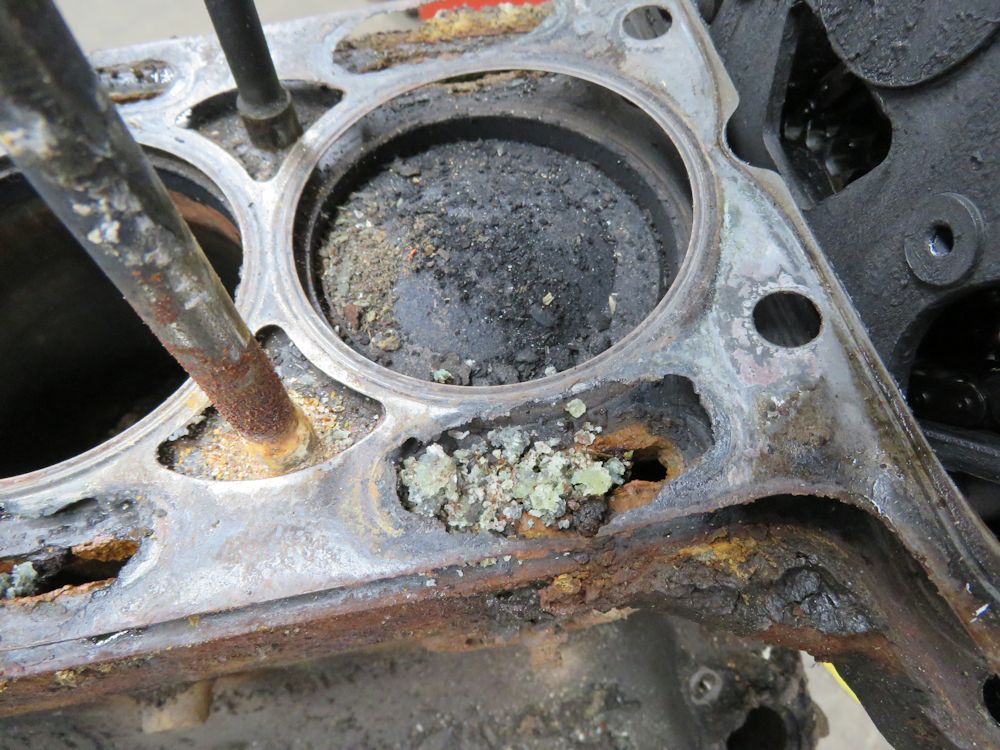
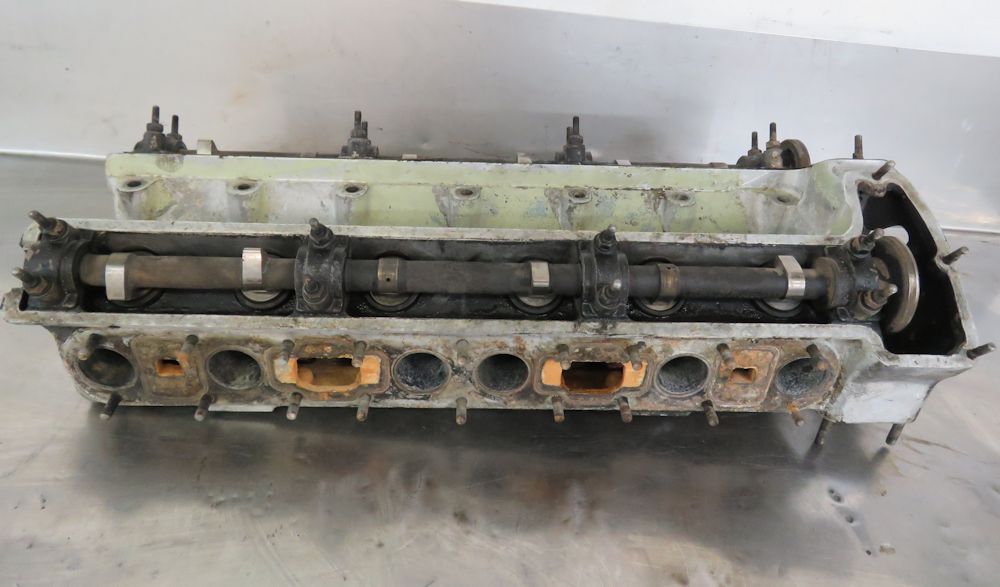
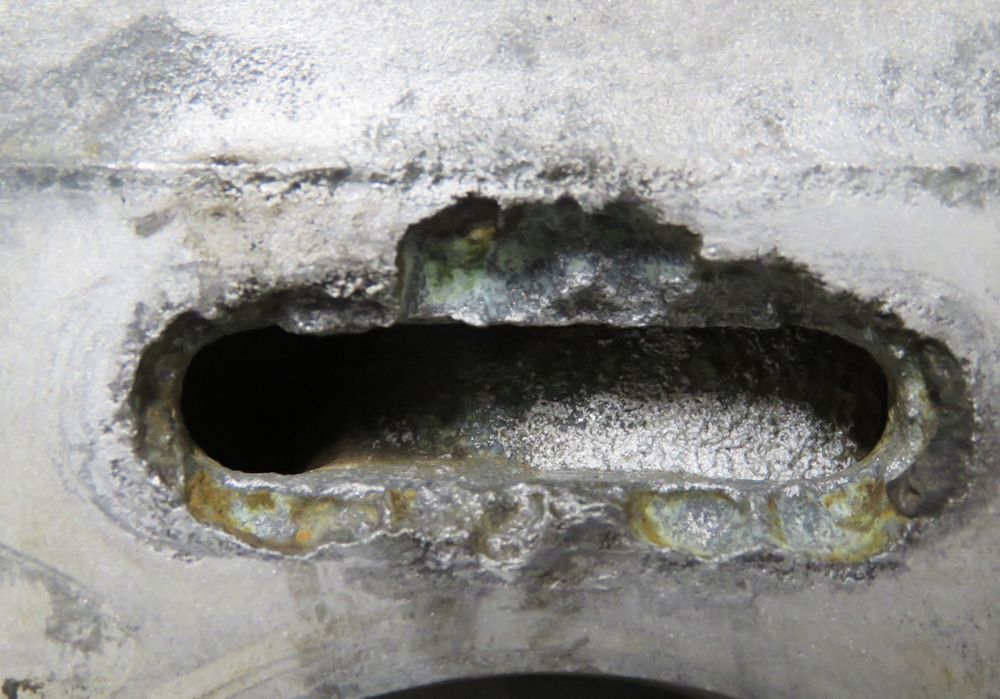
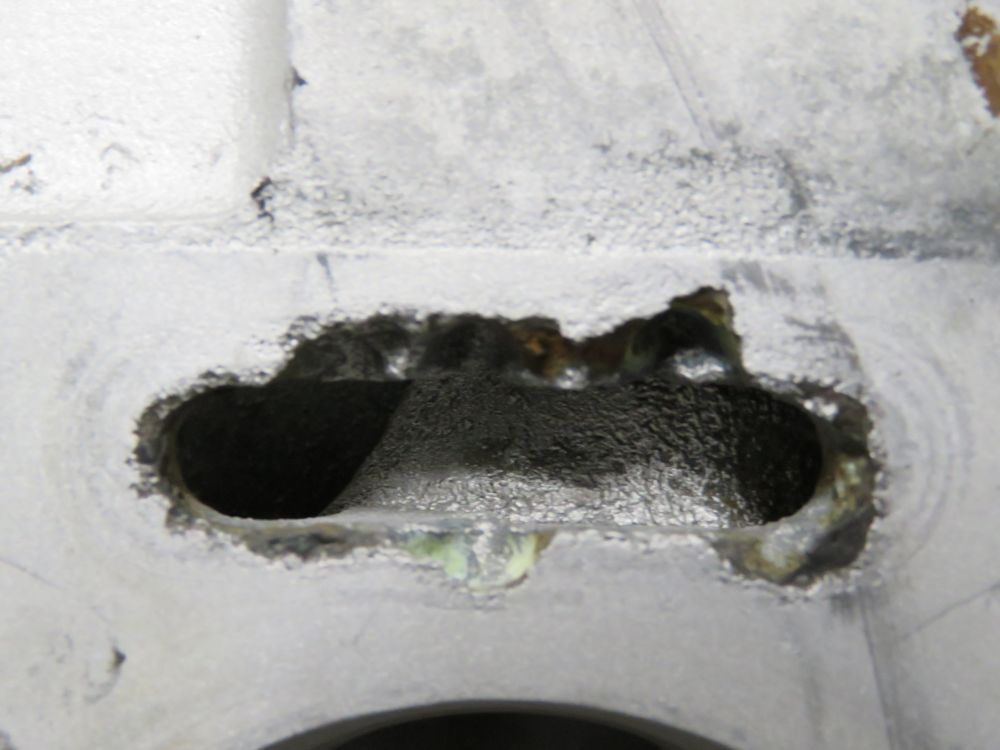
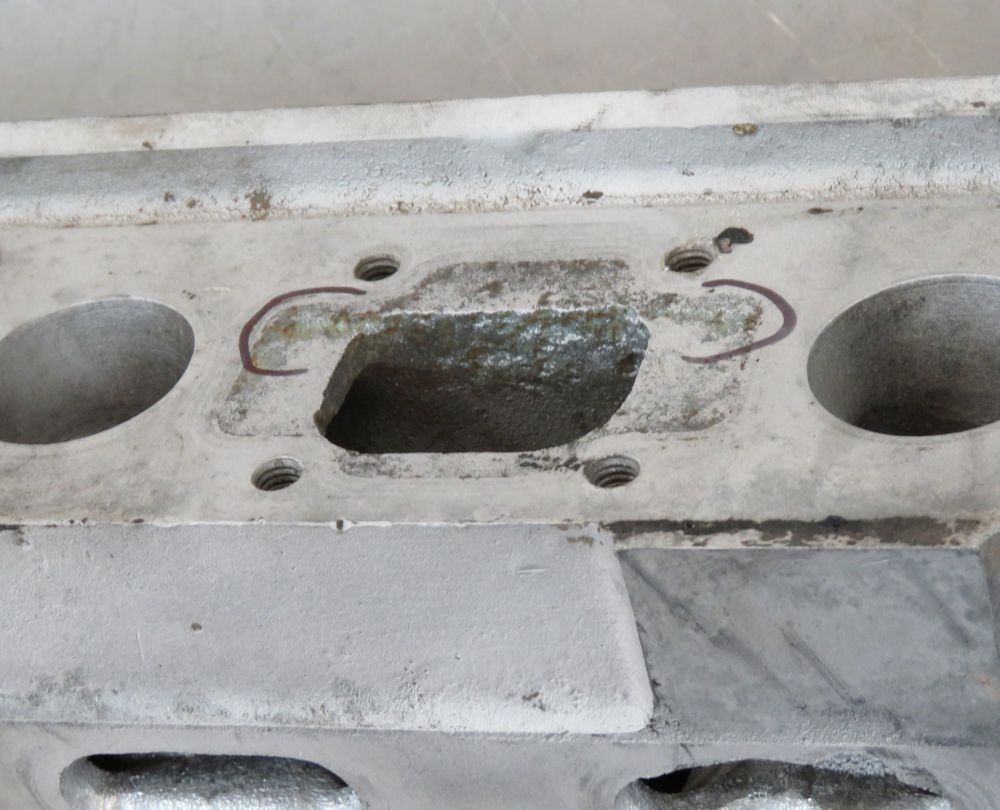
Cylinder head is in very poor condition
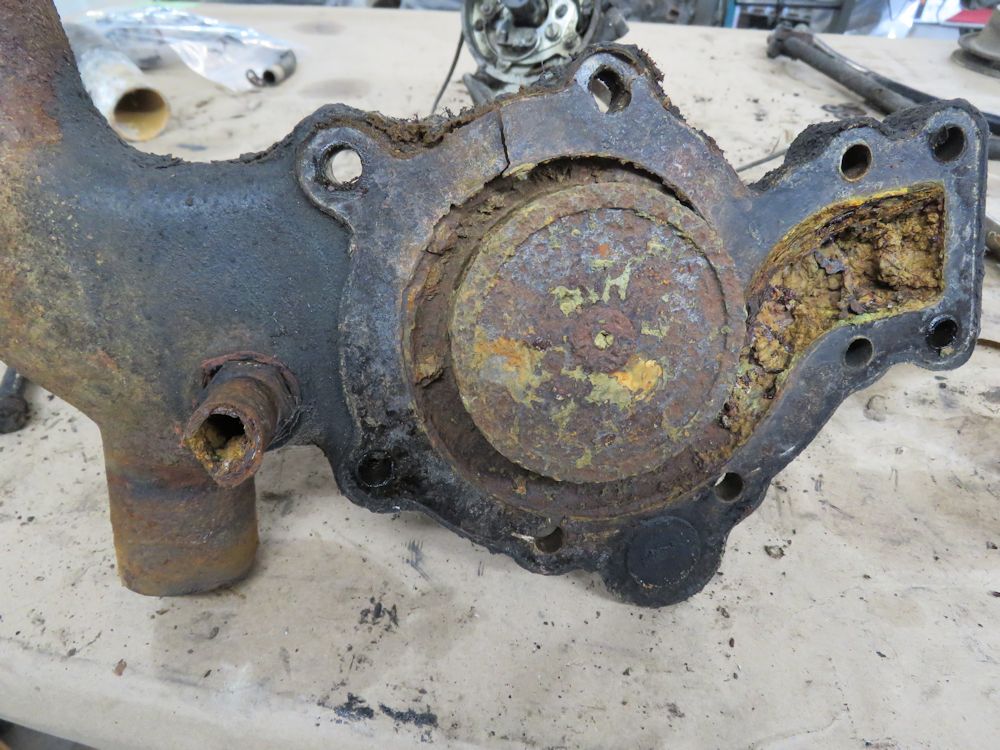
Serious corrosion issues around the water jackets
Tear down underway
Head will need to spend some time in the
CJ Coachworks
As bad as we have seen!
Nasty deposits lurking behind the core plugs in the
water jackets of the block
Thankfully we have a world class welder in the
Coachworks to assist with corroded engines
Corroded alloy is ground away prior to welding
Jake built up the corroded areas around the
water jackets with a welded bead
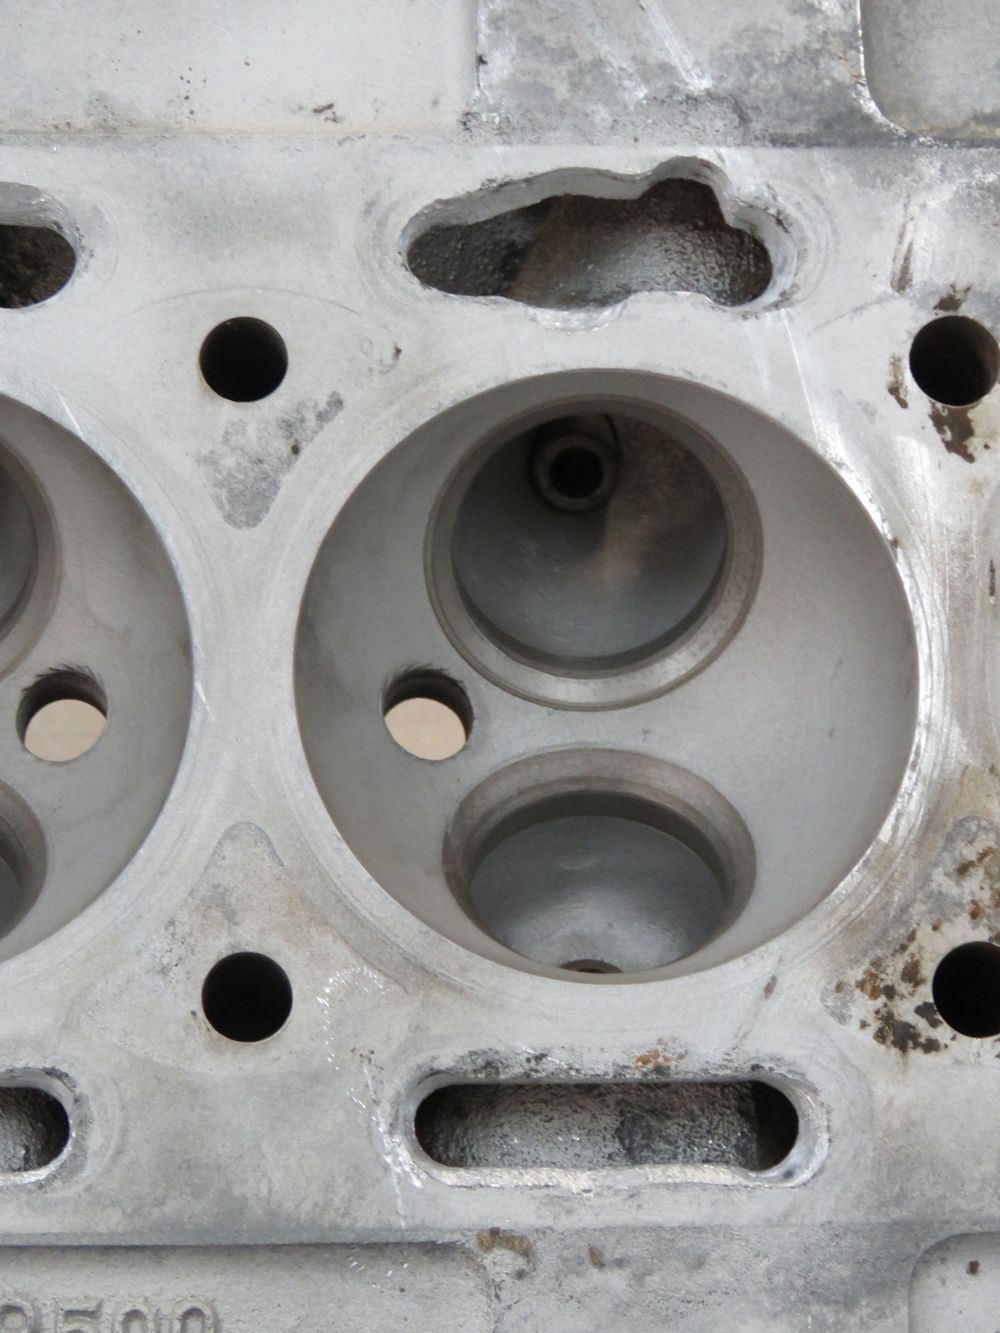
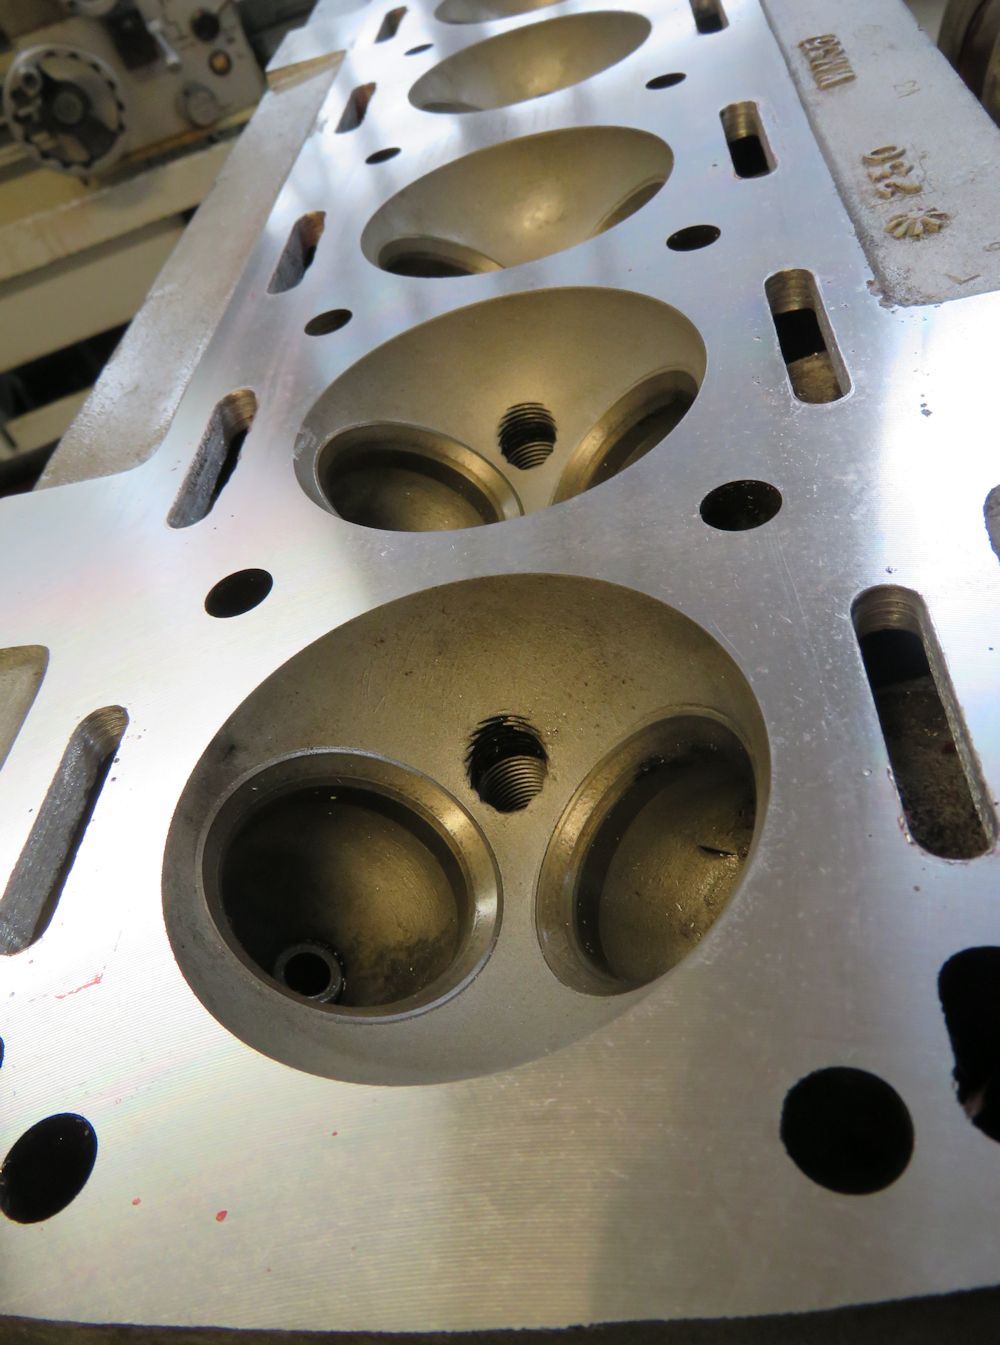
Initial surfacing of the head after weld repairs
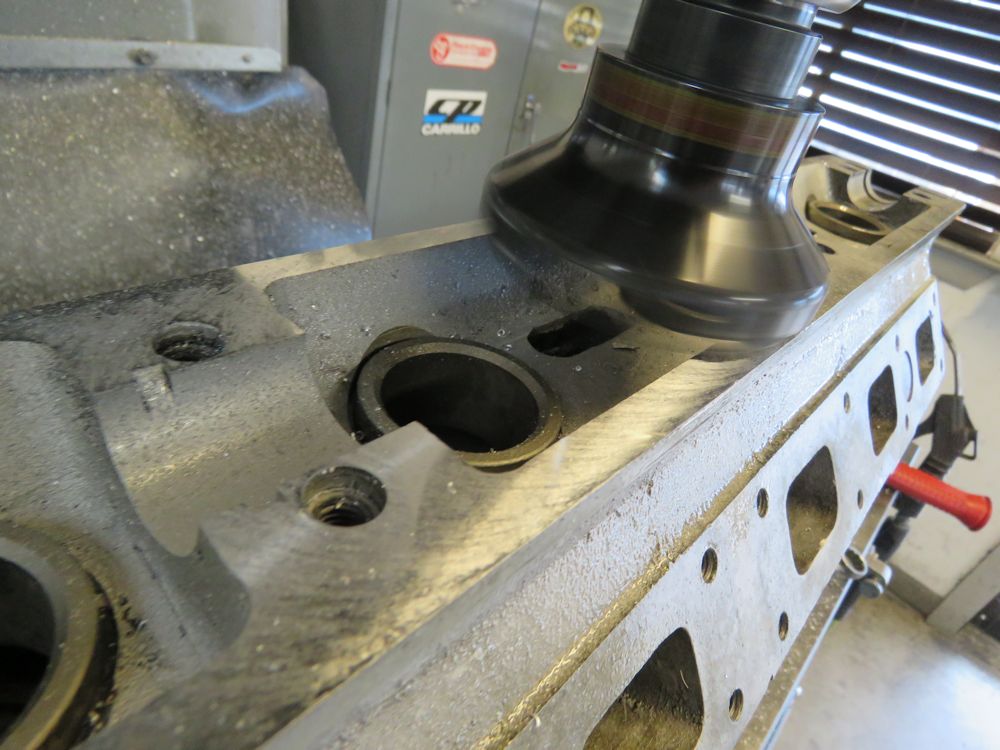
Reshaping the water jackets on the mill
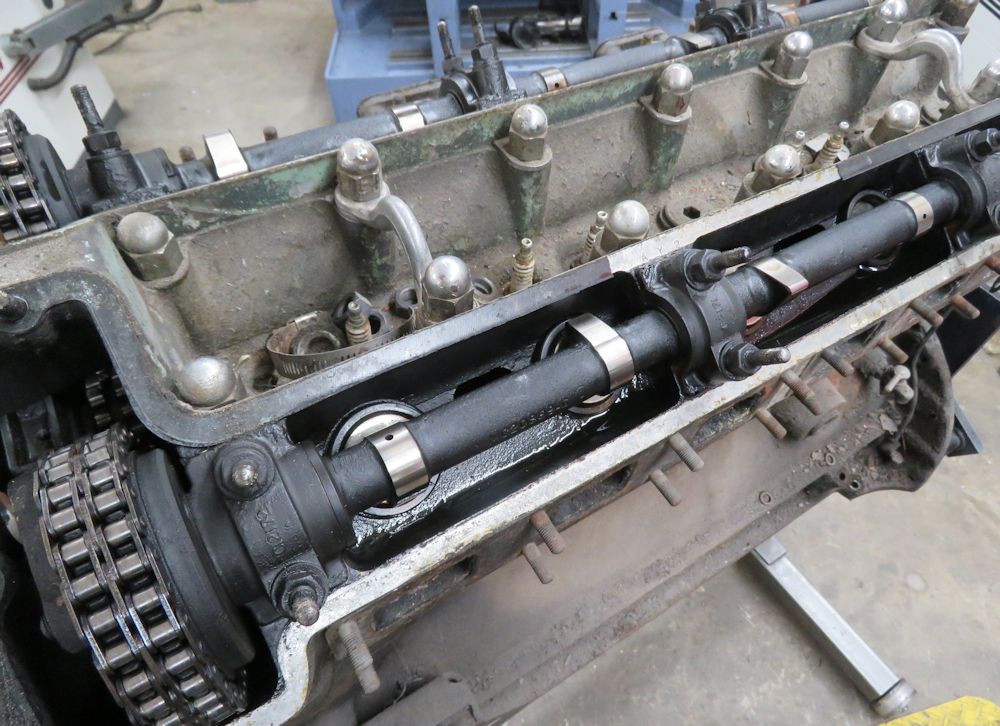
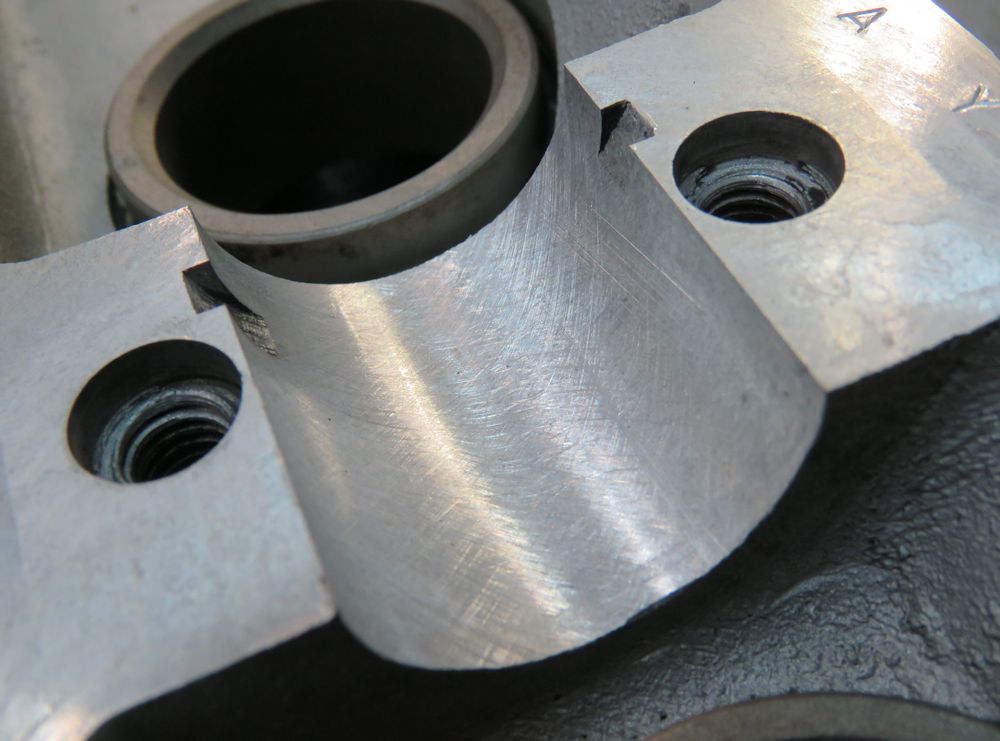
Cam saddles had to be align honed
Truing the valve cover gasket surfaces
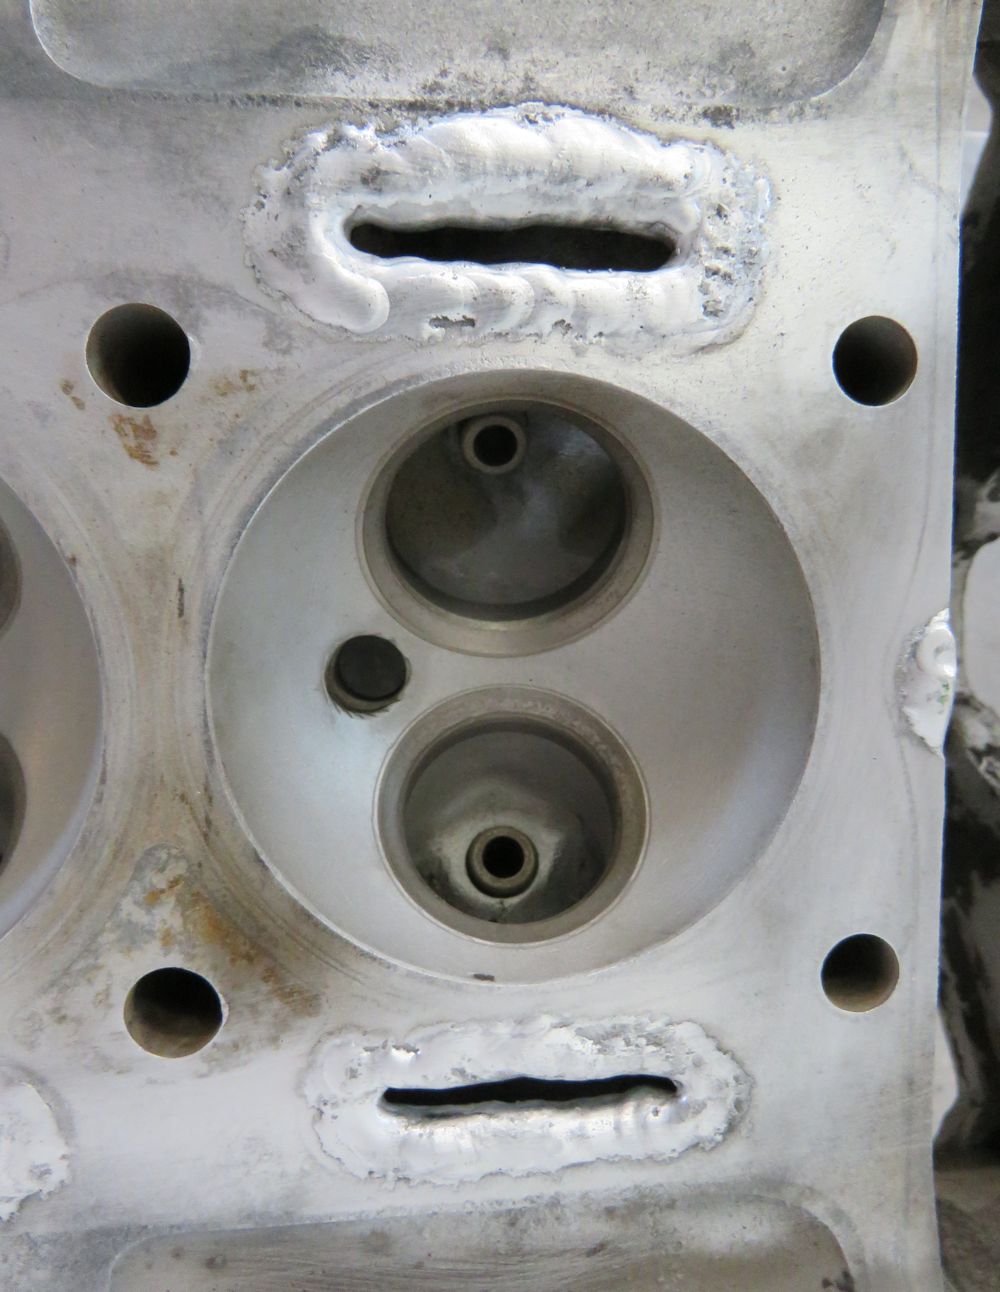
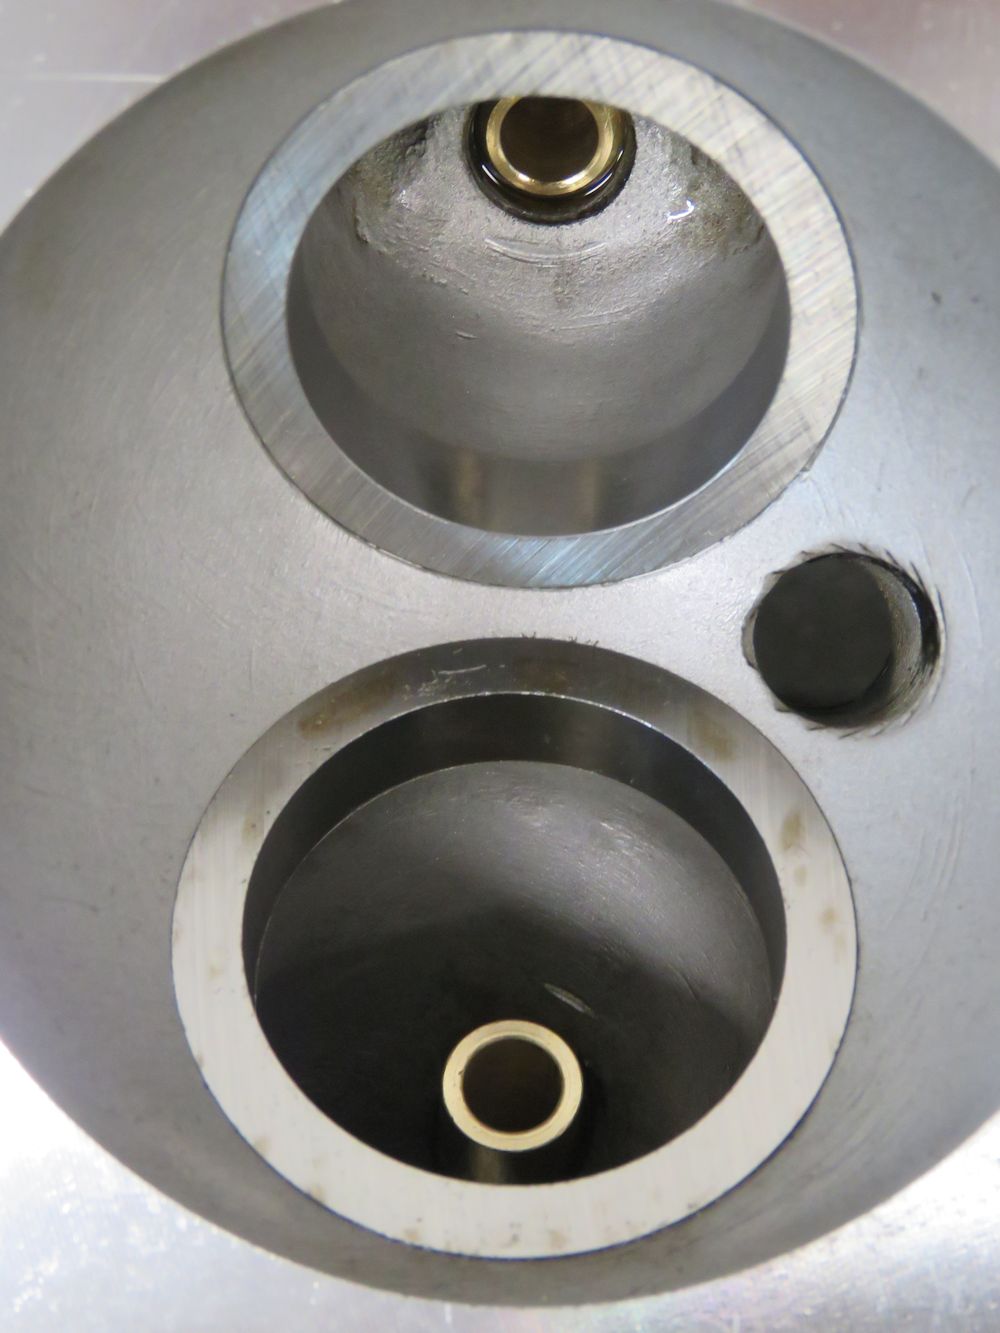
Pressing in custom CJ valve seats
Machining out the old valve seats
Pressure testing head after all the welding and
machine work
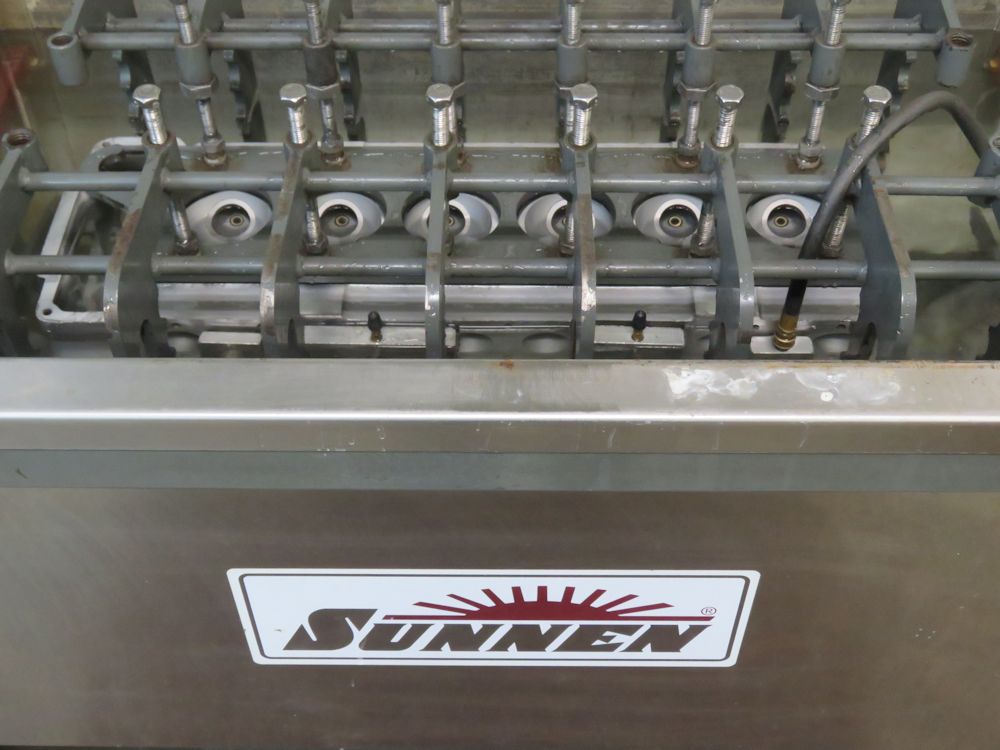
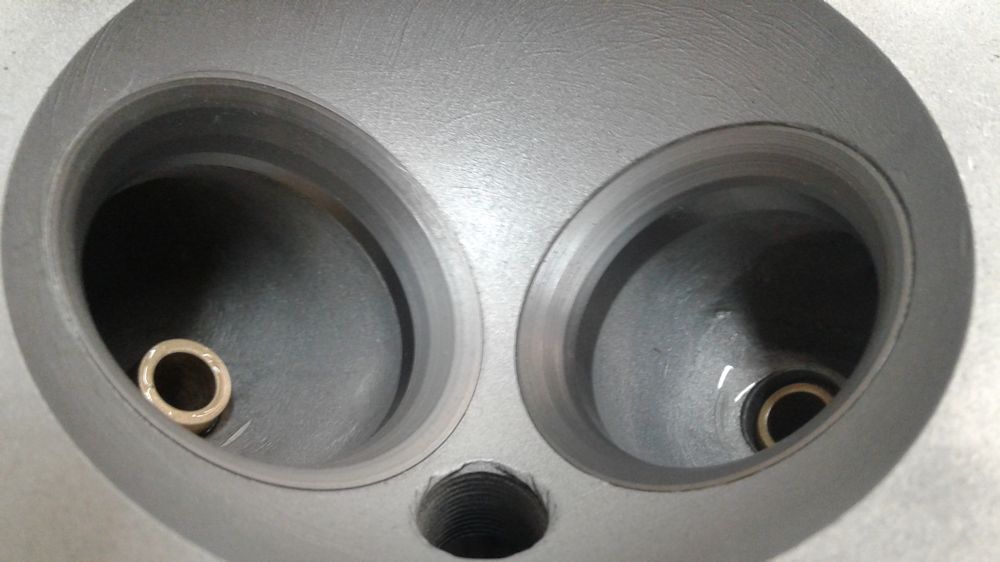
Honing tappet guides for oversized tappets
Honing new valve guides to size
Pressure test passed with flying colors
Close up of the 5 angled valve job
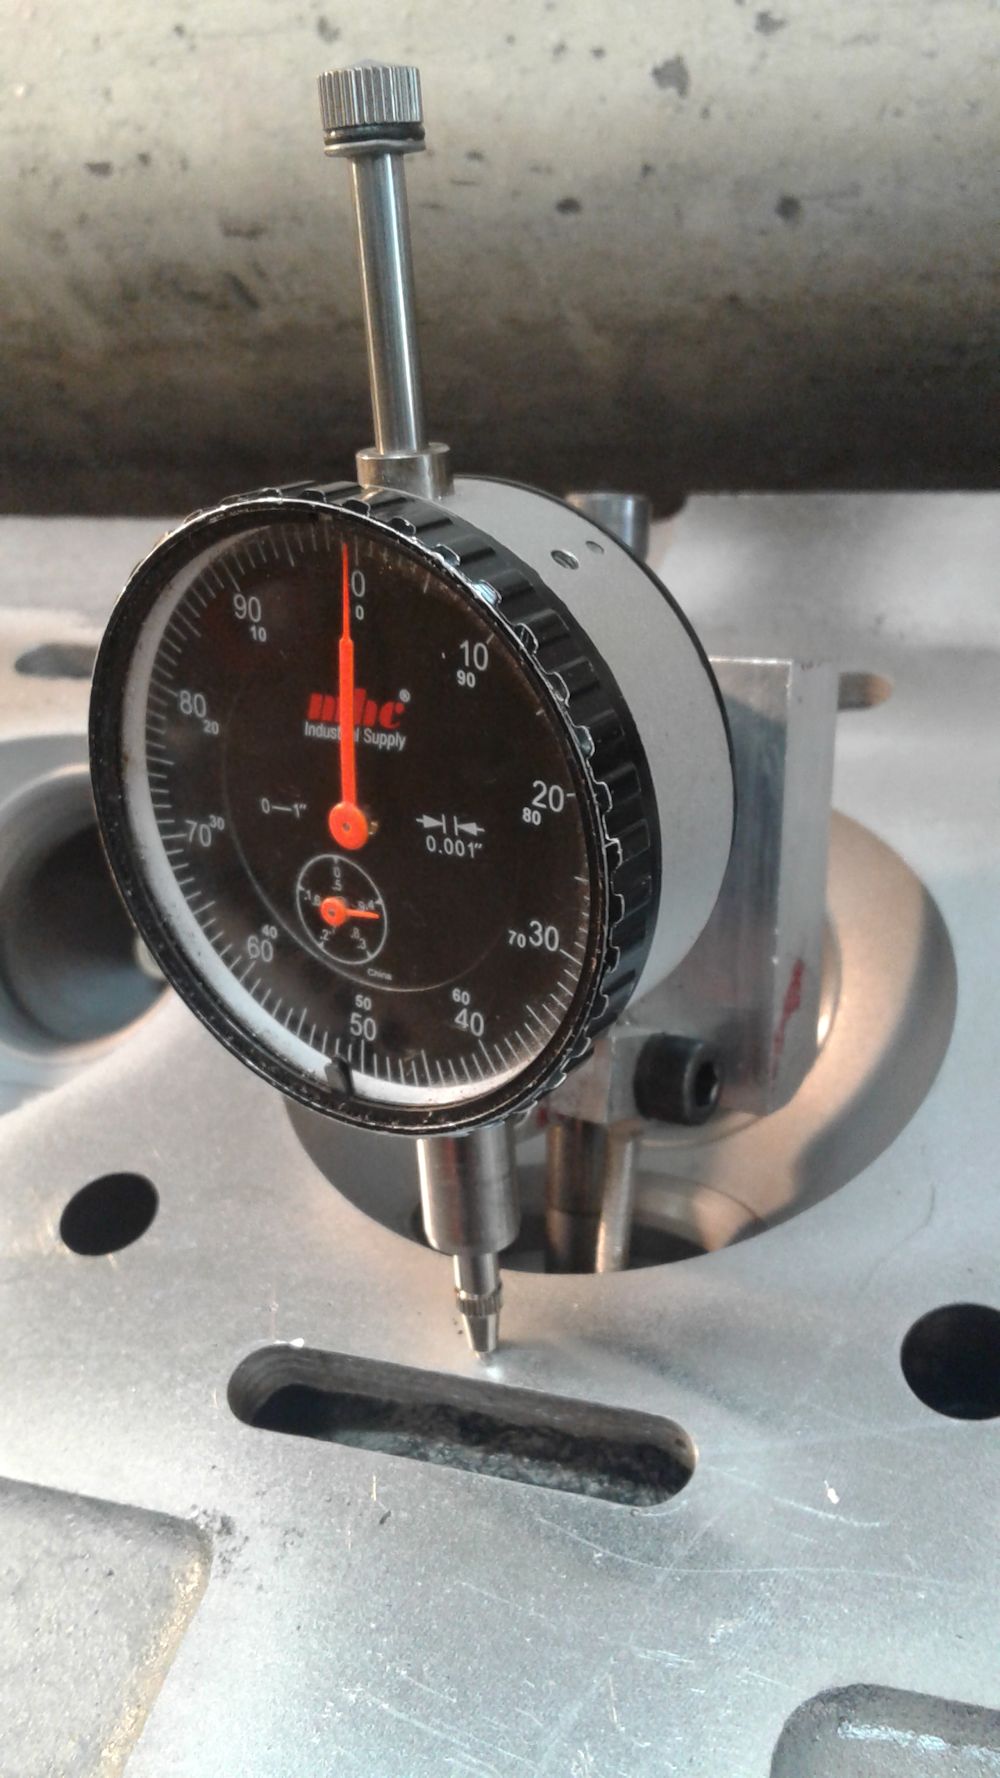
Measuring the run out on the new valve job (zero)
I am pleased to report that the station buck for the front of the Zagato has now been completed.
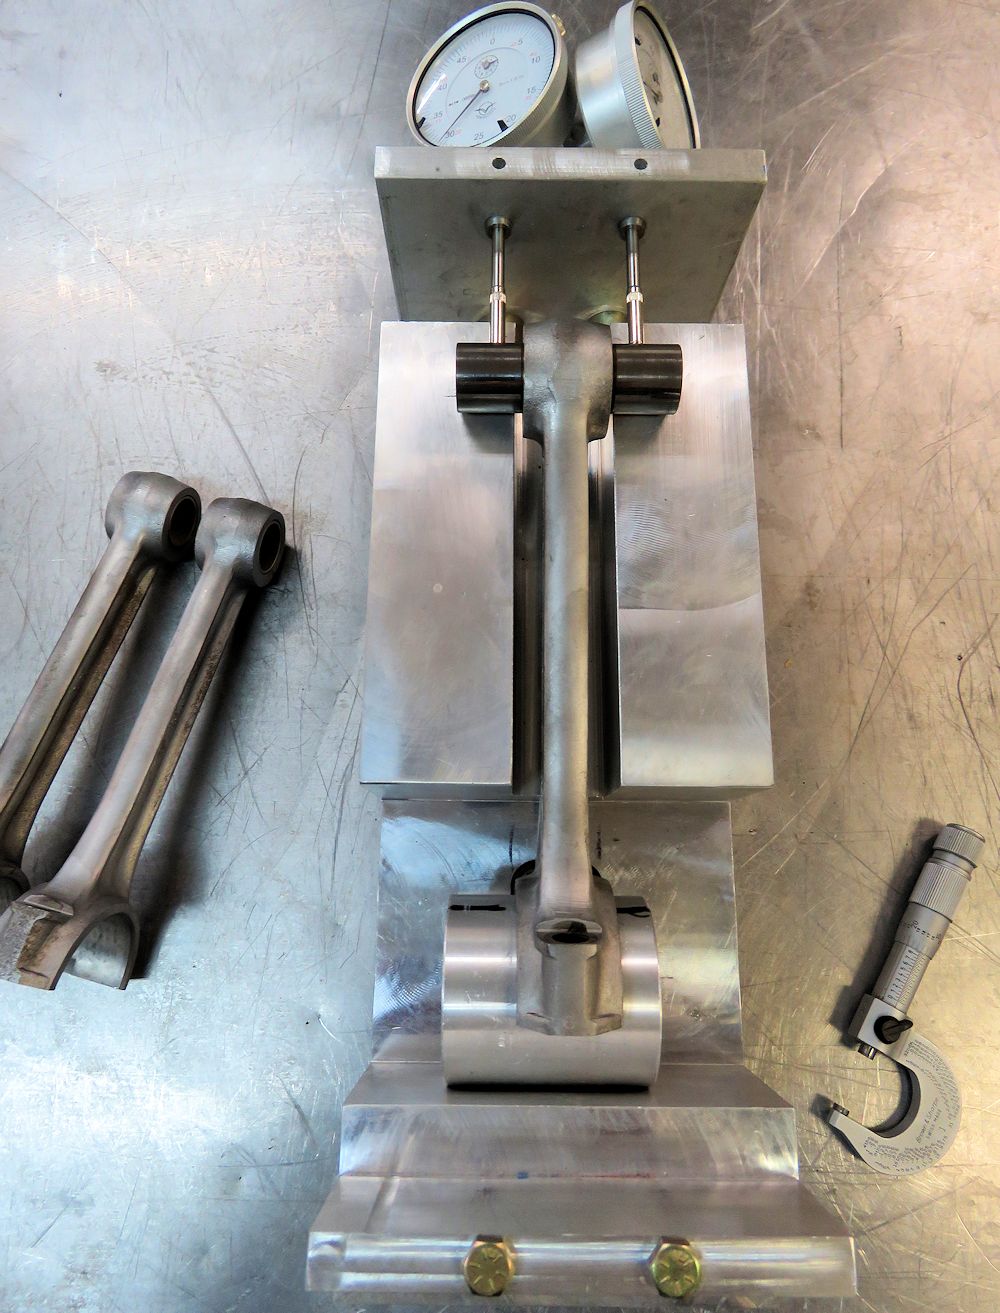
Measuring connecting rods for straightness
Edward is almost finished assembling the station buck.
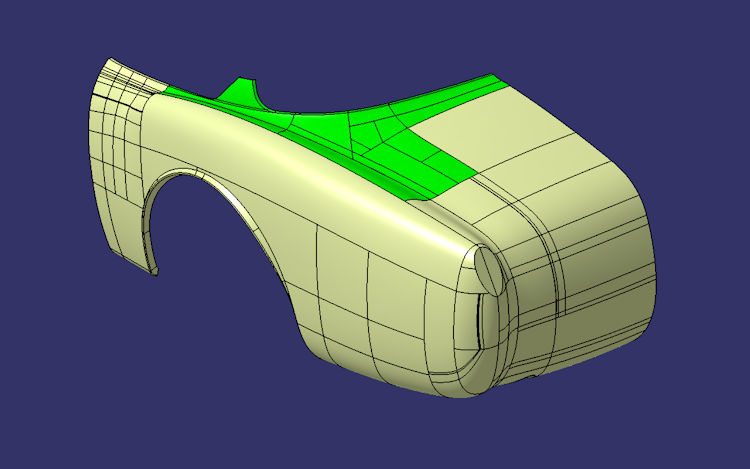
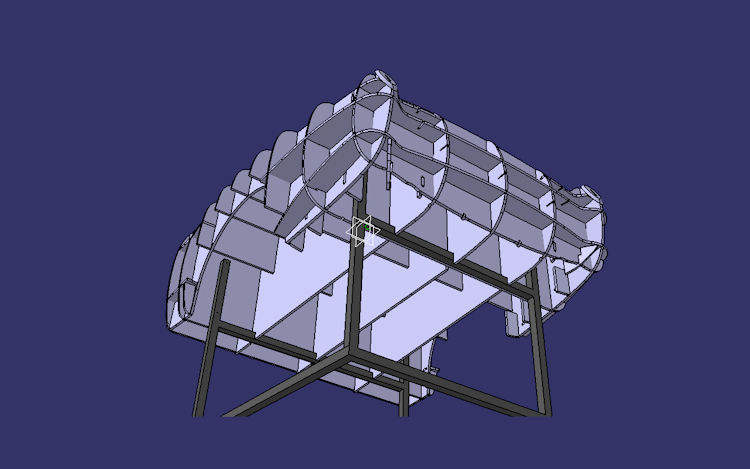
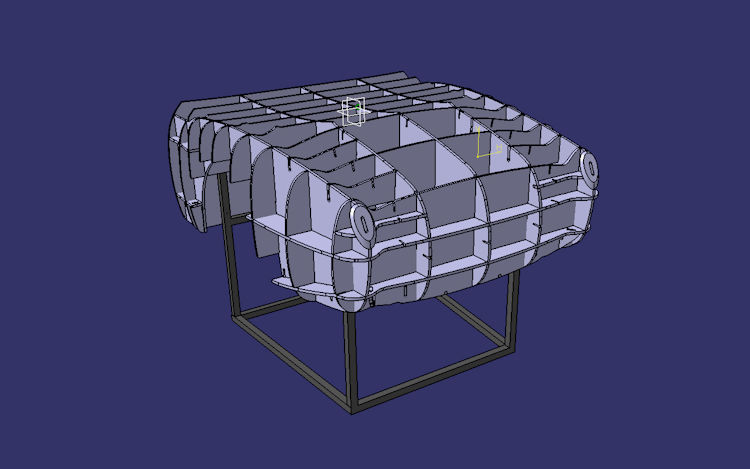
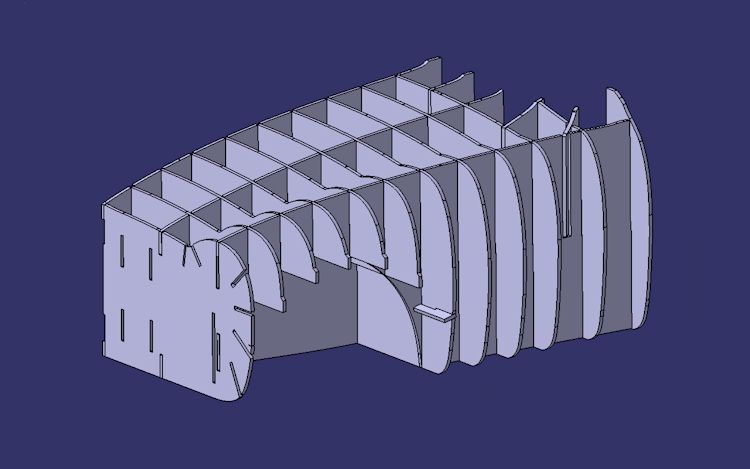
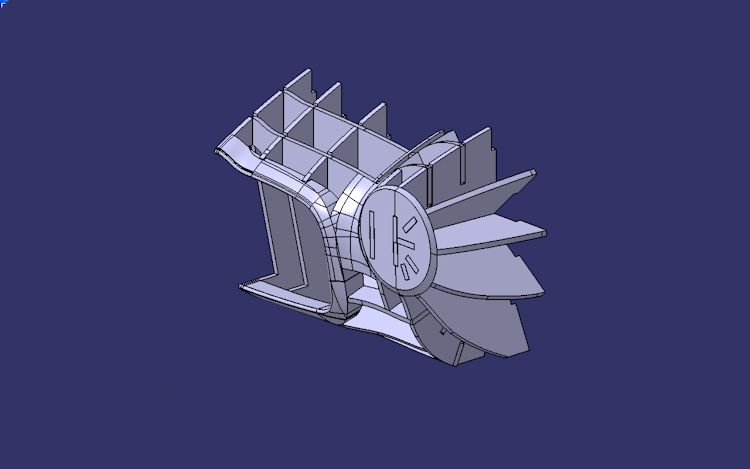
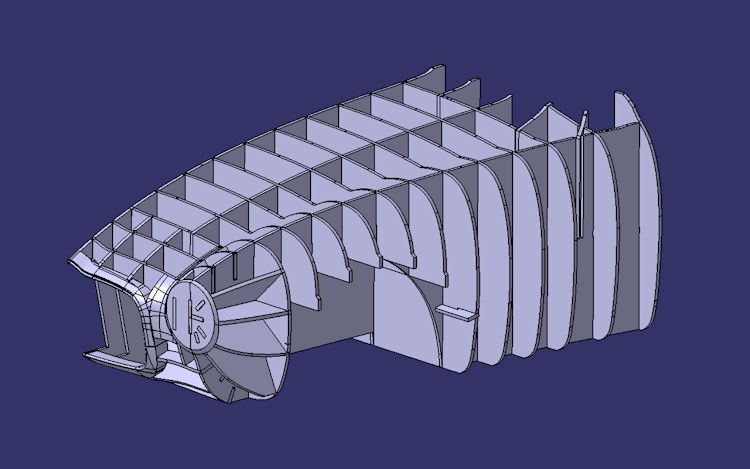
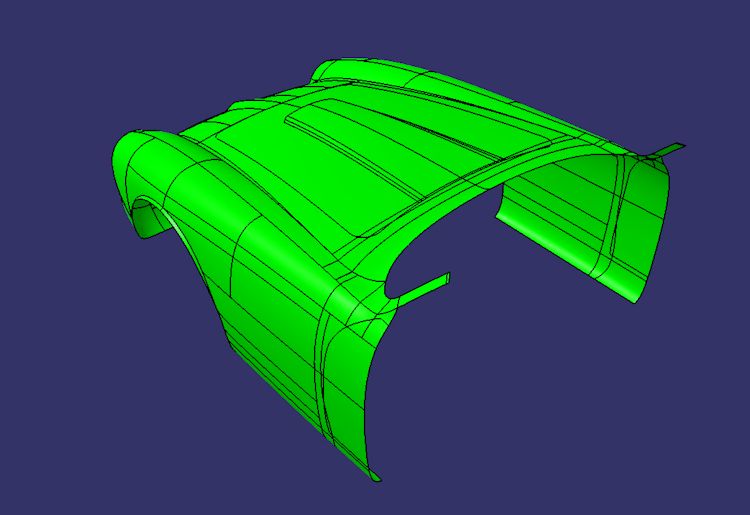
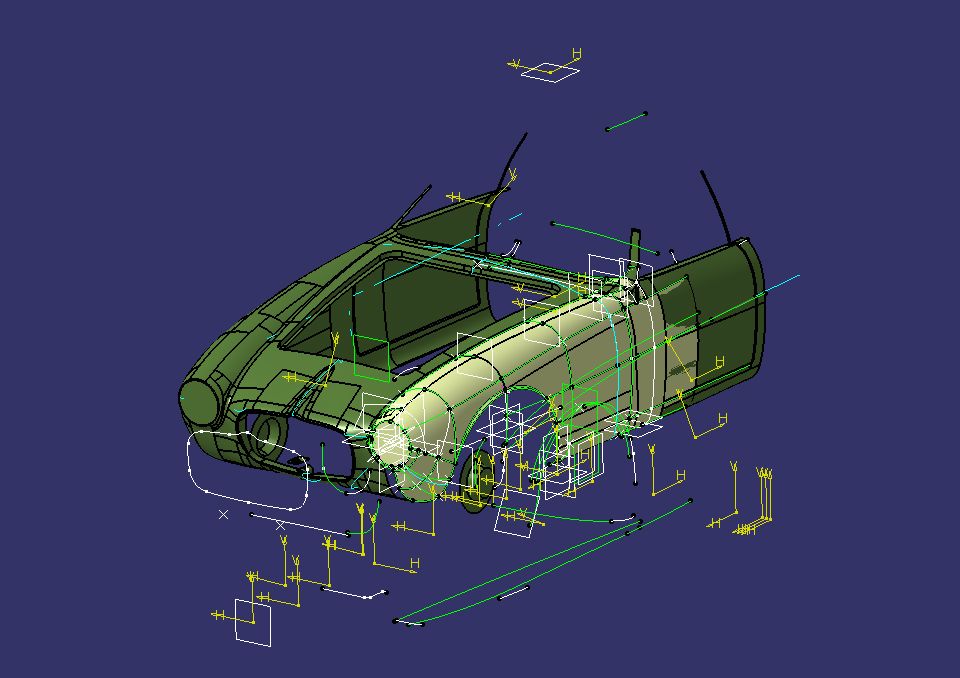
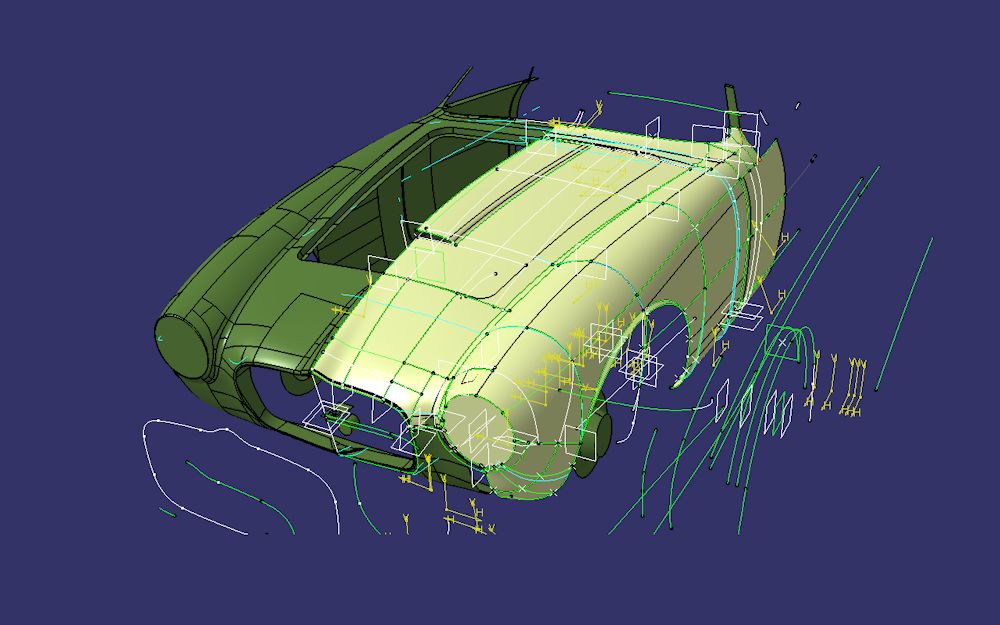
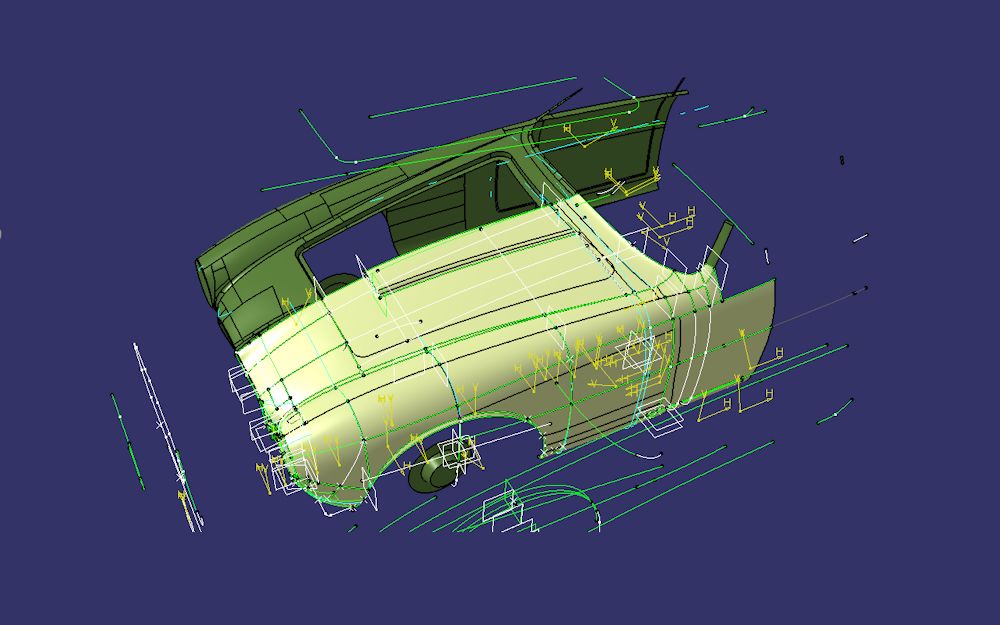
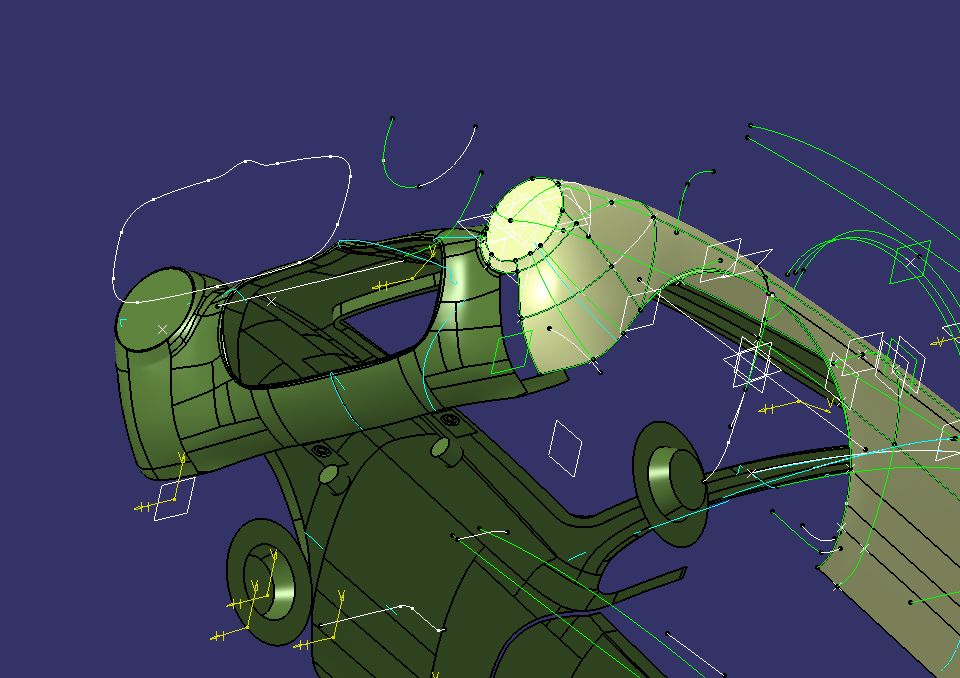
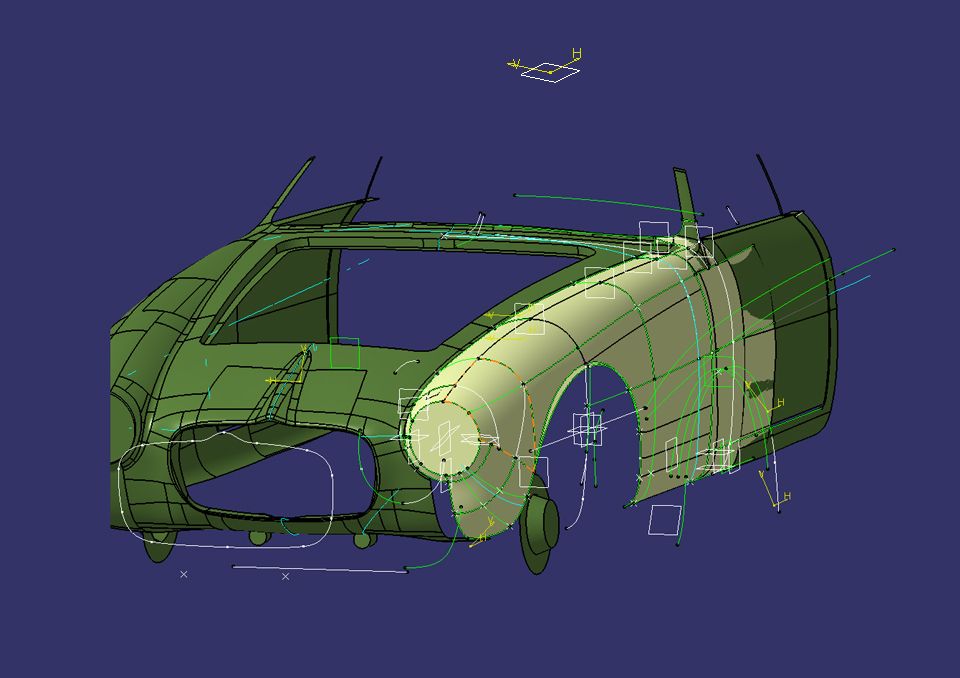
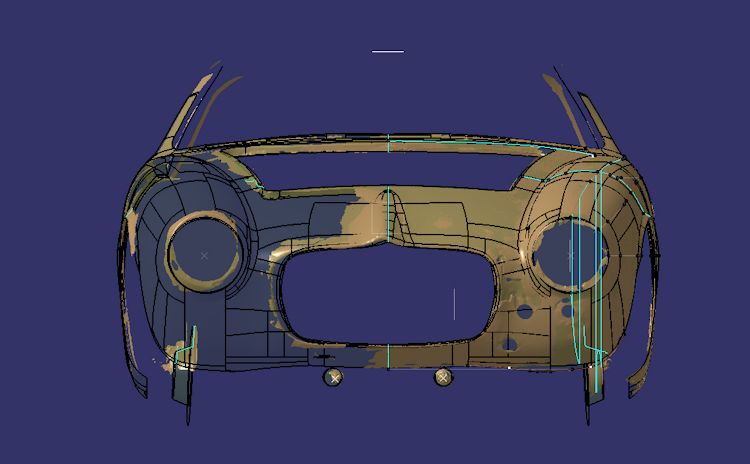
The following images are screen shots of Edward's station buck design, which is nearing completion.
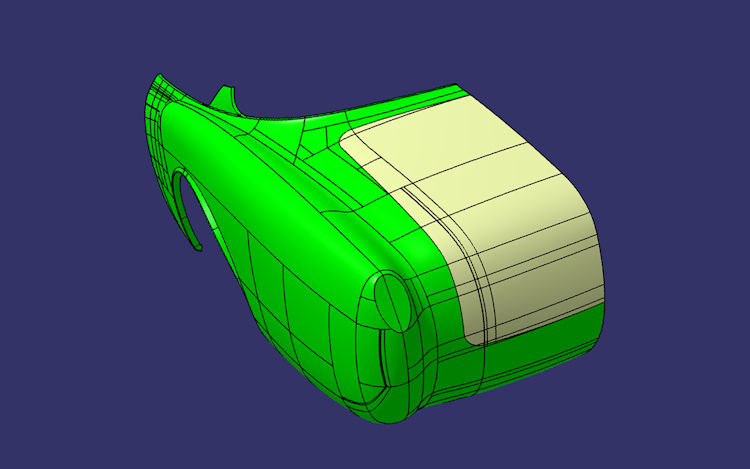
Edward has now finished the CAD model of the entire front end and has trued all surfaces. Next up is the design of the station buck, which is already underway.
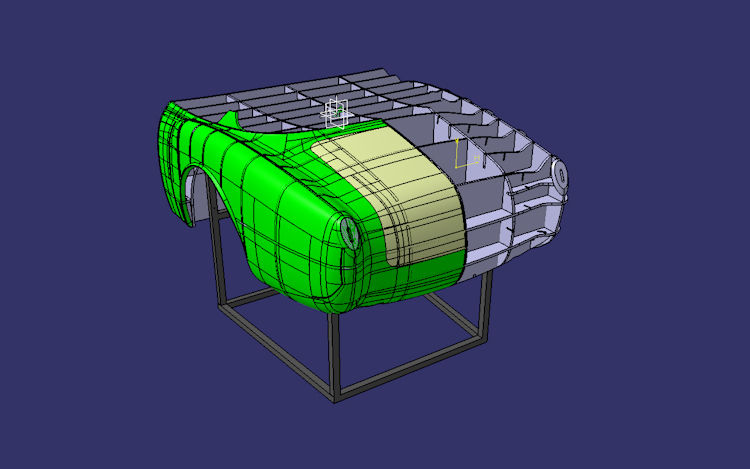
More screen shots of Edward's CAD design work.
Slowly but surely, the front end of the car is taking shape in Edward's CAD drawing.
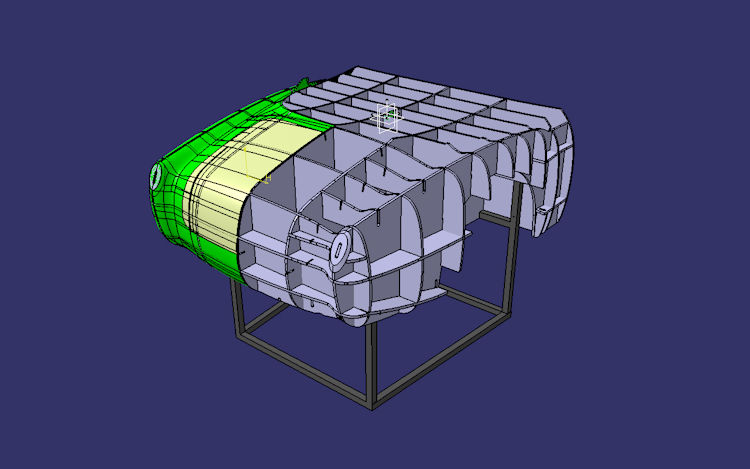
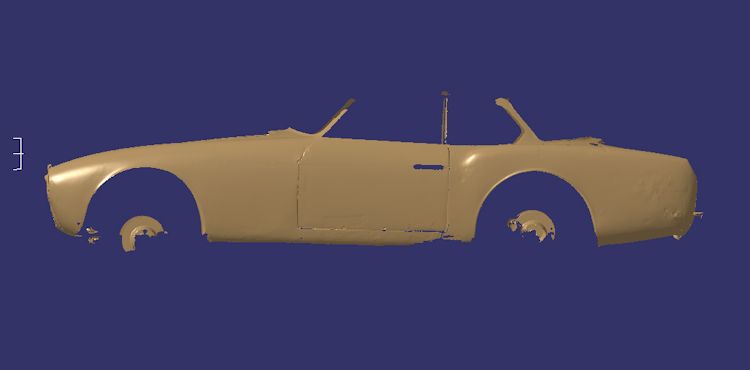
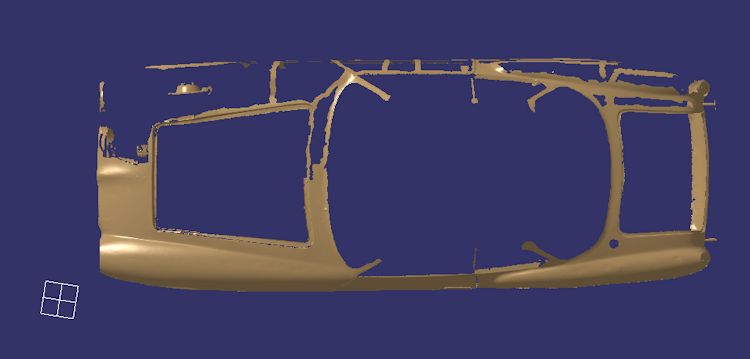
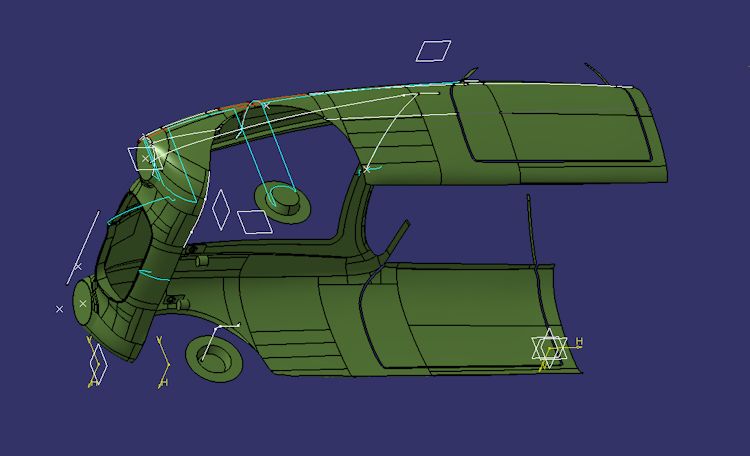
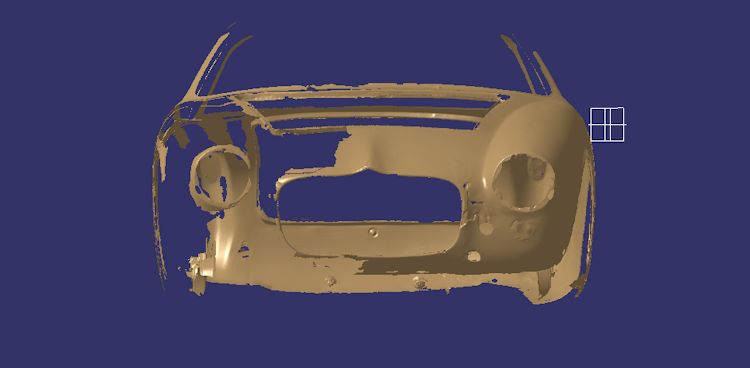
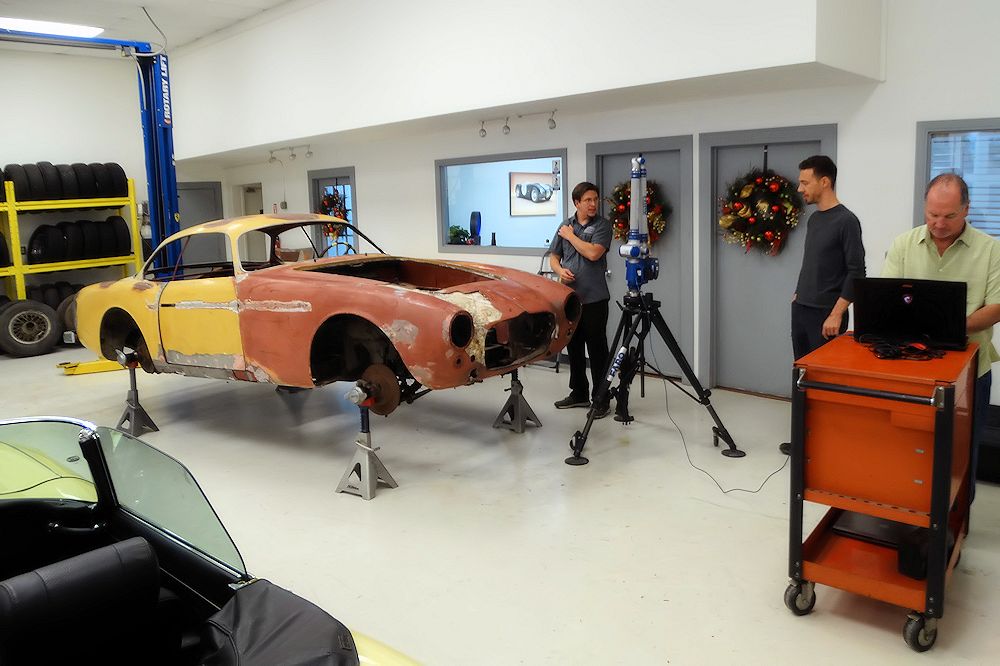
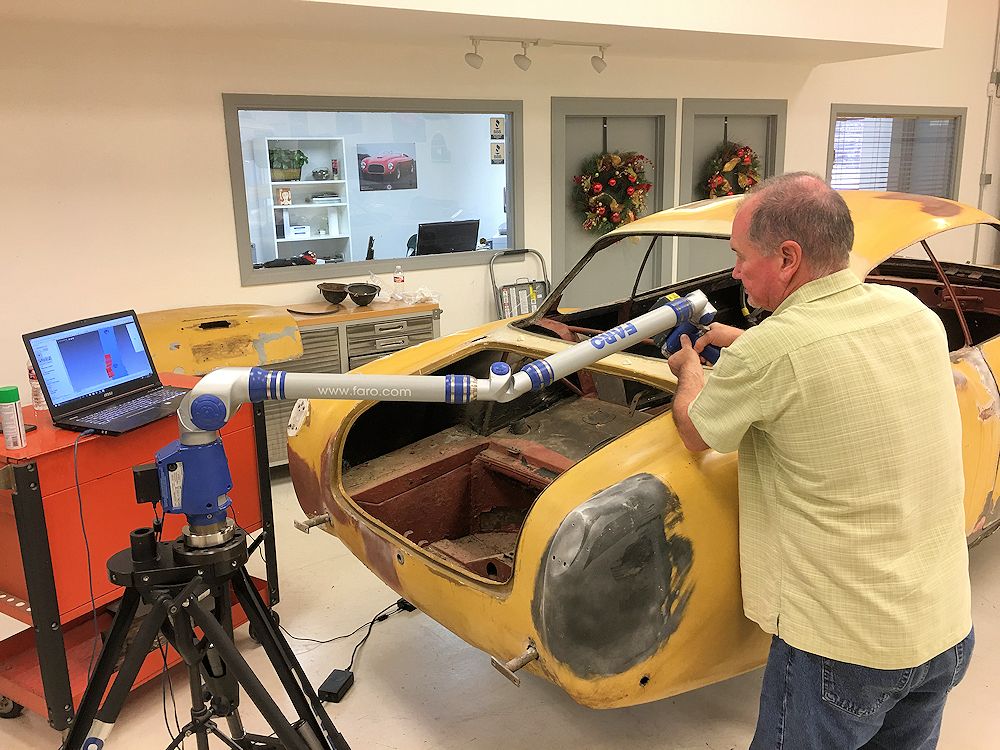
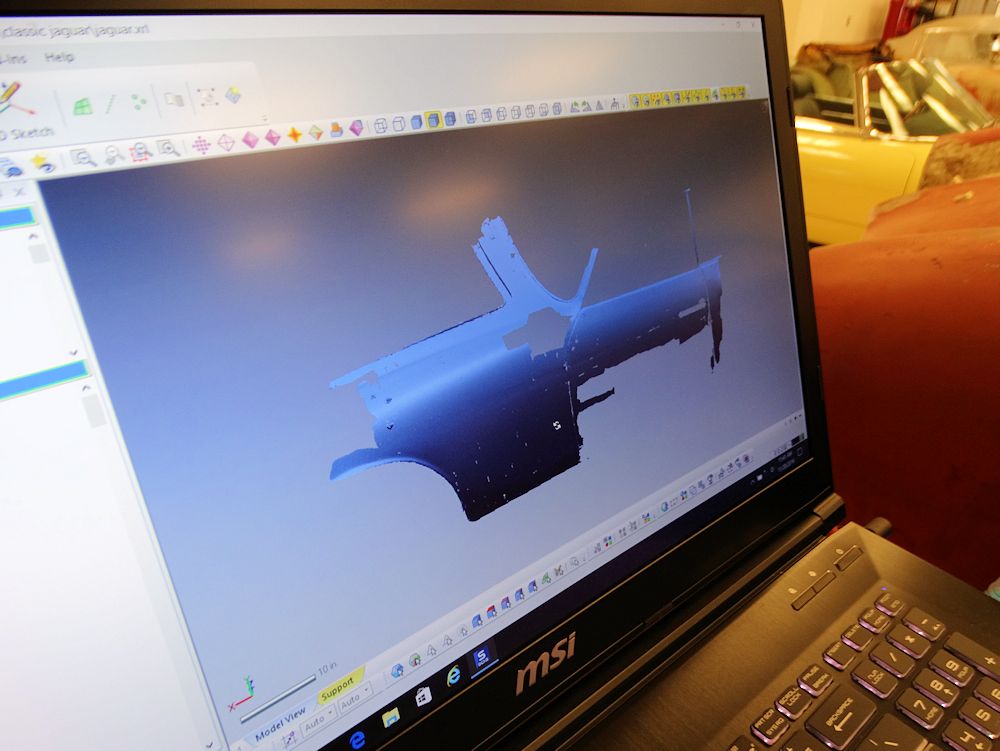
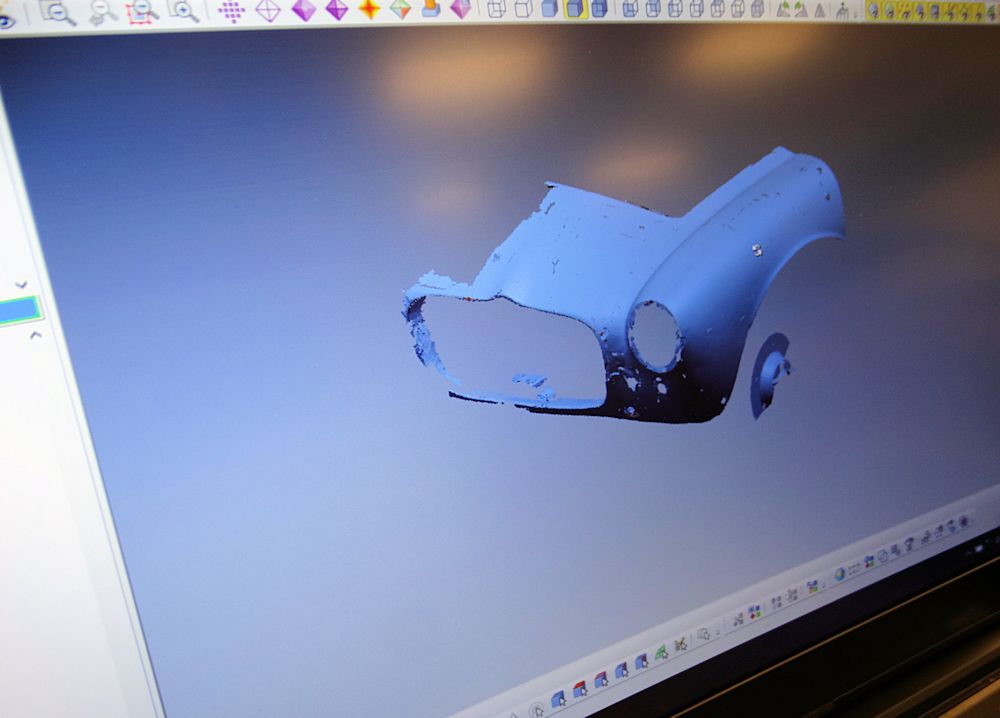
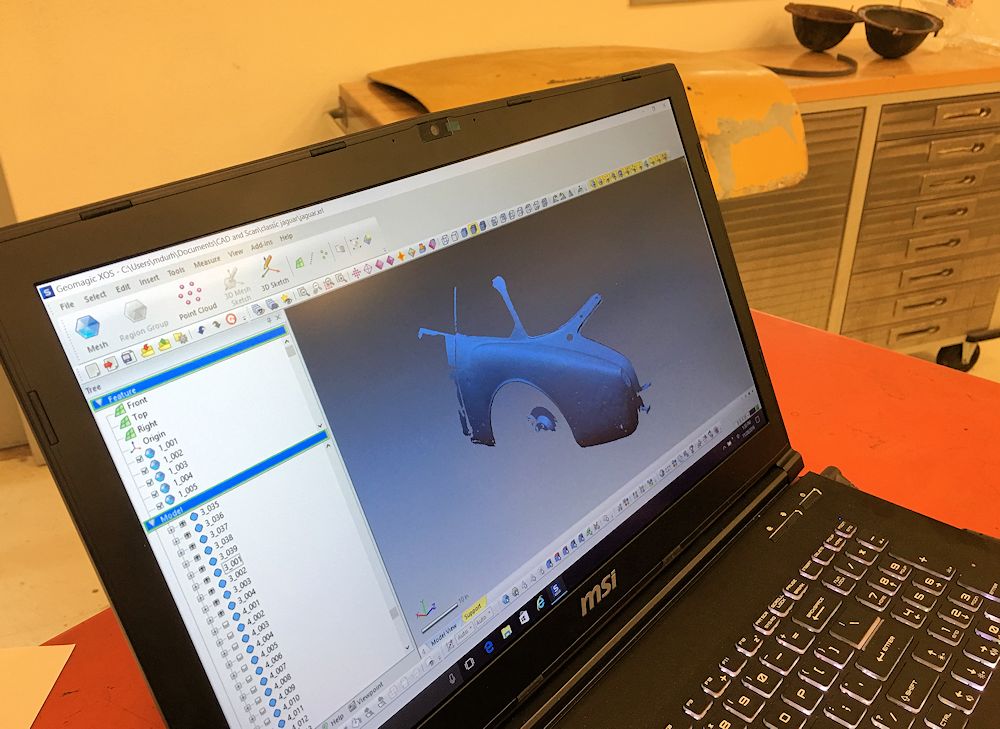
The following screenshot images show how Edward is using the raw scan data to produce a 3D model from which we can construct the station bucks needed to fabricate our new panels.
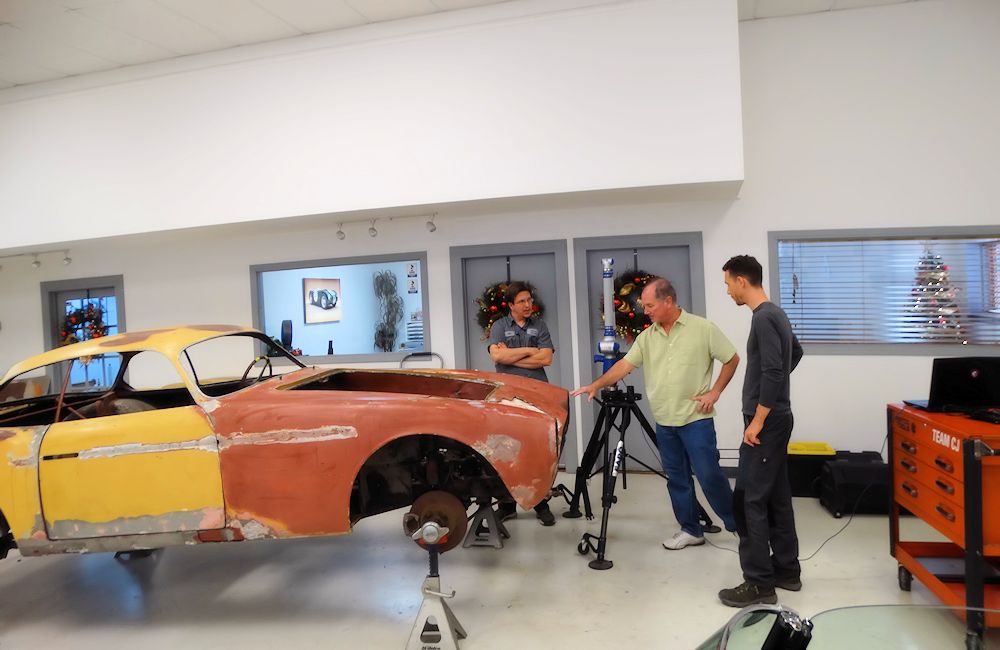
Jake, Mike and Edward discussing the project
Very cool to watch the car taking shape on
Mike's computer screen
Scanning the front left wing and driver's door
Familiar looking Zagato nose!
If you look carefully at this before shot, you will
see the tape is well away from the splined hub
Note how nose is offset to the right slightly
Peak of grille opening now much closer to the
center line of the car
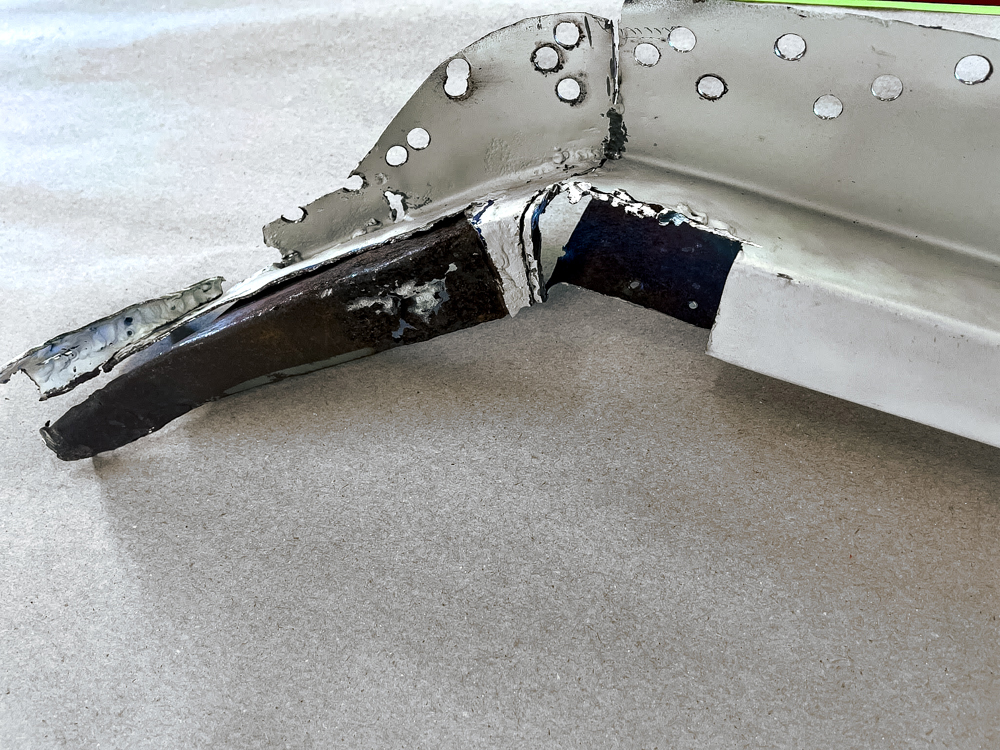
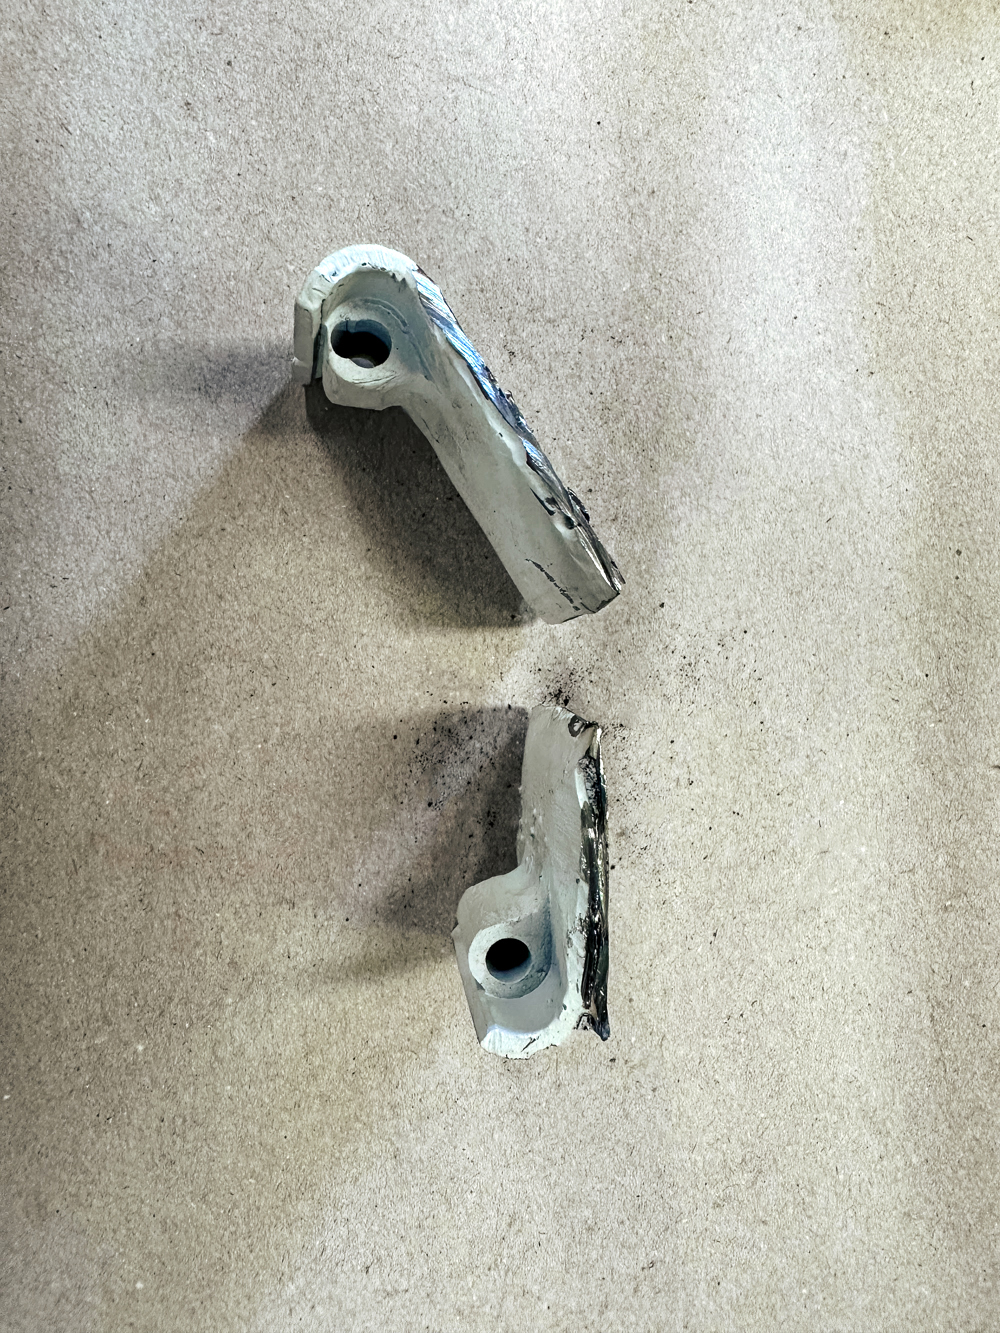
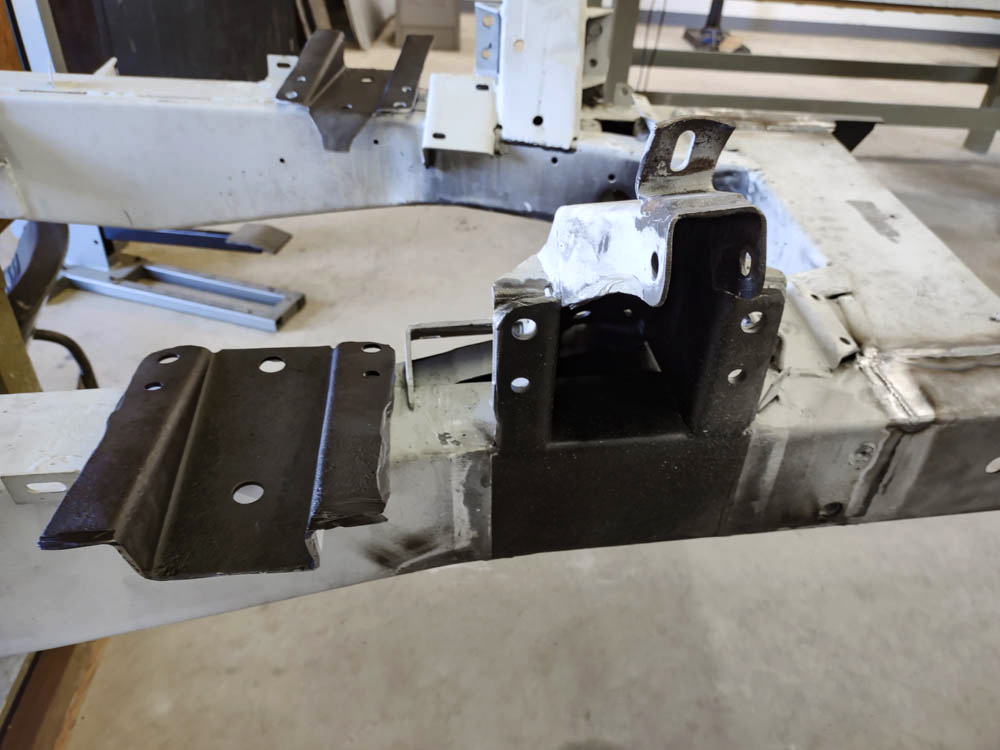
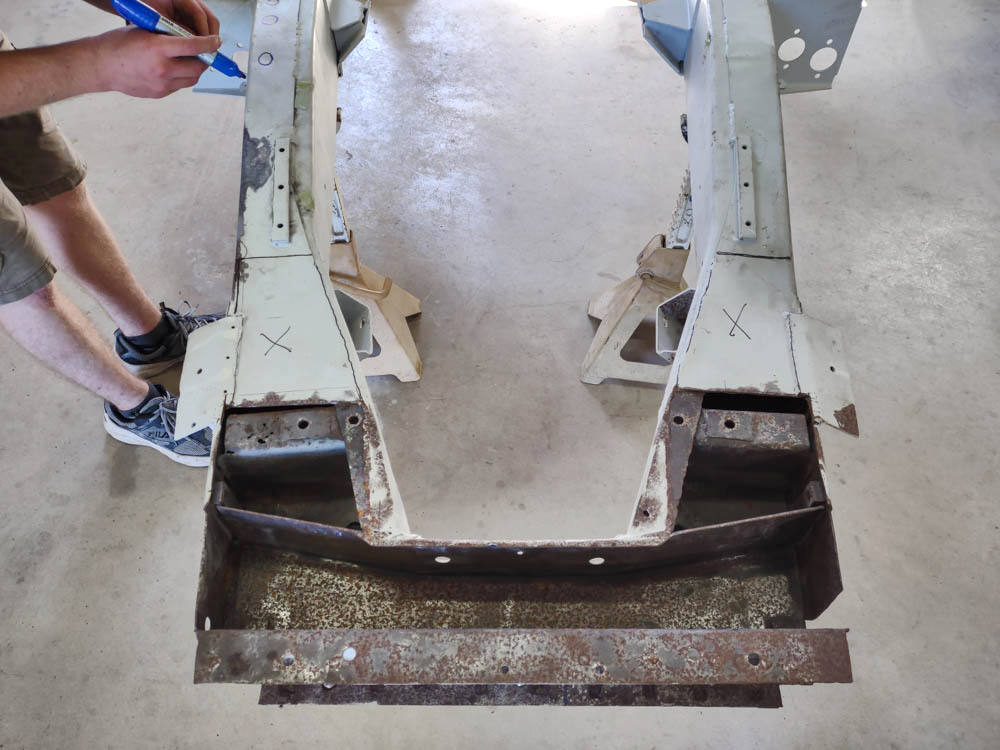
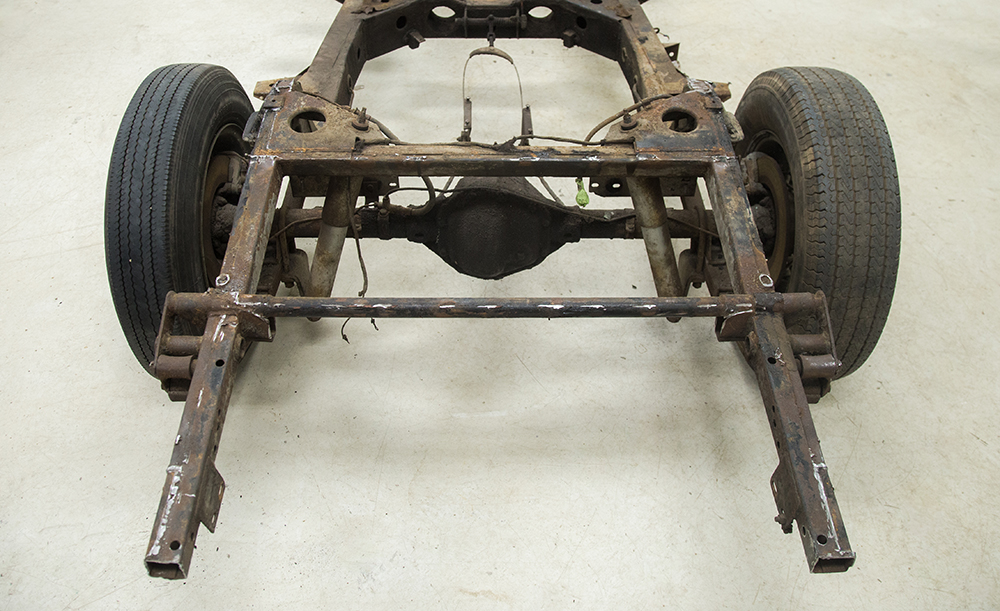
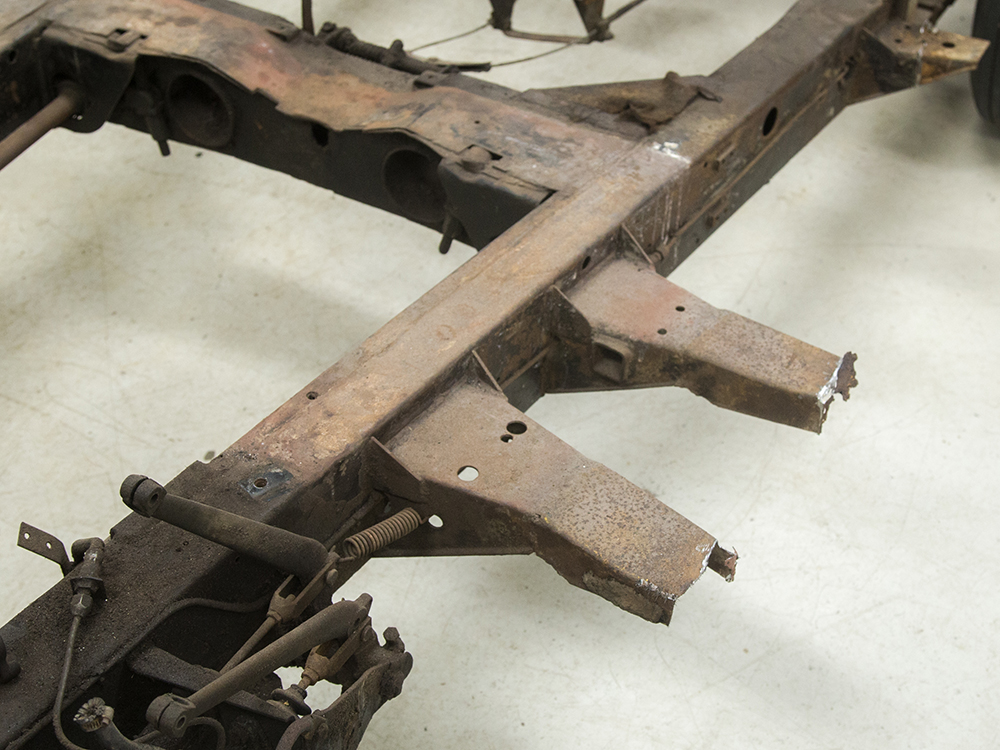
These photos show how Zagato welded extension
outriggers to the XK150 chassis
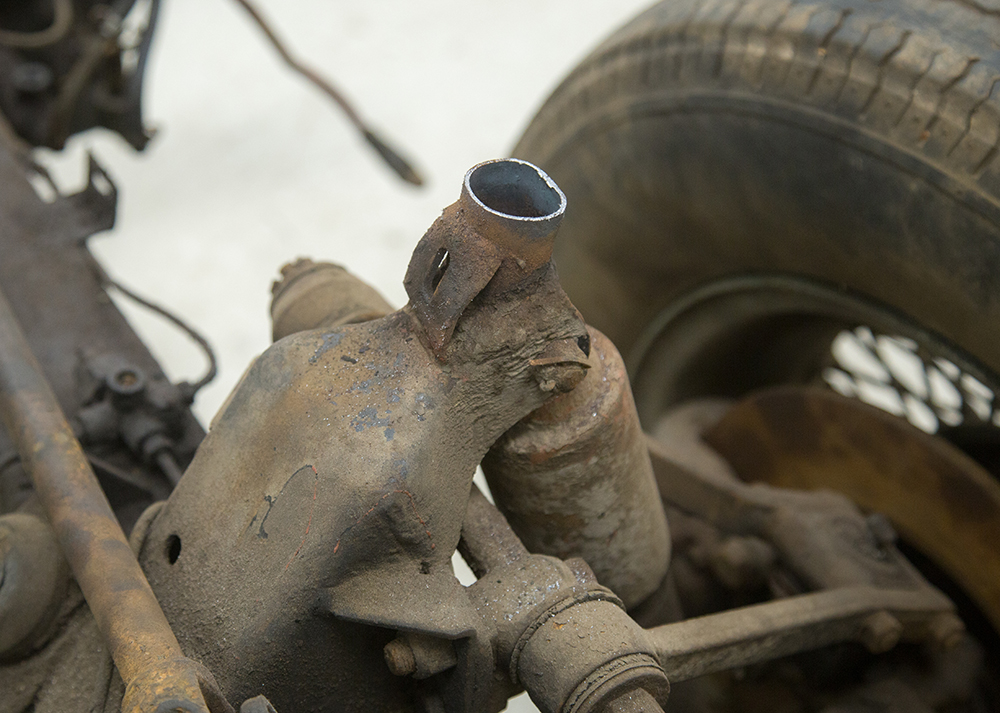
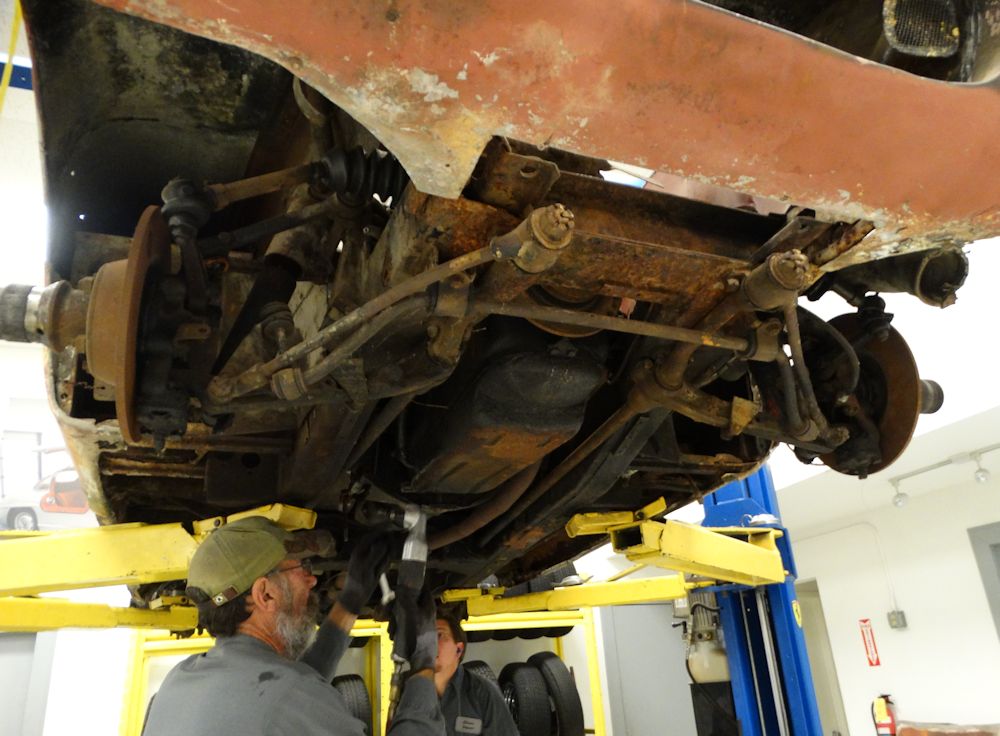
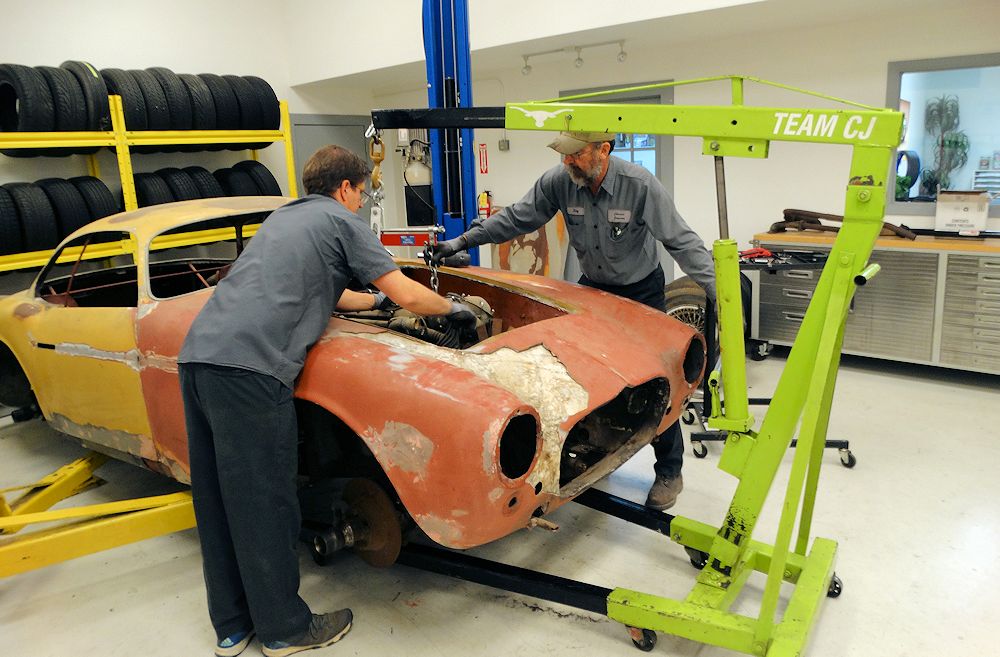
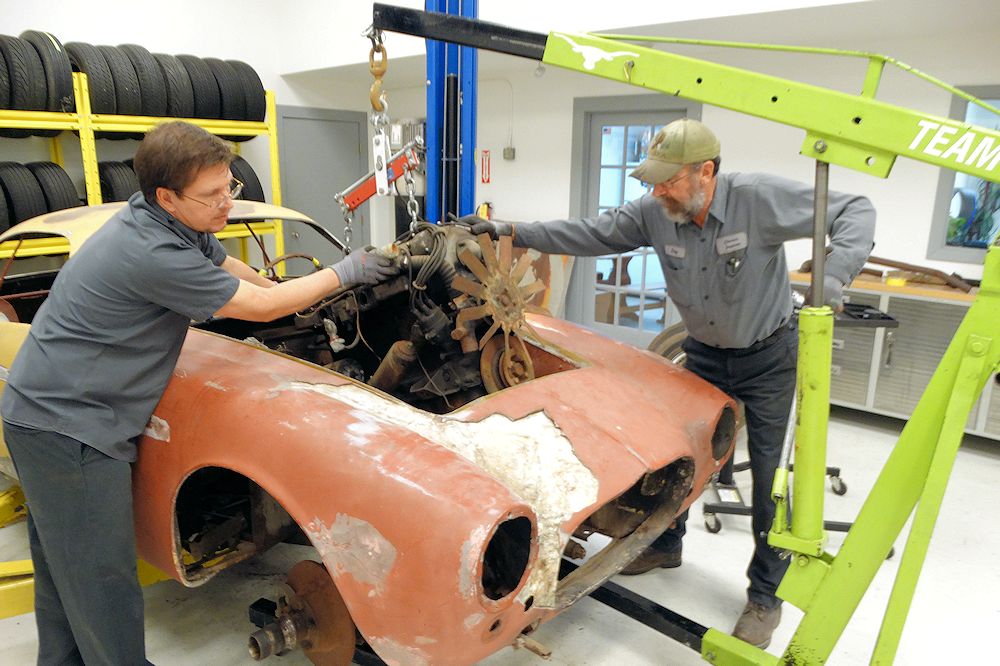
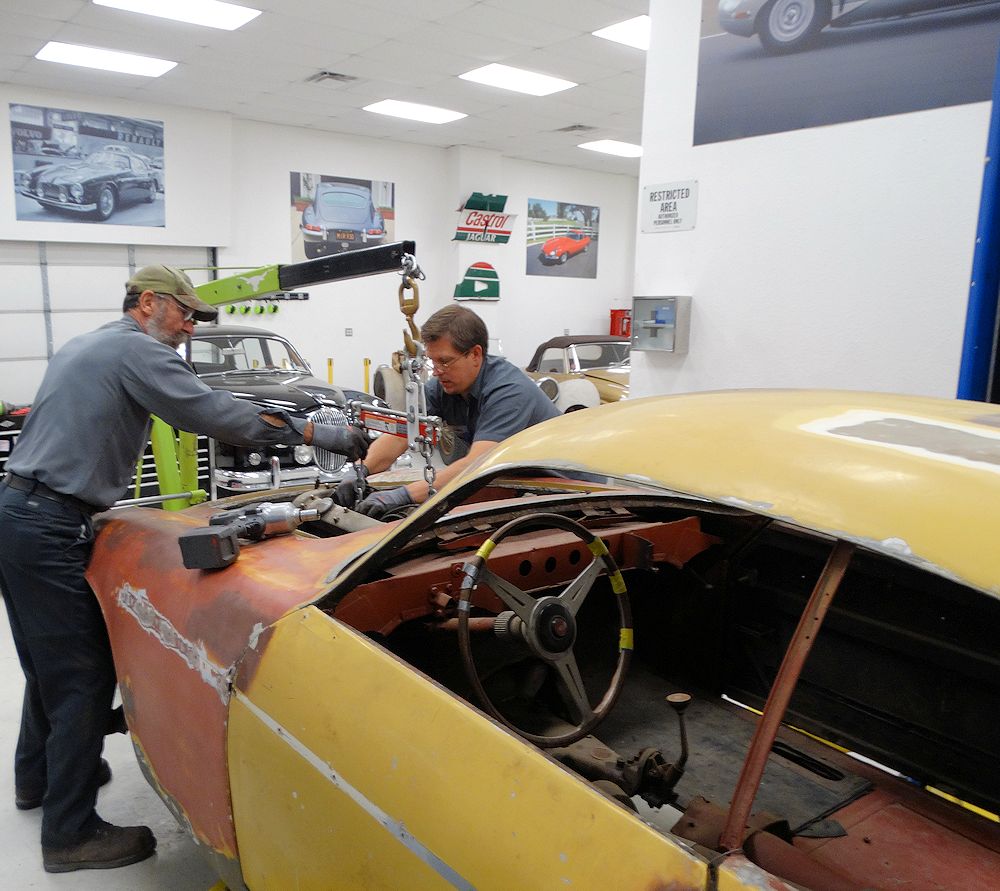
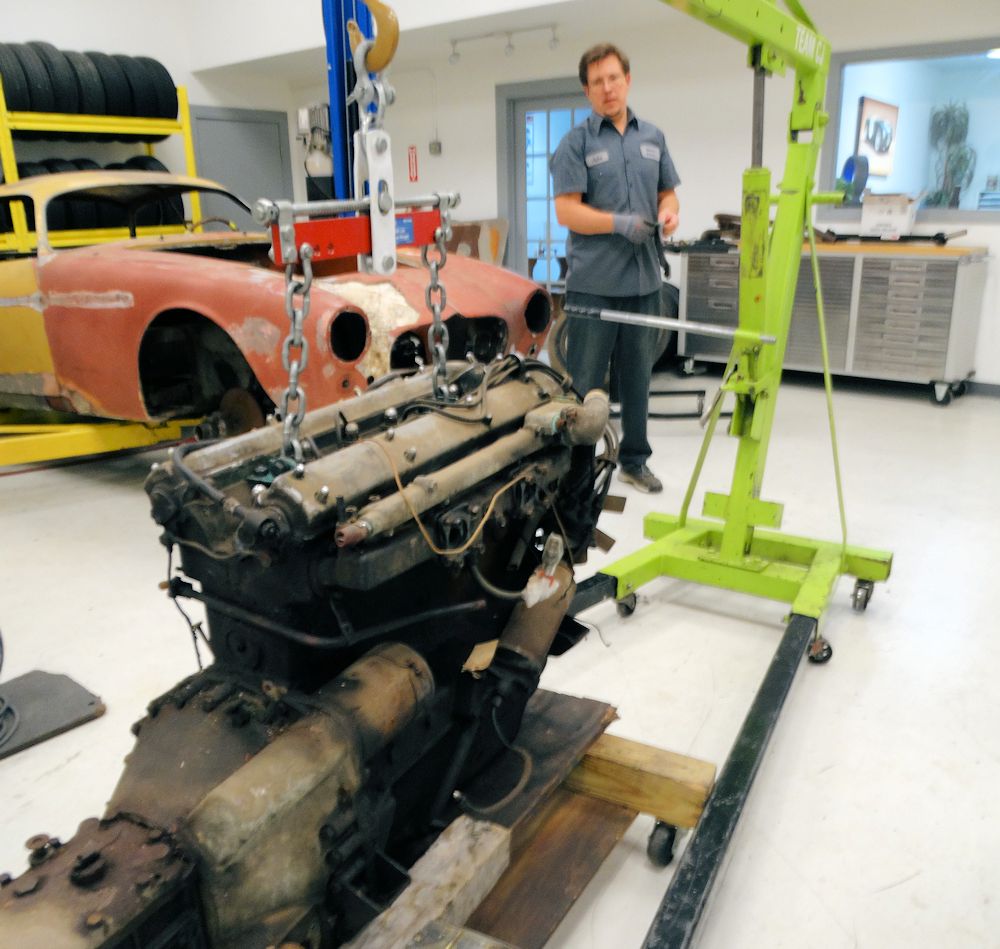
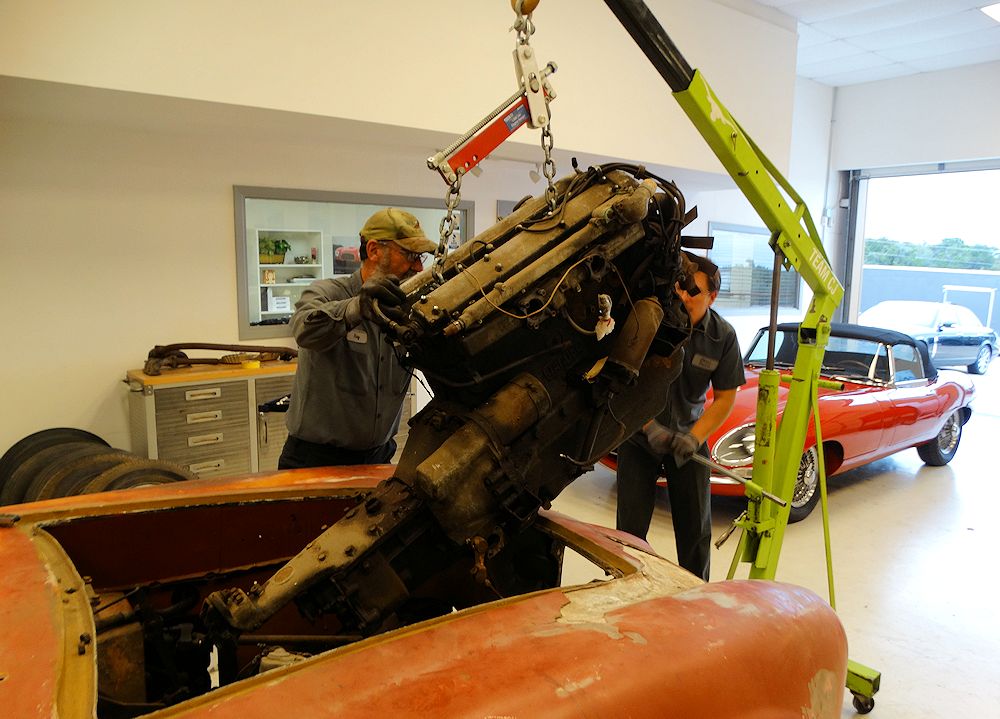
Jake and Ray removing the engine
Superleggera tubing was mangled behind the
right hand headlamp
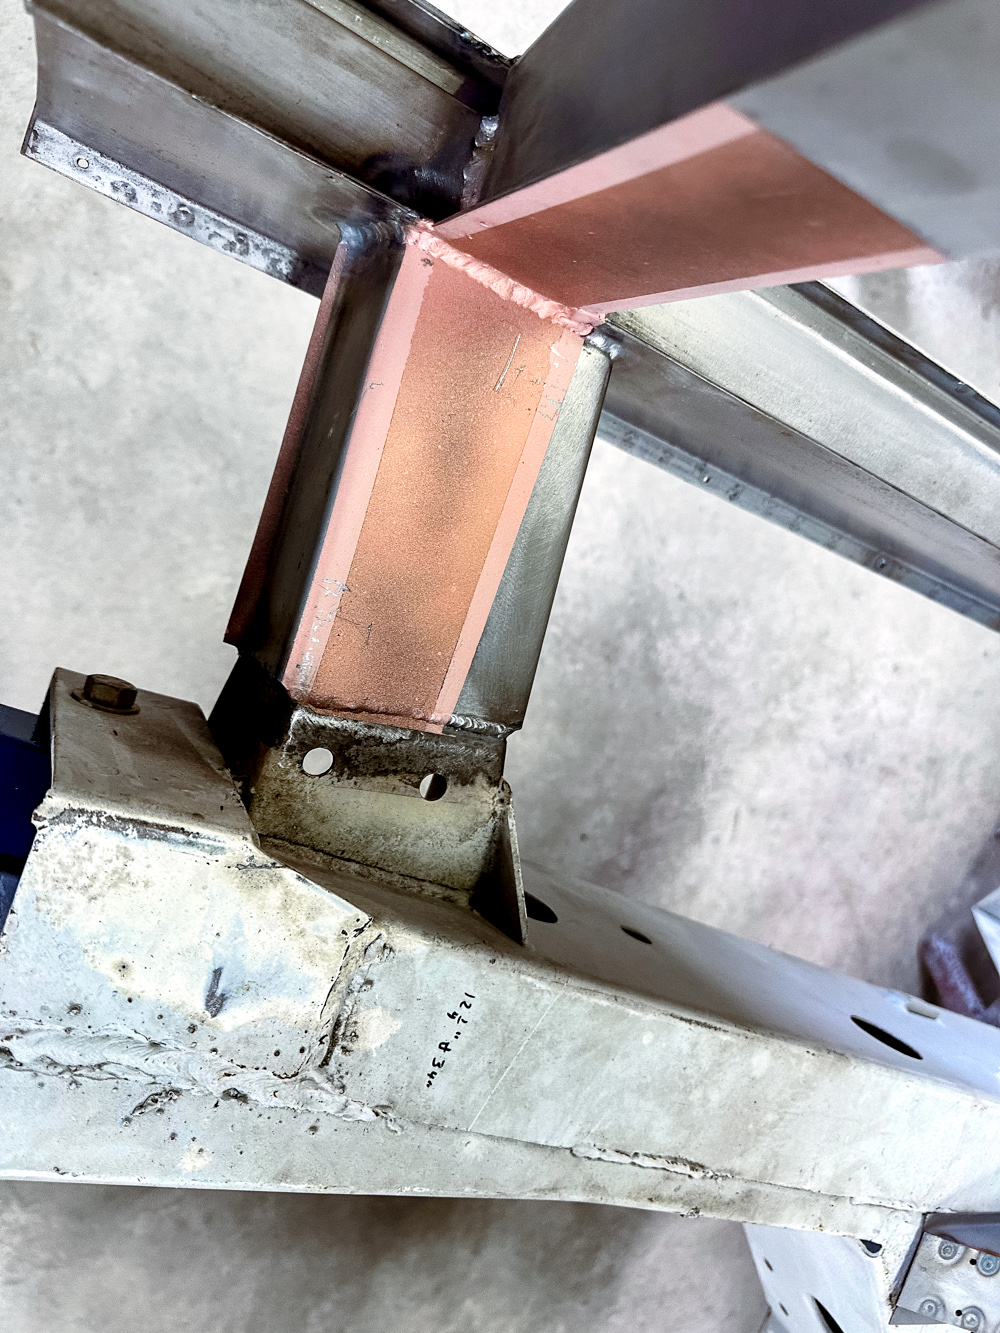
Steel inner sills were welded to the extended
chassis outriggers
Tear down underway
Note recess in rear edge of front wing to
accommodate door trim when door opens
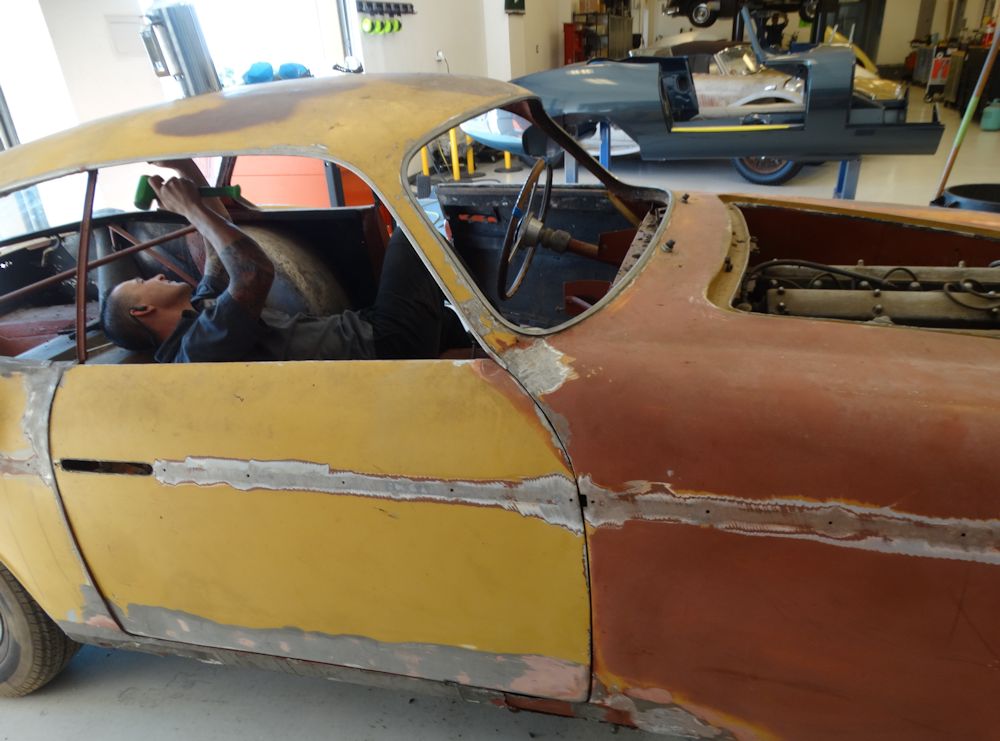
Bad accident damage and even worse repairs mean
the front end will have to be reconstructed
The Motor magazine commented on plastic
'louvers' in their Geneva Show report
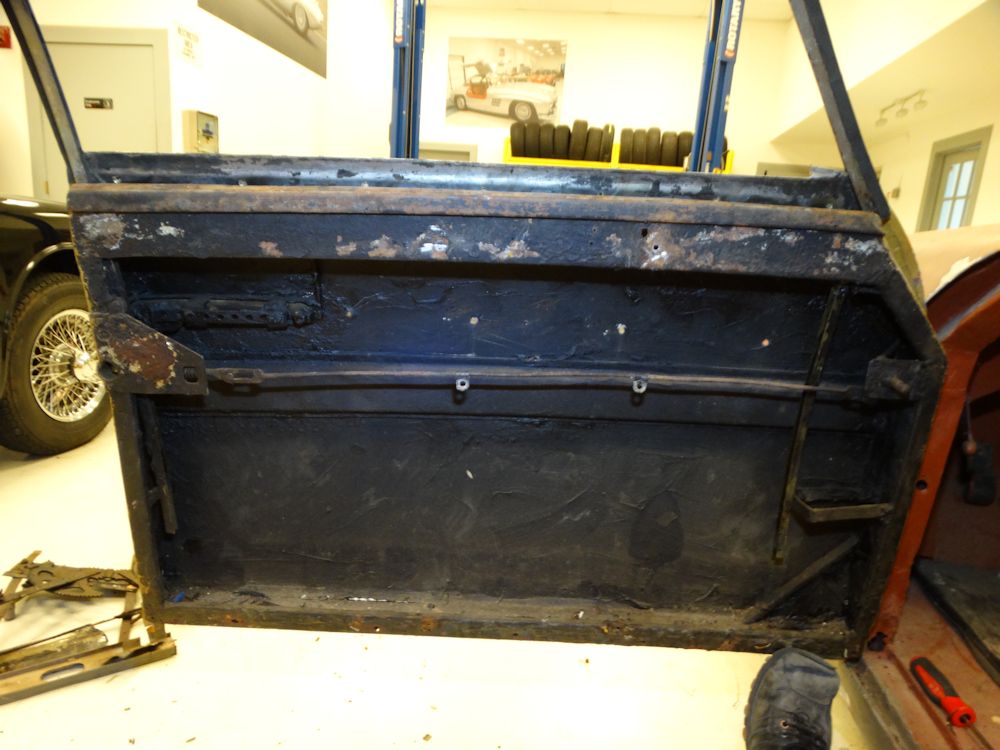
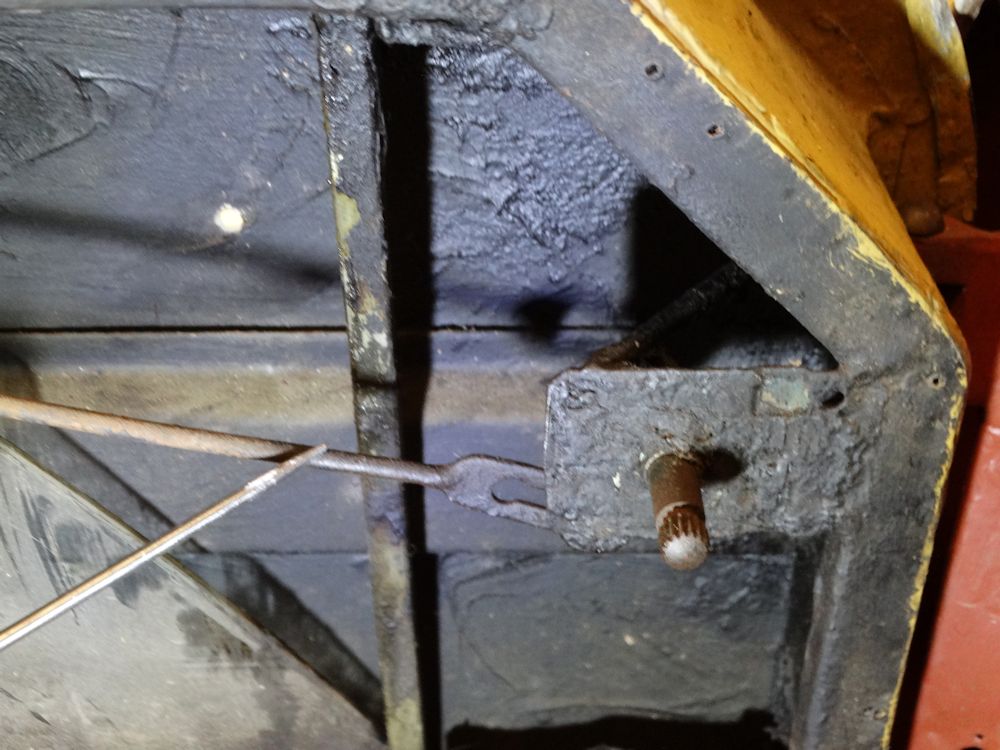
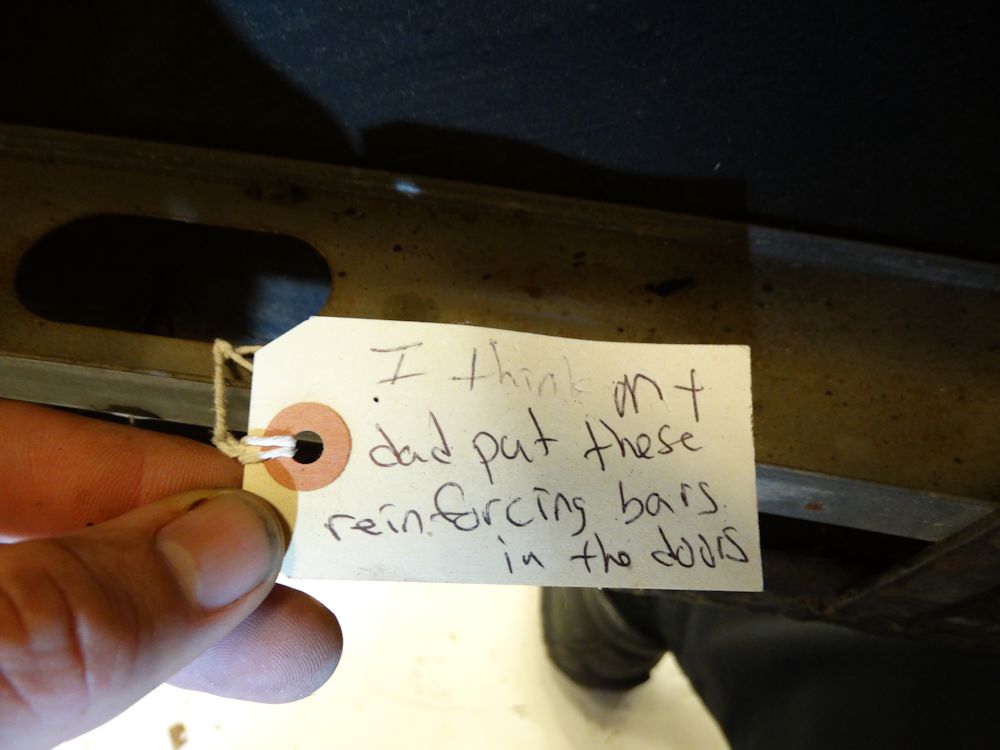
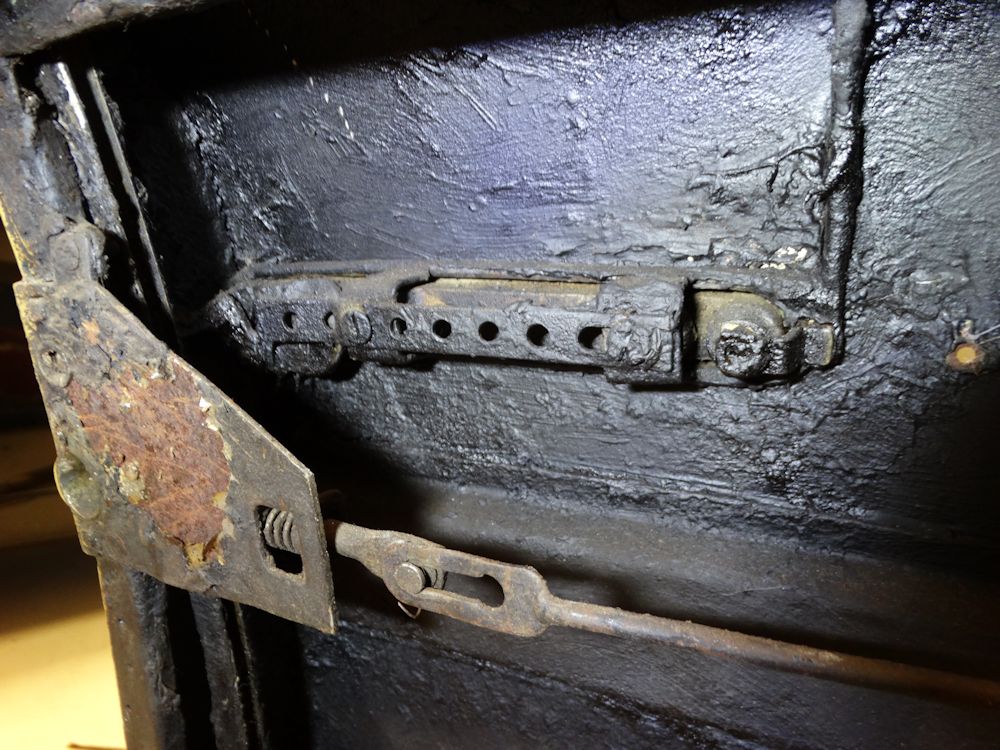
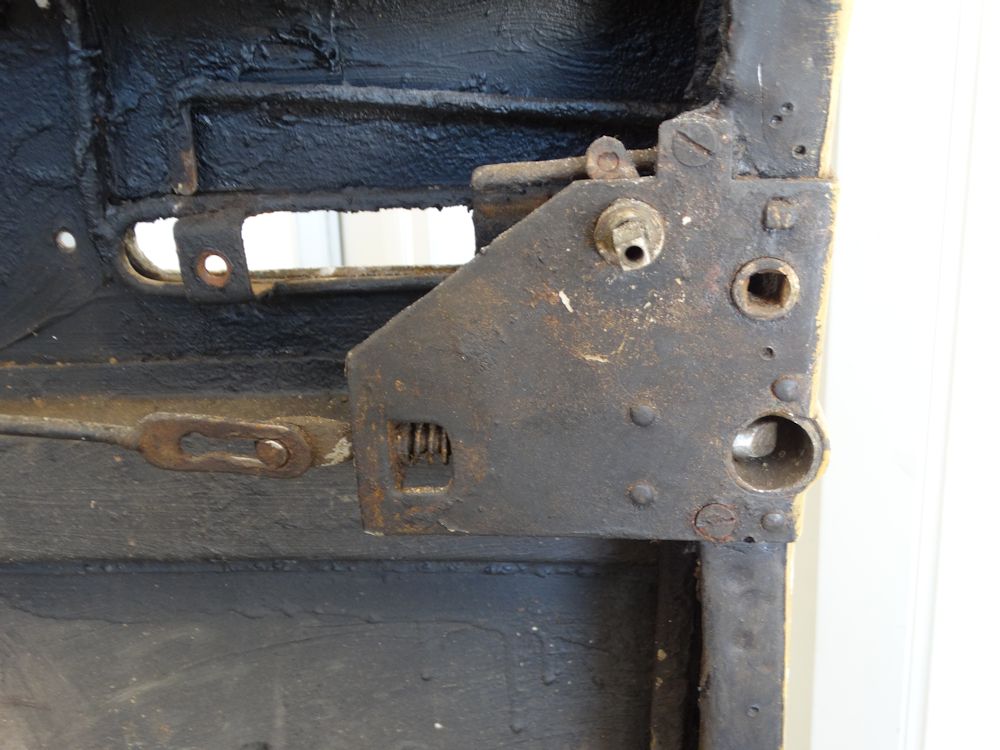
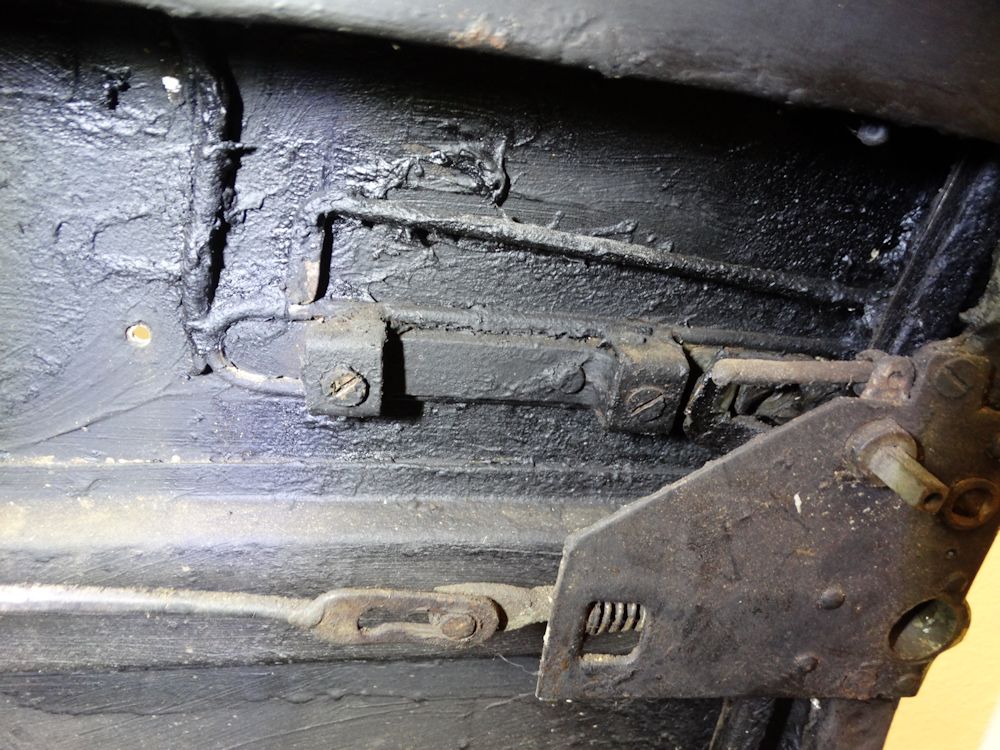
Home made braces have been added to the doors
I believe you are correct 🙂
Driver's door handle has also received some home
made reinforcement
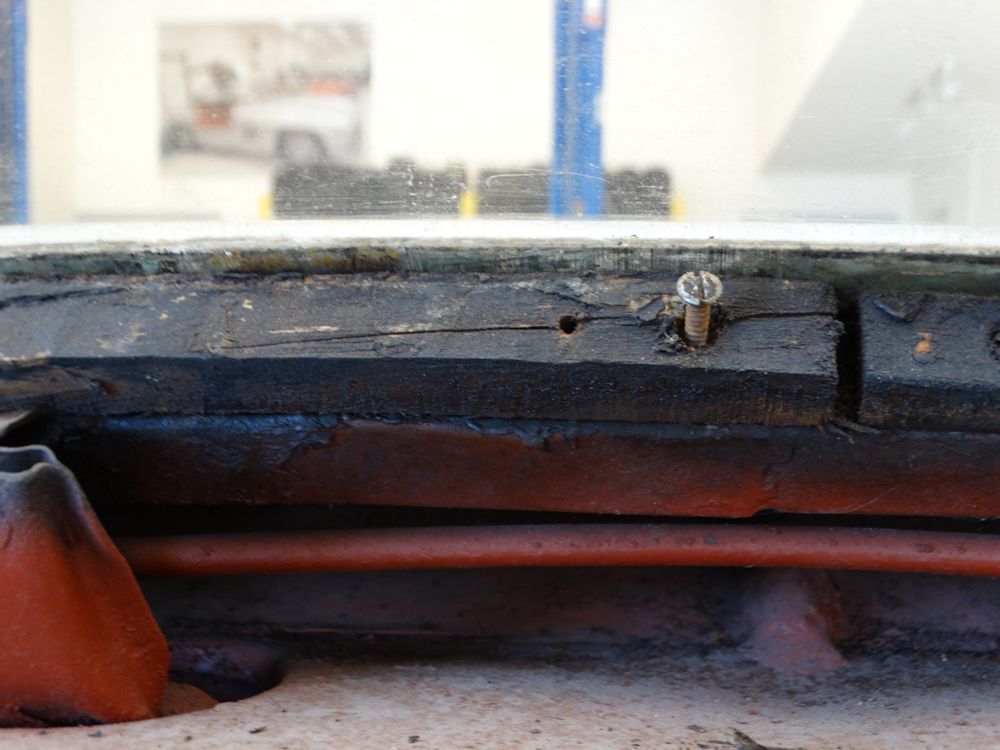
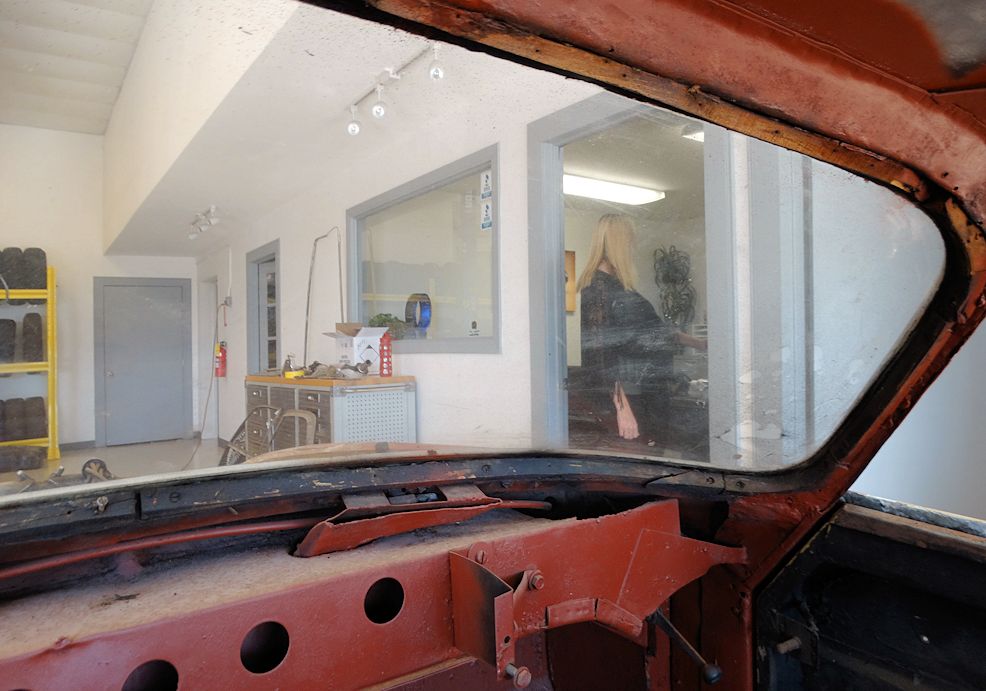
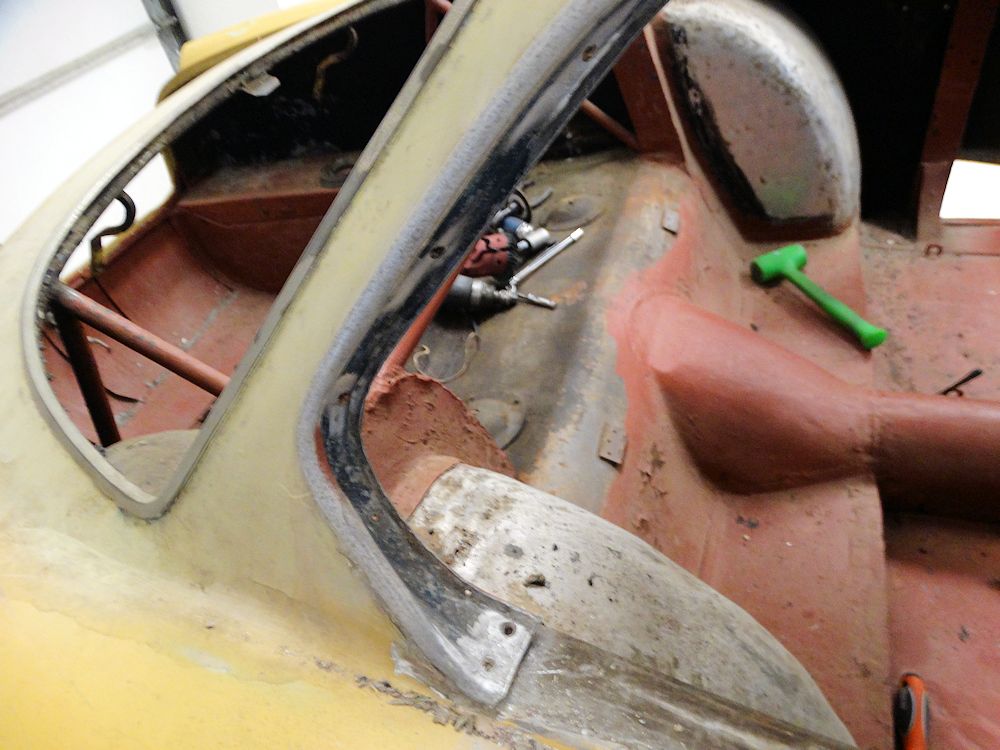
Front screen held in place with wooden trim surround
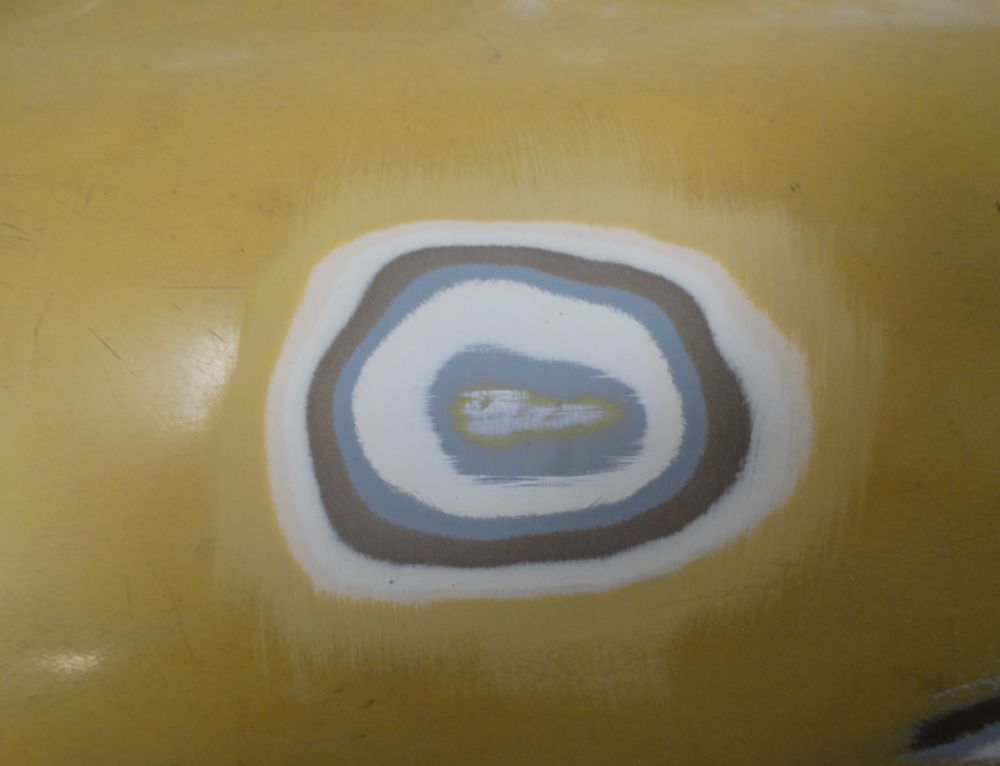
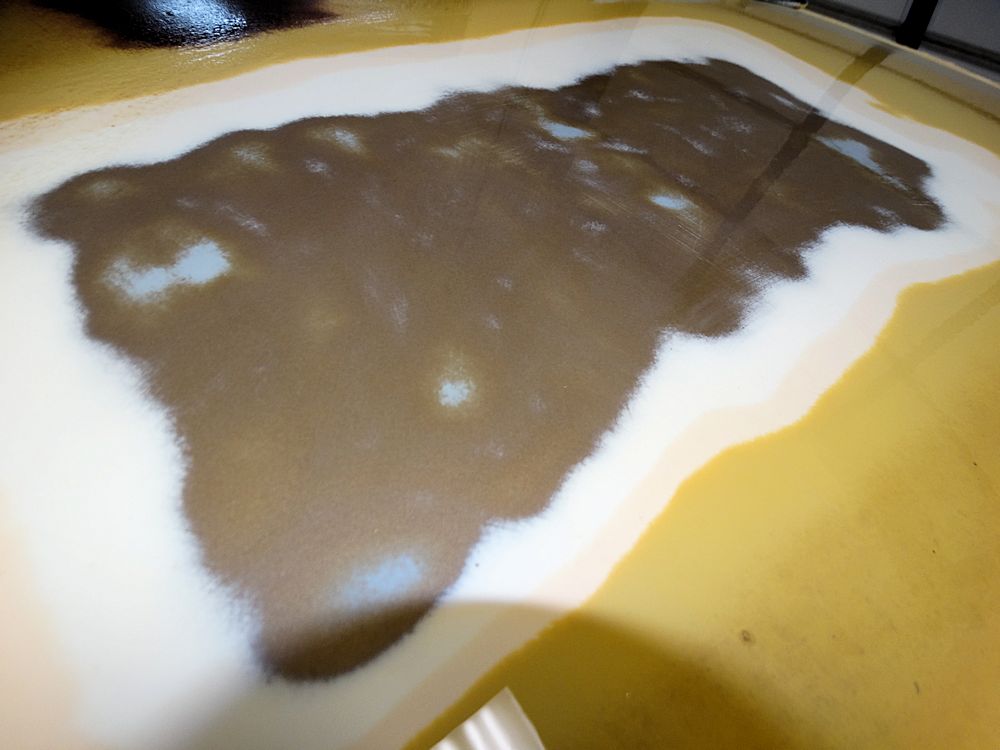
This image shows the various layer of primer, filler
and paint - none of which are black
Photos of the car in the Geneva Show in 1958
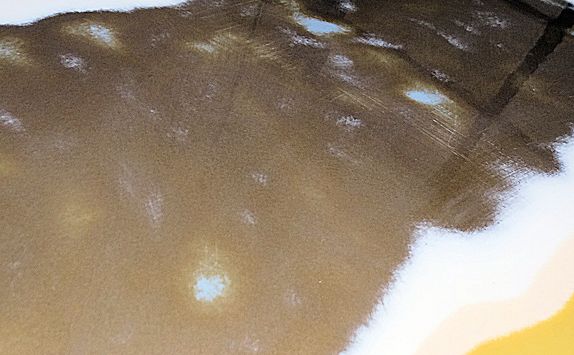
This shot gives a clear indication of the Dark Bronze
color the car was originally
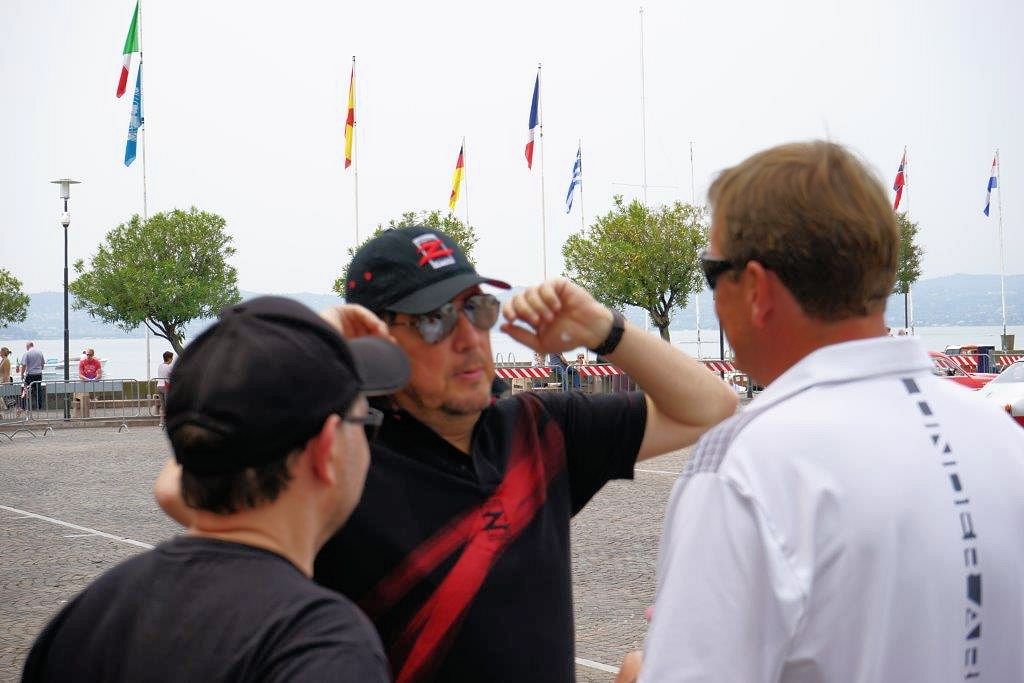
Andrea enthusiastically offered his full cooperation
and support for our project
Andrea Zagato was excited to discuss the restoration
of the XK150 Zagato his father had built
With Matteo Bosisio (center) head of classic wheels
at Borrani, and Andrea Zagato (right)
With Zagato executive Paolo Di Taranto and
Andrea's Alfa 1900 C Super Sprint Zagato
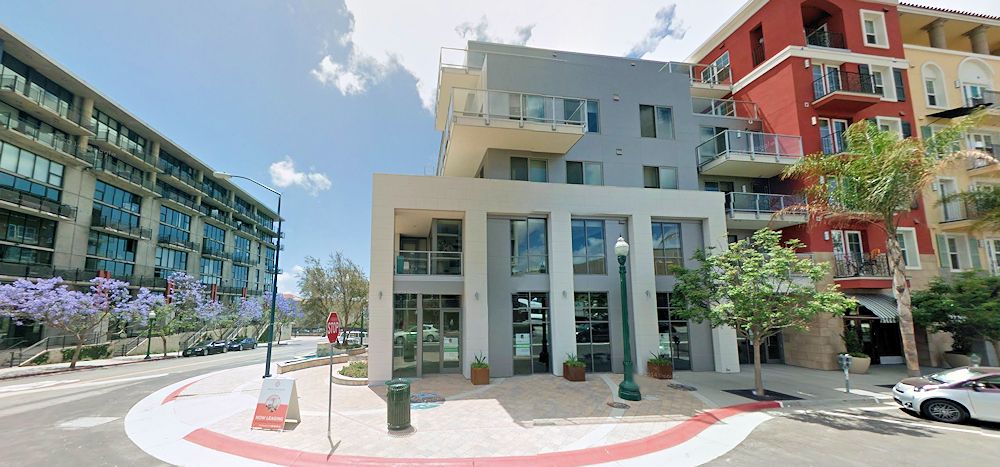
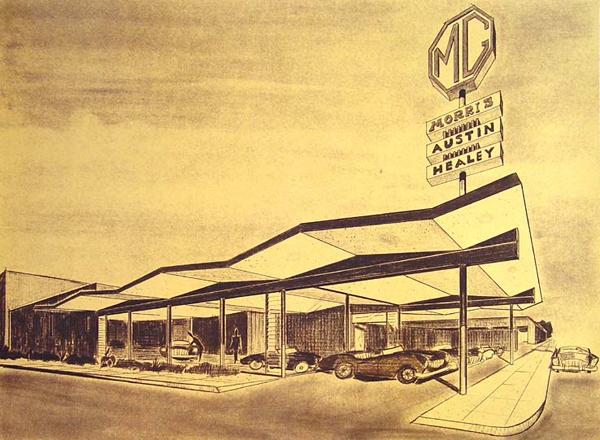
The site where the British Motor Sales Company had once been is now a
luxury apartment block (photo courtesy of Google Earth)
Rendition of British Motor Sales Co by the architect, Robert J. Platt (1958)
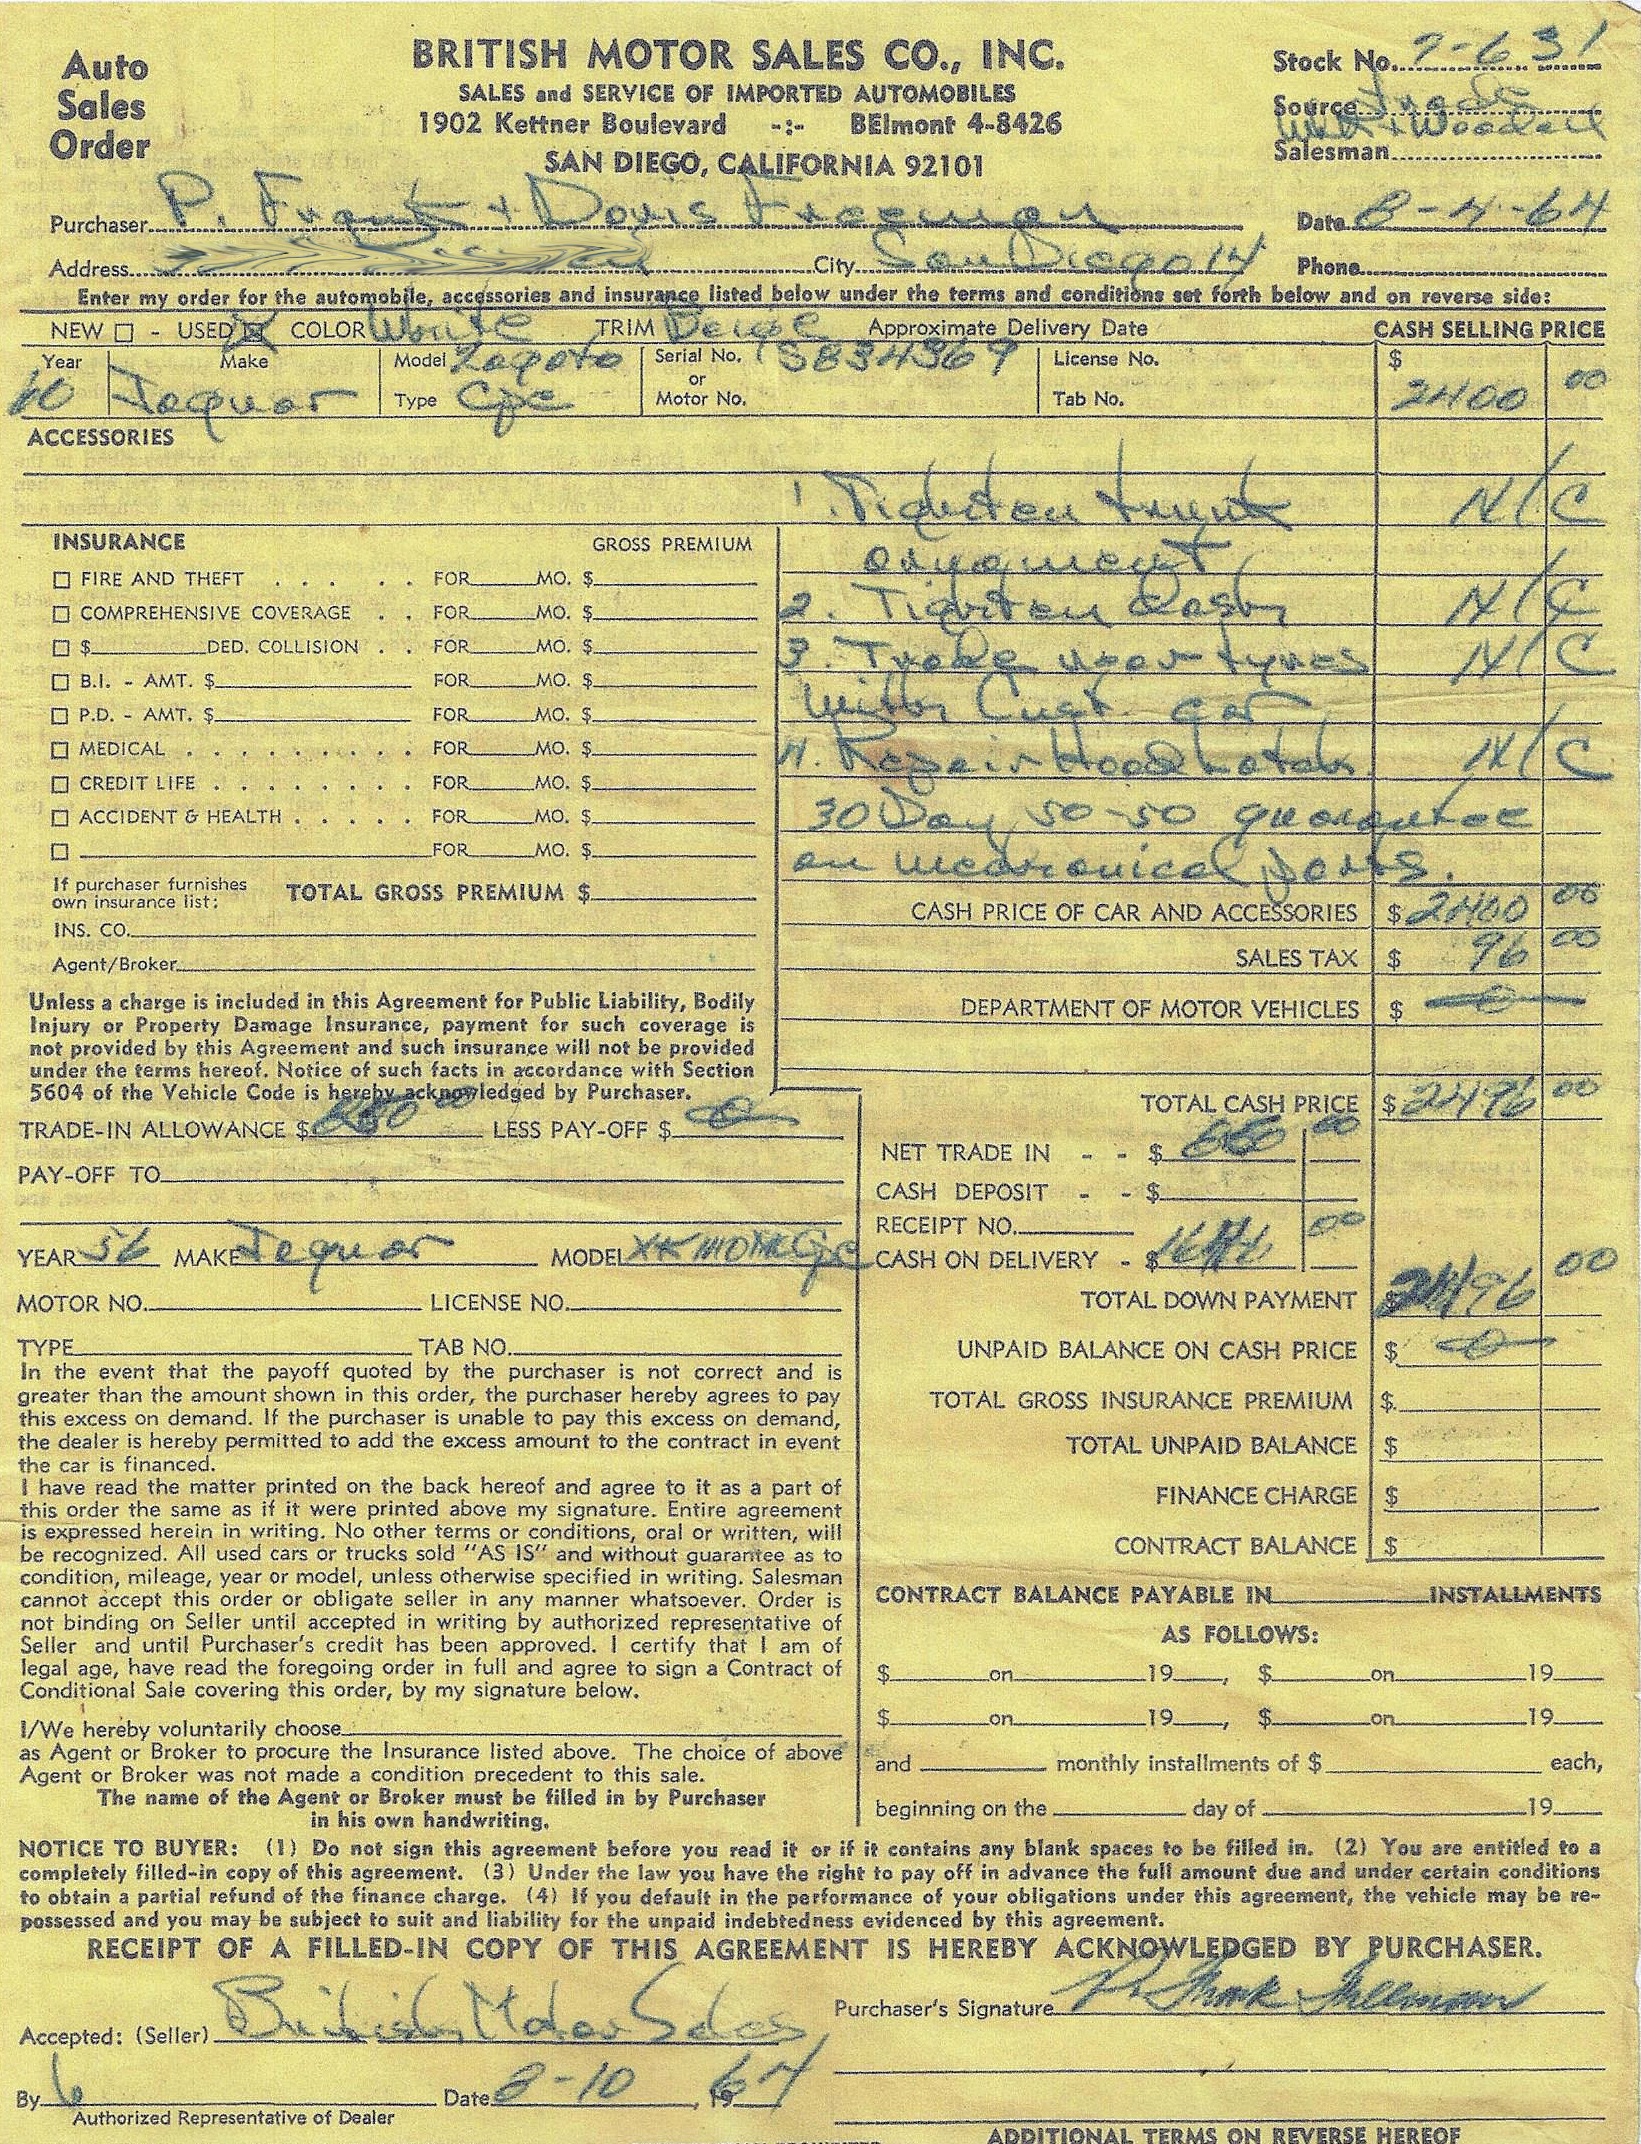
The sales order relating to Frank Freeman's purchase of the Zagato in August 1964
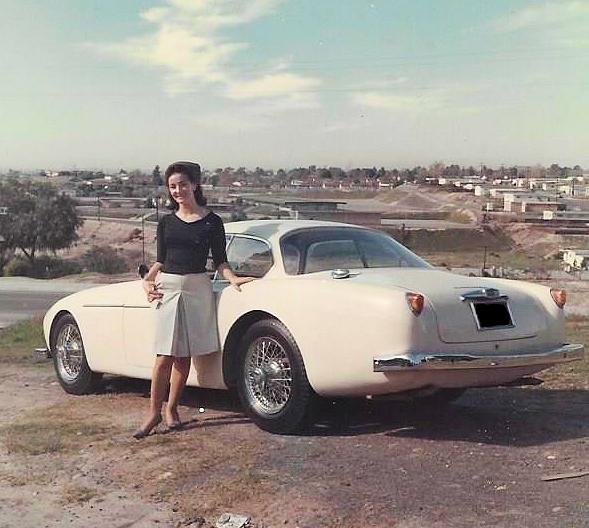
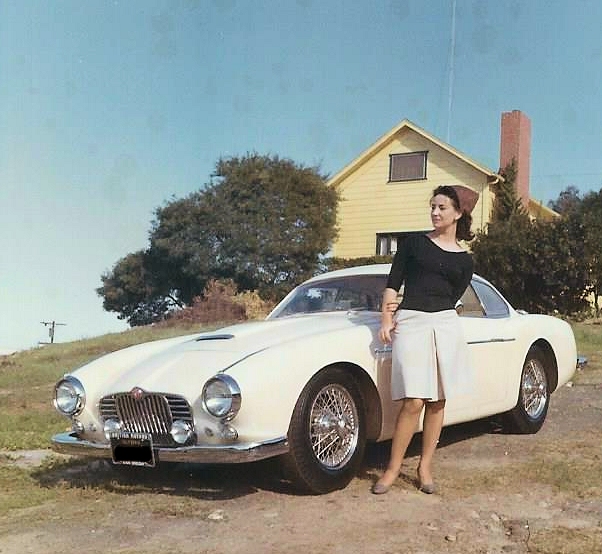
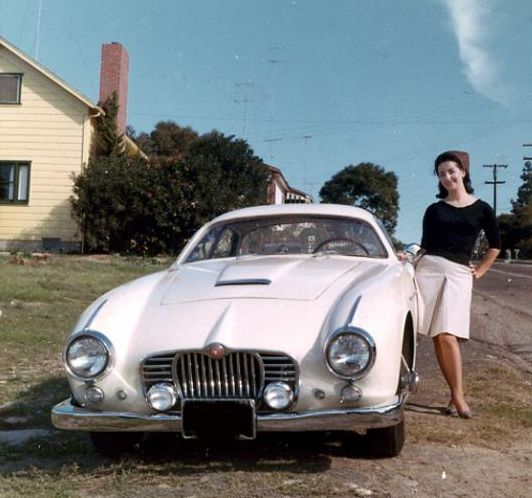
Doris Freeman, the current owners stepmother, posing with the Zagato - 1966
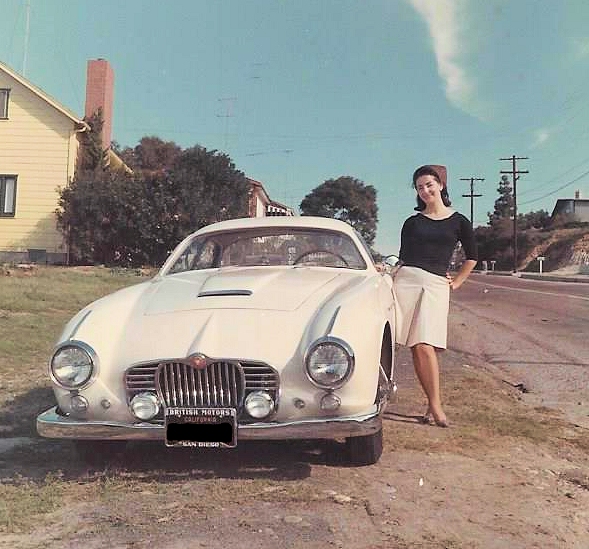
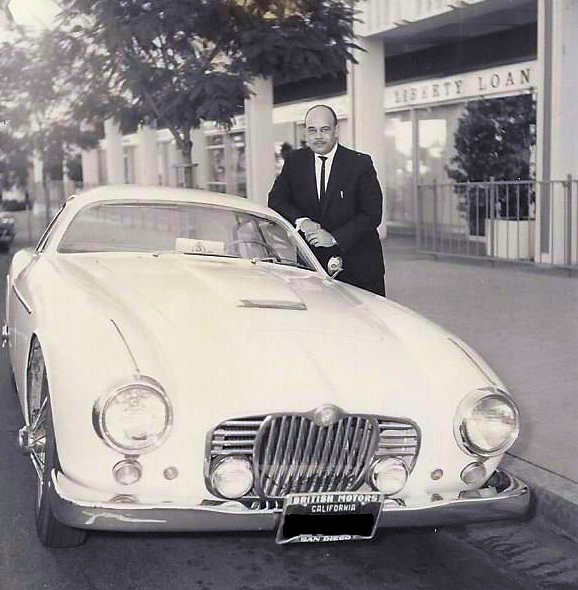
Frank Freeman outside his place of work in San Diego in the mid 1960's
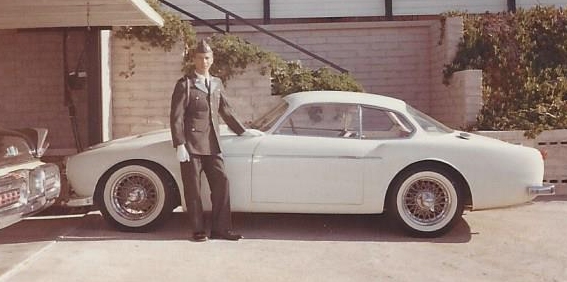
The current owner standing by his father's car in the fall of 1964
The car on the Zagato stand at the 1958 Geneva Motor Show
Geneva Show report in Motor - March 1958
The Jaguar Zagato in all its glory on page 229
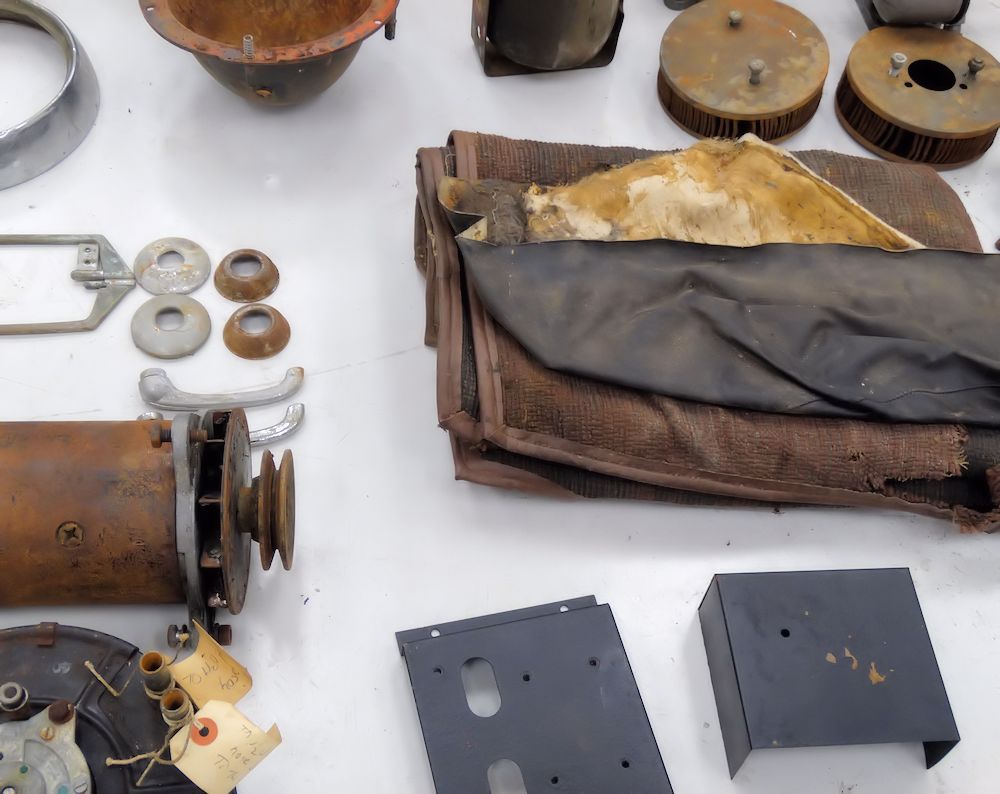
We have now unpacked and inspected the car, paying particular attention to the materials used when the car was first trimmed at the Zagato factory.
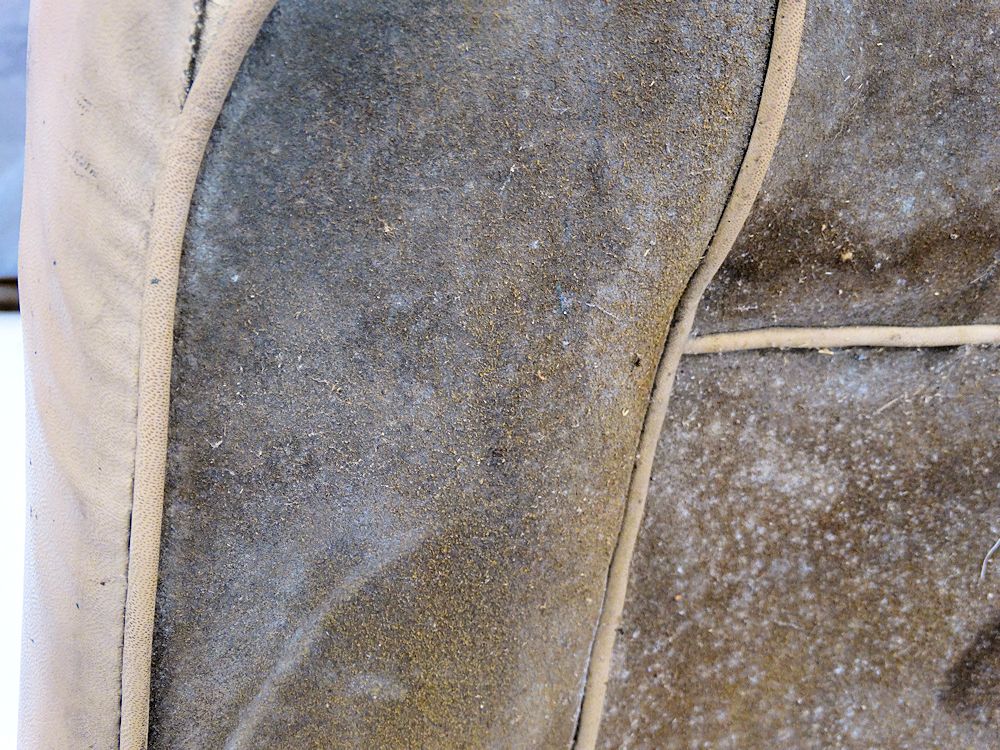
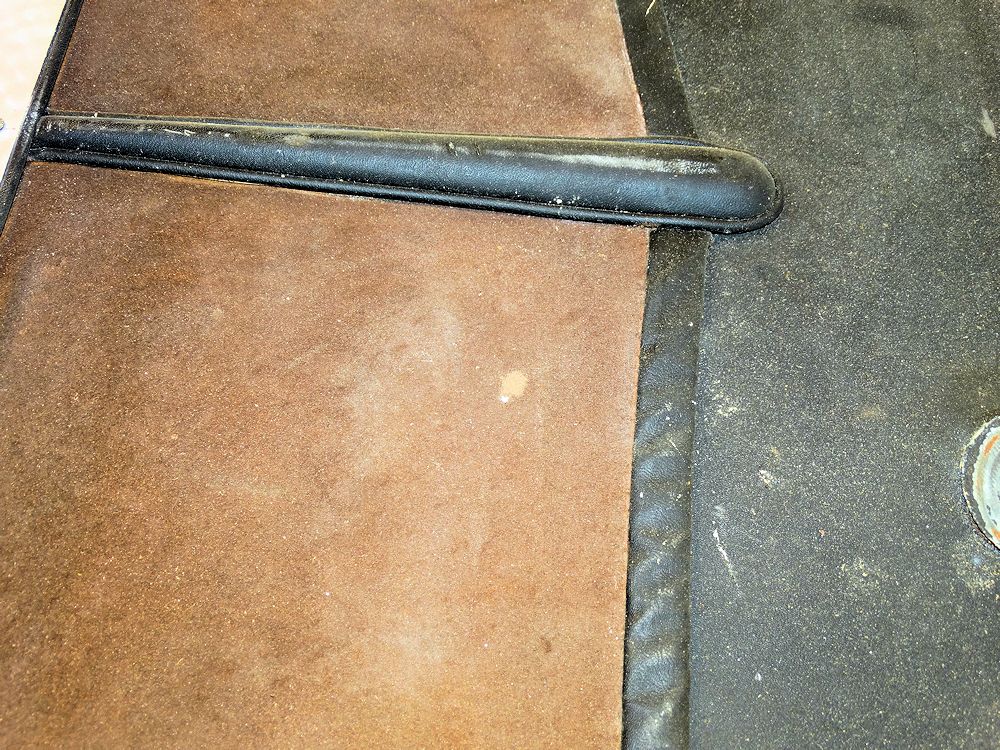
The seats are trimmed in two tone suede and vinyl
A close up of the suede seating surface
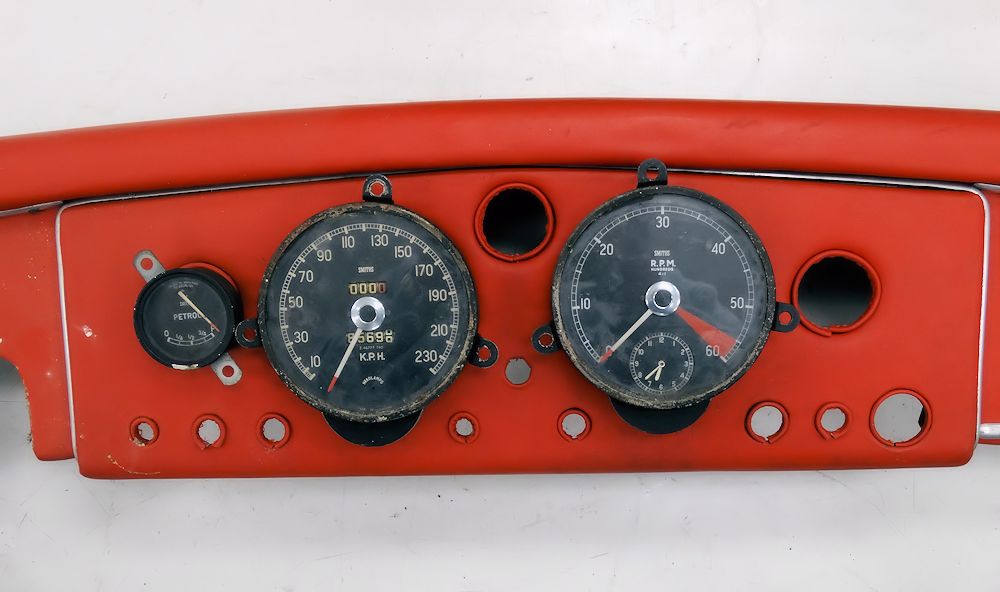
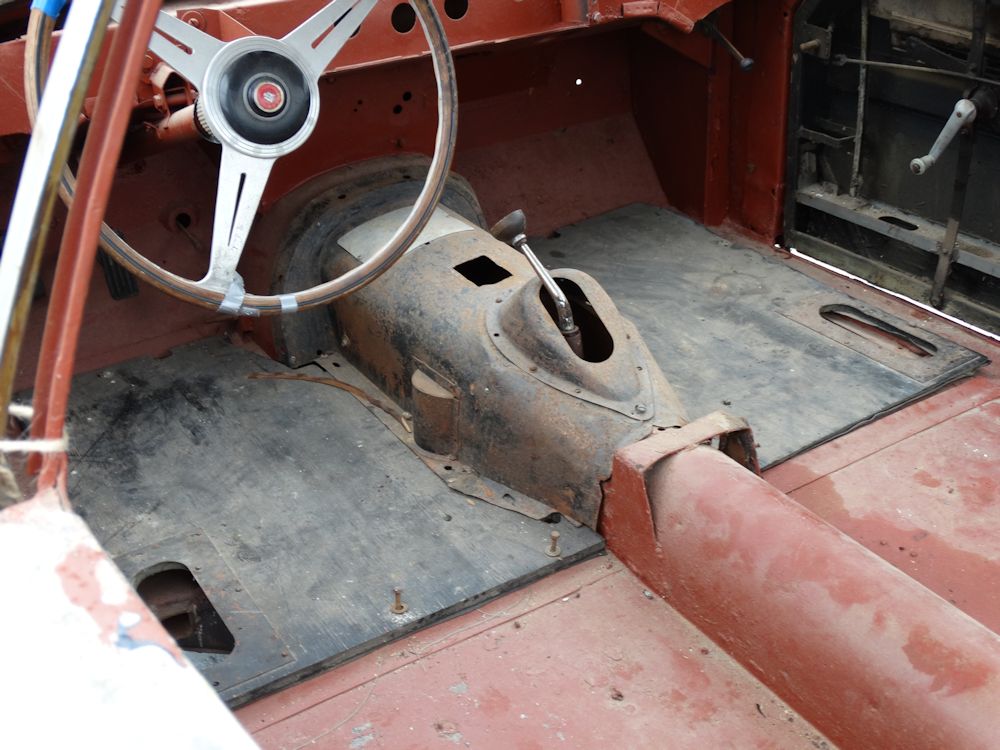
Familiar looking XK dash gauges
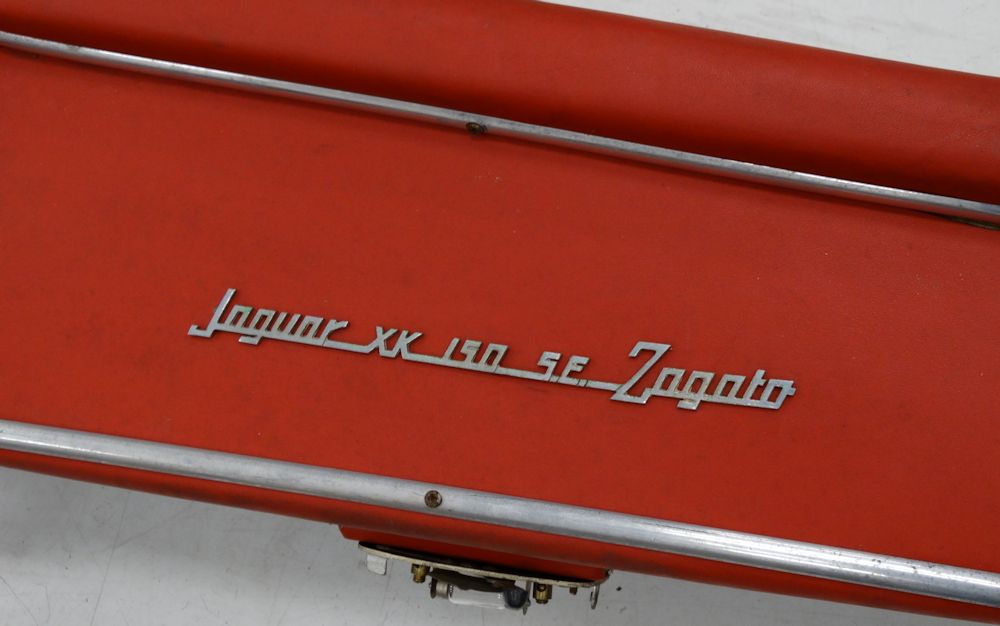
Red dash is a later addition, Zagato badging
obviously original
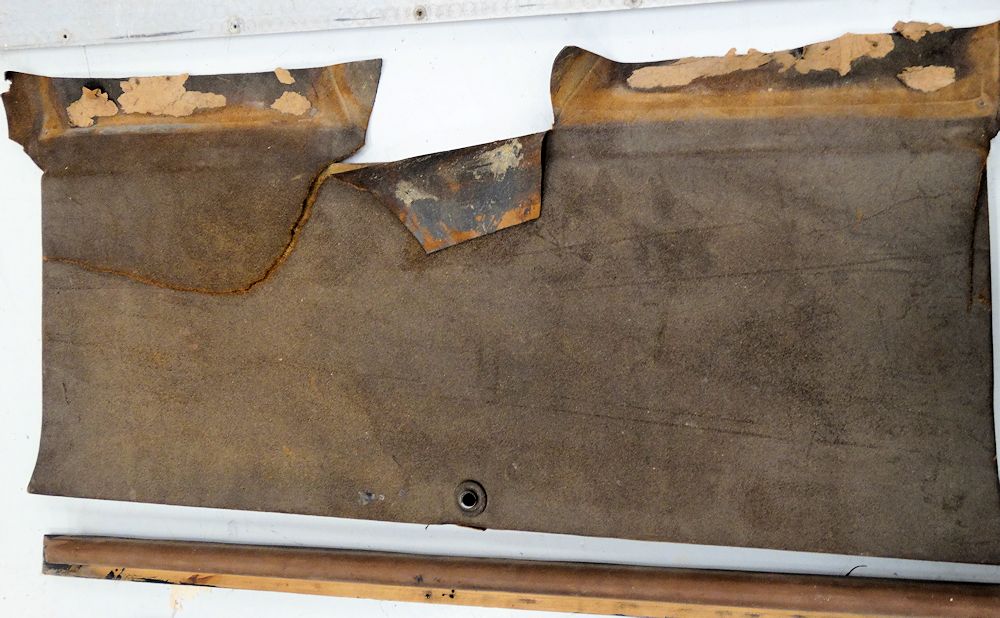
More brown suede trimming rear panel
Note brown carpeting
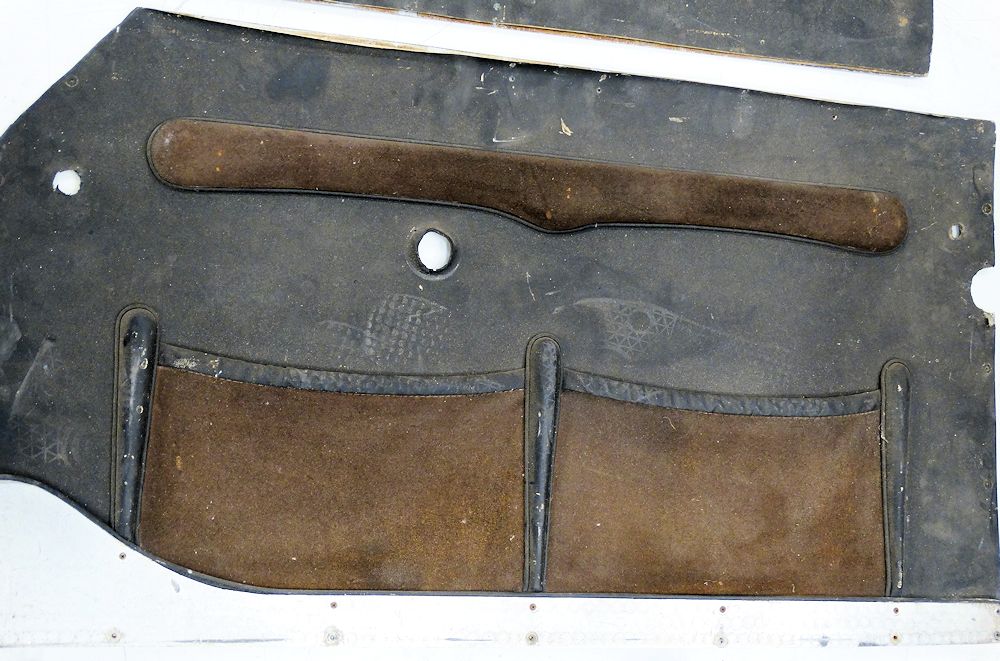
Close up of door panel materials
This type of interior trim is very much in keeping
with the Zagato styling of the period
Door panels trimmed elaborately in black hide and
brown suede
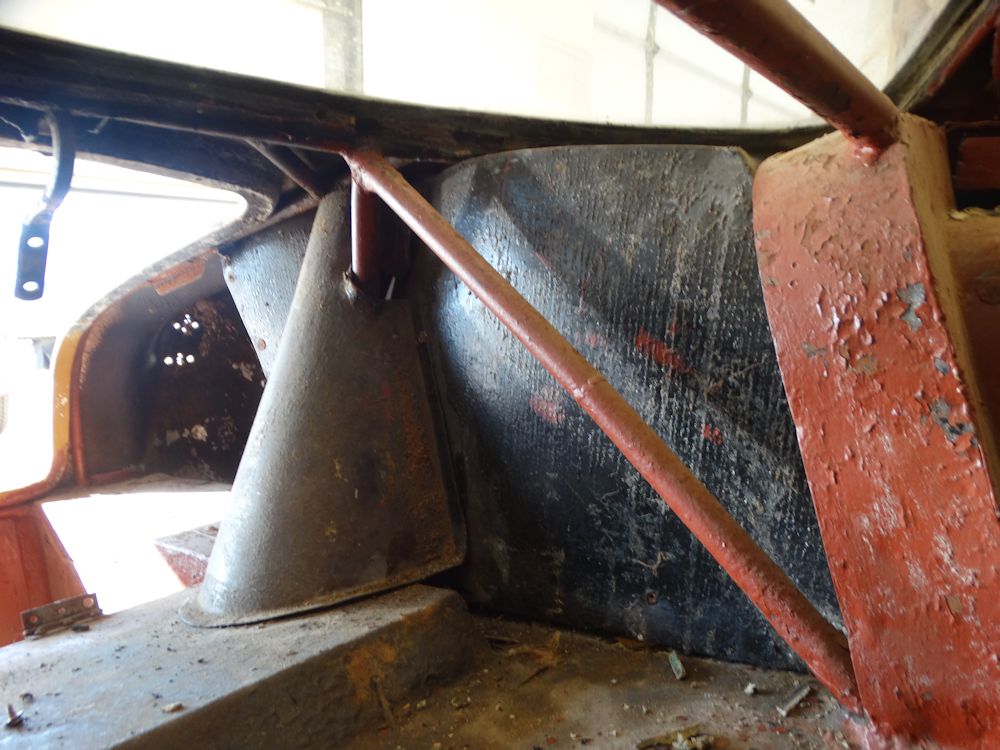
Typical Milanese superleggera construction visible in
this photograph
Rear bulkhead looks very like a 60s Aston
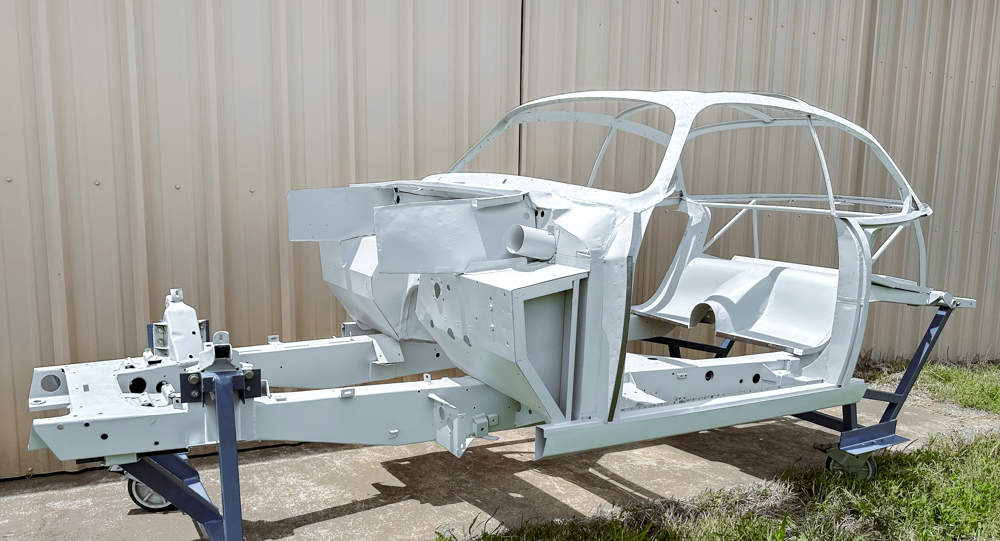
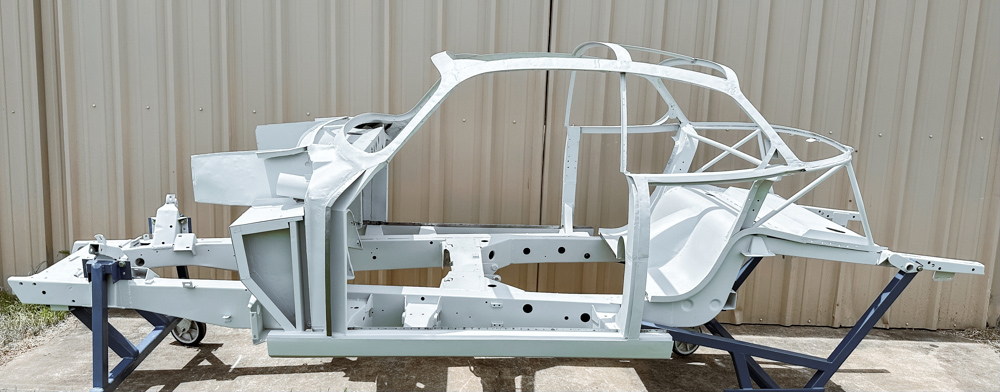
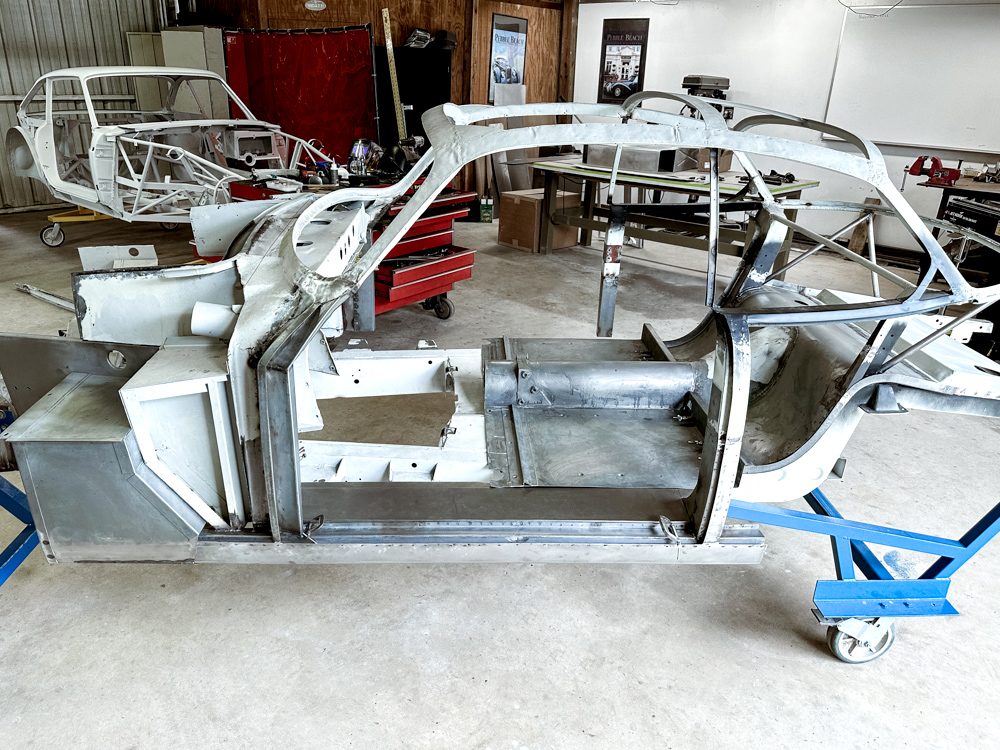
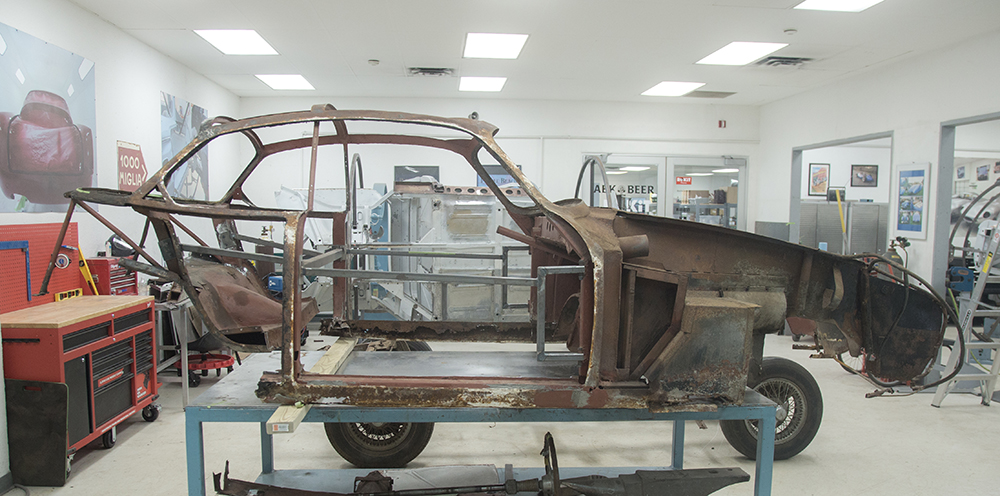
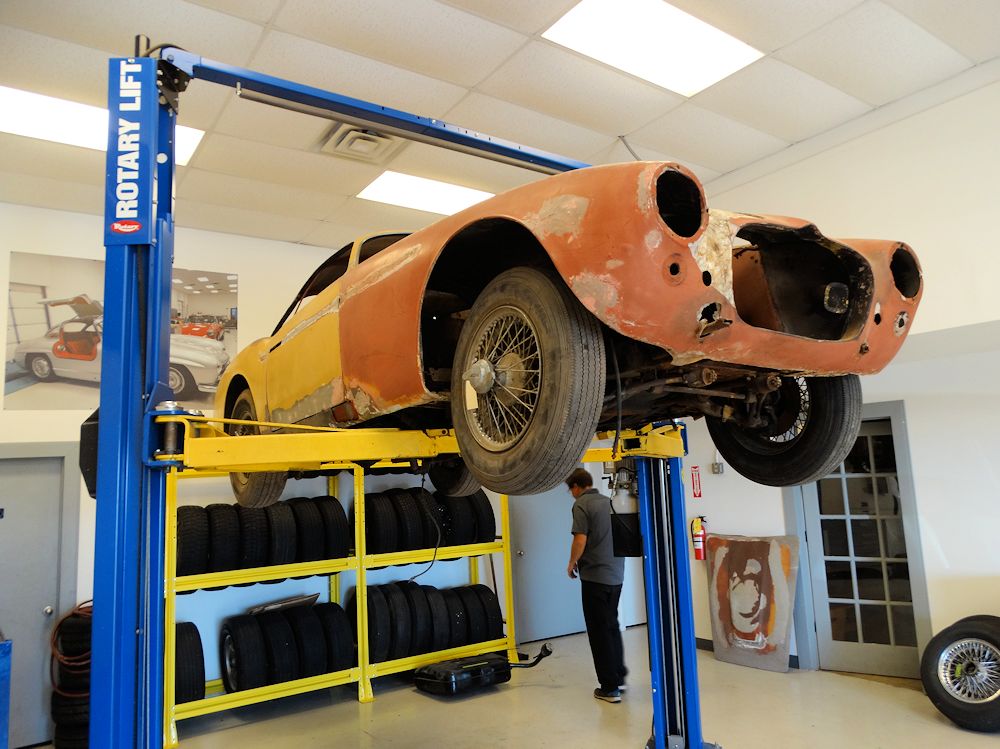
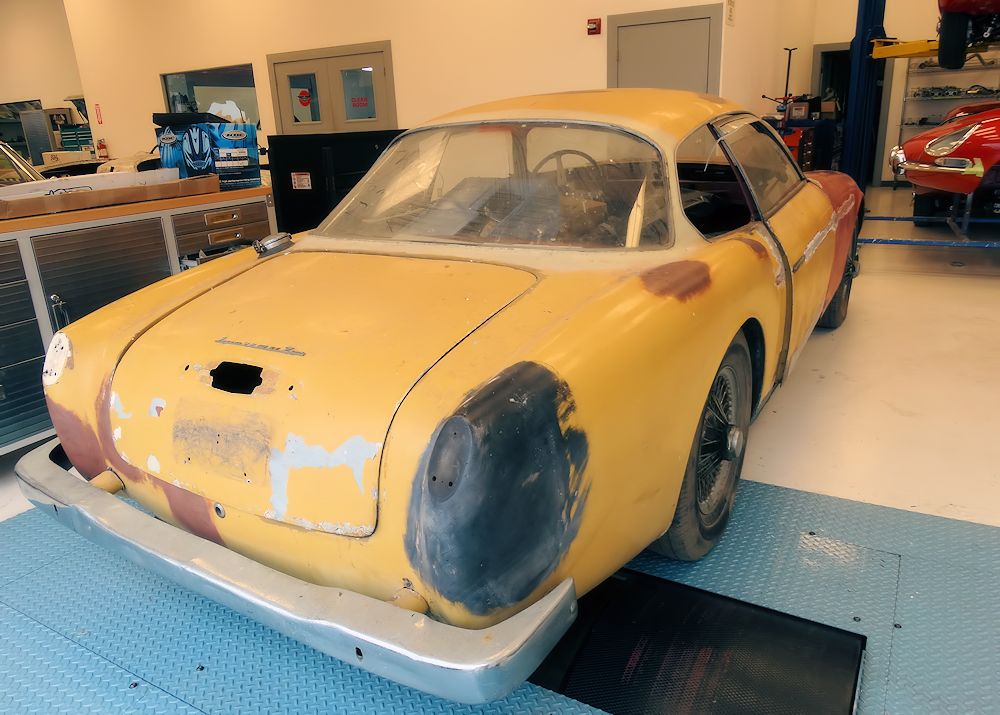
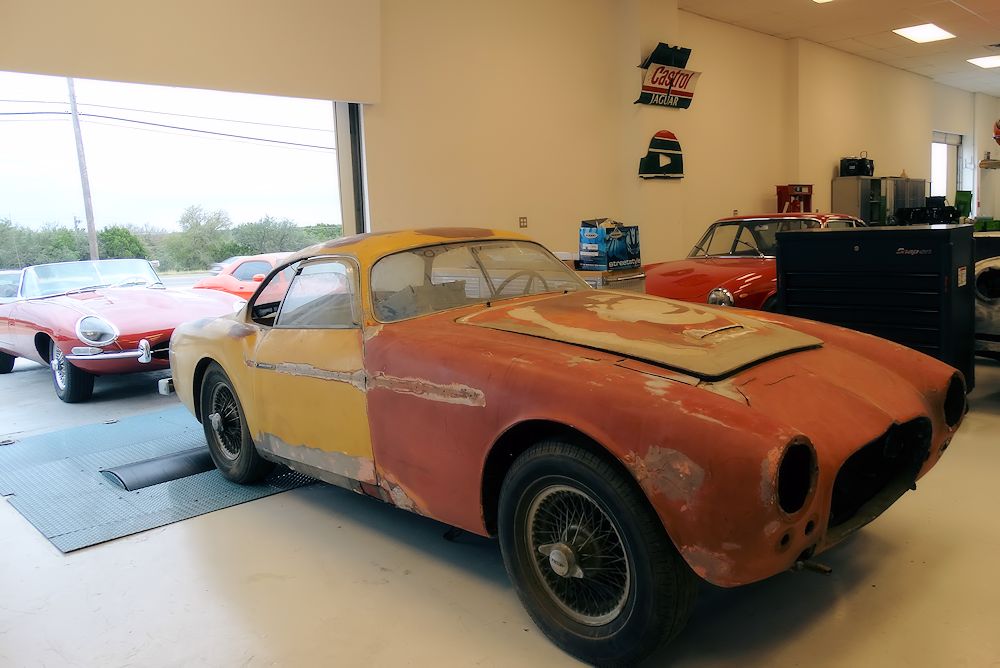
Jaguar XK150 Zagato is an imposing and
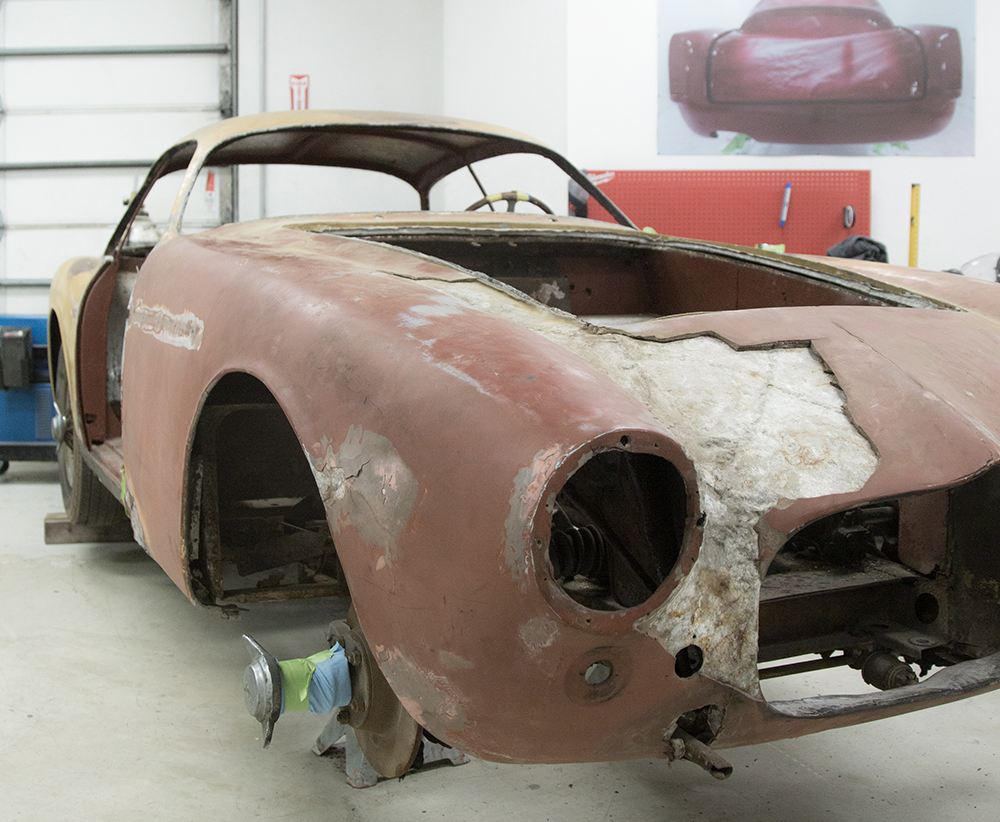
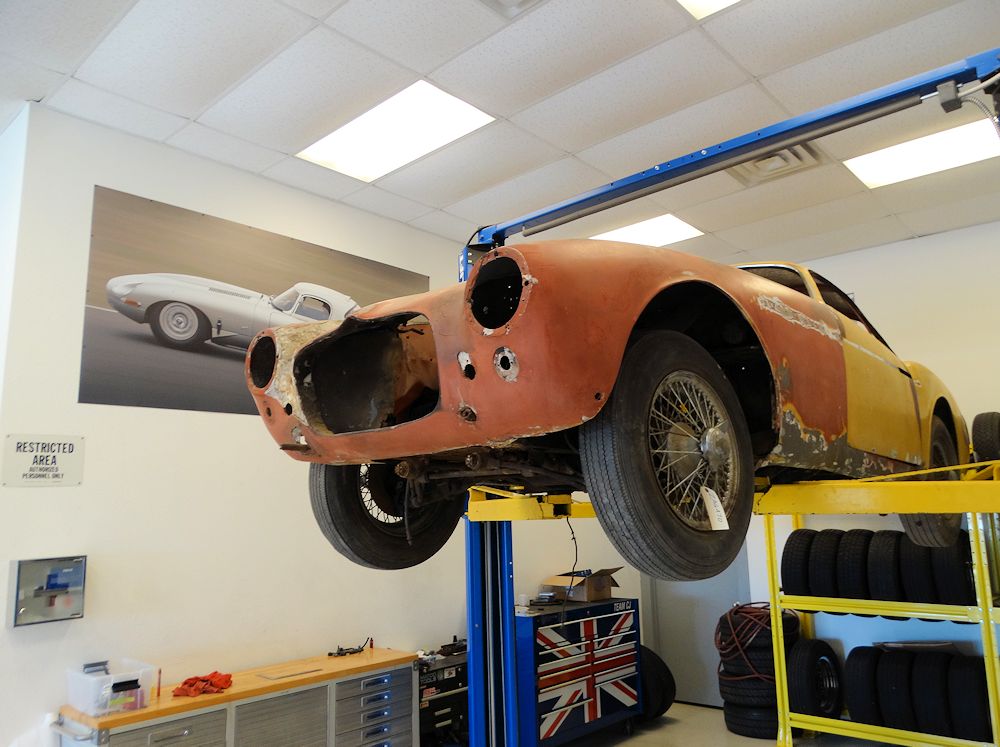
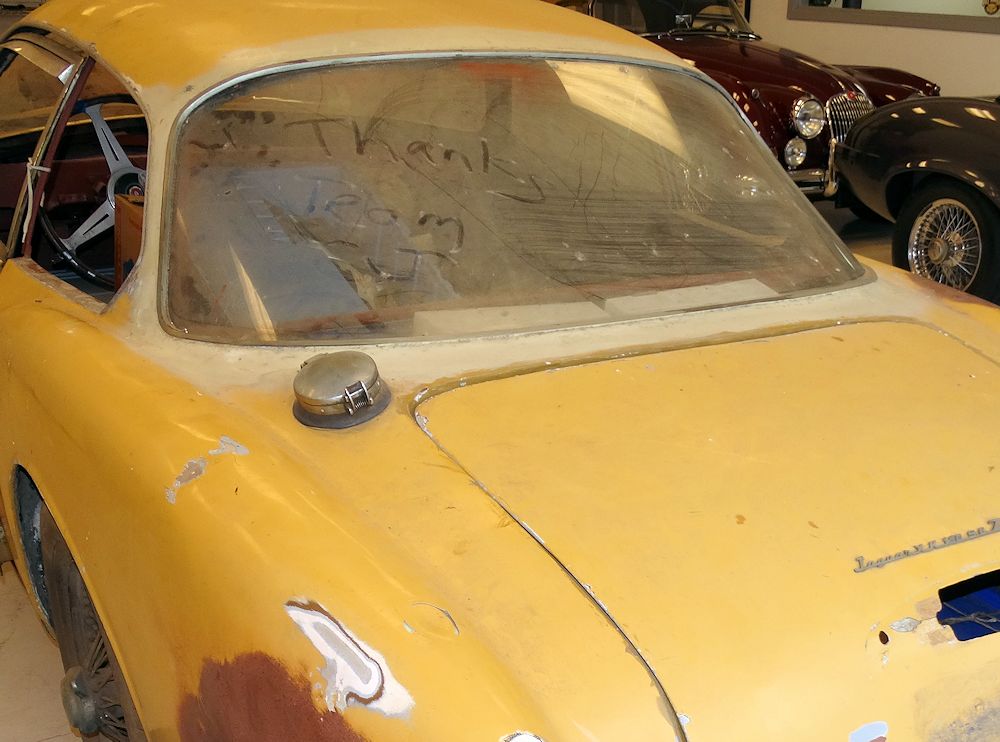
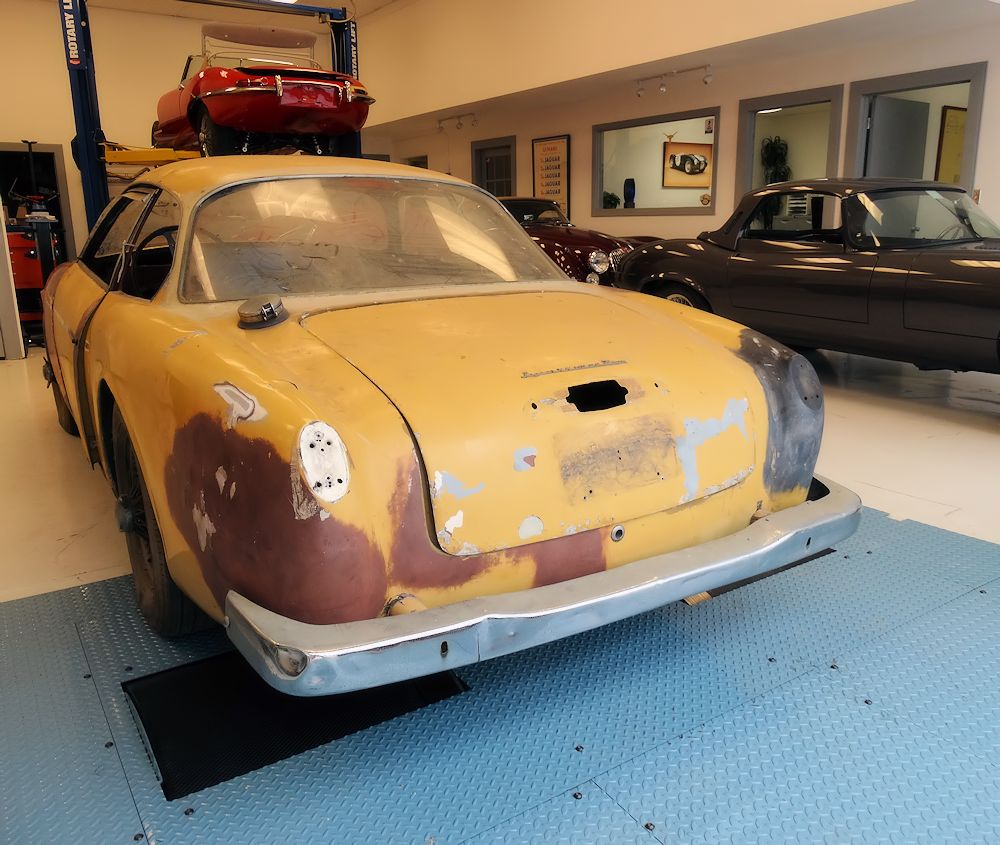
impressive car when seen in person
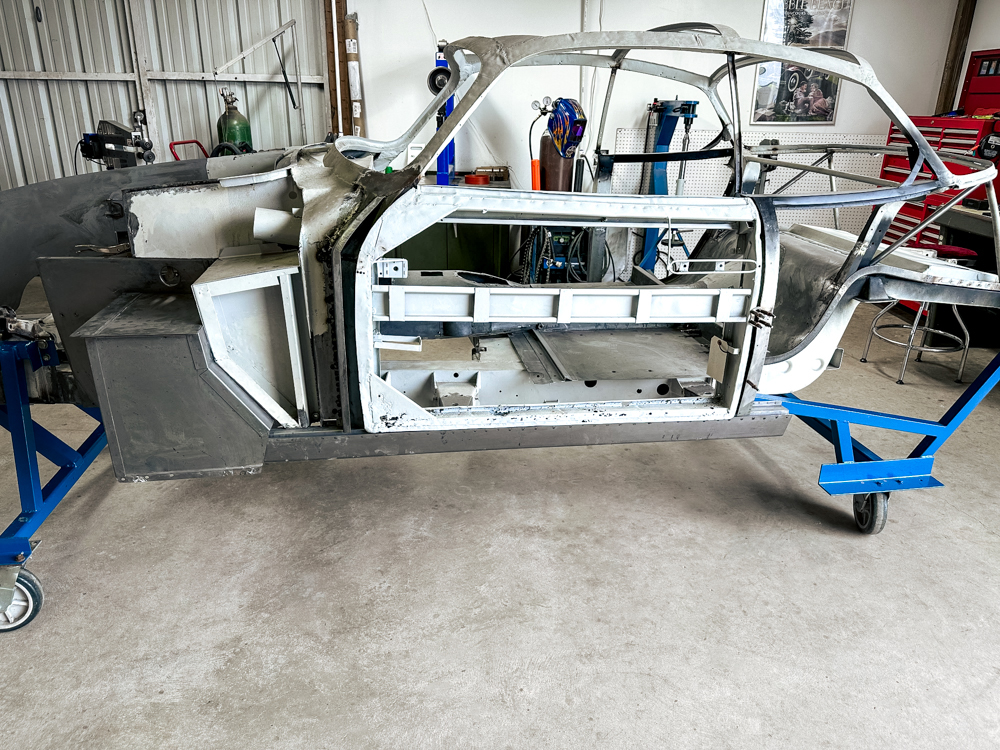
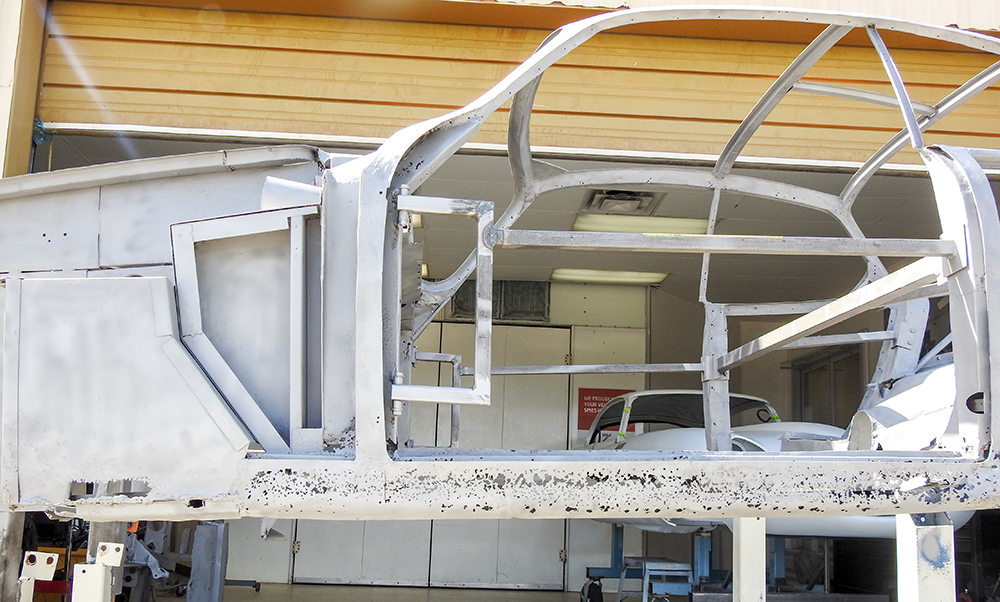
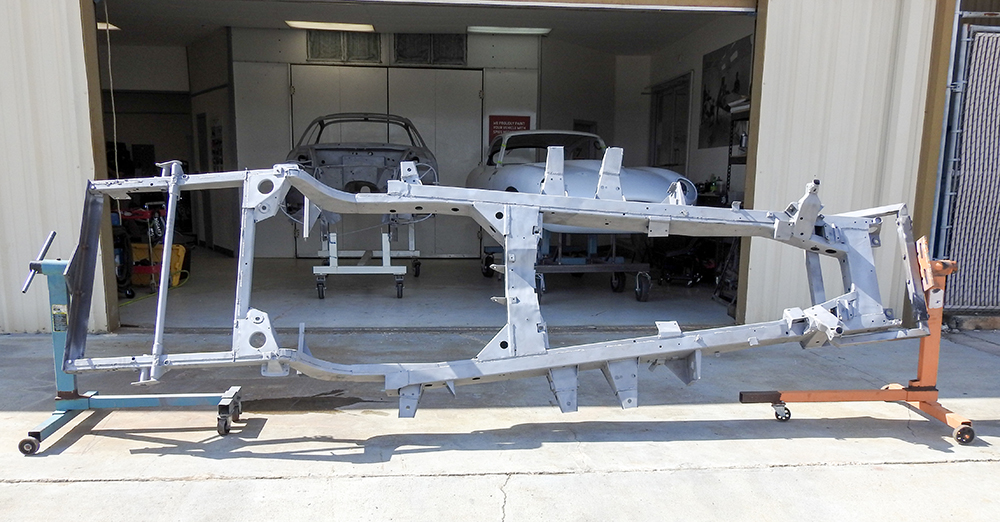
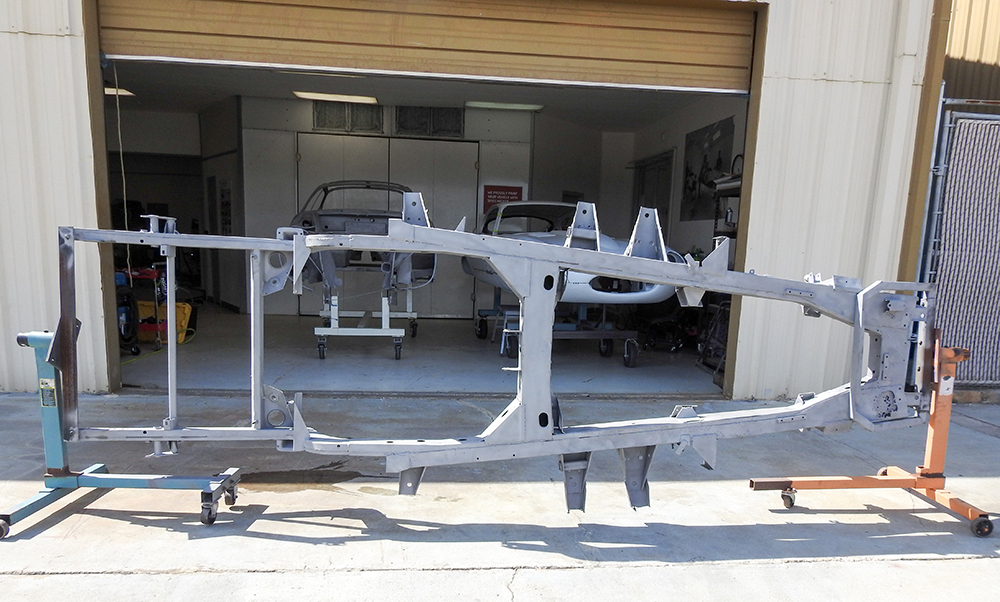
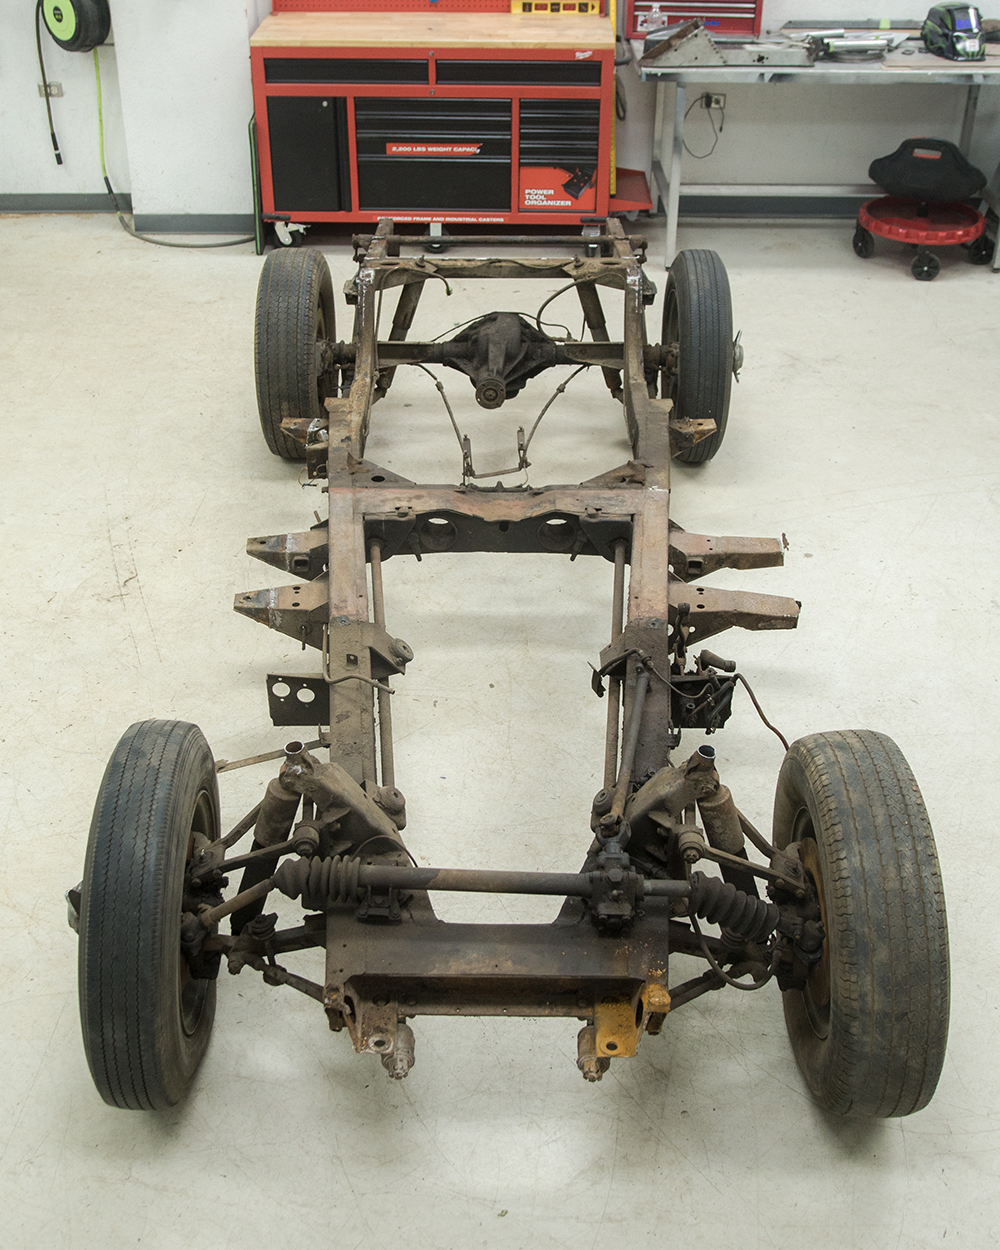
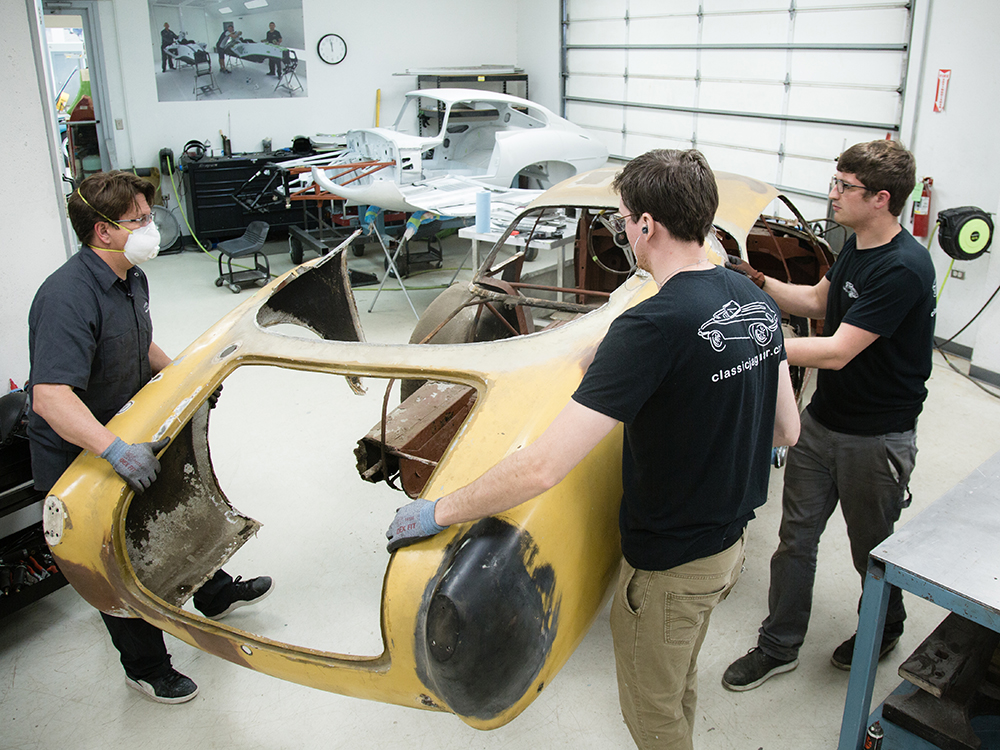
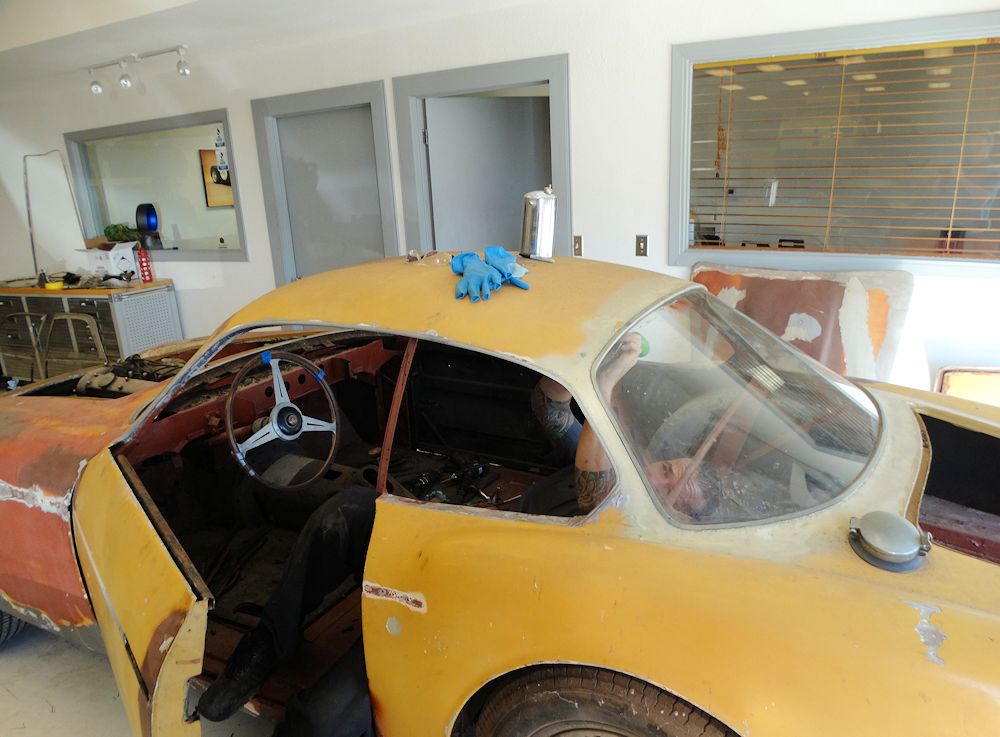
I am pleased to report that your car has been safely delivered to the Team CJ workshops.
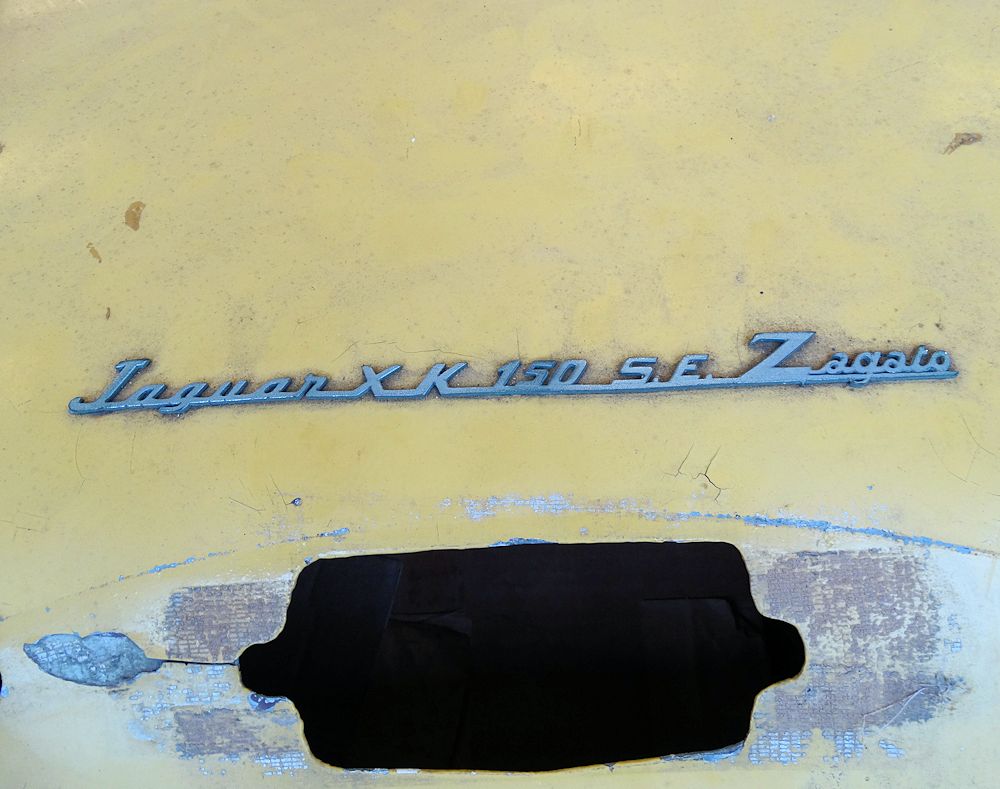
This car is probably the only Zagato built on
an XK150 chassis
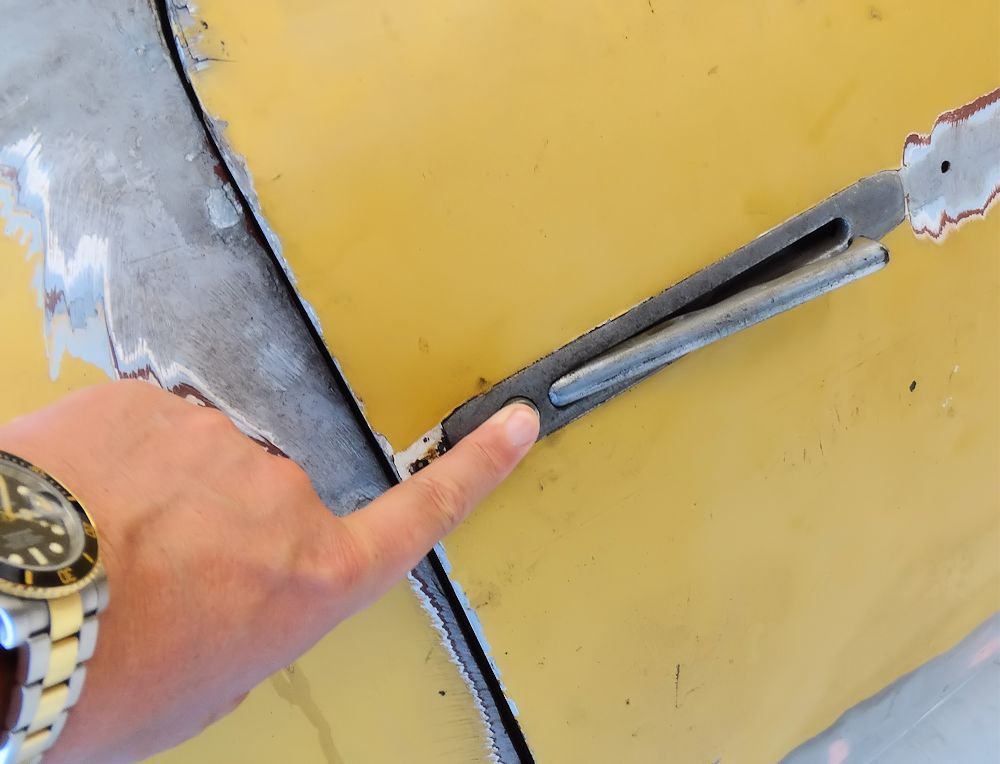
Recessed door handles a nice touch
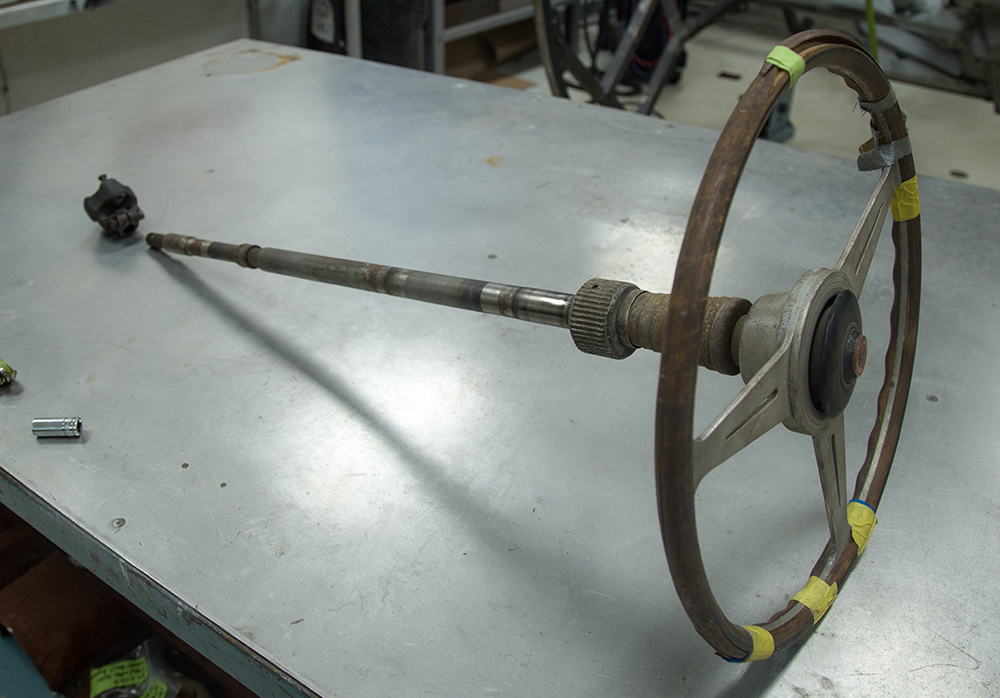
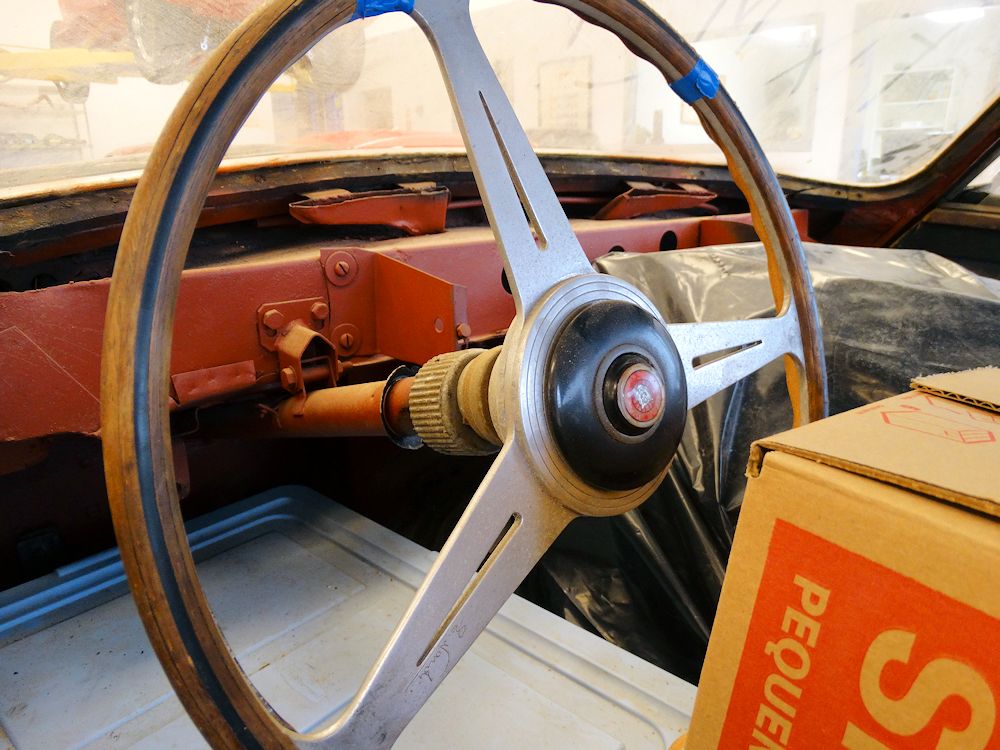
Original Nardi steering wheel will be restored
Another message from the owner!
Bumper appears very basic compared to the
rest of the car
The current owner's stepmother with the car c 1966
Note absence of a body number - for obvious
reasons
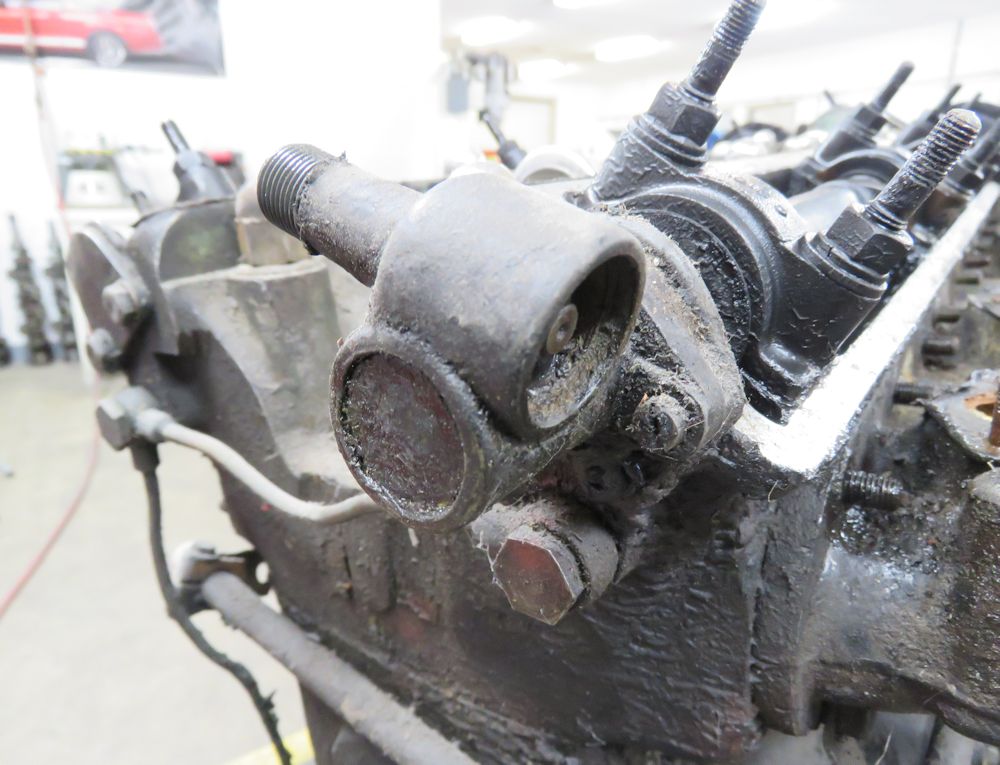
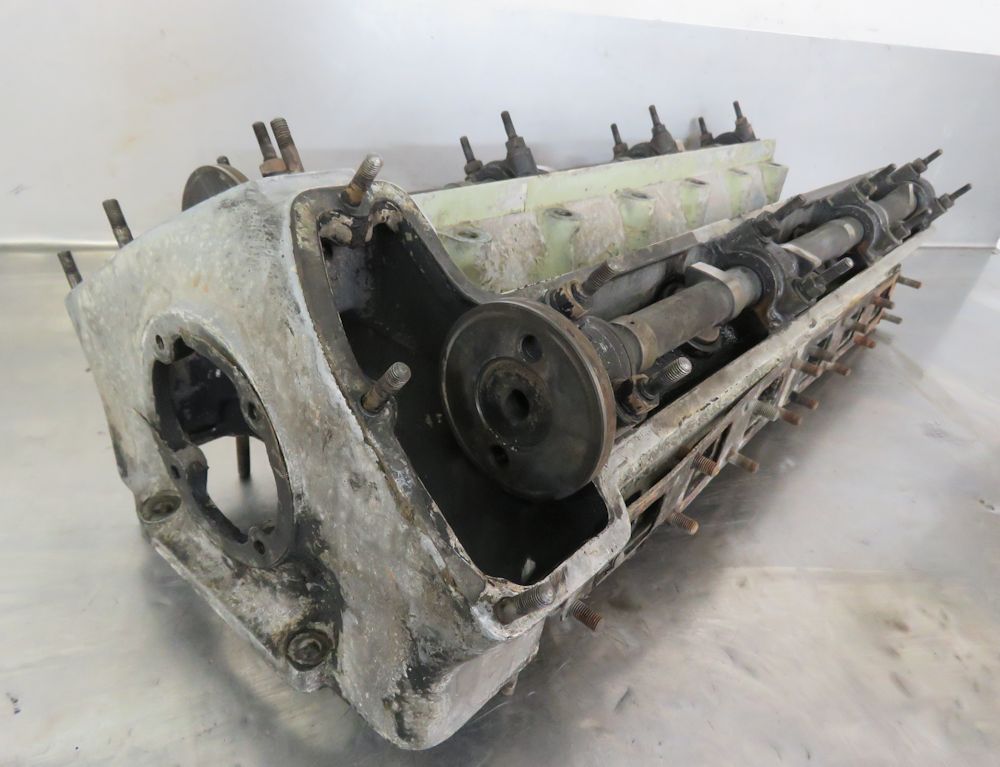
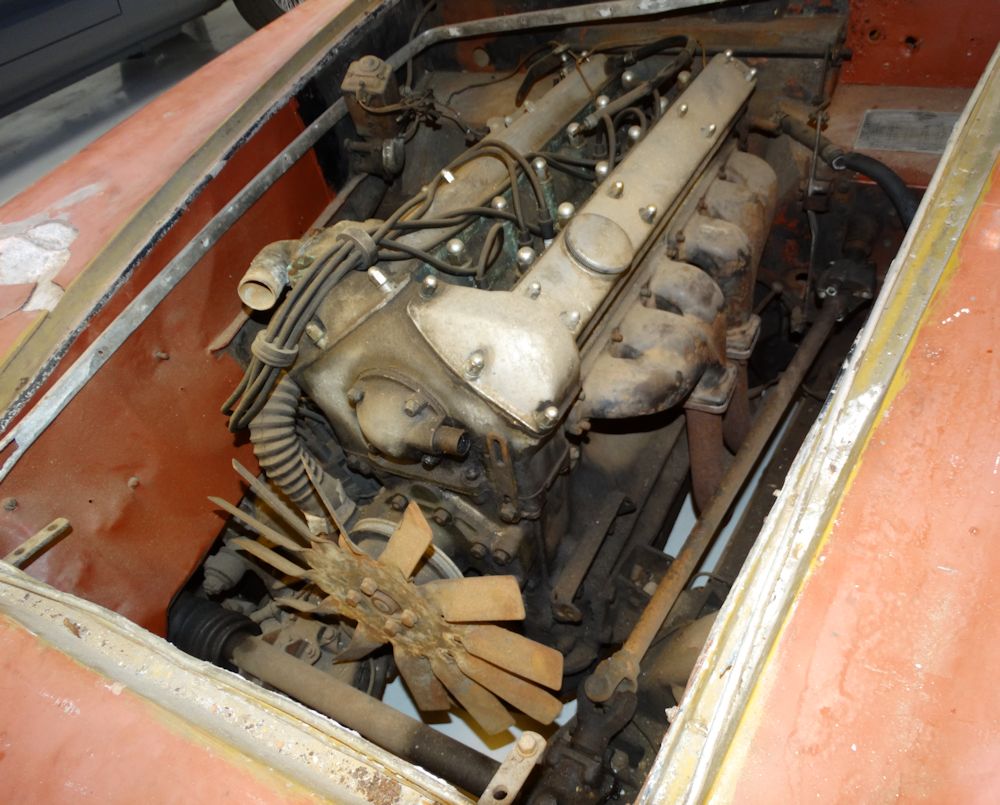
Familiar looking engine
We look forward to replicating this photo when the
car is totally restored!
Always helpful to receive written instructions
from our restoration clients
On the Zagato stand at the 1958 Geneva Motor Show

